Tag: Aids

  • Applying the Rein Aids while Riding

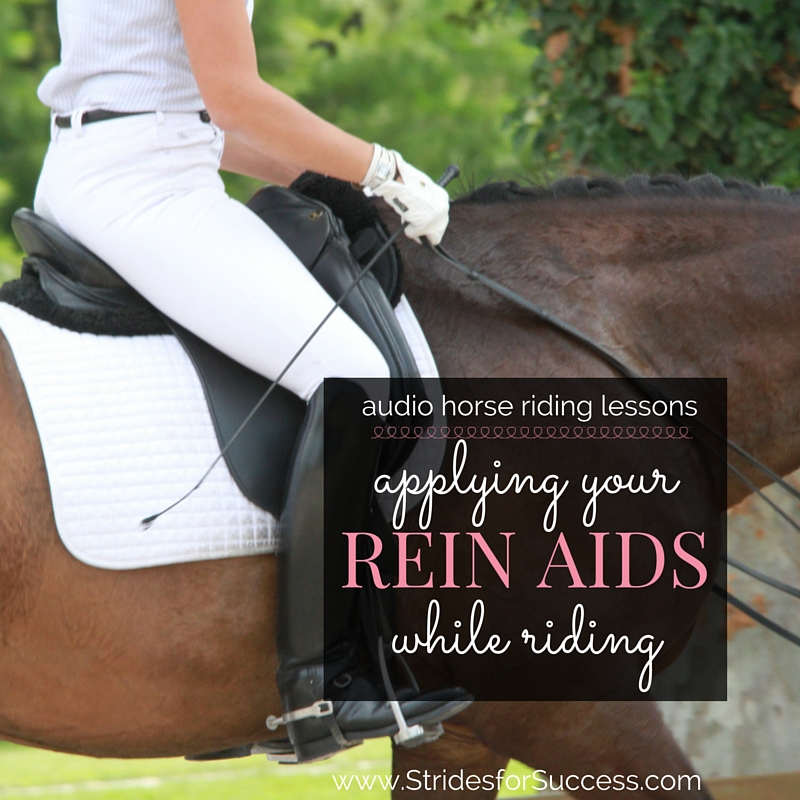
    Applying the Rein Aids while Riding

    .. This[fusebox_track_player url=”https://op3.dev/e/traffic.libsyn.com/dailystridespodcast/SFA471-Applying-the-Rein-Aids-as-You-Ride.mp3″ title=”Applying the Rein Aids as You Ride” social_linkedin=”true” social_pinterest=”true” social_email=”true” ]

    Do you find yourself becoming confused and frustrated about how you are supposed to be using your rein aids while riding?  Do terms such as soften your rein, fill up your rein, hold with the rein, lighten the rein leave you baffled?  Not to mention how much pressure is good and how much is too much?!

    I want you to take a quick trip down memory lane and back to your first ride on a horse…  Chances are that back then, before you knew any different, you thought of your reins as the means to steer and stop your horse.

     However, you soon began to realize that while your reins make up part of the system to do this, in order to really have a happy contact with your horse, you needed to reframe how you think of your reins. And what you use them for.

    Applying Your Rein Aids while Riding

    What are Rein Aids For?

    Your reins are, first and foremost, the way that you collect the energy your horse creates in his hindquarters and back, so you can then channel it where you want it to go.

    This is done through you have a consistent contact on the rein. This allows your horse to build trust in you that you won’t catch him or drop him while he is working into that contact.

    However, before you can even begin thinking about this, we must first discuss how your hand will come to meet the rein and the effect this has on you and your horse.

    An Extension of Your Core

    While your hands are holding the actual reins, it is good to keep in mind that they are merely acting on behalf of your body.  

    This means that any aids happening through your core are connected to the conversation you are having with your horse down the rein with your hands.

    A practical example of this is a pony trying to eat grass while being ridden.  Riders that depend on the strength of their arms to apply rein aids will be pulled forward out of the saddle when the horse puts his head down.  However, a rider that is connected through their seat and core, merely using their arms and hands as an extension of this, will sit tight as their core will come into play rather than their arms.

    Your Hands and Arms

    It amazes me that so many riders still believe they are strong enough through their arms to ‘win’ a pulling match against their horse.  The sad part is that the pulling match should never happen to begin with.

    Your hands have an important job of gathering up the energy created by your horse, however, this can only be achieved if your horse trusts your hands enough to connect that energy with them

    Next time you are in the saddle, become aware of the fall of your arms as you ride.  Is it a natural fall?  Are you perhaps overarching your back? Is this resulting in your elbows being slightly behind your body?  Or maybe you are collapsing your upper body causing your elbows to be in front of your body?  How supple and flexible are your elbows?

    Your arms should fall from your shoulders in a natural position.  

    Being supple and soft means that there will be little tension in them, just enough to carry your hands, which should be on a straight line between your elbow and your horse’s mouth along the rein.  Your wrists should be straight, never clawed or bent.  In fact, if you have to claw your wrist to ‘activate’ the rein, your reins are too long!

    Your fingers and hands should also be soft and supple.  Try not to clench your fingers into a fist.  Rather use your thumb as a ‘clamp’ to hold the reins which will allow your fingers to follow and communicate with the rein and your horse’s mouth.  Keep the pads of your finger tips as the touch point with the palm of your hand.


    Suppleness Through Your Body

    If your horse trusts you to be consistent and considerate with the rein, he will ‘seek’ the rein by moving his poll forward and down into the contact.  A horse trying to evade or get away from a sharp hand will rather move his head up and back, causing his back to hollow.

    Focus on keeping your hand and elbow supple and elastic.  Move with your horse

    So often horses that have been labeled as lazy or not very forward are this way because of a rider that failed to follow with their hand.  Turning your knuckles on top, rather than your thumb, causes a similar scenario.

    When you think of giving with your hand, think of allowing through your fingers first and then, if necessary through your elbows.  It should be a slight, subtle communication with your horse.  Work on how you can ‘allow’ using your fingers and next time you ride see if your horse responds to this more subtle direction.

    The same applies when you think of taking or restraining; imagine moving the pads of your fingers closer to your wrist or ball of your thumb, gently closing your fingers rather than stiffening or clamping your fist.

    Building Responsiveness

    As you are practicing this, pay attention to how much pressure you are applying and how your horse responds.  This can be a confusing principle for many riders.  And it is often compounded by the fact that their horse may have already become a little hard or unfeeling through his mouth due to being ridden with hard hands before.

    I suggest that rather than thinking about applying pressure, reframe that into what is necessary to ride your horse at that time in order to achieve or maintain the desired outcome.  Then, over time, make adjustments and refine how you are applying the aid

    The amount of pressure in your hand will directly correlate to how your horse is going. From the hindquarters through the back. And then resulting in where his head and neck are positioned due to this way of going.

    Rein Aids & Self Carriage

    The more true collection your horse has achieved, the lighter he will be in your hand. This is because he is now carrying himself. The result is that his poll having lifted up and is now situated closer to your hand.  When working in a more relaxed outline, there will be a more consistent pressure.

    Your job, as the rider, is to maintain that balance between your hand and your horse’s mouth through the rein.

    However, if your horse is heavy on the forehand or leaning, you will feel a distinctly heavy and uncomfortable amount of pressure or weight down the rein.  This is due to your ‘carrying’ him, rather than, as we just mentioned with the collection example, him carrying himself.

    Consistent Contact (versus ‘Piano Fingers’)

    The final point I want to talk about is ‘piano fingers’!  Many riders think that by opening their fingers completely on the reins, they are somehow being nicer to their horse.  Bear in mind that contact through the rein is a conversation.  And conversations are a two-way street…  Opening your fingers stops you from hold up your end of the chat!  Rather work on being more supple and following through your hand, elbow and shoulder.

    From there, when your horse learns to trust your contact, you can begin refining the pressure and movements in your communication.

    I also feel it is important to note that this consideration of your horse’s mouth should colour all aspects of your time in the saddle.  From gathering up the reins initially. To shortening and lengthening the reins (which we have a video on). And even to rewarding your horse by softening or giving with your inside rein.

    Subtlety is the key to success where your horse’s mouth is concerned…  Be gentle, soft and kind at all times.

    Your Responsibility…

    It is worth repeating again that in order for your horse to truly accept the contact you are providing down the rein, you must first guarantee him that you are going to provide a steady, soft, consistent contact to begin with.

    And just like your horse having to strengthen himself in order to build up to a more collected way of going, you will too.  This means finding ways to develop an independent seat. And practicing on making changes and adjustments gently and softly

    Happy Riding
    Lorna

    Additional Resources for Equestrians:-

    Applying Your Rein Aids while Riding

  • Lightening Up on Your Inside Rein

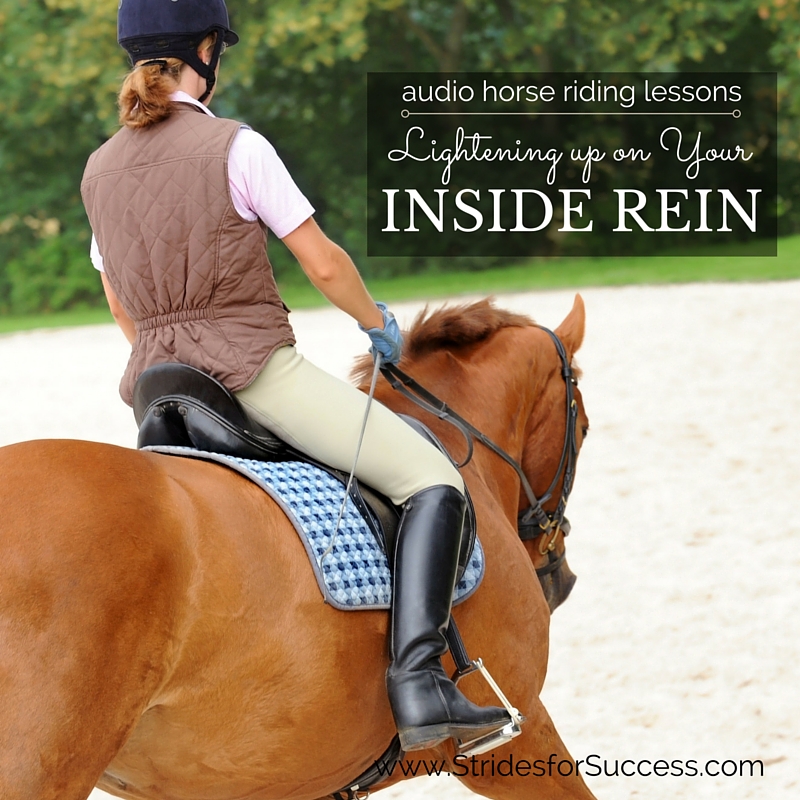
    Lightening Up on Your Inside Rein

    [fusebox_track_player url=”https://op3.dev/e/traffic.libsyn.com/dailystridespodcast/SFA461-Lightening-Up-on-Your-Inside-Rein.mp3″ title=”Lightening Up on Your Inside Rein” social_linkedin=”true” social_pinterest=”true” social_email=”true” ]

    When we first learn to ride, turning is often explained to us as merely a ‘tug’ or pull on one rein or the other to turn our horse’s head. There’s a general consensus being that where his head turns, his body will go…

    However, anyone who has ridden a determined pony or horse will know that this is very often not the case… You can point the head where you ‘want’ to go. But, very often, your horse will crab along sideways, almost following his hindquarters. This is usually in the opposite direction; which 90% of the time is the same direction as the stable!

    Later as we become more accomplished in the saddle, what started out as a simple instruction in our first lesson, has become an ingrained habit.

    Something that we often feel nervous or anxious about giving up control over!

    Early Riding Lessons

    So why are we thought to turn this way if it is indeed incorrect? And why, later when we get into the nitty-gritty details of riding, are we constantly hearing about softening or lightening our inside rein?

    Lightening Up on the Inside Rein

    I think the reason that we are thought this initially is threefold…

    Firstly, we get a quick win under our belts which then leaves us wanting more (translate into booking more riding lessons!).  Secondly, even the best-coordinated person struggles when they first get into the saddle to use their different limbs and body parts in different ways all at the same time to produce the desired result!  And lastly, it’s a control thing and one that we need to learn to let go of!

    The Importance of the Inside Rein

    However, the inside rein is a vitally important part of riding, for flexion, support and balance.   Today I want you to begin thinking of your inside rein as having more of a supporting role rather than being the lead character in your riding performance

    Often we have become so set in our ways of depending completely on our inside rein, that the only way to get out of this habit is to go cold turkey before we can then begin thinking about and practicing lightening up on it.

    So, let’s think about being on a 20m circle to the right in the walk.  If you were to drop your inside rein, what would happen?  You will notice I said ‘drop’ here…  Yes, cold turkey means that – nothing; letting go; surviving and riding on without it!  You would probably think, well my horse will just begin walking large around the arena again… Or, he may even begin to track left!

    And initially, you may be correct, he might just do that.

    The key to getting over your dependency on the inside rein is to start thinking of all the other aids you have at your disposal to help communicate with your horse that you want him to continue tracking right on the 20m circle.

    A Balance of Your Aids

    Firstly, there is your seat and weight aids.  Think of sliding your inside seat bone forward and, in doing so, the inside seat bone becoming a little more weighted.

    Then, shift your attention to what your inside leg is doing…  This is particularly important and often the key to keeping your horse going in the direction you are looking for.  If you are only now holding your outside rein (which in this case is your left rein) your inside leg or right leg is the aid that will balance that strong or leading outside rein.  We can often see this better in action if you were to drop your inside rein while traveling down the long side of the school.

    Without the inside leg, your horse would completely bend to the outside, however your inside leg regulates the ‘pull’ of the outside rein.

    Then we have your outside leg.  This is probably the most forgotten aid of all in your toolbox.  Use your outside leg to indicate to your horse to move around your inside leg.  Again, using our 20m circle to the right, your outside leg being your left leg, it will literally pick up the slack from your inside rein and keep ‘indicating’ to your horse to continue on around the circle, or more to the point, around your inside leg.

    You may initially find that your horse is just wandering around the school or arena, but I really encourage you to keep continuing to try ride the circle without any use of your inside rein.  

    Your Mind is an Aid Too…

    I also advise having a quick ‘check-up’ with what is going on in your head and translating it to your body…  Are you feeling nervous about the ‘lack of control’?  It could be that you’re feeling a little stiff, wondering what will happen?  Or maybe you are trying to influence your horse with your upper body by leaning or shoving – please don’t!

    Or has your outside rein gone on vacation, across the withers, to the ‘other side’ in an unconscious attempt to neck rein your horse to the right?!

    Keep focusing on just asking correctly with your aids; seat, inside leg, outside leg and outside rein, and slowly you will begin to see that your horse begins to pay attention to what you are asking…  He may even begin to walk on a ‘circle’ (of sorts!).

    Remember to keep verbally rewarding your horse when he makes a move in the correct direction.

     Keep in mind that you have trained him to follow your inside rein and retraining him to rather look for other indicators and signals will take time, consistency and patience from your part as a rider.

    Work in Both Directions

    Once you have begun making progress on the right rein, begin working on the left rein.  Swap your inside for your outside and vice versa and then, letting go of your new inside rein (left rein), ask your horse to now pick up a 20m circle to the left.

    Continue to practice this on both reins until you have begun to believe that you can indeed influence your horse to turn without pulling on your inside rein.  I think believing you can do it, is a big part of overcoming your dependency on it!

    You can also, once you have mastered your circles in walk and if it is safe to do so depending on your level of experience and your particular situation, pick up trot and even canter on the circle.  You may notice that initially things may go a little haywire. They can when you factor more speed and movement into the equation!  But, again, stick with it until you can communicate to both yourself and your horse that the inside rein is not what is turning your horse!!

    Re-Introducing Your Inside Rein

    So, we mentioned at the beginning that your inside rein is a vitally important part of your riding.  Now it is time to invite your inside rein back on stage.  But keep in mind all the time that it merely has a supporting role in your whole performance.

    In riding, just like acting, timing is everything and knowing when and how to use your inside rein to influence and support your horse is vitally important.  A badly timed squeeze or softening of the rein can be the difference between your horse staying balanced and your horse falling onto his forehand. 

    This is due to the fact that the inside rein, when used, will affect the inside hind leg and your horse’s inside hind leg is where most of his forward propulsion and balance stems from.

    I would first suggest beginning to practice ‘timing’ this with a very loose inside rein where you really don’t have any contact.  Practice ‘allowing’ with your arm, more notably your elbow, and then taking it back or resisting.

    However with your inside hand, rather than thinking of resisting, think of ‘indicating’.  It is merely a suggestion rather than a hard and fast order.

    Influencing the Inside Hind Foot

    Your aim is to communicate what needs to be said when your horse’s inside hind foot is on the ground.  When he is lifting his inside back foot off the ground and bringing it forward, any pulling or resisting on your inside rein will result in the hind leg not coming as far forward as you would like. This will result in a loss of balance or impulsion for your horse.

    Said differently, your aim is to be soft or light with your inside rein as your horse’s inside hind leg is in the air and moving forward

    Your horse must be schooled, obedient and responsive to then follow through with that suggestion himself in order for your inside hand to truly be effective.  Again, this comes back to consistency on your part. And, also, saying goodbye to the dependency you may have built up on your inside rein.

    Creating Contact with Your Inside Rein

    Once you feel comfortable with giving and taking the loose inside rein, begin to develop a contact by shortening your inside rein.  Make sure you do this slowly, in gradual little increments, so as to not grab it and undo all the work you have just put in.

    Test your effectiveness while riding up the center line.  Can you flex your horse’s poll one way or the other using your inside rein, without losing any forward momentum or your horse stepping to the inside, which will happen if he feels unbalanced?

    You can also go back to your circle and using your other aids to maintain the circle, just use your inside rein to ask for flexion through the poll to the inside.  You should find that your horse will have a more active gait on the circle, have more balance and just be a happier horse overall!

    Remember your inside rein is only the supporting character and without your other aids, the whole performance is pretty much guaranteed to be a flop!

    If, over time, you feel that you are beginning to pull or depend a little too much on your inside rein again, take it back to riding without it for a few minutes in the arena to reassert your other aids again.

    Happy Riding
    Lorna

    Additional Resources for Equestrians

    Lightening Up on Your inside Rein

  • Asking Your Horse to Bend

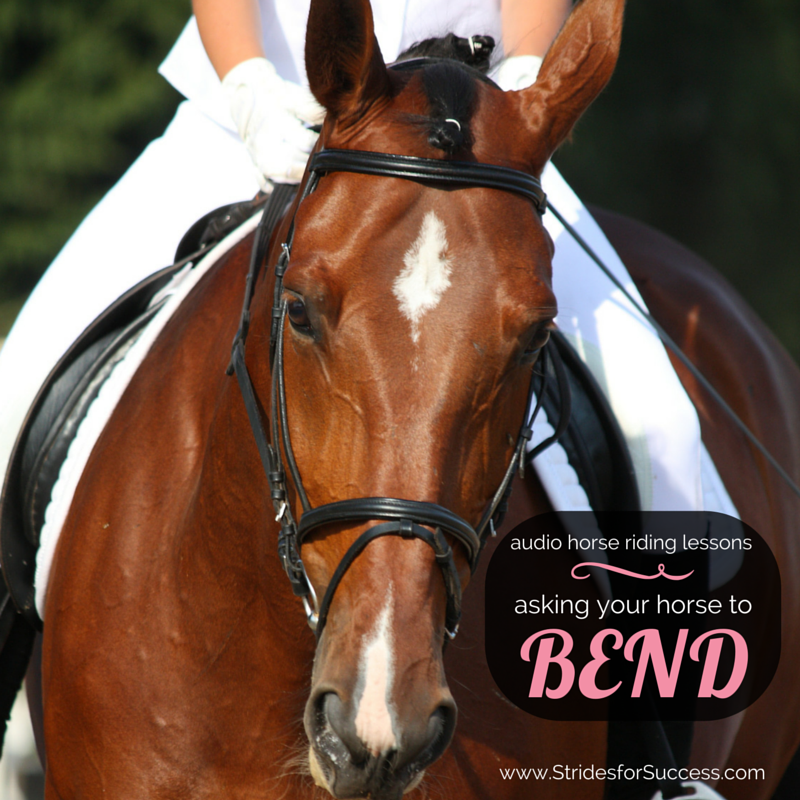
    Asking Your Horse to Bend

    Riding through a bend is something you will have to do every time you get in the saddle, whether it be the 4 corners of your arena or just the route you take to get from point A to point B.  It therefore makes good sense to work on your ability to navigate those bends successfully, without losing balance, rhythm, energy and focus each time you encounter a bend.

    [smart_track_player url=”https://op3.dev/e/traffic.libsyn.com/dailystridespodcast/SFA446-Asking-Your-Horse-to-Bend-Correctly.mp3″ title=”Asking Your Horse to Bend” social_linkedin=”true” social_pinterest=”true” social_email=”true” tweet_text=”Asking your horse to bend…” hashtag=”horse #equestrian” twitter_username=”strides_success” ]

    Riding a bend correctly will result in your horse having an equal bend throughout his body, resulting in the energy continuously being directed where you want it to go; forwards, and not out being lost anywhere along the arc from tail to poll.

    Asking Your Horse To Bend

    A good way of ‘seeing’ this equal bend, so you can visualize using your aids, is to think of a whip or stick being held at each end with your two hands.  Now, imagine closing your hands closer together…  If you use equal pressure from both hands on each side and gently ‘feel’ to make sure you are balancing that pressure and not overexerting the whip, the whip will have an equal bend all the way through.

    Now (without snapping your whip!) imagine what would happen if you pushed too hard or too much with one hand or the other, or try to force or ‘fix’ the bend; the whip would snap, leaving you with two straight lines with a break in the middle.  This is similar to what happens to the line from poll to tail on your horses back; often by applying too much of one or the other aid (usually hand), the result is a straight line from poll to withers and then another straight line from withers to tail, with a ‘break’ at the withers or shoulder where all the energy has fallen out of.

    Riding your horse correctly around a bend requires a balance of aids from you, which will allow your horse to navigate the bend to the best of his ability.  You cannot force him and you cannot fix him.  Your job as the rider to is guide him around the bend so he remains in balance and moving forward.

    When you horse rounds the bend correctly, his inside back hoof will stay on the track created by his inside front hoof, and the same applies to the outside legs, almost like train tracks, remaining parallel to each other around a turn or bend.

    In order for this to happen the horse must lengthen or stretch of one side (the outside) of the body, rather than a shortening of the inside.  Your aids will ask him to do this, however before we can discuss the aids, we must first become clear on the terms Inside and Outside with relation to riding and bending.

    Often when we are learning what is the inside leg or what is the outside rein, the instructor will use the analogy of a circle or the arena wall itself to demonstrate and when you are initially learning to ride, this generally holds true.

    However, as you begin to ride more complex movements, such as counter canter or leg yielding, the issue of inside and outside changes from where you are in the arena or what shape you are riding, to what way your horse is bending.

    This is the true meaning of inside and outside, the inside being the leg, hand and seat on the concave side of the horse, depending on which direction or way he is bent.  The outside being the opposite of the above on the convex side of the horse.

    So once you have decided which way you are going to bend your horse, begin by shifting your inside seat bone slightly more forward than your outside seat bone.  In doing so, you will feel that your inside seatbone is now a little more ‘weighted’ as well.  Make sure you are not leaning towards the inside with your upper body; this will have the opposite effect and ‘push’ your weight to the outside of the saddle.

    Your inside leg is applied on or at the girth.   This will help you continue to create forward energy and gives your horse something to bend around, rather than falling in and sideways.  In fact I have found it helpful to get my riders to think of their inside leg as a pole that their horse must bend around.  It helps visualise the bend, but it also helps to ensure that they are using their outside leg aid as well.

    When riding on a bend, your outside leg will move back slightly in order to control the hind quarters and, in particular, make sure they don’t swing out around the bend.  This is often evident on circles and when it happens the horse is no longer following the ‘train tracks’ that his front legs are creating.

    Your inside hand is used to indicate to your horse that you are asking for the turn, using a combination of arm, hand, wrist and fingers.  Very often riders will use only their inside hand to turn, and just like the whip analogy we spoke of earlier, using too much pressure from one aid will result in the ‘break’ of the arc and the energy falling out.  The use of the inside hand is very subtle and can be thought of as more of an indicator, rather than what actually bends your horse.

    Finally, your outside hand prevents your horse from over bending and helps to hold the forward energy created by your inside leg together.  Unfortunately a lot of riders forget about their outside hand when turning, however it is vitally important in holding everything together as you and your horse navigate a turn or bend.

    I suggest beginning by practicing first in halt.  Adjust your position to where you would if you were to ask for a bend while riding.  Notice how easy it is for you to move in and out of this.  Keep in mind that the movement should be fluid and that if you are having to really struggle to ‘hold’ something, you may in fact be over doing it.  You are only making small subtle movements that your horse will pick up on and respond accordingly.

    Once you are clear about how to ask your horse to bend one way or the other, you can ask for walk and whether you choose to walk large around the arena or begin to ride some different school figures, begin assessing how your horse bends and how you are using your aids to ask him and then ride him through the bend.

    Notice if you are perhaps dropping your inside shoulder?  Or maybe you are completely forgetting about your outside hand or leg.  Keep working on this in walk until it becomes second nature to you to ‘bend’ your horse around each and every turn, rather than use your inside hand to drag him around!

    From there you can begin to work in trot, where you may find that your horse falls in around the corners, or that the hind quarters are more likely to swing out rather than following the front end.  Notice it and then, begin by correcting your position and aids.  See what effect this has on your horse and work from there.

    Keep in mind that your horse may experience some stiffness on one side compared to the other.  If you experience this, create a plan for your ride that will incorporate a slight increase of work on that side, however slight is the key word here.  This will, with correct training, be corrected over time with consistent, correct riding and work.

    Happy Riding
    Lorna


  • Retraining a Horse Who is Heavy on Your Hand

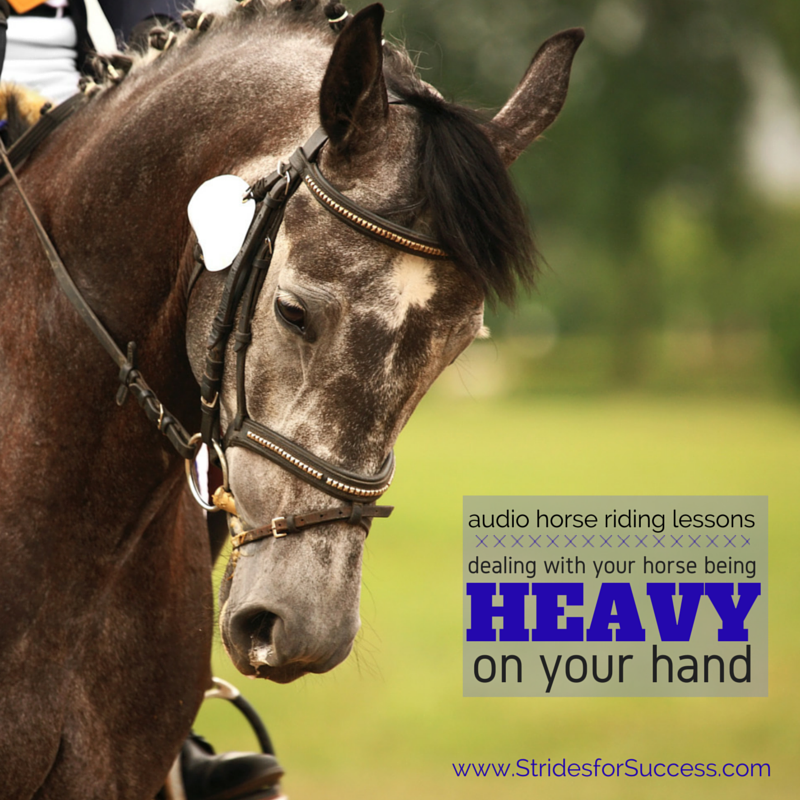
    Retraining a Horse Who is Heavy on Your Hand

    Dealing with a Heavy Horse
    Have you ever had the experience of riding a horse who was so heavy on the forehand, it felt as though your arms were a couple of inches longer by the time you dismounted?!

    [smart_track_player url=”https://op3.dev/e/traffic.libsyn.com/dailystridespodcast/SFA436-Dealing-with-Your-Horse-being-Heavy-on-Your-Hand.mp3″ title=”Retraining a Horse who is Heavy on Your Hand” social_linkedin=”true” social_pinterest=”true” social_email=”true” tweet_text=”Does your horse tend to get a little heavy in the hand? This may help…” hashtag=”equestrian #podcast #makeeveryridegreat” twitter_username=”strides_success” ]

    The whole experience is exhausting!  It feels as though you are literally carrying the horse’s head and neck by bracing your shoulders and arms against him the whole time…  Not a fun ride!

    Horses that are heavy or lean on your hands are unfortunately more common than not.  It is usually the result of the horse not been thought to yield to the pressure of the bit.  Or a horse who has been wrongly trained or retrained by a rider to lean on the bit.

    Why This Doesn’t Work for Your Horse Either

    When your horse is heavy in front, he will find it difficult to perform correct, balanced transitions.  He will have trouble bending consistently throughout his body.  His lateral work will usually be stiff and ‘jerky’ and his jumping abilities will also suffer as more weight than usual is on the forehand and shoulders.

    You will also find it difficult to engage the hind quarters and bring them ‘underneath’ your horse.

    In fact, when you are riding, it will feel as though all the energy is falling out the front end of your horses body.  Plus the fact remains that no amount of pulling on your part will actually go towards fixing the problem!

    The lack of balance that is a result of this leaning will become even more evident later, when more difficult questions are asked of your horse.  ‘Heavy’ horses, generally, end up beginning to rely on the riders hands for support and balance throughout the ride.  This, of course, just exaggerates the problem even further!

    Is it a Bit Problem? Nope, Not Usually!

    Most riders will try to remedy the problem by shoving a stronger bit into the horse’s mouth.  The thinking is that it will give them more ‘leverage’ to haul on the horse even further…

    However, this will generally will only worsen the problem as the true cause for the leaning has not been dealt with.

    The Most Common Reason for This Happening

    Horses being heavy or leaning on the hand often become like because of their rider.  More specifically being ridden by a rider who lacks an independent seat or lacks confidence.  The unstable rider will use the horse’s mouth for balance and support.  This then trains the horse to firstly ignore the rein aids and, even worse, lean into in the contact.

    Anxious or nervous riders will tend to hang on to the reins often as reassurance that they are ‘in control’ of the situation.  

    Again, this leads to the horse’s mouth becoming hardened to the hand aid.  The result often being that the horse moving more and more onto the forehand.

    Very often the stiffness and dependency of the rider carries through and is passed to the horse.  This creates a similar stiffness and co-dependency in the horse.  The horse begins to use the riders hands for physical and mental support.

    The Never Ending Battle

    After being ridden like this for a while, the horse will learn to begin to ride into the pressure.  This will soon transition to pulling against it.  Which is what makes this such an exhausting experience for the rider who encounters a horse like this…  The rider will never win against a 600kg horse!

    The cycle is self-perpetuating.  The heavier the horse becomes, the more the rider hangs on trying to bring their head and neck up.  Which causes the horse to pull more; causing the rider to haul more… 

    Other Reasons for this Occurring

    Heaviness can also manifest itself in the horse becoming over bent through the poll.  This causes the horse to become ‘locked’ in an unnatural frame, behind the vertical.  This is often the result of too harsh a bit having been applied to the mouth.

    It can also be due to a rider who is obsessive about being ‘on the bit’ without actually using their legs and seat correctly to first engage the hind quarters.

    A horse that moves like this may ‘look pretty’ to an uneducated eye.  But really they are just forced into, and learn to hold, a shape which inhibits their natural movement.  This results in their training stalling and going stagnant.

    Due to horse being fixed in this unnatural shape, he learns to brace against his riders hands to hold himself there.

    Starting Your Re-Schooling of Your Heavy Horse

    Re-schooling a horse to lighten up in front takes time and consistency from a rider.

    Before you begin focusing on your horse, make sure your seat is indeed truly independent.  Especially that you are not dependent on the reins for support or confidence.   Also, begin paying more attention to your aids.  The ‘how, when and where’ you are applying them.

    Confusion on either you or your horses part will almost always result in a loss of balance.  This will only ‘tip’ your horse further onto his forehand.

    Working With All of Your Aids

    Each time when you are asking your horse for something, begin to apply and use your aids in a sequence.  Seat, then legs and finally hands…  There are many different situations and circumstances that we find ourselves in while riding.

    Doing things this way will allow you to prepare both yourself and your horse in a way that will interfere the least with the natural flow of energy and balance.

    Schooling Using the Walk to Halt Transition

    Start by working in walk and begin asking for halt using your seat and core muscles.  Then use your legs to support your horse and make him ‘close’ the halt with his hind quarters.

    Your horse must step into a halt, not fall into one! 

    Finally, close your ring fingers on the rein, resist with your hand.  Many riders will have been advised at some point to lift up their hand as they give the rein aid.  Rather think about closing your ring finger and as you do, allowing a little movement in your wrist which will bring your finger nails ‘up’ more.

    As soon as the horse responds, even a step, reward by softening the rein.  Softening does not mean throwing the reins at your horse or dropping the contact.  It merely has you softening the pressure by relaxing your ring finger again and ‘allowing’ a little with your arm.

    Understanding the Balance of Your Aids

    If your horse insists on walking through your hand and ignoring you, apply a stronger aid, asking for a very firm ‘stop’.  Be sure to reward as soon as he does so.  Sometimes you will have to be quite stern on your horse, particularly if he has become quite good at ignoring you!

    Make sure that while you are being firm, you are also holding your correct position and asking correctly for the halt – just applying more pressure as you do so.

    Once your horse has halted, ask him to stand for a few seconds.  Use this time to reevaluate your position and correct it if necessary.  Your horse should not need you to keep applying the ‘hand brake’ while he is halted.  He should merely wait patiently for your next question and then respond accordingly in a timely fashion.  No dilly dallying!!

    Repeat as Necessary

    When you are satisfied that you are sitting correctly, ask him to walk on again, using your seat and legs. Make sure that although you have a contact, you are allowing him to step into the walk, not resisting with hard hands or arms… Soft, Soft, Soft.

    Walk for 5 strides and again, using sequence of the seat, then legs and finally hands, ask for halt again.

    Be firm if necessary, but make sure that you are not leaning back and hauling.  Let the firmness come from your core, with your legs underneath you, rather than having a tug of war leaning backwards and hauling for all your worth!

    Working on Suppleness

    Once you have established a good baseline for halt, using the seat, legs then hands sequence, ask for halt again.  Once there, open your right hand away from your horse’s neck and ask him to bend his head and neck a little to the right by ‘having a conversation’ with your ring finger.  You can do this by squeezing the ring finger two or three times.

    As soon as your horse yields to the pressure and bends the head and neck reward him.  Do this softening the rein and using the voice if necessary to reward.


    Repeat to this same exercise to the left.  If you horse is more hesitant one way or the other, make a note of this.  I suggest working some suppling exercises into his schooling sessions to begin remedying the problem.  Also, some horses can become so stiff through their heads and necks because they are leaning so much that only the slightest of ‘gives’ is all you will see.

    Reward any small step in the correct direction.  Then use this as your measuring stick to gauge how much progress you are both achieving over time.

    Balance in the Halt Itself

    Your horse should continue to remain in a square halt while he does the above exercises.  You may find that he wants to move his shoulders to try counter balance himself.  Use your legs to hold him in a square halt.  Again, remember to only ask for small movement in the head and neck to begin with.

    You can also begin to add some trot in to the schooling, particularly transitioning between walk and trot.  Choose an amount of trot strides you want to ride, perhaps 5 or 6, each time and make sure it is an active working trot that you are riding.  Use the same downward aids that you applied in asking for halt to ask for the walk.  Walk for 5 or 6 strides and then forward to trot.

    Consistency and Time are Essential

    Continue to move up and down between the gaits, focusing all the time on not participating in any tug of wars or leaning matches.

    It will take time to retrain your horse and also you the rider, however it is essential if you want to move forward and progress with your training.  A horse that resembles an arrow aiming for the ground while being ridden will never achieve the lightness and self carriage in front that is essential to them becoming the best version of themselves.

    Happy Riding
    Lorna

    Links to Related Articles & Freebies Which You May Find Useful:-

  • Harnessing the Power of the Half Halt

    Harnessing the Power of the Half Halt

    [fusebox_track_player url=”https://op3.dev/e/traffic.libsyn.com/dailystridespodcast/SFA406-Harnessing-the-Half-Halt.mp3″ title=”Harnessing the Power of the Half Halt” social_linkedin=”true” social_pinterest=”true” social_email=”true” ]

    The half-halt should be one of the earliest things that riders learn to master when learning to ride their horse. It is a vital part of riding well and being able to perform accurate, balanced movements with your horse.

    However, while many riders understand the concept of the half-halt in theory, unfortunately, the carrying out of the actual movement leaves a lot of room for improvement.

    What is the Half Halt?

    The half-halt is essentially a rein check or a postponement. You are asking your horse for his undivided attention and letting him know that something is about to happen.

    When ridden correctly, the half-halt can be used to re-balance your horse, to ask him for his attention, prepare him for an upcoming movement, to ask for more self-carriage or collection, to steady or slow him down, to set up transitions and, in fact, should be sprinkled generously throughout your ride from start to finish.

    Harnessing the Power of the Half halt

    When and Why Should I Use It?

    There are so many different situations where the half-halt is required while riding that many riders may become confused as to where exactly to perform the movement. How often it should be applied is also a source of confusion. Along with what intensity or firmness.

    Each half halt, in essence, is similar regardless of the reason for using it. However, there are slight differences depending on many factors between the horse, rider, and present circumstances. 

    The more you ride and practice the half halt, the better you will become at using just the correct amount of pressure at the correct time. Regardless of the horse or circumstances.

    How Do I Ride a Half Halt?

    To perform the half halt, the rider uses three different aids, the seat, the legs, and the hands. Many riders struggle to use all three aids in such close conjunction with each other. And, often, this lack of co-ordination from the rider often results in a deterioration of the horse’s way of going.

    A true half halt, as we mentioned before, is a postponement of the forward energy.

    However, what is important to notice here is that the forward energy must remain and continue to be created by the rider, at the correct times, so the horse does not stop or break from what it is doing.

    There is a previous blog post & audio lesson HERE on using your seat while riding

    Its an ‘Invisible Aid’…

    The other point worth mentioning before we get into the nuts and bolts of the half halt is that it should be barely visible to others watching you ride. I say barely because if a person is well-trained in what to look for, they will of course see these little ‘rein checks’.  However, to the average spectator, it will look as though nothing is happening.  The horse is simply remaining in a balanced and consistent way of going.

    The half halt does require a certain amount of strength and development from the horse, as there is a transfer happening from the front end, more onto the back-end.  

    Strength & Training

    This results in the hindquarters coming underneath the horse and bearing more weight. Many riders forget to allow for this lack of training and development in young or green horses. They can become frustrated when the half halt does not result in the desired action happening underneath them.  Or as ‘big’ of a difference occurring. Horses must learn what the movement is, and over time, become capable of performing it correctly.

    Practice by firstly using the thought of the half halt as an opportunity to correct and ‘fix’, if necessary, your position while riding

    Setting Up the Movement

    Check that your basic position is free of any obvious errors and that your legs are underneath you.  It is important that your legs must remain underneath you throughout the half halt.  In order to maintain the forwardness of your horse’s movement and energy, your legs must be ‘on’ and applied first when asking for the half halt.

    Once you have engaged your horse with your legs, you will then use your seat and hands together to ‘resist’ or ‘slightly contain’ the energy and perform that ‘rein-check’ that we spoke of.  This will only happen for a split second. Then you will soften allowing your horse to move forward again. From here, use your legs once again to help create that forward energy.

    Remember, the half halt only lasts a split second; any longer and you are having a tug of war!

    Your Seat When Asking…

    One of the biggest challenges riders have is when they activate their seat and core in the half halt. Their lower legs tend to shoot out in front of them. This results in the rider’s feet being somewhere near or on the horse’s shoulders!

    Practice engaging your core in a ‘resisting’ motion for a split second. All the while making sure your legs are correctly underneath you.  Your legs are vital to keeping your horse moving forward and working correctly.

    As I mentioned earlier, the half halt is a slight postponement of the energy, not a cancellation!

    When using your seat and core, make sure you are carrying your upper body, to allow the muscles around your pelvis to work correctly.  Try not to brace your lower back, in an attempt to lean back.  This will result in a jarring feeling and the beginning of the end with regards to the forward energy you have created!  Also, make sure you don’t crouch or curve your upper back. This movement generally correlates with an overuse of the hand and lack of seat and core in the half halt.

    Not A ‘One Time Only’ Event

    Also keep in mind that you may need to perform numerous half halts in order to achieve your desired outcome.  

    Keep each one short, quick and correct.  If you ‘hold’ the position or the half halt for too long, your horse will begin to lean against you. This is exactly the opposite of what you want to achieve in the first place.

    Take time to begin coordinating your different aids so that once ‘put together’, your half halt will appear seamless and fluid. It will work with your horse. Not against. This will help to both balance and steady.  It often helps to say something while you are performing the movement, as it will help you better establish the cause and effect that you are making happen underneath you.

    A simple ‘Steady’ said out loud can be enough to help this movement become a subconscious one for you in the long run.

    Timing the Half Halt

    As with all things relating to horse riding, the timing of the movement and aids are also important.  Once you have successfully managed to use your different aids together to achieve the desired result, begin noticing what is happening underneath you.

    As you become more adept at feeling which foot is falling when you will grow more confident in asking for the half halt at the correct time.

    This is usually when the horse’s back hoof has been placed on the ground.

    Harnessing The Power of the Half Halt

    Sprinkle Around the Arena

    Train your body to automatically begin using the half halt in particular areas of the arena or parts of your ride.  I initially suggest using corners, bends, or changes of direction as the initial trigger you use to remember to half halt.

    Soon, riding this movement without thinking about it during one particular aspect of your work will become second nature. This will allow you to free up your mind to begin working it into other areas.  Again, I suggest methodically and consistently until it again becomes something that just happens while you ride.

    Finally, mindfully develop your ‘feel’ as you use the half halt…  

    Different levels of intensity or different ways of riding the half halt will be necessary depending on the various factors that make up each situation, such as rider, horse, and circumstances surrounding that particular ride.

    Happy Riding

    Lorna

    Additional Resources for Equestrians:-

  • Developing Your Riding Seat

    Developing Your Riding Seat

    [fusebox_track_player url=”https://op3.dev/e/traffic.libsyn.com/dailystridespodcast/SFA341-Developing-Your-Riding-Seat.mp3″ title=”Developing Your Riding Seat” social_linkedin=”true” social_pinterest=”true” social_email=”true” ]

    There’s always a desire among riders to develop their seat in the saddle. Most riders understand that developing this one aid is a key part of improving as a rider. But what does it really mean? And how can you start to do it?

    Developing your riding seat begins with understanding that your seat must be used to signal to your horse.  It is not there to interfere or disrupt his natural movement.  

    In order for you to utilize this aid successfully, it is imperative that you be relaxed first.  Relaxation is not floppiness, it is just an awareness of your body and how you are using it without any excess tension or resistance through your muscles.

    Control Without Excess Tension

    The problem and confusion over developing your riding seat often begin right at the start when we first learn to ride. We hear certain phrases repeated continuously. Phrases like “sit up straight, shoulders back, heels down, look up, bend elbows”.  The list goes on and on.

    However, all those commands, while each in their own way is correct and coming from a good place, can very often have the negative effect of making us stiff and resembling a poker!

    Developing your riding seat essentially the ability to control your core muscles, both when you need to use them and when they should remain passive or neutral.

    Many riders think that this is a foreign thing for them to do; using their core to influence something else. But cast your mind back to when you were small and enjoying the sensation of the wind in your hair as you swung back and forth on a simple swing. Yes, the ones with two ropes hanging from a branch or beam and a plank in the middle for you to sit on.

    Now, think how you were more than able, on your own steam and without touching the ground, to make each swing go higher than the last… You were essentially using your ‘driving seat’ to do that.  

    Likewise, think about when you wanted to get off the swing; you used your body to slow the momentum down and bring the swing to a halt; your resisting seat.

    How Your Seat Can Influence Your Horse

    This same approach applies when riding a horse, although admittedly used in far more subtle applications.  We can use our seat to drive our horse forward.   We can also use our seat to slow our horse down or gather our horse up a little.

    In fact, when we start being mindful about what we are doing and the effect it has on our horse, we realize that our seat is an important factor in going, turning, stopping, starting, transitions, not to mention the more intricate movements such as lateral and adjusting suspension and movement within a gait.

    Developing Your Riding Seat

    But just as being able to guide your horse along to perform what you wish of him, equally as important is the ability to shift your seat into ‘neutral’ and allowing our horse to actually do his job.  

    Often when people begin realizing how powerful their seat is in riding, they are quickly horrified as to how much ‘chatting’ they are doing without realizing it every time they are in the saddle!

    Becoming Mindful of Your Seat

    So, what do we need to do in order to begin tapping into our seat aid and using it when we ride?

    First and foremost, you must have or begin to condition your body to have, a strong core in order to correctly use your seat.  So many people are after this ‘independent seat’ but are not willing to put in the necessary effort and time that it takes to achieve it.  Learning to use your seat correctly is not something which we achieve overnight.

    It takes years of practice to develop the ‘feel’ and conditioning of your bodies in order to truly support you when you ride

    30 Day Rider Fitness Challenge

    It seems so strange, but so many riders just don’t carry themselves when on their horse… And those same riders get awfully upset when their horses refuse to carry themselves as well!

    You also must become almost obsessive about the cause and effect of every movement while in the saddle.  Being finicky and playing close attention initially to each movement and the reaction that it causes is the key to being able to perform what appears to be an effortless ride in the long term.

    Negative Effects of Excess Tension

    Earlier, I mentioned how essential it is to relax your body while riding.  One of the reasons is to prevent gripping!  I see so many riders in the saddle and they seem like they have the fear of God inside them that they might just fall off!

    Firstly, you will fall off if you stay riding long enough.  It is as enviable as the sun rising in the East each morning and setting in the West every evening.  Secondly, gripping will only work to get you there sooner, trust me!

    When you find yourself tensing and beginning to grip, catch yourself in the act and then rather relax.

    Think of a stone and a piece of jelly on a plate.  If you bounce the plate up and down, which bounce off first?  The stone of course!  Don’t be the stone.

    Confusion in Communication

    Gripping also works against you because it tells your horse a different story to what you are really perhaps trying to convey.  I have come across quite a few horses, particularly OTTBs, whose riders get a little nervous and begin to grip.

    The horse’s general reaction is always something that moves them farther from what the rider actually was trying to achieve and quite often ends with the horse showing his athletic ability with a few cartwheels for good measure.  This of course causes the rider to grip more, drive more and so the cycle goes on and on.

    Learn to relax both your mind and your body while riding. This will improve your ability to really develop your seat

    Your Position and Your Seat

    We can also look at the rider’s position when speaking about seat.  Make sure you are sitting in the lowest part of the saddle and not leaning back towards the cantle of the saddle. Leaning back will cause your legs to stick out in front of you with your toes tipping your horse’s shoulders or elbows.

    When a rider is continuously tipping back while in the saddle, the horse will begin to hollow his back all the time in order to get away from the uncomfortable pressure of the rider’s seat-bones.

    Equally as important is to guard against crouching over the pommel of the saddle.  People who ride like this are completely unbalanced and will never cultivate an independent seat.

    Also, you cannot ride a horse sitting on their neck; so don’t try it!

    30 Day Rider Fitness Challenge

    ‘Driving Seat’ Challenges

    Another position fault I see with riders, particularly when they try and use a driving seat is the ‘Quasimodo Position’.  They have tucked their pelvis so far forward that their back and, in particular, the area between the shoulder blades become curved into a C shape.

    In this position, the core is being ‘squashed’ making it impossible to carry the upper body, with the effect being that the rider becomes extremely heavy and cumbersome on the horse’s back.

    The last position problem that I want to mention today which is common when riders try to engage that ‘driving seat’ is an upward and forward thrust of the pelvis, coupled with an equally powerful thrust backward of the shoulders.  The result is again, a complete loss of any core engagement and an extremely arched and uncomfortable position for your spine to be in!

    When we look at what causes riders to do any of the above, it tends to circle back to two underlying reasons.  The first is a lack of time spent cultivating that all-important feel for the seat. And the second is a lack of strength and flexibility in the core of the body.


    Step by Step Training on This Topic

    This week in Daily Strides we are working on your seat. Specifically learning how to begin feeling it and then how to influence your horse with it.  The second lesson focuses specifically on asking our horse to move forward and how the seat is the first part of this ask.  Think about how you subtly adjust your body just before you stand up out of a chair.  This is a similar use of your core.  You will be riding exercises to help you use your ‘forward going’ seat correctly and also the correct application and use of the driving seat.

    In Wednesday’s lesson we knuckle down on how we can use our seat correctly while slowing down and stopping.  We are working on transitions between gaits themselves and using your seat to encourage a change within the gait itself.  This seat is often called a resisting seat. And if used correctly can be the difference between a connected and fluent transition; or a hollowed and choppy one!

    Finally, we put this all together on Thursday…  And for the brave few, I lay down a challenge that will open your eyes to the consequences of using your seat aids correctly. And the unfortunate issues that can arise when riders choose not to!

    The aim of this group of lessons is to help you to sit quieter in the saddle. This will lead to greater influence and better understanding of all the intricacies you are communicating to your horse as you ride.

    All this week’s lessons are available for you right now inside of Connection.  In fact, there are over 500 audio horse riding lessons on a huge variety of different topics in there. All ready for you to dive into with your horse.

    We will also help you set goals and create a plan to reach those goals – and equally as important.  You can find out more about Connection HERE >>

    Happy Riding
    Lorna

    Additional Resources on This Topic

    30 Day Rider Fitness Challenge