Tag: circle

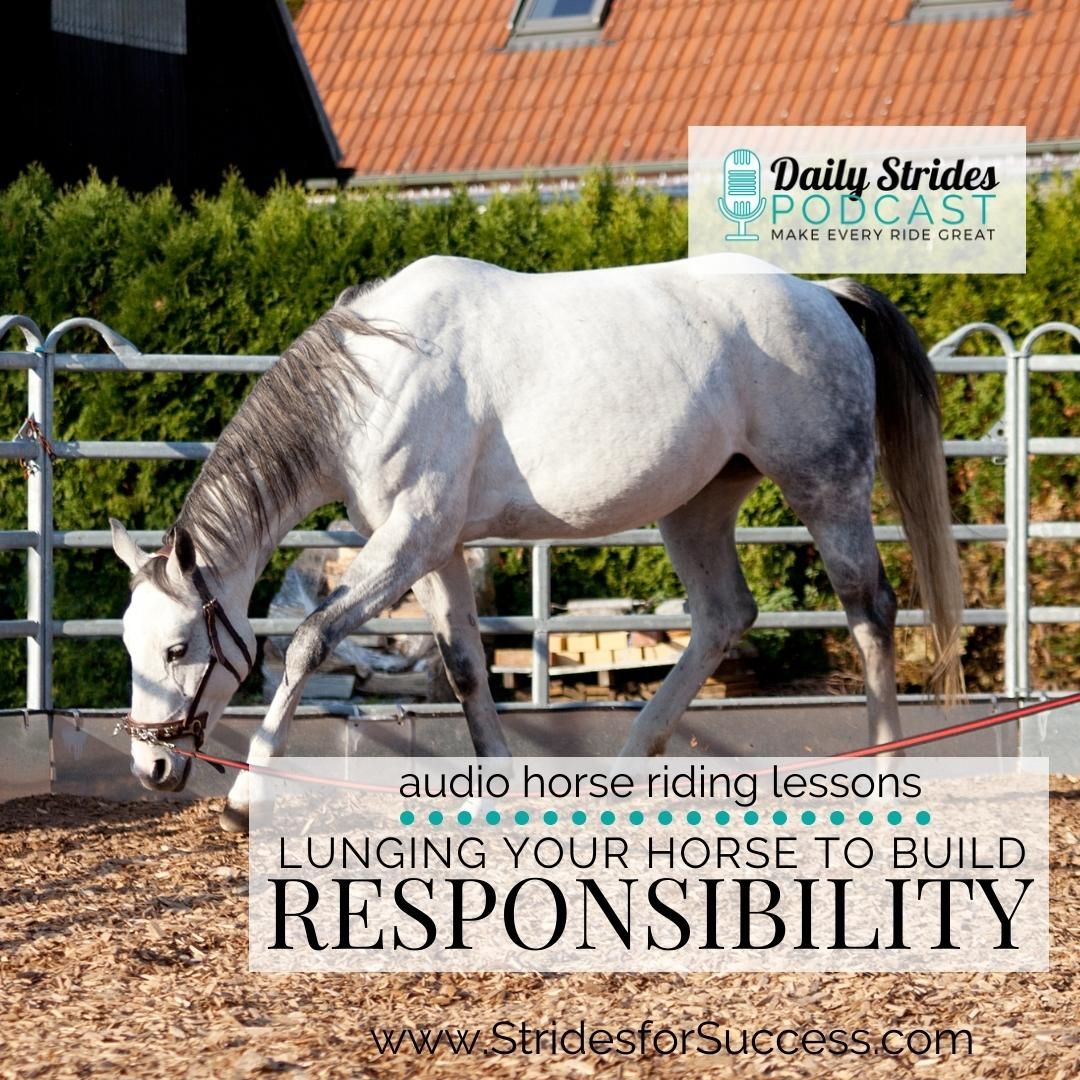
  • Using Lunging to Help Your Horse Build Responsibility

    Using Lunging to Help Your Horse Build Responsibility

    [fusebox_track_player url=”https://op3.dev/e/traffic.libsyn.com/dailystridespodcast/1263_Lunging_to_Help_Your_Horse_Build_Responsibility.mp3″ title=”Using Lunging to Help Your Horse Build Responsibility” social_linkedin=”true” social_pinterest=”true” social_email=”true” tweet_text=”Give this a listen… It’s good #horselovers” hashtag=”horsepodcast” twitter_username=”strides_success” ]

    As both a rider and trainer of your horse, one of your responsibilities is to help your horse build responsibility. In order for riders and their horses to take their training further, both sides of the team need to show up and work together. This cannot happen if we, the riders, are trying to control all of the moving parts. And so, this can bring up a few questions for riders…

    How can I begin to help my horse work ‘with’ me, rather than just ‘for’ me? And how can I develop his confidence so that he feels ready to take on some of the responsibility?

    Now, I believe that the responsible way to do this is to be consistent and invest time. I also think that this part of the learning should be approached in a few different ways. In the saddle, on the ground, and on the lunge or long lines. This way we can both explain, allow, and respond to our horses from lots of different perspectives. And this, in turn, allows them more opportunities to develop their ‘responsibility muscle’.

    Recently I spoke about how to begin doing this while riding. You can read or listen to that article/episode HERE. However, today, I want to dive into a personal favorite of mine; lunging.

    The Rider’s Responsibility

    Let’s start this conversation by saying the obvious… Before you can expect your horse to begin taking responsibility, it’s important that you do this first. In my experience, the most successful way to train horses is to ‘model’ what we expect from them. In this case, that is a personal responsibility for their role in the overall conversation and work. So, you must ‘show up’ first…

    This begins with the understanding that lunging is not just running in circles. It is an opportunity to introduce, develop, and refine aids and responses between horse and rider

    So, it makes sense that before you can truly begin focusing on your horse taking care of his own stuff, you must first ensure that you’re both on the same page regarding expectations and communication.

    Once you have established the basics in your lunging, you can then start working on delegating some of the responsibility for the work to your horse

    The Horse’s Responsibility

    So, once there is a basic level of understanding regarding basic communication while lunging, you can begin going a little deeper with your horse. Often this is simply beginning to expect a little ‘more’ from your horse. Tweaking those expectations slightly creates slightly different outcomes and results.

    Some of the specific ways you can begin this work are:-

        • More responsiveness to increasingly more subtle aids (this requires your horse to pay greater attention)
        • Greater accuracy regarding where and when (increased ‘body control’ and, again, more attention)
        • Maintaining rhythm for longer periods (working alone without constant input)
        • Larger circles (working more independently from you)
        • More accurate circles in open spaces (developing true straightness through the body)
        • Accuracy & rhythm over ground poles (increased physical abilities and concentration)
        • Self-carriage and collection (physical and mental development)

    Now, obviously, this is not a definitive list; there are many other opportunities for your horse while lunging to develop responsibility, however, these are probably the most obvious. Today, I want to dive a little deeper into one of these. My hope is to demonstrate how versatile this is and how it truly does develop personal responsibility in your horse.

    CLICK HERE TO DOWNLOAD a printable version of this article now, so that you can refer back to this list over the coming weeks and months to help you plan your training with your horse.

    Working on Larger Circles

    Often, when we initially begin lunging a horse for the first time, the circle can get big pretty quickly. However, this is generally due to the horse going faster, larger, and wider as he explores this new way of working together; exuberance rather than focused work! This is why I generally suggest getting started with lunging in a more enclosed space.

    It is really important that you are not using the lunge line, the contact, to keep your horse in the circle. This will instantly close the door on any true work and connection begin achieved

    So, that being said, the larger circles I am referring to here are intentional ones. Where, you actually ask your horse to move further away from you while on the circle, and he happily responds and obliges.

    It is key to understand, at this point, that you are not achieving this bigger circle by you standing still… You must be an active participant in lunging. The amount of lunge line between you and your horse has simply increased

    Working in Open Spaces

    When your horse is willing to work more independently from you, while still listening for and responding to your aids, it is a sign that he has developed greater confidence in both of you. And this is where you can begin to apply other intentions to your training session together. I would start by opening up the space you are working with.

    By removing the outside boundary, you are also removing an artificial aid – and you can only do this when your natural aids are being understood and respected

    By being able to effectively work with your horse in an open space, you have proven that your horse can be responsible for his part in the conversation as a whole. This is an important milestone when working with horses. And for him to do this while maintaining that space between both of you; that is developing independence as well.

    The more independent and responsible your horse becomes, the more he can add to the ongoing conversation that’s happening between you. On the ground, on the lunge, and in the saddle

    Lunging to Build Responsibility

    Anything great that took time to build, required someone who maintained focus while getting there. When it comes to you and your horse, this will be one of your responsibilities inside your partnership together. It will be up to you to create the plans and set the intentions.

    By choosing something specific to work on each lunging session, you will help your horse to develop more confidence in his own abilities – and in yours.

    You can download this article so that you can keep the list above to use to help you plan by CLICKING HERE. And then, from there, just show up and be consistent. If part of your responsibility is to model what you desire for your horse, start there🙂

    Happy Riding
    Lorna

    More on This Topic:-

    Get Support & Guidance in Your Riding

  • 3 Exercises to Ride While on a Circle with Your Horse

    3 Exercises to Ride While on a Circle with Your Horse

    [fusebox_track_player url=”https://op3.dev/e/traffic.libsyn.com/secure/dailystridespodcast/1220_3_Exercises_to_Ride_while_on_a_Circle_with_Your_Horse.mp3″ title=”3 Exercises to Ride While on a Circle with Your Horse” social_linkedin=”true” social_pinterest=”true” social_email=”true” tweet_text=”3 Exercises to use while riding a circle with your horse…” hashtag=”horsepodcast #equestrian ” twitter_username=”strides_success” ]
    It is probably the most ridden shape for most riders, the trusty circle.  And yet, a lot of circles are uninteresting, uninspiring, and (if we’re being completely honest here) a total waste of time for you and your horse.
    When ridden with a little intention and purpose, the trusty circle can become one of the greatest ways to develop your horse and improve your skills.
    Here are 3 exercises you can ride next time you’re in the arena to help you make the most of your circles with your horse.

    1.  Counting Strides on the Circle

    This is a great way to practice and work on some basics in your riding.  By knowing how many strides you are riding on a specifically sized circle, you can begin to ‘test’ yourself and your horse.
    Start with counting strides to see if you can ride the same number consistently on each consecutive circle.
    Once you have your number and can maintain it, you can then begin to ask different questions.  Shortening the strides to fit more into each circle.  Or lengthening to fit less.  You can also play with tempo while you do this exercise.

    2.  Leg Yielding on a Circle

    Circles, in and of themselves, are a great way to build and develop suppleness in both horse and rider.  However, you can take this a step further by incorporating lateral work into your circle.
    By asking your horse to leg yield while continuing to ride the circle, you can ask different questions around both straightness and suppleness – for you and your horse.
    I find that this exercise also helps riders to become more aware of their own straightness in the saddle.  Couple this with the fact that, for many riders, rhythm can be a challenge, it truly is a great exercise to incorporate into your riding plans.

    3.  Accurate Transitions on a Circle

    The final way I suggest making better use of the versatile circle is to become intentional with transitions while on it.  Moving up and down the gears, whether between gaits or inside of a gait,  will test both horse and rider.
    Transitions on a circle are a great way of ‘tuning’ both horse and rider to each other. 
    The preparation involved before each transition, the lightness through the transition, and the quality of the gait after each one is a great way to test horse and riders balance.

    Riding A Circle

    So, next time you are in the arena, give one or two of these a go.  By beginning to ride each circle with a little more intention, you can dramatically improve the quality of your schooling.
    Happy Riding
    Lorna
    Connection; My Online Membership for Equestrians is open and enrolling new riders.  if you would like a day-by-day plan to follow in your riding, this is for you.  Your own time, your own arena,  your own horse…
  • Riding Through a Bend; Understanding Your Role

    Riding Through a Bend; Understanding Your Role

    Riding Through a Bend; Understanding Your Role

    What this episode is all about & how it can help you:-

    • Realise that you do not ‘turn the horse’
    • Set up circumstances that will help make each bend successful
    • Understand that you have to ‘allow’ your horse to actually ride through the bend
    • ‘Support’ your horse rather than ‘control’ your horse

    [smart_track_player url=”https://op3.dev/e/traffic.libsyn.com/dailystridespodcast/1084-Riding-Through-a-Bend-Understanding-Your-Role.mp3″ title=”Understanding Your Role when Riding through a Bend” social_linkedin=”true” social_pinterest=”true” social_email=”true” tweet_text=”Riders often wonder why they have limited success where ‘turning’ your horse is concerned…  Have you ever tried to ‘turn’ 600kg?! Rather think of it like this…” hashtag=”equestrian” twitter_username=”strides_success” ]

    Have you ever considered how many times you ride a bend, corner or circle on each single ride? The fact is that every ride at some point after you get into a saddle, you are going to have to turn around.

    I see time and again how riders manage to establish whatever they are working on while on the straight. However, as soon as they begin to travel around a bend or corner, it all falls apart.  

    In this episode of the Daily Strides Podcast we will look at how you can, starting with your very next ride, begin to ride bends, corners and circles as they should be ridden.  As paths that take you from one straight line to the next, without changing how your horse is actually ‘going’.

    If you understand your role when riding a successful bend, you will inevitably support your horse to travel through the bend with more consistency. 

    Your Role when Riding a Bend, Corner or Circle

    This seems like a strange place to begin, however I feel that if you have a better understanding of your responsibilities, the whole exercise becomes a whole lot easier!  Easier for both you and your horse. There seems to be a fair amount of confusion surround who does what when it comes to riding through bends and around circles…

    Your responsibility, first and foremost to both you and your horse is that of ‘rider’ or ‘team leader’.  What this means is that you are taking responsibility for both planning the bend and then setting things up so that both you and your horse have the best chance or succeeding.

    This means that rather than the bend or corner being a piece that connects two other pieces together, it actually becomes an important stand alone movement itself. 

    It is prepared for just like any other school movement or exercise you would ride.  Correct planning will include where you are going to travel. How you would like to travel through it.  What you need to do beforehand in order to support both of the above. And, not least, accurately and clearly communicating what you want to your horse so that he can make it happen.

    Then realise that you don’t ‘TURN’ your horse… You rather ask your horse to turn…

    Creating the Circumstances that Lead to a Successful Outcome

    It has been said time and again that the plan is only as good as the implementation of it.  This is where your responsibilities as ‘rider’ or ‘team leader’ will truly be called on.

    Often riders choose a track that is simply too difficult for where they are in their current training.  I am going to suggest planning your initial track to complement what comes before it and what comes afterwards.

    Think simple yet as specific and therefore accurate as you can be when travelling through or around it. 

    Where you are coming from and what you want to do when you get around the corner will also play a big role in plotting out the actual track you want to travel on with your horse.  So too will how supple you and your horse are.  How ‘tight’ of a corner can your horse ride without losing rhythm, relaxation and forwardness?

    Your horse must be supple enough to replicate, through his back, the arc that your track takes you both through the bend, corner or circle. 

    Using cones or markers to ride between is the easiest and most effective way to make sure your horse stays on track as you travel through the bend and corner.  Start by plotting a track which you feel will be pretty simple for you and your horse.  Then ‘tidy’ things up as you go.

    Setting up the ‘Ideal Conditions’ for Your Horse

    So you have your ‘track’ planned.  Now what?  Well, the next responsibility you have is firstly getting your horses attention so that he too realises something is coming up.  This is where the half halt comes into play.

    How many half halts you will need to apply will depend on many factors.  What is safe to say is that it is very, very rarely just one! 

    Use your half halts to firstly get your horses attention.  From here, you can begin asking him to make subtle adjustments that will help him remain balanced, forward and rhythmic through the bend or corner.

    Correct flexion or bend is essential to successfully riding through a corner or bend.  Your ‘job’ is to ask for the bend or flexion and then allow your horse to actually move through the corner.

    It is not your job to ‘hold’ or ‘control’ the horse as he travels through a bend, corner or circle.  In fact, ‘holding’ him will result in a loss of forwardness and, usually, an excessive amount of tension through the horses body.  Both will cause the horse to lose rhythm and balance.

    Finally, your aids are there to communicate what you would like to have happen.  They are not there to actually ‘make’ it happen.  That is your horses job.  However, you must always make sure that you are clearly applying your aids so as to not confuse your horse or contradict yourself.

    Allowing the Horse to Ride through the Bend or Corner

    From here, you simply allow things to unfold!  This can often be the most difficult part for many riders. However, if you would like to eventually have a solid partnership with your horse, you must begin giving him responsibility for his own actions.

    It is important to realise that there is a huge difference between delegating and abdicating…

    Think of it as delegating the task of actually moving through the bend or corner to your horse to carry out.  You have given him the parameters you want him to use or stay within.  He also has everything he needs to carry out the task successfully.

    Your position throughout the bend or corner is vitally important.  All the setting up in the world cannot undo a rider who is leaning or tilting through the corner.  A good position will channel the energy where you would like it to go.  It will also remaining supportive – rather than restrictive – to the horse as he travels through the bend or corner.

    Providing Correction and Extra Input Where Necessary

    Keep in mind that delegating also requires you to give occasional input and make occasional corrections.  Sometimes your horse will feel unsure as to what is being asked of him.  A ‘good’ team leader or rider will be quick to reiterate and encourage the horse that he is indeed doing the right thing.

    Sometimes, even with the best preparation, things will fall apart a little inside of the bend or corner.  A good rider position is essential to quickly help the horse to make an adjustment that will help him to reestablish what was lost.

    Remember that once you have made the correction, your job is done.  It is, again, up to your horse to carry on through the bend or corner.  

    Sometimes, especially early on in your training or relationship, you may have to make quite a few ‘corrections’ through each corner or bend.  But as time goes on, and as you consistently allow your horse to be responsible for successfully travelling through he corner, this will become less.

    Bends, corners and circles are an important part of your riding and your training with your horse.  It is well worth taking the time to ride through them in a way that builds and developing the overall ride with your horse.

    Happy Riding

    Lorna

    Other Posts and Episodes that Relate to This Topic:-

  • Using the Humble Figure of Eight in Your Schooling

    Using the Humble Figure of Eight in Your Schooling

    Correctly Riding the Humble Figure of Eight - Daily Strides Podcast

    [smart_track_player url=”https://op3.dev/e/traffic.libsyn.com/dailystridespodcast/1020-Using-the-Humble-Figure-of-Eight-in-Your-Schooling.mp3″ title=”Using the Humble Figure of Eight in Your Schooling” social_linkedin=”true” social_pinterest=”true” social_email=”true” tweet_text=”Rethinking the Figure of Eight ” hashtag=”Horseriding #Podcast” twitter_username=”strides_success” ]

    What this episode is all about & how it can help you:-

    • How accuracy is key to riding a successful figure of eight
    • The importance of rhythm all the way through
    • The power of ‘straightness’ through the change
    • Identifying where your challenges lie

    The figure of eight can be a fantastic aid in your schooling of both yourself and your horse, if it is ridden correctly and given the focus and effort it deserves.

    The humble figure of eight is one of those things that we learn very early in our introduction to horse riding.  It can sometimes seem that it is too easy to really bother with, but the figure of eight is something you can use regardless of the level you are at in your riding.

    It is an exercise that has lots of different benefits, depending on what level you and your horse are at in your training.  For example, each of the different levels of the traditional training scale can we worked on when riding the figure of eight.

    What is the Figure of Eight?

    Simply put, the figure of eight is two circles, side by side so they look like the number eight.  What trips many riders up is the fact that while it sounds simple, riding a single accurate circle is anything but simple and has a lot of potential for things to go a little off track.

    When we put two circles together, this can lead to further challenges if not approached carefully and with a plan of how you are going to ride the movement. This is one of the reasons why the figure of eight can be so beneficial for your riding, by developing not only physically (you and your horse), but also mentally as well.  You must be able to concentrate for the amount of time it takes to get you through the full figure.

    Why Accuracy is Key to a Good Figure of Eight

    Your circles must be well planned out.  I am going to suggest that if you are not fantastic at riding a line to rather put markers out which will help keep you on track.  Put more markers than what you would think you need out there.  You are going to be thinking about so many other things when you are riding the figure of eight that probably the shape is going to be the part that ‘gives’.  And you don’t want that.

    In order for the figure of eight to be beneficial to your schooling, a correct bend must be maintained throughout the exercise.  Your markers will help you to achieve this.

    The second point to consider when speaking about accuracy with the figure of eight is the middle point where the two circles join.  You must be very specific on where exactly that point is.  I would suggest maybe putting two poles out that you have to go through each time to avoid the centre from moving!

    Knowing its exact location is essential for a good approach and an equally as good departure from it and onto the ‘new’ circle.

    Relaxation and Rhythm while riding a Figure of Eight

    Both relaxation and rhythm are key while riding the movement, whatever gait you are in.  Whether you are in walk, trot or canter you want to make sure that you have those basics in place.

    The basic that is you are relaxed and your horse is relaxed, particularly when it comes to that all important middle point. 

    As well as the relaxation, you also want to notice that you are working to maintaining the rhythm.  A lot of riders will find that when they are on the circle the rhythm is great, but as soon as they begin approaching that middle point.  This is because you are preparing a lot of things to happen in order to successful change rein at this point, and it is easy to lose the rhythm (or / and relaxation) because of this.

    Riding the Figure of Eight

    When you are riding a circle on the left rein (circling to the left), you are riding in a particular way.  Your outside leg is going to be slightly behind or back from where your inside leg is; they are definitely not equal on your horse’s sides.

    The same applies to our seat bones and also our shoulders – our shoulders are going to be mirroring our horse’s shoulders, and they are not going to be ‘equal’.

    However, when you are approaching the middle point of your figure of eight, all this needs to change.  Your inside will become your outside and your outside will become your inside.  A lot has to happen in a small space of time, so I suggest simplifying things by riding a couple of strides of straightness each time at the middle point.

    Giving yourself between three and five strides where you are straightening things out will allow you to be more accurate and also help to maintain the rhythm and relaxation through the change as well. 

    Potential Areas for Things to Go Wrong

    There are two key areas where things have a lot of potential to go off track when it comes to riding a figure of eight.  The first is where the one circle ends, as you are approaching the ‘X’ or middle point (the point where the two circles intersect).  That final quarter of the circle what can sometimes lose its shape due to your horse beginning to fall in.

    To prevent this from happening, you must ride every stride.  Even though you are thinking ahead and you are planning for those couple of strides of straightness, you are not ignoring that final quarter of that circle in order to get there.

    The circle has to continue and you have to maintain the bend and stay on track in order to make that happen.

    The second area where things can potentially go off track is when you have passed the intersection point (the middle ‘X’ point) and have started on your second circle.  It is easy to ride off track by going too far out or a little bit too short.  Basically, our horse either falls out, or falls in.

    There can be a few reasons for this, but it is usually due to the rider not being very clear about where they want to go.  The lack of clarity in the riders plan leads to a lack of clarity in the aids and the communication in general.

    Keeping on Track

    Again, the biggest reason most riders ride mediocre figure of eights is because they underestimate all that is involved in riding a successful one.

    Focus on sitting tall in the saddle, having a good plan about where you are going to ride and how and then making it happen.  Use markers to plan out that track that you want to ride on, and then as you get better at it you can take the markers away and start to use your own eye – your line – to ride it.

    Begin in walk, building up to trot and later canter.  In canter, you can transition through that ‘X’ back down to trot, or you can ride a flying change.

    The beauty of the figure of eight is how versatile it is depending on your level of riding.

    Riding a good quality figure of eight will lead to increased suppleness, which is the next step of that all-important Training Scale for both you and your horse.  But in order to work on suppleness, the foundational pieces of the rhythm and the relaxation must be in place.  Let them be your focus the next time you ride a figure of eight in the arena.

    Happy Riding

    Lorna

    Links mentioned in the episode:-

    Other content that will compliment this episode:-

  • Staying on Track on a Circle

    Staying on Track on a Circle

    What this episode is all about & how it can help you:-

    • What is straightness on a circle
    • Creating a channel and maintaining it
    • The importance of independent aids to maintain the circle
    • What can go wrong and how to identify and work on it

    [smart_track_player url=”https://op3.dev/e/traffic.libsyn.com/dailystridespodcast/1019-Staying-on-Track-on-a-Circle.mp3″ title=”Staying on Track on a Circle” social_linkedin=”true” social_pinterest=”true” social_email=”true” tweet_text=”You ride them every day- circles – let’s start getting them right…” hashtag=”Equestrian, #Podcast” twitter_username=”strides_success” ]

    I am willing to bet that every time you get in the arena with your horse, you are riding circles in some ‘shape or form’.  Imagine if you became really focused and intentional about those circles and how they are working towards your overall schooling…

    Mark Your Circles Out if Necessary

    Circles are something we learn from very early, however they are also something that most riders don’t really ride very well.  The shape they are riding is not a true circle, it is not very accurate. Before you begin working on riding circles with your horse, first go and mark your circles out.

    How many markers you need will depend on your abilities to ride a line.

    If you are unsure, rather put more and then take away if necessary.  More would look like eight markers, less would look like four markers, but it is entirely up to yourself.  What is important is that the bend or arc remains consistent for the whole circle.

    Simply put; there should be no straight lines or corners!

    What Becoming ‘Off Track’ Looks Like on a Circle

    One of the most important concepts when riding a circle is being straight on the circle.  It sounds like a contradiction, doesn’t it?  However, straightness on a circle simply means that your horses two left legs are on one track and his two right legs are on another track.

    It looks a lot like train tracks; your horses two tracks remain parallel to each other regardless of where they go.

    If your horse ‘derails’ off of those tracks, you will lose energy and as a result, lose connection and forwardness.  Your responsibility is to establish those tracks and then maintaining your horse moving along those tracks.

    Creating a Channel using Your Aids

    Every time you are in the saddle, whether you are riding a straight line or a circle, you should be thinking about your channel and how you can improve it.

    Your channel is how you direct your horse’s energy. 

    This energy is created in the hind quarters, the backend or engine of your horse, and then funnelled along, through your horses back to the front end, where you can gather it up by creating contact and connection.

    When the channel is not maintained, this energy can either leak out or ‘overflow’ in certain areas.  As soon as the energy is not going where you want it to go, there is a lack of flow in your horses way of going – and the potential to become ‘derailed’ off of your tracks when you are on a circle!

    Your channel is maintained by establishing and then continuously adjusting the balance between all your different aids.

    Why Does the Your Horse ‘Derail’?

    In a previous episode we spoke about the importance of your independent seat.  How, in order for you to truly communicate with your horse effectively, all your aids must remain independent of each other – but at the same time working together towards a common goal.

    When your horse ‘derails’ or goes off track from the initial circle you had planned to ride, this is usually due to an imbalance in your aids.  Perhaps your inside hand is too heavy, or your outside leg is asleep  on the job.  It could be due to your being physically tired in the saddle and unable to maintain the channel as you ride the circle. A loss or lack or relaxation is another common fault that shows up for a lot of riders.

    Regardless of the cause of your aids becoming out of balance, the result will generally be that your horse moves off the original track and begins to run (walk, trot or canter) on three or even four tracks.

    How Can You Begin Fixing This?

    You can begin by understanding the aids to ride a circle (I have included a few links to blog posts on this topic below) and the importance of riding each individual stride in order to create a better overall circle.

    You can also work on your position.  Where are your seat-bones in the saddle?  And your legs?  Are your hands and shoulders doing what they are supposed to be doing?  Are you ‘weighting’ the inside seat-bone correctly?  Can you feel both seat-bones on the saddle at all times?

    There are a lot of things to think about when riding circles and even more when you begin really seeing circles as an important part of your schooling for your horse.

    I am including links below to other trainings on this topic that will help you stay on track with your circles, every single stride.

    Links mentioned in the episode:-

    Links to other content that will support you in developing your independent seat:-

    Happy Riding

    Lorna