Tag: Timing

  • Timing Is Everything: Finding the Sweet Spot for Half Halts

    If you’ve ever asked for a half halt and felt… well, nothing – you’re not alone! So many riders don’t really use the half halt in their riding because they find that it either doesn’t work, or it’s a little ‘too much’ for them and their horses!

    I know many riders can feel a little daunted when they hear the phrase “half halt.” It sounds complicated, almost mystical!  Like something only advanced riders can master. But that’s just not true!

    A good quality, well-timed half halt doesnt’ have to be rocket science! It can be a simple communication tool between you and your horse. And because it’s part of the conversation, the timing needs to be right as well.

    In this episode, we’re going to chat about why timing is so important for your half halts and a few common mistakes riders make when implementing it. I also want to touch on how lunging can be a change in perspective for riders working on their half halt and the timing of it.

    By the end, you’ll have a much clearer picture of how to sharpen your half halts so they actually work. And this will help set you both up for greater balance, responsiveness, and flow in your work together.

    Why Timing Matters So Much

    Think about a conversation with a friend. If they tell you a story and you interrupt too soon, your point falls flat. If you jump in too late, the moment’s passed. And if you constantly interject every two seconds? They’ll tune you out completely.  Half halts work pretty much like this for you and your horse.

    A half-halt is essentially a moment of ‘pause’ within the stride. It’s your way of saying to your horse: “Refocus, rebalance, and prepare for what’s next.” If you ask in the wrong place or at the wrong time, your horse may not be able ot respond. And if you are not paying attention and apply the aid too late, things will already have gone sideways! You’ll have missed the opportunity to rebalance before it all fell apart.

    And keep in mind that the timing of the half halt is vital, but so too is how you ask. Too strong, and you’ll block the energy. Too light or badly timed, and you run the risk of becoming ‘background noise’! 

    Common Mistakes Riders Make

    Most riders think they’re applying perfectly timed and executed half halts. However, that is often not what’s really going on! And, over the years, I’ve seen 3 common challenges and mistakes show up time and again.

    1. Not Getting Your Horse’s Attention

    The half halt is great. However, like most things in riding, it’s usually only as great as what came before it! And if you’re not first actually ‘focusing’ your horse’s attention to the fact that you’re going to ask a question, the answer will probably fall short! One of the key purposes of the half halt is to first get your horse’s attention. I chat more about that HERE.

    When you fail to first get your horses attention, you end up “nagging” with constant mini half halts, every stride, that your horse is just completely ignoring!  

    Imagine your phone buzzing with notifications all day long. After a while, you don’t even notice them anymore. The same thing happens with your horse — they tune out.  It’s only when your phone actually RINGS, that you’re reminded to pay attention and do something about it.

    2. Too Late

    This happens when you wait until things have already gone completely sideways before stepping in. It’s a bit like just ignoring the warning signs, wishing and praying that things will sort themselves out. Sometimes they do – but often they don’t! Picture riding on a downhill slope and feeling your horse becoming a little ‘more energetic’ underneath you. Instead of half halting and rebalancing so that your horse maintains the existing trot or canter, you find yourself barrelling down the hill!

    At this stage, your “half halt” turns into a desperate ‘drop the anchors’ in an attempt to brake! And instead of helping your horse rebalance, you end up blocking energy and, usually, creating excess tension!

    4. Too Strong

    This is the overcorrection. Now, often this is in direct reaction to the previous issue of applying the half halt a wee bit too late! But sometimes this can also show up when riders fail to realise that there is a ‘balance of aids’. Riders know they need to do something, so they just ‘haul’ on the aid that ‘seems’ to be the one that will work. Usually the reins, but sometimes the seat!

    The result? The horse doesn’t recycle energy through the body. Instead, it shuts down, hollows, or even stops! The flow of the energy is lost, replaced with resistance. And, you have to start from scratch to reestablish what you were originally doing.

    Timing: From Awareness to Feel

    So, back to our timing. Let’s be really honest here; timing isn’t something you can learn from reading a book or watching a video. You can understand it in theory, but to truly ‘get it’, you need to feel it.  You need to begin to understand how your aids directly influence your horse.

    You need to learn how to feel when the best time to apply the aids is, so that your horse can best respond. 

    And while there are many exercises and ways to do this in the saddle, I’m going to suggest starting off on the ground. Before you ever feel it, educate yourself by actually seeing it happen. And that’s where lunging comes in.

    Lunging Helps You ‘See’ Timing

    When you’re in the saddle, your brain is juggling a lot: your position, your hands, your legs, your seat, the arena, your horse’s balance… the list goes on. Throw into the mix trying to figure out when to half halt and when best to time it… It can feel overwhelming!

    On the lunge, a lot of the overwhelm drops away. You’re not working on a million things and hoping that you’re feeling it all correctly – you’re simply watching your horse move.

    And when you watch closely, you’ll notice something important: the rhythm of the stride. Every stride has a natural moment where your horse is best able to respond to your influence.  This will depend on what you want to ask for or do… But, if we think of half halt, the best time to balance is when your foot is firmly on the floor, yes? So, apply this to your horse as well.

    By observing this over and over on the lunge, you train your eye to recognize timing. And once you see it, you can start to anticipate it. Then, when you’re back in the saddle, your body learns to match that rhythm almost automatically.

    You and Your Riding

    If your half halts aren’t working, don’t beat yourself up. Most riders are either too late, too strong, or talking to the wall when it comes to half halts. And often, because they haven’t developed the timing piece yet.  The takeaway here is that timing is a skill you can train. It’s not about being a “natural rider” or having some magical gift. It’s about practice, observation, and awareness.

    Start with lunging. Watch your horse move. Identify the sweet spot of the stride for the question you want to ask. Then, begin experimenting. What happens when you ask slightly earlier? Slightly lighter? Less heavy handed?

    Over time, you’ll start hitting that sweet spot more consistently. And that’s when your half halts become powerful.  Not because they’re bigger or stronger, but because you’ve learned to refine them by applying the aids at the right time.

    Timing Your Half Halts

    Half halts are the foundation of so much in riding: transitions, balance, collection, even safety out on the trail. And yet, so many riders miss out on their potential simply because of timing.  If you can learn to assess the “when” before you ask, you’ll unlock a whole new level of communication with your horse.

    That’s exactly what we’re working on inside Connection this month. We’re starting with half halts on the lunge — the clearest way to train your eye and develop timing — before moving into half halts under saddle later this year.

    Because when they’re done well, a half halt feels almost magical: your horse shifts balance, lightens the front end, and tunes in to your next aid.

    And it’s a skill you can learn, step by step.  Start by seeing it on the lunge. Play with it in the saddle.  And remember: every time you refine your timing, you’re making it easier for your horse to understand you.

    Happy Riding
    Lorna

    The Your Signature Ride Challenge

    Here’s the idea: you use only your seat and leg aids to “write” your name in the arena. Sounds simple, right? But what it really does is sharpen your awareness of timing and clarity.  You’ll learn when your aids actually make a difference.  And you’ll have fun doing it.  All while creating a pattern that’s uniquely yours!

    You can sign up by CLICKING HERE

    It’s free to join, and every rider who participates gets access to a guided audio lesson to help them through the challenge. Plus, you’ll have a chance to win 3 months inside Connection (a $66 value)

    Restart & Reschool

    And if you would like a little more 1-to-1 coaching, explore Restart & Reschool Private Coaching. It is perfect if you’re starting your practice – or if you’re looking to turn your existing practice into something ‘real’ for you and your horse. I’ll guide you step by step on the way! You’ll not only get the full ‘OTTB; From Racetrack to Ready Program’, but also fornightly private lessons with me to move you forward in your riding.

    We can work on anything you would like; from groundwork, to lunging, to riding, to jumping… With the virtual private lessons, we can do all of these things – and more.  If you would like to find out me, you can let me know a little more about you HERE and I will then reach back out and we can chat!

    This is the support, training, and accountability you’ve been missing to finally follow through and start seeing progress. No fluff. No overwhelm. And as flexible as you need for your lifestyle. 

    Online Training & Coaching

    Connect with Lorna online:-

  • Step Up Your Riding with the Walk to Canter Transition

    Step Up Your Riding with the Walk to Canter Transition

    [fusebox_track_player url=”https://op3.dev/e/traffic.libsyn.com/dailystridespodcast/1256_Step_Up_Your_Riding_With_The_Walk_To_Canter_Transition.mp3″ title=”Step Up Your Riding with the Walk to Canter Transition” social_linkedin=”true” social_pinterest=”true” social_email=”true” tweet_text=”Something fun to try this week riding your horse…” hashtag=”walktocanter ” twitter_username=”strides_success” ]

    This transition is a personal favorite of mine.  To ride and to help other riders as well. I really do believe that the walk to canter transition can help you and your horse to connect more to each other.  It can help you to have more clarity over your canter aids, and your horse to become more responsive. And you both to develop so that your training can progress forward.

    In fact, the walk to canter can help horses and riders progress in ways that they don’t even realize they are.  It introduces a certain level of collection to the ride. For many riders, this is one of the best introductions to this as it feels very natural and ‘in flow’.

    You can begin introducing, or refining, the existing transition from the walk to canter today in your training by focusing on a few different elements.

    Your Canter Aids

    One of the reasons the walk to canter transition is so good for riders is due to the speed of the walk.  Many riders can feel flustered, bounced, rushed, or tense when preparing for and riding the trot to canter transition. Which is one of the reasons I love helping riders to effectively use the walk to canter transition in their training.

    The walk to canter transition allows riders enough time and space to identify the point in the stride to ask for the transition, as well as actually apply their aids in a meaningful and effective way. 

    I have an article and Daily Strides Podcast episode HERE that details the aids to ask for the canter that you might find useful for your riding.

    Timing Your Aids to Ask for Canter

    One of the biggest challenges riders have when it comes to getting into a canter with their horse is timing.  When you ask the question makes a huge difference to how your horse responds. If we ask at a point in the stride where he simply can’t respond, this can lead to excess tension, rushing, or just being ignored!

    When using the transition from walk to canter to really work on the timing of their ‘ask’ for the canter, it allows both horse and rider to begin riding cleaner transitions

    I would suggest spending some time on the walk familiarising yourself with what is moving where underneath you.  When you feel your right seatbone swing down and forwards, it means that your horse’s right back leg is also moving forwards.  As this is happening, your left seatbone will have moved up and is ‘moving backward’. This is because your horse’s left back leg is, at this moment, on the ground. His body is moving over the back leg, creating the ‘up’ feeling through your seatbone.

    You will ask for the canter as the outside back leg is moving forward and preparing to step down into the stride.  This will allow this leg to become the 1 in the 1,2,3 that makes up a canter stride. 

    I have another article and an episode of the Daily Strides Podcast HERE that goes into much more detail when it comes to timing your aids to ask for the canter.

    Increasing Responsiveness

    So often, we make the mistake of assuming this is a horse issue.  ‘My horse is not responsive enough’ is a common complaint among riders! I truly think this has more to do with you first.  And when you begin to become more responsive and intentional, your horse will respond by improving how well he listens.

    Begin building responsiveness by becoming very focused on what you want to make happen, when you want it to happen, and where you want it to happen – and stick to those decisions. 

    A great exercise you can use to help you work on increasing responsiveness is to ride set numbers of strides in each gait.  So, for example, 10 strides of walk followed by 10 strides of trot. Then back to 10 strides of walk again. As you and your horse improve the communication between you both, begin playing with the number of strides between each transition.

    The more responsive you both become, the easier you will find it to ride fewer strides in each gait while still maintaining your relaxation, balance, and suppleness.  

    This is when you know that you and your horse are on the same page, listening to each other, and ready to ‘step up’ into the canter from the walk.  I have a previous article and episode of the Daily Strides Podcast HERE that will help you to improve your responsiveness in your riding.

    Riding the Walk to Canter Transition

    Once you and your horse are clear on the aids, clear on the timing, and responsive towards each other, you can prepare to ask for the walk to canter transition. Start by focusing. on the rhythm of the walk, the energy inside of the walk, and the flexion.

    From here use your half halt to firstly get your horse’s attention, and then, from there, to gather and channel the energy a little more inside of the walk

    This will feel like a slight collection and your horse will need this in order to successfully make the transition from walk to canter. Your job in all of this is to set things up and then allow your horse to actually perform the transition. So many riders think it is their job to canter. It’s not. Make sure you engage your core, work on your posture, and allow your horse to simply ‘step into’ the new gait when you ask.

    I have a previous article and episode of the Daily Strides Podcast HERE on how important your posture is to a successful transition into the canter.

    From here, it is simply a matter of ‘asking’ and then allowing your horse to respond.

    Happy Riding
    Lorna

    Riding a Smooth & Timely Walk to Canter Transition

    Some exercises can have a ripple effect all through our riding when we dedicate some time and energy to making them better.  I believe that the walk to canter is one of those exercises and I am excited to help you master the transition this month with your horse.

    This group of episodes is available for you to begin working with today, inside of Connection. They are suitable for all horses and riders who are able to canter. They will help you both become clearer on the aids, and more focused on timing and its importance.  And more balanced and responsive as well. 
    Riding a Smooth and Timely Walk to Canter Transition

    More About Canter Transitions:-

    Get Support & Guidance in Your Riding

  • Creating Space for Better Canter Transitions

    Creating Space for Better Canter Transitions

    [fusebox_track_player url=”https://op3.dev/e/traffic.libsyn.com/secure/dailystridespodcast/1198_Creating_Space_for_Better_Canter_Transitions.mp3″ title=”Creating Space for Better Canter Transitions” social_linkedin=”true” social_pinterest=”true” social_email=”true” tweet_text=”Here’s how you can begin riding better transitions into the canter…” hashtag=”equestrian #podcast” twitter_username=”strides_success” ]

    A couple of weeks ago, I gave you an audio horse riding lesson on the Daily Strides Podcast.  It was all about self-carriage and awareness in your body.   Today’s episode is focused specifically on creating the space for better canter transitions with your horse.

    Getting into canter can be a challenge for many riders.   Okay, let’s get a little more specific; transitioning into a good quality canter is a challenge!  This is why I want to specifically chat about how creating space for better canter transitions is so important.  I am a firm believer in putting the basics’ onto autopilot.  And your posture and position as you transition into the canter are just some of those basics.

    What do you want and where?

    So, yes, you want to canter :) But what are you specifically looking for in each particular transition?  Straightness or responsiveness? A clean strike at a specific place on the correct lead?  Maintaining rhythm before and after the transition?  Smooth shifts in the tension levels, otherwise known as relaxation both before, during, and after the transition itself?  All of the above?

    It is a mistake to think that all canter transitions are the same.  Get specific about what you want to work on for each individual transition and then be intentional about doing just that. 

    Once you are clear about what you want, you can then begin to plan where you want it to happen.  It is easy to say ‘in the corner’ or ‘between  A and K’ and if the horse, rider, or both are green, this is all good.  However, as you become more developed, it is essential that you begin to get a little more specific with your questions.

    What is the goal of the transition and where do you want it to take place in the arena?

    Use Flexion like an Indicator to Your Horse

    If you have been having any sort of issues with your transitions into the canter, this is probably one of the first places I would suggest working on.  Too many riders are failing to include flexion in their riding in general.  And especially in their canter transitions.  And I get it… There is a lot to remember, and flexion is just another ‘thing’ to add to the list!

    However, forgetting to include flexion in your canter transitions is like forgetting to use your indicators when you drive your car… It makes it very difficult for anyone else to know what you’re thinking and planning on doing!

    Obviously, when you are preparing to transition into the canter, it’s your horse that ‘needs to know’ your intentions.  Correct use of flexion tells him a lot.  When combined with your other aids, in a certain way, it clearly communicates to him that you do indeed want to transition into the canter.  And it also lets him know what lead you want him to canter on.

    Positioning Yourself for Canter Transitions

    The next key area to look at in order to really work on and improve your canter transitions is your own position. Well-balanced and correct position and posture are key to creating space for your horse to move into the canter.  I have spoken about this in previous Daily Strides Podcast episodes HERE, HERE, and HERE.

    Simply put, the better your position, the easier it is for your horse to hear what it is you want to say.  

    Many riders have the right aids to canter.  They apply the aids correctly.  However, they are let down by poor position or posture because it changes both the placement of your aids and how your seat and weight aids work. Not exactly great for when you are trying to work on improving your canter transitions!

    Poor posture blocks the energy from flowing.  Poor position means that your aids are often asking something different – or nothing at all!   

    Timing Your ‘Ask’ for the Canter Transition

    This is another key element riders fail to consider when they are asking for the transition into the canter.   Asking at the wrong time makes it very difficult for your horse to respond.  He will either have to give a little ‘jig’ so that he can strike the canter.  He might pick up the canter on the incorrect lead.  Or, he might just not canter.  This can often be seen when a horse trots faster, rather than transitions into the canter.

    Asking at the incorrect time for the transition can also cause your horse to become unresponsive in the long term.  

    From working with a lot of different riders over the years, I often find that it is easier for the rider to begin perfecting their timing in the walk.  Obviously, that means that they are riding a walk to the canter transition, rather than trot to canter.

    Working on this in the walk gives you more time, but also a more distinctive feel of what is moving where underneath you at any given time. 

    Obviously, over time, it is also important to work on the trot to canter transition.  However, I have found that this can often be a little more difficult for riders to continue to hold all of the pieces together.  My advice to novice riders is to practice feeling what is moving under you in the walk first.  And then from there, progress onto the trot.

    Allow Your Horse to Step into the Canter

    The final piece is to make space for your horse to then do what you asked him to do.  Many riders have a habit of shutting down the canter before it ever gets started!  This can be done in a lot of different ways, but the two most common are either with their seat or their hands.

    Your job, once you have set up the transition, is to simply get out of the way and allow it to happen.

    Collapsing your upper body, tilting your seat, leaning one way or the other, closing your reins and hands down are all ways you can unintentionally block the canter transition.  Start to become aware of how, maybe, you are doing all the right things to set the transition up, but then blocking it from actually taking place and happening.

    Good, clean, spacious canter transitions take work.  It requires a mental development of the rider, as well as a physical suppling.  I suppose my final piece of advice is, if you are noticing your canter transitions are less than great, perhaps it may be time to stop focusing on your horse.  Rather turn your attention to yourself and what you can do to improve your canter transitions.

    Happy Riding
    Lorna

    Additional Links to Help You:-

  • Timing Your Seat Aids – 3 Ways to Do This Today When You Ride

    Timing Your Seat Aids – 3 Ways to Do This Today When You Ride

    [fusebox_track_player url=”https://op3.dev/e/traffic.libsyn.com/secure/dailystridespodcast/1184_Timing_Your_Seat_Aids_3_Exercises_to_Help_Today.mp3″ title=”Improving the Timing of Your Seat Aids – 3 Exercises You Can Ride Today” social_linkedin=”true” social_pinterest=”true” social_email=”true” ]

    Timing… It’s an important element of great conversations.  You can give all the correct responses, but if the timing is off – they are not as meaningful.   And this affects the connection and flow. Horse riding is the same.

    After all, horse riding is just a word we use to describe the conversation between the rider and the horse.

    As a rider, it takes time to learn how to move one part of our body while having minimal influence on other parts.  Part of improving your ability to do this is to work on developing your aids independently of each other.  And the other part is to become very aware of what you are saying and when. It takes time to develop your independent aids and, as a result, your independent seat.

    However, while you are working on doing these, you can also start to become more aware of when you are communicating.  You can work on the timing of your seat aids.

    In this episode, I want to focus on the ‘when’ part of your conversation.  And specifically, the aid that we tend to get most muddled up about – your seat.

    Exercise 1:- Feeling in the Walk

    I spend a lot of time with my novice riders working on this.  I think that understanding what is happening underneath you from the beginning, makes developing your timing (and coordination) so much easier as the weeks and months go by.  However, regardless of how long you have been riding, becoming mindful about what is happening underneath you will always help improve your skills as a rider.

    Your seat bones will move like the pedals of a bicycle if you were peddling backward.  Down and forward, up and back. 

    Once you can feel this happening, I want you to begin merging this with what your horse’s back legs are doing.  As your horse’s right back leg moves forward, your right seat bone will drop down slightly and swing forward as well.  While this is happening, you and your horse’s body will be moving over your horse’s left back leg.  It will be on the ground bearing the weight.  This will cause your left seat bone to feel like it is moving backward while raising up slightly.

    If you’re struggling to feel anything, try taking your feet out of your stirrups.  You can also if it is safe to do so, close your eyes.  Finally, you can glance at your horse’s shoulders and go from there.

    Exercise 2:- Walk to Trot Transition

    The second exercise to help with developing the timing of your seat aids is working on that often overlooked transition from the walk into a trot. This is one of the earliest transitions we ride when we just get started.  And, often, because of this, we don’t tend to work on developing it a whole lot! Which is a pity – there’s a lot to be learned from riding this transition.

    To practice this, I first am going to suggest getting off your horse and onto a firm ‘dining’ type chair. Then feel what you do with your core as you’re about to ‘stand up’ out of the chair.

    It is important to be mindful that you are not using your arms or hands to stand up.  Just your core and then, your legs. Feel the shift that happens just before you stand.  The engagement of the core.  This feeling is what you will then take with you into the saddle.

    Practice creating that same feeling with your core in the saddle.  The feeling of asking for the trot, from the walk, and just as your horse takes that first step, ‘lightening’ your core. 

    The more you do this, the better you will become at timing it to just the right time where you allow the energy to flow underneath you. This same technique can then be modified and practiced with other upward transitions.

    Exercise 3:- Walk to Canter Transition

    This is maybe one of my favorite transitions to work with riders on.  Particularly when it comes to refining the timing of the aids to coordinate with the horse’s movement. Start in the walk and noticing, using exercise 1, what is moving when at any given time. Then, combine this with exercise 2, allowing the energy to flow when you ask.

    It is very easy to tell if you get your timing right when asking for the walk to canter transition. Failing to do so usually results in a little ‘double step’ from your horse

    The goal is to ride a ‘clean’ transition. The preparation was done. You asked at the right time. And then you allowed with your seat as the horse stepped into the canter.

    Connection Between Seat & Hands

    Finally, as you are working on all of the above, pay attention to how your seat leads your hands.  Often riders get this backward.  They allow their hands to lead the seat.  Timing is important.  Paying attention to this will help you become more mindful of how you are using your aids and when.

    Practice this… And see how you develop it over a matter of days with your horse.

    Happy Riding
    Lorna

    Additional Resources:-

  • Staying with Your Horse Over Jumps

    Staying with Your Horse Over Jumps

    Staying with Your Horse Over Jumps

    What this episode is all about & how it can help you:-

    • Understand the importance of a solid position to begin with
    • Realise that timing is everything when it comes to jumping with your horse
    • Feel motivated to learn ‘how’ your horse jumps
    • Get started improving your skills over fences today

    [smart_track_player url=”https://op3.dev/e/traffic.libsyn.com/dailystridespodcast/1083-Staying-with-Your-Horse-Over-Jumps.mp3″ title=”Staying with Your Horse Over Jumps” social_linkedin=”true” social_pinterest=”true” social_email=”true” tweet_text=”This weeks podcast episode is focused on ‘Goldilocksing’ your jumping – getting it ‘just right’” hashtag=”equestrian” twitter_username=”strides_success” ]

    Do you find that your jumping is a little ‘touch and go’?  Some days you are great at staying with your horse over the fence.  However those other days are showing up a little too often for you to be truly confident and positive about your jumping.

    Staying with your horse while he jumps helps you both to feel confident and relaxed.  It allows your horse to use himself fully and correctly.  And it allows you to remain balanced and ride a great ‘get away’ from each jump

    In this episode of the Daily Strides Podcast I want to give you some simple tips and instruction regarding how you can become more ‘hit’ and less ‘miss’ where your jumping in concerned.

    I am going to give you a few ideas to work on when you are in the saddle with your horse, along with some that can be done from the comfort of your home. 

    Your Jumping Position is Constantly Shifting

    I want to begin by pointing out something which I feel is pretty obvious, but often overlooked by many riders when it comes to jumping.  Your jumping position is not ‘fixed’.  There is no ‘plug in and play’ when it comes to your jumping position.

    Think about your position when you are walking, trotting or cantering.  There are subtle shifts and changes happening all the time.

    Every second of each stride involves a slight shift or change in your position in order to remain ‘with the horse’. 

    While most riders apply this to their riding ‘on the flat’, so many riders approach their jumping position differently.  They ‘fix’ themselves in it.  Brace themselves for the jump.  Often this happens long before the horse has every actually jumped. And they remain motionless there until the horse has all 4 feet safely back on the ground, sometimes a stride or four later!

    Developing a Strong Yet Supple Position for Jumping

    While there is a ‘position’ for jumping, this in no way means that you must ‘fix’ yourself in this position.  The more supple you are, the stronger you are and therefore the more you can move with your horse as he jumps.

    Your joints must remain supple enough to make the required small shifts as your horse moves over the jump itself.  Simultaneously, your position must remain strong enough to carry your body throughout the movement as well.

    Strong, yet supple… We have heard that before when it comes to riding, haven’t we?!  However so often it is applied to the horse.  I want you to begin applying it to yourself and your abilities in the saddle.

    I believe the ‘click your fingers’ rule when it comes to your position applies just as much to jumping as it does to flat work.  Basically, at any point before, during or after the jump, if your horse was to magically ‘vanish’ (by someone clicking their fingers) you would land on your feet.

    You are responsible for your own balance throughout the jumping effort. 

    If you are depending on your horse to support or balance you, you have work to do!  I suggest working on the flat initially before starting working over jumps.

    Timing is Everything when Jumping

    As riders, we know that timing is important.  It is necessary for clear communication between horse and rider.  In jumping timing is also essential to allow your horse to actually use himself correctly over the jump.

    One of the most common reasons riders struggle to stay with their horse over a jump is due to ‘ducking’.  Ducking basically means that the rider has transitioned into their jumping position before it was necessary to do so.  This can be a half a second too early, or two strides too early!

    In order for your horse to use himself correctly over fences, you need to get out-of-the-way and allow him to jump! 

    This means waiting until he begins moving up and over the fence before you follow him there.  The important word in that sentence is ‘follow’.

    Set Things Up – Then Follow Him Over

    Your job is not to jump the jump! Your job is to set things up so that your horse has the best chance of successfully jumping the jump. 

    I see riders throw themselves at fences (and therefore, their horses necks) as though the further up the neck they can get, the better the jump.  The irony is that the opposite is true.

    In order for your horse to jump, he has to ‘lift’ his front end.  Having all the rider’s weight been flung onto the very thing he is being asked to lift, makes his job so much harder!

    Rather think of sitting tall in order to give your horse the space he needs when lifting his front end.  As he begins to lift, over the jump, you simply follow.  Let your horse come up to you and then follow him over.

    Learn How Your Horse Jumps

    How much you need to do in order to remain balanced while you follow him will depend on your horse, the jump itself and your abilities as a rider. I think that one of the most basic things you can do as a rider is learn how your horse moves over fences.  Study his body. And the great news is, you can do this from the comfort of your couch!

    Having a clear picture in your head about how your horse is moving over jumps will allow you to feel more confident about how to best move with him while he jumps. 

    Look at his body as he approaches the fence.  Pay attention to the changes in his overall frame, especially on the final stride as he transitions to actually jumping. Look at how he uses his body over the jump.  How he goes from the approach side to the landing side.  Pay attention to how he lands, particularly his head and neck at this point. Finally, look at the first few strides after the fence.

    If you don’t have the opportunity to study your own horses jumping technique, through videos or photographs, look at other horses. 

    Go online and find YouTube videos.  Watch jumping competitions on the TV or go in person and watch them live.  You will begin to see similarities and patterns.  Study how the horses use themselves.  Understand what helps and what hinders.  Then take this knowledge and apply it to your riding and your position over the jump.

    Start Working On It Today

    Jumping is really just a big canter stride.  This is great news if you are feeling less than capable of staying with your horse over each jump.  The reason is, you can actually begin working on it while on the flat.

    The two point seat or light seat is your friend when it comes to developing suppleness and strength for jumping.  Work in it daily when in the arena.  Keep in mind that you are responsible for balancing you.  Your balance is not your horses concern!

    From here, begin working over a single pole.  Practice transitioning in and out of a jumping position over the pole.  Work on your timing and your strides.

    Begin merging what you are feeling through your body in the saddle, with what you know your horse is physically doing underneath you

    Once you are confident walking, trotting and cantering over the single pole, you can begin ‘building’ your jump.  As your jumping becomes more ‘hits’ than ‘misses’ both you and your horses confidence will grow.  So too will both of your enjoyment about jumping.

    Learning to stay with your horse over fences is not a difficult task.  Consistency is key and, like most things in riding, my number one piece of advice is to start small and get the basics right.

    Happy Riding

    Lorna

    Other Posts and Episodes that Relate to This Topic:-

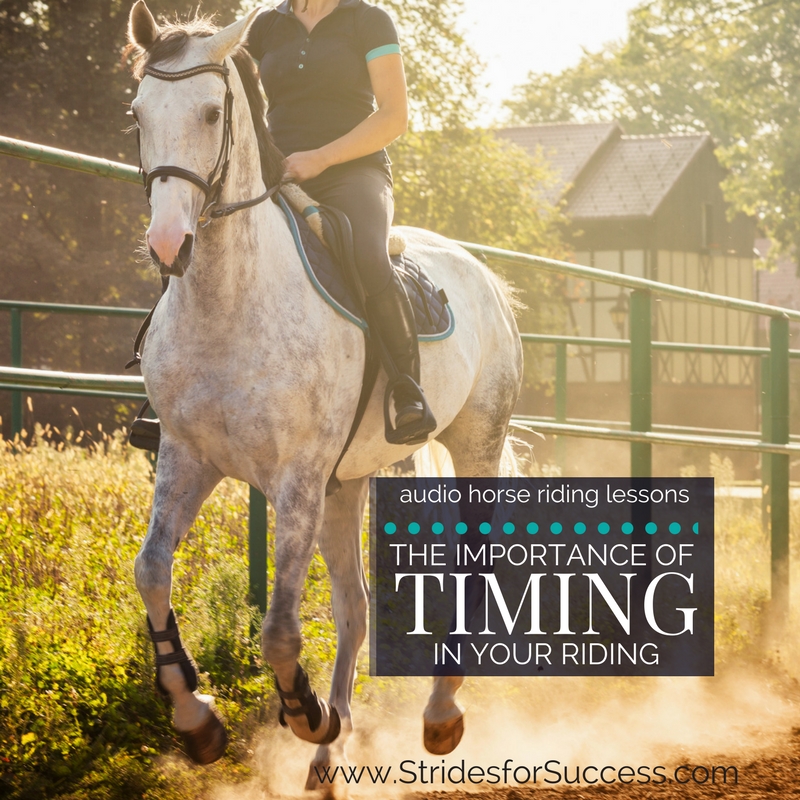
  • The Importance of Timing in Your Riding

    The Importance of Timing in Your Riding

    The Importance of Timing in Your Riding

    What this episode is all about & how it can help you:-

    • Timing – the big picture view
    • How to make the best use of your time in each ride
    • Using short bursts of time to focus you when you are in the saddle
    • Understanding the importance timing when it comes to your aids

    [smart_track_player url=”https://op3.dev/e/traffic.libsyn.com/dailystridespodcast/1022-The-Importance-of-Timing-in-Your-Riding.mp3″ title=”The Importance of Timing in Your Riding” social_linkedin=”true” social_pinterest=”true” social_email=”true” tweet_text=”Timing has a lot to do with if you will succeed or not in your riding… ” hashtag=”Equestrian #Horseriding #ticktock” twitter_username=”strides_success” ]

    Correct timing in your riding is essential to communication, both on the ground and in the saddle, with your horse.  In this episode we are going to take a look at timing from the ‘big picture view’ and also the closer, more intricate detail orientated, view.

    Timing when Working Towards your Goals

    I believe the most realistic and successful way of planning out goals when it comes to horses and riding is working in 90 day (or three month) chunks of time.  I think if we look further than that, especially with horses, it can tend to become a little hypothetical.

    That being said, it is clearly important to have a realistic picture of what you want things to look like a year from now.  Each of your 90 day chunks should be with that ‘year’ goal in mind.   Start with the coming 90 days and working backwards from that goal to where you are right now.  This is your beginning and the place you will measure your time from.

    Timing when Riding Your Horse

    Timing is important when you think about the ride itself.  From how long you are warming up, to how long you are schooling your horse and then your cool down time.

    Rhythm is another way of measuring time and rhythm can be worked on while preparing the horse to be ridden, of course the rhythm while actually riding your horse and also putting the horse away afterwards.

    If you plan to have an even, steady rhythm to all the above parts of each individual ride, you will minimise those feelings of being rushed, overwhelmed or frazzled. 

    Knowing how much time you have before each ride and allocating it out into flexible portions will give you a framework to plug your actual schooling into.

    You can also pay attention to the time of day you ride and how that influences both you and your horses way of going.  Perhaps there is a time of day when your horse is more responsive or he listens better,  more focused and less likely to spook or become distracted. Timing is all about finding what works best for you and your horse.

    Timing the Segments of Each Ride

    So we have already mentioned allocating time for your warm up, time for the actual schooling, then giving time for the cooling off.  However, we can go a little deeper here by focusing on the exercises themselves and what we want to achieve in that ride.

    Concerning exercises, many riders are of the opinion that they must simply ride through each exercise a couple of times in order for them to have benefit.  I want you to think about if you were to allocate a certain amount of focused time on working through each exercise.

    Let’s use the example of 20 minutes for actual schooling work.  This 20 minutes of time can be divided up into 6 minutes, 6 minutes and 6 minutes, and I am going to put a minute between the two as well.  I realise this is an extreme example, but by giving your horse and yourself a focused 6 minutes and then a minute just to relax and unwind, you will find the quality of the work improves.

    This method is proven to work because it stops the exercise from becoming monotonous and never ending.  Also, when we give ourselves an end point, it helps us become a lot more focused on what we are doing between now and then. 

    It helps us assess the quality of the work we are doing.  Noticing what you want to work on, and what you want to have made happen when you get to the end point will help you become more consistent and disciplined in the saddle.

    Timing of the Aids

    Timing can also be used on a very precise split second level in riding with the timing of the aids.  Specific aids given at an exact moment in order for your horse to take that direction and make the necessary changes happen regarding his movement.

    As riders, it is this type of timing that we look to refine every time we get into the saddle.  This is where you should be working every single day.  This is what you can focus and concentrate on in those timed schooling sessions.   The practiced refinement of the timing of your aids.

    This begins when you start working on what is moving when underneath you.  Your aim is to feel your way here, not peek over the side!

    Knowing what is moving when beneath you, is the foundation for knowing when to apply your aids to get a specific result.

    You should ask with your aid at the moment when the horse can respond to your aid.  Otherwise your horse may not be physically in a position to respond your aid, resulting in frustrations about a lack of responsiveness. 

    Start working on developing this skill next time you are in the saddle.  Take note of what is moving, when it is moving, how is it moving and where would be the best point for you to act and influence that movement to get the desired result that you are after.

    Begin Working on Your Timing Today

    It is important to understand the importance of timing when it comes to riding.  Taking it from the big picture, 90 day goal view, all the way down to the split second application of your aids in the saddle.

    Happy Riding

    Lorna

    Links mentioned in the episode:-