Author: Lorna Leeson

  • Exercises to Help Loosen a Stiff Horse

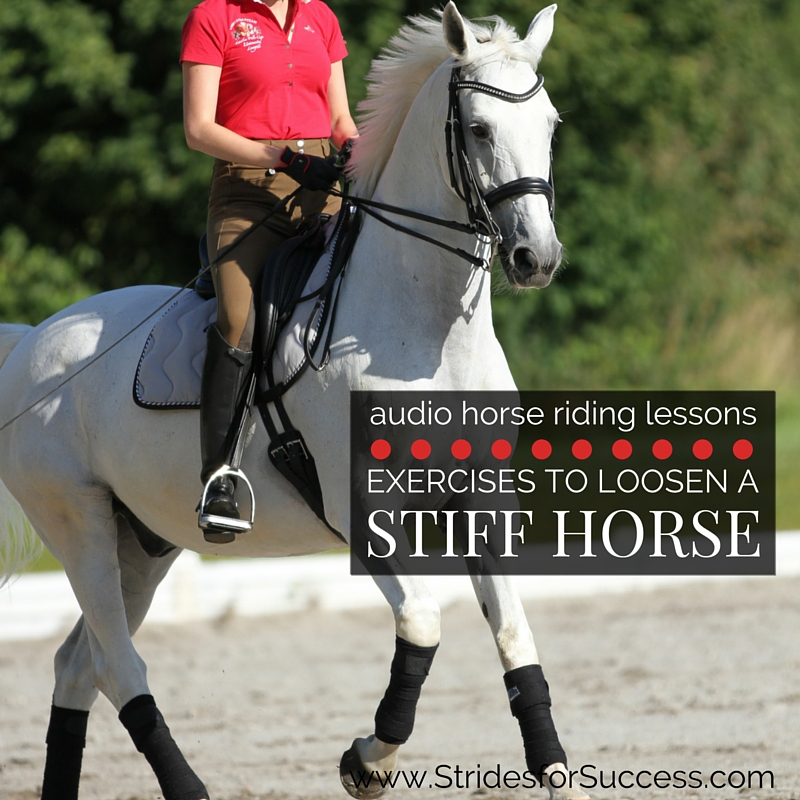
    Exercises to Help Loosen a Stiff Horse

    Exercises to Loosen a Stiff Horse

    Does your horse find doing things on one rein a lot easier than on the other?  Or perhaps you’ve noticed ‘something’ as you round a corner or bend?  Maybe even as you ask for a lateral movement?

    It feel like, rather than responding how you want him to, he bulges to the wrong side or against you?

    Horses, just like humans, become stiff in certain areas of their bodies for many reasons.  When we say the word ‘stiff’, we are referring to a lack of suppleness in that area.  A certain looseness and ease that is missing when performing a particular movement or exercise.

    [smart_track_player url=”https://op3.dev/e/traffic.libsyn.com/dailystridespodcast/551-Exercises-to-Loosen-a-Stiff-Horse.mp3″ title=”Exercises to Loosen a Stiff Horse” social_linkedin=”true” social_pinterest=”true” social_email=”true” tweet_text=”Is your horse not as ‘loosey goosey’ as you would like? This will help supple things up…” hashtag=”equestrian #horseriding #makeeveryridegreat” twitter_username=”strides_success” ]

    In this episode of the Daily Strides Podcast I discuss stiffness in your horse.  Stiffness is a lack of suppleness; which is essential to your horses correct development.

    What is Suppleness?

    Suppleness is basically a measure of how loose, flexible or pliable your horse is through his body.  A lot of horses, just like us,  need to loosen out quite a bit before they can use their body to the fullness of its potential.  This is why a good, well planned and then ridden warm up is vitally important to set the tone for the quality of work that will happen in the schooling session.

    Your horse needs to work through any stiffness if he is to be able to fully use his body to perform any tasks you require.

    Very often stiffness shows up in bad behaviour.  An unwillingness to do what is asked.  It can also be reason for loss of balance or rhythm.

    A lack of suppleness is tightness or tension in an area when asked to stretch, lengthen or even, in more pronounced cases, move in general.

    Working With Your Horse – Not Against

    Confirmation can play a large part in how your horse uses his body and it is important to realise this when working with your horse.

    Work to his strengths rather than focusing on his weaknesses.

    You will never change a short neck, however you can learn how to work with it!  Keep in mind that all horses can be improved upon with time and consistent, correct, sympathetic exercises which help loosen up any areas that they are experiencing a lack of flexibility in.

    Types of Suppleness in Your Horse

    When supplying our horses, we must think both longitudinally and latitudinally, so as our horse can fully perform his job to the best of his ability

    Longitudinal suppling is from tail to head over the topline of your horse.  It helps to loosen out the back as well as the joints in the legs and can be done with stretching long and low, raising the back, and basic transitions up and down between the gaits.

    Latitudinal suppling is sideways movements.  Asking your horse to cross one back leg, or one front leg, in front of the other and so on.  This helps to loosen the shoulders, and hips as well as the leg joints and, to some degree back as well.

    Latitudinal suppling exercises can also help to loosen up the poll and neck areas of your horse through sideways flexion.

    Noticing Where Your Horse is Stiff

    Very often knowing where to begin will become evident when you pay close attention to how your horse performs the same movement or exercise on both reins.  Is the movement and way of going equal on both sides?  Or is there any bracing or loss of balance and rhythm on one side over the other?

    Stiffness is far more common than most riders realize.  In fact, a lot of issues that are often put down to a lack of discipline or attentiveness or just being downright naughty is actually the result of a horse being stiff.  Being stiff will cause the horse to be unable to really perform the movement in the first place

    So we have already mentioned that your horse may show resistance if stiff.  Or he may be unable or unwilling to bend and flex if any stiffness is present.  There may also be a shorter range of motion in that area.

    So whether it be through the muscles, or joints, stiffness will feel like your horse is ‘resisting’ you.  It becomes even more evident if you ask him to ‘use’ himself and move out of what your horse perceives as his comfort zone.

    Identifying the Stiffness & the Cause…

    Unfortunately with many riders, the initial reaction is to use the reins, particularly the inside rein, to ‘fix’ the problem.  They do this by essentially forcing the horse into the desired shape…  This will inevitably lead to more stiffness in other areas as the horse tries to compensate.  It also can often cause your horse to ‘bulge’ even more!

    So once we have identified any stiffness, and before we begin working particular exercises into warm-ups and schooling sessions, it is important to find the cause of the problem so you can remove it if possible

    • Have the tack, particularly the saddle, checked by a qualified saddler
    • Make sure that you are not sitting lopsided or crooked in the saddle
    • Assess yourself for stiffness – I highly recommend Yoga – which you may be transferring to your horse
    • Rule out any physical problems such as joints, hooves, teeth, back etc

    And once you are sure that there is nothing external or internal adding to the problem, you can then begin working towards loosening your horse out by formulating a long-term plan or program to help him

    Working with a Stiff Horse

    Take things right back to basics and back to the beginning.  Notice when any resistance or stiffness shows up as you perform simple movements.  This is important both during both your warm up and when schooling.  Take note of which side is the stiffness more pronounced and what type of movement it is more evident; lateral or longitudinal.

    More than anything, keep in mind that consistency is king and time will play a huge part in working through any hardness or stiffness that your horse is experiencing.  Consistency in how you ask and how you respond.  This means asking the correct way and then expecting a certain result.  Remember to reward any move in the right direction, no matter how small.

    If you have ever experienced any stiffness in your own body, you will know that while you can do a lot in one day, generally the problem will resurface again the next day, and will require just as much attention and patience to loosen out again

    Also keep in mind that if the stiffness is due to age, a past injury or wear and tear, you may have to find ways to work around it rather than thinking of ‘fixing’ it

    Where to Begin Loosening Your Horse

    Start by aiming to loosen your horse along his back and topline.  Transitions up and down between halt, walk and trot to help longitudinal supplying.  Later lengthening and shortening within the gait itself will also help to eradicate any excess tension or stiffness that is lurking there.

    You can then begin adding some sideways, or latitudinal, suppling into your warm up or schooling sessions.  Bending your horse left and right, both while keep your horse straight – such as on a circle or center line –  or while moving sideways such as shoulder in or haunches in will help him.  Also the slight flexion required for leg yielding works well to help him begin moving more freely through his body.

    Working Through Any Stiffness – The ‘Right’ Way

    Whatever you decide to do, it is really important that you take time, and lots of it!  Don’t just drill your horse for hours and hours constantly stretching the ‘stiff’ area.  Rather than loosening your horse up, this will most likely cause an injury or end up creating another problem elsewhere as your horse tries to compensate for the discomfort you are causing him.

    Rather work a few small but correct steps in throughout the overall session and then, as he begins to loosen up over the coming weeks, increase the difficulty for him – step by step and inch by inch.  If you feel you are forcing him into an uncomfortable or difficult position, you are pushing too far.

    Slowly and consistently riding correct exercises is what will work best in the long run to help your horse either work out or manage any stiff areas in his body.

    Happy Riding

    Related posts, episodes and freebies you may enjoy:-

  • Exercises for a Young Horse

    Exercises for a Young Horse

    Young horses!  It is such an honour as a rider to be one of the first people they get to work with, however can sometimes feel like you are riding an eel!  They are moving up and down in the rhythm and if there is a dance that you are both moving to, it quickly becomes evident that no one is really sure of the correct moves or steps!

    Horses need to be allowed the time and space to begin working out how they can carry themselves, with all this new equipment and also, how they can then carry the added weight of a rider on board their backs as well.  When given the necessary time and when the correct guidelines are there to help, your horse will soon become more confident in his abilities to carry you and confidence is key for balance.

    The reason the ‘dance’ seems so staggered is due to the lack of true balance.  So, in saying this, balance is first and foremost for young horses.  However very often riders try to do this job for their horse, rather than allowing the horse to figure it out on their own.  This usually results in a horse that insists on holding on to or grabbing the contact and being unable to relax enough through their backs to truly use themselves correctly.  This, as I am sure you can imagine, will inevitably lead to all sorts of trouble and problems further down the line.

    [smart_track_player url=”https://op3.dev/e/traffic.libsyn.com/dailystridespodcast/541-Exercises-for-Working-with-a-Young-Horse.mp3″ title=”Exercises for a Young Horse” social_linkedin=”true” social_pinterest=”true” social_email=”true” tweet_text=”Do you have a young horse? Here’s a couple of useful exercises to try today ” hashtag=”horseriding #younghorse” twitter_username=”strides_success” ]

    Before we go any further, it is important to stress that the rider must be experienced, sympathetic and patient. Young horses should not be ridden by riders who lack a balanced and independent seat.  It will only make the horse’s job much more difficult and very often results in a loss of confidence, that will have repercussions all through their riding career.

    When working with a young horse, remember it is the quality of the work, rather than the quantity that is important.  Ride for shorter periods and rest often throughout each ride

    Many factors will influence how quickly your horse progresses, such as age, breed, build, confirmation, groundwork, consistency and even his upbringing.  Remember, even if your horse is the ‘ideal age’ to start, he may still not be physically or mentally ready to begin work.  Again, slow and steady will win out over pushing your horse to do things he is not ready for.

    So assuming that you have assessed the situation and have deemed it the right time in your horse’s life to begin introducing him to a more ‘structured’ training program, I suggest by starting off on a long rein.  You can begin teaching your horse this on the lunge initially and then, when you’re on his back.  The long rein will allow him to stretch out his back muscles and overall body, which will encourage relaxation and rid him of any excess tension

    Start at the lunge.  This will allow your horse to loosen up, and also work out any excess energy that he might be ‘storing up’.  It also gives you a great opportunity to assess him further which will then help you to create a more structured plan.  Which gait is the most balanced and comfortable for him?  Which rein, if any, does he prefer?  You can then use this information when you mount up to help relax him and start by doing something he enjoys and working on the side he goes better on.

    Keep in mind that lunging is not just chasing him around the ring; he must begin with relaxing, just like he would if on a long rein and then slowly beginning to work into a contact, with emphasis on moving forward at all times.  You can also use the time on the lunge to reinforce the voice aids.

    Exercises for a Young Horse

    When riding a young horse, the focus should begin on rhythm and balance within that rhythm.  As I mentioned before, you as the rider must be balanced in your seat and able to move with your horse as he works forward.  At no point should you begin trying to ‘shorten’ him or force him into a ‘frame’.  If he is to develop correctly he must learn to balance himself and from there, then look for your contact and accept it happily while moving forward all the time.

    Another thing to keep in mind when riding a young horse is that he will be naturally a little ‘downhill’.  His body must strengthen, over time, before he can begin to transfer that weight back onto his hind quarters, and during this period it is your responsibility as the rider not to add to the weight being carried by his front end by leaning or slouching

    When working in the arena, vary the work and sprinkle breaks or rest periods throughout the ride, which will allow him to relax and stretch out on a long rein again.  This will help to make sure he does not become stiff or tense which will in turn, ruin the work you are trying to achieve.

    Work on basic school figures such as large circles, all the time trying to establish the rhythm in the gait.  You can also work in some transitions, however I find that it is better to work in a chosen gait for a few minutes, allowing him to become confident in his balance and rhythm, rather than chopping and changing gaits.  Transitions are a wonderful tool when schooling horses but I have found that if too many are incorporated into the early rides, the horse can tend to become a little choppy, short and tense through his work, rather than moving forward in a relaxed  and loose fashion.

    Keep in mind that you are there to guide; he must learn to balance himself.  So correcting him is important, but it should be only that, a correction, rather than a constant support or aid

    After a few weeks or months, depending on your horse, and once he is happily carrying you around the arena you can begin introducing ground poles into his schooling sessions.  You will know the time is right when he has found a certain rhythm and balance to his way of going, which he can adjust in and out of with ease.  Like everything else, incorporating the poles too early will only serve to do more harm than good, so proceed with caution and only when you are confident that he is confident!

    Start with a single pole on the ground, which you can allow him to walk over.  Walk over it, from both directions quite a few times until it becomes a non-event in your horse’s head.  Keep in mind that your horse might just jump the pole on the first few occasions and take the precautions to avoid any discomfort for him or you if this happens!  Make sure that you do not punish him when he successfully navigates the pole by catching him in the mouth or becoming heavy on his back.

    Once he is happily walking over the single pole, you can then begin trotting up to and over the pole.  Again, we want him working over the poles happily and relaxed before you move on to anything more complicated.  This may take a few rides, however your patience while he is finding his way here will be worth it later.

    Poles can be used in all sorts of ways when riding a young horse, as both obstacles to navigate over and also guiding rails to ride between or around.  Depending on your horse, you can use them to help reinforce a concept and also, to ask for more flexion and a way of asking him to ‘use’ himself more.

    Riding young horses can be a challenge, but when done with patience and kindness as well as consistently, it pays off as both a rewarding for the rider and it sets the horse up for a happier, healthier working life as well.

    Happy Riding!

    Exercises for Riding a Young Horse

  • Lengthening Your Horse’s Stride in Trot

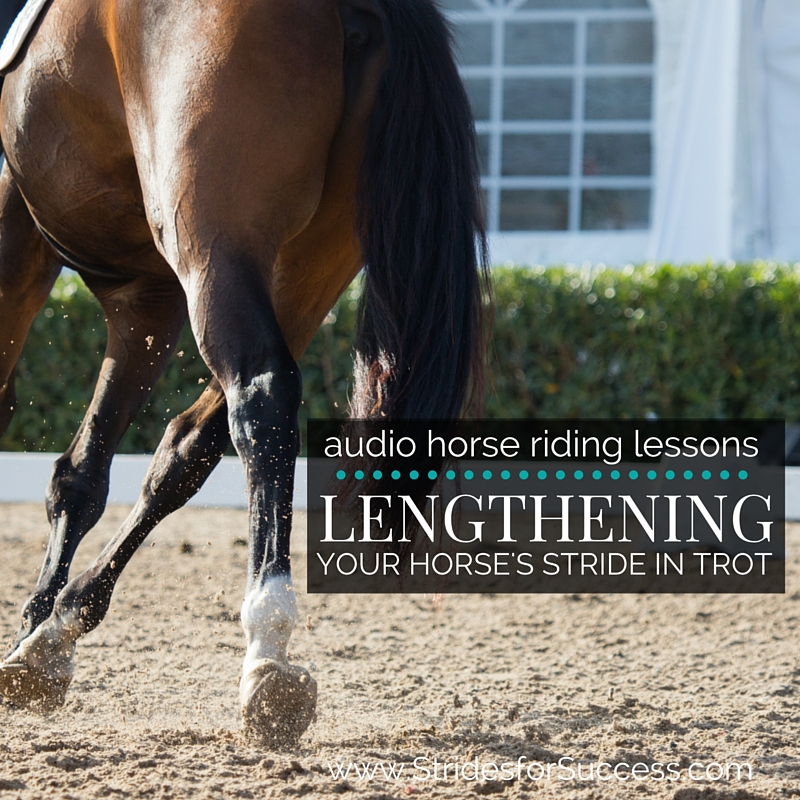
    Lengthening Your Horse’s Stride in Trot

    [fusebox_track_player url=”https://op3.dev/e/traffic.libsyn.com/dailystridespodcast/531-Lengthening-Your-Horses-Stride-in-Trot.mp3″ title=”Lengthening Your Horses Stride in the Trot” social_linkedin=”true” social_pinterest=”true” social_email=”true” ]

    We have all seen the wonderful video clips of horses showing extravagant extensions in the trot and I think most riders dream of being able to perform a similar feat.  However, for most riders, merely asking for a lengthening of the stride in trot results in their horse either breaking into a canter or running on to their forehand, with the hind end being, well, left behind!

    Being able to lengthen and then subsequently shorten your horse’s stride when you want, develops your horse’s responsiveness, suppleness, and balance while being ridden.  

    It also allows you to make adjustments if necessary while in the saddle, without changing from one gait to another.

    However, it takes time for your horse to develop physically and mentally so as to begin holding a lengthened stride for longer periods.  Failure to do so is often a lack of patience from riders, who will try to push and force their horse to lengthen. This results in the horse hollowing his back, shortening the stride, and rushing onto the forehand.

    What is Lengthening the Stride?

    When your horse lengthens, he basically covers more ground in the same amount of strides.  Each stride he takes sees him stretching or reaching more forward.  His hind feet coming more underneath him with every stride and then the front legs stretching out more in front of him with each stride.

    However, when lengthening his stride, he will not change the tempo of the gait.  The 1 – 2 – 1 – 2 – 1 – 2 of the trot will remain the same, regardless of the length of the stride or ground being covered with each passing stride.

    Asking, not pushing is the key to a true lengthening on the stride in trot.  

    In order to lengthen his stride, your horse must lengthen his whole back and topline.  Suppleness is required to do this, and often we only think of suppleness as being lateral, it is also important longitudinal as well.

    Start with Rhythm

    The rhythm and tempo of the trot should remain consistent throughout the gait.  I think that this is often the most simple place and way to begin introducing your horse to this type of work.  Start by becoming familiar with your horses tempo and knowing the length of this strides in working trot.

    Depending on how independent and ‘under control’ your seat is, you can lengthen your horse in trot from either rising trot or sitting trot,

    I strongly suggest working in rising trot initially as it will allow your horses back to lengthen out without you being heavy on it during the longer strides.  

    I also find that using rising trot tends to prevent an overly ambitious ‘seat shoving’ happening from the rider, whether intentional or not!

    So first and foremost, focus on creating and then maintaining or establishing a correct and balanced rhythm and tempo.  

    You can do this through all three gaits, using the transitions to further engage your horse’s hind quarters and also, refine your aids and your horse’s responsiveness to them.

    Pay Attention to Straightness

    It is also important to cultivate straightness in your horse.  Doing this earlier on will make it easier for him later when you begin asking for the lengthened strides.  If you horse is straight, he will push equally from both hind legs, propelling him correctly in the gait.

    If he is crooked or falling out, he will find it hard to maintain a rhythm, as one side will literally be moving more forward than the other.

    Spend quite a bit of time on transitions, using your half halts, and circles, particularly smaller ones, such as 12 or 10 meter circles.  Work between shortening your horse slightly and then returning back to working trot as well.  Don’t attempt to lengthen until you have truly established and can maintain a good balance throughout the above mentioned exercises.

    Begin By Shortening First…

    I find that riders often find lengthening the canter easier than the trot, particularly when there are canter poles involved.  However, you can use a similar principle in the trot when starting out at first.  Pick two fixed points in the arena or on the trail where you are riding.  Ride between these two points quite a few times in working trot, counting each time the amount of strides your horse fits between the two points.

    Use your body passing the first point as the ‘go’ or ‘start’ and then again, your body passing the second point as your ‘stop’ or ‘end’.  Continue to do so until you have a regular amount of strides each time as you ride through this movement.

    Think of it almost as having two ground poles with 5 or 6 canter strides in between, but use the points you have chosen as the poles and trot rather than canter.

    Once you know the amount of strides in a ‘normal’ working trot, then ask for a slight shortening of the stride between the two points.  If you can get an extra stride in there, then your horse has truly shortened. However remember the tempo or recurrence of the 1 – 2 – 1 – 2 – 1 – 2  must remain the same throughout.

    The shortening of the stride can be thought of as your horse lifting his legs more ‘up’ rather than ‘out in front’.

    Lengthening Your Horses Stride in Trot

    Asking for Lengthened Strides

    Once you and your horse have established a balanced transition between the working trot and a slightly shorter more collected trot, you can then begin to think about asking for a few lengthened strides in the trot.  It is really important to maintain the contact between you and your horse throughout the movement.

    Lengthening the stride does not mean throwing the reins at your horse and kicking on.  It simply means that you are allowing your horse more space to move within each stride.

    You may find, particularly if it is your horse’s first time, that initially there will be very little difference.  This is fine, your horse has to first understand what you are asking and then also, begin to understand how he can move his body to achieve this new lengthening of it.

    Remember, when you horse lengthens his stride, he will use his muscles, tendons, ligaments and joints differently. Slow and steady, taking plenty of time to learn this correctly, is key to maintaining a sound horse that enjoys his job.

    Noticing the Increased Lenght

    If he does begin to lengthen the stride, you will count less strides between your ‘start’ and ‘end’ points than what you were counting while in working trot or whatever you are using as your ‘control gait’.   I say ‘control gait, as in order to know if your horse is lengthening rather than running, you need something to measure it against.  Use your working trot as the measure or the control.

    Keep in mind that your horse cannot move or ‘extend’ his shoulders if you are leaning or jiggling around on top of them.  

    Pay attention to your position and posture throughout the exercise, and again, take things slowly.  The better your horse understands and the more confident he feels about his ability to perform the movement, the greater it will eventually be.

    Happy Riding

    Lorna

    Additional Resources for Equestrians:-

    Lengthening Your Horses Stride in Trot

    [wp-tiles post_type=”post” orderby=”date” order=”DESC” grids=”Simple”]

  • Retraining a Horse that Evades Your Contact

    Retraining a Horse that Evades Your Contact

    [fusebox_track_player url=”https://op3.dev/e/traffic.libsyn.com/dailystridespodcast/526-Retraining-a-Horse-that-Evades-Your-Contact.mp3″ title=”Retraining a Horse that Evades Your Contact” social_linkedin=”true” social_pinterest=”true” social_email=”true” ]

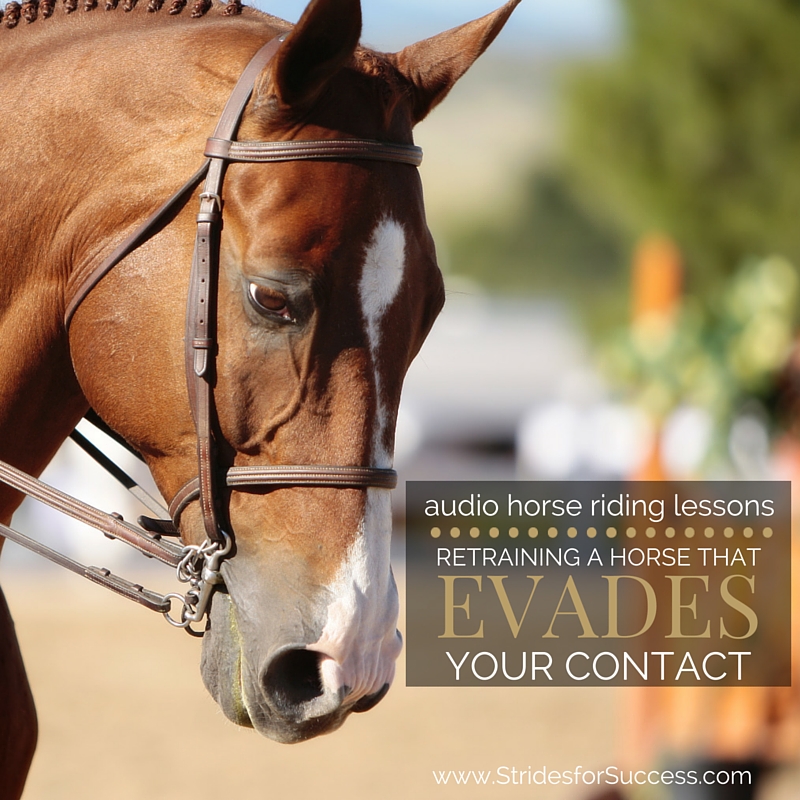
    Are there days where your horse’s camel impression is worryingly accurate?  He lounges along, his back all strung out resembling a cable that’s sole purpose is to work against you.  His neck stretched out in what must be an extremely uncomfortable way, his nose pointing skyward…  And it seems that all your efforts to establish a correct contact are falling on deaf ears?!

    Or perhaps your horse is the other end of the spectrum? As soon as you pick up a contact he curls his head so his lips are close to touching his chest… Leaving you with loopy reins that have no contact at all with said horse’s mouth?!

    The unfortunate fact is that horses evade contact in many different ways and for many different reasons which all have the potential to ruin a good performance or ride.  However before we go any further, let’s get clear on what is correct, ‘true contact when riding a horse…

    What is True Contact?

    Contact is your connection with your horse through your rein aid.  You must offer a stable, consistent contact through your hand and rein, which in turn, your horse will then accept with his mouth.  However, the contact that we can ‘see’ in the above description is merely the end result of a lot of other communications and aids.

    Things that are ongoing and happening between horse and rider. Their culmination is what produces a consistent, soft, and accepting contact.

    In order to create correct contact, the horse must be moving forward from behind.  So the rider must first work on activating the hindquarters, then allowing that energy to connect through to the front, before they can then harness and direct it using their contact.

    Responsibility and Responsiveness

    In order to achieve correct contact you need to be responsible and your horse must be responsive.

    This means that you are conscientious in how you ask for and respond to your horse’s contact that will cause no discomfort or pain to your horse.  He must be perceptive and reactive to your aids when he receives them.

    Very often riders forget or just don’t know about the first, vitally important, responsibility on their part in order to achieve a correct contact. Because of this, they become focused on ‘head carriage’.  Or if their horse is ‘on the bit’.

    Instead, I want you to think of contact as being the result of a carefully set up and orchestrated use of your different aids when in the saddle. And this culminates in your horse accepting your conscientious, soft, and elastic contact.

    How Does a Horse Evade the Contact?

    So, how does a horse evade the bit or contact?  Horses generally do this in a few different ways.  They either become ‘above the bit’. This is where their noses are ‘skyward’ and the whole back, from tail to ears, is hollow.

    Or they can also become ‘behind the bit’. This is when they begin to curl their head and neck back towards their body, nose to chest, which leaves the rider very little options when it comes to contact at all.

    Lastly, there are some horses that when you have ‘closed’ all open doors, will still try to evade by wriggling around, never truly connecting with the rider through the reins at all.  It feels like someone has replaced your horse with an eel!

    Retraining a Horse that Evades Your Contact

    Why Does a Horse Evade the Contact?

    All of the above descriptions lead to a less than pleasant picture to look at. And all also look extremely uncomfortable for the horse!  So what is it exactly that brings them to act like this?

        • The rider is asking incorrectly – This can be due to ignorance or incorrect training on the riders part.  Very often riders will only focus on their horse’s head and where it is, rather than what is happening underneath them that is leading their horse to travel like that.
        • Unsteady contact from the rider – Many riders continue to do this, even though they understand and know about the importance of a steady and ‘safe’ contact for their horse.

    Some riders continue to use the reins as a safety harness rather than work on developing an independent seat.

        • The horse is unbalanced – Young and underdeveloped horses will find it difficult to accept a contact for any great length of time.  This needs to be worked on and developed slowly, over time, using correct aids and techniques, in a way the horse can understand and trust.
        • Over or incorrect use of a gadget or training aid – This is particularly evident with the usage of draw reins, where horses begin to evade the contact by coming behind the vertical or bit.
        • The horse’s conformation makes him more inclined to travel like this initially
        • Physical discomfort – Such as pain in the back due to tack or another disease or injury.  Also problems with teeth and correct fitting of the bit.  All physical discomfort should be ruled out before continuing on with and retraining your horse.

    Contact as a Development Step

    So often we think of contact as being just holding the reins, however the contact that you create is so much more than that.  This is both in terms of communication between horse and rider and also as a vital piece to moving on up the training scale with your horse later.

    It is your job as the rider to create or provide a contact that is consistent, kind, soft, following yet effective.  

    Once you have done this, your horse can then accept this contact and trust you that you won’t catch him in the mouth or drop him by releasing and letting go of the contact.

    Your level of contact will depend on how much energy you are asking your horse to create with his hind quarters.  Contact is merely gathering up and then giving that energy some focused direction of where to go

    Therefore it is impossible to have contact if you horse is not using his hind quarters to push himself forward  and having forward energy.  It is the lack of this forward momentum that causes a horse to begin to lean or become heavy on your hand and essentially evade the bit.

    Reschooling a More Correct Contact

    So assuming that you have an independent seat and your hands are thoughtful and balanced, once a horse has begun to evade how can you then begin to re-school or retrain him to a better way of going? Nne where he is happy to accept your contact?

        • Forwardness & Responsiveness
        • Rhythm
        • Suppleness
        • Straightness

    Begin working on assessing how responsive your horse is to your aids.  If you ask for more, does he respond and begin creating a little more energy into his movement?  Is this response immediate or does he think about it for a few steps?  If his response time is a little ‘wanting’ I suggest carrying a schooling whip and backing up your leg aids with it each time he shows begins to procrastinate or ignore your aids.

    Once he is responsive then make sure he is indeed moving forward, pushing from behind.  It is impossible to direct what is not there, so make sure your horse is using his hindquarters with each stride.

    Then work on creating a rhythm in the gait you have chosen.  I suggest working on a 20m circle, and using half halts and transitions on the circle to further engage the hindquarters as your horse is working.

    Straightness to Enhance Contact

    Straightness is important.  Firstly to correctly channel the energy where you want it to go. But also so you can quickly lock any doors that your horse will try to open once you have blocked his initial ‘evade of choice’!

    Many horses will look for another way of evading when you shut down the initial window of opportunity!

    Finally, don’t be afraid of creating contact with your horse while riding.  Many riders are worried about hurting their horse’s mouth, or pulling on the reins and never truly get to experience and feel how wonderful it is to communicate with their horse in a consistent, safe, following contact.

    Happy Riding

    Lorna

    Additional Resources for Equestrians:-

    Retraining a horse that Evades Your contact

  • Correctly Applying Your Weight Aids

    Correctly Applying Your Weight Aids

    When we begin riding, we are generally told about this almost magical ability that we have to communicate with our horse, known as the weight aids.   However, it soon becomes apparent that we have to master many other aspects of riding before we can hope to use our weight to communicate with our horse…

    Unfortunately for many of us, this takes too much time to achieve, so instead we begin happily throwing our weight around in the saddle and then getting upset when our horse does something completely different to what we ‘asked’.

    [smart_track_player url=”https://op3.dev/e/traffic.libsyn.com/dailystridespodcast/516-Learning-to-Correctly-Apply-Your-Weight-Aids.mp3 Feedback” title=”Learning to Correctly Apply Your Weight Aids” social_linkedin=”true” social_pinterest=”true” social_email=”true” tweet_text=”Learning to Correctly Apply Your Weight Aids in the Saddle” hashtag=”horseriding #equestrian” twitter_username=”strides_success” ]

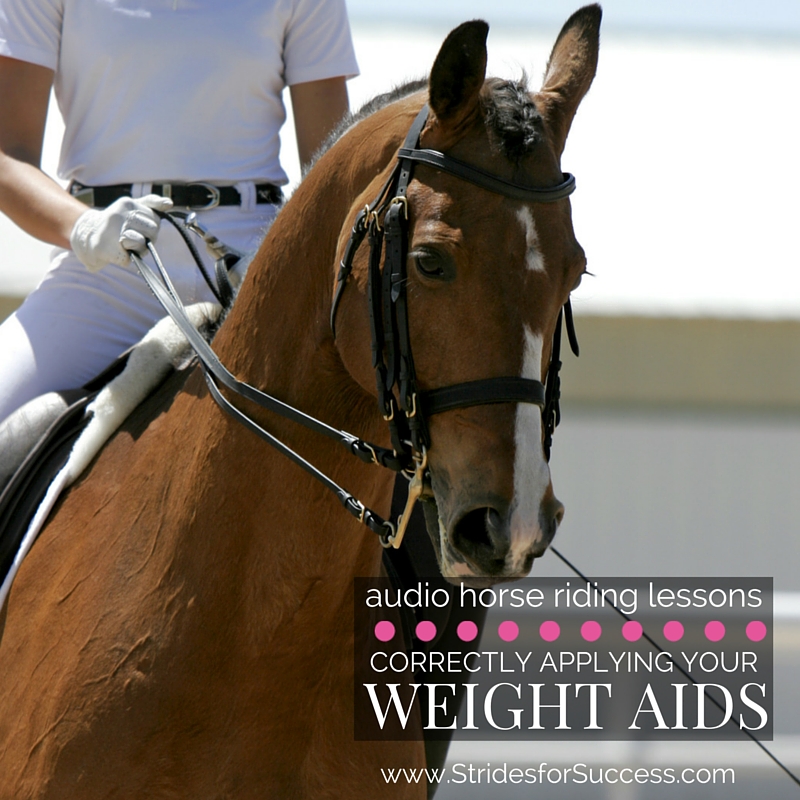
    So first and foremost, what are your weight aids?  The term ‘weight aids’ refers to where and how you are using your core to distribute your weight in the saddle.  Your weight aids are controlled with subtle movements which shift the pressure and weight of the seat bones in a way that communicates a certain instruction to your horse.

    You use your weight aids in all aspects of riding, from slowing down or stopping, to asking for more energy or moving forward.  Weight aids are an important part of transitions, bending, turning and even just riding a straight line.  Learning how to control your weight aid is a vital and essential part of good riding.

    It is only when we learn to develop a truly independent seat that those aids really can become useful to both us and our horse

    An independent seat is when you can move your legs or other parts of your body without affecting your overall balance & position in the saddle.  An independent seat is also something that is really earned by spending consistent time in the saddle, riding correctly and practicing correct movements and sound techniques.   A rider also needs a certain level of fitness and body awareness, so as to be able to use their muscles, and therefore shift their weight, as desired or required.

    If we do not first cultivate that independent seat, our weight aids can often work against us and our horse.  They can also when applied incorrectly, whether due to lack of knowledge or lack of control, contradict the other aids being applied which leads to our horse not performing as we think he should.

    Applying Your Weight Aids

    Many riders think that they are applying their weight aids correctly, however something as simple as not sitting straight in the saddle is enough to change the application and meaning of a particular movement.  Often riders will sit to one side, or favour one side of their body, when in the saddle and the problem then begins to compound when they begin shifting their weight around, giving a total different feeling to their horse than what the rider thinks they are asking

    Another way that the weight aids can begin to work against the rider if not correctly understood and applied is that often riders get a little ‘over enthusiastic’ in the application of the aid.  So rather than that subtle shift we mentioned in the beginning, they either begin ‘shoving’ or ‘pushing’ their horse, or they begin leaning…  Never Lean!  We can also incorrectly apply the weight aids, particularly when turning, by lifting our outside seatbone off the saddle…

    Keep in mind that both seat bones must remain seated if you want to give a correct and easily understood weight aid!

    The final issue I want to warn you of before we carry on is incorrect timing of the aid.  As with all things riding related, the weight aid being given will only be as good as the preparation leading up to it and the timing of it.  No matter how well-balanced, or finely tuned your seat may be, if you apply the aid at a moment when your horse physically cannot respond to it, the aid will never get anywhere near the result you desire.

    It is when you can combine a true independent seat with correctly applied subtle weight aids & a perfect sense of timing you will begin to master what we call ‘feel’ in the saddle

    To get an idea of just how subtle your weight aids and the ways you affect them are, I suggest beginning off your horse.  Find a firm surface you can sit on, and gently put a hand under each of your seat bones.  Feel how just applying a little more tension to the different muscles in your core, affects the distribution of the weight applied by your seat bones on your hands.

    Move your body as you would when in the saddle performing a half halt; feel how your seat bones would ‘block’ a river of energy that would flow underneath you through your horse’s back when you are in the saddle.  However, then begin to see how, my making slight adjustments,  you can soften that aid or smooth it out.

    Once you can begin feeling these subtle differences, try it with how you would move when you ask your horse to move forward, whether it be to transition up a gait, or within a gait.  Again, imagine the river of energy flowing underneath you and how, when applied correctly, your weight aids will ‘open’ and allow that energy to flow a little more.

    Of course, when you apply your weight aids you are not necessarily ‘blocking’ or ‘allowing’, just rather suggesting this to your horse, who with time, will understand and make adjustments as required

    Once you have a good feeling and understanding of the ’cause and effect’ of your body movements out of the saddle, then you can begin experimenting in the saddle.  Unfortunately however, many riders will experience that their horse is not all that attentive to their weight aids initially.  This is usually due to the fact that the rider has been guilty of literally ‘throwing their weight about’ in the saddle!

    However, all is not lost and you can begin to re-school or retrain your horse to your newly acquired subtle weight aids.  To do this you will have to be consistent and mindful of where you are sitting in the saddle and also that each movement or change is set in motion by applying the correct, subtle, weight aid first.   Your horse will, given time, begin to associate that particular weight aid with that instruction and soon, begin responding to the weight aid when it is applied.

    Really effective communication with your horse through your weight aids will take time and patience, however is really worthwhile in the end.

    Happy Riding

    Lorna

    Applying Your Weight Aids


  • Diffusing a Difficult or Dangerous Situation

    Diffusing a Difficult or Dangerous Situation

    [fusebox_track_player url=”https://op3.dev/e/traffic.libsyn.com/dailystridespodcast/511-Diffusing-a-Difficult-or-Dangerous-Situation.mp3″ title=”Diffusing a Dangerous or Difficult Situation with Your Horse” social_linkedin=”true” social_pinterest=”true” social_email=”true” ]

    Being an equestrian, it is a safe assumption to make that you love your horse.  However, every now and again we will find ourselves in a situation that has the potential to turn dangerous very quickly, whether it be in the saddle or on the ground.

    Depending on your personality and experience, how you deal with this type of situation can vary greatly. Some riders become angry or aggressive, others become anxious or nervous.  While others simply ignore the behaviour and carry on…

    Knowing what to do and how to act when a dangerous situation presents itself is vital to not only your own confidence around horses but also to your horse’s training and wellbeing.

    Why Is He Being so Dangerous?!

    Horses react in ‘dangerous’ ways for many different factors.  The most obvious two are being frightened or in pain.  However, there is a whole other multitude of reasons your horse may react in a way that can become dangerous or unsafe for both of you.

    Some horses are excitable, others are aggressive.  Some horses are reacting to a deep-seated instinct while others are simply following the rider’s lead.  Factors such as your horse’s history or method which he was trained can play a part, his breeding, the food he is receiving, or perhaps an underlying health condition or disease.

    Figuring out what is triggering his behaviour to begin with is paramount to how you will then react to or deal with the situation when it occurs again.  

    Look for patterns in the circumstances.  Also, look at how he then reacts to the different methods that are being used to try to defuse the dangerous actions each time.

    Working With Your Horse

    Working with a nervous, frightened horse is quite different from working with an aggressive or ‘angry’ horse.  The same is true of a horse that is excitable and high-spirited to a horse that is overly sensitive and easily stimulated.

    Once you have figured out why your horse is reacting the way he is, the next question to ask yourself is: “Am I able to deal with this, or is this a job for a professional?”

    Whatever route you choose, time and consistency will be the essential ingredients to learning how to defuse a difficult or dangerous situation correctly and safely, so that type of scenario happens less and less in your riding.  Now, more often than not, you can compromise by hiring a trainer that will have experience of overcoming the type of challenge you are faced with.

    Confidence, knowledge and self assuredness in your abilities is key to being able to deal with a dangerous situation, whether it being asserting authority, or being a human that your horse can trust

    However, the sad fact remains that more often than not, these traits are usually lacking in most pleasure riders, through no fault of their own.  And trying to mask uncertainty and fear is a tough act for anyone to pull off, let alone when in a dangerous situation with a 600kg horse!  This is where working with an experienced professional is priceless.

    Diffusing a Difficult or Dangerous Situation

    Training Yourself First

    I suggest taking a more methodical approach to training yourself to be ready and able to react closer to how you would like in these sorts of circumstances.

        • Identify a ‘comfort zone’, where you feel safe and in control of the situation.
        • Begin leaving this comfort zone, for short periods, each time you work with your horse.
        • notice how your confidence and your horse’s confidence is growing
        • Soon your ‘comfort zone’ will begin to expand; when this happens, push yourself to venture further away from the comfort zone, knowing that you can return at all times.

    This can be a simple as riding in a round pen for a while or just touching your horse’s hindquarters briefly during grooming.

    It will depend on what the situation is. However, growing and deepening the relationship between you and your horse will be key in being able to identify the ‘danger signs’ and defuse the situation before it escalates into a full-blown disaster.

    Developing Your Abilities

    You can also develop your fitness, your ability to balance, and your agility in the saddle by working some basic exercises into your schooling routine.  Another way to increase your ability to react and adapt quickly in the saddle is by riding in the fields or on tracks and trails.  Your horse will constantly have to readjust his footing and balance, which will require you to do the same…

    However, if this is a problem, perhaps look at starting small in a small paddock or field to build confidence in either yourself and your horse.

    Other Options…

    Sadly, sometimes the challenge is too large or the reaction too ingrained. This can be in either you or your horse. When this happens it almost it can be very difficult to work through safely. If this is the case, selling your horse might be the best option.  It is important to do this from a place of integrity and honesty.

    Be mindful that the person who takes on the horse has the necessary tools to begin helping the horse; rather than the cycle repeating itself over again.  

    This might take time, or thinking outside the box, to find the right person. But you will feel better knowing you done all you can for the horse.

    The number one thing to remember throughout is the safety of yourself, your horse, and those surrounding you.  

    Try to not get into situations where things can quickly escalate.  I realize this is often easier said than done. However, if you can take the time to really get to know your horse (and yourself!) will definitely lower the risk factor.

    Happy and safe riding

    Lorna

    Additional Resources on this Topic:-

    Diffusing a Difficult or Dangerous Situation