Tag: Canter

  • Straightness in the Canter

    Straightness in the Canter

    Straightness in the Canter

    What this episode is all about & how it can help you:-

    • Rule out possible causes for your canter being crooked
    • How to ensure you are straight
    • The benefits of initially working in walk and trot
    • What to look for in your canter and how you will know if you are truly straight

    [smart_track_player url=”https://op3.dev/e/traffic.libsyn.com/dailystridespodcast/1042-Straightness-in-the-Canter.mp3″ title=”Straightness in the Canter” social_linkedin=”true” social_pinterest=”true” social_email=”true” tweet_text=”Are you struggling to stay on track in canter? This will help…” hashtag=”equestrian #podcast #canter” twitter_username=”strides_success” ]

    Has this ever happened to you?  You’re cantering, along enjoying every stride, when suddenly it dawns on you that things are not quite as straight as they could be.  In fact, if you give a quick glance over your shoulder, you wonder if it is indeed possible for your horses’ back end to pass you out!  Hmmm, straightness in the canter.

    This episode is focused on how you can keep your horse straight through the canter.  Deviations away from this ‘straightness’ can often be subtle, but it is often there…

    Rule Out Possible Causes

    Before we go any further, obviously I am assuming you have ruled out the possibility of a physical ailment causing any crookedness in your canter.

    Making sure that there isn’t something physically wrong with your horse is first and foremost.  Physical ailments may be preventing him from carrying the same amount of weight on both hind legs for example.  If you are worried about that, have your horse checked by a vet.  Also I suggest have both teeth and tack checked as well.

    Once your horse has been given a clean bill of health, I want you to turn your attention to yourself – and what you are doing in the canter.

    Make Sure You Are Straight

    Very often riders get hung up on the fact that their horse is being a little bit crooked, but meanwhile it is the rider that is being a little crooked.  Your horse is often merely reflecting or mirroring back what you, the rider, is doing in the saddle.  Rider crookedness can often be quite obvious, as with the shoulders. Is one shoulder dipped slightly lower than the other? Or, is one shoulder travelling slightly ahead of the other?

    Something that is a little more difficult to feel and more difficult to remedy, is when your seat bones that are not straight.  Often, I see that a horse will go disunited behind in the canter due to the rider ‘forcing’ the horse, with their seat, to travel this way.

    Make sure that you straight in your riding, and especially in your canter.  If you are unsure about how straight you are, check out this free training HERE  that will get you well on your way to straightening things out in your body.

    So, let’s now assume that you are indeed straight, your horse is perfectly healthy, the tack fits… Where can you start if your horse is a still a little bit crooked in the canter?

    Work in Walk and Trot Initially

    Firstly, I suggest that you and your horse go back to the basics.  Start in trot or walk.  Focus on riding a lot of straight, balanced transitions.  Crookedness can be quite obvious in the canter, leading riders to only work and focus on the canter.  But this often only works to reinforce the crookedness!

    Remember all the time that you are working your horse, you are strengthening and building muscles.  You are both developing and you can do this the right way, or the wrong way.  When you repeatedly ride the crooked canter, be careful you are not ingraining that fault in your horse’s basic body structure.

    Rather take it back down to where you can really and truly control things.  Of course in the walk and trot all things are generally equal, meaning that while the canter can sometimes feel a little ‘one sided’ (not equal), due to the nature of how your horse travels in the canter, the walk and trot are very equal and symmetrical.

    So, it makes sense that when you are working, you are conditioning and strengthening your horse to move in that symmetrical way.   By him continuously moving straight and symmetrical, it is going to strengthen and develop this way.

    However, sometimes that alone will not be enough.  If this is the case I am going to suggest that you try to take any crookedness, or any desire to go crooked, out of the equation.  One of the simplest ways to do this is to work on hills.  Gentle, gradual hills or inclines.  When you work your horse up and down the hill, and you horse will find it very difficult to travel ‘crookedly’.  This is due to him needing to have both sides thrusting him forward equally.  In this way you can develop both sides.

    Unfortunately, a lot of riders won’t invest the necessary time and energy to do this, usually because it is boring in the walk!  If you are struggling with this (and yes, the struggle is often real) try focus on other things.  Perhaps include some lateral work into your schooling. The focus is on consistently building and developing.  Trying get that equal thrust from both hind legs, which will help to straighten out your canter.

    How You will Know if Your Canter Needs Work

    So, you are at this point probably wondering if your horse is truly straight – or if there is a little crookedness happening in your canter.  How will you know if your horse is crooked or not?

    Obviously, if you have mirrors in your arena, it is as simple as paying attention to what is happening.  However, this is not the case for most riders.  If you don’t have mirrors you can check whether your horse is straight in the canter by using a video.  You can set your phone up and, simply, ride straight at it.  If you don’t have a video, you could ask somebody to watch and tell you.

    What should you look for?  Simply that your horse is on two tracks.  This means that both legs on the left side of his body are on one track (meaning the back leg is behind the front leg), and both legs on the right side of his body are on the other track.  So, you have two straight parallel tracks, a little like train tracks.

    You can also check that he is straight throughout the rest of his body.  Sometimes you will notice a little bit of a curve or a kink.  Checking for your horse’s tail between his back legs can often help you see this one.

    Of course, don’t focus all your attention on your horse, but also pay attention to you, the rider, and what you are doing in the saddle.  By focusing on yourself as well, you are making sure that you are both developing together in moving forward with this.

    Finally, balance is an important element when it comes to straightness.  Pay attention that you are producing balanced transitions.  If your horse is using his whole body, as opposed to using one side and then compensating for the lack of using the other side, your transitions will feel more balanced.  Aim for straight transitions, all the way through.

    Only when balanced in the walk and trot, attempt cantering again

    When you genuinely feel that you are both straight throughout your walk and trot, then you can begin asking for the canter again.  Don’t keep hammering on the canter if it is not right, because all you are doing is reinforcing the ‘unwanted’ outcome.

    As I have already mentioned, sometimes it can be as simple as straightening yourself up so that you are carrying yourself.  In doing this, you then allow your horse to carry himself in way that is also straight. 

    Remember, any excess tension on either side of your body or your horses body, will reflect through into the canter.

    Happy Riding

    Lorna

    Links mentioned in the episode:-


  • Using Your Body to Effectively Influence the Canter

    Using Your Body to Effectively Influence the Canter

    Effectively Influencing the Canter with Your Body

    What this episode is all about & how it can help you:-

    • Understand the difference between being influenced and doing the influencing
    • Being able to ‘roll’ with the canter first
    • How feeling the reach of your seat is the start of understanding your influence
    • The part your legs and hands play

    [smart_track_player url=”https://op3.dev/e/traffic.libsyn.com/dailystridespodcast/1030-How-to-Begin-Influencing-the-Canter-with-Your-Body.mp3″ title=”Using your body to influence your horses canter” tweet_text=”Are you influencing or being influenced by your horse in the canter? Here’s how you can start having more say in the saddle in canter…” hashtag=”equestrian” twitter_username=”strides_success” ]

    What happens when you get into canter with your horse?  Do you find that you are more of a passenger than a rider?  Simply put, are you influencing the canter, or are you allowing the canter to influence you?

    Today we will start figuring out what is going on in your canter, so you can begin to have more of an influencing effect on it.

    The Difference between Influencing the Canter and Being Influenced by the Canter

    The canter is a gait which can potentially have a lot of energy inside of it.  For many riders, being influenced by the canter feels like this energy is causing them to ‘bounce’ or ‘bump’ in the saddle each stride.

    Unfortunately, many try to correct this problem by gripping on or holding down into the saddle.  This only makes things more uncomfortable for both horse and rider.

    In order for the rider to begin influencing the canter through their aids and actions, they must first understand the canter.  Understanding what is happening underneath them.  This all begins with learning to first follow the horse.  Allowing the horse to influence.  Only then can they begin to focus on influencing the canter by what they are doing in the saddle.

    Being Able to ‘Roll’ with the Canter First

    A lot of what happens in the canter happens through the riders seat.  The seat is important to both transition into the canter, but also then to ‘roll’ with the canter.

    However, many riders, rather than ‘rolling’, they try to hold themselves in the canter.  I think that this often comes from some anxiety being present around canter.  Regardless of the reason behind this anxiety, the result is often that by the time they get into canter, they have a lot of excess tension in their body.

    This excess tension can often be seen by riders gripping with their thighs. In doing so they shut down any and all movement in their hips.  Simply put, there cannot be any roll.  It can also show up as a stiffness though their lower back. 

    Whichever one is happening, the experience is generally not going to be as smooth as the rider would like.  Every stride of the canter as it continues tends to result in the rider becoming a little more ‘bumped’ out of the saddle.

    However, if the rider could just relax and allow their body to move with, rather than gripping against, the result is them achieving the rolling motion.

    The good news is that once you can really move with the canter, you have overcome the first barrier to entry to a good canter.  Meaning you are on your way to effectively influencing the canter. 

    If you are at the stage that you have not mastered this rolling motion the following is going to seem a little counter intuitive.  But trust me, it works! The less you grip and the less stiffness in your lower back, the more you will stay with the horse.  Remember, when you try to dictate the roll before you truly understand how to move with it, it is very difficult to get into the same momentum and movement as the horse.

    Feeling the Reach of Your Seat Within Each Roll

    Assuming you have mastered the rolling motion, I then recommend that you bring your attention back to what your seat bones are doing.  Remember the rolling motion comes from your pelvis and hips.  In fact, the whole lower torso and upper thighs are moving with the horse.

    Identifying your seat bones and where they are at any given point in the canter is the beginning of being able to ‘feel’ in the saddle.  What I want you to feel is the reach. The arc your seat bones travel or move ever single stride. 

    Think of this ‘roll’ for a moment.  It will always result in your seat coming back to a ‘starting point’ and then setting off on the next ‘roll’ each stride.  It feels like a circular or oval motion.

    What I want you to focus on here is the reach, meaning the ‘starting point’ and then the ‘furthest point’ your seat travels as it continues on its roll.

    Once you can feel that, you can start playing with it.  You can start allowing the seat bone to perhaps reach a little bit further.  Or you can bring it back, so that the seat bone is not reaching as far.  It is really important that you maintain your posture and position throughout this; otherwise you will block or shut down the free movement in your seat.

    The Part Your Legs and Hands Play

    One of the helpful aspects of plugging your seat in correctly in the saddle, is that a lot of other things just fall into place naturally afterwards.  Your legs are one of these things!

    When you have any excess tension in the saddle, particularly around your seat or your thighs, your leg position becomes affected.  When in the saddle, you want your legs to simply fall down your horse’s sides.  Of course, when your horse begins moving there is a little work required in order to keep them still while your horse is moving.

    Once your legs are draping the horse, they are in the correct position to most effectively influence and communicate with the horse. 

    However, when there is tightness through our pelvis, our legs are generally too far forward.  Or if we are gripping with our knees our lower legs tend to go too far back.  A lot of ‘leg problems’ can be remedied by simply ensuring that the seat and pelvis is allowing the movement to happen when in the saddle.

    Maintaining Consistent Connection through Your Arms and Hands

    The final piece of influencing the canter is your hands and your arms.  Your hands and arms must follow the horse.  I like to think about your hands and arms being connected to your seat.

    It is important to understand that when the horse canters, there is a lot of natural movement happening.  You must be able to discern that movement and then begin following the horse.  This will ensure there is no resistance on your part through your hand or through the bit & rein.

    It is through this quietness that you can begin to influence the canter. The hands and arms are engaged in the communication, but they are not overpowering the communication.

    You will often see riders ‘pump’ with the top half of their body.  Rather try to ‘still’ through your shoulders, while allowing the movement through your elbows, and of course your wrists and hands.

    Your job is to try to keep your shoulders nicely balanced so that they are carrying you.  You almost want to think of your shoulders as a clothes hanger with a long garment hanging from them.  The garment is the rest of you.  But the clothes hanger is there providing the support.  Now imagine the wind moving the garment.  The wind is the horses movement or energy, the clothes hanger is your shoulder.

    Once again, once you can move with the horse and then understand that movement, then you can begin influencing the canter.

    Happy Riding

    Lorna

    Links mentioned in the episode:-

  • Canter to Improve the Trot

    Canter to Improve the Trot

    🌟🐴  Get the Improve Your Canter Program TODAY and transform your riding – and your training 🐴🌟

    Have you noticed how, very often, there are only two ‘gears’ when trotting; a good, forward trot or a bland, shuffle trot? However, changing from the latter to the former can often be one of the more difficult aspects of trotting.  If so, have you ever considered using the canter to improve the trot?

    Sounds too good to be true, but very often a good, forward canter can be the simple catalyst from that mediocre flat shuffle, to that wonderful springy and engaged trot.

    [fusebox_track_player url=”https://op3.dev/e/traffic.libsyn.com/dailystridespodcast/676-Using-the-Canter-to-Improve-the-Trot.mp3″ title=”Canter to Improve the Trot” social_linkedin=”true” social_pinterest=”true” social_email=”true” ]

    However, like everything worth doing in life, the canter must be of good quality, and the transitions both into and out of the canter from the trot will often dictate just how effective this technique will be to your horse’s schooling.

    What Makes a Good Trot?

    So, before we go any further, let’s chat quickly about what exactly makes a good trot.  The trot itself is usually quite easy to establish a rhythm, the 1.. 2.. 1.. 2.. almost setting itself up each stride.  The trouble for many riders is then regulating the tempo of that rhythm.

    If the rhythm is the 1.. 2.. 1.. 2.. the tempo is how often that 1.. 2.. rhythm occurs in any set period of time or distance.  

    For example, take the long side of a 60m arena.  By adjusting the tempo of the trot rhythm, you can either have a lot of ‘quick’ 12121212s occurring, or you can have fewer 1…… 2…… 1…… 2……. happening in the same distance.

    So when many riders begin trotting, establishing the rhythm and tempo is often not a problem.  But as soon as they begin to make adjustments to the trot, one (usually the tempo) or both can very quickly become erratic.   Those adjustments can be half halts, shortening the stride, lengthening the stride, or asking for a transition either up or down to a different gait, or within the gait itself.

    In fact, even just beginning to activate the hind quarters and connect the horse a little more very often results in a loss of rhythm and tempo.  This is where we see many horses either begin to run in the trot, or become heavy and lean on the rider’s hand.

    Canter to Improve the Trot

    Riding the canter to improve the trot will help riders to firstly become more quiet in the saddle. It also improves the riders skills in noticing if the gait itself is a quality one to begin with

    Because of the transitions between trot and canter, riders may want to rather ride in a sitting trot when riding the trot.  However, I strongly suggest just using the sitting trot for the actual transition.  Post or rise to the trot when working in the trot.  The reason I say this is because, in order to improve the quality of the trot, the horse must first engage his hindquarters.

    For this to happen, the energy being created there must be allowed to connect through, underneath the rider and saddle, from the back to the front

    Using Your Energy Wisely

    However, it has been my experience that when working between trot and canter for any length of time, riders tire quickly.  This causes them to begin ’slouching’ through their upper body and this, in turn, results in them ‘shutting down’ that flow of energy necessary for the horse to truly work in a quality trot.

    So, for the duration of this exercise, I suggest working in rising or posting to the trot where you can, to give both yourself and your horses back a little break!

    Start with ‘Forward’

    Start by asking your horse to work in what you would consider a forward-going ‘working trot’.  Focus on the rhythm and then the tempo, particularly as you work through corners or change rein.  Can your horse remain to maintain consistency in both?  Many riders wonder if the trot is indeed a ‘working trot’.

    The next part of the exercise will quickly tell you either way if your trot is working, or shuffling!

    Using Canter to Improve the Trot

    Using Half Halts to Prepare

    Begin to prepare your horse for canter.  Use your half halts, but all the while paying close attention to the aforementioned rhythm and tempo.  I also think noticing how straight your horse remains through the transition is important.  Do his hindquarters swing or drift?  Does he ‘curl’ around your inside leg?  Or perhaps he is bracing against your inside leg…?  If you notice any of the above, take this as your cue to begin working through these more basic evasions, before you allow your horse to canter.

    You may find maintaining the rhythm and, in particular, tempo as your horse transitions into canter from the trot rather difficult.  This is what your focus should be on throughout the schooling session.

    Think of ‘you ask – he responds’

    Working Forward in the Canter

    Once in the canter, firstly make sure the canter is moving forward and actually taking you somewhere.  One of the reasons we can use the canter to improve the trot is because the canter often has naturally more energetic and rolling energy with it.  Having to push and kick at every stride is not forward.  But it is important to note that allowing your horse to run like a wild thing around the arena is also not a forward canter.

    The canter can be classed as ‘forward’ if the energy is taking  you somewhere and that somewhere is dictated by you.  You can influence where it goes and how much is allowed ‘out’ at any give time in the gait

    The Canter to Trot Transition

    Once you have indeed established a forward canter, you can begin thinking about transitioning back into the trot.  Again, maintaining the rhythm and tempo is vitally important.  What is also important is the fact that you ‘allow’ your horse to trot.

    There is a split second, that you will feel, when your horse actually takes that step that transitions him from the canter into the trot.  In order to do this he must ‘land’ into the trot. And you must ‘allow’ or ‘soften’ through your hand so he can indeed move forward into the trot

    This is also where I suggest posting or rising from the first step.  This way, when you have ‘allowed’ him to continue to move forward, that energy in his hind quarters can indeed connect with the front end.  It will feel like he is ‘swinging’ underneath you.

    Feeling the Difference to the Trot

    Many riders find that the first time they really ride a good trot with their horse, the bounce is a little too much for them.  Again, rising or posting will help you initially.  Then, later, as you become more supple and allowing through your body, you can start moving with your horse and this new energy in sitting trot.

    You can use the canter to improve the trot both in the saddle and on the ground.  The same principles can be applied when lunging your horse with the added bonus of actually being able to see the results, rather than feel them

    Keep in mind that in order for your horse to improve and develop himself, it is your responsibility to establish and maintain that straightness, rhythm, and tempo.  Work towards being able to move up and down, through your horse’s gears, without losing any of the above.

    It is also vital that your horse continues to ‘move forward’ at all times; taking you somewhere.

    Happy Riding
    Lorna

    Improve Your Canter Program

    4 weeks of self-study with easy-to-follow audio horse riding lessons that will help you to transform your canter – and your aids in your riding. Suitable for riders who are just getting started with canter, and riders who want to improve both their abilities and their horse’s canter.

    And with lifetime access, you can dip in and out of the program again, and again… All of the details are HERE

    Connection; The Online Resource for Riders

    This podcast is the first in a series of five on this specific topic which were created for Daily Strides Premium, now know as Connection.  Every month you will get audio horse riding lessons to listen to as you work your horse. Connection is created to help riders working alone, without a trainer or coach, to continue to both improve their riding AND train their horse.

    All of the audio programs are step-by-step instructions for you to follow while riding your horse.  All of your lessons are available, on your phone, using a Private Podcast Feed. 


    All of the details are available at https://stridesforsuccess.com/join.  The membership is risk free, with no contracts.  You can cancel any time. I would love to have you on a lesson soon :)

  • Riding a Bounce to Improve Overall Strength

    Riding a Bounce to Improve Overall Strength

    Have you ever experienced popping over a jump with your horse, when he suddenly realises he needs a little ‘more’ if he is going to clear the jump?  He stretches, or pushes, a little farther than you expected and suddenly you find yourself very much behind the movement and bracing for the inevitable ‘thud’ that your backside connecting with the saddle will create on landing!

    Or perhaps your horse has a frustrating habit of hanging a hoof here and there over fences, which leads to poles on the floor and a less ribbons than you would like hanging on your wall!

    [smart_track_player url=”https://op3.dev/e/traffic.libsyn.com/dailystridespodcast/601-Correctly-Riding-a-Bounce-to-Improve-Overall-Strength.mp3″ title=”Riding a Bounce to Improve Overall Strenght” social_linkedin=”true” social_pinterest=”true” social_email=”true” tweet_text=”Do you include bounces in your pole work with your horse? Here’s how to get started…” hashtag=”equestrian #jumping” twitter_username=”Strides_success” ]

    Developing both you and your horse’s physical strength is essential for successful, safe and injury free jumping.  But doing so without ‘jumping the legs off’ your horse is often a challenge for many riders.  This is where incorporating a simple bounce or two into your schooling, initially as ground poles and later as actual jumping obstacles, can help you both become stronger and more in control of your body over jumps and fences.

    For many riders, the thoughts of riding a horse into a bounce is a daunting one.  However, it need not be and in fact, will help you not only become stronger, but also give you a greater understanding of how your horse uses his body both before, during and after a fence, and how you must move to stay in sync with him throughout the effort

    A bounce, simply put, is when a horse lands from one jump (or canter stride) and as he touches down, immediately takes off again over a second jump or ground pole.  There are no ‘non jumping strides’ between the two obstacles; the front feet will touch down and then as the back feet near landing, the front feet will pick up again to jump the second jump.

    Successfully navigating a bounce requires quite a bit of athleticism from your horse, as well as quick thinking.  They are a super way of teaching horses to ‘snap up’ their front legs and also, to use their hind quarters over a fence and on landing to propel them forward again.

    Learning to Correctly Ride a Bounce to Improve Overall Strength

    For the rider, the bounce requires balance and micro adjustments throughout the body in order to stay with the horse, poised over the saddle, rather than getting too far ahead of the movement, or being left behind.

    It also helps riders to react quicker to what is happening underneath them as the horse is continually having to shift the weight between back and front throughout the sequence

    Riding through a grid containing more than one bounce also requires the rider to understand impulsion and how the horse’s energy must be controlled.  If the horse is ‘chased’ through the fences, he will not have time to make the necessary adjustments to successfully clear the obstacles.  Similarly, if the riders fails to create enough impulsion or energy, the horse will be unable to make it through the line without having poles down along the way.

    Before you begin introducing your horse to a bounce, it is important that he is confident jumping both individual fences and also related fences, such as doubles with one or two non jumping strides in between.  The rider must also be able to stay with the horse over fences and have a secure and balanced jumping position when jumping related distances.

    Start by placing a single pole on the ground and cantering over it.  Feel how your horse moves over the pole, and also, how you remain balanced, while getting off his back, as he canters over the pole.  Once you are both comfortable with this, you can then add a second pole between 3m and 3.7m or 10′ and 12′ away from the first.  Canter your horse over the poles and make adjustments to the distance as necessary.

    Work over the poles on both reins, approaching from different directions.  Working over the bounce when still only ground poles is a great way to test your horse’s rhythm and balance.

    See if you can maintain a consistent rhythm before, during and after the poles

    This is also a great opportunity to see how well you can follow your horse before increasing the difficulty.  I suggest keeping the weight dropped into your heels, your back straight, your shoulders open across your chest and your seat moving with your horse and ‘hovering’ when actually moving over the poles, in a light seat.  You can also use this exercise to assess your hands and shoulders.  Are they ‘following’ your horse’s mouth, continuing to maintain a consistent contact with your horse at all times?

    It is tempting to try avoid landing heavily on your horse’s back, or catching him in the mouth by ‘over preparing’ yourself for the jump.   Over preparing will result in you getting into your jumping position too early, and will see you leaning on your horse’s neck and shoulders for support.  Use your practice over the ground poles in order work on this, rather than when there are actual jumps involved, as it will make it much more difficult for your horse to lift his shoulders and perform a clean jumping effort.

    Remember to wait for your horse to begin over the pole, and then follow his lead

    Also notice how centered your horse is over the poles.  Later, when you are both comfortable popping through the bounce, you can begin to build cross poles, which will help keep your horse centered through the line.   But for now, notice if there is a tendency to drift one way or the other.

    Keep in mind that your horse is always influenced by your position in the saddle, so make sure you are riding in a balanced way through the line yourself

    It is common for riders to ‘duck’ one side or the other of the horse’s neck over fences…  Not a good habit to cultivate, so if it is there, nip it in the bud now!  Think about keeping your chin centered over your horse’s neck or mane as you move with your horse through the bounce.

    Once you are both comfortable riding through a single bounce of ground poles, you can begin to add more poles to the line.   Continue to assess the distance and adjust it to suit your horse’s comfort levels.  Later, as you both become stronger, you can then begin asking more difficult questions of your horse by asking him to adjust to set distances, but to begin with, build his confidence levels by building the lines for him and his preferred lengths.

    You then begin to build actual jumps where the poles are.  Depending on the height of the jumps, you may have to adjust the distances again for your horse, and always move through the line from both directions to help keep your horse fresh.

    Keep in mind that riding a bounce takes concentration and strength from your horse; therefore riding a line of bounces is quite taxing.  Don’t over do it, rather work through it and then leave it for a while, to return later when your horse is fresher.  Working your horse through this when he is tired, either physically or mentally, will only lead to mistakes and injuries.

    Happy Riding
    Lorna

    If you are interested in finding out more about bounces and how they can help you and your horse, perhaps the four other audio horse riding programs about this topic can help you. You can get theses, and hundreds more lessons, in Daily Strides Premium.  You can find out more by visiting https://stridesforsuccess.com/join/.

  • More Advanced Exercises for a Young Horse

    More Advanced Exercises for a Young Horse

    [fusebox_track_player url=”https://op3.dev/e/traffic.libsyn.com/dailystridespodcast/586-More-Advanced-Exercises-for-a-Young-Horse.mp3″ title=”More Advanced Exercises for a Young Horse” social_linkedin=”true” social_pinterest=”true” social_email=”true” ]

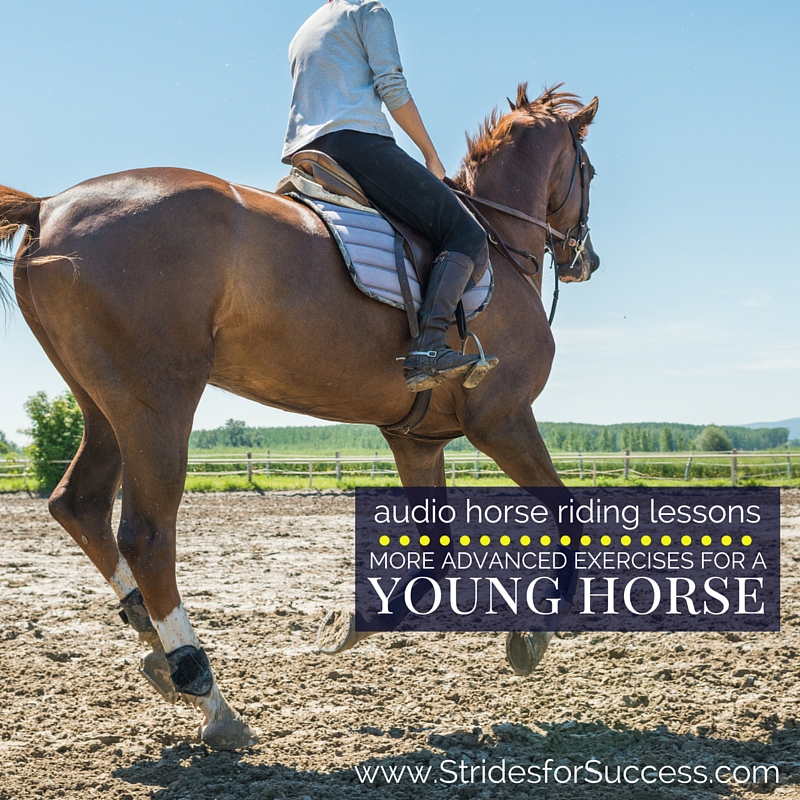
    You have spent the past few months diligently improving your young horse’s standard of education. A lot of time invested on the basics of moving forward in a balanced rhythmic way.  He is happy, you are happy and the next natural progression is to ask for the canter.

    However, it seems all those carefully cultivated hours in the arena fly out the door as soon as you ask for the upward transition.

    Your horse begins running on his forehand, each trot stride becoming longer and faster… He eventually breaks into a canter of sorts, but nothing like what you imagined it to be!  Unbalanced, uncoordinated, and no rhythm whatsoever!

    Introducing ‘New’ To Your Young Horse

    Often it seems that no matter how much preparation we put into preparing our young horse for his first departure from a trot into a canter, the canter falls a little flat and well below our expectations.   But rather than becoming frustrated and demoralized with your horse’s apparent lack of understanding, see this as being the next step of the ladder with regards to your horse’s education. And one that, if he graduates from, will see him in a great position to really begin working from.

    Just like when you first began riding your young horse in walk and trot, your horse is going to feel very unbalanced and unsure of himself when you do ask for the canter when in the saddle.  

    This is due to the canter having a three-timed beat which depends on your horse’s outside back leg starting and propelling the rest of his footfalls and body forward in each stride.  In the trot, it is far easier to remain balanced. This is due to the effect the diagonals have on balancing him with each stride. However, the canter is almost one-sided and extra strength and development are required of your horse in order to really ‘power’ into.  Power into it and then remain balanced through each stride.

    Preparing the Transition

    As with most things concerning riding, the preparation that leads up to the transition will have a massive outcome on the success of the transition itself

    See the trot as now being the foundation for setting up the canter.  Not only from a rhythm and balance point of view. But also with regards to developing strength through his body.  Use your half halts in the trot to begin asking for his hind legs to engage a little more. This may only be for a stride or two each time. However, it will allow him to begin building the muscles necessary for a good canter later.

    More Advanced Exercises for Your Young Horse

    Be Patient Through the Transition

    When you feel that you have prepared the trot enough, you can start thinking about the canter transition itself.  It is tempting to ‘push’ your horse into the canter at first. Using your upper body in particular.  However, throwing your upper body forward will only serve to unbalance him even further.

    Rather think of sitting up tall. 

    Then asking with the correct aids.  Including, perhaps most importantly, your voice and seat.  And, from here, allowing him to break into the canter himself.

    He may run for the first few strides of trot before then almost falling into the canter, but this is to be expected initially.  Your job is to remain balanced and ‘quiet’ throughout. This will help to build his confidence in his ability to actually move into the canter under the saddle.

    Make sure you follow through your body and also your hands and arms.  Catching him in the mouth or bouncing on his back, particularly in the first few transitions, will only serve to punish him. It may also cause him to associate the canter with anxiety and tension

    Once in the Canter

    Once he has actually transitioned into the canter, remain quiet but keep him moving forward.  Very often with a young horse, the canter may be a little ‘fast’ at first if forwardness is to be maintained.  This, again, is to be expected and rather allow him this. It will help him to begin to settle into this new gait and find his balance and rhythm himself.

    The canter requires quite a bit more effort from him than the trot, so he will probably tire quickly.

    Try to ask for the downward transition into a trot before he naturally breaks into trot himself.  

    You will usually feel the lack of energy in the canter, it will seem to become more strung out, rather than bounding forward.  Again, make sure you are balanced and quiet through the transition, using your voice and seat first.

    Re-Establish, Rinse & Repeat!

    As soon as he has come back into trot, begin the work of re-establishing a balanced rhythmic trot.  It may take quite a few strides initially, particularly after the first few canter to trot transitions… However, keep in mind that working forward in a balanced and rhythmic trot is something that your young horse knows how to do. So insist on it!

    Working in and out of the canter initially is a great way to begin developing your young horse for more prolonged and balanced canters.  

    Be sure that the trot is balanced and working before asking for the canter again each time.  Also, try to be consistent and regular with your aids both into the canter, while cantering, and then back into the trot.

    Developing Over Time

    Over time, your horse will begin to strengthen up and carry himself for longer periods, in a more balanced and rhythmic canter. The lenght of time will depend on many things.

    However, how mature your horse is and/or how much time you have spent working on the more foundational aspects of his schooling, will play a big role in how quickly he progresses, both physically, mentally & emotionally

    Continue to use the walk, trot, and halt to reinforce the aids and responsiveness.  Only when he has truly mastered the canter for longer periods can you then begin thinking about making adjustments within the canter itself.

    Initially, you will only ask for short canter periods each time, perhaps 5 or 6 strides of a better quality canter rather than laps of ‘racing’ and running around the arena, which will only serve to teach him how to incorrectly maintain the canter when being ridden.  Then slowly you can begin to apply the half halt in the canter itself, so to shorten the canter strides.

    Remember that forwardness is the foundation to all his gaits, so make sure that you keep him moving actively and with energy regardless of what you are asking.

    Schooling your young horse in the canter takes time and consistency. However, all the initial investment will pay off handsomely when your horse is able to maintain a balanced, forward-moving canter from which you can begin to make adjustments.

    Happy Riding
    Lorna

    Additional Resources for Equestrians

    Are you looking for step by step instructions to listen to as you ride your young horse? I have created 5 audio horse riding programs specifically focusing on this topic. To find out how you can get these lessons (and hundreds more) visit https://stridesforsuccess.com/join/

  • Asking Your Horse to Lengthen the Stride in Canter

    Asking Your Horse to Lengthen the Stride in Canter

    [fusebox_track_player url=”https://op3.dev/e/traffic.libsyn.com/dailystridespodcast/581-Asking-Your-Horse-To-Lengthen-the-Stride-in-Canter.mp3″ title=”Ask Your Horse to Lengthen the Stride in Canter” social_linkedin=”true” social_pinterest=”true” social_email=”true” ]

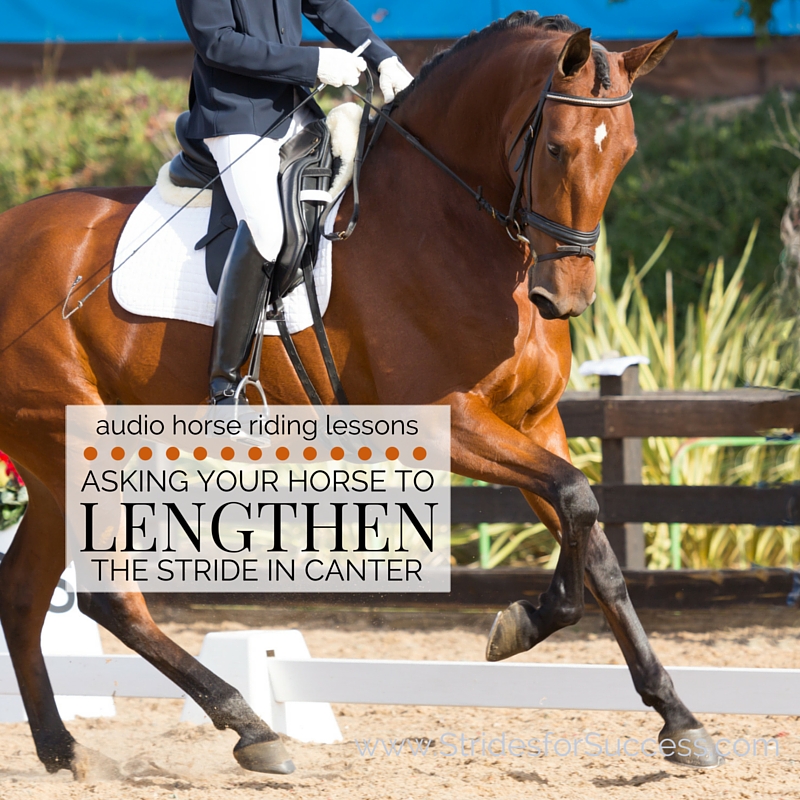
    You turn the corner and ask your horse to lengthen the stride in canter a little.  But, instead of covering more ground with each passing stride, it feels like his legs have begun to move nineteen to the dozen.  Flashbacks to pony riding are flying through your brain…  And the rushing and racing is becoming more intense with each passing stride!

    The result is that, yes sure, you are definitely covering more ground however you also have less control, less energy, and a lot more tension in each stride.  And this is a problem, particularly when there are obstacles to be navigated on a jumping track!

    Why Lengthen the Stride?

    Being able to effectively lengthen the stride in the canter is important in both flatwork and jumping.  The key is the lengthen throughout the whole body, covering more ground.

    But doing so without losing the energy, connection, balance, and rhythm that is necessary to keep engagement during the movement.

    The stronger and more developed and agile your horse is, the easier he will find it to lengthen and shorten his stride to greater degrees which, particularly in jumping, is often the difference between a successful exercise or not.  It will also allow him to make changes faster with less transition time in between and without sacrificing balance and rhythm.

    Your horse most remain relaxed throughout the lengthening because any shortening will result in the strides actually becoming more ‘choppy’, shorter and quicker rather than longer, flowing and connected

    Lengthening Versus Increased Speed

    Often, lengthening the stride is confused with an increase in speed.  I have found that a simple exercise for riders to do on the ground (on their own two feet) is often enough to allow riders to see the differences between lengthening the rushing.

    Begin by ‘cantering’ on your own two legs on the ground.  Yes, you might look a little silly, but bear with me here.  So, as you are there, merrily skipping along, begin by seeing how little distance you can cover with each ‘stride’ of your skip.  Now, start experimenting with how much distance you can cover with each ‘stride’ of your skip.

    Notice how the longer the stride or distance, the more ‘stretching you are having to do?  Also, notice how you have to bring your initial foot that is pushing off on each ‘stride’ underneath you in order to achieve any forwardness in your skip?  Each stride sets the next up.

    Engaging Your Horses Hindquarters

    Well, it is a similar principle for your horse.  Rather than the hind end being left behind as he works to lengthen the stride in canter, rather think about the hindquarters stretching forward.

    The more underneath him he can engage his hind legs with each stride, the more they can propel him further along in the stride itself

    Straightness Through His Body

    So in order for your horse to correctly be able to lengthen the stride, his body must be straight throughout the canter to begin with.  If his hind quarter tends to drift one way or the other, it stands to reason that the ‘propulsion’ will not be equal through the body.  This will leave him unable to create the energy required to truly lengthen the stride.

    Begin by working on straightness.  Having mirrors in the arena are a great help for this as they allow you to assess your horse is truly correct and straight through his body while working.  Or you can also ask someone on the ground or take some photographs or videos.  Take from both a head-on angle and directly from behind.  These are often the easiest angles to see if there is any tendency to carry the hindquarters a little more to the inside or outside.

    Keep in mind that your horse’s straightness is often very much in relation to your straightness in the saddle

    Make sure that you are symmetric through your body and carrying yourself equally on both sides.  Also assess any tendencies you might have to be a little stronger with one leg over the other.  Perhaps you are a little crooked through your hips, which will almost always affect the quality and straightness of the canter.

    Asking Your Horse to Lengthen the Stride in Canter

    Straightness Through Your Seat

    The reason that your balance and straightness are so important when cantering, and particularly when asking your horse to lengthen the stride, is that a lot of the ‘asking’ is with your seat.  When we canter, our seat moves with the horse in an almost circular, rolling motion.  Being able to identify this movement in your body and then adjust it as you want is key to making transitions up and down within the canter itself.

    It is often described as a ‘scoop’ action and I think this is a good description because a scoop comes ‘up’.  This up part of the movement is necessary to allow the energy to connect through your horse’s back from the hindquarters to the front end.

    Spend time working on isolating the particular muscles in your core that are responsible for this movement in your body.  Then begin experimenting with your horse how modifying the movement translates across to your horse in the canter

    Remain Consistent Through Upper Body

    Also make sure that you are able to follow with your pelvis and lower torso, while making sure your upper body remains balanced and as still as possible.  A lot of riders make the mistake of cantering with their shoulders and chest.

    Rather see your shoulders as being responsible for maintaining a consistent, following, and elastic contact with your elbows.  From here, work on establishing the same connection to your horse’s mouth.  

    This is pretty much impossible if your shoulders are shaking and twisting around in the saddle, while your pelvis is locked and stiff.

    Prepare the Transition

    So, now that we have a better understanding of what our horse actually does when he lengthens and of what we should be doing while it is happening, let’s look at setting the transition up.  When starting out first, it is often easier to lengthen after you have asked for a few shorter strides first.

    Using your half halt, begin rebalancing your horse in the canter.  Think about moving with him and following him in the canter, but also about how you want him to lengthen.  If he lengthens correctly, his hindquarters will come further underneath him, which will in turn, lighten his front end a little more.

    So rather than your horse becoming all strung out with a downward trajectory, think of your horse as an aeroplane.  This bum is low his front is higher.  Keep this in mind as you ask for the half halts and also as you ask him to lengthen.

    Asking for ‘Longer’ Strides

    Once your canter is established and your horse is listening to you, you can begin asking with your seat for a ‘longer’ movement each stride.  Keep in mind that your seat and hands are connected, so it is important to also allow for this ‘stretching’ with your contact as well.   This does not mean throwing the reins at your horse; consistent contact is essential.  Also, continue to use your leg with each stride, to ensure that energy is constantly being created behind to continue to push or propel your horse forward.

    Pay close attention to the tempo; rather than speed up, it should either remain consistent or actually slow down a little as your horse covers more ground – so has more time between each footfall – with the longer stride

    If the tempo speeds up, it usually signals that your horse has excess tension in his body.  Said differently, he is rather doing his best ‘pony’ impression than actually reaching for more length with each passing stride!

    An Inch is Longer…

    Also when you initially begin to lengthen think of each stride as reaching further than the last.  It takes quite a bit of development and strength on your horse’s part to lengthen his body while continuing to work forward with impulsion.  So rather than just pushing him faster, build each stride a few inches longer than the last.  As he becomes stronger and more responsive to your aids, you can ask for a longer stride from the start, but think of it as an initial ‘building blocks’.

    You may find that your horse can ‘hold’ this lengthened stride for only a few strides initially before he begins to lose the forwardness of the movement.  

    This is to be expected initially at this point, half halt again and begin to shorten the stride.  Often a small circle ridden in a working canter can help to rebalance your horse, but remember to maintain the straightness throughout both your bodies all the time.

    Lengthening and shortening of his strides in canter is a great suppling exercise to work into your schooling sessions and will help you to keep your horse fresh, responsive, and agile regardless of what your chosen discipline is.

    Happy Riding
    Lorna

    Connection for Equestrians

    Are you interested in the step by step instructions as to how to ride your horse correctly and influence the length of his canter stride? There are 5 audio horse riding programs dedicated to this topic (along with hundreds of other programs) inside of Connection. You can find out more about it by visiting https://stridesforsuccess.com/join/