Tag: core

  • Developing Steady Hands as You Ride Your Horse

    [fusebox_track_player url=”https://dts.podtrac.com/redirect.mp3/pdcn.co/e/traffic.libsyn.com/dailystridespodcast/1365-Steadying-Your-Hands-While-Riding.mp3″ title=”Steady Hands When You’re Riding” social_linkedin=”true” social_pinterest=”true” social_email=”true” ]

    Do your hands sometimes seem like they develop a mind of their own when you’re riding?  You tell them to stay quiet, steady, and soft…  But they just seem committed to waving about. In fact, they feel miles away from being the ‘steady hands’ that you want as a rider!

    Trust me, you’re not alone! Steady hands are a sore spot for so many riders, with the added frustration of as soon as you recognise it as a problem, it can often get worse before it gets better!  Today we’re going to unpack how to begin developing steady hands that are more consistent and will improve communication with your horse.

    Why Steady Hands Matter

    Having steady hands isn’t about your hands being ‘fixed’ or ‘rigid’. Far from it actually. Steady hands is all about creating a consistent, gentle connection between you and your horse. It improves your horse’s trust in your contact and makes your aids clearer – and kinder.

    Ironically, the harder we try to force our hands to stay still, the more exaggerated their movements often become. It’s like being aware of them makes them become even more animated! 

    So let’s dive into practical ways to address this issue once and for all…

    What’s Really Happening?

    Before fixing a problem, you need to know exactly what’s causing it. There are generally two big reasons your hands may move too much. The first is that you’re actually moving your hands! I know, you might think ‘No Way!’, but it’s true! Especially if you’re always fiddling with and shortening/lengthening your reins.

    If your reins keep slipping so that you have to keep shortening them, you’re probably holding your reins wrong. Get that issue sorted first… Then move on from there :)

    The other way your hands can be moving about is far more unintentional.  It often comes down to you relying far too much on your hands for balance or support. This really shows up in trot, canter, turns, and bends. It can also show up as you post to the trot.

    Get Clear on Your Hands First

    Grab a whip or stick and hold your reins normally, thumbs on top. Lift your thumbs slightly and lay the whip horizontally across your fingers, then gently clamp your thumbs back down to hold it in place. As you ride, glance down occasionally to check if your whip remains ‘still’ or is it moving about all over the place! You will also be able to quickly see if you’re tilting or dropping one hand using this method as well.

    The other way to assess what your hands are doing is to film yourself riding with this setup. Bonus points if you wear bright white gloves! This makes your hand movements glaringly obvious, helping you clearly see what’s going on.

    Identifying the Root Cause

    So, if you’ve looked back over the videos and seen your hands merrily dancing all over the place, you need to find out why that is happening! Ask yourself: Is this simply a habit? Or is something deeper affecting your balance and stability?

    Often, unsteady hands signal balance and position problems. For example, riders frequently use their hands to balance, similar to how you’d extend your arms if you were walking on a narrow plank.

    Another thing to keep in mind is how incorrect posting to the trot can also be causing your issues. If you’re pulling yourself up, instead of using your core to rise ‘forward’, you will see hard, moving hands. If you see this as an issue, keep in mind that you were probably told to go ‘up-down’ when you initially learned to post.

    Also keep in mind that improving your core strength, along with correct posting techniques, will often help resolve this issue. 

    Practical Solutions to Steady Hands

    1. Relax and Check Your Elbows

    Believe it or not, your elbows play a huge role in hand stability. Some riders lock their elbows straight, causing their hands to bounce. If you see from your video that you’re doing that, rather gently let your elbows drape softly by your side.  Naturally bent and relaxed as though you were carrying two cups of tea.

    And just like if you were carrying cups of tea while walking, your elbows gently absorb the horse’s movement while riding. This helps to keep create steady hands that are soft and connected. 

    2. Strengthen Your Core

    Core strength is crucial for horse riding and creating steady hands!  If your core is weak, you will be far more likely to rely on your hands for balance. You probably know if this is an issue for you… You know, those ‘wobbly’ feelings that come up when you trot without stirrups, bend or circle in trot or canter, etc.

    Begin incorporating simple exercises into your daily routine, like planks, balance ball workouts, and the Equestrian Fitness Challenge (FREE HERE). These off-horse exercises help build core strength and stability, which will result in steadier hands for you in the saddle.

    3. Connect Your Seat to Your Hands

    Your seat and hands should work together seamlessly, with your hands following the subtle movements of your seat – not the other way around. Unfortunately, a lot of riders depend too much on their hands, so they end up leading the seat!

    If you are a little too ‘handy’ when riding, consider lunge lessons where someone else lunges you on your horse. They can direct your horse, which will allow you to focus on you :)

    If lunging with a helper isn’t possible, create a small, safe area to practice riding without reins at walk and trot, helping you strengthen your seat and core without relying on your hands for balance.

    4. Off-Horse Exercises for Better Stability

    There’s so much you can do out of the saddle to improve your riding. Get yourself a large exercise or Pilates ball and use it to improve your balance and hand steadiness.  Plus, it’s so much fun as well! Sit on the ball, create makeshift reins (or use your own reins fixed to something sturdy), and practice posting, sitting trot, and even canter motions.

    This type of exercise and practice will help your body develop muscle memory, enabling better coordination between your seat and hands when you’re back on your horse.

    Important Reminders as You Improve

    When you begin down the path to create steady hands in the saddle, be prepared for it sometimes getting worse before it gets better! It can feel that initially focusing intensely on your hands can cause tension, making your movements temporarily stiffer and more exaggerated. Don’t worry – this is completely normal! The key is to remain patient and consistent. Steady improvement will follow.

    Instead of aiming for absolute stillness (which isn’t realistic or helpful), aim for “steady” hands. Hands that softly and smoothly follow your horse’s movements, maintaining gentle contact without rigidity.

    Take Regular Videos

    Make video analysis a regular part of your practice. The visual feedback helps you notice subtle improvements and identify lingering issues. Wearing white gloves or using the whip technique periodically is also a great way to gauge your progress.

    Bringing it All Together

    At the end of the day, creating steady hands is not an overnight thing. It will require a combination of awareness, targeted practice, patience, and consistency, both in and out of the saddle. Strengthening your core, stabilizing your seat, and keeping relaxed, flexible elbows will lead you toward more stable, soft hands that genuinely improve communication with your horse.

    Remember, because your hands are at the ends of your arms (like your feet at the end of your legs) they often are a telltale sign of movement and tension happening in other areas of your body. 

    Want extra support? Join me over at ReturningtoRiding.com. Get on the waitlist to start mastering the basics and build your riding confidence.

    Happy riding
    Lorna

    More on This Topic:-

    Online Training to Help Your Riding

    Connect with Lorna online:-

  • Developing Independent Aids in Your Riding

    Developing Independent Aids in Your Riding

    [fusebox_track_player url=”https://op3.dev/e/traffic.libsyn.com/dailystridespodcast/1321_Developing_Independent_Aids_in_Your_Riding.mp3″ title=”Developing Your Independent Aids in Your Riding” social_linkedin=”true” social_pinterest=”true” social_email=”true” ]
    Ask any rider what they want to make happen when it comes to their riding aids and, hopefully, creating truly independent aids will be high up there on that list.  Because, let’s face it, your aids can only be as clear and useful in direct relation to how independent they are. But saying you want independent aids and working towards developing independent aids are two very different things.
    Especially when, as a whole, your aids are almost always used in conjunction with each other – not independently on their own…
    And yet, for each aid to become a useful member of your team of aids, I believe that you should first isolate each one and develop it intentionally and individually. Having one ‘strong’ independent aid when the rest are flapping about won’t be enough to create clear conversations with your horse.
    Each aid must be strengthened in its own right and then be allowed to contribute to the overall team effort.

    Intentionally Isolating Your Aids

    How well can you use your left leg without moving your right leg at the same time? Or for you, perhaps it’s your inside hand that, when actively engaged in communicating with your horse, causes an involuntary movement from your inside leg?
    When we can’t easily move one body part without unconsciously moving another, there is no way that our aids can be truly classed as independent.
    And yet, this can be quite a challenge for most riders initially – until they begin developing each aid in its own right and then putting them together. I prefer starting riders off with their more obvious aids first.  Their hands and legs. I bring their attention to previously unconscious and unintentional linked movements between these aids.  And whether you are just getting started on your riding journey, or you’ve been at this for a while, it can be eyeopening once these related movements – and their overall influence on the horse – are pointed out.

    Obvious Versus Subtle Aids

    As a rider, your aids can be loosely grouped into two different categories.  Subtle and Obvious.  As mentioned, your obvious aids are the ones that anyone can see and pick up on if they were watching you ride.  Bigger movements happening in your limbs are the obvious ones.  But so could your voice and position if not carefully applied.
    Your ‘obvious aids’ are usually the ones you rely on most when starting your riding journey.  So it makes sense that you work on creating independence in them first as a rider.
    Your subtle aids will then, over time, begin to take on a bigger role in your and your horse’s communication and conversation. These have more to do with your weight, your seat, and your thoughts. The things that are not as easily picked up on by an observer or cannot be seen at all.
    Your subtle aids will create the secret conversation between you and your horse and require true, independent aids to make a reality.

    Start with Obvious Aids First

    Next time you’re in the saddle, ask your horse to walk a 15m circle in the walk.  Spend a few strides making sure that you are in the correct position up there in the saddle.  Check your lines (‘head shoulder hip heel’ line and also the ‘elbow, wrist, thumb, rein, bit’ line).
    Then check that you have your obvious aids in the right place to create a channel or flow for your horse’s body and energy. 
    When on that circle, use your aids to ask for appropriate bend and flexion through your horse’s body while asking your horse to continue to move forward.  So, for example, your outside leg will be slightly behind or further back than your inside leg.
    Once you are correctly positioned, begin experimenting with using a single aid without it having an effect on your other aids. 
    Can you slide (or swing) your outside leg back without moving your hands or tilting/twisting your upper body?  What about gently squeezing the outside rein without lifting or gripping with your inside leg?  Or are you able to ask for ‘over’ using your inside leg without shoving with your seat?  How about asking for a canter using your legs and seat without tipping forward through your upper body?

    Then Work on Subtle Aids

    Why? This question runs through most riders’ heads when they are told to wait before developing their more subtle aids.  And I get it… The subtle ones are the ‘fancy’ ones. They are the aids that everyone speaks about. So why the wait?  Diving into developing independent ‘subtle aids is a complete waste of your time until those more obvious ones are under your control!
    The rest of your body must first learn to be ‘quiet’ in the saddle, so that your horse can really ‘hear’ your more subtle aids, such as your seat, weight aids, breath, etc. 
    You can of course begin training yourself to be in the best position to use these aids from Day 1 in your riding. So ensure that your seat, position, and posture are good. But to truly be fair to your horse, it’s best to have everything else under control and like I said, quiet.

    Your Independent Aids

    My final piece of advice for you developing your independent aids is to develop your physical fitness… And not just in the saddle.  When you are fitter and have more stamina, you will naturally have more control over your body.  And I find that when riders take the time and work on this OUT OF THE SADDLE, it really benefits them in the saddle.
    When you gain more control over your own body, and then understand your aids, you will naturally increase your ability to communicate effectively with your horse…
    And this is why I am rebooting the Equestrian Fitness Challenge for 2024.  Make sure you are on the list to get this year’s brand new challenge sent straight to your inbox by signing up HERE. This year we are focusing on walking… Yep, walking and expanding our knowledge, enthusiasm, and confidence in our abilities as a rider.
    Visit https://equestrianfitnesschallenge.com/24 to get the brand-new challenge!
    Happy Riding
    Lorna

    Equestrian Fitness Challenge ’24

    Let’s walk together for 21 days and have a chat about how you can do much more than you think you can as a rider and an equestrian… I am so excited to bring you along on this journey for the 100% FREE 2024 Equestrian Fitness Challenge
    There will be a daily walk, a 10 minute daily yoga practice, and lots of tips, ideas, exercises, and ways to improve so that you can show up as the best version of you – for you and your horse.
    Sign up today and let’s transform your riding – one stride at a time! 100% FREE 2024 Equestrian Fitness Challenge
    Have a super day
    Happy Riding
    Lorna

    Resources for Riders:-

    Connect with Lorna online:-

    Get Going in Your Riding:-

    Daily Strides Premium is back! You can use the first and original audio horse riding lessons to improve your riding, train your horse, keep things interesting, and have fun… Even if you don’t have a trainer or coach

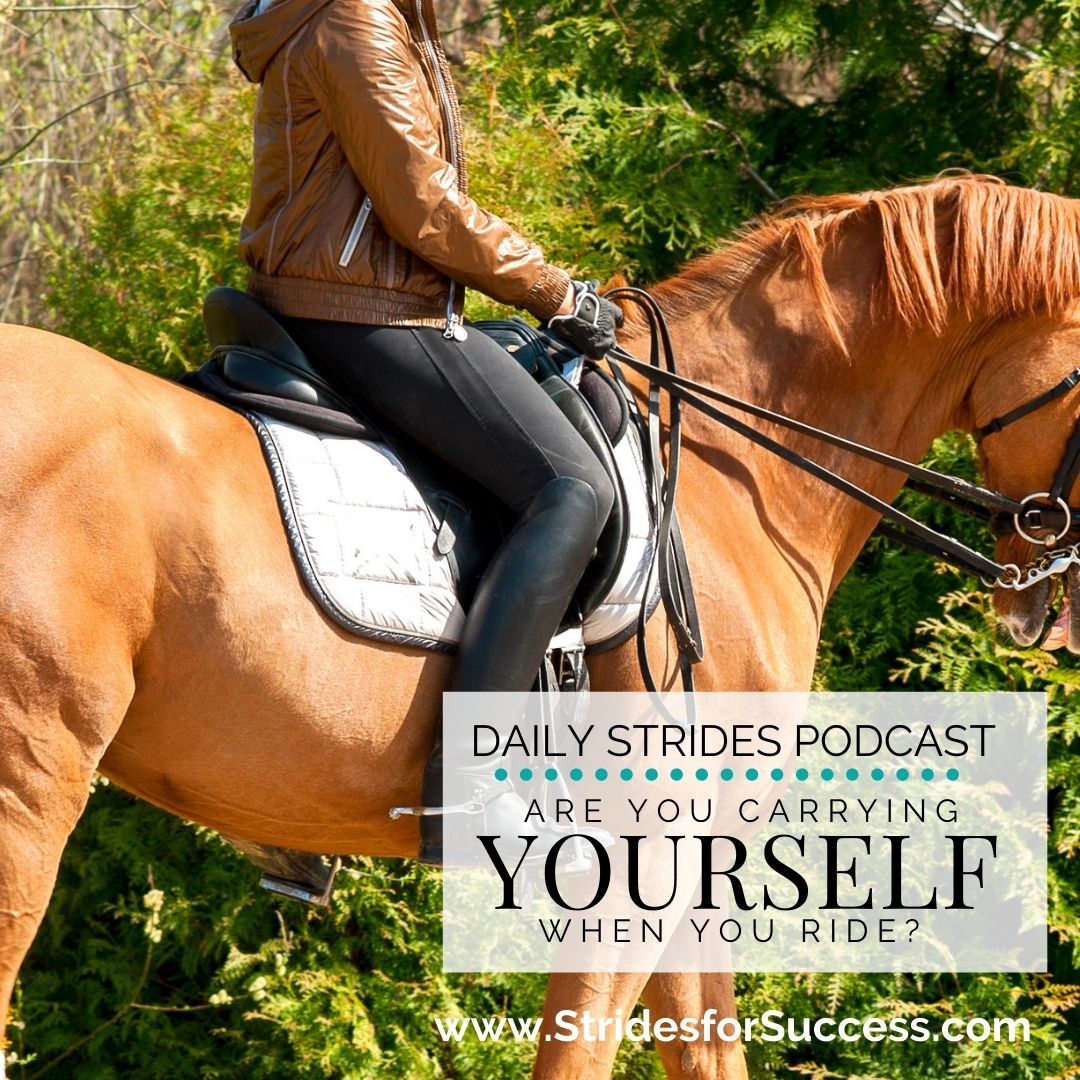
  • Are you Working on Your Self-Carriage When You Ride?

    Are you Working on Your Self-Carriage When You Ride?

    [fusebox_track_player url=”https://op3.dev/e/traffic.libsyn.com/secure/dailystridespodcast/1193_Are_You_Working_on_Your_Self_Carriage_When_You_Ride.mp3″ title=”Are You Working on Your Self Carriage when You Ride?” social_linkedin=”true” social_pinterest=”true” social_email=”true” tweet_text=”Self carriage is not just for your horse…” hashtag=”horseriding” twitter_username=”strides_success” ]

    Self-carriage is a pretty big topic when it comes to riding and riders in general. And it should be. It is an important aspect when it comes to training moving in the right direction. However – you knew there was a ‘however’ coming, right?!

    Often we put the cart before the horse when it comes to self-carriage in riding. We focus on the horse’s self-carriage – or lack thereof. When, in reality, we should first focus on the rider’s ability to correctly carry themselves first.

    Creating Space

    The reason this is true is pretty obvious when you actually spend time looking at horses and their riders. In order for the horse to truly begin to embrace the concept of self-carriage in their training, there must be space available for them to move into.

    In order for this to occur there needs to the necessary strength and engagement through the core of the body. And it is this ‘core engagement’ that is so often missing as riders work and train in the saddle with their horse.

    Think Standing Not Sitting

    One of the most simple ways to begin ‘testing’ this in your riding is to become aware. If you were to stand the arena, no horse underneath us, your core must engage. I say must, because if not, you will fall over. I say this because so many riders use ‘lack of core’ as an excuse for poor performance in the saddle.

    The simple truth of the matter is that if you walked unaided to your horse to mount up, your basic core is pretty sufficient to begin carrying yourself in the saddle when you ride.

    This brings me to the awareness of how it feels to ‘stand’ on your own two feet. This ‘standing’ feeling is different from when most people sit. Sitting encourages slouching and complete relaxation of the core muscles. This is what most riders do when they ‘sit’ in the saddle.

    Next time you ride, even though you are technically ‘sitting’, engage your core as you would if you were standing. This is where self-carriage as a rider begins.

    Carrying Your Hands

    The next piece is often an unhelpful habit than anything else. Riders, whether due to initial nerves or just not knowing, begin riding with their hands low. Too low. Dropping your hands’ changes how your hands feel and connect to the reins. It changes the tension levels that are communicated through the reins.

    If you are unsure as to whether or not you’re carrying your hands apply the ‘line’ rule. There should be a straight line from your elbow, through to your hand, through the rein, and connecting with your horse’s mouth. Any deviation from that line will result in muddled communication between horse and rider.

    When you carry your hands as you ride, you will naturally open your chest. Which will then encourage you to carry your upper body. Engage your core. And, begin riding in self-carriage.

    Developing Your Self-Carriage as a Rider

    So once you can identify if you are currently carrying yourself while you ride, I feel that it is then important to begin developing this to improve. As you learn and practice self-carriage, you naturally encourage it more in your horse. This is often why more experienced riders get a better ‘tune’ out of a horse than less developed riders.

    One of the easiest ways to improve your self-carriage is to focus on developing your suppleness in the saddle while maintaining a correct position.

    Any feelings of limitations that show up physically will be indicators to go deeper in that area. Many riders feel this, particularly while trying to ride the sitting trot and canter. The bouncing indicates you are not moving with, but rather against the horse.

    Unfortunately, these are also the areas riders often look for a way out. A shortcut. Buckling and hunkering down, rather than ‘sitting’ tall, engaging, and allowing the flow to come through your body.

    Working Off the Horse as Well

    There are also plenty of programs created for riders while on the ground to help improve these areas. Challenges, workouts, cross-training, yoga, pilates, and so many more different options you can look into.

    However, I really do feel that the key to improving your own self-carriage is to get really focused on what you are doing while ON your horse.

    Carry yourself. Allow the swing. And then see where it goes from there…

    Happy Riding
    Lorna

    Additional Links to Help You:-

  • Fixing Your Position for Less ‘Bump’ When Riding Over Groundpoles

    Fixing Your Position for Less ‘Bump’ When Riding Over Groundpoles

    [fusebox_track_player url=”https://op3.dev/e/traffic.libsyn.com/secure/dailystridespodcast/1187.Taking_The_BUMP_Out_Of_Riding_Over_Groundpoles.mp3″ title=”Fixing Your Position for Less ‘Bump’ When Horse Riding Over Groundpoles” social_linkedin=”true” social_pinterest=”true” social_email=”true” ]

    It can feel bumpy, right? A little more space than what you’re used to feeling. And, if there are two or more poles, well, it can all get a little unbalanced! For you and your horse.

    I preach all the time about the benefits of groundpoles when used correctly. And, one of those benefits comes from riders learning what to do when navigating them.

    Groundpoles are, well, Poles!

    One of the first issues riders come up against when working over groundpoles is that they treat them like they’re not there. They are. And all of the bumpy, unbalanced, sometimes discomfort, you are feeling when you ride over them is evidence of that! Expecting to initially ride over groundpoles and not do a thing differently is simply setting both you and your horse up for an uncomfortable experience.

    As your horse steps over the pole, he will use his body differently.

    He has to lift his legs higher. Yes, 4 to 5 inches is still higher. He will also have to step under himself a little more to propel himself forward. This is especially true if there are two or more poles for him to navigate. He will engage his core. A little like ’tightening up his tummy’ as he moves over them. And he will stretch down and forward with his head and neck to see what he is doing, to balance, and to allow the freedom of movement the rest of his body needs.

    All of the above is one of the reasons groundpoles are so beneficial for your horse, regardless of discipline or training level.

    Who Are You Relying On?

    The biggest challenge riders face when moving over the poles is that they are relying on their horse for balance and support. And while, generally speaking, this may be acceptable for the first few rides in the saddle, every rider must begin taking responsibility for their own support as early as possible in their riding.

    Simply put, it means that you begin to carry yourself and are aware of your body as you ride.

    When you and your horse are moving in a straight line on a flat piece of ground, this can feel relatively simple and easy. However, as soon as we begin to include bends, circles, and corners into the equation, more demands are made of the rider’s independent seat in the saddle. Which is good. This is the progress we make as riders.

    Learning to ride over poles while maintaining balance and self-support is the next step to really developing an independent seat as a rider.

    The key is to position yourself in a place that allows your horse to do what it is you asked him to do AND allows you to remain balanced and ready to use your aids if and when needed.

    Weight Into the Heels

    Heels down is a concept we are all familiar with as riders. It is the thing (along with ‘sit up’) that we probably heard most in our first few months of riding. And for good reason. Being able to weight your heels is literally the key to the kingdom when it comes to riding horses. That is a big statement, however, it is true.

    When your weight is into your heels, you are in charge of your own support. You are standing on your own two feet (even though you might be sitting!).

    When you begin working over groundpoles, start with this. Push the weight into your heels. I use the word ‘push’ because, initially, it will feel like that. It will feel forced. After all, who walks around all day long with their heels pushed down?!

    When you are preparing to ride groundpoles, let the first thing you do be to make sure your weight is flowing towards your heels…

    Standing on Your Own Two Feet

    Now, you don’t always need to stand to have your weight into your heels. However, when you’re initially learning to travel over groundpoles, it is the most comfortable way for both you and your horse. But it is not standing as we would do it while dismounted.

    As your backside rises out of the saddle, think ‘back’. Literally, reverse your bum so that while you are moving it up out of the saddle, you are also moving it backward. Closer to your horse’s tail.

    Up and back. When you first do it, it will feel a little odd. But, when coupled with your heels down, you will instantly feel more balanced in the saddle. It’s a little like a squat, but on horseback. When you squat, your bum moves backward. When you are getting ready to ride over groundpoles, I suggest your bum do the same ;)

    Also, remember the first, key piece to all of this; as you stand up, ‘stand on your heels’.

    So many riders will shift their weight at this point to the ball of their foot and try to stand on the stirrup irons. This is the equivalent of squatting while on your tippy-toes. Not very balanced. Focus on keeping the weight into the heel as you move your rear end up and back.

    Counter Balance with Your Upper Body

    As you move your bum up and back, while standing on your heels, you will feel that your upper body will naturally fold down. This is correct and it will help you to maintain balance. Again, think of the squat. Instead of your back being vertical, your shoulders move in front of the vertical.

    It is at this point that many riders will look for the easy way out; they ‘lie’ on their horse’s neck.

    This is incorrect for a few reasons. It prevents your horse from moving as you have asked him to and it stops you from supporting yourself. And yet, it feels so easy! Especially if you are using your horse’s mane or a neckstrap for a little extra support…

    Your upper body can only balance out your lower body if you engage your core and carry yourself.

    This means keeping your back straight and keeping a lot of daylight between your chest and your horse’s neck! Think of not going below a 45-degree angle from your hips to your shoulders. The less ‘down’ you go, the easier it is for you to maintain your own balance and support.

    Also, focus on keeping your chest ‘open’ and wide. Imagine how it feels when you take a deep breath and let your chest remain open as you ride over the poles.

    Following with Your Hands

    As your horse moves over the poles, he will stretch his head and neck down and forward. If you are balancing with your reins, you make this uncomfortable and, sometimes even, impossible for him to do. Blocking this movement over long periods of time will result in hollowness in your horse.

    We often only think of our hands when it comes to the reins. However, when you follow here, I want you to think about your shoulders. Allowing through them in order to give your horse the space to move his.

    The simplest way to think of this is to just follow your horse’s mouth. Where it goes, allow your hands to follow a little.

    If you are struggling with balance, you can also grab a piece of mane. Just make sure that you have moved your hands forward a little first; about a third of the way between the withers and the poll is usually a good rule of thumb to follow. I also think that most horses would prefer a tug on their mane to a stab on their mouth when a rider is trying to rebalance!

    Your Head and Symmetry

    The final piece is your head. Again, think back to advice you probably received in your early lessons on a horse. “Look where you’re going”. Good advice, heed it! Remember to keep your head up and looking forwards. Looking down as you travel over the poles is an easy habit to fall into and one that can be difficult to break.

    Look up and think about riding your line as you ride towards, over, and after the groundpoles.

    Also, use your head as a warning signal for the rest of your body. Your chin should remain centered over your horse as you travel over the poles. Not more to the left or the right. If you do realize that it is slightly more to the left or right, the issue is probably to do with your body rather than your head.

    By keeping your head centered over your horse, you can remind yourself to keep your body equally positioned as well.

    Practice Makes Perfect

    I would suggest first practicing all of the above in a walk while on the flat with your horse. You can even begin at a halt if there are too many moving parts in the walk. From there, work in trot a little. Again, while on the flat. No poles.

    Working on moving in and out of the light seat without losing balance or jabbing your horse. It should be a soft, fluid motion.

    And only do as much as you need to do in order to remain balanced and give your horse the space he needs to work over the poles unhindered by you in the saddle.

    Happy Riding
    Lorna

    Other Useful Bits & Bobs to Help Your Riding

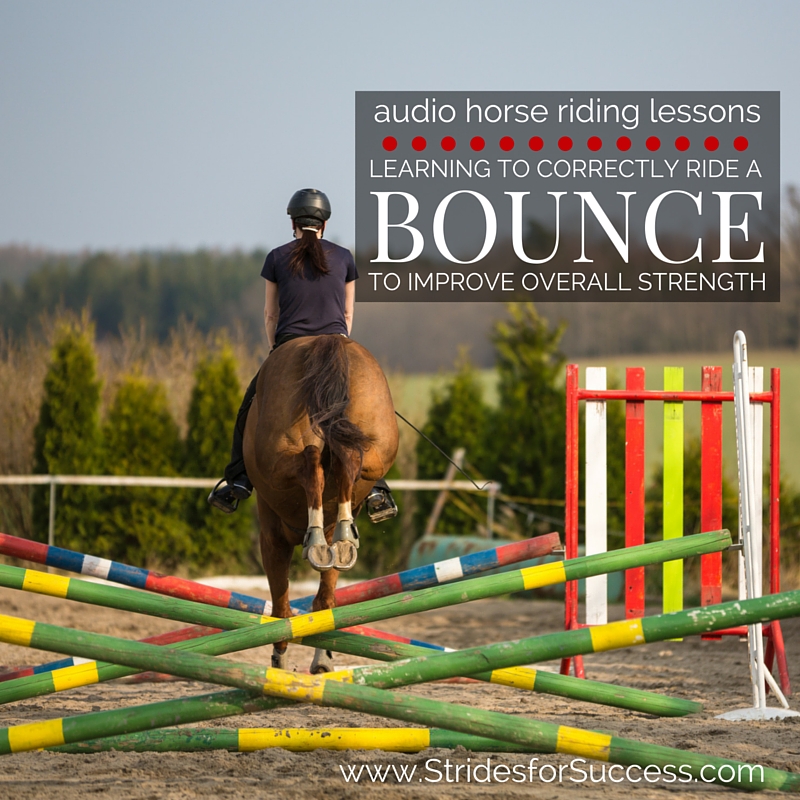
  • Riding a Bounce to Improve Overall Strength

    Riding a Bounce to Improve Overall Strength

    Have you ever experienced popping over a jump with your horse, when he suddenly realises he needs a little ‘more’ if he is going to clear the jump?  He stretches, or pushes, a little farther than you expected and suddenly you find yourself very much behind the movement and bracing for the inevitable ‘thud’ that your backside connecting with the saddle will create on landing!

    Or perhaps your horse has a frustrating habit of hanging a hoof here and there over fences, which leads to poles on the floor and a less ribbons than you would like hanging on your wall!

    [smart_track_player url=”https://op3.dev/e/traffic.libsyn.com/dailystridespodcast/601-Correctly-Riding-a-Bounce-to-Improve-Overall-Strength.mp3″ title=”Riding a Bounce to Improve Overall Strenght” social_linkedin=”true” social_pinterest=”true” social_email=”true” tweet_text=”Do you include bounces in your pole work with your horse? Here’s how to get started…” hashtag=”equestrian #jumping” twitter_username=”Strides_success” ]

    Developing both you and your horse’s physical strength is essential for successful, safe and injury free jumping.  But doing so without ‘jumping the legs off’ your horse is often a challenge for many riders.  This is where incorporating a simple bounce or two into your schooling, initially as ground poles and later as actual jumping obstacles, can help you both become stronger and more in control of your body over jumps and fences.

    For many riders, the thoughts of riding a horse into a bounce is a daunting one.  However, it need not be and in fact, will help you not only become stronger, but also give you a greater understanding of how your horse uses his body both before, during and after a fence, and how you must move to stay in sync with him throughout the effort

    A bounce, simply put, is when a horse lands from one jump (or canter stride) and as he touches down, immediately takes off again over a second jump or ground pole.  There are no ‘non jumping strides’ between the two obstacles; the front feet will touch down and then as the back feet near landing, the front feet will pick up again to jump the second jump.

    Successfully navigating a bounce requires quite a bit of athleticism from your horse, as well as quick thinking.  They are a super way of teaching horses to ‘snap up’ their front legs and also, to use their hind quarters over a fence and on landing to propel them forward again.

    Learning to Correctly Ride a Bounce to Improve Overall Strength

    For the rider, the bounce requires balance and micro adjustments throughout the body in order to stay with the horse, poised over the saddle, rather than getting too far ahead of the movement, or being left behind.

    It also helps riders to react quicker to what is happening underneath them as the horse is continually having to shift the weight between back and front throughout the sequence

    Riding through a grid containing more than one bounce also requires the rider to understand impulsion and how the horse’s energy must be controlled.  If the horse is ‘chased’ through the fences, he will not have time to make the necessary adjustments to successfully clear the obstacles.  Similarly, if the riders fails to create enough impulsion or energy, the horse will be unable to make it through the line without having poles down along the way.

    Before you begin introducing your horse to a bounce, it is important that he is confident jumping both individual fences and also related fences, such as doubles with one or two non jumping strides in between.  The rider must also be able to stay with the horse over fences and have a secure and balanced jumping position when jumping related distances.

    Start by placing a single pole on the ground and cantering over it.  Feel how your horse moves over the pole, and also, how you remain balanced, while getting off his back, as he canters over the pole.  Once you are both comfortable with this, you can then add a second pole between 3m and 3.7m or 10′ and 12′ away from the first.  Canter your horse over the poles and make adjustments to the distance as necessary.

    Work over the poles on both reins, approaching from different directions.  Working over the bounce when still only ground poles is a great way to test your horse’s rhythm and balance.

    See if you can maintain a consistent rhythm before, during and after the poles

    This is also a great opportunity to see how well you can follow your horse before increasing the difficulty.  I suggest keeping the weight dropped into your heels, your back straight, your shoulders open across your chest and your seat moving with your horse and ‘hovering’ when actually moving over the poles, in a light seat.  You can also use this exercise to assess your hands and shoulders.  Are they ‘following’ your horse’s mouth, continuing to maintain a consistent contact with your horse at all times?

    It is tempting to try avoid landing heavily on your horse’s back, or catching him in the mouth by ‘over preparing’ yourself for the jump.   Over preparing will result in you getting into your jumping position too early, and will see you leaning on your horse’s neck and shoulders for support.  Use your practice over the ground poles in order work on this, rather than when there are actual jumps involved, as it will make it much more difficult for your horse to lift his shoulders and perform a clean jumping effort.

    Remember to wait for your horse to begin over the pole, and then follow his lead

    Also notice how centered your horse is over the poles.  Later, when you are both comfortable popping through the bounce, you can begin to build cross poles, which will help keep your horse centered through the line.   But for now, notice if there is a tendency to drift one way or the other.

    Keep in mind that your horse is always influenced by your position in the saddle, so make sure you are riding in a balanced way through the line yourself

    It is common for riders to ‘duck’ one side or the other of the horse’s neck over fences…  Not a good habit to cultivate, so if it is there, nip it in the bud now!  Think about keeping your chin centered over your horse’s neck or mane as you move with your horse through the bounce.

    Once you are both comfortable riding through a single bounce of ground poles, you can begin to add more poles to the line.   Continue to assess the distance and adjust it to suit your horse’s comfort levels.  Later, as you both become stronger, you can then begin asking more difficult questions of your horse by asking him to adjust to set distances, but to begin with, build his confidence levels by building the lines for him and his preferred lengths.

    You then begin to build actual jumps where the poles are.  Depending on the height of the jumps, you may have to adjust the distances again for your horse, and always move through the line from both directions to help keep your horse fresh.

    Keep in mind that riding a bounce takes concentration and strength from your horse; therefore riding a line of bounces is quite taxing.  Don’t over do it, rather work through it and then leave it for a while, to return later when your horse is fresher.  Working your horse through this when he is tired, either physically or mentally, will only lead to mistakes and injuries.

    Happy Riding
    Lorna

    If you are interested in finding out more about bounces and how they can help you and your horse, perhaps the four other audio horse riding programs about this topic can help you. You can get theses, and hundreds more lessons, in Daily Strides Premium.  You can find out more by visiting https://stridesforsuccess.com/join/.

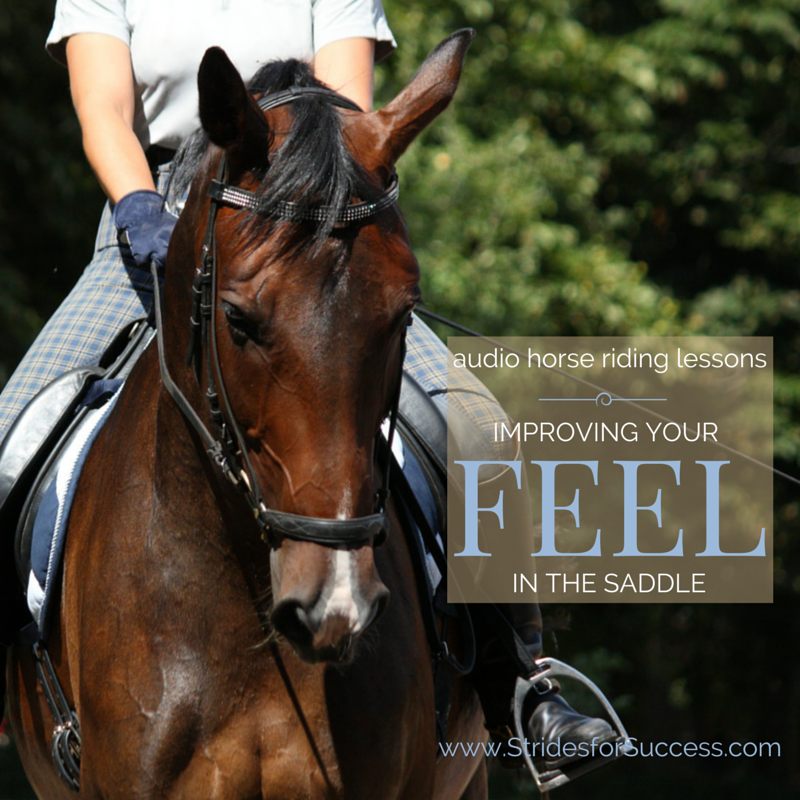
  • Improving Your Feel in the Saddle

    Improving Your Feel in the Saddle

    Developing Your Feel in the SAddle

    [fusebox_track_player url=”https://op3.dev/e/traffic.libsyn.com/dailystridespodcast/SFA376-Improving-Your-Feel-In-The-Saddle.mp3″ title=”Developing Feel in the Saddle” social_linkedin=”true” social_pinterest=”true” social_email=”true” ]

    Feel…  A hugely important component of successful horsemanship and something that is often considered as a talent that you are either gifted at birth with or your not!

    From years spent helping and watching people ride, I do agree that some people seem to have a more natural feel than others. However, I have also found that, often, riders who seemingly lack natural feel can learn it. They can develop it with consistent effort and diligence.

    What Is Feel?

    So what is feel?  My explanation of feel is the ability to know the right time to ask a question of your horse without having to consciously think about it.  It is also the skill of reacting correctly, in a timely fashion, to almost all situations without, again, having to think too long or hard about it.

    True feel is not a conscious thought, rather a subconscious response to the present situation to affect the outcome you want.

    However, often the frustration felt while trying to find your ‘feel’, is the very thing that will prevent you from developing your riding skills and mastering your body. This prevents you from getting in tune with your horse and dancing the same dance.

    Warm Up Before Riding

    Firstly, before you hop into the saddle, invest some time warming up your body.  This will ensure that you are just as ready to work as your horse is.  I think as riders we can definitely improve our own personal performance in the saddle if we invest even a quarter amount of the time and dedication we spend on warming up our horses, warming up our own bodies!

    Some initial simple stretches & exercises can be a huge game-changer when you do then mount up.

    Correct Your Position & Posture

    When in the saddle, begin by engaging your core. Then make sure your shoulders, pelvis, and legs are aligned as they should be.  More times than not, a locked pelvis or hip joint is what works against you developing your natural feel as a rider.

    Pay attention that your legs are not too far back, leaving you sitting on your crotch. Also that you are not squeezing or pinching with your thighs or legs which stops you from releasing your knee.  Allow your legs to hang. Then look at ‘wrapping’ them around your horse, keeping your knee off so your legs do not ‘stick out’.

    Relaxation is, as always, of the utmost importance in order for you to be receptive to the horse & his movement.  Excess tension in either you or the horse will stop most of the feel between horse & rider. And stop you from absorbing the movement as it happens.

    It is also important to remember that your horse must be allowed to move forward. When he does you,as the rider, should follow your horse. Make adjustments based on what you are feeling, when, and with each body part.  Only when you, the rider, can truly feel the horse underneath you can you then actively begin to make adjustments based on what is happening, or what you desire to happen.

    Developing Your Feel in the SAddle

    Increase Your Awareness

    You need to become aware of your horse and be sensitive to their every movement.  I suggest taking things back to walk. Then, with your feet out of your stirrups, allowing your legs to drape over your horse’s sides. From here,  begin counting each footfall in each stride your horse takes.

    Begin to notice which hoof is the 1, which is the 2, the  3 and the 4 of each stride.

    Once you can accurately tell which hoof is moving when in the sequence, begin paying attention to your body. Notice how your horse’s moving is affecting & influencing your movement. If you are in a safe, enclosed space with a horse you trust, you can even close your eyes. This will help you to block out other distractions and really allow you to feel what is going on underneath you. So, as your horse is walking, first begin to feel the rhythm of the walk, the 1, 2, 3, 4…

    Notice The Hind Legs Moving

    Once this is established, begin focusing on which of the beats is your horse’s inside back leg moving forward (before) he puts his hoof on the ground.  Your left hip (on that same side) will dip down as his leg lifts off the ground to move forward underneath you both.

    This is because his barrel will swing out to the opposite side to make room for the leg coming under him.  Often this is an easy way to remember this…

    Concentrate and focus on the movement, rhythm, and beat.  If necessary, have a person on the ground first tell you when this is happening.  Then notice and remember how your body reacts to this movement.   If you are not fortunate enough to have a reliable person on the ground and you are still struggling to feel, it often helps if you place your hands on your upper thighs and feel which thigh goes up and down, and when.

    Only through correct repetition of this exercise in a calm, relaxed manner will you begin to enhance your powers to feel what is happening and from there, begin to move with your horse as a real team.

    Happy Riding
    Lorna

    This topic is just one that we regularly cover inside of Connection. If you are interested in finding out more about Connection, have a look HERE >>

    Additional Resources for Equestrians