Author: Lorna Leeson

  • Increasing Your Horses General Responsiveness

    Increasing Your Horses General Responsiveness

    Are your horse’s response times a little dismal?  Do find yourself asking… and then waiting… and maybe asking again…  and maybe, just maybe, on the fourth or fifth request you are lucky enough to get a response?!  Responsiveness is the factor which can make all the difference with you and your horse when working together.

    Riding is a little like day-to-day life in this regard; a quick response to something will often set the tone for how the relationship will proceed from that point.  Slow or non-existent response times lead to frustration, hold ups, loss of attention and energy.  They leave an overall bad taste in your mouth.

    [smart_track_player url=”https://op3.dev/e/traffic.libsyn.com/dailystridespodcast/706-Increasing-Your-Horses-General-Responsiveness.mp3″ title=”Increasing Your Horses General Responsiveness” social_linkedin=”true” social_pinterest=”true” social_email=”true” tweet_text=”Increasing Your Horses General Responsiveness” hashtag=”horseriding #equestrian #aids” twitter_username=”strides_success” ]

    Riding a horse who is less than responsive to your aids is a frustrating place to be.  It results in the quality of the overall ride or performance to deteriorate. Accuracy, energy, balance, rhythm, transitions, straightness and just plain old enjoyment all diminish when your horse seemingly ignores you.

    Many riders will also notice that their progress stagnates; after all it becomes rather difficult to improve things when the basics are missing to begin with.

    But before we get into how you can begin ‘fixing’ your horses responsiveness, it is first important to figure out why your horse is indeed ignoring you.

    Many riders believe that horses who lack good responsiveness are lazy, unwilling and perhaps a little too laid back.  This can be true in certain situations, however, it is my experience that many horses are rather trained to ignore their riders. 

    This ‘training’ is usually unintentional, but it happens none the less.  When we speak about riding, it is good to remember that horses only learn what we teach them.  We teach what we do repeatedly or consistently… If you are doing the wrong things consistently in the saddle, your horse will begin to think that is the correct way of doing things.  I know, a bitter pill to swallow for many riders!

    Focus on ‘how’ you are asking your questions

    A good example of this is the walk to halt transition.  When riders are ‘training’ or ‘schooling’ in the arena, special attention is given to the quality of this transition.  The aids are timed to perfection, the coordination, the balance, the straightness, the rhythm – all beautifully carried out in the correct time and sequence to produce a wonderfully balance, square halt.

    However – on leaving the arena, perhaps to cool down on a short hack or the walk back to the stalls, both horse and rider seem to switch to ‘relax mode’.  While the relaxing itself it not wrong, very often the consistency of how things are done when in that mood is.  Horse and rider arrive at the barn and rather than the wonderful, well planned transition which happened 10 minutes earlier in the arena being repeated – the rider simply ‘hauls’ on the reins, the horse ‘falls’ into a standstill, legs everywhere, and the rider slides off…

    The next time they get into the arena, the same rider will complain and moan about the fact that their horse is ‘unresponsive’ to their aids.  Meanwhile they told, no – asked, their horse to be just that on arrival at the barn the previous ride.  Do you see the connection?

    The same applies with all elements and aspects of riding.  Your horses responsiveness is often a direct reflection of your consistency when asking

    Pay attention to what you are doing ‘between’ questions

    So once you become clear on how you are asking different questions, you need to also start focusing on what you are doing between those questions.

    We often hear the term ‘quiet’ used when describing riders.  It is a confusing term for many, but I suggest you begin associating the term with how the horse hears things, rather than us riders.

    When we are in the saddle, we are communicating all the time with our horse.  Understanding this simple concept is the first step to developing this ‘quietness’ in the saddle.  Can you turn up or down the volume of your aids?  Are you perhaps shouting at your horse, without even realising it?

    Shuffling, moving, shifting, driving, leaning, nudging, swinging, banging, fidgeting, collapsing, wriggling, pulling, tugging – the list is endless – all result in you speaking with your horse.   Is it any wonder that he begins to tune out and ignore everything.

    Riders who have little or no control over their movements in the saddle are like the chatty 3-year-old child…  You soon train your brain to ‘ignore’ the chatter, only paying attention when the tone / noise levels change.  Unfortunately, many horses who practice non-responsiveness are treating you just like that 3-year-old chatter box!  They only pay attention when you ‘shout’ at them, perhaps using your crop or an extra forceful kick…

    Improving Your Horses General Responsiveness

    Tweaking the conversation to improve responsiveness

    All good conversations have a purpose.  The reason you being to filter out the 3 year olds babbling, is just that, its nonsensical babbling!  There is no purpose to it.  The same applies to your aids.

    You need to begin thinking about every move you make in the saddle, and filtering out those that are only there for the sake of being there.  Become intentional about every single aid – regardless of where you are riding or what part of the ride you are on.

    I find that one of the easiest ways to begin this process is to firstly correct your position and posture in the saddle.  The correct position is hammered home by trainers and instructors the world over for a reason – it places you in the best place to be most effective with your aids

    From here, begin doing your homework regarding how best to use your body to communicate different questions to your horse.  Spend time learning about what aids are required the half halt for example.  Then start working on in-graining that sequence of correct aids into your riding, so as you don’t have to consciously think about them every time.  Put the basics on autopilot.

    Let Your Horse Know the Conversation Has Changed

    The final piece to the responsiveness puzzle is retraining your horse to understand and respond to your newfound clarity in the saddle.  This may take a while and can only be attempted once you have streamlined your aids / chatter / conversation first.

    Remember, by moving and ‘talking’ all the time, you have trained your horse to ignore you.  Now, you need to retrain him to the mindset that anything you ‘say’ from here on out will be of value and will only add to your conversation

    I suggest having a crop or riding whip for this.  Ideally we want your horse to respond to your seat, but those aids need to be refined first, before he can differentiate between a ‘speed wobble’ and an actual ‘aid’ coming from your body in the saddle.  Start with the simple lesson of ’cause and effect’ – you put your leg on, he responds to it.

    Cause and Effect

    The reason I say to carry the whip is because initially you may have to back your leg up with your stick.  Leg –  no response – leg and stick – response – reward.   The next time you can try again; Leg – response – reward.  It may take a few tries for your horse to realise that your leg is now a quality part of the conversation that must be listened to.  In my experience usually 2 to 3 repetitions is enough to get the point across.

    It is also important to remember that your stick / whip / crop is only there to back up your leg.  Not to be used alone at any point in the ride

    It should be used directly behind your calf muscle / lower leg / heel area, not on the shoulder or hind quarters.  To use it anywhere else in this situation is, in my opinion, confusing and cruel towards your horse.  It should also not be used with undue force.  A simple tap – a reminder of sorts – is enough to draw attention to your leg and get the desired result.

    Make sure that when you ask your horse to move forward, you are then ‘positioned’ correctly to ALLOW him to move forward.  Otherwise, again, it becomes confusing for your horse. 

    Re-schooling your horse to become more responsive is a challenge, however once you have your position and aids streamlined, progress can be achieved quite quickly.  Keep in mind that responsiveness is trained – unresponsiveness is also trained.  Make sure that what you are saying to your horse is worth listening to and from there, set the basics on autopilot.

    Happy Riding

    Lorna

    If you are finding that your horse is unresponsiveness to your aids, take responsibility and begin working on your coordination in the saddle.  Your ability to control your body results in your being able to have more ‘meaningful conversations’ with your horse, through your aids, when riding.  Join the 100% free 30 Day Rider Fitness Challenge today to begin reining in your ‘non-stop chatter’ when riding!

    This topic is the introduction to 4 more audio programs specifically focused on improving your horses responsiveness when being ridden.  The rest of the programs are created to be listened to while actually riding your horse.  You simply download the programs to your phone, pop your phone in your pocket and work through the exercises while you ride your horse.

    If you are interested in finding out more about these programs and all the lessons inside of Daily Strides Premium, you can visit HERE >> for more information.

  • Stability Over Jumps for Rider & Horse

    Stability Over Jumps for Rider & Horse

    More stability in the saddle – as riders we are all guilty of being a little like Oliver Twist when it comes to it; we want more, please sir! This is none more true than when it comes to jumping as it is often the activity that makes us feel most unbalanced and ‘wobbly’ in the saddle.

    As riders we want to be as effective as possible in the saddle. We are working towards having aids and general communication that cannot be confused or misunderstood by our horse.

    [smart_track_player url=”https://op3.dev/e/traffic.libsyn.com/dailystridespodcast/691-Improving-Stability-over-Jumps-Rider-and-Horse.mp3″ title=”Increasing Stability over Jumps for Horse and Rider” social_linkedin=”true” social_pinterest=”true” social_email=”true” tweet_text=”Struggling to remain balanced over the fences?! This will help… for horse and rider” hashtag=”Horseriding #jumping #stayingon” twitter_username=”strides_Success” ]

    One of the most rewarding results of developing better stability is that riders find their effectiveness and overall application of their aids increases dramatically.  This is due to  the rider being ‘quieter’, which allows the horse to distinguish better between an actual aid and a random move or shift.

    An easy way to see the benefits of a stable load is to imagine having a schoolbag or backpack strapped over both shoulders; and then going for a jog. If the bag does not fit correctly, perhaps the straps are too loose or there is too much play inside the bag itself, it is going to bounce around quite a bit as you run. This is going to have a direct effect on how you run and also your balance while running. Imagine trying to jump a fence or jump with this same loose, moving backpack – pretty difficult, right?  This is similar to how it feels for your horse when you are unstable or unbalanced in the saddle.

    However, when it comes to riding, there is the added problem of your horse having to try to decipher between your actual aids and your ‘speed wobbles’

    He is also going to become more unbalanced himself, as he struggles to keep both of you upright while working through certain movements while being ridden, regardless of if they include jumps or not.  This is often very obvious through corners and transitions.

    Very often when riders progress plateaus it can be traced back to the rider being less balanced in the saddle than they should. The impact of which, as mentioned, is very often muddled and conflicting aids being given to the horse.

    So it goes without saying that these challenges are compounded where jumping is concerned. It is not unusual to see riders who have a somewhat secure seat when working on the flat experience a major lack of stability when fences are introduced.  All balance and stability is completely undone as soon as a pole or jump is attempted.

    Become familiar with your 2 point seat

    One of the best ways riders can begin to develop more stability in general in the saddle is to work in a correct 2 point seat. It is difficult for many riders initially to hold and ride.

    However, the 2 point seat will allow you to become very secure in the saddle, through literally standing on your own two feet. It requires a secure and correct lower leg in order for it to work; which overtime will strengthen.

    The 2 point seat is also a great way to both see and feel the relationship between different parts of your body. For example, how an open chest can directly influence your backsides position in the saddle. Or how the position of your lower legs will dictate how balanced the rest of the body is while the horse moves underneath.

    Your chest area will basically balance out your backside when in the 2 point seat. If you don’t have the correct ratio of balance between the two, you will lose your balance in the saddle

    Your brain needs time to ‘recalibrate’ the factors needed to keep your body balanced when in the saddle. Riding in the 2 point seat helps this process to happen a little faster; and for the rider to understand the process as well.

    Improving Stability over Jumps for Horse and Rider

    Realising ‘Cause and Effect’ is Happening

    When we are jumping we need to be in complete control of our body, so we do not feel like the loose backpack to our horse. A lot of riders make the mistake of relying on the horse for balance over the fences.  They will lean on the horse’s neck or ‘hunker down’ into the saddle, which will inevitably hinder how the horse can use himself over the jump.

    Of course, the added problem with using the horse for balance is if the horse stumbles, runs out or perhaps has a refusal at the fence. The rider is completely ineffective to help; and often ends up on the ground because their balancing aid – the horse – suddenly stops working!

    Developing a secure lower leg is key to beginning to take responsibility for your own stability and balance when riding your horse. The 2 point seat, and the ‘burn’ that often accompanies it, is a fantastic way of working this part of your body in the saddle.

    Knowing how to adapt the use and position of your lower leg when in the saddle, will directly affect what happens to the rest of your body in the saddle.

    The difference between ‘secure’ and ‘fixed’

    When initially beginning to work on this particular aspect of riding, many riders mistakenly try to ‘fix’ themselves in the saddle. They become rigid and stiff. This, unfortunately, will result in a marked decrease in their overall stability and balance.

    You definitely don’t want your leg doing the ‘hokey pokey’ when you are riding – but fixing your leg in one place will not work either.

    You need to rather focus on suppleness through your body and leg. When you are supple in the saddle, you will be able to move with your horse, all the while remaining in the best possible position for your body to make the micro adjustments needed to stabilise and balance you in the saddle.

    You need to allow and move with your horse, rather than fix and bump against your horses motion

    This suppleness comes from your joints; ankles, knees and hips. Working in the 2 point seat will help you notice and then begin to use your joints to stabilise your position and body in the saddle as your horse moves underneath you.

    I think it is also worth mentioning at this point that your contact is important when working in the 2 point seat. Many riders seem to think that the 2 point seat is rather a jumping position on the flat. It is not!

    Your contact will remain consistent with your horse throughout your 2 point seat, which will allow you to, again, effectively communicate with your horse while you ride

    Once you have begun to master the 2 point seat on the flat, through walk trot and then canter, you can begin adding some ground poles to your exercises.

    Becoming more secure on the flat is the key to being able to move with your horse in a balanced way, rather than relying on, your horse over fences. The ground poles will allow you to work up to some jumps later; but I strongly suggest waiting to move forward with your training when you have mastered this on the flat initially.

    Happy riding
    Lorna

    This podcast episode is the first in a series of 5 on the topic, available for you inside of Daily Strides Premium. The remaining 4 lessons will take you step by step through different exercises that will help you become more secure and balanced in the saddle.

    Those audio programs can be downloaded onto your phone and then listened to as you ride your horse. They are filled with reminders on what to do, step by step instructions on how to do it – can have the added bonus of being replayed over and over again! You can find out more about Daily Strides Premium by visiting www.stridesforsuccess.com/join/.

    [wp-tiles post_type=”post” orderby=”date” order=”DESC” grids=”Simple”]

  • Learning to Stop Driving with Your Seat

    Learning to Stop Driving with Your Seat

    Do you often hear the term ‘electric backside’ being used to describe you when you ride?  Perhaps you have found that usually docile and ‘laid back’ horses become a little more, well, lively when you are in their saddle?  Have you ever considered that perhaps you don’t realise just how much you are communicating to your horse through your seat…

    When I first heard the term electric backside I had visions of lightning bolts shooting out of a riders backside, through the saddle and straight into the horse!  Now as strange as this sounds, the reality of having an ‘overactive seat’ has a very similar effect on how your horse behaves while being ridden.

    [smart_track_player url=”https://op3.dev/e/traffic.libsyn.com/dailystridespodcast/686-Learning-to-Stop-Driving-with-Your-Seat.mp3″ title=”Learning to Stop Driving with Your Seat in the Saddle” social_linkedin=”true” social_pinterest=”true” social_email=”true” tweet_text=”Struggling to ‘quiet’ your seat in the saddle? This will help…” hashtag=”equestrian #horseriding” twitter_username=”strides_success” ]

    When we learn to ride, we very quickly begin to notice that how we sit and move influences the horse and how he goes. This awareness is one of the most important parts of developing ‘feel’ and becoming a good rider. however merely knowing this is not enough. Controlling this important aid in the saddle is, for most riders, a little more difficult to master.

    Being able to influence your horse using your seat is one thing, but knowing how to shift between ‘stop, go and neutral’ and all the important subtleties in between, is quite another.

    For many riders this is where the problems begin to arise.  Riders discover that they are ‘over sharing’ when it comes to communicating with their seat aids.  The result is often that the rider is driving with their seat all the time.

    Before we go any further, it is important to recognise that there are certain situations and scenarios where, yes indeed, you will have to drive your horse forward with your seat.However we are speaking here about riders who have incorporated the habit of scrubbing with their seat, like they are trying to polish the saddle or rub a hole in their horses back with their backside, as the status quo.  It becomes their modus operandi or ‘go to’ method for riding their horse.

    This can result in a few things happening. Usually their horse becomes increasingly hot and lively, or their horse begins to ignore their aids completely.

    After all it’s not much fun being shouted at all the time, and constant driving with your seat is the equivalent of roaring at your horse – the whole ride!

    Think of your seat as being similar to the gears of a car.  You can transition up and down gears, however there is also the all important neutral. And to begin really seeing results in riding you need to be able to do all three of the above.

    Knowing how to disengage your seat or, in the case of the car gears, find neutral is vitally important to becoming more quiet and subtle in how you communicate with your horse.

    In my experience, the canter is very often the easiest place to being noticing if you are indeed being a little over enthusiastic with your seat when in the saddle. When you are really driving your horse with your seat in the canter, the horse may begin to hollow his back out from underneath you. This can often be felt rather than seen when in the saddle. However, unfortunately the tendency is there to only focus on what you see in front of you –  your horse bracing against your hand.  But if this is looked at from the ground, it quickly becomes very obvious that the horse is bracing his whole body away from the rider.

    Constant driving with the seat leads to an often epic battle between horse and rider.  Your horse does not have to be galloping or even cantering for this to happen.  It occurs in all gaits, however (as mentioned above) it is usually easiest to spot in the canter.  The overuse of the seat, hips and pelvis in the canter often causes the riders shoulders to begin to ‘swing’ in the canter as well.

    Another way this can show up is when the horse begins to hollow out from underneath the rider through the actual trot to canter transition itself.  We often hear about ‘scooping’ the horse into canter using the inside seat bone.  If you are prone to being a little heavy-handed with your seat to begin with, that same ‘scooping’ can quickly become uncomfortable for you horse.  The result is often that the horse will strike on the incorrect lead.

    However, perhaps the most obvious, is the horse who starts out quite relaxed in the canter, however due to the riders continuous driving, soon becomes tense and rushed.  What began as a good quality canter rather quickly turns into something resembling the final furlong at Aintree!

    Learning to Stop Driving with Your Seat

    Now, we know that we cannot effectively communicate and ride our horses if we just sit in the saddle completely stationary.  We realise that we have to move with our horse when in the saddle.

    But moving with the energy and driving the energy are two very different things.

    When we learn to canter, we are often told that we must ‘roll’ our hips with the motion of the horse. When I am explaining this in the arena I will often use my wrist and hand to demonstrate the movement.  The normal canter will be, from the elbow, my lower arm horizontal to the ground moving up and back, followed by forward and down in an almost circular rotation.  As my arm completes the ‘down and forward’ part of the circle, my wrist will flex slightly down, causing the back of my hand to become a little more upright. Then as my arm begins to lift up, in order to come back closer to my body, my wrist will flex up, allowing my hand to become more horizontal again.

    When a person drives with their seat, the circuit is the same, however as my arm is moving forward and down, the heel of my hand is pushing forward as well.  This causes the back of my hand to strain at an almost 90 angle to my wrist. Then as my arm raises up to come back, the action is no longer fluid as my wrist relaxes again.

    I mentioned earlier how an overactive seat is a little like shouting at your horse all the time.  Good riding is an holistic practice; all aids are involved when communicating with your horse.  In order for your horse to hear and understand all the different aids, they must be subtle.

    So what can you do if you in fact have lightning bolts shooting from your backside when you are in the saddle. Well the first thing is you need to start learning to follow.  Now you are probably saying, “Yes, I do follow – I just follow awfully well!”

    If this is the case I would hazard a guess that you are doing less following and more leading.  I suggest going back a few steps initially with your riding and focus on allowing your horse to move.  Let any movement happening in your seat to be guided by your horse.

    Start with walk initially and think about doing as little as possible, while still allowing everything to happen underneath you.  This is neutral.  When you can find neutral and begin getting used to how this feels, you can then begin working on shifting to first gear and so on.

    It is important to keep in mind that neutral and ‘heavy’ are two very different things.  Heavy does not ‘allow’, it rather blocks the flow of energy underneath you.  Neutral is being carried along, understanding that you still have the responsibility of carrying your own body.

    Unfortunately a lot of riders, once they commit to becoming more ‘quiet’ with their seat, begin slouching through their upper body.  Doing this will definitely cause less movement with your seat, but it will also make things uncomfortable for your horse and cause you to become even less effective in the saddle!

    Rather think of elongating or lifting your upper body off of your hips.  This does not mean that you ride with your shoulders around your ears, but rather carrying your ribcage, so to lengthen the space between it and your pelvis.   Doing this will result in your hips and seat being able to move with your horse, in neutral.  From neutral, you can begin experimenting with how you can use your seat to encourage your horse to move forwards.

    From here, you can begin to work on this ‘allowing’ in both trot and canter. Keep in mind that doing nothing is one of the most difficult things to do on a horse, but in order to break that ‘driving’ habit, it is often the very thing you need to learn!

    Your seat is possibly the most important and effective tool you have when riding your horse, however cultivating that all important ‘feel‘ will take time.  Learning the difference between enough and too much is important – and very often you have to go right back to basics in order to do so.

    Happy Riding
    Lorna

    If you are interested in taming your seat in the saddle, there are a few resources I have that may help you.  Firstly, you can join the FREE 30 Day Rider Fitness Challenge.  Over the course of the 30 days, you will strengthen your core, which will allow you better control over your body in the saddle.

    You can also join Daily Strides Premium, where you will find a whole ‘collection’ of audio horse riding lessons on the seat aids, as well as lots of other collections to help you with your riding.  All the lessons are available for you immediately when you join, and it’s as simple as downloading them to your phone, popping your phone in your pocket and off you go!  A riding instructor with you in the arena.   You can find out more when you visit www.StridesforSuccess.com/join/

    [wp-tiles post_type=”post” orderby=”date” order=”DESC” grids=”Simple”]

  • Improving Your Dressage Scores – Part 2

    Improving Your Dressage Scores – Part 2

    You leave the arena on a long rein at A and to say you feel a little disheartened is putting things mildly… Dressage can be difficult, there’s no doubt about it, however what tends to stack the odds even more so against a good dressage score is the fact that many riders see it as ‘boring’; a means to an end of sorts.

    Are you the sort of rider that thinks the most challenging part of dressage is memorising your test? For many riders, this is the be all and end all of dressage. Is it any wonder that it is often those same riders that feel hard done by and disappointed when they receive their score sheet?

    [fusebox_track_player url=”https://op3.dev/e/traffic.libsyn.com/dailystridespodcast/681-Improving-Your-Dressage-Scores-Part-2.mp3″ title=”Improving Your Dressage Scores Part 2″ social_linkedin=”true” social_pinterest=”true” social_email=”true” ]The dressage test is merely a means to see how the horses, and riders, training is progressing and a way to ‘course correct’ where necessary. If the test is looked at in this way, the boredom vanishes and the scores begin to mean something…

    We already discussed a few points on improving your dressage scores previously here on the blog. You can read Part 1 HERE >>

    In this blog post I want to focus on using the training aspects that the test is trying to encourage, the reason behind the ‘symmetry’ on both reins and the disastrous effect riding the test just to ‘check’ all the movements off can have on your overall score.

    Training Aspects of the Test

    Each level of dressage is looking to progress and build on the level that came before. The ascension through the levels corresponds with the basic training scale, the foundation of which is rhythm, relaxation and, suppleness. Both the movements themselves and the sequence they are asked in that are laid out in the test are there to see just how well you and your horse have grasped the concepts.

    Depending on the level you are riding at, the dressage judge will be looking for slightly different things while you ride your horse. Keep this in mind and work towards what is required for your level. Don’t try to achieve something that is far more advanced than where you are right now. Similarly, if you are riding at a higher level, but have not truly mastered the basics, your scores and comments will reflect this.

    Allow the level you are currently at to set the tone for all your rides. Focus on achieving that particular aspect of riding within both yourself and your horse, regardless of the exercise or work you are busy with. This is how you will then become better; and move up the scale.

    Focusing on Symmetry while Riding

    You have probably noticed that when riding a dressage test, whatever you do on one rein is generally repeated on the opposite rein soon after. This is not due to the creator or designer of the test taking a shortcut when designing the test; rather it has to do with the symmetry that you should be aiming for in your riding.

    Dressage tests are there so the experts, judges, can guide you and give you pointers as to how both you and your horse can improve your overall ride. By seeing how well you both can ride a movement to the right and to the left, any stiffness, crookedness or lopsidedness is more easily identified and noted.

    Going back to that initial thought that the dressage test is to see how well your training is progressing, you have to agree that being loose and supple on ‘both’ sides is vitally important to your horses way of going… And to both of you successfully grasping and then applying the concepts behind each step of the training scale.

    Change Your Perception of the Scores

    A lot of riders seem to think that their dressage judge is just there to nit pick their overall riding performance. Reshaping this single belief can sometimes be the catalyst to becoming a more effective and efficient rider – regardless of where and when.

    I suggest rather thinking of your next dressage judge as being a trainer of sorts. It’s like having a lesson or training session and then being given a hardcopy of your homework afterwards

    Just like when in the arena with a trainer, the judges comments on your dressage score sheet will usually include some positive aspects of your ride. They will also spotlight a few places that can be improved, a couple of ideas on what to focus on improving and, very often, an overall synopsis that you can use as a benchmark for your riding at that particular time in your equestrian journey.

    If knowledge is power, your dressage score is a mighty benchmark of your riding progress indeed. Seeing it as this, rather than something negative can very often encourage you to really begin working on your weaknesses; and take more pride in your strengths

    Improving Your Dressage Scores - Part 2

    Don’t Ride a Checklist!

    Before you begin getting into the more technical aspects of your particular test, you have to first memorise the test. Every dressage test is like a map, you reach a particular place on your way to somewhere else. However just looking at the test as this is the downfall of so many riders.

    Most riders seem to have an attitude of getting in and out of the arena as quickly as possible. Savour your time in the arena – it’s your time, use all of it to the fullest to really show what you and your horse can do.

    When we are initially introduced to dressage, the mere fact that we have to ‘learn’ the test seems to be the overriding factor of the whole process. It is easy to begin believing that taking a wrong turn somewhere, going off course so to speak, is the worse thing that can happen to you. It’s not! If you do find yourself on a slight detour, how you react and deal with it will very often dictate the outcome of the test – not the fact that you took a wrong turn.

    Rather think about each individual movement you ride in the test as setting up the next movement. That way, you can work on riding the current movement to the best of your ability, while still keeping your ‘plan’ or ‘map’ in mind

    If you do find yourself ‘lost’ out on the course, take a moment to gather yourself and your horse, pick up where you went wrong and continue on; it’s done! Worrying and stressing about it won’t undo it. Rather make a conscious decision to ride every movement from that point on to the absolute best of you and your horses ability.

    If you can begin seeing your dressage scores as another tool in your belt that you can use to better your riding, you will soon begin to see a definite improvement in your overall scores. Ride each test to the best of your abilities and value each score sheet as much as you would a lesson with a top trainer; that is essentially what it is after all.

    Happy Riding
    Lorna

    This is part 2 in a series on how you can begin improving your dressage scores. There are 5 audio programs in each part, which along with other ‘schooling’ topics, are available for you to download and listen to inside of Daily Strides Premium. To find out more click HERE >>

    [wp-tiles post_type=”post” orderby=”date” order=”DESC” grids=”Plain”]

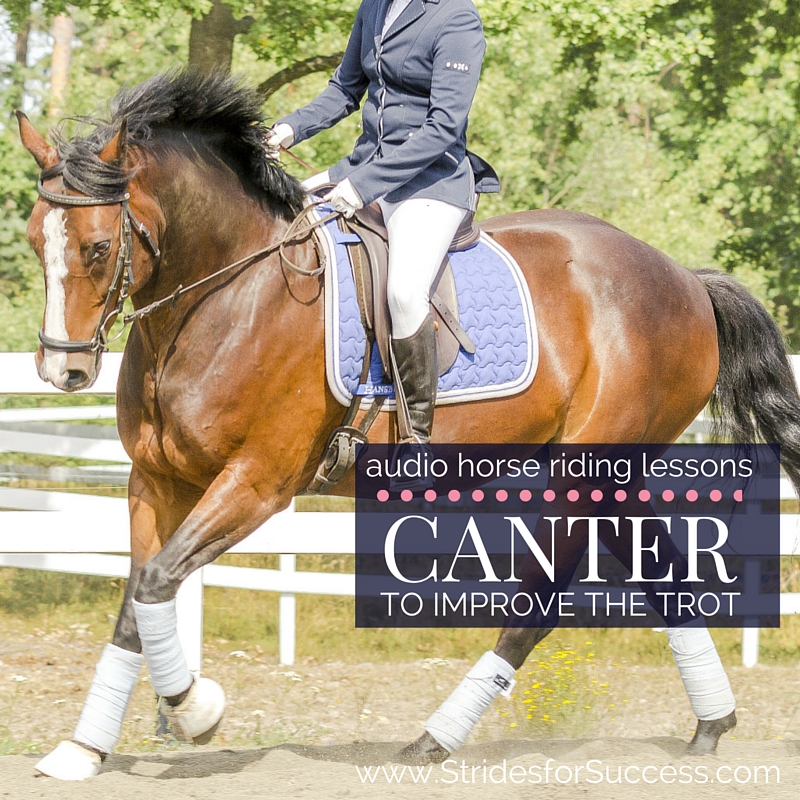
  • Canter to Improve the Trot

    Canter to Improve the Trot

    🌟🐴  Get the Improve Your Canter Program TODAY and transform your riding – and your training 🐴🌟

    Have you noticed how, very often, there are only two ‘gears’ when trotting; a good, forward trot or a bland, shuffle trot? However, changing from the latter to the former can often be one of the more difficult aspects of trotting.  If so, have you ever considered using the canter to improve the trot?

    Sounds too good to be true, but very often a good, forward canter can be the simple catalyst from that mediocre flat shuffle, to that wonderful springy and engaged trot.

    [fusebox_track_player url=”https://op3.dev/e/traffic.libsyn.com/dailystridespodcast/676-Using-the-Canter-to-Improve-the-Trot.mp3″ title=”Canter to Improve the Trot” social_linkedin=”true” social_pinterest=”true” social_email=”true” ]

    However, like everything worth doing in life, the canter must be of good quality, and the transitions both into and out of the canter from the trot will often dictate just how effective this technique will be to your horse’s schooling.

    What Makes a Good Trot?

    So, before we go any further, let’s chat quickly about what exactly makes a good trot.  The trot itself is usually quite easy to establish a rhythm, the 1.. 2.. 1.. 2.. almost setting itself up each stride.  The trouble for many riders is then regulating the tempo of that rhythm.

    If the rhythm is the 1.. 2.. 1.. 2.. the tempo is how often that 1.. 2.. rhythm occurs in any set period of time or distance.  

    For example, take the long side of a 60m arena.  By adjusting the tempo of the trot rhythm, you can either have a lot of ‘quick’ 12121212s occurring, or you can have fewer 1…… 2…… 1…… 2……. happening in the same distance.

    So when many riders begin trotting, establishing the rhythm and tempo is often not a problem.  But as soon as they begin to make adjustments to the trot, one (usually the tempo) or both can very quickly become erratic.   Those adjustments can be half halts, shortening the stride, lengthening the stride, or asking for a transition either up or down to a different gait, or within the gait itself.

    In fact, even just beginning to activate the hind quarters and connect the horse a little more very often results in a loss of rhythm and tempo.  This is where we see many horses either begin to run in the trot, or become heavy and lean on the rider’s hand.

    Canter to Improve the Trot

    Riding the canter to improve the trot will help riders to firstly become more quiet in the saddle. It also improves the riders skills in noticing if the gait itself is a quality one to begin with

    Because of the transitions between trot and canter, riders may want to rather ride in a sitting trot when riding the trot.  However, I strongly suggest just using the sitting trot for the actual transition.  Post or rise to the trot when working in the trot.  The reason I say this is because, in order to improve the quality of the trot, the horse must first engage his hindquarters.

    For this to happen, the energy being created there must be allowed to connect through, underneath the rider and saddle, from the back to the front

    Using Your Energy Wisely

    However, it has been my experience that when working between trot and canter for any length of time, riders tire quickly.  This causes them to begin ’slouching’ through their upper body and this, in turn, results in them ‘shutting down’ that flow of energy necessary for the horse to truly work in a quality trot.

    So, for the duration of this exercise, I suggest working in rising or posting to the trot where you can, to give both yourself and your horses back a little break!

    Start with ‘Forward’

    Start by asking your horse to work in what you would consider a forward-going ‘working trot’.  Focus on the rhythm and then the tempo, particularly as you work through corners or change rein.  Can your horse remain to maintain consistency in both?  Many riders wonder if the trot is indeed a ‘working trot’.

    The next part of the exercise will quickly tell you either way if your trot is working, or shuffling!

    Using Canter to Improve the Trot

    Using Half Halts to Prepare

    Begin to prepare your horse for canter.  Use your half halts, but all the while paying close attention to the aforementioned rhythm and tempo.  I also think noticing how straight your horse remains through the transition is important.  Do his hindquarters swing or drift?  Does he ‘curl’ around your inside leg?  Or perhaps he is bracing against your inside leg…?  If you notice any of the above, take this as your cue to begin working through these more basic evasions, before you allow your horse to canter.

    You may find maintaining the rhythm and, in particular, tempo as your horse transitions into canter from the trot rather difficult.  This is what your focus should be on throughout the schooling session.

    Think of ‘you ask – he responds’

    Working Forward in the Canter

    Once in the canter, firstly make sure the canter is moving forward and actually taking you somewhere.  One of the reasons we can use the canter to improve the trot is because the canter often has naturally more energetic and rolling energy with it.  Having to push and kick at every stride is not forward.  But it is important to note that allowing your horse to run like a wild thing around the arena is also not a forward canter.

    The canter can be classed as ‘forward’ if the energy is taking  you somewhere and that somewhere is dictated by you.  You can influence where it goes and how much is allowed ‘out’ at any give time in the gait

    The Canter to Trot Transition

    Once you have indeed established a forward canter, you can begin thinking about transitioning back into the trot.  Again, maintaining the rhythm and tempo is vitally important.  What is also important is the fact that you ‘allow’ your horse to trot.

    There is a split second, that you will feel, when your horse actually takes that step that transitions him from the canter into the trot.  In order to do this he must ‘land’ into the trot. And you must ‘allow’ or ‘soften’ through your hand so he can indeed move forward into the trot

    This is also where I suggest posting or rising from the first step.  This way, when you have ‘allowed’ him to continue to move forward, that energy in his hind quarters can indeed connect with the front end.  It will feel like he is ‘swinging’ underneath you.

    Feeling the Difference to the Trot

    Many riders find that the first time they really ride a good trot with their horse, the bounce is a little too much for them.  Again, rising or posting will help you initially.  Then, later, as you become more supple and allowing through your body, you can start moving with your horse and this new energy in sitting trot.

    You can use the canter to improve the trot both in the saddle and on the ground.  The same principles can be applied when lunging your horse with the added bonus of actually being able to see the results, rather than feel them

    Keep in mind that in order for your horse to improve and develop himself, it is your responsibility to establish and maintain that straightness, rhythm, and tempo.  Work towards being able to move up and down, through your horse’s gears, without losing any of the above.

    It is also vital that your horse continues to ‘move forward’ at all times; taking you somewhere.

    Happy Riding
    Lorna

    Improve Your Canter Program

    4 weeks of self-study with easy-to-follow audio horse riding lessons that will help you to transform your canter – and your aids in your riding. Suitable for riders who are just getting started with canter, and riders who want to improve both their abilities and their horse’s canter.

    And with lifetime access, you can dip in and out of the program again, and again… All of the details are HERE

    Connection; The Online Resource for Riders

    This podcast is the first in a series of five on this specific topic which were created for Daily Strides Premium, now know as Connection.  Every month you will get audio horse riding lessons to listen to as you work your horse. Connection is created to help riders working alone, without a trainer or coach, to continue to both improve their riding AND train their horse.

    All of the audio programs are step-by-step instructions for you to follow while riding your horse.  All of your lessons are available, on your phone, using a Private Podcast Feed. 


    All of the details are available at https://stridesforsuccess.com/join.  The membership is risk free, with no contracts.  You can cancel any time. I would love to have you on a lesson soon :)

  • Communicate with Your Horse Through Groundwork – Part 2 Pressure & Release

    Communicate with Your Horse Through Groundwork – Part 2 Pressure & Release

    Groundwork, when referring to horses, simply means working with your horse from the ground in order to train and increase communication skills.  In this blog post we are going to focus on ‘Pressure and Release’ and how you can begin to correctly and fully understand the concept in order to further your horse’s training from the ground.

    This is part 2 of a full series dedicated to Groundwork from Strides for Success. Part 1 which explains the basics and then moves into specifically dealing with ‘Touch’ can be found HERE >>

    [smart_track_player url=”https://op3.dev/e/traffic.libsyn.com/dailystridespodcast/671-Using-Groundwork-when-Training-Your-Horse-Part-2-Pressure-and-Release.mp3″ title=”Groundwork Part 2 – Pressure and Release” social_linkedin=”true” social_pinterest=”true” social_email=”true” tweet_text=”Groundwork and how it can help you teach your horse about pressure and release” hashtag=”horse #horseriding” twitter_username=”strides_success” ]

    When we are in the saddle, most riders and trainers will use the concept of pressure and release to communicate with the horse, from the saddle, what they want the horse to do.  Pressure and release is viewed as ‘negative reinforcement’ in that when you apply the pressure, you are placing the horse in a somewhat uncomfortable situation.  However as soon as the horse makes a move towards the direction you desire, you reward him by removing the discomfort; or pressure.  This is the release part of the work.

    What is important to note however is the word ‘discomfort’ and how we view applying this to the horse in any given situation.  I personally do not believe that the level of pressure being applied must be painful for the horse.  Think of discomfort as being literally a hoof step out of the horse’s current ‘comfort zone’.  By gradually, over time, increasing the comfort zone, you can train your horse using the pressure and release concept, without ever raising their anxiety levels.

    Raising your horse’s anxiety levels, regardless of the situation, rarely will produce a positive outcome.  I have found that the pressure works best when it asks the horse to think a little differently and when it is applied by a person they have learned to trust.  If you apply pressure to the point where it causes pain, that trust will be eroded – and we all know how difficult it is to rebuild trust when broken.

    This brings us to the other all important aspects that makes the ‘pressure and release’ way of training work; timing and amounts of pressure applied.  Having worked with riders who are literally just beginning their journey into the world of horses, these are often the most difficult parts of teaching this way of working with horses.

    The challenge seems to lie in the fact that every situation is different, regardless of the horse or the circumstances.  Factors such as the weather, the time of day or even just how the sun is creating shadows  can lead to having to adjust the approach and the technique used.  It is learning how to assess this and then proceed confidently that trips many riders up

    I used the word confidently there on purpose; another factor that dictates a successful outcome when using the pressure and release system when training is the mindset of the rider, both before, during and after the groundwork or riding session with the horse.   If you want your horse to become comfortable ‘stretching’ his comfort zone, you must be comfortable and certain of how you ask and the consequences of asking that question.

    Any hesitation on your part will be seen as uncertainty to the horse, and quite frankly, would you trust someone who seemed a little ‘iffy’ about something?  I didn’t think so!  Therefore, don’t expect the horse to do so either.

    Groundwork Part 2 - Pressure and Release

    So taking all this into account, how can you being incorporating pressure and release into your groundwork sessions in a way that will positively benefit your horse later when under the saddle?

    Start slowly and have a plan for every action you take with your horse.  It sounds pretty simple, but you would be surprised how many riders launch into something with no idea of just how they want the outcome to look like or feel like…  Let’s take something simple like asking your horse to move over in the stable.  Firstly, do you want him to ‘pivot’ around his front end, or are you asking him to move his entire body over?  Secondly, how far over are you wanting him to move?  And finally, are you confident enough to remain in charge, even if things don’t go quite as planned?

    Now, bear in mind that the more you work with your horse, the more this will just become second nature; I rarely have to consciously ask myself these questions as I do this daily with horses.  But if it is either you or your horses first time, very often becoming clear on the desired outcome before you begin is the vital key to your success.

    So, assuming that you have indeed thought about all the above, you can begin to position yourself in the best possible place to make this happen.  Remain calm and confident as you move around your horse and realise that once you have committed, you will most likely have to remain in this ‘moment’ until he makes even the slightest move in the direction you desire.   I find that placing your hand on his body where your leg will be later if you were to ask a similar movement when riding is the best way to approach this.  However, you can also work with your horse moving away from the pressure regardless of where your hand is placed; hindquarters etc.

    The next consideration on your part is the amount of pressure applied.  This varies depending on so many factors; the horse itself, the area you are touching, the type of touch etc.  Start off with the smallest amount of pressure possible and then gradually build the amount you are exerting until your horse begins to respond.

    The response of the horse will dictate the ‘timing’ factor I spoke of earlier.  It is vitally important that in order for this to work, you must reward the horse for the slightest move towards what you are desiring.  The reward is the release of the pressure.  Now, depending on the horse and, again, the circumstances, you can release the pressure slightly and then increase again if you want him to move further over.  Or you can release the pressure all together however I personally don’t suggest taking your hand away as this will rather train the horse to ‘run away’ from pressure, rather than react to it.

    You can also verbally reward your horse, something I highly recommend incorporating into your everyday interactions with your horse.  I personally use a higher pitched tone when communicating a ‘reward’ to my horses, this way they understand what they did was correct and it is something that can later be transferred over to their training when being ridden under saddle.

    What you will find, if done correctly, is that when you consistently take the same approach each and every time, the amount of pressure you will have to use to enact the desired response will lessen.  This is what many riders call ‘lightness’, whether it be on the ground or in the saddle.

    The pressure and release training methods can be used in many different ways when working with your horse.  From asking them to move over in the stable, to asking them to walk forward.  It is one of the most successful ways of training horses when being ridden and it can even be used, without touching the horse at all.  This happens when you replace physical pressure with a more subtle ‘body language’ pressure.

    Regardless of how it is used, the concepts of understand what you want, noticing the amount of pressure, timing the pressure and the release and then being consistent and confident throughout is vital to this working with your horse.

    Happy Riding

    Lorna

    This is the first of a five audio programs, taking you step by step through applying these principles with your horse.  The other four programs can be downloaded to your phone and then listened to as you work with your horse, helping to ensure your success when applying this method of training.  You can visit www.stridesforsuccess.com/join/ for more details.

    As mentioned above, this is the second in a series of trainings on how to correctly apply groundwork techniques when working and training your horse.  The first in the series – Touch – and all following sections of this topic are all included inside of Daily Strides Premium.  If you would like to find out more about how you can access over 600 audio horse riding lessons, including the groundwork lessons, you can visit www.stridesforsuccess.com/join/