Author: Lorna Leeson

  • Harnessing the Power of the Half Halt

    Harnessing the Power of the Half Halt

    [fusebox_track_player url=”https://op3.dev/e/traffic.libsyn.com/dailystridespodcast/SFA406-Harnessing-the-Half-Halt.mp3″ title=”Harnessing the Power of the Half Halt” social_linkedin=”true” social_pinterest=”true” social_email=”true” ]

    The half-halt should be one of the earliest things that riders learn to master when learning to ride their horse. It is a vital part of riding well and being able to perform accurate, balanced movements with your horse.

    However, while many riders understand the concept of the half-halt in theory, unfortunately, the carrying out of the actual movement leaves a lot of room for improvement.

    What is the Half Halt?

    The half-halt is essentially a rein check or a postponement. You are asking your horse for his undivided attention and letting him know that something is about to happen.

    When ridden correctly, the half-halt can be used to re-balance your horse, to ask him for his attention, prepare him for an upcoming movement, to ask for more self-carriage or collection, to steady or slow him down, to set up transitions and, in fact, should be sprinkled generously throughout your ride from start to finish.

    Harnessing the Power of the Half halt

    When and Why Should I Use It?

    There are so many different situations where the half-halt is required while riding that many riders may become confused as to where exactly to perform the movement. How often it should be applied is also a source of confusion. Along with what intensity or firmness.

    Each half halt, in essence, is similar regardless of the reason for using it. However, there are slight differences depending on many factors between the horse, rider, and present circumstances. 

    The more you ride and practice the half halt, the better you will become at using just the correct amount of pressure at the correct time. Regardless of the horse or circumstances.

    How Do I Ride a Half Halt?

    To perform the half halt, the rider uses three different aids, the seat, the legs, and the hands. Many riders struggle to use all three aids in such close conjunction with each other. And, often, this lack of co-ordination from the rider often results in a deterioration of the horse’s way of going.

    A true half halt, as we mentioned before, is a postponement of the forward energy.

    However, what is important to notice here is that the forward energy must remain and continue to be created by the rider, at the correct times, so the horse does not stop or break from what it is doing.

    There is a previous blog post & audio lesson HERE on using your seat while riding

    Its an ‘Invisible Aid’…

    The other point worth mentioning before we get into the nuts and bolts of the half halt is that it should be barely visible to others watching you ride. I say barely because if a person is well-trained in what to look for, they will of course see these little ‘rein checks’.  However, to the average spectator, it will look as though nothing is happening.  The horse is simply remaining in a balanced and consistent way of going.

    The half halt does require a certain amount of strength and development from the horse, as there is a transfer happening from the front end, more onto the back-end.  

    Strength & Training

    This results in the hindquarters coming underneath the horse and bearing more weight. Many riders forget to allow for this lack of training and development in young or green horses. They can become frustrated when the half halt does not result in the desired action happening underneath them.  Or as ‘big’ of a difference occurring. Horses must learn what the movement is, and over time, become capable of performing it correctly.

    Practice by firstly using the thought of the half halt as an opportunity to correct and ‘fix’, if necessary, your position while riding

    Setting Up the Movement

    Check that your basic position is free of any obvious errors and that your legs are underneath you.  It is important that your legs must remain underneath you throughout the half halt.  In order to maintain the forwardness of your horse’s movement and energy, your legs must be ‘on’ and applied first when asking for the half halt.

    Once you have engaged your horse with your legs, you will then use your seat and hands together to ‘resist’ or ‘slightly contain’ the energy and perform that ‘rein-check’ that we spoke of.  This will only happen for a split second. Then you will soften allowing your horse to move forward again. From here, use your legs once again to help create that forward energy.

    Remember, the half halt only lasts a split second; any longer and you are having a tug of war!

    Your Seat When Asking…

    One of the biggest challenges riders have is when they activate their seat and core in the half halt. Their lower legs tend to shoot out in front of them. This results in the rider’s feet being somewhere near or on the horse’s shoulders!

    Practice engaging your core in a ‘resisting’ motion for a split second. All the while making sure your legs are correctly underneath you.  Your legs are vital to keeping your horse moving forward and working correctly.

    As I mentioned earlier, the half halt is a slight postponement of the energy, not a cancellation!

    When using your seat and core, make sure you are carrying your upper body, to allow the muscles around your pelvis to work correctly.  Try not to brace your lower back, in an attempt to lean back.  This will result in a jarring feeling and the beginning of the end with regards to the forward energy you have created!  Also, make sure you don’t crouch or curve your upper back. This movement generally correlates with an overuse of the hand and lack of seat and core in the half halt.

    Not A ‘One Time Only’ Event

    Also keep in mind that you may need to perform numerous half halts in order to achieve your desired outcome.  

    Keep each one short, quick and correct.  If you ‘hold’ the position or the half halt for too long, your horse will begin to lean against you. This is exactly the opposite of what you want to achieve in the first place.

    Take time to begin coordinating your different aids so that once ‘put together’, your half halt will appear seamless and fluid. It will work with your horse. Not against. This will help to both balance and steady.  It often helps to say something while you are performing the movement, as it will help you better establish the cause and effect that you are making happen underneath you.

    A simple ‘Steady’ said out loud can be enough to help this movement become a subconscious one for you in the long run.

    Timing the Half Halt

    As with all things relating to horse riding, the timing of the movement and aids are also important.  Once you have successfully managed to use your different aids together to achieve the desired result, begin noticing what is happening underneath you.

    As you become more adept at feeling which foot is falling when you will grow more confident in asking for the half halt at the correct time.

    This is usually when the horse’s back hoof has been placed on the ground.

    Harnessing The Power of the Half Halt

    Sprinkle Around the Arena

    Train your body to automatically begin using the half halt in particular areas of the arena or parts of your ride.  I initially suggest using corners, bends, or changes of direction as the initial trigger you use to remember to half halt.

    Soon, riding this movement without thinking about it during one particular aspect of your work will become second nature. This will allow you to free up your mind to begin working it into other areas.  Again, I suggest methodically and consistently until it again becomes something that just happens while you ride.

    Finally, mindfully develop your ‘feel’ as you use the half halt…  

    Different levels of intensity or different ways of riding the half halt will be necessary depending on the various factors that make up each situation, such as rider, horse, and circumstances surrounding that particular ride.

    Happy Riding

    Lorna

    Additional Resources for Equestrians:-

  • Schooling on the Trail

    Schooling on the Trail

    Trail riding or hacking is a fantastic way for both you and your horse to experience the world outside the gates of the arena.

    However many riders look at riding on the trail as merely a way to relax and unwind.  And while they are not wrong, riding along a bridle path is a fantastic way at boosting the connection between you and your horse, it is often an overlooked opportunity for schooling and working through different exercises and movement, with the advantage of doing so in a different environment and from a different perspective.

    [smart_track_player url=”https://op3.dev/e/traffic.libsyn.com/dailystridespodcast/SFA401-Schooling-Your-Horse-on-the-Trail.mp3″ title=”Schooling Your Horse on the Trail” social_linkedin=”true” social_pinterest=”true” social_email=”true” tweet_text=”Schooling is not just for the arena; here are some ideas of the trail as well ” hashtag=”equestrian #horseriding #trailriding” twitter_username=”strides_success” ]

    The benefits of trail riding are numerous, from relaxation to preventing sourness in the arena.  From building confidence to helping your horse become more sure-footed and of course, strengthening tendons and ligaments with your road work.  Trail riding also helps increase and reinforces the bond between you and your horse, not to mention allowing you the opportunity to just enjoy your horse while surrounded by nature!

    The trail is very often an overlooked opportunity to work with your horse and engage their mind in a different and beneficial way than just endless circles and school movements in the arena.

    Schooling Your Horse on the Trail

    Many riders will agree that while out of the arena and on the trail, their horses have more energy and forward movement.  Focus your attention on how you deal with this new energy supply that you can harness while on the trail.

    Instead of fighting and arguing with your horse, which often only results in an uncomfortable jig-jog for the duration of the ride, rather direct that energy into some exercises and movements that, when performed in the arena, perhaps lack the same enthusiasm, flexion, suppleness and lightness.  

    In order to perform any of these movements, it is important to have first developed your eye to see a ‘line’.  Without the aid of the arena wall or fence, you may find that straightness while working becomes compromised, resulting in you riding ‘lines’ that have the ability to induce sea sickness in a sailor.

    Begin practicing this by softly focusing on something in the distance on the trail and then, paying careful attention to both you and your horses shoulders and hips, ride straight to that object.  This is the sort of exercise that really benefits from ground where you leave a track of hoof prints behind you.

    Once you can ride a fairly straight line and hold that line as you work, you can then begin adding some transitions onto the line, again, paying attention to how straight both you and your horse is through the transition and how established the rhythm and tempo are when riding each gait.

    As I mentioned, often while on the trail, you horse will be more exuberant in his movement, which you can use to your advantage.  Rather than trying to ‘rein the energy in’, work with it and shift your mindset to this new ‘normal’ when working outside of the arena.

    After working through your transitions, you should have a more defined ‘line’ in your head, which will be important for the next movement I suggest you ride; shallow 5m loops.  Most tracks and trails are at the very least 3 meters wide,  and if your track does not allow the full 5m, vary your movement to 3 meters.  What is important here is that you are focusing on straightness, then the bend, and then changing the bend and back to the straight line.

    Having the ‘line’ clearly defined in your head will be paramount to performing the movement correctly.  You may also have to practice this a few times on the trail, firstly in walk and then trot due to the extra energy your horse has on the trail meaning that it will look and feel different to how he would normally ride it in the arena.

    Later, as both you and horse get better and better at this, you can begin performing the exercise in canter, which is a great introduction to counter canter.  Just remember that when riding a 5 meter shallow loop in canter, the horses bend must stay over the lead leg.  Often the temptation to ‘steer’ the horse back to the line using your hand and reins is very strong, however this will change the bend.  You must use your legs to ask the horse where to go with his body in this exercise.

    You can also change the ‘length’ of your loop, and begin asking for more loops from your horse in the same distance.  This will test both you and your horses balance and ability to wait.  It will also require a degree of suppleness if it is to be ridden correctly.

    Schooling Your Horse on the Trail

    Another exercise which is often easier when outdoors on the trail is leg yielding.  You can ask your horse to yield from one side of the road to the other, over and back and over again.  This too can first be asked for in walk and then later in trot.  Break the yielding by mixing it with straight-lines and transitions as well, so your horse can also rest.

    Shoulder in can also be incorporated into your ride.  Again, you need to have a well-defined ‘line’ and your horse will also have to have a certain level of prior training.

    It is worth mentioning that introducing these exercises slowly and for small periods of time is important to keeping your trail riding productive.  If in the past, your horses experience of riding on the trail or anywhere outside of the arena has been to relax, it will do both him and you good to, as always, warm up correctly and then ask for 2 to 5 minutes of work.  Follow this with a break or relax period and then ask for another short period of work.

    Introduce the exercises slowly, allowing your horse to build his physical strength and abilities, while also conditioning him mentally, for schooling while on the trail; both of which are vital for success.

    Happy Riding
    Lorna

  • Slow Down Over Fences

    Slow Down Over Fences

    [fusebox_track_player url=”https://op3.dev/e/traffic.libsyn.com/dailystridespodcast/SFA396-Learning-to-Slow-Down-Over-Fences.mp3″ title=”Learning to Slow Down Over Fences” social_linkedin=”true” social_pinterest=”true” social_email=”true” ]

    Does your normally relaxed, sane, and rhythmic horse turn into his version of a racehorse each time he rounds a corner and spots anything that resembles a jump when you are riding?  Your quiet calm ride turns into a flat-out gallop, resembling the rush for the finish post on the final furlong of Aintree…  (minus the cheering crowds!)

    Unfortunately, horses rushing or racing over fences is a common problem for riders. And one that, once all pain or discomfort has been ruled out as the cause, only patience, time, and consistent correct schooling can help remedy and slow down your jumping experience.

    Why Do Horses Rush?

    Rushing over jumps may begin to become a habit because of lots of varied triggers for different horses and riders.  One of the more common ways is due to a lot of riders becoming anxious over fences. This is also true for the horses. They pick up on this anxiety and become a little tenser themselves.

    This feeds the rider’s anxiety, which in turn feeds the horses. A vicious cycle is created between horse and rider every time a fence appears on the horizon

    Alternatively, many horses when jumping need a lot of practice to maintain the same speed around a course of fences.  Most horses enjoy jumping. And they become naturally more excited and ‘goey’ as they progress through the course.

    Learning to Slow Down over Fence

    Why You Need to Slow Down

    The downside to this is that instead of getting their back end underneath them, the horse flattens out. This causes them to pull forward with the front end. It also allows the energy to literally fall out through the front door.

    When the horse does not slow down it can have a real negative effect on the outcome. As reaches the fence, he cannot get sufficient height with his heavy front end.  He also cannot use his back correctly over the fence. This leads to knocking rails or worse.

    Anxiety in the Rider

    Rushing fences also leads to even more anxiety in the rider, who will generally do one of two things…

    Firstly, they lean back, behind the movement and haul on the reins with all their might.  

    While the horse will usually lift its head, it will also hollow its back. This, again makes it impossible to use its back correctly.  Also, when they do get to the fence, the rider is so focused on slowing the horse, that they usually end up being left behind over the fence. This causes discomfort and a loss of balance for both horse and rider.

    The other way I see riders react to a horse that runs at fences is to lean forward, hamster style, and just hold on.  

    They become completely ineffective as a rider. They are no longer supporting or carrying themselves. And all the while, the horse is getting faster and faster. Becoming heavier and heavier on the forehand.  Hamster style and hiding, the rider fails to do anything!

    This particular situation generally ends in one of two ways. The horse runs out of the fence with the rider coming off over the dropped shoulder. Or the rider stays on for the jump but hits the deck at the inevitable next turn after the fence.  Both, for obvious reasons, only increase the rider’s anxiety levels.

    Engaging the Hind Quarters

    As I mentioned before, in order for your horse to correctly use himself over the fence, the power must come from his hindquarters.  If you can just imagine a cat preparing to jump up onto a windowsill…  He first ‘rocks’ back onto his ‘hocks’, placing his back legs squarely underneath his body. Then, from that position, springs up by pushing off with his back legs, up onto the windowsill.

    Now, I do realize that a horse is built a bit differently from a cat, but the same principles apply.  His hocks must come more underneath his body in order to propel him cleanly over the fence.

    Learning to Slow Down over Fences

    Not only that, if the rider has collapsed their upper body, or gone into their jumping position too early which often happens with nervous and anxious riders, all their weight is now sitting squarely on the horses front end, making it even more difficult to lift the and shoulders and front legs out of the way of the fence.

    This is often why the horse will run out… It just becomes physically impossible for them to safely get from A to B over the fence.

    Starting with Reschooling The Rider

    All of these scenarios only lead to further issues for both horse and rider.  I believe when teaching a seasoned rusher to slow down over the fences, the training has to first begin with the rider’s mindset and control of their body and aids.  Only when this has been improved or changed can the horse can be worked on.

    A secure and correct jumping position is vital when working over bigger fences, but it is also necessary when working with a horse that rushes its jumps.

    Being able to direct the horse, while keeping out of his way over the actual fence is an essential element to riding clear rounds.

    One of the most important habits we can cultivate as a rider is to be able to ride through and focus on the end goal, regardless of what distractions or invitations crop up while getting there.

    What I mean by this, is to keep the focus on your aids.  Pay attention that you are correctly asking for what you are desiring your horse to do, at all times.  Don’t allow your body to shut down, and just become a passenger.  It is your responsibility as a rider to keep your sights set firmly on whatever goal you have set for you and your horse.

    Riding Individual Lines

    However, often the goal is simply just too big, so rather break it down; instead of looking to ride a course of fences, see the course as a series of individual lines that are merely joined together.  Rather ride each individual line, stride for stride, and when you have successfully completed one, then move onto the next line, again stride for stride.

    This is easier said than done. But in order to slow things down physically, you must condition yourself to slow them down mentally first.

    Begin with riding a straight line, on the quarter line of your arena. Place a single pole on this line. Ride over it in the canter. Focus on riding that line as straight as you possibly can. Also, halt while still on the line before the corner or bend.  Notice how, when you are thinking about halting before that corner, you are preparing for that all along… Not only focusing on the pole anymore.  I

    n fact, the pole is merely an obstacle to overcome before you get to what you are truly doing, which is the halt.

    The Importance of Straightness…

    It is important to note here that the line must be straight.  In order to successfully navigate a course of connected fences, your horse must be able to jump in a straight line.  This is not only essential to getting over a single fence, but also related distances, lead changes, and riding correctly through the corners as well.

    You will often see that many horses that rush fences, will tend to drift to one side or the other. This becomes even more noticeable through combinations.  Of course, straightness is also the key to preventing run outs.

    Work on establishing straightness as the rule early in your horse’s training, so as to minimize problems later as the fences get higher.

    Working Over Small Fences

    Once you and your horse are comfortable able to this on both reins, build a small fence where the pole is.  SMALL… 18 inches or so.  I want the fence to be so inconsequential that, again, it is merely a small obstacle between you and that lovely straight halt.

    If you find that, once the fence has been added to the exercise, your horse is beginning to rush, I want you to take things back again…

    Are you riding each stride with purpose or are you simply reacting to your horses rushing and riding defensively or not at all?

    If indeed your horse is rushing, place a ground pole about 9′ on either side of the fence.  Again, try to ride the fence with the same controlled, rhythmic canter that you achieved when there was only a pole there and aim for that straight halt afterward

    ReTraining Takes Time

    This may take weeks to achieve; horses develop habits, just like us, and unfortunately rushing is a habit that will take time to reprogram in your horse’s head.  All the while as you are working through the exercise, continuously check that you are indeed riding the actual line and not just reacting to the situation.

    Stride for stride… Keeping straight all the way through and asking your horse to follow your lead and do the same.

    As you and your horse learn to wait for the fence to arrive, I would then suggest moving the two ground poles further away from the fence.  However, this depends on the length of your arena.  If possible, moving them 5 strides on either side of the fence.  And then, working through the same exercise, balanced, rhythmic strides to the fence and away from the fence.  The aim is to ride, again, a straight halt before the corner or end of the line.

    Happy Riding
    Lorna

    Additional Resources to Help with This Topic


  • Developing Your Horses Self Carriage

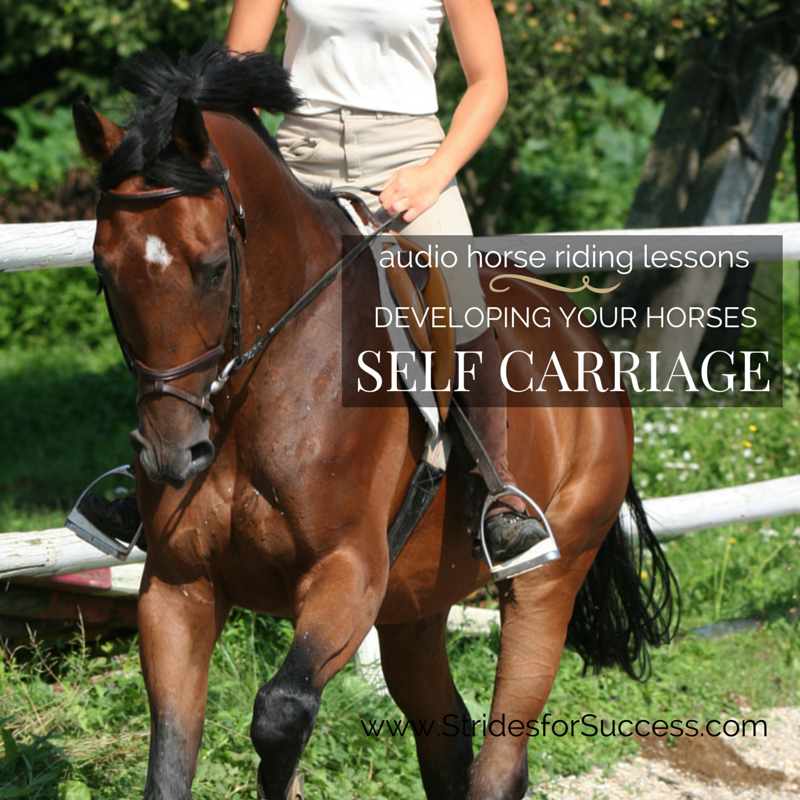
    Developing Your Horses Self Carriage

    When you are riding, is your horse carrying himself, or are you in-fact carrying him? 

    Self carriage in horses can be explained as your horse carrying himself, without needing support from or relying on you, the rider, in order to continue and maintain the movement he is performing.

    [smart_track_player url=”https://op3.dev/e/traffic.libsyn.com/dailystridespodcast/SFA391-Developing-Self-Carriage-in-Your-Horse.mp3″ title=”Developing Your Horses Self Carriage” social_linkedin=”true” social_pinterest=”true” social_email=”true” tweet_text=”Does your horse carry himself? Does he know how?! ” hashtag=”Equestrian #SelfCarriage” twitter_username=”strides_success” ]

    Your horses ability to carry himself comes from him being responsible for his own body, balanced physically and also mentally because he understands what is expected of him and is confident that he can do it.

    Developing Self Carriage in your horse

    As you ride, stop directing for a few strides; will your horse be confident, competent, balanced and able to maintain the correct amounts of impulsion and tension to ‘hold’ what he is doing, until you come back with further instructions?

    Unfortunately, for most riders the answer is no! In fact, most horses are ridden in such a way that they may never be truly able to achieve and maintain a degree of self carriage in higher levels of performance and work.

    Self carriage comes from your horse being encouraged to work by himself, confident in his own abilities and your consistent correction only when he gets things wrong.  Self carriage is really self motivation on your horses part and his knowing that when you ask for something it is his job to respond and then continue until asked to do differently.

    However this simply cannot happen if you, as the rider, are micro-managing every movement.

    The riders job is not to support the horse through every stride, but rather to influence the horses movements and balance, which will then, over time, allow the horse to develop the necessary strength to support himself, and achieve true self carriage.

    Another important aspect is the level of trust which must develop between both horse and rider and also, the horses confidence in himself and the same of the rider in herself.

    This is where developing ‘feel’ as a rider is important.  You must be able to feel that he is about to go wrong, or about to lose his balance, or about to stop what is being asked and then act on this before it happens.  Once you have given the aids to get your horse back on track, again, stop giving them and allow him to perform the movement.

    There is a blog post and audio lesson on Improving Your Feel in the Saddle HERE.

    Self carriage requires the horse to be balanced, supple, have the required level of physical strength and his being capable of using this in a controlled and consistent way every time.

    Self Carriage

    Often we see horses in the paddock or field with wonderful self carriage, prancing around, 100% control of their body. They display athletic abilities and prowess that often, as the rider, we can only dream of emulating while in the saddle.

    The disconnect comes because under the saddle, the riders influence pays a huge part.  Rider are often asking their horse for completely different movements, unbeknownst to them, by moving around in the saddle. Unfortunately, if there is not a high level of understanding and awareness on the riders part as to how to control their body while riding, these questions may conflict each other, ruining any hope of obtaining true self carriage.

    It takes calmness of mind from both horse and rider to achieve true self carriage and also the knowledge that self carriage in a young, green or preliminary level horse looks and feels different to self carriage in a well schooled, experienced grand prix level horse.

    When schooling our horses, it is important to introduce new movements slowly and gradually. Remember that the level of balance, for new exercises, will be in direct proportion to the muscles strength and ability while being used that way.  When balance is lost, apply the correct aids quickly to correct your horse, and over time allow him to hold this balance longer and longer in the movement.

    Also remember that self carriage will require different use of the muscles depending on what movement is being performed. Extended trot will both look and feel very different to collected trot and so on.

    Developing self carriage, I feel, begins by the rider working on gaining full control of their aids and developing the ability follow when their horse responds correctly.

    If he responds immediately and correctly to what you are asking… stop asking!  Bring your aids back to neutral and allow him to do what you have asked of him.  If he begins to lose what you have asked or if he wanders (both mentally or physically) off track from what you are asking, then use your aids to correct him.  As soon as he responds and is back where you want, shift back to neutral again.

    Riders, whether consciously or not, often nag their horses continuously while riding.  This will work against your horse developing himself enough to achieve self carriage.  It is important to develop the skills to ask and then allow your horse to perform his movements.  A horse that can only work when his rider is controlling every little micro movement is, in all disciplines, not going to be a successful one and, in some cases may even become downright dangerous to ride.

    The first thing you can do to help your horse to achieve self carriage is carry yourself and make sure your position is correctly applied in order to support your horse and cause as little distraction and hindrance as possible.

    Ask your horse to halt.   Rather than worrying about the quality of the halt for now,  rather notice if is happy to stop where you ask and then wait for further instruction.  If he is jig jogging, side stepping, pulling, leaning, walking on, reversing, do a quick check of your position and what aids you are applying.

    Do the same when you ask him to walk on.  Notice how quickly he responds and if you have to ask more than once, back this up with your whip or spur.  Once he is indeed walking, just allow him to walk.

    One of the most difficult things to do as a rider is nothing!  Nothing is just being neutral and rather only applying aids when necessary.

    • Pay attention to what you are asking, are you nagging?
    • Are you being heavy?
    • Are you fidgeting or nudging, patting, tapping, and just micro managing your horses every move?

    If so, you need to control yourself and only ‘talk’ when you are required to do so!  Again, bring your horse back to halt and notice if he does as you ask and then awaits further instruction or if he is continuously moving and fighting.  If so, correct quickly and then return to neutral.  Repeat the exercise again until you are confident that your horse is responding in a timely and proportionate manner to each question you ask.

    We said at the beginning that self carriage becomes possible as your horse develops his balance and suppleness.  A way to do this is by working and developing his top-line.

    You can do this by working on a 20m circle in a long and low frame.  He must work from behind, pushing with his back end. Make sure you are not continuously correcting and ‘holding’ him in position, but rather guiding and correcting before it becomes necessary.

    Notice how balanced he feels and once he is reaching down for the contact, stretch your hands to him for 1 or 2 strides.  Notice if he can hold himself, in this self carriage, even if just for a second or two to begin with and then work on lengthening the time he can support himself.

    Happy Riding!

    FREE 30 Day Rider Fitness Challenge


  • Riding a Serpentine

    Riding a Serpentine

    Do you , like many riders, find yourself overlooking the humble serpentine as being too basic and easy a schooling movement to be of any real consequence to your horses development?  If so, I would love to challenge you that the modest serpentine, if ridden and worked on correctly, can be a fantastic training aid for both your horse;  and for you as a rider…

    [smart_track_player url=”https://op3.dev/e/traffic.libsyn.com/dailystridespodcast/SFA386-Serpentines-for-Straightness-Balance-and-Suppleness.mp3″ title=”Serpentines for Straightness, Balance and Suppleness” social_linkedin=”true” social_pinterest=”true” social_email=”true” tweet_text=”Back to basics with the suppling serpentine… ” hashtag=”horseriding #schooling #equestrian” twitter_username=”strides_success” ]

    The serpentine is the sort of exercise that can be used over and over again, daily if necessary,  to improve your horses balance and rhythm, as well as his straightness, suppleness,  bend, and can also help, later, with lateral movement.

    Serpentines

    They are a great tool that you can use to first assess your horses rhythm, balance and straightness.  Serpentines will often show up any favoring of one side to the other in your horse which, once identified, allows you to develop a solid strategy from where to jump start not only your horses training, but also your own.

    The serpentine is also a great tool that riders to use to improve and develop their own skills in the saddle.   I have found them extremely useful in helping to keep riders looking forward and thinking ahead as to where they are going, and how the movement they are riding now will affect this.   This combination will ensure that are looking up and ahead, while still riding the specific movement you are riding at that moment.

    Unfortunately many riders see the serpentine as being merely a basic riding school movement and not giving it the attention it deserves while being ridden.   This is where the potential is greatest for riders to get this wonderful and helpful movement wrong.

    One of the first steps to riding a correct serpentine is to continuously monitor and feel what is happening underneath you, adjusting all the time to the different requirements of you as a rider, as you and your horse progress through the serpentine.

    I have found that many riders tend to get ahead of the movement while riding a serpentine, both physically with their upper bodies and mentally, in their heads.

    Serpentines teaches control on the riders part, to wait for each aspect of the movement as they ride through.

    I have also seen riders leaning and collapsing through their upper bodies as they ride through a serpentine.  It is almost as though they wish to get through the serpentine as quickly as possible and are physically willing their horses on and forward through the movement.

    Serpentines for Balance, Suppleness and Control

    On the other side of the spectrum, I will find riders taking far too much of a hold on the reins or head and resulting on the horse going or leaning on to the forehand and becoming heavy.  Part of riding the horse through a serpentine involves allowing your horse to carry himself through the movement and

    Lack of preparation will result in late transitions or inaccurate changes of flexion which affect the whole exercise.  It will also show up inconsistencies in tempo, bend and general suppleness of both horse and rider.

    The next time you are in the arena riding, really use the time spent riding through the serpentine movement to, firstly, notice which side you and your horse find easier.  Look out for any differences between the shape, bend and later transitions from one rein to the other.

    I suggest taking the time before you mount up to mark out your serpentine, so you initially don’t have to worry about hitting the correct parts of the arena or figuring out where to go.   Use poles or cones, however bearing in mind that sometimes riding over a pole each time may cause you and your horse to lose concentration… Maybe two parallel poles to ride through may work better.

    Ride the serpentine first in walk and then work up to trot.   Try and keep all of the loops the same size and aim for accuracy throughout the movement.  Ride the serpentine from both directions and begin from both A and C on the arena so your horse does not begin to anticipate the movement.  You can start initially with a large 3 loop serpentine and then, as you and your horse become more balanced over time, look to creating a 4 loop serpentine and even a 5 loop, depending on your arena and experience level.

    Also concentrate on the ‘straight’ part between the loops.  Use this space to half halt and re-balance your horse.  You can initially have as many as 4 or 5 strides of ‘straight’ with a green horse and slowly as balance improves, work to 1 stride of straightness.

    Pay particular attention to your horses shoulders, are they ‘falling out’ or or is maybe your horse using the rail as support?  If so, you can begin by ‘shortening’ the width of your serpentine, by riding the outer most point of each ‘loop’ about 2 to 3 meters before you reach the track of the arena fence.  Again, as you ride through the movement, analyse how well balanced your horse is when the fence or track is no longer there to support him.

    Look for any leaning in from both you or your horse.  Also try and keep the tempo and bend all the way through.  See is your horse is willing to wait for each movement or if he is rushing through.  This can often indicate a lack of balance and is something which should be corrected early in your horses training.

    As always, come back to walk if there are problems and work through them from the walk before trying again in the trot.

    Once both you and your horse are happy and confident riding through the initial 3 loop serpentine,  you can begin to add variations to the exercise.  One of these is to ‘close’ each loop into a circle, which you can ride for 1 or more circuits before continuing on with the traditional serpentine itself.

    This exercise can be used to re-balance the horse, and also, can slow things down if necessary or change things up if your horse is beginning to anticipate the movement and run through it.

    As you are riding each circle, make sure you don’t get ahead of your horses movement and ahead of the vertical with your upper body.  Use your bending aids to correctly to ride the circle and then half halt as you leave the circle before then straightening your horse, crossing the center line and then continue on with your serpentine, bending the other way.

    30 Day Rider Fitness Challenge

    Another variation you can use of the traditional serpentine is flexing your horse away from the direction he is working on each loop and thus asking your horse for some shoulder-fore as you go around each loop.  However, your horse does need to be supple and obedient to the aids, as well as supple and balanced, before attempting to perform this particular movement.

    Finally, you can work transitions into your serpentine, both incorporating different gaits and transitions within the initial gait itself.   This can be built up to cantering your serpentine, crossing the center line and changing bend through trot and later canter itself by performing flying changes.

    Happy riding!
    Lorna

  • A Smooth Sitting Trot

    A Smooth Sitting Trot

    [fusebox_track_player url=”https://op3.dev/e/traffic.libsyn.com/dailystridespodcast/SFA381-Mastering-a-Smooth-Sitting-Trot.mp3″ title=”Riding a Smooth Sitting Trot” social_linkedin=”true” social_pinterest=”true” social_email=”true” ]

    Does the thought of any sort of prolonged periods of sitting trot fill both you, your bum, and your horse’s back with a sense of dread?!  Perhaps the find the more you try not to bounce; the higher you appear to go?!

    Sitting trot is probably one of the most confounding things to master when you first begin riding. And often enough time is not invested at the beginning of your training to understanding the sitting trot. This leaves riders to their own devices, of which there are many, in trying to stay in the saddle and not bounce around like a gummy bear!

    Ideally, the sitting trot should be thought before the rising or posting to the trot, however, because sitting trot has gotten a bad name over the past few years, this is rarely the case.

    This leads most novice riders to think of it as difficult or hard, which does not have to be the case.

    Challenges with the Sitting Trot

    Riding a good sitting trot involves staying in the saddle and moving with your horse.  No bouncing and no daylight between your backside and your horse’s back.  However, this is often easier said than done.  What happens is when your horse’s back moves up on the first stride of the trot, you move up with it.

    However as your horse’s back moves back down, you are not quite quick enough to move with your horse and your ‘coming down’ is now a fraction of a second behind your horse’s movement.  

    This can be due to a number of reasons and the problems begin to present themselves when your horse’s back moves up again, while you are still on your way down.  The saddle or your horse’s back will ‘bump’ you and this causes the bounce, of which two or three in a row is usually enough to put most riders off balance and results in them clinging on by any means possible!

    The Trampoline Effect

    The same effect is experienced when on a trampoline with another person. If they touch down on the trampoline before you do… Their bounce coming back up meets your legs coming down… And results in a huge bounce, knocking you completely off balance and sometimes off the trampoline itself!

    When the bouncing begins, so do all reactive actions that riders take to try make the bouncing stop, all of which only make the bouncing worse and get the rider further and further away from their correct position, which is essential to correctly move with the horse and stop the cycle.

    What Not to Do…

    Common faults include gripping with upper thighs to stay in the saddle or using your reins to balance yourself.  Collapsing your upper body and rolling into an almost fetal position is also popular!

    Gripping with knees and/or holding the arch at the pommel of the saddle is another common occurrence. And, of course, flapping the legs. I have even seen riders hanging on around their horses neck!!  Not good folks, not good!!!

    Sitting Trot; the Right Way…

    A smooth sitting trot begins with being relaxed enough to move with your horse.  

    However many riders confuse a relaxed body with a floppy body.  Relaxed means that while you are still carrying yourself.  You have simply released all the excess tension from your muscles.  There is the right amout of tension there.  This allows you to be pliable and flexible enough to allow that movement.

    Your hips and pelvis will certainly move up and down in the sitting trot.  However, there is also a slight backward and forwards movement happening as well.

    Becoming Like Jelly…

    The strange thing about initially riding a sitting trot is that often the best way to learn how to actually begin moving with your horse is to ride a little incorrectly.  This is just so you can begin to really feel what is happening under you.

    You can then begin ‘polishing’ things up and holding a correct position for longer each time.

    Firstly, make sure your legs are long and not gripping upwards.  Focus on keeping your toes up, which for some reason seems easier to think of than weight into the heel in this particular situation.  Also, keep your knee off the saddle.

    By ‘off’ I mean no gripping or squeezing, just a very relaxed knee laying gently against the saddle.

    Next, look at opening your pelvis.  Do this by allowing your thighs to relax and open up.  Again, no gripping, or pressing…  Just gently draped down over your saddle and relaxed all the time.  As you ‘open your pelvis’, allow your body to sink down, so you are no longer really carrying yourself in the saddle and are actually becoming heavy.

    Again, I have to stress, this is not the correct way to ride, however often when riders are stiff or tense, ‘over relaxing’ is the key to allowing them to feel for the first time, what it is like to move with their horse instead of tensing against each stride.

    Move With Your Horse

    Once you have relaxed everything, you will probably feel almost like you are leaning back a little and are quite low in the saddle.  Don’t hold this position for too long and it is uncomfortable for your horse, not to mention bad for your back. However, while there try to notice how your horse’s back is moving underneath you.  I

    f you feel confident, you can try a few strides of a very slow trot and see how, in this ‘jelly-like’ position, you stay on the saddle, not bouncing off it.

    Self Carriage for the Rider

    Once you can master the sitting trot in a completely relaxed position, you can begin to carry yourself again.  Do this by engaging your core muscles, in particular your abdominal muscles.  Notice how, when you engage the muscles in your tummy, you lift your body up.  You are still relaxed, however now you are beginning to carry yourself.

    Again, ask for slow, short trots, making sure not to spend too long in the gait as, until you can master carrying yourself and allowing your pelvis to follow. Otherwise you will feel very heavy on your horses back and may cause him discomfort.

    As you use your core to carry yourself, pay attention to how you are sitting up through your body. Almost as though you don’t want your rib-cage to squash the organs underneath.  Work on keeping your chest open. The points of your shoulders opened out and no ‘creases’ on the front of your tummy.   Try not to arch your back or pull your shoulders back, as this will only cause you to tense your lower back again. This will lead to straight back to bouncing.  You must carry your upper body so your pelvis, hips, and seat can indeed move with your horse

    Sitting Trot is Like Dancing…

    Sometimes we hear that we must try and absorb the energy. However, this is often difficult to visualize or understand for many riders.  If this is the case for you, rather think of moving with your horse. Like a dancing partner.

    Each of you is responsible for carrying and supporting your own body and all the while, you move together.

    Another exercise you can try is to put both reins into one hand and, bending your elbow, place your other arm behind you with your hand flat on your back.  This works in two ways; you can feel what is happening with your back as you ride, but also, your elbow is now slightly behind your shoulder, which will help keep your upper body and chest area open.

    Lastly, remember to keep on relaxing through your legs so you do not grip up.  A ground pointing toe is often the result of gripping up with the legs, so pay attention that legs are hanging down, with the weight going into your heel.

    Start with a Few Strides of Trot

    Again, begin by trotting 5 to 10 strides and then back to walk.  Repeat until you can really begin to understand what is happening to your body as your horse trots. But, also, that you don’t have to concentrate on not gripping or curling forward.

    If you do run into trouble and feel like you are about to fall off at any time, lean back, push your heels down, and bring your lower leg forward.  Once you have regained your balance, begin working on ‘fixing’ your position again.

    As I mentioned earlier allowing yourself to become heavy and completely relaxed in the saddle is not correct. However sometimes as riders, we make such an issue out of our bouncing in the sitting trot, that we train ourselves to tense up in order to try to prevent it.

    Often the easiest way to untrain this is to feel what the movement is actually like with a totally relaxed body. Then begin to control your core so that it can support you and, most importantly, can move with your horse in the trot.

    Once you have mastered carrying yourself and not bouncing for the shorter, slower periods of trot, you can then begin to ride longer pieces of sitting trot as you are now moving with your horse, not against him.

    And, trust me, when this happens both you and him will be happier for it!

    Happy Riding
    Lorna

    Additional Resources for Equestrians

    Mastering a Smooth Sitting Trot