Tag: audio horse riding lessons

  • Asking Your Horse to Bend

    Asking Your Horse to Bend

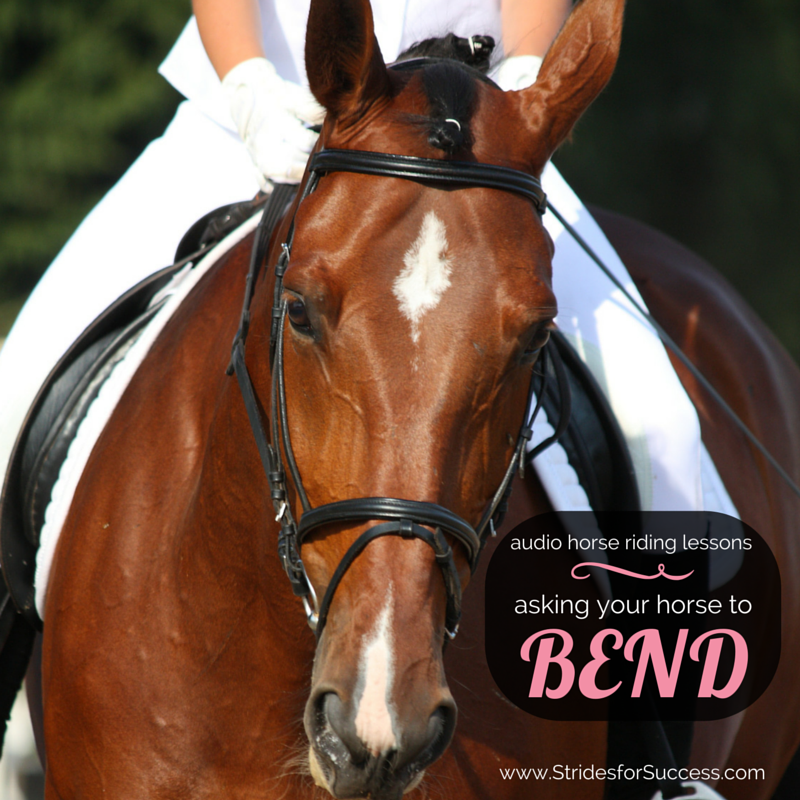
    Riding through a bend is something you will have to do every time you get in the saddle, whether it be the 4 corners of your arena or just the route you take to get from point A to point B.  It therefore makes good sense to work on your ability to navigate those bends successfully, without losing balance, rhythm, energy and focus each time you encounter a bend.

    [smart_track_player url=”https://op3.dev/e/traffic.libsyn.com/dailystridespodcast/SFA446-Asking-Your-Horse-to-Bend-Correctly.mp3″ title=”Asking Your Horse to Bend” social_linkedin=”true” social_pinterest=”true” social_email=”true” tweet_text=”Asking your horse to bend…” hashtag=”horse #equestrian” twitter_username=”strides_success” ]

    Riding a bend correctly will result in your horse having an equal bend throughout his body, resulting in the energy continuously being directed where you want it to go; forwards, and not out being lost anywhere along the arc from tail to poll.

    Asking Your Horse To Bend

    A good way of ‘seeing’ this equal bend, so you can visualize using your aids, is to think of a whip or stick being held at each end with your two hands.  Now, imagine closing your hands closer together…  If you use equal pressure from both hands on each side and gently ‘feel’ to make sure you are balancing that pressure and not overexerting the whip, the whip will have an equal bend all the way through.

    Now (without snapping your whip!) imagine what would happen if you pushed too hard or too much with one hand or the other, or try to force or ‘fix’ the bend; the whip would snap, leaving you with two straight lines with a break in the middle.  This is similar to what happens to the line from poll to tail on your horses back; often by applying too much of one or the other aid (usually hand), the result is a straight line from poll to withers and then another straight line from withers to tail, with a ‘break’ at the withers or shoulder where all the energy has fallen out of.

    Riding your horse correctly around a bend requires a balance of aids from you, which will allow your horse to navigate the bend to the best of his ability.  You cannot force him and you cannot fix him.  Your job as the rider to is guide him around the bend so he remains in balance and moving forward.

    When you horse rounds the bend correctly, his inside back hoof will stay on the track created by his inside front hoof, and the same applies to the outside legs, almost like train tracks, remaining parallel to each other around a turn or bend.

    In order for this to happen the horse must lengthen or stretch of one side (the outside) of the body, rather than a shortening of the inside.  Your aids will ask him to do this, however before we can discuss the aids, we must first become clear on the terms Inside and Outside with relation to riding and bending.

    Often when we are learning what is the inside leg or what is the outside rein, the instructor will use the analogy of a circle or the arena wall itself to demonstrate and when you are initially learning to ride, this generally holds true.

    However, as you begin to ride more complex movements, such as counter canter or leg yielding, the issue of inside and outside changes from where you are in the arena or what shape you are riding, to what way your horse is bending.

    This is the true meaning of inside and outside, the inside being the leg, hand and seat on the concave side of the horse, depending on which direction or way he is bent.  The outside being the opposite of the above on the convex side of the horse.

    So once you have decided which way you are going to bend your horse, begin by shifting your inside seat bone slightly more forward than your outside seat bone.  In doing so, you will feel that your inside seatbone is now a little more ‘weighted’ as well.  Make sure you are not leaning towards the inside with your upper body; this will have the opposite effect and ‘push’ your weight to the outside of the saddle.

    Your inside leg is applied on or at the girth.   This will help you continue to create forward energy and gives your horse something to bend around, rather than falling in and sideways.  In fact I have found it helpful to get my riders to think of their inside leg as a pole that their horse must bend around.  It helps visualise the bend, but it also helps to ensure that they are using their outside leg aid as well.

    When riding on a bend, your outside leg will move back slightly in order to control the hind quarters and, in particular, make sure they don’t swing out around the bend.  This is often evident on circles and when it happens the horse is no longer following the ‘train tracks’ that his front legs are creating.

    Your inside hand is used to indicate to your horse that you are asking for the turn, using a combination of arm, hand, wrist and fingers.  Very often riders will use only their inside hand to turn, and just like the whip analogy we spoke of earlier, using too much pressure from one aid will result in the ‘break’ of the arc and the energy falling out.  The use of the inside hand is very subtle and can be thought of as more of an indicator, rather than what actually bends your horse.

    Finally, your outside hand prevents your horse from over bending and helps to hold the forward energy created by your inside leg together.  Unfortunately a lot of riders forget about their outside hand when turning, however it is vitally important in holding everything together as you and your horse navigate a turn or bend.

    I suggest beginning by practicing first in halt.  Adjust your position to where you would if you were to ask for a bend while riding.  Notice how easy it is for you to move in and out of this.  Keep in mind that the movement should be fluid and that if you are having to really struggle to ‘hold’ something, you may in fact be over doing it.  You are only making small subtle movements that your horse will pick up on and respond accordingly.

    Once you are clear about how to ask your horse to bend one way or the other, you can ask for walk and whether you choose to walk large around the arena or begin to ride some different school figures, begin assessing how your horse bends and how you are using your aids to ask him and then ride him through the bend.

    Notice if you are perhaps dropping your inside shoulder?  Or maybe you are completely forgetting about your outside hand or leg.  Keep working on this in walk until it becomes second nature to you to ‘bend’ your horse around each and every turn, rather than use your inside hand to drag him around!

    From there you can begin to work in trot, where you may find that your horse falls in around the corners, or that the hind quarters are more likely to swing out rather than following the front end.  Notice it and then, begin by correcting your position and aids.  See what effect this has on your horse and work from there.

    Keep in mind that your horse may experience some stiffness on one side compared to the other.  If you experience this, create a plan for your ride that will incorporate a slight increase of work on that side, however slight is the key word here.  This will, with correct training, be corrected over time with consistent, correct riding and work.

    Happy Riding
    Lorna


  • Riding Haunches In or Travers

    Riding Haunches In or Travers

    [fusebox_track_player url=”https://op3.dev/e/traffic.libsyn.com/dailystridespodcast/SFA441-Riding-Haunches-In-or-Travers.mp3″ title=”Riding Haunches In or Travers with Your Horse” social_linkedin=”true” social_pinterest=”true” social_email=”true” ]

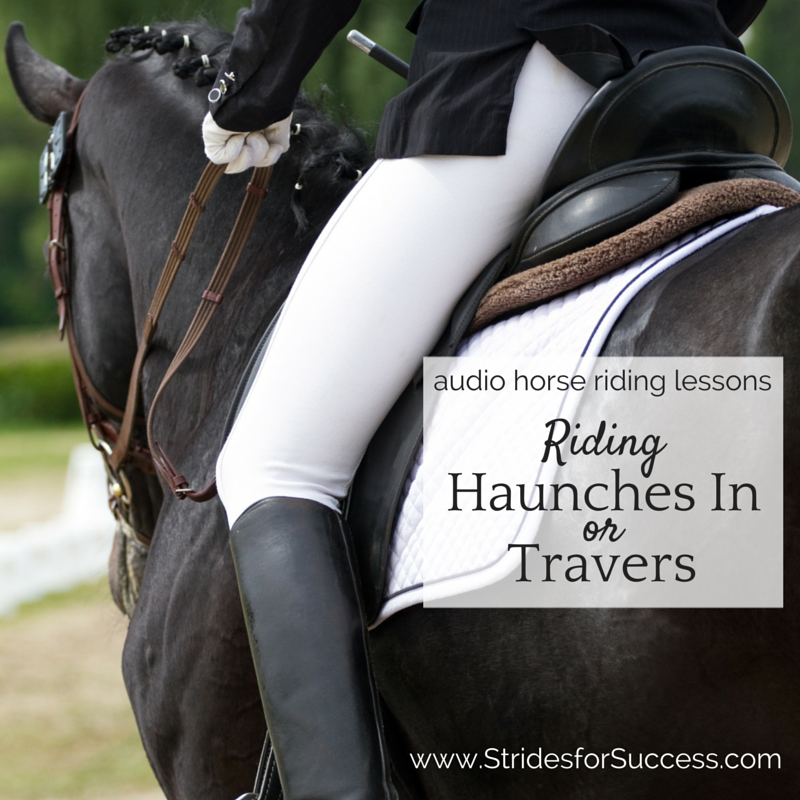
    Do you find that when you ask your horse to perform haunches in or travers, the forward movement tends to get a little ‘stuck’?  It feels as though he is on his tippy toes, pottering along with no inclination to get to the other end of the arena?!

    The Benefits of Haunches In

    Haunches in is a lateral movement that is fantastic for suppling your horse and it also opens the door to performing a half pass later in training.

    It requires an engagement of the hindquarters, due to the outside hind leg having to move over and almost in front of the inside hind leg, and so incorporating this movement into your schooling will, in turn, help strengthen your horses’ hindquarters.

    Riding Haunches In or Travers


    I find that haunches in is also a great exercise to improve the rider’s coordination, both physically and in their head. It also helps to take the confusion out of riding lateral movements on their horses.

    What is Travers (or Haunches In)?

    You ride this movement by asking your horse to move his hindquarters or haunches in off the track. So, towards the inside of the arena if you are on the outside track.  As he continues to move forward, his shoulders remain on the track.

    He does this by bending around your inside leg at an approximately 30-degree angle to the track.  

    How Much Bend Off the Track?

    If you looked at your horse moving down the arena, from the front, you would see either 3 or 4 distinct tracks created by your horse’s hooves.  I say 3 or 4 because this depends on what level in his training your horse is at. It can also depend on how he is put together.

    A simple way of imagining how haunches in should look when being ridden is to think the ‘last stride’ of a circle or bend, just before your horse straightens up again.  

    Now imagine holding this position as you ride down the long side of the arena.   Your horse’s shoulders would be on the track. However, the hindquarters or haunches would be slightly in off the track as he bends around your inside leg.

    Getting Started…

    Haunches in or travers can be performed in walk, trot or canter and, as always, I suggest first asking for the movement in walk before building up to faster gaits.  This will give both you and your horse the opportunity to figure out what to do when it is being ridden.

    Start in a walk on a 10-meter circle in the corner before the long side of your arena.  Focus on establishing and maintaining a correct bend while on the circle. Do this by applying the half halt as necessary to re-balance your horse, and let him know something is happening.

    Your Aids for Haunches In

    As you come out of the corner on the circle, use your outside leg to keep your horse’s hindquarters off the track. They will be closer to the inside of the school.  Do this by bringing it back and maintaining the bend around your inside leg.

    Make sure the shoulders remain on the track by using your inside leg on the girth.  

    Your inside leg will also help create the bend and continue to create the forward energy that is essential to prevent you and your horse from becoming ‘sticky’ while riding the haunches in.

    Work towards maintaining the bend around your inside leg and ask your horse to move down the long side with his hindquarters to the inside and off the track.  Continue to half halt throughout the movement to re-balance. Also, pay attention that your horse is not over-bent,

    Only ask for a few strides of travers initially, working up to longer periods as your horse becomes stronger and grows his confidence in his ability.

    The Balance of Aids…

    Make sure your inside leg is continuing to create forward impulsion as you perform the movement.  Also, continue to check that you are not applying too much inside rein. This will result in you ‘pulling’ his head and neck around.

    Over-bending through the front end will prevent your horse from stepping out correctly. This will ultimately lead to the short, choppy, sticky steps that we often achieve when riding haunches in.

    Don’t worry too much about the angle initially.  Rather focus that your horse is listening to your aids and responding. Even if that response is not as ‘active’ or expressive as you would like it to be.  As he becomes more supple, you can ask more difficult questions of him and work on ‘polishing’ the movement up.

    Alignment Through Your Position

    All the while, both before, during, and afterward, make sure your body and position are correct.  Also, that you are applying and using your aids as clearly for your horse to understand as possible.

    Often when we are not getting the desired result, riders can ‘fight’ with their horse; pulling, pushing, and shoving in frustration.  Rather realize that if what you are doing is not working, go back a step or two, perhaps to leg yielding, and after re-establishing a solid foundation, ask again.

    Try not twist or slouch your body while riding.  It is tempting to ‘look’ your horses hind quarters to see if you are achieving what you are setting out to do; rather use your seat to ‘feel’ what is going in and ‘glance’ with your eyes that the shoulders are remaining on the track.

    Also, think about your seat aids as you prepare and ride the haunches in movement.  Don’t try to influence your horse to ‘go sideways’ by swinging your seat around in the saddle.  Simply make sure your inside seat-bone is slightly more forward than your outside.  A little like when you are asking for a bend. Also, pay attention that you are not collapsing through the inside hip and shifting all the weight onto your outside seat-bone.

    Developing the Movement

    Once you and your horse have successfully performed the movement in the walk, you can begin to add trot. You can also later add canter into your schooling time.

    Pay attention that your horse is truly bending around your inside leg, otherwise he may just be leg yielding!

    Another exercise you can ride is a 20-meter circle, which using haunches in, you can spiral smaller into a 15 meter or even 10 meters if your horse is balanced enough.

    From there you can use shoulder in to move your horse back out to the original 20-meter circle.  

    This can be ridden on both reins in all three gaits and is a simple way of incorporating this movement into your daily schooling routines.

    Happy Riding
    Lorna

    Additional Resources for Equestrians

    Riding Haunches In

  • Retraining a Horse Who is Heavy on Your Hand

    Retraining a Horse Who is Heavy on Your Hand

    Dealing with a Heavy Horse
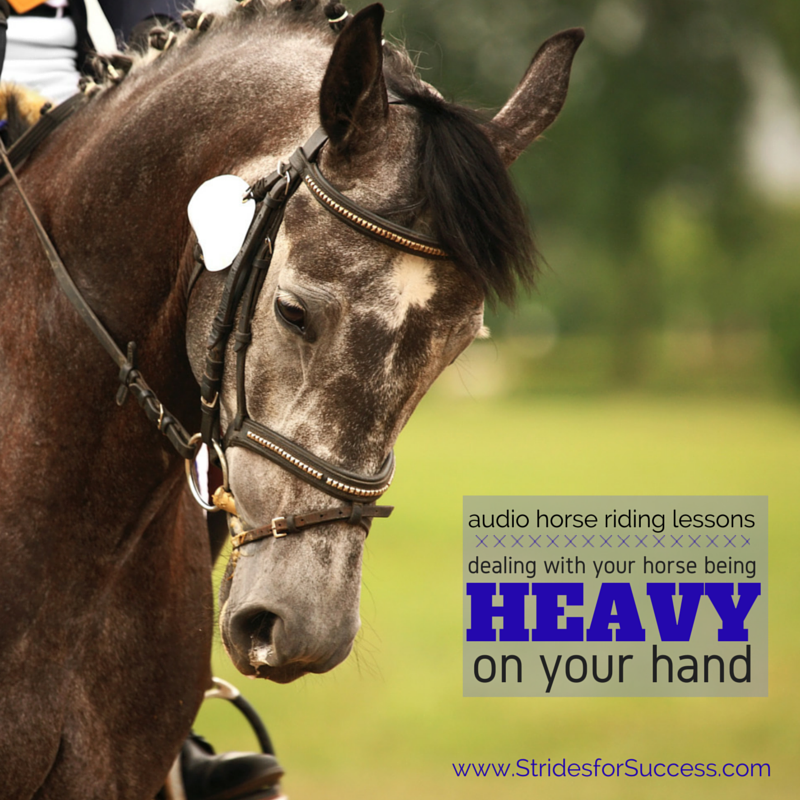
    Have you ever had the experience of riding a horse who was so heavy on the forehand, it felt as though your arms were a couple of inches longer by the time you dismounted?!

    [smart_track_player url=”https://op3.dev/e/traffic.libsyn.com/dailystridespodcast/SFA436-Dealing-with-Your-Horse-being-Heavy-on-Your-Hand.mp3″ title=”Retraining a Horse who is Heavy on Your Hand” social_linkedin=”true” social_pinterest=”true” social_email=”true” tweet_text=”Does your horse tend to get a little heavy in the hand? This may help…” hashtag=”equestrian #podcast #makeeveryridegreat” twitter_username=”strides_success” ]

    The whole experience is exhausting!  It feels as though you are literally carrying the horse’s head and neck by bracing your shoulders and arms against him the whole time…  Not a fun ride!

    Horses that are heavy or lean on your hands are unfortunately more common than not.  It is usually the result of the horse not been thought to yield to the pressure of the bit.  Or a horse who has been wrongly trained or retrained by a rider to lean on the bit.

    Why This Doesn’t Work for Your Horse Either

    When your horse is heavy in front, he will find it difficult to perform correct, balanced transitions.  He will have trouble bending consistently throughout his body.  His lateral work will usually be stiff and ‘jerky’ and his jumping abilities will also suffer as more weight than usual is on the forehand and shoulders.

    You will also find it difficult to engage the hind quarters and bring them ‘underneath’ your horse.

    In fact, when you are riding, it will feel as though all the energy is falling out the front end of your horses body.  Plus the fact remains that no amount of pulling on your part will actually go towards fixing the problem!

    The lack of balance that is a result of this leaning will become even more evident later, when more difficult questions are asked of your horse.  ‘Heavy’ horses, generally, end up beginning to rely on the riders hands for support and balance throughout the ride.  This, of course, just exaggerates the problem even further!

    Is it a Bit Problem? Nope, Not Usually!

    Most riders will try to remedy the problem by shoving a stronger bit into the horse’s mouth.  The thinking is that it will give them more ‘leverage’ to haul on the horse even further…

    However, this will generally will only worsen the problem as the true cause for the leaning has not been dealt with.

    The Most Common Reason for This Happening

    Horses being heavy or leaning on the hand often become like because of their rider.  More specifically being ridden by a rider who lacks an independent seat or lacks confidence.  The unstable rider will use the horse’s mouth for balance and support.  This then trains the horse to firstly ignore the rein aids and, even worse, lean into in the contact.

    Anxious or nervous riders will tend to hang on to the reins often as reassurance that they are ‘in control’ of the situation.  

    Again, this leads to the horse’s mouth becoming hardened to the hand aid.  The result often being that the horse moving more and more onto the forehand.

    Very often the stiffness and dependency of the rider carries through and is passed to the horse.  This creates a similar stiffness and co-dependency in the horse.  The horse begins to use the riders hands for physical and mental support.

    The Never Ending Battle

    After being ridden like this for a while, the horse will learn to begin to ride into the pressure.  This will soon transition to pulling against it.  Which is what makes this such an exhausting experience for the rider who encounters a horse like this…  The rider will never win against a 600kg horse!

    The cycle is self-perpetuating.  The heavier the horse becomes, the more the rider hangs on trying to bring their head and neck up.  Which causes the horse to pull more; causing the rider to haul more… 

    Other Reasons for this Occurring

    Heaviness can also manifest itself in the horse becoming over bent through the poll.  This causes the horse to become ‘locked’ in an unnatural frame, behind the vertical.  This is often the result of too harsh a bit having been applied to the mouth.

    It can also be due to a rider who is obsessive about being ‘on the bit’ without actually using their legs and seat correctly to first engage the hind quarters.

    A horse that moves like this may ‘look pretty’ to an uneducated eye.  But really they are just forced into, and learn to hold, a shape which inhibits their natural movement.  This results in their training stalling and going stagnant.

    Due to horse being fixed in this unnatural shape, he learns to brace against his riders hands to hold himself there.

    Starting Your Re-Schooling of Your Heavy Horse

    Re-schooling a horse to lighten up in front takes time and consistency from a rider.

    Before you begin focusing on your horse, make sure your seat is indeed truly independent.  Especially that you are not dependent on the reins for support or confidence.   Also, begin paying more attention to your aids.  The ‘how, when and where’ you are applying them.

    Confusion on either you or your horses part will almost always result in a loss of balance.  This will only ‘tip’ your horse further onto his forehand.

    Working With All of Your Aids

    Each time when you are asking your horse for something, begin to apply and use your aids in a sequence.  Seat, then legs and finally hands…  There are many different situations and circumstances that we find ourselves in while riding.

    Doing things this way will allow you to prepare both yourself and your horse in a way that will interfere the least with the natural flow of energy and balance.

    Schooling Using the Walk to Halt Transition

    Start by working in walk and begin asking for halt using your seat and core muscles.  Then use your legs to support your horse and make him ‘close’ the halt with his hind quarters.

    Your horse must step into a halt, not fall into one! 

    Finally, close your ring fingers on the rein, resist with your hand.  Many riders will have been advised at some point to lift up their hand as they give the rein aid.  Rather think about closing your ring finger and as you do, allowing a little movement in your wrist which will bring your finger nails ‘up’ more.

    As soon as the horse responds, even a step, reward by softening the rein.  Softening does not mean throwing the reins at your horse or dropping the contact.  It merely has you softening the pressure by relaxing your ring finger again and ‘allowing’ a little with your arm.

    Understanding the Balance of Your Aids

    If your horse insists on walking through your hand and ignoring you, apply a stronger aid, asking for a very firm ‘stop’.  Be sure to reward as soon as he does so.  Sometimes you will have to be quite stern on your horse, particularly if he has become quite good at ignoring you!

    Make sure that while you are being firm, you are also holding your correct position and asking correctly for the halt – just applying more pressure as you do so.

    Once your horse has halted, ask him to stand for a few seconds.  Use this time to reevaluate your position and correct it if necessary.  Your horse should not need you to keep applying the ‘hand brake’ while he is halted.  He should merely wait patiently for your next question and then respond accordingly in a timely fashion.  No dilly dallying!!

    Repeat as Necessary

    When you are satisfied that you are sitting correctly, ask him to walk on again, using your seat and legs. Make sure that although you have a contact, you are allowing him to step into the walk, not resisting with hard hands or arms… Soft, Soft, Soft.

    Walk for 5 strides and again, using sequence of the seat, then legs and finally hands, ask for halt again.

    Be firm if necessary, but make sure that you are not leaning back and hauling.  Let the firmness come from your core, with your legs underneath you, rather than having a tug of war leaning backwards and hauling for all your worth!

    Working on Suppleness

    Once you have established a good baseline for halt, using the seat, legs then hands sequence, ask for halt again.  Once there, open your right hand away from your horse’s neck and ask him to bend his head and neck a little to the right by ‘having a conversation’ with your ring finger.  You can do this by squeezing the ring finger two or three times.

    As soon as your horse yields to the pressure and bends the head and neck reward him.  Do this softening the rein and using the voice if necessary to reward.


    Repeat to this same exercise to the left.  If you horse is more hesitant one way or the other, make a note of this.  I suggest working some suppling exercises into his schooling sessions to begin remedying the problem.  Also, some horses can become so stiff through their heads and necks because they are leaning so much that only the slightest of ‘gives’ is all you will see.

    Reward any small step in the correct direction.  Then use this as your measuring stick to gauge how much progress you are both achieving over time.

    Balance in the Halt Itself

    Your horse should continue to remain in a square halt while he does the above exercises.  You may find that he wants to move his shoulders to try counter balance himself.  Use your legs to hold him in a square halt.  Again, remember to only ask for small movement in the head and neck to begin with.

    You can also begin to add some trot in to the schooling, particularly transitioning between walk and trot.  Choose an amount of trot strides you want to ride, perhaps 5 or 6, each time and make sure it is an active working trot that you are riding.  Use the same downward aids that you applied in asking for halt to ask for the walk.  Walk for 5 or 6 strides and then forward to trot.

    Consistency and Time are Essential

    Continue to move up and down between the gaits, focusing all the time on not participating in any tug of wars or leaning matches.

    It will take time to retrain your horse and also you the rider, however it is essential if you want to move forward and progress with your training.  A horse that resembles an arrow aiming for the ground while being ridden will never achieve the lightness and self carriage in front that is essential to them becoming the best version of themselves.

    Happy Riding
    Lorna

    Links to Related Articles & Freebies Which You May Find Useful:-

  • Increasing Your Horses Suppleness

    Increasing Your Horses Suppleness

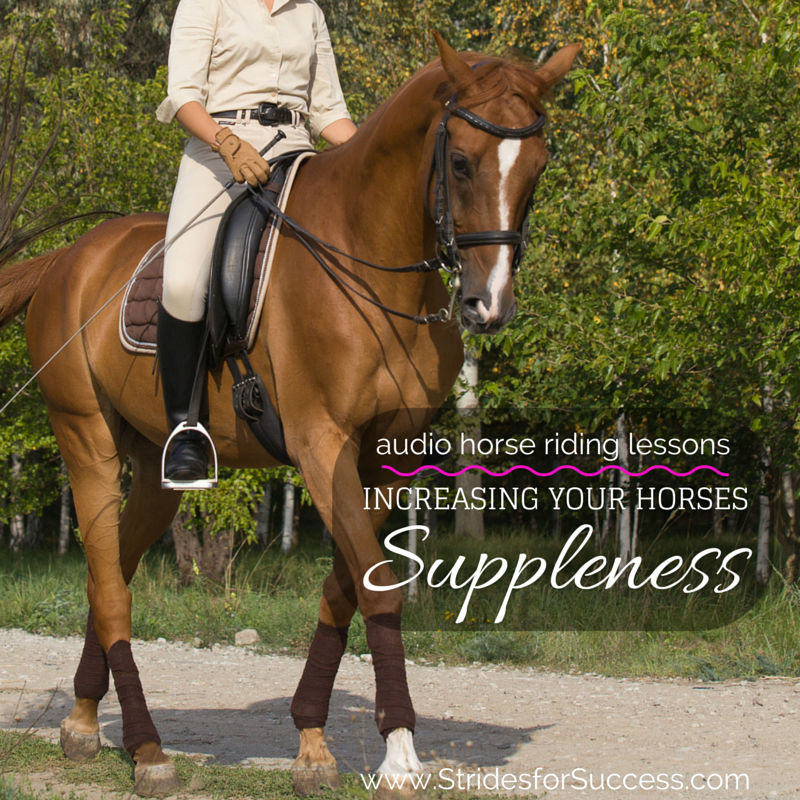
    Have you ever ridden a horse and they feel so wonderfully loose and pliable underneath you?  Perhaps you can remember how your horse was able to really and truly use his body and how the suppleness made it feel like he was performing movements in the best possible way that his body, fitness and confirmation allowed?

    [smart_track_player url=”https://op3.dev/e/traffic.libsyn.com/dailystridespodcast/SFA431-Increasing-Your-Horses-Suppleness.mp3″ title=”Increasing Your Horses Suppleness” social_linkedin=”true” social_pinterest=”true” social_email=”true” tweet_text=”Loosey Goosey… That feeling you get when your horse is warmed up, ‘bendy’ and ready to go… ” hashtag=”Supple #TrainingScale #Equestrian” twitter_username=”strides_success” ]

    True suppleness allows your horse to bend without stiffness and work freely without excess tension or stiffness throughout his back and muscles.   This enables him to perform smoother movements and transitions with greater balance which leads to building strength, development of muscles and growing confidence in both horse and rider.

    Increasing Your Horses Suppleness

    As riders, we are seeking true flexibility or suppleness in our horses, and should always work towards trying to establish, and then allow, elasticity throughout the horse, particularly the jaw, poll, back shoulders, knees, hips and hocks.

    However this is often difficult to understand due to the simple fact that we will not achieve suppleness by ‘fixing’, ‘forcing’ or ‘restricting’ our horses in any way.  Rather than forcing your horse into unnatural frames or positions trying to promote this relaxation and flexibility, think of asking your horse to stretch himself in a natural way, little by little in slight increments, to grow the natural pliability of his muscles and joints.

    Also, when he is flexing or bending, if you are ‘fixing’ him or holding him there, he is not truly supple himself.  When riding , ask your horse for a small about of flexion or bend and then allow him to carry on with the movement himself for a period of strides or seconds.

    As his strength grows, he will become more flexible and his ability to carry himself for longer periods will also increase.

    Suppleness can be thought of in both a forward movement capacity and a sideways or lateral capacity. It is important to ride exercises that boost the development of both. Your horse will not achieve true suppleness if only using his body a certain way. In fact over-development of one will  often result in stiffness in the other.

    Another advantage of working to increase relaxation and suppleness is that it can have a positive effect on your horse mentally and emotionally as well. Often we try to ‘relax’ our horses by speaking to them in a soothing manner, however, if we think about life, feelings follow actions (it is rarely the other way around), so by relaxing the body, we can often dissipate anxiety and stress in the mind and put that energy to better use elsewhere.

    In riding, we are thought to think from the back of the horse to the front of the horse.  Energy created in the hind quarters and then sending it to the front of the horse.  However, we should think of loosening or relaxing our horses the other way around, from front to back.

    There are many horses that are flexible, pliable and supple through their backs and limbs, however they are ‘stuck’ at the poll or jaw which causes that flow of energy to also become stuck or blocked and makes true connection  impossible.

    When working on increasing your horses suppleness, I suggest starting with the poll and jaw.  Place two poles parallel to each other across the center line about 1 meter apart.  In walk, bring your horse between the poles and ask for halt. Try to keep him straight, using the poles for guidance and reference. Then, remembering to keep his neck straight, as him to flex his poll, first one way and then the other.  Use your inside hand and turn your wrist slightly so as the underside is more on top and your thumb is about 45 past the vertical to the outside. Gently squeeze with your ring finger.

    When asking for the movement, keep in mind it is very slight flexion in the poll, not bending though the neck. Ask to the right and then back to center, and then back to the left. You can repeat this quite a few times, all the while noticing any resistance or stiffness. If this shows up, rather invest more time over the coming weeks and months, slowly asking for the flexion and then working it out.

    Don’t force it! Suppleness does not happen overnight, it takes time for your horse to soften, relax and become flexible

    Once you have mastered this in halt and your horse understands, you can begin to incorporate it into walk, trot and eventually, canter.  Use the center line, and if necessary, place some parallel ground poles to work between school to help keep you ‘straight’ and on target for where you want to go.  Remember, you are only flexing your horses poll, not bending the neck.  In walk, ride up the center line and begin asking you horse to flex left then back to straight and then left.

    Pay attention that his shoulders are not ‘swinging’ where you are flexing to which will give your horse the appearance of being slightly inebriated!  Also, focus on keeping him straight through his back, not allowing the hind quarters to fall in or out

    As mentioned, it is important to work all parts of your horses body, so I recommend beginning to incorporating some large circles into your work.  how well your horse can maintain the bend in their body on the circle, will depend on how supple your horse is.  the smaller the circle, the more difficult it will be for your horse, so stick to large circles initially in walk or trot.

    Increasing Your Horses Suppleness

    When riding the circle, Establish and maintain a consistent bend to the inside, all the way from neck to tail. The degree of the bend will depend on the size of the circle as you will follow the arc of the circle.

    Notice if your horse is falling in or out through this shoulders.  Often, when we ask for the horse to bend to the inside, he will begin to literally fall in towards the center of your circle, rather than maintaining the ‘line’ of the circle and his back replicating the arc of the circle.  If this is the case, use your inside leg to encourage him to stay ‘out’ on the circle, however once he is there, he must learn to balance himself so you are not all the time supporting him on the circle or bend.

    There is nothing more exhausting that riding a horse which you have to hold up with your legs

    Again, start your circles in walk and once he understands and has a nice equal bend through his body, go forward to trot and later canter.  Work on both directions and pay attention to any stiffness, tension or lack of balance on one side more than the other.

    If you do notice any problems, see working in it as a long-term project that will be successful if you consistently work little by little at stretching and loosening up your horse

    You can also begin to incorporate some serpentines into your schooling.  Obviously work on your bend while riding the loops, but also focus on your straightness as you cross the center line.  Transition in and out of the two by beginning to ask for some flexion through the poll for 2 to 3 strides before and after the center line.  As you round your ‘loop’ again, straighten the body with just the poll flexed and as you cross the center line, straighten your horse, so you can then change the flexion in order to ride the next loop.  Work the serpentines from both sides, again walk, trot and then canter if necessary.

    You can also incorporate some halts into the serpentine, as you cross the center line, and spend the time in halt flexing the poll again in order to flex the poll and reinforce the principle, in both your head and your horses!

    Finally, you can begin to add some counter bend to your circles.  Ride a large 20 meter circle in walk and once you have established bend to the inside, see if you can ‘change’ the flexion to the outside, paying close attention that the shoulders do not come off the track of the circle.

    The flexion to the outside will be very slight at first, and not held for long periods.   Work on a quarter circle to the outside, then change to a half circle to the inside and then returning to a quarter circle to the outside.  Slowly, your horse will begin to increase his suppleness and flexibility throughout his body and from there, you can begin to make the circle smaller or begin working in trot and, again, later canter

    Suppleness is something that must be continuously and consistently worked on in order to maintain and improve with your horse

    Just like us, if our horses become restricted and only use their body in a certain fixed movement, over time they will lose their ability to bend and be pliable..

    It will take time to build true suppleness, and it will have to become an integral part of your training program to maintain it

    Happy Riding
    Lorna

    [wp-tiles post_type=”post” orderby=”date” order=”DESC” grids=”Simple”]

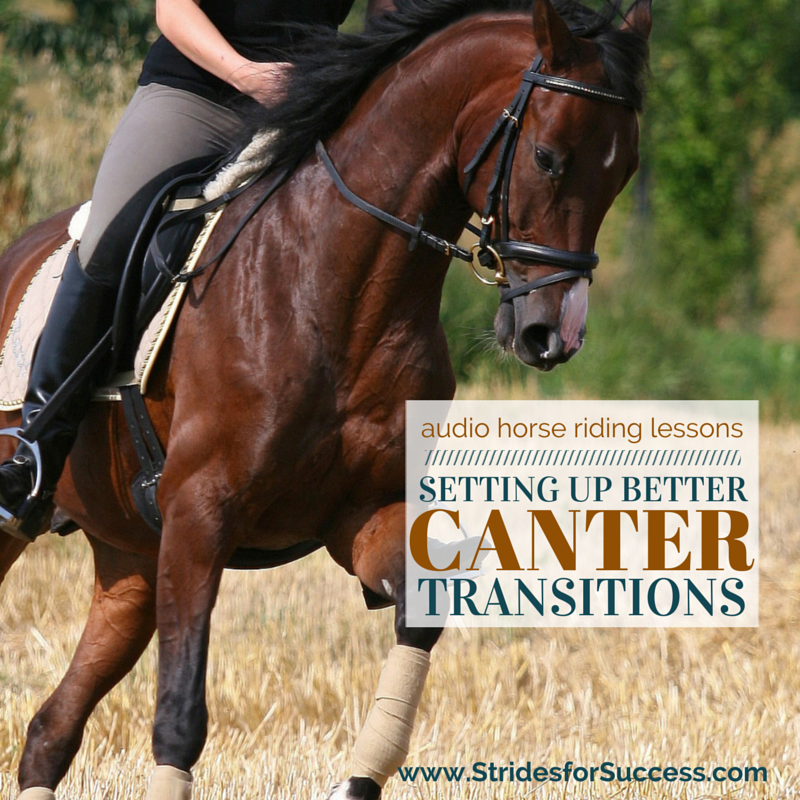
  • Setting Up Better Canter Transitions

    Setting Up Better Canter Transitions

    Who doesn’t love to canter?  It may just be the most enjoyable gait to ride when in the saddle for many riders, however it is also the gait that might just have us working the hardest to actually successfully get there and then, returning back to trot or walk seems to also open a whole can of worms for many riders too!!

    In fact, often the lack of competence felt by a rider with regards to riding smooth, balanced canter transitions is enough to make them avoid canter like the plague… It becomes something that is only performed when it is absolutely essential and necessary!

    [smart_track_player url=”https://op3.dev/e/traffic.libsyn.com/dailystridespodcast/SFA426-Setting-Up-Better-Canter-Transitions.mp3″ title=”Setting Up Better Canter Transitions” social_linkedin=”true” social_pinterest=”true” social_email=”true” tweet_text=”Struggling to get a smooth canter transition – this can help…” hashtag=”cantering #horses #equestrian” twitter_username=”strides_success” ]

    However, many of the aspects to riding a good canter transition can be put in place or improved before you actually go forward into canter at all.  The preparation of both you and horse, mentally and physically, for the canter is vital to performing a successful canter transition, whether it be up or down.

     1.  Focus on the Quality of the Current Gait

    One of the first things you can do to prepare for a successful transition is to work on the quality of the current gait you are riding in.  Make sure your horse is moving forward in a rhythmic, balanced way and is responsive to your aids.

    Setting Up Better Canter Transitions

     2.  Become Clear on What You Are Doing in the Saddle

    Begin working on your own position and becoming clear on what you are going to ask and when.  Start in walk.  Notice where your seat bones are in the saddle, how they are moving and how your weight is distributed over them.

    When we ask for canter, we shift our seat slightly more to the inside seat bone and ‘scoop’ our horse into the canter with it.  Use your walk to practice firstly, identifying your separate seat bones and how you can move them independently from each other and then secondly, begin experimenting how the ‘scooping’ motion feels when you apply that aid.

    If you are struggling to isolate one seat-bone from the other, try moving your outside shoulder back slightly… You should feel your inside seat-bone ‘scoop’ forward a little.

    That is the movement you are after, however it is important that you can perform this same movement without having to rely on moving your outside shoulder.  Just use your outside shoulder to help identify the muscles involved.

     3.  Encourage Suppleness in You and Your Horse

    Next, look at how supple you are through your hips and pelvic area.  In order to ride a successful trot to canter transition, you must be able to move with your horse in sitting trot and, from there, follow him into the canter when he strikes.

    Begin working in sitting trot and focus on relaxing your hips so they are following the motion of your horse.  

    Tension or stiffness will show up as bouncing up and down out of the saddle.  It will also be reflected in your legs when they begin to ‘grip up’ and creep higher and higher in the saddle.

    Keep your pelvis open, so your legs can hang long around your horse’s sides.  This is vital in order to both ask for, and then ride, a good forward moving canter.  If you are ‘pinching’ with your pelvis or upper legs and knees, your horse cannot lift his shoulders to begin cantering but also, the canter will be choppy and uncomfortable for all as you will bounce more!

     4.  Develop Straightness through Your Horse

    As you are working in sitting trot, notice what your horses shoulders and hindquarters are doing, particularly through the corners.  Your inside leg must be sufficiently on to keep your horse straight and avoid falling in.  Your outside rein must also be working to regulate the bend and stop your horse falling out through the outside shoulder.

     5.  Question His Responsiveness to Your Aids

    Once you have established a good quality gait, begin to investigate just how responsive your horse is to your aids and if his concentration is wandering, focus on bringing it back to you by being consistent with the aids you are applying.  Your horse must be listening closely to your aids before you can ask for the canter transition, whether it be up or down.

    When you feel that the quality of your sitting trot is high enough to continue to follow in the canter, you can begin thinking about the transition itself.

     6.  Prepare the Transition

    Make sure that you are only thinking ‘prepare’ not actually ‘canter’.  I see many riders in the arena, who once they are told that they should pick up canter in the next corner, automatically think canter!  The horse speeds up and begins to run, they usually lean forward and have a look of terror on their face approaching the designated ‘canter departure point’…  It should not and must not be this way.

    When you are preparing to ask for a canter transition, you do so like you would any other movement in riding.  Think about how you can get your horse to that point in the best possible way for the circumstances you are in.

    Begin with your half halt and use this time to also re-evaluate your position.  As you approach the point where you will ask, begin to shift your inside seat-bone slightly more forward and redistribute your weight a little more over the inside seat bone.

    Keep your inside leg on, sit up through your upper body and ask for a slight flexion to the inside.  Use your outside leg to keep your horse straight and then, when you are ready, to signal to your horse along with your inside leg, to move forward in to the canter.  As you do this, use the ‘scoop’ motion with your inside seat-bone to lift your horse up into the canter.

    Also, it is important to note that at in order to shift into canter, your horse must lighten or lift up his front end slightly which you achieve by riding your half halts to bring his hind quarters a little more underneath him.  This enables him to strike the canter with the outside hind leg, which you indicate with your outside leg ‘swinging’ back.  Your outside leg is merely like an indicator telling him ‘this side’, your inside leg will have the ‘driving aid’ to go forward into the canter.

    Setting Up Better Canter Transitions

     7.  Allow the Canter to Happen

    Once he is cantering make sure you are allowing him to go forward with both your hands and your body.  Continue to following the ‘rolling’ motion with your seat, making sure that your pelvis remains open and allowing the energy that your inside leg is creating to come forward, and connect through to the front end of the horse.

     8.  Notice the Quality of the Transition and the Canter

    Common fault that many riders experience when asking their horse for canter is that the horse tends to run in to the canter rather than striking into the canter.  If you find this is the case when you are trying to transition into canter from trot, bring him back to a balanced trot using your half halt and then prepare to ask again, but next time with a stronger ‘driving’ aid.

    Horses ‘run’ into the canter for many reasons, however often it is due to the rider collapsing through their upper body, which will result in the horse being unable to ‘lift’ the front end which makes a clean transition very difficult.  Make sure you are sitting up through your upper body and think of it as allowing this new surge of energy to come between your legs and up to your horses ears.  You need to make room for this energy, which you will block if you are leaning forward or pinching your pelvis and legs.

    It is important to keep in mind that your horse must canter; not you!!

    Have a plan before you begin to canter and perhaps you decide to canter for 10 or 15 strides, begin then the preparation for the downward transition.  Again half halt is the key to this preparation and your position in the saddle.

     9.  The Downward Transition Out of Canter

    Just like the upward transition to canter, the downward, back to trot, needs you to carry yourself through the transition.  It also needs you to then ride the trot, not just bounce around in it when you are there!

    Use your seat to indicate to your horse that you are moving down from canter back to trot.  Keep your leg on and as your horse prepares to make the transition, you must move your body into trot position; shift your seat bones so they are even, and hold with your core muscles, so you are no longer ‘rolling’ with him, rather resisting him.

    It is important, as with all downward transitions, that you follow with your hands, particularly as he takes that first step into trot.  

    Relax through your pelvis and again, work on following the trot and moving with your horse rather than bouncing stiffly against him.

    The canter transition is one that can initially seem daunting, however, as I said you can do so much in preparation for this movement before you actually perform it, that you chances of succeeding in a correct way get higher and higher the more effort you put in.

    Have a super week and happy riding!
    Lorna

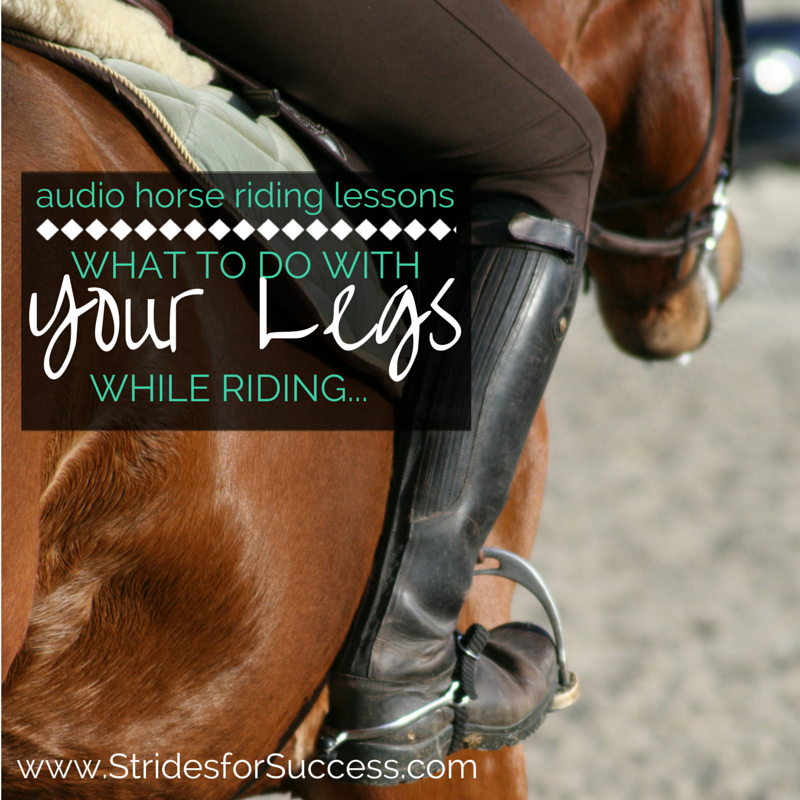
  • How to Use Your Leg While Riding

    How to Use Your Leg While Riding

    .How to use your legs while riding

    Do you find yourself a tad confused as to what exactly to do with your legs while you ride?  Do you find that even if you know what to do, degree of pressure to use or how often to apply the aid is confusing you?

    You are hearing terms such as ‘Keep your leg on’, ‘use your leg’, ‘more leg’, ‘leg’, ‘soften your leg’, ‘support with your leg’, ‘back up your leg’… leg, leg, leg!!!  You find yourself thinking back to the days when you were just happy keeping one either side of your horse!

    [smart_track_player url=”https://op3.dev/e/traffic.libsyn.com/dailystridespodcast/SFA416-What-to-do-with-Your-Legs-While-Riding.mp3″ title=”What to Do With Your Legs While Riding” social_linkedin=”true” social_pinterest=”true” social_email=”true” tweet_text=”Confused about leg aids in the saddle? This will clear things up…” hashtag=”equestrian #deadtotheleg #horseriding” twitter_username=”strides_success” ]

    Knowing how to apply your leg, when to apply your leg and with what pressure and regularity is something that takes lots of practice.  It falls under the ‘feel’ category of horsemanship and riding skills.  However, you can begin to improve your use of your leg right now with a few simple steps.

    Why Your Leg Aids are So Important in Riding

    You leg is one of the riding aids you use to communicate with your horse.  It is used to influence your horses forward and sideways movement.  It also has a regulating influence when necessary. Couple this with being essential for bending your horse, as well as helping to contain your horse.

    Your leg will always be present on your horses sides while you ride.  It should never be absent or, for whatever reason, taken away.  This is often the aspect of the leg aid that confuses many riders; they initially only see the leg as a driving aid.

    Before we begin, it is necessary to understand that in order to use your leg correctly, you need to have developed an independent seat while you are riding.  Using your legs to balance or grip will make it impossible for you to use them to direct and ask questions of your horse.

    It is also important to realize that consistency is key to mastering the leg aids, for both you and your horse.

    If you wish to better your skills in the saddle, committing to being mindful and present as much as possible while you ride. This is particularly true when it comes to how, when and why you are using your legs.

    How Your Overall Position will Affect Your Leg Effectiveness

    The first aspect of beginning to use your legs as effectively as possible begins with ensuring you have a correct position in the saddle.  Many times an ineffective or ‘hokey pokey’ leg is caused by a faulty seat.  Make sure you are sitting on your seat-bones.  This will allow your legs to ‘fall’ down your horses sides.

    You ideally want to establish the first of the two all important ‘lines’ of riding; the head, shoulder, hip to heel.  What is important to point out here is that your hip is not your backside!!

    Another way to think of this line and really know if it is true and correct is to imagine that if we could click our fingers and ‘abbrakedabra’ our horse away, you should technically land on your feet; not your backside and not on your face… Your feet should be underneath you at all times in the saddle!

    Learning to ‘Drape’ Your Legs Around Your Horse

    Once you have established what is right for you, don’t squeeze or tense your legs to keep them in position, this will happen naturally if your seat is correct and your hips and pelvis is open and relaxed.

    Keep in mind that how your legs ‘fall’ depends a great deal on how you are actually put together!

    In fact, the fall of your leg will depend on many different factors, the most obvious being both you and your horses conformation as well as the saddle etc.  Sometimes taking a few photos of yourself in the saddle from the side and behind can help you establish if your position is indeed correct to the best of the situation.

    Different Situations results in Different Applications

    Next thing to begin thinking about is the type of leg aid necessary for a given situation, and the degree to which it should be used.  This depends a lot on the horse himself and the type of questions you are intending to ask with your legs.

    Generally speaking, hotter horses respond better to a consistent pressure.  Laid back, docile horses prefer to be asked and then the aid taken away.  This action can then be repeated as much as necessary to achieve the desired result.  

    One of the biggest problems faced by many riders is that both these applications of the aids almost seems to appear counter-intuitive when they initially begin working with a horse that may be similar to either of the two I just mentioned.

    A ‘Hot’ Horse Versus a ‘Laid Back’ Horse

    A hot or sensitive horse almost invites us to keep our leg off, training the rider to just apply a mere hint of an aid when they feel it is absolutely necessary…  Frustratingly, this will just compound the problem and condition the horse even more that the leg is something which they must run away from.

    Strangely these same sensitive horses actually respond much better to a steady consistent pressure or contact from the leg, rather than short bursts of an aid here and there…

    Similarly, the same is true for the more laid back horses of the world.  The rider feels like they must give continuous, strong leg aids, usually to the tune of squeezing or ‘pumping’.  Unfortunately, this often increases their frustration as their horse ignores them more and more… These types of horses respond better to short, concise directions that are given when needed…

    Like all things worth doing, learning which aid to apply to a particular horse for the best result takes time.  However it is well worth the investment in the long run.

    The Varying Degrees of Pressure

    The third factor to consider when applying your leg aids is the degree of pressure that you use when applying the aid.  Again, this depends on many factors.  These include those we have already spoken about and others.  The feed your horse is receiving, if he is stabled or turned out.  Look at the work he is doing, his fitness levels.

    Even outside factors such as the weather conditions at that time, the riding conditions…  The list is endless and as I mentioned at the beginning, this again falls under the category of developing your feel as a rider.  Luckily, all of these things, you can work on daily and become aware of every time you get into the saddle.

    In fact, only through increasing your mindfulness will you have any lasting success in increasing the effectiveness of your leg aids.

    When it comes to actually applying your leg aids,  we can broadly break the term leg aids down into three different and distinct categories.  It is important to keep in mind that within these three categories, the aids can be further divided up based on degrees of pressure and regularity of occurrence.

    Your Driving Leg Aid

    The first is the driving aid.  Terms to describe this particular aid can often be heard resounding around arenas, ringing in the ears of exhausted riders.  Exasperated instructors and trainers can be seen, turning red in the face and heard roaring “Put Your Leg On!!” or “Give Him Some Leg!!”.  Sometimes, a short, repetitive and quite often effective ‘LEG!!” will do the trick.

    What the instructor or trainer is trying to say is ‘Use your leg to create initial energy in your horse’… Hmmm, come again?!

    I suggest thinking of your driving leg as turning the ignition or key in your car, or just switching on the vacuum cleaner. You ask and it responds without having to be continuously pushed in or turned.  When your horse is truly listening to your aids, this will also happen when you apply this aid.

    I recommend  that you imagine your legs are going to wrap underneath your horses tummy and pick him up.  Try lengthening your leg and then imagine that using your calves, you are going to lift his barrel up underneath you.  Of course, if you do really imagine doing this, your seat and core will also begin to respond in the correct way to ask for the forward movement.

    Your Maintenance Leg Aid

    The second use of the leg aid is a more maintenance aid.  Once your horse is going forward, this will be used to keep him doing so in the way you desire.  This is often expressed as ‘Keep Your Leg On’ or ‘Hold Him with Your Leg’.

    There is confusion surrounding this application of the leg aid.  Many riders turn purple in the face from the physical exertion of squeezing continuously while riding… Which of course is not what this means at all!

    If you can think of your legs as being the barriers on the side of the road.  Except instead of keeping your horses direction on the straight and narrow (which of course your legs help to do) rather, for this aid, think of keeping the energy being created focused where you want it go.

    Its like when you use the accelerator pedal in your car to go faster (your driving aid).  Once you have reached your desired speed you lighten the pressure.  This is while still keeping your foot on the pedal.  You are now maintaining that speed (keeping your leg on).

    Your Relaxed ‘Leg Off’ Leg Aid

    The final term and leg aid that often confuses riders is the ‘Relax Your Leg’ or ‘Take Your Leg Off’.  Again, this does not literally mean what it says.  In fact, trying to lift your legs off your horses sides for any length of time will quickly tire you out! This often results in twisting your upper body to compensate.

    Rather this means that, given the situation, think of softening your leg in order to achieve a particular outcome  

    For example, often relaxing your outside leg while leg yielding will allow your horse to actually move to the outside.  It creates a ‘door’ of sorts for him to move through.  Again, the use of this aid depends a lot on the situation and circumstances of it being applied.

    Becoming more mindful as to how you use your legs involves paying attention to the reaction you receive from your horse.  Keep in mind that only through consistent correct practice will you eventually achieve a ‘better’ leg.  This will lead to having almost invisible conversations with your horse.  Quiet and soft, with the result you desire.

    Happy Riding
    Lorna

    You can purchase the audio trainings on this topic HERE

    Links to related content & freebies:-