Tag: jumping

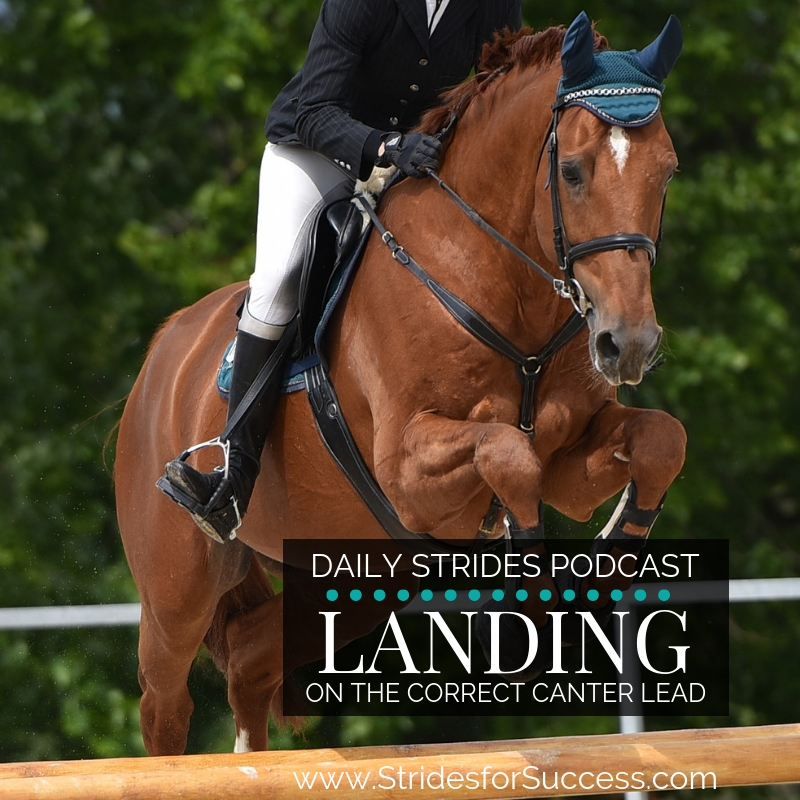
  • Landing on the Correct Canter Lead After a Fence

    Landing on the Correct Canter Lead After a Fence

    Landing on the Correct Canter Lead

    What this episode is all about & how it can help you:-

    • Understand the influence of your weight on the approach
    • Learn how to ‘open a door’ for your horse
    • Begin shifting your weight over the fence
    • Effectively school on this to practice it

    [smart_track_player url=”https://op3.dev/e/traffic.libsyn.com/dailystridespodcast/1066-Landing-on-the-Correct-Canter-Lead-After-A-Fence.mp3″ title=”Landing on the Correct Canter Lead After A Jump” social_linkedin=”true” social_pinterest=”true” social_email=”true” tweet_text=”Struggling with canter leads on landing over jumps? This episode of the Daily Strides Podcast will help…” hashtag=”equestrian #jumping” twitter_username=”strides_success” ]

    Are you struggling with your correct canter lead when landing from a fence? Perhaps you approach the fence on the one rein, however the track or exercise requires a change of rein after the fence.  You find that you often need to come back to trot in order to change lead.  Or perform a flying change.

    In this episode of the Daily Strides Podcast we focus on your correct canter lead on landing from a jump.  I will give you some practical tips you can implement the next time you ride. However, like all things in horse riding, it will take mindfulness and effort on your part.  But the results are well worth it.

    Why the Correct Canter Lead on Landing is Important

    Think back to the last time you were jumping.  If you could add up how many minutes you actually spend jumping and place that side by side with all the minutes spent in between the jumps…  So much of jumping depends on what you are doing on the ‘flat’ before and after (or in between) the jumps.

    Now, obviously we first have to master actually getting over the fences.  Getting from A to B.  However, once we have that, our focus then really shifts to the part on the flat between the fences.  Having to continuously either transition to trot to change lead breaks the flow between your fences.

    Therefore being able to ask your horse to land on a specific lead will help the overall flow of your jumping. 

    Which leads to the question, ‘How do I tell my horses that I want him to change lead in the air over the fence?’.  Now, you can do this over a smaller jump, however there is often not enough time for you to get clarity on what you are trying to do. Which means they are asking in a way which is not very clear to the horse.

    For this reason I suggest you work over fences that are around 60 to 70 cm (2 foot to 2 foot 6 inches).

    Can you work over smaller fences?  Yes of course, you can apply this to working over a pole on the ground if you want.  However, I have found the riders gain more clarity – and have more time to make necessary adjustments initially – when the fences are a little more substantial.

    Your Weight on the Approach

    You must be very clear on where your weight is before the fence. If you are approaching the fence on the right canter lead, so your horse is leading to the right, you must be positioned correctly to reflect this.  Your inside seat bone and leg, in this case, your right seat bone, should be slightly more weighted.

    Being mindful and specific about the details on approach will help both you and your horse notice when things change or shift.  It is the small, subtle changes that ask the horse to also make a change 

    Your horse will do everything in his power to keep both of you upright.  Who wants to fall over, right?!  So it goes without saying that if and when you shift your weight, he will try shift as well to remain underneath you.

    Often the rider is sitting incorrectly on the approach to the fence. This is why being very clear on what you are doing before the fence is so important.

    It is worth repeating; jumping has very little to do with the actual jumping of the fence.  It is more to do with what is happening before and after the fence

    ‘Weighting’ is not Leaning or Tilting…

    A word of warning; when I say that you must make sure that your weight is on the correct side, I do not mean that you must be leaning towards that side!

    Leaning or tilting, particularly with your upper body will have the complete reverse effect.  Leaning to the inside is usually accompanied by a shifting of the seat to the outside of the saddle.  You definitely don’t want to happen!

    Weighting it only means that you have a little bit more weight dropped into that inside seat bone and / or heel. In fact, it has more to do with your core than anywhere else in your body.

    There are some links at the end of this post to other episodes and posts that go into more detail about weighting and how to do it correctly.

    Opening a Door for Your Horse

    Most horses seem to respond well when they feel like they have a ‘way to go’.  I call it a door. Very often you have to open a door to show your horse which way you want them to go. You can do this through your rein.

    You can use a more open rein to show your horse which direction you want to take on landing.  Direction will determine ‘inside’ and ‘outside’, which in turn will dictate the choice of lead.

    By using more of an open left rein, for example, he will begin realise that you will be tracking left on landing.  This allows him to perform a quick switch and land on the left lead from the jump.

    Remaining Straight While ‘Opening a Door’…

    The down side to doing it this way is that very often because you have opened that door, the shoulders tend to follow through the same space!   This results in losing your line.  I’m sure you know how important lines are when jumping!

    For example, let’s say that you are on the right lead approaching the fence, and want your horse to track left on landing.  You can open your left rein as a way to indicate to your horse that you want to track left and therefore land on the left canter lead.

    The potential is there that he can come off your line, veering slightly to the left. Now, for the most part, if you are indeed tracking left after the fence, it shouldn’t be too much of a problem.  You can correct him using your other aids.

    However, if you are riding a related distance or a combination, veering off your line can have huge repercussions on the following jumps.  In those instances, you definitely want your horse to ‘stay the line’. 

    Shifting Your Weight Over the Fence

    We spoke earlier about weighting your inside seat bone. Where I suggest making this change or shift is as your horse is going over the fence.

    This is a subtle, quiet shift.  It does not mean that you throw your body one way or the other. A shift in the weight can sometimes be made by simply turning your head

    I am sure you have often it said often when riders are training how important it is to ‘look for the next fence’.   This is not only to be sure of where you are going, but also to make that subtle shift begin to happen.

    When you and your horse are well ‘tuned in’ to each other, you won’t need to think about the shifts.  They will just happen, as though on autopilot

    In order to make this happen, I suggest beginning to work on this in your very next ride.  You will find that, as you progress, it becomes automatic for you too. This allows you to focus your attention on other issues.

    Refining Your ‘Subtle Shifts’

    Initially think about just turning your head and looking in the direction you want to travel on landing.  You could even allow your shoulders to follow a little bit as well. You will often find that this is enough to affect the weight in the saddle.

    Keep in mind that refining your aids all depends on how well you and your horse have been conversing or communicating with each other up to this point.

    If you have been doing a lot of unnecessary ‘talking’ by overusing your aids, then your horse is probably not going to listen as well as you would like.

    You begin refining your conversation by only speaking to your horse when you have something worthwhile to say. Meaning that you only apply your aids or ask for your horses attention when you have something worthwhile to add to the conversation

    Schooling to Practice Landing on the Correct Canter Lead

    Every time you are approaching a fence, pay attention to how you are ‘sitting’ and make any necessary corrections.  Have your inside seat bone and heel weighted a little.

    Be clear on where you want to go afterwards.  In other words, have a clear line planned out in your mind’s eye.

    When you are in the air, shift your weight slightly from the inside to the outside.  Said differently, swap your inside and your outside.  You can also open your inside hand a little.

    Finally, make sure you are looking in the direction you want to go as you go over the fence. As you are in mid-air you should already be thinking about the next fence and plotting your line. This will make enough subtle shifts in your body for your horse to pick up on, and for him to make the change.

    A Word of Caution

    This goes without saying, but let’s just include it here anyway…  This episode and blog post is assuming that you have had all the necessary ‘checks’ performed on your horse.

    Many riders struggle with canter leads due to problems with the horses back, legs, tack suitability or teeth to name just a few. 

    Make sure that your horse is sound and that there are no underlying problems which are potentially hindering him, or making it uncomfortable for him to land on a correct lead.

    Happy Riding

    Lorna

    Links mentioned in the episode:-

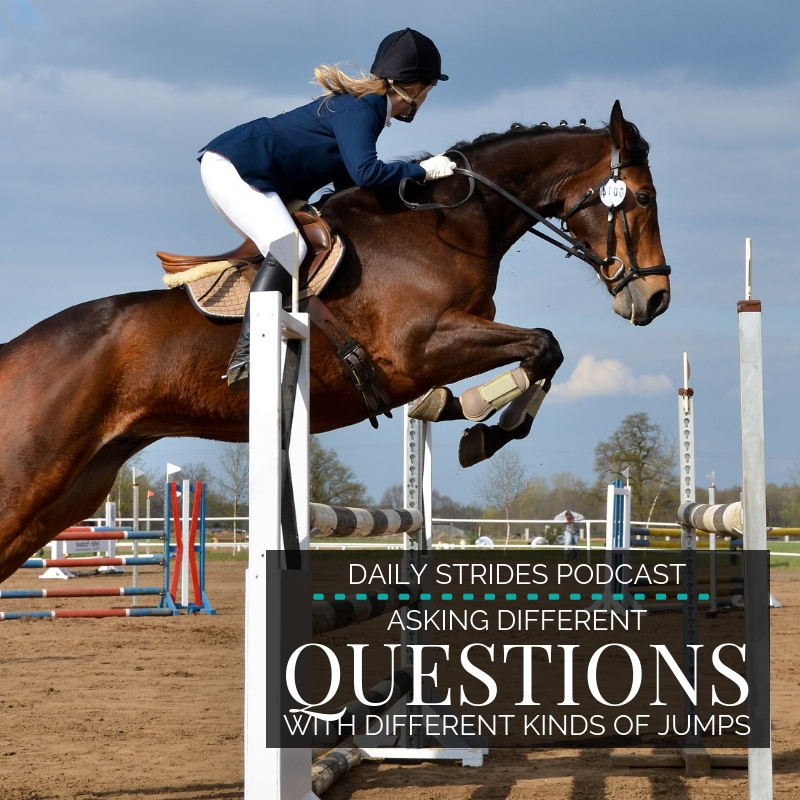
  • Asking Different Questions with Different Types of Jumps

    Asking Different Questions with Different Types of Jumps

    Asking Different Questions with Different Types of Jumps

    This episode is all about helping you to use and make the most of:-

    • Crosspoles
    • Uprights
    • Ascending oxers
    • Square oxers

    [smart_track_player url=”https://op3.dev/e/traffic.libsyn.com/dailystridespodcast/1060-Asking-Different-Questions-with-Different-Types-of-Jumps.mp3″ title=”Asking Different Questions with Different Types of Jumps” social_linkedin=”true” social_pinterest=”true” social_email=”true” tweet_text=”Not sure about which jumps to work on when schooling? Here is a quick rundown of how you can use each type when riding…” hashtag=”Podcast #Equestrian” twitter_username=”strides_success” ]

    Have you found yourself, like many riders, initially thinking about all jumps as being equal? Simply obstacles that are in your way when moving from A to B with your horse?  It is common to feel this way initially when you begin working over fences.

    However, once you can safely navigate a jump or ten, it is important to begin understanding how different jumps ask different questions of both you and your horse.  When you begin recognising the difference, you can really begin using small, but different, types of jumps in your schooling to move you both forward.

    Jumps can be for All Horses & Disciplines

    Even if you ride a ‘flat only’ discipline, small jumps are a great way of keeping both you and your horse ‘fresh’.  You can also use this information to ask different questions in your schooling with your horse as well

    So even if you chosen or preferred discipline is dressage or trail riding, I really believe that a few poles every now and then can only add to your overall conversation.  Of course, using the poles correctly is a huge part of this.  I am going to include links other past episodes at the bottom of this blog post where you can get all the help you need to get you safely started over poles and jumps.

    Jumps come in all sorts of shapes and sizes.  I am going to focus on the most common four in this episode.  Most jumps you meet will be either one of these or a variation of one of these types of jumps.

    I feel, that when schooling, the goal should be to build confidence and correct way of going.  In order to do this, it is important that you are building the jumps safely and correctly.

    The All Important Ground Pole

    I always suggest a ground pole when working with inexperienced horses or riders.  It helps both to ‘size the jump up’ correctly.   It also leads to fewer mistakes being made, which builds overall confidence.

    For you, a correctly placed ground pole will allow your horse to gauge the height of the fence as well as better judge his take off point.  

    It will also allow you, the rider, to also better judge the approach.  And, it can almost always make the jump seem less ‘airy’, which is great for your confidence. 

    Correct use and placement of the ground pole is vital.  As you and your horse become more experienced, you can place the ground pole directly under the front poles or jumping effort.

    The ground pole must never be ‘behind’ the jump poles.  Or, in the case of an oxer, never behind the front rail or pole.  It creates an optical illusion which can lead to accidents and injuries for both horse & rider.

    Ground poles can also be used to make the jump a little more inviting for both horse and rider.  This is achieved by simply rolling the ground pole out a couple of inches.  This will leave it a little in-front of the fence.  ‘Couple of inches’ are the important words here!  Not too far in front of the fence or the horse can mistake it for a placing pole, which is it not.

    With all that being said, let’s take a look at the four basic types of jumps you can use in your schooling.

    1.  The Cross Pole

    The trusty cross pole.  Did your first introduction to jumping, like so many other riders, include a pop over one of these?  Many riders start out over a cross pole because they build confidence. They create an optical illusion in that they can look lower than what they really are.  

    However, cross poles can be used in your schooling long after that first introduction over fences.  In fact, they have many great benefits for both you and your horse, and I would strongly suggest including them into your schooling on a regular basis.

    Why I Suggest Cross Poles for Your Horse

    For horses, cross poles are inviting.  They help centre the horse over the fence due to their shape and build.  Cross poles are usually easy to judge the height of.  Also, they can be easy to judge distance from, which will often build confidence in a green horse.

    Cross poles also teach horses to be more ‘tidy’ and careful over the fences.  In fact, they can often help improve a loose front end, the front legs, if they are used consistently and correctly.

    Keeping in mind that cross poles can be as low as 6 inches or 15 cm and as high as your jump uprights will go, they are also incredibly versatile.  They can be made wider or more narrow without having to worry too much about pole lengths, which also helps if you worry about not having enough equipment.

    Cross Poles for You, the Rider

    The plain and simple fact of the matter is that cross poles build confidence in riders.  They look ‘filled’, which makes them feel more friendly on the approach.  Also, cross poles can often seem a lot smaller than they are.  Most riders measure them by the centre of the X.  However, the horse will have to jump higher than this in order to fit through the centre of the X.

    Cross poles also have the added benefit of helping you to stay straight on your approach, over the fence and then after the fence as well.  When you are trying to remember a lot of different things initially, this can be a great help for many riders; and their horses. 

    2. The Upright

    The upright, or ‘straight pole’ is usually the next type of jump that many riders will graduate on to.  It can look a little intimidating sometimes because, if it only consists of a single horizontal pole and a ground pole it can be a little ‘airy’.

    For this reason, I strongly suggest either having a small filler under the jumping pole or two poles and a ground pole in each upright effort.    

    An upright can come in all sorts of shapes and sizes and, generally speaking, can ask some great questions of both horse and rider when they begin to get a little higher.  However, they don’t have to be high to be beneficial in your schooling.

    Uprights for Your Horse

    Building two or three low uprights around the arena and using them as a ‘track’ is a fantastic way to work on rhythm and balance between fences.  Even jumps of 60cm will ask questions and require accuracy in order to get right.

    Uprights also begin transferring the responsibility of remaining straight before, over and after the fence to the horse and rider team.  They do not ‘help’ or assist you to remain centred, so better planning is essential if they are to be jumped correctly. 

    You can also play around with your ground pole when working over uprights.  The closer it is to being underneath the jump, the more difficult the question you are asking.  Remember to begin by making things as inviting as possible, and then building from there.

    Successful jumping is all about building confidence, for both you the rider and your horse

    Uprights for The Rider

    As I mentioned before, I feel that uprights are more of a mindset shift for riders, rather than being a bigger or different type of fence.  They can look open or airy, but they can also be made to look inviting and welcoming.

    Start with the welcoming looking uprights!  Build slowly and remember to try to keep your horse straight all the way through

    This is where your ability to ride a line will start to be tested.  Can you remain in rhythm and balance, while following through on your line before, over and after the jump?  Are you able to successfully string two or three fences together and do the same thing?

    If you keep the fences at 60cm or 70cm, you can pop them quite a few times without worrying about overdoing it on your horses legs and joints.  Build the fences on schooling movements and keep a check on how well everything is being maintained all the way through.

    Finally, use the smaller cross poles and uprights to master your position over the smaller fences.  Practice doing what is necessary and trying to tune in your eye and your position to what is necessary for the fence. 

    3. The Ascending Oxer

    Oxers are when there is more than one pole at the top of the fence for the horse to jump over.  They require a second set of wings or jumping uprights in order to make and they can vary hugely in how ‘wide’ and ‘high’ they are.

    An ascending oxer is a nice way to introduce both horse and rider to oxers.  You can build one by making the front pole lower than the back pole.  It must never be the other way around.  It creates a more inviting jump for both horse and rider because it follows the natural jumping effort the horse makes as he goes over the fence.

    Ascending oxers can be made even more inviting by rolling the ground pole out  a few inches in front of the front pole of the actual fence.  This gives a staircase effect to the jump 

    Ascending Oxers for Your Horse

    Oxers begin asking questions of your horses jumping ability.  There is more ‘stretch’ involved, meaning more athletic ability required.  It is also important to focus on allowing your horse to really focus on how well he is jumping the fence.

    This is also where you are beginning to ask more questions of your horses actual jumping technique.  Ascending oxers are particularly good for encouraging your horse to use his hind quarters over the fence. 

    Ascending Oxers for You, the Rider

    As well as being more inviting, ascending oxers help riders begin to get over any fears they may have of jumping wider fences.  I strongly suggest starting off with the two poles being very close together and then making the fence gradually wider over time.

    Your horses ability to correctly use himself over an oxer will be directly related to your ability to support and control yourself over the oxer!

    Can you remain balanced while he makes that slightly greater jumping effort?  Are you waiting for him to actually jump before following him over the fence?  How about if you are staying with him over the fence?

    Riders who fall behind over the fence often contribute to horses clipping a pole with their back hooves…  Practicing staying with your horse over smaller, low ascending oxers will help you when the fences do eventually get bigger and wider

    4. The Square Oxer

    Square oxers or ‘parallels’ can often be a large question for a lot of riders when they first begin jumping them.  Having the back and the front rail the same height as each other can make the fence seem more formidable and challenging.

    However, if you have been perfecting your technique over smaller and simpler jumps, square oxers should not be too much of a challenge for either horse or rider. 

    It is very similar to the ascending oxer with what you are ‘testing’ or asking questions about.  Having the fence more ‘square’ or table like will also require your horse to be quick with his front legs.  This is as well as athletic and clean with his hind end. 

    As always, the fence can be made seem more friendly if some fillers or more poles are added to the front.  And the ground pole can also be adjusted out initially to make it seem less ‘table’ like.

    Including Simple Jumps & Grids in Your Schooling Plan

    I really and truly believe there are so many benefits for all horse and rider combinations when working over jumps.  If you are a little anxious about getting started with your jumping, I have an episode HERE to help get you started.

    Also, if you are a little bewildered as to what to do, exercise wise, I have an excellent resource for you.  We have a whole collection of premium trainings on jumping and grid work waiting for you inside of Daily Strides Premium.  They will take you step by step through setting up specific schooling exercises to get results with your horse.  You can find out more HERE

    Happy Riding

    Lorna

    Links mentioned in the episode:-
    
  • Considerations for an Ideal Jumping Training Schedule

    Considerations for an Ideal Jumping Training Schedule

    Considerations for an Ideal Jump Training Schedule

    What this episode is all about & how it can help you:-

    • It’s all about the bits ‘inbetween’ the fences
    • Think about conditioning – both mentally and physically
    • Notice where you & your horse’s strengths and weaknesses apply
    • Make each ‘jump day’ count

    [smart_track_player url=”https://op3.dev/e/traffic.libsyn.com/dailystridespodcast/1040-Considerations-for-a-Jumping-Training-Schedule.mp3″ title=”Considerations for a Jump Training Schedule” social_linkedin=”true” social_pinterest=”true” social_email=”true” tweet_text=”Not sure of how often you should be jumping your horse? Here is how you can create a training schedule for your horse and your jumping” hashtag=”equestrian #jumping” twitter_username=”strides_success” ]

    This is perfect for you if you have “dipped your toe” into the jumping part of horse riding and are loving it!  The next question for many riders is ‘how do I go forward from here?’.   Many riders want to jump every day, because it is so much fun.  We are going to cover this – and more – today.

    Creating a training schedule for jumping with your horse is essential if you want to begin seeing progress in this part of your riding.  A couple of episodes ago we began the jumping conversation, by focusing on ‘Introducing Jumping to Your Riding”.  If you followed my advice and suggestions, you have hopefully made it over your first fence!  Don’t worry if it was only 20 cm, it is still a fence.  Well done!

    But now you need to have something in place to work forward with.  This episode will also be helpful if you are jumping with your horse and you want to keep on progressing and working up over bigger fences.  It will help you to create a plan going forward.

    It’s All About the Bits “In Between’ the Jumps

    Contrary to what we all initially think, jumping really depends on what happens between the jumps!  A lot of riders don’t want or like to hear this, because, well, that is not the fun part for them.  They want to focus on the jumping of the fences themselves.

    If you want to be successful in the consistent conditioning and improving of your horse, and your own riding, you need to focus on what is going on between the fences. 

    If the ‘between the jumps’ part is not correct, you will have limited success over the fences themselves.  True, initially this won’t really be obvious; success over small fences is not that difficult.  However later as you start building up and the fences start getting higher, the lack of attention to details between the fences will become evident.  It will not be so much fun when you struggle to leave all the poles up!

    Apply the 80/20 rule. The 20 is the jumping and the 80 is between the fences.  The jumping is of course important, but the 80 is just as important to keep things moving forward.

    Think About Conditioning – Both Mentally and Physically

    Conditioning your horse should be a holistic process, both mental and physical.  Everything that you are doing in the arena, will come back to either developing your horse in a positive way for jumping, or un-doing the things you are trying to achieve!

    Make sure that everything you are doing is working towards the goal that you have. For example, I see a lot of riders who will trot aimlessly around the arena and then suddenly they decide that because there’s a jump, they will jump it.  It is literally a ‘point and go’ reaction to a split second thought they have had.

    Firstly, they could not possibly have a whole lot of rhythm in that approach.  Secondly, they are training their horse to look at a fence and then proceed to run flat-out at it.

    There is a reason that people do opening circles when they go into an arena before they jump the fences.  It is to establish things on the flat, the things between the fences, first.

    It is difficult at first, but please try not to allow yourself to get all caught up in the jumping only.  Focus about establishing everything, the basics, and then work on being able to maintain that as you go through the jumps, or around the course.

    Being able to maintain what you have established is important.  In doing so, you will condition your horse physically because he must remain balanced.  This will require a certain amount of development through his body.  But you are also conditioning him mentally to ‘wait’.  A lot of horses don’t like to ‘wait’, and this is usually because the rider, at some point, also did not like to ‘wait’!

    Make sure you consider this every time you are jumping or preparing to jump.   Everything you do is either adding to your horse’s abilities or taking away from it.  There is no neutral.

    Notice Where You & Your Horse’s Strengths and Weaknesses Apply

    This seems pretty simple, however if done correctly, it has the potential to change everything.  Learn to notice where your horse’s strengths or weaknesses lie.  For example, your horse may be a little loose in front.  Or he might not really engage through his back-end so he lacks power over the fence.  It could be that he tends to weave a little, so he kind of wanders.

    Notice where your horse’s strengths and weaknesses are, so that in going forward you are including work that is developing his strengths as well as improving his weaknesses.

    A lot of people just focus on the weaknesses.  I urge you not to.  Building on his strengths builds confidence.   Simply sprinkle the weaknesses in between the strengths in order to work on them.  Always try to build your horse’s confidence.

    Imagine for a moment something that you are not very good at doing, and you don’t enjoy doing (probably because you aren’t very good at it!)  How would you feel if you were forced to continue to do that thing all the time?  Not great I’m going to guess!  Well, the same principle applies for your horse.

    Of course, you are going to have to devote some time to working on the weaker parts of the ride and your performance together.  But, rather throw them in as odd little speckles, and in doing so this will build both of your confidence. 

    This could be your horse favouring approaching on one rein over the other, or landing on one lead over the other.  Don’t keep hammering on the bad rein / lead / side.   Rather allow the time to slowly but surely work on it, improve it and build it up.

    Keep in mind that most of what is going on over the fence, can be directly linked back to what is going on ‘on the ground’.   Remember conditioning can be done from the ground, and then later practiced over the fence.  Building the muscles, suppleness, accuracy, responsiveness and of course rhythm and relaxation.  Start on the flat and then progress to working on those same issues over a fence.

    Make Each ‘Jump Day’ Count

    Finally, try to restrain yourself from jumping the legs off your horse!  I see this happening a lot when riders get into that arena daily and jump and jump and jump.  Now, it is important to mention here that riders don’t do this intentionally from a place of ‘overworking’ their horses.  Rather from a place of being over enthusiastic about learning to jump and developing their jumping.

    If you find that you sometimes get caught up in the ‘jump jump jump’ energy, bring things back to that 80/20 rule I spoke about in the beginning.  Apply it to the days of the week you are going to jump.  2 days jumping, 5 days flat work for example.  However, in order for this to work, you must make each jump day count.

    You must create a plan, an intention, for what you will be working on for those two days.  Again, this is going to come back to understanding the strengths and weaknesses.  They will help guide you when creating your plan going forward.

    Once you have figured out your strengths and the weaknesses, you have created your plan and have scheduled your jump days there is a final step you can take to really 10x the impact of your schooling…

    Make Every Single Jump Count

    Get really clear on the desired outcome that you are looking for and set the intention for each and every jumping effort. 

    I also suggest for you, the rider, to try to get onto as many different horses as you can.  I realise it is not always possible for everybody.  But if you can, do.  Being on other horses, is firstly going to open you up to a whole different set of experiences.  In fact often it can be quite an eye opener.

    You will notice things about yourself in your riding.  Sometimes our horses can invite us to ride badly or to ride very well.  If a horse is inviting you to ride very well by something that he is doing, then there is the chance that he might just be ‘carrying’ you.  By getting on another horse, it will show that up, and you will know what to work on.  It could in fact turn out that the ‘weakness’ is something you are doing and needs work, rather than your horse.

    Riding other horses will also allow you to develop your eye for seeing a stride more quickly.  Knowing where your horse should be taking off for the fence, which will allow you to begin to gauge things a little bit better in your training.

    Lastly, riding other horses will build your confidence in your riding abilities.  It will allow you to  return to your own horse feeling that you are able to manage and cope with a lot more.

    Happy riding

    Lorna

    Links mentioned in the episode:-

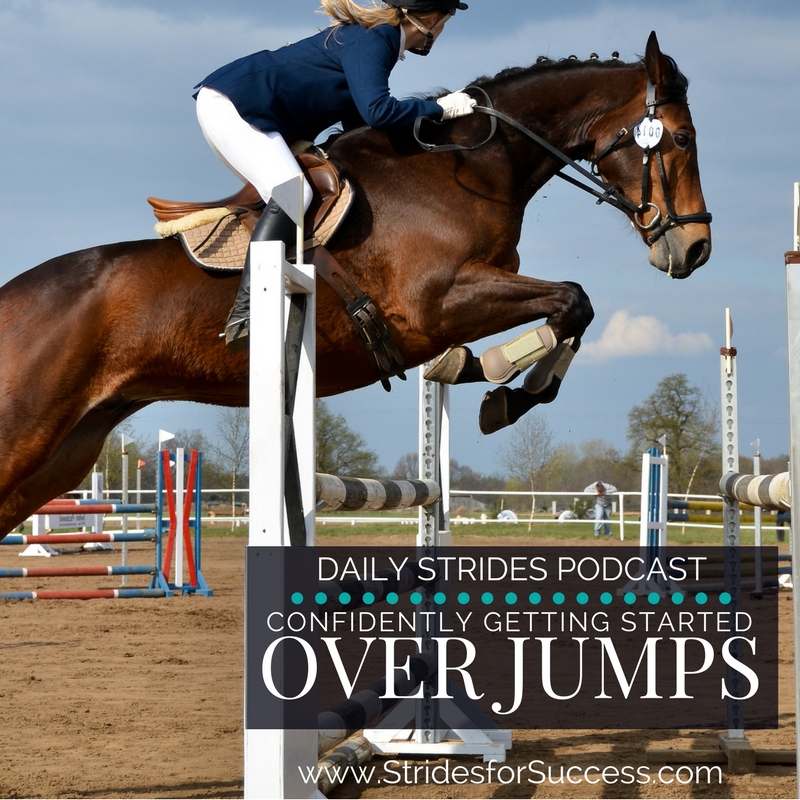
  • Confidently Getting Started Over Jumps

    Confidently Getting Started Over Jumps

    Confidently getting Started Over Jumps

    What this episode is all about & how it can help you:-

    • Why the basics still apply
    • Why balance is essential; for both you and your horse
    • Think of helping your horse, rather than hindering
    • How to begin perfecting over small jumps first

    [smart_track_player url=”https://op3.dev/e/traffic.libsyn.com/dailystridespodcast/1038-Getting-Started-Over-Jumps.mp3″ title=”Confidently Getting Started Over Jumps” social_linkedin=”true” social_pinterest=”true” social_email=”true” tweet_text=”Thinking about jumping but feeling a little overwhelmed about the ‘up and over’? Here is how to confidently get started over jumps” hashtag=”equestrian” twitter_username=”strides_success” ]

    Does the thought of jumping with your horse fill you with excitement?  Is that excitement mixed with a dash of fear?  Like most riders, you probably have thought about jumps and jumping.  And yet thoughts of the ‘up and over’ tends to keep you, and them, away from it.

    This episode is all about jumps and, more specifically, getting you started over jumps in your riding.

    Working over jumps can be beneficial for both you, the rider, and horse.  It helps to keep things fresh and interesting.  It works both the brain and the body in a slightly different way.  But there can be the limiting perception of a ‘barrier to entry’ for many riders.  A very high barrier that perhaps you feel that you cannot get over in order to make it happen.

    I’m here today to tell you that you can not only get over the barrier, but enjoy yourself along the way as well.

    Jumping is really and truly just like riding a very big canter stride.  I am basing todays training on the prerequisite that you have a fair working knowledge of the canter;  how it works, what’s happening, what you should be doing and what your horse should be doing.

    From canter, beginning to jump is simply placing a pole underneath that canter stride.  I know this sounds like a very simplified description, but bear with me here.   My goal is to lower your anxiety towards jumps and jumping by at least a couple of notches!

    The Basics Apply Still – Especially Rhythm & Relaxation

    Successful jumping is built on the basics of good flatwork, with principles such as relaxation and rhythm being extremely important when it comes to jumping.  One of the most obvious ways riders start off on the wrong track when it comes to working over jumps is the tendency to confuse speed with impulsion.  Bounding towards a jump at great speed becomes scary for all involved; the rider, the horse and even the spectators.  It is definitely not how it should be done.

    Jumping is all about relaxation and rhythm, and that is why you should try to eliminate any anxiety as it shows up.

    Balance is Essential; Both You and Your Horse

    Start by cantering over a single pole.  Focus on your on balance as you do this.  Balance between and over the jumps is essential for both you and your horse.  Where many riders tend to fall short in the balance department, is that they depend on the horse to balance them.

    A good basic jumping position will help you to remain balanced using your own body.  You can practice this on the flat, before trying it out over a pole or, later, a fence.   

    It is important that you keep the weight into your heels, keep your leg underneath you, and you use your bum to basically balance the upper half of your body – a little like a weighing scale effect.  Lastly, your horse must be given enough freedom through his head and neck, for him to stretch out and make it over the canter pole, or whatever you are doing.

    Allowing does not mean that you throw everything at him and with a ‘best of luck’ attitude.  Remember, think about balance here.  Your horse also needs to remain in balance.  It is no good you being balanced, if your horse is not.  Your job as rider is to help your horse remain balanced as well.  You can practice all of this while cantering over a single pole on the ground.

    Think of Helping Your Horse, Rather than Hindering

    This is a largely misunderstood principle in jumping.  Many riders, when they start jumping, think only of themselves.  They launch themselves forward towards the horse’s head, without a single consideration for how this will feel for their horse.

    If you have ever jumped anything yourself (on your two legs) with a backpack on your back, you are going to understand what I mean here.  Imagine yourself with your backpack on your back and some things inside.  This particular backpack is loose and is moving around – meaning it’s not very secure.  Jumping anything in this set of circumstances is hard work!

    However, let’s now change that backpack for a more professional type of backpack that hikers would use  One that is stabilised at the front as well as the back, where it fits correctly, and is shaped to suit the body of the person wearing it.  Everything is snugly packed inside and is not moving around, it is balanced and secure.  It now becomes a whole lot easier to jump something, with that on your back.  That is how you need to become for your horse.

    You need to become balanced and secure over the fence, rather than loose and floppy.  I know, simple words – but sometimes simple is easiest to understand!

    Your horse needs to lift his front legs to get over the fence.  If you launch yourself in the general direction of the horse’s head, you are make it very difficult for your horse to truly lift and use himself correctly.

    Resisting the Temptation to Throw Yourself Forward!

    Throwing yourself at your horse’s head means you are no longer balancing yourself, simply because your legs are no longer underneath you!  Your legs will be left behind in the saddle with the rest of your body on the horse’s neck.   Your weight is now being added to his own body weight that he has to lift in order to clear the fence.

    I think this happens because a lot of riders want to model their position on top show jumpers. However there is one big difference between a lot of riders and the top showjumpers – the height of the jumps! 

    You don’t really have to do a whole lot at all going over a small pole, the bigger factor here is that you are remaining balanced.  Balanced will help your horse, launching yourself will hinder.

    Make Perfect Over Small Jumps First

    Finally, I am strongly suggesting that you perfect things over the little jumps, even the pole on the ground, before you start building up.  If you can get it right over the smaller ones, you are inevitably going to get it right over the bigger ones.

    This way you will also get to build your confidence.  In building your confidence, you build the relaxation.   When you build the relaxation, you will also find that the rhythm becomes more natural as well. 

    The result will be an approach that feels good, a correct take off and you and your horse feeling balanced and ‘a team’ as you are going over the fence. Everything is in balance, relaxed and rhythmic.  From there you are perfectly poised to either go on to your next fence, or whatever you want to do.

    The Benefits of Starting Working Over Jumps

    Unfortunately a lot of riders may feel that working over jumps is not for them.  However, if shown the value of including this in their schooling, a lot reconsider.  Values such as engaging a different sets of muscles within the horse and the rider.  Being prepared on the trail or a hack to pop over something you meet.

    Jumping also gives you a greater sense of this balance and this communication.  It is a real feeling of teamwork between the horse and the rider, that they must work together to get over this obstacle that is in the way.

    I suppose the important thing to remember is to take it slow and steady.  Work over smaller jumps initially before building to bigger, higher and more complex.   This way, you and your horse can successfully work out jumping, and get it working for both of you.

    Happy riding

    Lorna

    Links mentioned in the episode:

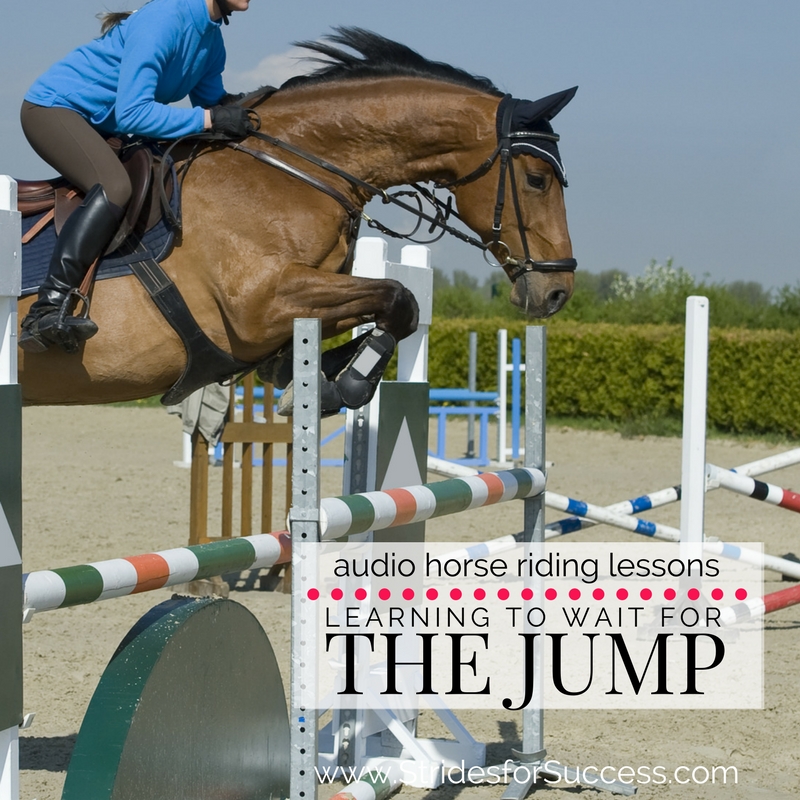
  • Learning to Wait for the Jump

    Learning to Wait for the Jump

    Learning to Wait for the Jump


    What this episode is all about & how it can help you:-

    • Understand why timing matters with regards to confidence
    • Modify your position depending on the jump
    • Working on the ‘wait’
    • Follow, rather than go first

    [smart_track_player url=”https://op3.dev/e/traffic.libsyn.com/dailystridespodcast/1031-Learning-to-Wait-for-the-Jump.mp3″ title=”Learning to Wait for the Jump” social_linkedin=”true” social_pinterest=”true” social_email=”true” tweet_text=”The art of letting the horse go first over the jump!!” hashtag=”jumping #equestrian #horseriding” twitter_username=”strides_success” ]

    The jump is in sight.  You have choosen your line.  However, as you approach, you notice some anxiety creeping in to your mind regarding timing.  Why?  Because, every now and then, you and your horse just don’t seem to go over that fence together!

    Today we are talking timing.  Timing your jumping position when it comes to going over fences.  Specifically, make sure you are not going into your jumping position too early.

    Why Your Timing Matters with Regards to Confidence

    Arriving at the base of the jump already ahead of the movement has a huge impact confidence, for both horse and rider.  It can quickly erode trust and make both sides feel anxious when they see a jump.  The reasons are different for both horse and rider, so let’s look at them one by one.

    We will start with the horse.  Horses, particularly young or green horses rely on the riders guidance and support going over the jump.

    This support is just as much an emotional or mental support as well as physically supporting him through the connection and contact.  All parts of your body that are in contact and communicating with the horse.  Your legs, your seat and of course your voice plays a part.  Obviously, the hands and the reins are also a big part. 

    When the rider goes into the jumping position too early, the horse can feel let down or dropped.  Couple this with the fact that the rider has probably shot up the horse’s neck, makes it not only unnerving for the horse, but also difficult for them to lift their front end off the ground.  This is potentially further complicated due to a young horse not being developed physically enough to enable them to compensate for the rider fault.  The result is a different negative impact on the horses confidence.

    If we flip the coin, and focus on the rider as they approach the jump things are a little different.  An inexperienced rider who goes into their jumping position too early is often paired with a more experienced horse.  As they approach the jump and the rider is too early with their position, many horses see this as an opportunity to duck out the side door!

    Unfortunately for the rider in this situation, the force called momentum then usually comes into play!   This only makes the rider more anxious and tense on the next approach, which will only serve to increase the potential for things to go off plan.

    Your Position will Depend on the Jump

    It is important that you can correctly time your jumping position so that you move over the fence with your horse.  Your position will depend on the jump.  I see many novice riders ‘over doing’ their position over a smaller jump.  They look as though they are jumping 160cm, rather than 60cm!

    Keep in mind that your ‘fold’ will depend on the size and the aspects of each individual jump.  The height, the size, where the jump is, whether it is going up or down hill.  It is important to understand that when the jump is small you don’t have to fold as much.  A lot of riders by overdoing the ‘fold’ end up going into their jumping position too early.

    Think of it this way; the smaller the fence, the less time in the air.  Meaning the less time you have to fold in and out of your jumping position.  

    Rather try to ‘wait’ for the jump and then only do what is necessary, no more, when you get there.

    Working on the ‘Wait’

    Simply put, you must try to wait for the horse to get to the fence.  It sounds really basic, but for many riders they are so focused on what they should do, that they fail to ride where they actually are at any given moment.

    When you are jumping it is very important to try and merge these two things.  Obviously, you are thinking about where you are going to go after the fence, and what is coming up after the next fence – but you also must ride each individual stride getting to the fence.

    One of the ways that you can do this is by counting yourself down into the fence.  For example, as you are approaching the fence, pick a spot and decide how many strides you will get between that spot and the fence.  Then count down from that spot – three, two, one.

    Doing this will allow you to develop a better eye for where your horse is going to take off.  Also by counting it down “three, two, one” it makes it easier because you know that you must wait for “one” to be done before you go over the fence. 

    I normally get my riders to say something as they go over the fence, like “jump” or “land” if we are doing a grid with a couple of fences.  Say anything as you go over the fence – you could even say “now”.  You only allow yourself to go into your jumping position when you are on that word.

    Following, Rather than Going First

    Another way you can train yourself to wait, is by waiting for the horse’s front end to come up to meet you.  This does take a little more experience.  In an ideal situation, on the approach to the jump you will be out of the way and allowing the horse to take you both to the fence.

    Being out of the way means that you will not be perched on his neck!  As the horse goes to take off, his front-end will rise.  This is where you literally wait and then follow him on over.  If you throw all your weight at that front end while he is lifting it, you are making his job incredibly difficult.

    Another way to test this timing is to build yourself a couple of grids, starting off with just poles on the ground.  Then as you are trotting or cantering through – perhaps approach it at a trot and pick up canter as you are going through it – allow yourself to fold in and out of a light seat over the poles.

    Make sure that you are indeed sitting up in between the poles.  Sometimes when people go into their jumping position too early, they also tend to either stay there too long or they come up too early, and get the whole timing wrong.

    Whatever way it is happening with you, you need to work on that timing.  Practicing over ground poles is probably one of the best ways that you and your horse can happily work on this.

    Set up a grid of poles, and start working on folding in and out, all the way.  Allowing your knees to be the shock absorbers, all the while keeping that contact and connection with your horse all the way through.

    Happy Riding

    Lorna

    Links mentioned in the episode:-


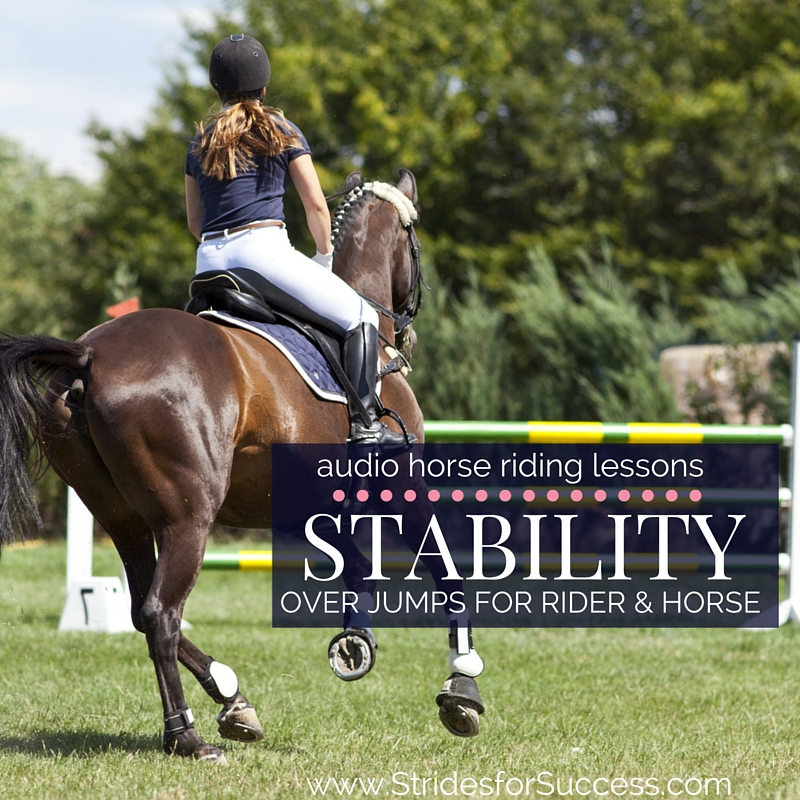
  • Stability Over Jumps for Rider & Horse

    Stability Over Jumps for Rider & Horse

    More stability in the saddle – as riders we are all guilty of being a little like Oliver Twist when it comes to it; we want more, please sir! This is none more true than when it comes to jumping as it is often the activity that makes us feel most unbalanced and ‘wobbly’ in the saddle.

    As riders we want to be as effective as possible in the saddle. We are working towards having aids and general communication that cannot be confused or misunderstood by our horse.

    [smart_track_player url=”https://op3.dev/e/traffic.libsyn.com/dailystridespodcast/691-Improving-Stability-over-Jumps-Rider-and-Horse.mp3″ title=”Increasing Stability over Jumps for Horse and Rider” social_linkedin=”true” social_pinterest=”true” social_email=”true” tweet_text=”Struggling to remain balanced over the fences?! This will help… for horse and rider” hashtag=”Horseriding #jumping #stayingon” twitter_username=”strides_Success” ]

    One of the most rewarding results of developing better stability is that riders find their effectiveness and overall application of their aids increases dramatically.  This is due to  the rider being ‘quieter’, which allows the horse to distinguish better between an actual aid and a random move or shift.

    An easy way to see the benefits of a stable load is to imagine having a schoolbag or backpack strapped over both shoulders; and then going for a jog. If the bag does not fit correctly, perhaps the straps are too loose or there is too much play inside the bag itself, it is going to bounce around quite a bit as you run. This is going to have a direct effect on how you run and also your balance while running. Imagine trying to jump a fence or jump with this same loose, moving backpack – pretty difficult, right?  This is similar to how it feels for your horse when you are unstable or unbalanced in the saddle.

    However, when it comes to riding, there is the added problem of your horse having to try to decipher between your actual aids and your ‘speed wobbles’

    He is also going to become more unbalanced himself, as he struggles to keep both of you upright while working through certain movements while being ridden, regardless of if they include jumps or not.  This is often very obvious through corners and transitions.

    Very often when riders progress plateaus it can be traced back to the rider being less balanced in the saddle than they should. The impact of which, as mentioned, is very often muddled and conflicting aids being given to the horse.

    So it goes without saying that these challenges are compounded where jumping is concerned. It is not unusual to see riders who have a somewhat secure seat when working on the flat experience a major lack of stability when fences are introduced.  All balance and stability is completely undone as soon as a pole or jump is attempted.

    Become familiar with your 2 point seat

    One of the best ways riders can begin to develop more stability in general in the saddle is to work in a correct 2 point seat. It is difficult for many riders initially to hold and ride.

    However, the 2 point seat will allow you to become very secure in the saddle, through literally standing on your own two feet. It requires a secure and correct lower leg in order for it to work; which overtime will strengthen.

    The 2 point seat is also a great way to both see and feel the relationship between different parts of your body. For example, how an open chest can directly influence your backsides position in the saddle. Or how the position of your lower legs will dictate how balanced the rest of the body is while the horse moves underneath.

    Your chest area will basically balance out your backside when in the 2 point seat. If you don’t have the correct ratio of balance between the two, you will lose your balance in the saddle

    Your brain needs time to ‘recalibrate’ the factors needed to keep your body balanced when in the saddle. Riding in the 2 point seat helps this process to happen a little faster; and for the rider to understand the process as well.

    Improving Stability over Jumps for Horse and Rider

    Realising ‘Cause and Effect’ is Happening

    When we are jumping we need to be in complete control of our body, so we do not feel like the loose backpack to our horse. A lot of riders make the mistake of relying on the horse for balance over the fences.  They will lean on the horse’s neck or ‘hunker down’ into the saddle, which will inevitably hinder how the horse can use himself over the jump.

    Of course, the added problem with using the horse for balance is if the horse stumbles, runs out or perhaps has a refusal at the fence. The rider is completely ineffective to help; and often ends up on the ground because their balancing aid – the horse – suddenly stops working!

    Developing a secure lower leg is key to beginning to take responsibility for your own stability and balance when riding your horse. The 2 point seat, and the ‘burn’ that often accompanies it, is a fantastic way of working this part of your body in the saddle.

    Knowing how to adapt the use and position of your lower leg when in the saddle, will directly affect what happens to the rest of your body in the saddle.

    The difference between ‘secure’ and ‘fixed’

    When initially beginning to work on this particular aspect of riding, many riders mistakenly try to ‘fix’ themselves in the saddle. They become rigid and stiff. This, unfortunately, will result in a marked decrease in their overall stability and balance.

    You definitely don’t want your leg doing the ‘hokey pokey’ when you are riding – but fixing your leg in one place will not work either.

    You need to rather focus on suppleness through your body and leg. When you are supple in the saddle, you will be able to move with your horse, all the while remaining in the best possible position for your body to make the micro adjustments needed to stabilise and balance you in the saddle.

    You need to allow and move with your horse, rather than fix and bump against your horses motion

    This suppleness comes from your joints; ankles, knees and hips. Working in the 2 point seat will help you notice and then begin to use your joints to stabilise your position and body in the saddle as your horse moves underneath you.

    I think it is also worth mentioning at this point that your contact is important when working in the 2 point seat. Many riders seem to think that the 2 point seat is rather a jumping position on the flat. It is not!

    Your contact will remain consistent with your horse throughout your 2 point seat, which will allow you to, again, effectively communicate with your horse while you ride

    Once you have begun to master the 2 point seat on the flat, through walk trot and then canter, you can begin adding some ground poles to your exercises.

    Becoming more secure on the flat is the key to being able to move with your horse in a balanced way, rather than relying on, your horse over fences. The ground poles will allow you to work up to some jumps later; but I strongly suggest waiting to move forward with your training when you have mastered this on the flat initially.

    Happy riding
    Lorna

    This podcast episode is the first in a series of 5 on the topic, available for you inside of Daily Strides Premium. The remaining 4 lessons will take you step by step through different exercises that will help you become more secure and balanced in the saddle.

    Those audio programs can be downloaded onto your phone and then listened to as you ride your horse. They are filled with reminders on what to do, step by step instructions on how to do it – can have the added bonus of being replayed over and over again! You can find out more about Daily Strides Premium by visiting www.stridesforsuccess.com/join/.

    [wp-tiles post_type=”post” orderby=”date” order=”DESC” grids=”Simple”]