Tag: jumping

  • Reforming a Horse with a Habit of Running Out

    Reforming a Horse with a Habit of Running Out

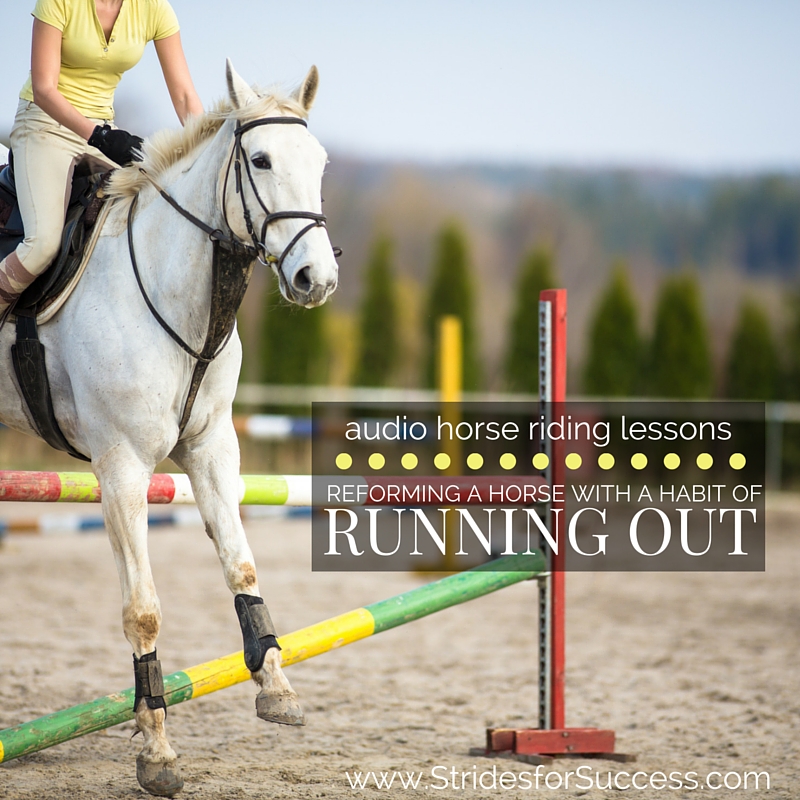
    Reforming a Horse with a Habit of Running Out You’re cantering along, the jump firmly in your sights, getting ready for your horse to take off…  When all of a sudden he begins to ‘veer’ a little off course.  Before you know it, the jump flies past you, to one side…  Your horse has, once again, proven that he is the master of running out at a fence! [smart_track_player url=”https://op3.dev/e/traffic.libsyn.com/dailystridespodcast/656-Reforming-a-Horse-with-a-Habit-of-Running-Out.mp3″ title=”Reforming a Horse with a Habit of Running Out” social_linkedin=”true” social_pinterest=”true” social_email=”true” tweet_text=”Is your horse pretty special at jumping; in that he is special at dropping the shoulder and ducking?! Here’s what to do…” hashtag=”equestrian #horseriding” twitter_username=”strides_success” ] Frustrating, right?  Particularly when it seems to happen regardless of what you do.  Or how you do it.  In fact for many riders, it feels like they spend more time running out at fences than actually jumping any at all!
    The unfortunate side of this is that the more confident your horse becomes with being able to sidestep a jump, the more often he will do it.
    And the more he does it, the better he becomes at dropping that shoulder and ducking to the side.

    Running Out…

    Running out is a common problem many riders face when they begin jumping more demanding fences.  Now, more demanding can mean 50cm to one person and 1m to another.
    Horses who have learned to employ the running out technique rarely discriminate on fence heights and types!  
    However, what is important to note is that it generally happens when there is an actual jumping effort required.
    For the rest of this blog post we are going to assume that you have eliminated all the obvious reasons that your horse might not want to jump; teeth, back, tack, soreness, sickness, being overfaced, tiredness etc.  This blog post is about horses who have learned to use running out as an easier alternative to jumping the actual fence.

    How Running Out is Different to a Refusal

    Many riders confuse running out with refusals.  Perhaps this is because they are penalised similarly.  However it is good to remember that running out and refusing a jump are two very different things.
    When your horse refuses, he generally stops in front of the fence.  Think of a grinding, sliding halt.
    Refusals can have many causes and reasons; many of which are to do with a horse not feeling confident or comfortable jumping the fence.
    Running out, on the other hand, is when your horse maintains his forward momentum, however he changes course in front of the fence and simply canters or trots past the fence to one side.  
    It can sometimes also be caused by overfacing the horse, however I have found that most horses who become skilled at running out, do so because the rider is allowing it to happen…

    Running Out and The Rider…

    “What?!”, you say.  “I do not ‘allow’ him to run out!  He just does it himself and there is nothing I can do to stop him!!”
    And that there is probably the biggest stumbling block most riders meet when trying to reform a horse who has mastered the art of running out. They try to fix it by working over fences or jumps
    Almost all cases of running out can actually find their roots way back in the basic flatwork schooling, or lack of, in the horse.  What generally tends to happen is the horse has been jumping quite happily, popping fences without question.  But one day, for whatever reason, he takes a chance and dives out the side door… The mere fact he was able to change course like that, usually without repercussions, is enough to plant a seed that perhaps – if the right opportunity presents itself – he can do it again!

    The Path of Least Resistance

    Sounds devious, but don’t worry, I am not suggesting your horse has some evil or mischievous tendencies; he has just found the path of least resistance and has decided to take it!
    The downside to having a horse who has a talent for running out is that reforming him is often a long journey.  This is particularly true if the rider he runs out with is the one accompanying him on this journey. Again, this is because very often it is the rider’s lack of ‘riding’ that has given him the opportunity to take the side door to begin with.  But, it can be done.  It will just take a lot of consistency, time, firmness and pure concentration from the rider to get there.

    Correcting the Rider First

    So, as mentioned earlier, the rider makes all the difference when dealing with a horse who has developed a knack for spotting a side door and running out.  It may be due to the rider getting into their jumping position too early.  This is essentially dropping the contact.  When the contact is dropped, your horse is left to his own devices.  Again, if so inclined, he will take the path of least resistance or the easiest route!
    Running out may also be caused by the rider not using their legs, seat and hands to correctly ‘channel’ the horse’s energy and direct it where they want.  
    Just like if the banks of a river are weak and the water runs out, so too will your horse if your legs are not being used to shut down those tendencies and keep him moving forward to where you want him to go

    Riding a Line

    The third most common reason I see horses running out is due to their riders taking a less than straight approach to the fence or jump.
    There is no ‘line’ to the fence.  Nothing connecting the approach to the getaway. 
    This often results in the horse meeting the fence at an odd angle.  Which essentially opens a door and allows him to simply canter on past.

    Approaching with Too Much Speed

    The final reason I want to mention, before we begin talking about solutions is that the horse is allowed to become too fast to the fence.  Due to the speed of the approach, the rider has no control over the horse.
    All the energy is running out the front like a freight train.  And just like that freight train; once it begins to derail, a whole army would find it difficult to get it back on track.

    Working on ‘Over’ Rather Than ‘Around’…

    So, now that we have placed the cause of the running out squarely in the riders court, we can begin working on how to re-school and reform the horse, so he goes over rather than around. When we ride, we often hear the term between leg and hand.  Put simply this means that the energy you are creating with your legs, is being directed to where and how you want it used with your hand.  Now, obviously things are a little more complicated that that, however, the basic principle is true when riding.
    When you’re dealing with a horse who likes to take the side door, the connection between your leg and hand is not a very strong one.  
    Simply put, there are holes there that your horse, if so inclined, can take advantage of.  Begin by practicing how you channel this forwardness and movement in your horse.

    Strengthening Your ‘Channel’

    Focus on straightness throughout his body when being ridden, and on the level of responsiveness to your aids
    Your horse should remain straight and true when being worked on the flat.  If you find him becoming crooked or ‘veering’ when working, quickly and quietly correct him.  He should then be responsive enough to your aids, particularly your leg in this situation.
    I also find that working on the centre or quarter lines is a good test of this straightness. 
    From here, you can also begin working on implementing better half halts.  This will help you to ‘steady’ things a little when you approach the fence.

    Gathering Energy on the Approach

    As I mentioned above, sometimes the approach to the fence is just too long, fast and strung out for you to keep the connection between leg and hand.   The energy is all running out the front.  This allows your horse to take advantage of this lack of direction. Practice applying the half halt, while continuing to move forward where you want to go.  It will help to ensure you gather the energy, rather than allow it to run out.
    You may find that as you begin closing those ‘side exits’ that once existed for your horse and his energy, there is a lot more energy there underneath you which needs to be directed.  
    This is another reason why working on perfecting your half halts is vitally important, otherwise your horse may begin to run…

    Using Ground Poles

    Another thing you can begin practicing, before you attempt jumping again, is working over ground poles.  This is good for both you and your horse.  You get to learn how to ‘wait’ for your horse to go over the pole, before following him over.
    Your horse has the opportunity to become familiar with the concept of working over the centre of the pole.  Ride a perfectly straight line on the approach, over the jump and continuing on with the getaway on landing
    Because you are channelling him between your leg and hand, all side exits have been shut.  The only way forward is the one which you present by riding him straight to where you want him to go. Running out is a frustrating and often costly habit where penalties are concerned.  However, before you lay the blame at your horse’s door, it is one of those challenges that very often has its roots in the rider’s own tendencies. This may be a bitter pill to swallow, however knowing that you may just be the reason also means that you are the key to banishing those pesky side dives and running out into the past; for good! Happy Riding Lorna This podcast episode and blog post is an overview of this weeks topic, running out.   The other four audio programs are step by step exercises and instructions you can listen to while in the saddle.  They help you to begin working through this problem with your horse.
    You can purchase the full 5 audio trainings for this topic HERE
    It is like having a riding instructor with you in the arena.  The lessons are simply downloaded to your phone and are then ready to listen to while you are in the saddle.
    You can listen to the over and over again, until both you and your horse are popping the centre of those jumps; every time!

    Daily Strides Premium

    Daily Strides Premium is packed full of audio trainings you can listen to anywhere you can bring your phone (including on your horse).  They will help you work towards your goal of having better conversations with your horse, both in and out of the saddle. You will also be able to create a plan for your rides and review what has happened when you join in on the monthly ‘Review and Planning’ call.  In there, you will go step by step through the month that was.  You then take that information and begin planning out the coming month.  When you will ride.  What you will work on.  And of course all aligned with your goals for you and your horse.
    Do you need to be competing? No!  Do you need to have competitive goals or ambitions? No again!
    In fact, I love working with riders who just ‘enjoy’ their horse; helping them to build and strengthen their relationship.  No competitions necessary ;) 
    Couple this with the live Q&As and the members only private group ~ we are here to help you remain accountable as team leader for you and your horse.
    All of the trainings are easily accessed using your phone, meaning that you can take them with you where ever you are going.  These trainings and so much more are available for you immediately when you join Daily Strides Premium. Find out more HERE
  • Riding a Horse with a ‘Chip In’ Habit at Take Off to a Jump

    Riding a Horse with a ‘Chip In’ Habit at Take Off to a Jump

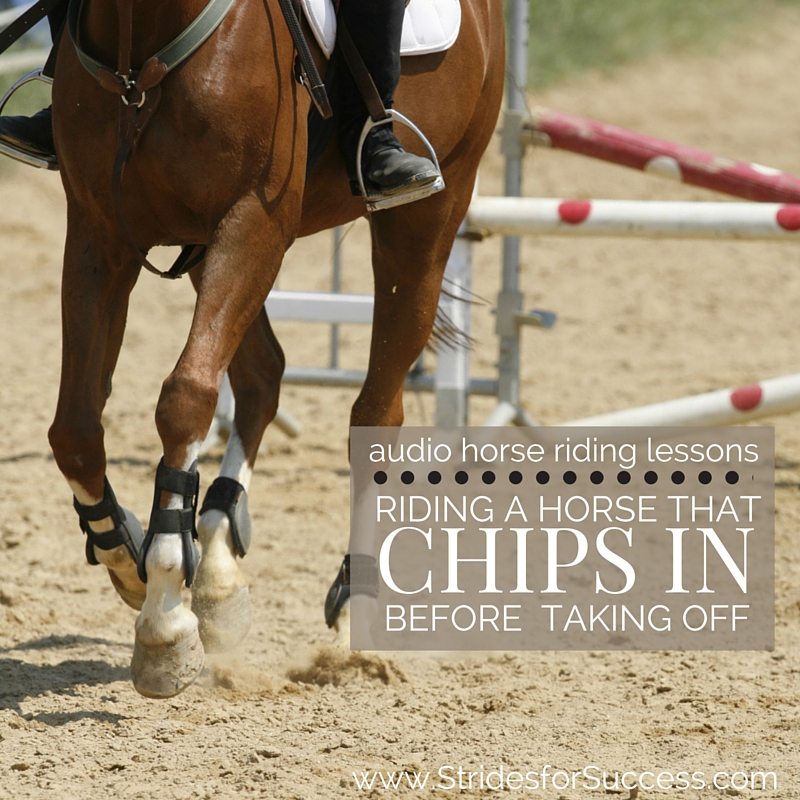
    You are cantering towards the jump… 3… 2… 1… But instead of the ‘Jump’ that should have followed the 1; you get a chip in.  A moment where your usually trusty horse decides to test both of you by inserting a little ‘half stride’ in there before takeoff!

    The result is you do a great Thelwell impression and your horse does his best helicopter move; straight up and straight down…  Not a good feeling for anyone!

    Riding a horse that regularly includes a chip in or three is not enjoyable for anyone; the rider, the person watching, or the horse.  Of course, it can happen to anyone, we call have days where we get the stride to the fence wrong. However, for some horses, it becomes a habit that can seem almost impossible to break. That extra little half stride…

    [fusebox_track_player url=”https://op3.dev/e/traffic.libsyn.com/dailystridespodcast/636-Ridig-a-Horse-that-Chips-In-Before-Take-Off.mp3″ title=”Riding a Horse That Chips in Before Take Off” social_linkedin=”true” social_pinterest=”true” social_email=”true” ]

    What A Chip In Looks & Feels Like

    This habit is uncomfortable and does little for building confidence to clear a course of fences safely.  However, before we look at how to begin working with a horse who adds a little stride here and there, let’s back up. It is important to first realize what this is and why it might be happening.

    When a horse chips in before a fence, he has literally fitted an extra stride into a space. A space that there was really not enough room for that stride…

    He decided that, rather than taking off where he initially met the base of the fence, he would get creative.  He would add a quick little half stride in there and then take off.  It often results in a ‘cat jump’ which is all four legs really taking off and touching down at the same time, due to the loss of impulsion or energy.  It can also result in a ‘helicopter jump’, which is a jumping effort, but with an extremely steep up followed by an extremely steep down, with just the width of the fence in the middle!

    In both these situations, the horse is not using his back or body to the best of his abilities and it feels really uncomfortable for the rider.   Because of the loss of ‘flow’ in the stride, the rider very often ends up either too far ahead of the movement or left behind.  Both scenarios will usually result in both horse and rider not being correctly prepared for the next, upcoming jump.

    Why Your Horse Might Chip In

    There are lots of reasons your horse may chip in before a jump or fence.  It is also worth remembering that most horses will do this at some point in their training.  However, we are dealing today with a ‘chip in addict’, or a horse that does it more times than not.  In order to identify why we must first look at the horse’s approach to the fence…

    Is it rushed?  Maybe he leaning or pulling on the reins and being heavy on the forehand?  Or is he moving forward? Perhaps are you literally scrubbing and kicking every stride just to get to the base of the fence?  

    With regards to the rushing or leaning, this may be due to a lack of training.  This will often result in a lack of confidence in your horse.  He may be off the mindset that he must ‘just get it done’ as quickly as physically possible.  Unfortunately when this happens, the rider’s reaction and how they deal with it plays a big part in not only the result for that particular fence but also the long-term as well.

    Retracing some basic steps in his training is very often the way to begin overcoming this challenge

    If your horse is on the other side of this coin, he is not taking you to the fence at all, this can also be a training issue.  However, again, it may also show signs of a lack of confidence in his abilities.  I strongly suggest that, whatever the cause, take things back to basics.  It truly is the key to building and developing correctly.  And to show your horse that he can indeed successfully make it from A to B over a fence.

    Could It Be You?

    Sometimes, a horse that chips in is doing so because of how he is being ridden by the rider…  A nervous rider often tends to throw themselves into their jumping position a little early.  This will encourage the horse to ‘chip in’ before the fence.  Unfortunately, this is often a difficult and vicious cycle to break.

    The rider is nervous because the horse is rushing, the horse begins to chip and rush even more because the rider collapses before the fence and ‘drops him’, both emotionally and physically. This causes the horse to rush even more.  And so it goes on and on…

    If you feel that this is the issue, I would strongly suggest working over a single pole and practicing your timing and your balance.  The light seat is wonderful and will help you do this.

    Riding a Horse that Chip In before Take Off at Jumps

    Begin By Improving Flatwork

    So, once we have discovered why your horse chips in before a fence, we can then look at how to begin working through it so we can get a good take-off point and reach each fence in the best possible way.

    A good place to start working with your horse on the flat and improving his general responsiveness and understanding of your aids in the saddle.  Does he listen when you half halt?   Or do you find yourself pulling and hauling to get him to ‘steady’ a little?

    Does he move forward when asked to do so from your leg?  Or do you have to kick and click like a crazy person to get any sort of movement happening?!  These are basic training issues and need to be addressed before we even think of turning our hoof to jumping.  It sounds repetitive, but this is because it is true… You have to have the basics mastered before you can move on to more ‘exciting’ things in the saddle!

    Your ability to balance things with a half halt while keeping your horse moving forwarding is vital to being able to approach any fence successfully.  Keep in mind that a horse who chips in every now and then is a horse who is not so confident in jumping.  He needs a rider who can allow him to build his confidence in a controlled, systematic and patient environment

    Figure Things Out for Himself

    So, once you have the basics working, I suggest beginning to allowing your horse to figure things out on his own, without a rider, in a controlled environment.  This can either be lunging or loose schooling, but the word controlled is the important one in the previous sentence!

    Loose schooling or lunging a horse over fences does not mean chasing them into a frenzy around the arena at dizzying speeds.  

    It is simply creating a situation that is conducive to an optimum jumping effort, either one or two fences.  Then allowing your horse to approach and work things out himself.

    The benefit of loose schooling is that you can have two jumping efforts, 2 measured and correct stride lengths apart from each other.  The first jump, a cross pole, is to set your horse up correctly for the second fence, which can also be a cross pole or an upright or parallel. Due to consistently meeting the second fence at the correct distance, your horse will begin to figure things out himself.

    Distance & Spacing of Poles & Jumps

    It is also important to remember that the ‘correct distance’ is what is correct for him, not trying to force him into a standard jumping distance.  Rather allow him to first build his confidence in his own abilities using a distance that suits his current way of going or current stride.

    Once he is able to begin ‘picking’ a correct take off point, without any anxiety, you can then slowly begin working over adjusted distances

    Also, don’t see the loose schooling or lunging as a once-off occurrence.  Rather, try to incorporate them into his training for as long as necessary.  Very often with horses, it is a lack of balance that causes them to be unsure of the jump, leading to a chip in here and there.  The rider will definitely affect this balance or lack of, so allow him time and space to work it out alone before then adding a rider into the equation.

    Using Groundpoles while Riding

    As well as the above, you can begin working over ground poles in the saddle with your horse.  Laying out a single ground pole and cantering over it can be a helpful exercise for both horse and rider.  With regards to the horse, we are looking for a balanced and rhythmic approach and also, a canter that is taking you to the fence, rather than you having to ask and push for every stride.  Try to keep the rhythm as consistent as possible, and the hindquarters underneath the horse.

    You can also use this to begin training yourself to see a better stride before the fence.  Simply counting backwards from where you think there will be three strides before take off is a fantastic exercise to get you in rhythm with your horse and begin seeing the stride.  Only when you can actually see the stride can you then look at adjusting the stride.  Before that it is just the luck of the draw – never a good idea when there are jumps involved!

    As you canter in on your ‘approach’ to the fence start 3…  2…  1…  Jump.   If you get in wrong the first few times, don’t worry.  Just keep trying to gauge that point where you are three strides away.  Later you can make things a little more difficult for yourself with 5…  4…  3…  2…  1…  Jump.  You will find that the more you ‘tune’ your eye into the approach, the further out you will be able to see if the take-off point is a good one or is a little too far away or close.  This will give you time to adjust the strides in between which will, in turn, allow you to arrive at the jump in a better position to clear it comfortably.

    Related Distances

    From here you can add more poles on the ground at ‘related distances’ to each other.  Work at maintaining the forwardness of the canter while keeping the rhythm and balance all the way through.  Also, work on your timing of the jumping position.  As I mentioned earlier, it is tempting to get into it a little early if your horse is rushing, but this will only make the problem worse.

    Try to use your 3…  2…  1… to steady yourself and only allowing your body to follow your horse at the ‘Jump’ part

    Once both you and your horse are more comfortable and have stopped any added strides or half strides before the pole, you can begin to build some small fences where the poles are.  Remember that if your horse chips in,  a lot of the time it is a confidence issue, so don’t be tempted to push him further than he is comfortable.  Just because he is ‘able’ does not mean he is comfortable doing it!

    Your horse’s ability to see a stride takes time to establish, just like yours.  Give him that time and it will pay dividends later when you are out on the track.  Count yourself down to the base of each fence, 3… 2… 1… at all times initially (in your head when in the company of others if you want!), but use it as a way to balance both of you on the approach to the fence.

    Happy Riding
    Lorna

    Connection for Equestrians

    If you are interested in finding out more about how you can begin re-schooling your horse in all aspects of riding, Connection might just be what you are looking for. Each week you will receive 5 audio ‘lessons’, where I give you step by step instructions.  You can listen using a free app on your phone, on your computer, or via your favorite podcast app.

    This makes it really handy to use and listen to while riding your horse; in the saddle.

    We cover loose schooling, working over single poles, related distances, and also working on improving your eye to see a stride. There are also diagrams with the actual distances for you to replicate in your arena.

    Find out more over at https://stridesforsuccess.com/join

  • Riding a Bounce to Improve Overall Strength

    Riding a Bounce to Improve Overall Strength

    Have you ever experienced popping over a jump with your horse, when he suddenly realises he needs a little ‘more’ if he is going to clear the jump?  He stretches, or pushes, a little farther than you expected and suddenly you find yourself very much behind the movement and bracing for the inevitable ‘thud’ that your backside connecting with the saddle will create on landing!

    Or perhaps your horse has a frustrating habit of hanging a hoof here and there over fences, which leads to poles on the floor and a less ribbons than you would like hanging on your wall!

    [smart_track_player url=”https://op3.dev/e/traffic.libsyn.com/dailystridespodcast/601-Correctly-Riding-a-Bounce-to-Improve-Overall-Strength.mp3″ title=”Riding a Bounce to Improve Overall Strenght” social_linkedin=”true” social_pinterest=”true” social_email=”true” tweet_text=”Do you include bounces in your pole work with your horse? Here’s how to get started…” hashtag=”equestrian #jumping” twitter_username=”Strides_success” ]

    Developing both you and your horse’s physical strength is essential for successful, safe and injury free jumping.  But doing so without ‘jumping the legs off’ your horse is often a challenge for many riders.  This is where incorporating a simple bounce or two into your schooling, initially as ground poles and later as actual jumping obstacles, can help you both become stronger and more in control of your body over jumps and fences.

    For many riders, the thoughts of riding a horse into a bounce is a daunting one.  However, it need not be and in fact, will help you not only become stronger, but also give you a greater understanding of how your horse uses his body both before, during and after a fence, and how you must move to stay in sync with him throughout the effort

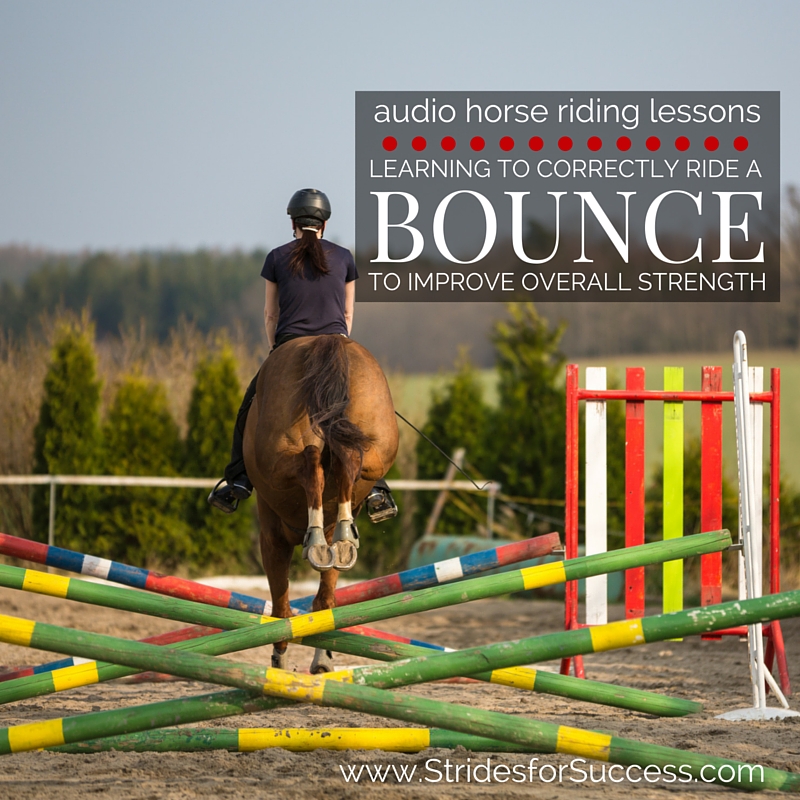
    A bounce, simply put, is when a horse lands from one jump (or canter stride) and as he touches down, immediately takes off again over a second jump or ground pole.  There are no ‘non jumping strides’ between the two obstacles; the front feet will touch down and then as the back feet near landing, the front feet will pick up again to jump the second jump.

    Successfully navigating a bounce requires quite a bit of athleticism from your horse, as well as quick thinking.  They are a super way of teaching horses to ‘snap up’ their front legs and also, to use their hind quarters over a fence and on landing to propel them forward again.

    Learning to Correctly Ride a Bounce to Improve Overall Strength

    For the rider, the bounce requires balance and micro adjustments throughout the body in order to stay with the horse, poised over the saddle, rather than getting too far ahead of the movement, or being left behind.

    It also helps riders to react quicker to what is happening underneath them as the horse is continually having to shift the weight between back and front throughout the sequence

    Riding through a grid containing more than one bounce also requires the rider to understand impulsion and how the horse’s energy must be controlled.  If the horse is ‘chased’ through the fences, he will not have time to make the necessary adjustments to successfully clear the obstacles.  Similarly, if the riders fails to create enough impulsion or energy, the horse will be unable to make it through the line without having poles down along the way.

    Before you begin introducing your horse to a bounce, it is important that he is confident jumping both individual fences and also related fences, such as doubles with one or two non jumping strides in between.  The rider must also be able to stay with the horse over fences and have a secure and balanced jumping position when jumping related distances.

    Start by placing a single pole on the ground and cantering over it.  Feel how your horse moves over the pole, and also, how you remain balanced, while getting off his back, as he canters over the pole.  Once you are both comfortable with this, you can then add a second pole between 3m and 3.7m or 10′ and 12′ away from the first.  Canter your horse over the poles and make adjustments to the distance as necessary.

    Work over the poles on both reins, approaching from different directions.  Working over the bounce when still only ground poles is a great way to test your horse’s rhythm and balance.

    See if you can maintain a consistent rhythm before, during and after the poles

    This is also a great opportunity to see how well you can follow your horse before increasing the difficulty.  I suggest keeping the weight dropped into your heels, your back straight, your shoulders open across your chest and your seat moving with your horse and ‘hovering’ when actually moving over the poles, in a light seat.  You can also use this exercise to assess your hands and shoulders.  Are they ‘following’ your horse’s mouth, continuing to maintain a consistent contact with your horse at all times?

    It is tempting to try avoid landing heavily on your horse’s back, or catching him in the mouth by ‘over preparing’ yourself for the jump.   Over preparing will result in you getting into your jumping position too early, and will see you leaning on your horse’s neck and shoulders for support.  Use your practice over the ground poles in order work on this, rather than when there are actual jumps involved, as it will make it much more difficult for your horse to lift his shoulders and perform a clean jumping effort.

    Remember to wait for your horse to begin over the pole, and then follow his lead

    Also notice how centered your horse is over the poles.  Later, when you are both comfortable popping through the bounce, you can begin to build cross poles, which will help keep your horse centered through the line.   But for now, notice if there is a tendency to drift one way or the other.

    Keep in mind that your horse is always influenced by your position in the saddle, so make sure you are riding in a balanced way through the line yourself

    It is common for riders to ‘duck’ one side or the other of the horse’s neck over fences…  Not a good habit to cultivate, so if it is there, nip it in the bud now!  Think about keeping your chin centered over your horse’s neck or mane as you move with your horse through the bounce.

    Once you are both comfortable riding through a single bounce of ground poles, you can begin to add more poles to the line.   Continue to assess the distance and adjust it to suit your horse’s comfort levels.  Later, as you both become stronger, you can then begin asking more difficult questions of your horse by asking him to adjust to set distances, but to begin with, build his confidence levels by building the lines for him and his preferred lengths.

    You then begin to build actual jumps where the poles are.  Depending on the height of the jumps, you may have to adjust the distances again for your horse, and always move through the line from both directions to help keep your horse fresh.

    Keep in mind that riding a bounce takes concentration and strength from your horse; therefore riding a line of bounces is quite taxing.  Don’t over do it, rather work through it and then leave it for a while, to return later when your horse is fresher.  Working your horse through this when he is tired, either physically or mentally, will only lead to mistakes and injuries.

    Happy Riding
    Lorna

    If you are interested in finding out more about bounces and how they can help you and your horse, perhaps the four other audio horse riding programs about this topic can help you. You can get theses, and hundreds more lessons, in Daily Strides Premium.  You can find out more by visiting https://stridesforsuccess.com/join/.

  • Riding a Clean Flying Change

    Riding a Clean Flying Change

    [fusebox_track_player url=”https://op3.dev/e/traffic.libsyn.com/dailystridespodcast/SFA476-Riding-a-Clean-Flying-Change.mp3″ title=”Riding a Clean Flying Change” social_linkedin=”true” social_pinterest=”true” social_email=”true” ]

    Think back to the last time you were cantering along on your horse and a change of rein was coming up.  You began the task of preparing to drop back a gear into a trot to change the canter lead.  “Better than losing rhythm and balance through a flying change…”  However before you even got there, your horse (being the clever guy that he is) decided to take matters into his own hands. And with what felt like a skip, Voila, he had performed the flying change all by himself…

    The flying change is one of those things that we tend to, as riders, overthink in our heads.

    However, the simple truth of the matter is that flawless flying changes happen when we focus on the preparation and then allow our horse to perform the change without interference from us in the saddle.

    Riding a Clean Flying Change

    What is a Flying Change?

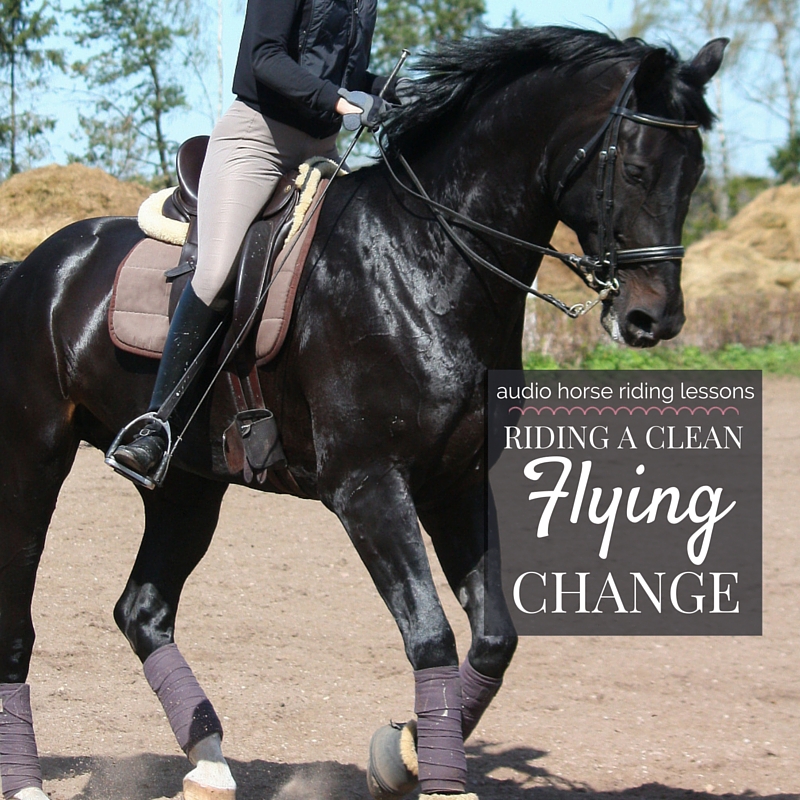
    A flying change is when your horse changes from one canter lead (let’s use right canter lead for this example) to the left canter lead without having to return to trot to do so.  It is essentially a ‘skip’ or suspension mid-stride.

    And during this ‘suspension’ your horse will change the sequence of his footfalls resulting in him swapping leads.

    Before you begin working on flying changes it is important to make sure you and your horse are ready.

    Pre-Requisites for Flying Change

    You should be both capable of riding a balanced canter. This means moving with your horse as he moves. Also, you should have an independent seat when cantering.

    I would also insist on the ability to tell, by feel, what leg is where underneath you as your horse canters. This is important for timing the change correctly.  

    Your horse must have sufficient strength for a balanced, rhythmical canter, during which he is truly straight.  He must also be responsive to your aids. As in, waiting for ‘further instructions’ from you throughout the canter.

    It is also an advantage if both of you can correctly lengthen and shorten your strides while cantering, maintaining impulsion, rhythm and balance while doing so.

    Physical Strength & Development

    Asking your horse to perform a flying change before he is physically and mentally ready can result in confusing him and even training him to only half perform the change, changing only in front rather than in front and behind.

    If your horse is not quite ready yet, perhaps he does not have enough physical strength, you can still use the following exercises in walk and trot to build up to a flying change later.

    As I mentioned before, the preparation of the quality of the canter leading up to the flying change is vitally important to ensure a clean change.  This simply means that your horse changes both his front and back legs to the new sequence of footfalls for the new canter lead at the same time.  Investing your training time in this preparation will ensure a clean change when you do eventually ask for it.

    Timing of Your Aids

    The timing of the aids for flying change is also essential and in order for your horse to have enough time to receive your signals and then to act accordingly. SImply put, you must ask for the flying change at the right time.

    The correct time is just before the inside front leg or leading leg touches down on the ground in the canter stride.  This is the 3 in the 1,2,3 beat of the canter.  This is why being able to tell what is happening underneath you at any given time throughout your time in the saddle is so important to clean, balanced transitions and changes.

    I suggest beginning your work on a 15m circle on the left rein in a walk, mimicking your position as it would be in canter.

    By practicing in the walk, you can begin to condition your body to respond in the manner you desire at the correct time.

    Your inside leg (left leg) will be on the girth, your outside leg will be slightly behind the girth.  Your inside seatbone (left seatbone) will be slightly in front of your outside seatbone and your inside shoulder (left shoulder) will be slightly behind your outside shoulder.

    You will have a consistent contact through your outside hand and your inside hand will be soft and offering, so as your horse’s inside shoulder can move forward in the canter stride.

    Practice in Walk & Trot

    Now, as you are on the circle, choose a place where you can at an imaginary X, straighten for 3 strides before tracking right onto a 15m circle to the right.  Don’t move onto the circle initially, but be aware of where the X is as you are riding.

    Beginning planning your ‘change’ by noticing the footfalls.  If necessary, glance down to your horse’s shoulder and to make sure you are indeed ‘asking’ when your horse’s front inside (in this case left) shoulder is moving forward and preparing to touch down on the ground.

    I suggest building to this by riding a few half halts, as you would when you canter and then at the desired place, begin straightening your horse just as the inside front leg reaches forward and quickly and quietly swap your inside to your outside and vice versa.

    Work on moving your legs and hands first, and then following with your seat and shoulders.  Your legs and arms will help straighten your horse through the ‘transition’, while your seat and shoulders will then shift as your horse makes the change, following along with his movement.

    Moving to Canter…

    Work on this a few times in walk and then begin working in trot. Change rein on the circles if necessary to ensure your horse does not become bored.  When you feel you are in control of your body, you can pick up the canter on the circle.

    As mentioned before, the quality of the canter is vitally important. Ride some transitions. Also lengthen and shorten the canter on the circle to help engage your horse’s hind quarters.

    If your horse has a tendency towards a flat canter, you will have to work on adding more ‘bounce’ into the canter in order to perform a clean flying change.  Again, transitions up and down between canter, trot, and walk as well as within the canter gait itself will help with this.  Also, remember to use your half halts to help rebalance and engage the hindquarters.

    Once you feel your canter is of good enough quality, you can begin again planning the change of rein from one circle to the other however you are going to initially ‘gear down’ to walk or trot in order to change canter lead.

    Take the time to ensure your horse does not lose balance and also that you are not shuffling or shifting your weight in the saddle while your horse is in the area around X.

    Pay attention to asking your horse to straighten before asking for the canter on the new lead.  Once you have ridden this a few times, using the walk or trot as a catalyst between canter leads, your horse will begin to anticipate what is happening.  Use this to your advantage.

    Asking for the Flying Change

    Prepare the canter and, making sure you are timing it correctly, make the changes and ask for the flying change.  It should be a clean ‘strike’ which will feel like a skip underneath you. Work on then maintaining the rhythm of the canter on the new lead as you continue around the circle.

    Once you have mastered the flying change between circles, you can begin working them into other areas of your schooling.  Canter down the center line and again, at X ask for the flying change.

    This is particularly eye-opening to see how straight your horse is during the transition and how balanced he is on the new lead.  You can use poles if necessary to help keep you straight as you move down the centerline.

    Things to Watch Out For…

    Make sure that you are not leaning with your upper body through the transition.  Many riders think an over-exaggerated ‘lean’ or ‘push’ with their upper body is the key to riding a flying change. However, this will only serve to unbalance your horse and confuse the situation.

    If your horse is struggling, or if he is changing in front and not behind, take things back a few steps and try again.

    Often, most of the problems that show up surrounding the flying change are a result of not enough ‘suspension’ in the canter, meaning that your horse does not have enough time to change the sequence of footfalls.

    If you are sure that your canter leading up to the change is sufficiently energetic, consider that perhaps you are leaning, particularly with your upper body while asking for the change, which is throwing your horse off-balance.  Focus on sitting up through the transition and ‘allowing’ it to happen underneath you.

    The flying change is a wonderful movement to ride, however asking too early in your horse’s training will do more harm than good in the long run.  once again, make sure your horse is sufficiently strong enough to ride the movement before you start.

    Happy Riding
    Lorna

    Additional Resources to Help with This Topic

    Riding a Clean Flying Change

  • Maintaining Balance Between Jumps

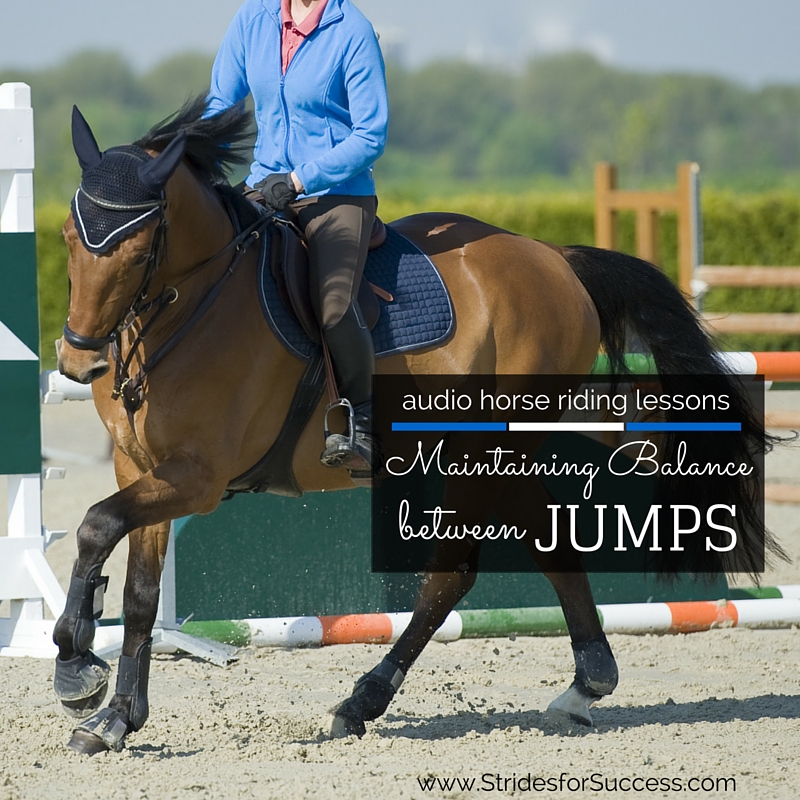
    Maintaining Balance Between Jumps

    The bell rings, you set off aiming for the first fence, you pop over it… And suddenly it’s like everything begins to speed up and rather than being the pilot, you have somehow been relegated to passenger status.  All the ‘if this then that’ scenarios you have spent months practicing are just gone and you are hoping that somehow, through the grace of God, you will make it through the two finish flags, still on board!

    [smart_track_player url=” https://op3.dev/e/traffic.libsyn.com/dailystridespodcast/SFA466-Maintaining-Control-Between-Fences.mp3″ title=”Maintaining Balance Between the Fences” social_linkedin=”true” social_pinterest=”true” social_email=”true” tweet_text=”The most important part of jumping? Successfully riding between each of the fences…” hashtag=”truestory #equestrian” twitter_username=”strides_success” ]

    Jumping tracks or courses is what many riders aspire to achieve with their horse . However, the majority of riders who love jumping and want to jump spend so much time focusing on the actual jumping part and so little on polishing up their technique between fences, that when they reach their goal of completing a course of jumps, the fact that they are on the ground, navigating from one fence to the next, for about 95% of the round, results in luck (as opposed to planning and skill) that dictates if the poles stay up or not (and if the rider remains mounted!).

    Maintaining Balance between the jumps

    Much of our success jumping tracks or a course of jumps comes from the quality of flatwork preparation we put in before hand, rather than time spent actually jumping.  Maintaining balance, rhythm and control around the track is what makes the difference between consistent clear rounds and having the odd sporadic moment of success amid usually disappointing rounds peppered with poles down and refusals.

    I believe this must be mastered in two parts. Firstly, perfecting your position over a fence (which I have exercises you can use HERE >> ) and then secondly, once you can seamlessly shift in and out of your jumping position, you can begin working on remaining in control for the entire duration of the ride!

    Courses are made up of jumps that are connected together with either straight lines or turns between them.  The problems begin when your horse begins to speed up on the straight lines which can use you, the rider, to become anxious and nervous. This is also what leads to a lot of run-outs and flattening over fences which can bring the poles down. Riding a course of connected jumps also magnifies problems with bending, turning and suppleness. Any issues here will result in your horse losing balance around corners which often results in a loss of overall control while riding the track and you becoming flustered with just too many things to do to bring it all back where you want!

    One of the reasons that jumping is broken up into different phases or parts is to show riders that each separate piece must be mastered in its own right before being put together. The phases are; the approach, the take off, the jumping, the landing and the getaway. When all pieces are ridden correctly the result is an effortless, graceful jump that sets you up perfectly for the next obstacle on your course.

    As mentioned, today we are chatting about the part between the fences. Many riders just focus on maintaining control between the fences, however they go about achieving this the wrong way. Constant pulling on their horse’s mouth will only result in the horse falling onto the forehand and pulling back. By failing to also factor in balance and rhythm, is often leads to a loss of rhythm and impulsion, which results in a loss of balance.

    Here are some exercises you can do to really establish and then maintain that all important balance and rhythm around your tracks.

    I suggest beginning by working over poles on the ground, and once you have gotten the knack of regulating and maintaining your horse over the poles, only then begin to build small jumps. I also recommend beginning each exercise in trot, so you can focus on your position and how you are riding the line or pole, before cantering the exercises. If you encounter any problems, take it back to trot again and work through the problems.

    Sometimes our desire to ride more complicated and challenging work with our horse results in us rushing over basic training issues. These same problems are easily masked when the stakes (or jumps) are low. However, ignoring basic training flaws will inevitably always result in an even bigger problem later down the line, when more difficult questions are being asked.

    Take the time to correct any basic issues early in your horse’s training; focus on building a strong correct foundation to work from

    Begin by setting up a pole or a jump on the centerline approximately 6 to 8 meters before X. As you ride up the centerline toward the pole, focus on maintaining your rhythm and not allowing your horse to speed up or slow down.
    Also pay attention to how straight your horse is on approach and, how easy it is to keep him on that straight line. If he tends to wander or weave left or right, use your legs to bring him back and then continue to ride the line you have chosen.

    Also consider how well you can continue to preserve the rhythm after the pole and around the bend when you reach the top of the arena. There should be no visible difference in your horse’s stride, energy or your level of control throughout the line, both before and after the pole.

    Once you feel comfortable doing this in trot and canter, you can begin to work in more difficult turns and bends. Ride the same pole on the centerline, pop it and continue on straight again until you reach X or just afterwards. Once there, begin tracking right, in a half 10m circle. When you reach the outside track again (the long side of the arena), immediately track right taking you across the centerline on a diagonal line. As you reach the other side of the arena (just before the corner), track left and if you have continued to maintain the rhythm and balance, when you reach the middle of the short side of the arena repeat the exercise again, instead this time on the other side (track left after X).

    Again, begin in trot and only when you can truly maintain the rhythm, balance and control, practice in canter. If you cannot perform a flying change, ask for trot as you cross the diagonal each time and then pick up the opposite canter lead, in preparation for the next corner.

    There are many variations of this exercise you can do while riding, and of course building an actual jump instead of the ground pole is part of adding to this exercise.

    The second exercise I recommend is focused more on controlling your horse while continuing to create impulsion after the fence. Using the same pole or jump, approach in canter and on landing, allow your horse 7 canter strides, before bringing him back to trot. However, you will only keep the trot for 5 strides, before picking up canter again.

    As you become more in tune with controlling your horse while continuing to create energy, you can ask for the trot at 5 canter strides after the fence. What you are looking to do here is regain control of your body as quickly as possible after the fence, so you can correctly ride the getaway and begin building a good approach to the next fence.

    The last exercise I suggest can be built on from this. Once you have tracked left or right at the top of the arena, after popping your pole or jump, ride a 10 or 15 meter circle in the corner. Again, the focus is on maintaining the rhythm and balance. Your horse should not fall in on the circle, or rush around the circle.

    You can then begin to add a 10m circle in the corner before you begin your approach to the fence as well. It should be a fluid progression all the way, around the circle, down the line, over the fence, after the fence and again round the circle. No speeding up, no breaking into a different gait, no falling out through the shoulders, no swinging of the hind quarters, just a correct, forward going, balanced rhythm throughout the exercise.

    Lastly, I feel it is vitally important to understand how courses are built and the flow that the course builder has envisioned happening as different horse and rider combinations navigate the track. Take the time to study courses of jumps. Look at how they ride, the bends, the turns, the opportunities to rebalance the horse. By doing this, you will subconsciously begin to make subtle changes as you ride the jumps that will, if you have that correct foundation, make all the difference between a clear round and 4 penalties.

    Happy Riding
    Lorna

    Maintaining Balance Between the Jumps

    [wp-tiles post_type=”post” orderby=”date” order=”DESC” grids=”Featured”]

  • Maintaining Control After Jumping

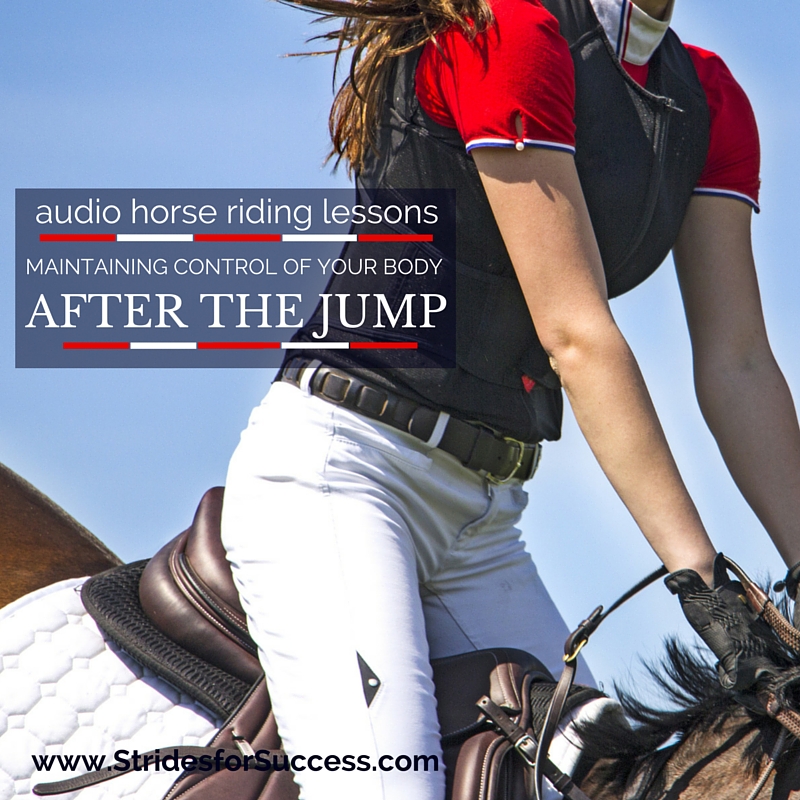
    Maintaining Control After Jumping

    You’ve just popped the fence and, in your mind, it was a success. Mostly because you managed to stay on board for it!  However, as soon as your horse lands, you are beginning to think that your ‘upright seat’ is becoming more and more of a fantasy…

    In fact, every stride your horse takes is literally bumping you further and further onto his withers… Your lower leg is coming up and back. And you’re pretty sure that you’re on the verge of losing your stirrups.

    Who knew that jumping meant such an up-close and personal view of your horse’s neck?!  You glance up, and low and behold, you are approaching the corner; fast!!

    Let’s Remove ‘Forward’ From Your Position!

    This is a really common problem. And one that often begins when we first begin jumping and the word ‘forward’ is used to encourage the position.  Couple this with a really strong desire not to ‘catch your horse in the mouth’…

    The result is you diving forward, leaning on your horse’s neck with your hands (which are filled with as much mane as they can physically hold), and just being a heavy passenger both over and after the jump.

    Maintaining Your Position After the Jump

    Jumping…  It is really one of the most fun things to do on a horse, but if you are not in control on the ground, between the fences, things have a terrible habit of going from bad to worse very quickly!

    Things Get Worse As Fences Get Higher!

    What compounds the problem more is that, generally speaking, when we are jumping over smaller fences, this ‘technique’ works quite well.  You manage to get from A to B. And your horse is in possession of all his back teeth at the end of the lesson.

    However, the problems begin to show up when the jumps become a little higher. Or there are a few of them added together to form a track or course of fences.

    Having an independent, balanced seat both over and after the fence is essential for you to efficiently pilot your horse over all the obstacles. And achieve that all important clear round.

    What Your Horse Does When Jumping

    I think the first part of either preventing this from becoming your jumping technique, or correcting an already formed habit, is to fully understand what happens to your horse when he jumps.

    As he approaches the jump, your horse should begin to transfer his weight a little more back onto his hocks and hindquarters, rather than his shoulders.  This is in preparation for lifting his shoulders and front end off the ground when beginning his jumping effort.

    He will then, when at the fence, with his hind legs moving under him, lift his shoulders, head, and neck to begin his jumping effort.  His hind legs will then come under him, push-off the ground, and ‘propel’ him on, up, and over the fence.

    His head and neck will stretch out and down a little, his shoulders will pull his front legs up and his knees should ideally ‘snap’ up to clear the fence.

    His hindquarters will fold up underneath him. There will be a point where he will be suspended in mid-air over the jump.  Once he is ‘over’ the fence, he will get the landing gear out, so to speak.  He will stretch out his front legs. And, to balance himself, raise his head and neck in anticipation for the first getaway stride after the fence.

    With his head and neck raised, his front legs can touch down and then move forward again into the first stride leaving space for his hind legs to land.  And then he will push-off again with the hind legs to continue cantering after the fence.

    How We Can Interfere With Jumping

    There are a number of different times when we riders have a great potential to get in the way. This can cause problems with our horse’s technique.  Here are some of the more common mistakes we can be guilty of:-

        • Getting ahead of the movement, to begin with on the approach
        • Diving too early when we reach the jump, resulting in us ‘jumping before the horse’
        • Using our horses head and neck over the fence for support and balance – leaning on our horse
        • Collapsing on our horse’s neck on landing
        • Tipping forward on the landing stride and continue to tip more forward with every stride thereafter

    So in order to control our position after the fence, we need to first control our position in front the fence. I suggest that wherever you previously used the word ‘Forward’; substitute it with ‘Back and Down’.

    Adjusting Your Jumping Position

    Next time you approach a pole or a fence, imagine trying to create an open space in front of you. Think of from your chin to your horse’s withers. Focus on making this space as big and empty as possible.

    Open your chest wide from the shoulder point to shoulder point. Sit up through your waist (no creases in your tummy). And, finally, open the angle between your thigh and your tummy as much as you can.

    Then begin creating energy with your legs. Keep asking. However, instead of letting the ‘energy’ run out the front end, imagine that energy coming from your horse’s back hoof in a line towards his ears. It is ‘filling’ that space you created earlier in front of you. And as it does, you use your hands, and in particular, your outside rein, to contain it and direct it where you want it to go.

    You will have to continuously check that you are carrying yourself and your hands in order for there to be enough ‘space’ for this energy to come up.

    Keep this ‘space’ in mind as you approach your jump or pole or even better; Your marker…

    Choose ‘Markers’ in Your Arena

    The first thing I would suggest you do when working on improving your jumping technique does not involve jumping at all. Simply pick different places around the arena and pretend there is a jump there.

    I and my sister done this for years when hacking out (on the trail). We used the posts from fences as ‘markers’. Alternatively, we used telephone poles, or trees, shadows, signposts, other jumps that we rode past. The list was and is endless.

    As you ride past your marker each time, try to imagine where your horse would take off if that was an actual real jump.

    Keep in mind that you will only then follow your horse after he has actually begun to lift off… Not throw yourself at the fence. It is often helpful to say, either in your head or out loud “Wait, Wait, Wait – Lift”. (I know you may feel a little silly, but it really does help!)

    Practice Your ‘New’ Jumping Position

    Then shift into your jumping position over the ‘fence’ (your marker).  Work on coming back into your normal, upright seat afterward, just as quickly as you would if you were indeed jumping a fence.

    Begin in walk… And really pay attention that when you are moving into your jumping position, it is a correct position.

        1. Weight into the heels
        2. Lift your bum a little out of the saddle
        3. Make sure your bum ‘reverses‘ – REALLY IMPORTANT!
        4. As your bum goes back, fold your hips bringing your upper body closer to the pommel of the saddle or withers
        5. Make sure your back is straight
        6. Keep your chest open – the point of each shoulder stretched away from each other across your chest
        7. Give with your arms and hand, through your shoulders
        8. Look up!

    Carry Your Upper Body

    What I often see happen is that although people get out of the saddle, heels down, etc, etc… Because they don’t support and carry their upper body (open the chest), they are leaning on the horse’s neck for support. This is REALLY difficult to get up out of after the jump when the horse is moving.

    It also causes the rider to squeeze with their knees. From here, the lower leg pivots, the upper body comes more down, They usually lose the stirrups… And on, and on, and on :(

    Put A Basic Position on Autopilot

    Once you are getting in and out of your jumping position easily in walk and it should become something that you don’t have to think about.  However, at the beginning of each session do a mental checklist that you are doing each of the above parts. Practice the exercise with no poles.  Only your imaginary ‘markers’.

    Work in walk, in trot and, when that is good, move to canter.

    Then begin working over a pole on the ground… Use the same principle… And lastly, you will be well able to hold your own over a fence and support and balance yourself all the way.

    The super thing about being able to do that is that your horse will also be able to jump better because you’re not shifting all your weight onto his shoulders :)

    Happy Riding
    Lorna

    Additional Resources for Equestrians