Tag: suppleness

  • Using the Centre Line to Strategically Improve Your Riding

    Using the Centre Line to Strategically Improve Your Riding

    Using the Centre Line to Strategically Improve Your riding

    What this episode is all about & how it can help you:-

    • Know how you are riding the centre line at the moment
    • Realise that you and your horse are one ‘container’
    • Understand what a channel is in your riding
    • Use your centre line to develop your overall riding skills

    Do you see the centre line as being a means to an end?  Somewhere you have to travel in order to take you to somewhere else?  Imagine if you began getting a little more strategic about each journey down the centre line…

    [smart_track_player url=”https://op3.dev/e/traffic.libsyn.com/dailystridespodcast/1097-Using-the-Centre-Line-to-Stratigically-Improve-Your-Riding.mp3″ title=”Using the Centre Line to Strategically Improve Your Riding” social_linkedin=”true” social_pinterest=”true” social_email=”true” tweet_text=”Not just for getting from A to C… Here is how to use the centre line to move your riding forward…” hashtag=”equestrian #horseriding” twitter_username=”strides_success” ]

    Every time you ride your horse in an arena, there is a good chance that one of the most ‘worn’ paths is the one down the middle of that arena.  The centre line is used to change rein.  It is used to ‘test’ channels.  The centre line is also an important element in many different exercises and school movements.  And, of course, it is often the easiest path from A to B (or A to C as is the case here!).

    In this episode of the Daily Strides Podcast you will learn how to make each trip up or down the centre line really work for you and your horse.  Rather than it being a ‘connecting piece’, it can become the exercise itself…

    Get Clear on Your Centre Line in a Sand Arena

    The first thing I am going to suggest doing will help you see how things actually are right now in your riding.  This versus how you ‘think’ things are.  Knowing where you are really riding every time you ride the centre line will allow you to see where improvements can happen.

    If you have a sand or fibre based arena, try to ride when the arena has been freshly harrowed or levelled.  This will let you actually see the track you are riding, which can be eye-opening in and of itself. If it is not possible for you to ride in a freshly manicured arena, prepare yourself for a little manual work! I am going to suggest grabbing a rake and just giving the centre line a quick ‘going over’ before you jump into the saddle.

    Knowing where you and your horse are actually making your path or track can often allow you to see where any current or potential weaknesses are hiding in your training.

    Ideas for a Grass or Wood Chip Arena

    Knowing the exact track you are riding can be a little trickier to figure out when working on a grass or wood-chip arena. It is often difficult to see what line you have ridden, especially if there are other horses regularly using the arena as well.  If this is the case, I am going to suggest using poles or markers to help keep you on the straight and narrow all the way from C to A (or A to C).

    If you find yourself continuously coming up against poles or markers, you know that things are not as straight as you thought they were!

    Another pretty simple way of seeing how accurate your current centre line journeys are is to video yourself.  Use your phone propped up at A or C and ride towards and away from it.  The great thing about this method is that you will actually have a record over time of how things are improving.

    Keep in mind that all of the above are only beneficial if you are willing to take appropriate action on what you discover.  This is where your riding and training comes in…

    You & Your Horse Are One ‘Container’

    One of the first suggestions I have for improving how you think about your schooling is to start thinking a little differently about you and your horse.  Rather than seeing the two of you as separate bodies, couple things together so that you are ‘one’.

    The energy that is created when you and your horse move must flow through both of you, unhindered, if it is to work correctly. 

    Think of you and your horse as being like a ‘piggy bank’.  An empty container or space that has just one outline or outer shell.  As you are riding on the centre line, notice how the energy moves through between you and your horse.  Is it leaking out in places?  Or is it failing to connect through or being blocked?  Maybe there is not enough energy to even fill the container to begin with…

    Your aids should create a channel which the ‘container’ that is you and your horse has to stay within

    Begin Noticing the Weak Points in Your Channel

    Seeing both yourself and your horse as one container, will allow you to more easily see where any weaknesses are hiding.  The channel you create with your aids is like the banks of a river or canal.  They help to keep the energy flowing in a specific direction and way, just like the banks do for the water.

    However, it is often only when MORE water gets put into a river or canal that the weak points of the banks become apparent.  Your channel in riding is the same. 

    As you begin asking for ‘more’ energy within the container, you will begin to see the weak points.  Falling out through the shoulder is a common one.  Becoming heavy and falling out through the front end is another.

    Anywhere the energy is being unintentionally leaked or lost is a weak point in your channel that needs to be address with training and schooling.

    Benefits of the Centre Line over the Long Sides

    The centre line is great for really getting to explore your channels strengths and weaknesses. This is because there are no ‘crutches’ or supports for you and your horse to use.  I know, it sounds a little random; your horse using a crutch!  However, often the sides of the arena can become just that for horse and rider combinations.

    Moving away from the sides of the arena is a little like taking the stabilizers or training wheels off a bicycle for the first time.  Things can get ‘wobbly’ initially!

    The quarter lines will work equally as well to help you really begin to see how effective your channel is.  Or how dependent you are on any crutches or supports!  However, for today and the purpose of this episode we are working on the centre line.

    Aligning to the Ends of Your Arena

    Once you understand your channel, begin thinking about how aligned you are when actually travelling down the centre line itself.  Adjust your shoulders so that they are parallel to the end of the arena you are travelling towards.

    The reason I am suggesting adjusting your shoulders rather than your seat initially is because you can ‘see’ your shoulders.  Any adjustments made to the position of your shoulders will affect your hands, which are clearly visible as you ride.

    Simply put, try to square your shoulders to the end of the arena you are travelling towards

    So many riders spend a lot of time in the saddle leading with one shoulder.  Usually the rider is not aware of it, however I can guarantee you that the horse is!  Squaring the shoulders allows the rest of the body to align underneath the shoulders.

    Shoulders are a lot more accessible for a rider to be aware of because they are ‘visible’.  Straighten the shoulders first and allow them to begin straightening the seat and hips.

    How Your Horse Will Align with You

    As you consistently remain aligned and straight travelling down or up your centre line, magic will begin to happen.  Your horse will begin to align his body to yours.  Meaning that he will also begin to straighten and use himself more correctly.

    Consistency is key to this happening.  So too is ‘allowing’ your horse to align with you, rather than ‘forcing’ your horse to align. 

    So many riders fail to recognise the power of consistently and calmly doing something in the saddle.  Horses will almost always ‘come round’ to your way of thinking and doing things if you are relaxed and consistent.

    Pay Attention to Your Entrance and Exit

    The final thing I feel is often overlooked when riding the centre line is how you get onto it and off of it!  If you find yourself tending to over or undershoot the turn, this is costing you valuable strides to ‘fix’ each time.

    Remember that how much bend you can ask for when turning onto or off of the centre line will depend on you and your horses level of training and development. 

    Obviously suppleness plays a big part.  But so too does rhythm, relaxation and forwardness.  It is also worth remembering that if any of the above are ‘lost’, you will lose contact and connection.

    Plan wider swings or bends onto and off of it initially.  Allow your horse the space to get there while maintain the gait he had before the turn or bend.  You must also allow yourself the space to adjust and change your position and aids as necessary.

    Become Intentional with Your Centre Line

    To close this post out, I just want to encourage you to begin getting really intentional when riding your centre lines.  See them as a point in each ride where you can assess how things are going.

    Use them to see how well your horse is developing and can ‘carry on’ without the stabilizers or training wheels. 

    Once you begin to become aware of the centre line, you may be shocked at how often you travel up or down it.  Make each of those trips count in both you and your horses training.

    Happy Riding

    Lorna

    Other posts, episodes and resources that relate to this topic:-

    Daily Strides Premium

    Straightness is one of the key elements in riding.  Couple this with suppleness and you have two of the keys to really improving your horses training.  If you are interested in learning more about these, and more, I am going to suggest joining Daily Strides Premium today.  In there, you will have instant access to audio trainings, which will take you step by step through different exercises that will move things forward in your riding.

    Couple This with Built In Accountability…

    It really is the easiest way you can begin moving forward in your riding – on your own terms. When you join a Daily Strides Premium Member you will get built-in accountability.  A real person from our team will be reaching out to you on a fortnightly basis to help you build and then maintain momentum with your progress in the saddle.

    Couple this with the live Q&As, the monthly review and planning live calls and the members only private group ~ we are here to help you remain accountable as team leader for you and your horse.

    Daily Strides Premium is packed full of step by step trainings for you to use in the saddle. All the trainings are easily accessed using your phone, meaning that you can take them with you where ever you are going.  These trainings and so much more are available for you immediately when you join Daily Strides Premium. Find out more HERE

  • 3 Mistakes Riders Makes when Riding the Sitting Trot

    3 Mistakes Riders Makes when Riding the Sitting Trot

    3 Mistakes Riders Make when Riding the Sitting Trot

    What this episode is all about & how it can help you:-

    • Think different words which will help you to move differently
    • Stop holding on in the sitting trot
    • Understand how to balance rather than ‘grip’ with your legs

    [smart_track_player url=”https://op3.dev/e/traffic.libsyn.com/dailystridespodcast/1072-The-3-Mistakes-Riders-Make-when-Riding-the-Sitting-Trot.mp3″ title=”3 Mistakes Riders Make when Riding the Sitting Trot” social_linkedin=”true” social_pinterest=”true” social_email=”true” tweet_text=”What not to do when riding the sitting trot with your horse… Daily Strides Podcast episode” hashtag=”horseriding” twitter_username=”strides_success” ]

    The sitting trot can be a challenge for many riders.  Being told how to ‘absorb the movement’ which can leave you scratching your head.  Or just move ‘with the horse’.  Another confusing term, especially when you have never managed it before.  This is going to be a little different…

    Have you ever noticed how it is often easier if you’re told what not to do, rather than what to do.  Sometimes the ‘don’t do this’ are easier to follow along with.  You can identify yourself better in those situations, possibly because they are already happening to you!

    In this episode of the Daily Strides Podcast I want to tell you what not to do in the sitting trot.  I hope that by hearing at least one of these things, you can have an ‘aha’ moment.  Knowing what you are doing wrong is one of the easiest ways to begin swapping out those habits for ones that better serve you.

    I believe that one of the reasons you might be struggling so much with the sitting trot, is because of how you are thinking about it.  Your mindset around the sitting trot.  The words you are using to describe it, which are influencing how you ride it. 

    Changing the Words Around the Sitting Trot

    If I asked you to think of the sitting trot or describe the sitting trot in one word, what would that word be?   For many riders the words bouncy or uncomfortable are top of the list.  Those types of words create a resistance in your mind, and therefore your body, when it comes to riding the sitting trot.

    Another common way riders make the sitting trot difficult for themselves is by thinking that they must ‘stay still’. No, you must move with your horse! In fact, ‘staying still’ will only cause you to work against your horse…

    If you can begin to reframe the words you are using to describe the sitting trot, you will begin to respond differently in the sitting trot.  ‘Moving with’ rather than ‘bouncing’.  Begin thinking about what you are telling yourself the sitting trot is, or is not.  Using different words will allow you to feel differently about how you approach the movement.

    Stop Holding On!

    One of the things that really drives me a little crazy when it comes to riders and the sitting trot is holding on.  Why do so many riders want to grab the pommel of the saddle, or the neck strap, when riding sitting trot?

    Holding on with your hands to something in front of you will NOT help you to ride a better sitting trot.  Your arms are simply not long enough! 

    What you will find is that holding on will cause you to either tip forwards into a fork seat, or close your chest and slouch your shoulders.  Both of those position faults lead to unbalanced riders, so rather don’t do either!

    Why This Affects Your Sitting Trot

    If you put a measuring tape from the point of your shoulder, across your chest to the point of your other shoulder, we want this to be wide.  When you hold on, it causes you to literally close or shorten your chest, which means you are no longer carrying yourself in the saddle.

    This ‘slouching’ and heaviness caused by not carrying yourself through the top half of your body stops your hips and seat from moving.  It shuts down your ability to follow your horse.  

    Disengaging your core, and therefore your seat, interferes with your overall balance, your ability to communicate with your horse and your effectiveness as a rider. It changes you from being a rider to being a passenger in the saddle.

    The result is that your movements, which will happen as the horse moves underneath you, will be too slow and stiff.  This leads to you moving against the horse, which leads to the ‘bounce’ or discomfort many riders experience in the sitting trot.

    How Lessons on the Lunge Can Help You

    I am a huge fan of riders taking lessons on the lunge.  You are on the horse, while a trainer or instructor is lunging the horse and giving you a lesson.

    It allows you, the rider being lunged, to not have to focus on the horse, and just focus on yourself and your habits.  

    One of the ways that I find it really helps riders to become more natural when riding the sitting trot is due to them being able to ride without reins.  Holding their arms out, or just ‘pretending’ they are holding the reins helps the rider to carry themselves.

    Lunging allows you to truly build your position and correct your posture in the saddle. Keeping your chest nice and open.  Keeping your chin up. All to allow your hips to move with your horse.

    Stop Gripping with Your Knees

    So many riders believe that if they grip hard enough, their legs are going to keep them in the saddle.  Unless you have legs of steel, your legs are not going to keep you in the saddle.

    Your legs are for communicating with your horse, not holding you in place when you ride!  

    In my experience, children don’t do this.  For the most part, their legs do not come far enough down their horses sides to be an effective ‘grip’.  However, adult riders are different.  I have met so many riders who are exhausted after each ride, purely from the effort required to ‘stay on’. Horse riding should not be that difficult!

    If you are gripping with your legs in the sitting trot, it can be a difficult habit to break…  Try thinking about how it is negatively impacting both you and your horse…

    For your horse, the gripping acts like a vice-grip on the horses back and most (maybe all) horses really don’t like that feeling.  They will try to get out from underneath it by hollowing or ‘running away’.

    The Clothes Peg Effect…

    For you, the gripping is closing down any supple movement through your body.  It is this movement that allows you to ride a smooth sitting trot.  Think of your legs, when they are gripping, as being like a clothes peg.  They are ‘tight’ and squeezing on your horses sides.

    Every bounce, and each stride will become a bounce when you are gripping, you take will ‘push’ you up higher in the saddle.  The ‘clothes peg’ will begin to slip off the horse – meaning you will begin to slip off the horse!

    Rather try to ‘drape’ your legs.  Like curtains. In constant contact with your horses sides so you can communicate. 

    Riding the sitting trot does not have to be difficult or hard.  If you can identify with any of the above, chances are that you are making this harder on yourself, and your horse, than it needs to be.

    Remember the ‘hinge’ movement and rather try to practice that in your sitting trot.

    Happy Riding

    Lorna

    I am hosting a free live online training on “The 6 Basics to Focus On in Your Riding” and I would love for you to join me there…  If you’re interested, you can register for your seat by CLICKING HERE

    CLICK HERE to save your seat in the free live online training

    Links mentioned in the episode:-


  • Avoiding the Trampoline Effect in the Sitting Trot

    Avoiding the Trampoline Effect in the Sitting Trot

    Avoiding the Trampoline Effect in the Sitting Trot

    What this episode is all about & how it can help you:-

    • Recognise the ‘trampoline effect’ in sitting trot
    • Understand why it’s not up and down, but rather forwards and back
    • Learn what the ‘hinge line’ is
    • Get started with practicing a smoother sitting trot

    [smart_track_player url=”https://op3.dev/e/traffic.libsyn.com/dailystridespodcast/1069-Avoiding-the-Trampoline-Effect-in-the-Sitting-Trot.mp3″ title=”Avoiding the Trampoline Effect in Sitting Trot” social_linkedin=”true” social_pinterest=”true” social_email=”true” tweet_text=”Are you experiencing the ‘trampoline effect’ in the sitting trot? Daily Strides Podcast episode” hashtag=”equestrian” twitter_username=”strides_success” ]

    Have you resigned yourself to the fact that you are never going to be great at riding it?  You’ve taken on an approach of ‘what is the point of working on it when I can get by without it’?  You might have even convinced yourself that you are actually doing both yourself and your horse a favour in not working on the sitting trot; the alternative being to prolong both of your discomfort!

    If it’s the last reason, you can go ahead and give yourself a little pat on the back… I really believe that for every rider who is miserable riding the sitting trot, there is a horse feeling equally as miserable having to carry them!

    In this episode of the Daily Strides Podcast I want to firstly explain why you may be experiencing the discomfort and bouncing when riding the movement.  I also want to give you some ideas on how you can begin working on it, in a more comfortable way.

    What is the Sitting Trot?

    The sitting trot is when your horse is trotting and you are not moving your seat in and out of the saddle, as you would with rising trot or posting to the trot.  It is riding a trot with no ‘up downs’. 

    What I have found really interesting is the reactions of beginner or novice riders…  Those who have no idea that there is a rising or posting in the trot, they have far less issues with riding a sitting trot.

    They have not attached any stories in their mind around riding the sitting trot, such as it being bumpy or uncomfortable. And, amazingly, it usually is not any of those things for them!

    Many riders have an issue surrounding the sitting trot because they have been told it is the ‘bumpy trot’.  Or that they will have a black and blue backside afterwards.  But this could not be further from the truth.

    A well ridden sitting trot feels ‘expansive’ and ‘spacious’.  It flows and moves, horse and rider working together in perfect harmony.  It is also not that hard to achieve…

    Suppleness & Up Downs…

    One of the most spoken about and worked on principles when it comes to horses is suppleness.  However, I believe that suppleness is just as important for the rider as well.  A lack of suppleness in the rider will become very obvious, very quickly, when riding the sitting trot.

    The bounce in the sitting trot happens when the rider cannot move with the horse…  The rider lacks the suppleness to follow the horses movement.

    I think one of the big issues is that riders think of the trot in terms of ‘up and downs’.  Even when they are speaking about the sitting trot, it is again in terms of ‘up downs’.  That is essentially what bouncing is; an up and down movement. 

    However the sitting trot is not an up down, it is a ‘hinge like’ movement through your hips and pelvis.  A ‘forwards and back’ rather than the up and down.  

    I have a free resource here for you that contains quick stretches you can do before you mount up that will help you become more supple through your body. You can get it HERE

    What is the ‘Trampoline Effect’ in the Sitting Trot?

    When we don’t allow that hinge like movement through our body, or we can’t allow it to happen due to a lack of suppleness, the trampoline effect occurs.  This is when you and your horse fall out of sync.

    I love trampolines.  I tell you this, because I know exactly how a bouncy sitting trot and an unfortunate lack of coordination on the trampoline have the same effect on people.

    Imagine you are jumping on a trampoline with a friend.  This person is of a similar weight to you, or heavier.  They are a second or two ahead of your movement on the trampoline.  Meaning that they are touching down on the base or mat of the trampoline a second before you.

    They touch down, the mat gives way underneath them.  They both go down. Then the springs come into play and the mat begins to push them back up.

    Unfortunately this happens to be when you are touching down and instead of the mat going down with you, you meet it with an equal and opposite force.  It feels like a ‘knock’ or a ‘jolt’ underneath you.

    While your body is ready for going down, you rather find yourself being pushed up, which results in a lost balance and rhythm.  This is, unfortunately, what happens to many riders a couple of strides into the sitting trot.

    The Trampoline Effect when Riding

    In the sitting trot there is an opening and closing of the angle between the front of your upper thigh and the flat of your tummy.  Basic terms, I know, but it is a whole lot easier for you to visualise if I put it like that!

    This opening and closing, forwards and back, must synchronise with your horses movement.

    However, as the angle opens more and the movement becomes ‘bigger’ many riders are just not supple or fit enough to keep up with the rhythm which is set by the horses trot. 

    They find themselves getting left behind, which causes the trampoline effect to happen between their seat and the saddle.  They are going down, or back, as the saddle is going up or forwards.

    Feeling the ‘Hinge’ Movement

    I am going to suggest that you go right back to basics when beginning to work on your sitting trot.  All the way back to walk.  As you are walking with your horse, I want you to imagine drawing a line from hip to hip, through your belly button.

    This is your ‘hinge line’.  This is where the swing, the forwards and back movement, happens and can also be felt through your body. 

    The hinge line is just like a hinge for a door, except instead of being horizontal it will be vertical.  When you are allowing the ‘hinge line’ to work, you are essentially changing the angle between the front of your thigh and the front of your torso, or tummy.

    Riding the Sitting Trot

    Once you have identified the movement and how you are opening and closing that angle with each stride, I am going to suggest picking up a slow trot.

    This is perhaps one of the few times I will suggest you to not pay attention to the quality of your horses trot.  In fact, the slower the better is true initially as you begin working on this!

    Slowing it down will mean that you will be able to keep up with your horse and the movement that is happening underneath you.  I recommend continuing to ride in this less active version of your horses normal trot until you have truly mastered the sitting trot here.

    More Energy Means More Movement

    Once you have done this, you can begin to work on improving the quality of your horses trot as well.  The reason I suggest not doing this when starting off, is due to how much more suppleness is required as your horses trot improves.

    Your suppleness must be able to keep up with your horses expanded movements when the trot begins to increase in quality and energy. 

    As more energy is created in your horses hind quarters, and as this energy is flowing through the horses body and connecting to the front, more movement will happen.  It might not necessarily be faster, but rather a more ‘extravagant’ use of the horses body with each stride.

    Focus on allowing yourself to be led first and then later you can begin influencing your horse in the sitting trot.  Like most things, you must first learn to be led before you can lead. 

    Work on Straight Lines Initially

    The final ‘tip’ I am going to leave you with is to work on a straight line initially before attempting the sitting trot through bends, corners or circles. 

    The reason for this is due to so many riders struggling with balance when riding a bend.  Balance and the sitting trot go hand in hand together.  Build confidence in your abilities by working where you have the most balance in the arena.  This will usually be down the long sides.

    The good news is that your sitting trot can definitely be improved.  It can become more enjoyable for not only you but your horse as well.  However, it will require a lot of suppleness and good practice from you.

    Happy Riding

    Lorna

    I am hosting a free live online training on “The 6 Basics to Focus On in Your Riding” and I would love for you to join me there…  If you’re interested, you can register for your seat by CLICKING HERE

    CLICK HERE to save your seat in the free live online training

    Links mentioned in the episode:-


  • Asking for The Correct Canter Lead when on the Straight

    Asking for The Correct Canter Lead when on the Straight

    Asking for the Correct Canter Lead when on the Straight

    What this episode is all about & how it can help you:-

    • Understand why correct flexion is everything
    • Get clear on the role of your seat
    • Use your legs to ‘ask’ the question
    • Actually allowing the horse to actually canter

    [smart_track_player url=”https://op3.dev/e/traffic.libsyn.com/dailystridespodcast/1064-Asking-for-Canter-on-the-Straight.mp3″ title=”Asking for Canter while on the Straight” social_linkedin=”true” social_pinterest=”true” social_email=”true” tweet_text=”Struggling to strike a correct canter lead on the straight? This episode of the Daily Strides Podcast will help” hashtag=”horseriding #canter #podcast” twitter_username=”strides_success” ]

    Do you find that canter leads end up getting you and your horse in a bit of a muddle sometimes?  You’ve perhaps noticed that if you ask in the corner you are usually okay…   But, if and when you ask on the straight, well, it seems to be down to chance!  A fifty / fifty chance, but a chance all the same!

    In this episode of the Daily Strides Podcast I am focusing about cantering, and the correct leads in canter. I want to help you to strike the correct canter lead 100% of the time, regardless of if you are on a bend or on the straight.

    For many riders, the transition to canter is one that is initially mastered on a corner or bend.  This is because the bend will naturally help ‘set you up’ for success through the transition itself.  However, it is when the same transition is asked while riding a straight line, muddled communication becomes apparent very quickly!

    If you have experienced this, firstly don’t worry.  It is a common issue for many riders and one that is easily ‘straightened out’ when you understand the mechanics behind it all. 

    Correct Flexion is Everything

    I cannot stress enough the importance of correct flexion in cantering.  I find that often riders are so busy trying to get the horse to go forward and into the canter – that they completely forget about the flexion.  The flexion that really must be there if the transition is going to be a successful one.

    I believe that correct flexion is one of the foundational pieces necessary for the correct transition to occur

    With canter you want to have a slight flexion to the inside. Remember that flexion is not a bend. Bending is when the horse’s nose and tail get closer together on the one side of their body, as they bend that way.

    Flexion and Suppleness

    Flexion is more like a slight ‘give’ to one side. What is really important about flexion is that there must be a certain degree of suppleness present in horse and rider.

    If you are fixing or forcing the flexion, then it is not flexion. 

    If you do this then the horse cannot move through the transition into whatever you want him to do. It is important to understand that for flexion there has to be movement.   There has to be suppleness and it has to be ‘loosey goosey’.

    Flexion is not dictated by which rein you are on, it is dictated by whichever canter lead you are asking for.  It is important to decide which is your inside and which is your outside and make that clear to your horse before the transition

    Let’s say you were to ask for a little flexion to the left, then you are going to be setting the horse up to canter on the left lead. It doesn’t mean that you horse veers off to the left, because we are riding a straight line. That is why I said that flexion is not bend, it is just a little ‘give’ – it is an indicator, or a ‘nod’ in that direction.

    Understanding the Role of Your Seat

    Your seat…  We could go deep into what your seat should and should not be doing. However I have covered it in detail in past episodes HERE & HERE.  There is also a complete list complementary episodes on this topic at the bottom of this blog post.

    I see so frequently with riders, that their seat is actually incorrect.  It often shows up in that they are not sitting straight; meaning that there is more of their body on the one side of the saddle than the other side.

    If you are riding on the straight, make sure you are straight in the saddle!  Otherwise you are giving conflicting directions, or asking questions that don’t make sense, to your horse

    How is Your ‘Scoop’?

    The second common mistake I see when it comes to the seat is riders confusing a ‘scoop’ with a ‘dig’.  You can ask for the transition, and the correct canter lead, with your seat.  Very often the term used is to ‘scoop’.

    Unfortunately, what very often happens is that riders will ‘dig’ instead of scoop. Trust me, your horse will not enjoy the feeling of having a hole dug in his back!  He will try to move his back away from you. This usually results in him either go crooked through his body, or hollow through his back. Neither are good when it comes to successful transitions, especially canter transitions.

    Think of your ‘scoop’ as being light, almost like an indicator. You are subtly asking for something ‘more’ or bigger to happen.  And remember, you and your horse must be ‘fluent’ in the seat in order for the ‘scoop’ to work :)

    Using Your Legs to ‘Ask’ the Question

    If you and your horse are not quite proficient in the language of the seat just yet, don’t worry. The easier way ask for the correct canter lead it to use your legs to ask the question.

    In a previous episode HERE we spoke about the ‘legs first or the seat first’ combination. The egg and chicken of horse riding for many riders.  I believe that they are both usually influential on each other.

    This is good news for you as it means that you can use your legs to influence your seat, and your horse, when asking for the canter transition initially

    The simple canter aids are that your inside leg is ‘on’ and your outside leg is slightly back.  However, instead of your outside leg remaining too far back, it is almost as though it plays tag

    Where you ‘tag’ your horse is important.  You don’t want to touch him too far back, closer to his flank (you would be surprised what I have seen riders try and do in an effort to get into canter!).

    I am going to suggest that you be more subtle and let the ‘back’ be just an inch or two behind your usual outside leg position.  Most horses will understand.

    Both Your Legs Have Important Roles in the Transition

    After touching him (tagging) your outside leg will stay a little more back when compared with your inside leg.  This is because your outside seat bone is a little back and your inside seat bone a little more forward as your horse canters.

    It is equally important to realise that it is not just your outside leg doing all the work.  When your outside leg is ‘tagging’ your horse,  your inside leg will be asking for ‘more’ energy.  This can be with your inside seat bone, and this is where the scoop comes in.

    Allowing the Horse to Actually Canter

    Once you have asked the question, you now have to actually allow your horse to canter!  We spoke about straightness through your body at the beginning of this post, and this is where it is really key to remain ‘straight.  Equal amounts of your body and weight on both sides of your saddle.

    It is also really important to make sure that you haven’t allowed your body to tip forward as your horse took that first step into the canter.   Your correct position is essential to allowing your horse to canter

    When it comes to ‘allowing’, I personally believe that it is all about your seat.  If you are shut down the energy through your seat, your horse can no longer go forward

    A simple way to imagine this is to imagine yourself sitting up and allow your seat to lead.  Your body must simply follow through from your seat.

    I believe there is an invisible connection between your seat and your hands, and by allowing through your seat, you allow through the hand.  This, in turn, allows your horse to move into the canter.

    Practicing the Correct Canter Lead While on the Straight

    Like all things in horse riding, this too is going to require practice. I would strongly suggest schooling on this using the centre line or a quarter line.

    A simple exercise you can do which will allow you to keep moving forward in your riding is to work on the quarter line.  Ask for the canter while on the quarter line.  Then change rein across the long diagonal.  As you change rein, transition down to trot and use the time to rebalance and establish your trot.  Then simply ride down the opposite quarter line ask for the other canter lead.

    Of course, there are many different schooling exercises and movements you can use to practice this.  What is important is to remember the flexion and ‘how’ you are asking your horse for the canter transition.

    Happy Riding

    Lorna

    Links mentioned in the episode:-

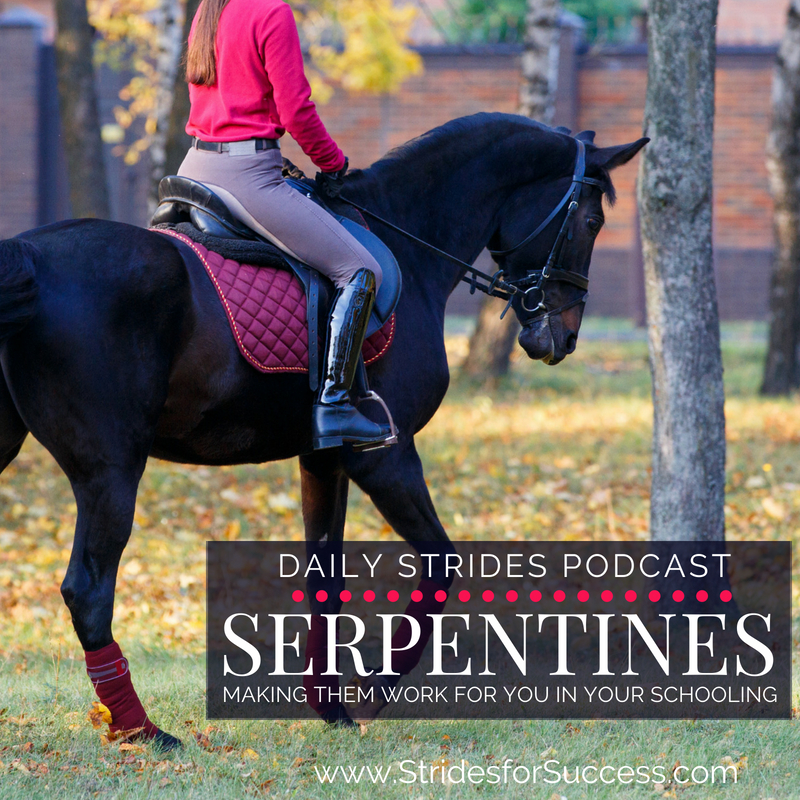
  • Serpentines; Making Them Work for You in Your Schooling

    Serpentines; Making Them Work for You in Your Schooling

    Serpentines, Making them work for you in your schooling

    What this episode is all about & how it can help you:-

    • Understand the difference between controlling versus influencing
    • How markers can help you become more mindful throughout the movement
    • Why I suggest slowing things down initially
    • How to begin working on improving your serpentines today

    [smart_track_player url=”https://op3.dev/e/traffic.libsyn.com/dailystridespodcast/1057-Serpentines-Making-them-Work-for-You-in-Your-Schooling.mp3″ title=”Serpentines; Making them Work for You In Your Schooling” social_linkedin=”true” social_pinterest=”true” social_email=”true” tweet_text=”Are you ‘flying’ through your serpentines – or are they a well thought out school movement for you and your horse?” hashtag=”Podcast #Equestrian” twitter_username=”strides_success” ]

    Serpentines really are the exercise or movement that ‘have it all’ when it comes to working or schooling your horse in the arena.  Suppleness, straightness, rhythm, relaxation and a whole host of other principles in between.

    Yet, so many riders fail to make the most out of their serpentines and never really get further than ‘flying’ around the loops full speed ahead!  In this episode of the Daily Strides Podcast I am going to give you a few ideas on how you can get the most out of this basic schooling movement in your riding.

    Deciding on Which Serpentine Suits You

    First of all, let’s quickly chat about what a serpentine is and deciding how many loops is right for you and your horse.  The serpentine is, simply put, like riding the letter s in the arena, but with extra loops added in where necessary.

    The amount of loops in your serpentine will be determined by the size of your arena and how developed both you and your horse are in your training.

    The more loops in your serpentines, the more suppleness will be required to maintain the forwardness and the ‘shape’ of the movement over all.

    Most riders start out with a traditional 3 looped serpentine.  Any odd number of loops will see you finish the movement on the same rein you begun.  An even number or loops will have you change rein when you complete the movement.

    Controlling Versus Influencing in the Saddle

    Many riders have the mindset that they must ‘control’ their horse.  Control every movement, every step.  The rhythm, the forwardness… Even down to how their horse moves and uses his body.  If you are one of these ‘controlling’ riders, I’m afraid I’m going to have to burst your bubble…

    The only thing you can control while riding is yourself.  You cannot control your horse.  However, by controlling yourself, you can learn to have more influence over your horse…  

    One of the aims of correct training with your horse should be getting to the point where your horse takes responsibility for his own movements and actions.  You will ‘control’ yourself and he will control his self.

    Controlling everything is exhausting and results in your focus being place on the wrong things when riding.  Holding your horse up with your inside leg.  Or creating a fixed or rigid ‘frame’ for your horse to work in and therefore removing all suppleness.

    Correct Rather than Control

    As you ride your serpentines over the coming weeks, think of asking your horse to do something and then allowing him to do it.  Don’t be the rider who is always looking over your horses shoulder waiting for him to make a mistake!

    If he goes off track, or makes a ‘mistake’, yes, correct him – but then try to get out-of-the-way again and allow him to continue on.

    This way, you are allowing your horse to begin thinking for himself and taking responsibility for his own actions.  Shifting your mindset around this topic is the is the beginning of working towards self carriage with your horse.

    Using Markers to Help Your Accuracy

    Very often when riders set out to ride a serpentine, they get a little off track with the true shape of the movement they want to ride.  It can end up looking more like a zig-zag rather than a series of equal bends connected by straight lines.

    Before you ride your next serpentine, rather go out and mark the exact track that you want to ride.  The loops, the track as you cross the arena.  The shape, the sizes, the centre line. 

    You can use anything at all, once it is safe, to mark out the path you want to ride on.  Tyres, cones, stones, poles, uprights.  My only concern with using poles or uprights is that sometimes the horse can ‘cling’ to them a little.

    Slowing Down and Starting from Walk

    Once you have your path marked out, I then suggest getting into the arena on your horse and begin working on riding the movement.  Start in walk.  Ride the movement a few times in the walk and begin being mindful to what is going on underneath you.

    Serpentines have a lot of different moving parts as you ride through them and taking the time to notice each stride in walk will help you begin getting the most out of the exercise.

    Notice where you begin, the middle of the short side of your arena.  Pay attention to how you transition between straight and flexed.  How well is your horse ‘staying on track’ through the exercise itself.

    If there was a drone above you, taking a video, would your horses back, from tail to poll, be on the same track all the way through as the one you laid out?

    Most riders think about transitions as going up and down between gaits or gears.  However, a transition is simply a change.  I am going to recommend that, as you ride through the serpentine, becoming really mindful on how you are transitioning between the loops.

    Incorporating Serpentines into Your Schooling

    From here, begin thinking about the best way you can ask  your horse to actually ride the serpentines and then getting out of his way and allowing him to do just that.  No leaning or shoving or holding things up.

    It is common for riders to become a little too enthusiastic with your inside rein as you ride the basic serpentine…

    Notice the suppleness and the bend.  Notice how your horse is coping with the transitions between loops and if you are truly helping him or hindering the process.

    Once you have mastered the exercise in walk, I would then suggest taking things a step further by riding the exercise in trot.  Keep your focus on the ‘eye in the sky’ and how it would look if viewed from above.

    Also make sure you are not ‘controlling’ everything, but rather setting things up and then allowing them to happen. 

    There are so many other ways to add variations to your serpentines.  We have a whole collection of trainings inside of Daily Strides Premium themed around doing just this, which you can begin working on today when you join.

    Happy Riding

    Lorna

    Links mentioned in the episode:-


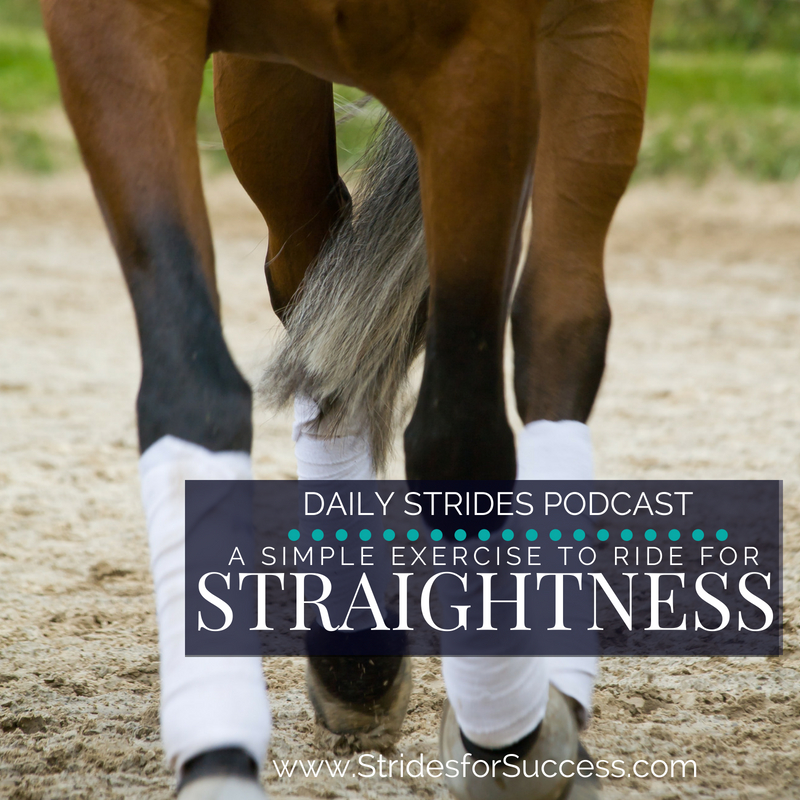
  • A Simple Exercise for Straightness

    A Simple Exercise for Straightness

    A Simple Exercise for Straightness

    What this episode is all about & how it can help you:-

    • Get clear on the importance of straightness
    • Understand your responsibility as the rider
    • Begin using straightness from day 1
    • Use your quarter lines to assess your horse

    [smart_track_player url=”https://op3.dev/e/traffic.libsyn.com/dailystridespodcast/1050-A-Simple-Exercise-for-Straightness.mp3″ title=”A Simple Exercise for Straightness” social_linkedin=”true” social_pinterest=”true” social_email=”true” tweet_text=”Looking for a basic exercise you can ride with your horse to work on suppleness and straightness?” hashtag=”#MakeEveryRideGreat #Equestrian #Podcast” twitter_username=”strides_success” ]

    Straightness.  It is one of the top elements of the traditional Training Scale when working with horses.  Yet, is it also something that we touch on regularly here inside of the Daily Strides Podcast.

    The question for many riders is ‘How can I work on straightness, if it is such a ‘high level’ concept?”  In this episode of the Daily Strides Podcast, I will give you a simple exercise you can begin working on today.  It is an exercise you can use, regardless of where you and your horse are in your training.

    Why Straightness?

    Straightness is simply a way of assessing symmetry in you and your horses way of going.  It is how the energy is brought into the ride and how it is distributed throughout the ride.

    I have explained straightness in more detail on a previous episode of the Daily Strides Podcast.  You can find that episode HERE and I strongly suggest popping on over if you are not fully understanding this exercise or straightness in general. 

    The symmetry comes from equal energy being created in both hind legs and propelling the horse forward.  If one side is stronger, or weaker, than the other the energy input will be different, causing crookedness or excess tension in how the horse goes.

    Straightness is also important when looking at how the energy is used, or the output of the energy.  Again, any weakness or tension on one side over the other will cause the energy to be ‘spent’ differently.  The result, again, will be crookedness or excess tension as the horse tries to constantly compensate or correct.

    Your Responsibility as the Rider

    So, that all being said, how can you begin riding with the intention of developing straightness?  The key word to consider here is ‘developing’.  Your horse will not go straight from day 1.  In fact, if you have ever ridden a young or green horse, it can sometimes feel like riding an eel!

    Their ‘speed-wobbles’ in straightness cause a lack of balance and a loss of rhythm.  It can also cause excess tension as they try to ‘hold’ themselves straight, but lack the physical strength or development to do so. 

    In the previous Daily Strides Podcast episode, we spoke about your responsibility to create a symmetrical ‘mould’ in order to channel your horse’s energy.  It is also important to remember that the sides of your arena, or the rails, are not what should keep you both straight.

    Straightness is a way of travelling.  As your horse develops more correctly, he will be able to travel more straight by just, well, travelling!

    What is important is that you are all the time working toward the ideal.  If you horse is weaker (which most horses are) on one side over the other, rather work on strengthening him in shorter but more correct sessions.

    Straightness From Day 1?

    This can be worked on in simple exercises performed as correctly as possible. Attention to detail is key when schooling horses, regardless of where they are in their journey.

    Riding on the quarter lines, or just 2 meters in off the track will get you started when it comes to noticing straightness.  

    Ensuring that the hind quarters are truly behind the shoulders regardless of if you are on a straight line or a bend.  Over time this will ‘switch’, in that the shoulders will be in front of the hind quarters.  However, this takes more ‘feel’ on your part as the rider.  It also takes more engagement and strength from your horse in order to lighten the front end.

    If you are also just beginning to work on straightness for the first time, becoming mindful about what you can actually see – and what is directly in front of you – is often a little easier. Hence my recommendation of shoulders followed by hind quarters to get you started. 

    The Quarter Line

    Let’s start with this simple movement.  Riding down the quarter line with your horse.  The quarter line is the imaginary line half way between the long side of the arena and the centre line.  There are two of them in any arena!

    Many riders will call the second one the three-quarter line. However regardless of which you ride and what you call it, riding on the quarter line means there is no rails, posts or fences to guide you and your horse.

    What I have noticed is that most riders, as they ride the second half of the line, will begin to ‘fall in’ around the upcoming bend or corner. They ride a large oval or egg shape, rather than a rectangle. 

    Instead of riding to the end of the line and riding the 90 degree bend or corner, the blend everything together.  The corner is no longer defined.  The shoulders, followed by the hind quarters, just veer off track until they get to the short side.

    The straightness on the quarter line was not defined, which resulted in the straightness through the corner not being defined. 

    Rather focus on riding straight, right up to the corner. From there, think about the quality of the bend.  The suppleness through your horses body.  The ‘tracks’ created by your horses inside legs and his outside legs.  The ‘mould’ your body is creating for your horse to travel through the bend.

    This can be started in walk and later worked on in trot and even canter.

    Defining the Line using Poles or Markers

    If you are still struggling to stay on track, I suggest defining things a little more using poles or markers.   I will be running a free ‘mini-course’ in July 2018 where you can get the printable outline for this exercise and what it looks like.  Of course this is just one of the exercises we will be using.  You can sign up to join us HERE


    My one tip for today if you are using poles or markers is to start with ‘wide’ poles.  A less defined track.  Then as your horse develops you can ask for a tighter and more defined track or line. 

    Suppleness

    One of the greatest ways to develop straightness is to focus on increasing true suppleness.  I personally believe that suppleness and straightness are directly related.

    You cannot be truly straight without being supple – ask anyone who practices yoga!

    You want to make sure that rather than your horse falling in or out through the shoulders or hind quarters, derailing, he is truly bending through his body.  Through the 90 degree corner you are riding at the start of and the end of each quarter line.

    Initially he may be ‘tight’.  There may be a lack of bend and this is where you’re focusing on increasing the overall suppleness will have a huge effect.

    Most horses ‘derail’ around corners because it is easier than bending through their body to remain on track. 

    Notice how, when you ask for the bend, is there any loss of rhythm or relaxation.  This is a good indicator that your horse is not as supple as you think he is.  Notice how well he transitions from straight to flexion to bend.  Notice how well he cope if you add circles into the exercises at the corners.

    Noticing the Difference

    By defining what is straight and what is a corner.  What is a rectangle and what is an oval.  By consistently asking for better quality line and then allowing your horse to ride on those lines, you will begin to develop him more evenly through his body.

    The result will be greater strength in propelling you both forward.  Equal thrust from the hind quarters, which will lead to a stronger, more correctly developed horse.

    Helping Your Horse

    Many riders almost look like they are trying to ride the bend.  They twist, contort, shuffle, pull, squeeze… You name it!  They interfere with the horse as he is travelling and moving forward.

    Your job as the rider to set things up and then allow the horse to actually ride through the bend himself.  You simply facilitate him travelling through the bend. 

    Part of straightness is balance.  Part of balance is finding the mid-point.  Becoming stable.  Set things up.  Put your horse in the best possible position to make it correctly through the bend.  And then simply allow him to do just that.

    Will you have to step in and assist from time to time?  Yes!  However assisting is different from doing it for your horse.  Assisting is first allowing him the space to try, and then gently guiding where necessary.

    Have a line in mind and try your best to ride that line.

    Happy Riding

    Lorna

    Links mentioned in the episode:-