Tag: suppleness

  • Exercises to Help Loosen a Stiff Horse

    Exercises to Help Loosen a Stiff Horse

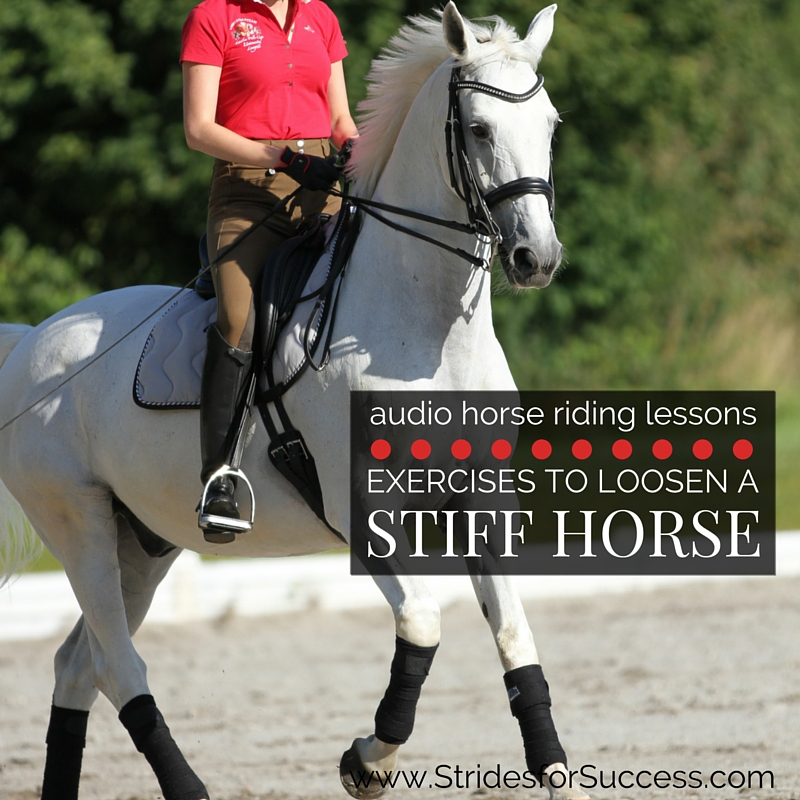
    Exercises to Loosen a Stiff Horse

    Does your horse find doing things on one rein a lot easier than on the other?  Or perhaps you’ve noticed ‘something’ as you round a corner or bend?  Maybe even as you ask for a lateral movement?

    It feel like, rather than responding how you want him to, he bulges to the wrong side or against you?

    Horses, just like humans, become stiff in certain areas of their bodies for many reasons.  When we say the word ‘stiff’, we are referring to a lack of suppleness in that area.  A certain looseness and ease that is missing when performing a particular movement or exercise.

    [smart_track_player url=”https://op3.dev/e/traffic.libsyn.com/dailystridespodcast/551-Exercises-to-Loosen-a-Stiff-Horse.mp3″ title=”Exercises to Loosen a Stiff Horse” social_linkedin=”true” social_pinterest=”true” social_email=”true” tweet_text=”Is your horse not as ‘loosey goosey’ as you would like? This will help supple things up…” hashtag=”equestrian #horseriding #makeeveryridegreat” twitter_username=”strides_success” ]

    In this episode of the Daily Strides Podcast I discuss stiffness in your horse.  Stiffness is a lack of suppleness; which is essential to your horses correct development.

    What is Suppleness?

    Suppleness is basically a measure of how loose, flexible or pliable your horse is through his body.  A lot of horses, just like us,  need to loosen out quite a bit before they can use their body to the fullness of its potential.  This is why a good, well planned and then ridden warm up is vitally important to set the tone for the quality of work that will happen in the schooling session.

    Your horse needs to work through any stiffness if he is to be able to fully use his body to perform any tasks you require.

    Very often stiffness shows up in bad behaviour.  An unwillingness to do what is asked.  It can also be reason for loss of balance or rhythm.

    A lack of suppleness is tightness or tension in an area when asked to stretch, lengthen or even, in more pronounced cases, move in general.

    Working With Your Horse – Not Against

    Confirmation can play a large part in how your horse uses his body and it is important to realise this when working with your horse.

    Work to his strengths rather than focusing on his weaknesses.

    You will never change a short neck, however you can learn how to work with it!  Keep in mind that all horses can be improved upon with time and consistent, correct, sympathetic exercises which help loosen up any areas that they are experiencing a lack of flexibility in.

    Types of Suppleness in Your Horse

    When supplying our horses, we must think both longitudinally and latitudinally, so as our horse can fully perform his job to the best of his ability

    Longitudinal suppling is from tail to head over the topline of your horse.  It helps to loosen out the back as well as the joints in the legs and can be done with stretching long and low, raising the back, and basic transitions up and down between the gaits.

    Latitudinal suppling is sideways movements.  Asking your horse to cross one back leg, or one front leg, in front of the other and so on.  This helps to loosen the shoulders, and hips as well as the leg joints and, to some degree back as well.

    Latitudinal suppling exercises can also help to loosen up the poll and neck areas of your horse through sideways flexion.

    Noticing Where Your Horse is Stiff

    Very often knowing where to begin will become evident when you pay close attention to how your horse performs the same movement or exercise on both reins.  Is the movement and way of going equal on both sides?  Or is there any bracing or loss of balance and rhythm on one side over the other?

    Stiffness is far more common than most riders realize.  In fact, a lot of issues that are often put down to a lack of discipline or attentiveness or just being downright naughty is actually the result of a horse being stiff.  Being stiff will cause the horse to be unable to really perform the movement in the first place

    So we have already mentioned that your horse may show resistance if stiff.  Or he may be unable or unwilling to bend and flex if any stiffness is present.  There may also be a shorter range of motion in that area.

    So whether it be through the muscles, or joints, stiffness will feel like your horse is ‘resisting’ you.  It becomes even more evident if you ask him to ‘use’ himself and move out of what your horse perceives as his comfort zone.

    Identifying the Stiffness & the Cause…

    Unfortunately with many riders, the initial reaction is to use the reins, particularly the inside rein, to ‘fix’ the problem.  They do this by essentially forcing the horse into the desired shape…  This will inevitably lead to more stiffness in other areas as the horse tries to compensate.  It also can often cause your horse to ‘bulge’ even more!

    So once we have identified any stiffness, and before we begin working particular exercises into warm-ups and schooling sessions, it is important to find the cause of the problem so you can remove it if possible

    • Have the tack, particularly the saddle, checked by a qualified saddler
    • Make sure that you are not sitting lopsided or crooked in the saddle
    • Assess yourself for stiffness – I highly recommend Yoga – which you may be transferring to your horse
    • Rule out any physical problems such as joints, hooves, teeth, back etc

    And once you are sure that there is nothing external or internal adding to the problem, you can then begin working towards loosening your horse out by formulating a long-term plan or program to help him

    Working with a Stiff Horse

    Take things right back to basics and back to the beginning.  Notice when any resistance or stiffness shows up as you perform simple movements.  This is important both during both your warm up and when schooling.  Take note of which side is the stiffness more pronounced and what type of movement it is more evident; lateral or longitudinal.

    More than anything, keep in mind that consistency is king and time will play a huge part in working through any hardness or stiffness that your horse is experiencing.  Consistency in how you ask and how you respond.  This means asking the correct way and then expecting a certain result.  Remember to reward any move in the right direction, no matter how small.

    If you have ever experienced any stiffness in your own body, you will know that while you can do a lot in one day, generally the problem will resurface again the next day, and will require just as much attention and patience to loosen out again

    Also keep in mind that if the stiffness is due to age, a past injury or wear and tear, you may have to find ways to work around it rather than thinking of ‘fixing’ it

    Where to Begin Loosening Your Horse

    Start by aiming to loosen your horse along his back and topline.  Transitions up and down between halt, walk and trot to help longitudinal supplying.  Later lengthening and shortening within the gait itself will also help to eradicate any excess tension or stiffness that is lurking there.

    You can then begin adding some sideways, or latitudinal, suppling into your warm up or schooling sessions.  Bending your horse left and right, both while keep your horse straight – such as on a circle or center line –  or while moving sideways such as shoulder in or haunches in will help him.  Also the slight flexion required for leg yielding works well to help him begin moving more freely through his body.

    Working Through Any Stiffness – The ‘Right’ Way

    Whatever you decide to do, it is really important that you take time, and lots of it!  Don’t just drill your horse for hours and hours constantly stretching the ‘stiff’ area.  Rather than loosening your horse up, this will most likely cause an injury or end up creating another problem elsewhere as your horse tries to compensate for the discomfort you are causing him.

    Rather work a few small but correct steps in throughout the overall session and then, as he begins to loosen up over the coming weeks, increase the difficulty for him – step by step and inch by inch.  If you feel you are forcing him into an uncomfortable or difficult position, you are pushing too far.

    Slowly and consistently riding correct exercises is what will work best in the long run to help your horse either work out or manage any stiff areas in his body.

    Happy Riding

    Related posts, episodes and freebies you may enjoy:-

  • Lengthening Your Horse’s Stride in Trot

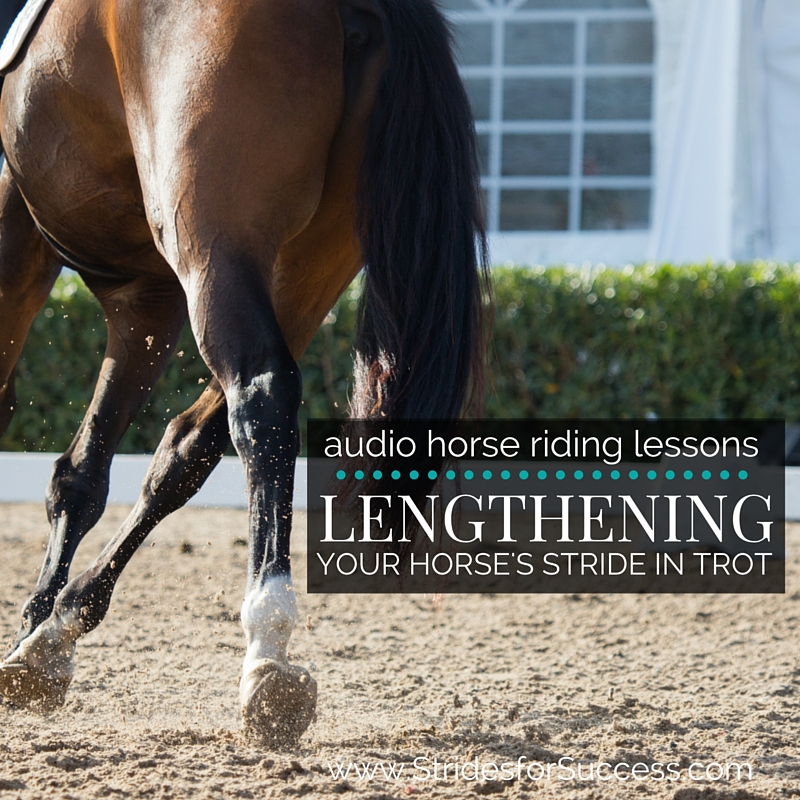
    Lengthening Your Horse’s Stride in Trot

    [fusebox_track_player url=”https://op3.dev/e/traffic.libsyn.com/dailystridespodcast/531-Lengthening-Your-Horses-Stride-in-Trot.mp3″ title=”Lengthening Your Horses Stride in the Trot” social_linkedin=”true” social_pinterest=”true” social_email=”true” ]

    We have all seen the wonderful video clips of horses showing extravagant extensions in the trot and I think most riders dream of being able to perform a similar feat.  However, for most riders, merely asking for a lengthening of the stride in trot results in their horse either breaking into a canter or running on to their forehand, with the hind end being, well, left behind!

    Being able to lengthen and then subsequently shorten your horse’s stride when you want, develops your horse’s responsiveness, suppleness, and balance while being ridden.  

    It also allows you to make adjustments if necessary while in the saddle, without changing from one gait to another.

    However, it takes time for your horse to develop physically and mentally so as to begin holding a lengthened stride for longer periods.  Failure to do so is often a lack of patience from riders, who will try to push and force their horse to lengthen. This results in the horse hollowing his back, shortening the stride, and rushing onto the forehand.

    What is Lengthening the Stride?

    When your horse lengthens, he basically covers more ground in the same amount of strides.  Each stride he takes sees him stretching or reaching more forward.  His hind feet coming more underneath him with every stride and then the front legs stretching out more in front of him with each stride.

    However, when lengthening his stride, he will not change the tempo of the gait.  The 1 – 2 – 1 – 2 – 1 – 2 of the trot will remain the same, regardless of the length of the stride or ground being covered with each passing stride.

    Asking, not pushing is the key to a true lengthening on the stride in trot.  

    In order to lengthen his stride, your horse must lengthen his whole back and topline.  Suppleness is required to do this, and often we only think of suppleness as being lateral, it is also important longitudinal as well.

    Start with Rhythm

    The rhythm and tempo of the trot should remain consistent throughout the gait.  I think that this is often the most simple place and way to begin introducing your horse to this type of work.  Start by becoming familiar with your horses tempo and knowing the length of this strides in working trot.

    Depending on how independent and ‘under control’ your seat is, you can lengthen your horse in trot from either rising trot or sitting trot,

    I strongly suggest working in rising trot initially as it will allow your horses back to lengthen out without you being heavy on it during the longer strides.  

    I also find that using rising trot tends to prevent an overly ambitious ‘seat shoving’ happening from the rider, whether intentional or not!

    So first and foremost, focus on creating and then maintaining or establishing a correct and balanced rhythm and tempo.  

    You can do this through all three gaits, using the transitions to further engage your horse’s hind quarters and also, refine your aids and your horse’s responsiveness to them.

    Pay Attention to Straightness

    It is also important to cultivate straightness in your horse.  Doing this earlier on will make it easier for him later when you begin asking for the lengthened strides.  If you horse is straight, he will push equally from both hind legs, propelling him correctly in the gait.

    If he is crooked or falling out, he will find it hard to maintain a rhythm, as one side will literally be moving more forward than the other.

    Spend quite a bit of time on transitions, using your half halts, and circles, particularly smaller ones, such as 12 or 10 meter circles.  Work between shortening your horse slightly and then returning back to working trot as well.  Don’t attempt to lengthen until you have truly established and can maintain a good balance throughout the above mentioned exercises.

    Begin By Shortening First…

    I find that riders often find lengthening the canter easier than the trot, particularly when there are canter poles involved.  However, you can use a similar principle in the trot when starting out at first.  Pick two fixed points in the arena or on the trail where you are riding.  Ride between these two points quite a few times in working trot, counting each time the amount of strides your horse fits between the two points.

    Use your body passing the first point as the ‘go’ or ‘start’ and then again, your body passing the second point as your ‘stop’ or ‘end’.  Continue to do so until you have a regular amount of strides each time as you ride through this movement.

    Think of it almost as having two ground poles with 5 or 6 canter strides in between, but use the points you have chosen as the poles and trot rather than canter.

    Once you know the amount of strides in a ‘normal’ working trot, then ask for a slight shortening of the stride between the two points.  If you can get an extra stride in there, then your horse has truly shortened. However remember the tempo or recurrence of the 1 – 2 – 1 – 2 – 1 – 2  must remain the same throughout.

    The shortening of the stride can be thought of as your horse lifting his legs more ‘up’ rather than ‘out in front’.

    Lengthening Your Horses Stride in Trot

    Asking for Lengthened Strides

    Once you and your horse have established a balanced transition between the working trot and a slightly shorter more collected trot, you can then begin to think about asking for a few lengthened strides in the trot.  It is really important to maintain the contact between you and your horse throughout the movement.

    Lengthening the stride does not mean throwing the reins at your horse and kicking on.  It simply means that you are allowing your horse more space to move within each stride.

    You may find, particularly if it is your horse’s first time, that initially there will be very little difference.  This is fine, your horse has to first understand what you are asking and then also, begin to understand how he can move his body to achieve this new lengthening of it.

    Remember, when you horse lengthens his stride, he will use his muscles, tendons, ligaments and joints differently. Slow and steady, taking plenty of time to learn this correctly, is key to maintaining a sound horse that enjoys his job.

    Noticing the Increased Lenght

    If he does begin to lengthen the stride, you will count less strides between your ‘start’ and ‘end’ points than what you were counting while in working trot or whatever you are using as your ‘control gait’.   I say ‘control gait, as in order to know if your horse is lengthening rather than running, you need something to measure it against.  Use your working trot as the measure or the control.

    Keep in mind that your horse cannot move or ‘extend’ his shoulders if you are leaning or jiggling around on top of them.  

    Pay attention to your position and posture throughout the exercise, and again, take things slowly.  The better your horse understands and the more confident he feels about his ability to perform the movement, the greater it will eventually be.

    Happy Riding

    Lorna

    Additional Resources for Equestrians:-

    Lengthening Your Horses Stride in Trot

    [wp-tiles post_type=”post” orderby=”date” order=”DESC” grids=”Simple”]

  • Working Long and Low

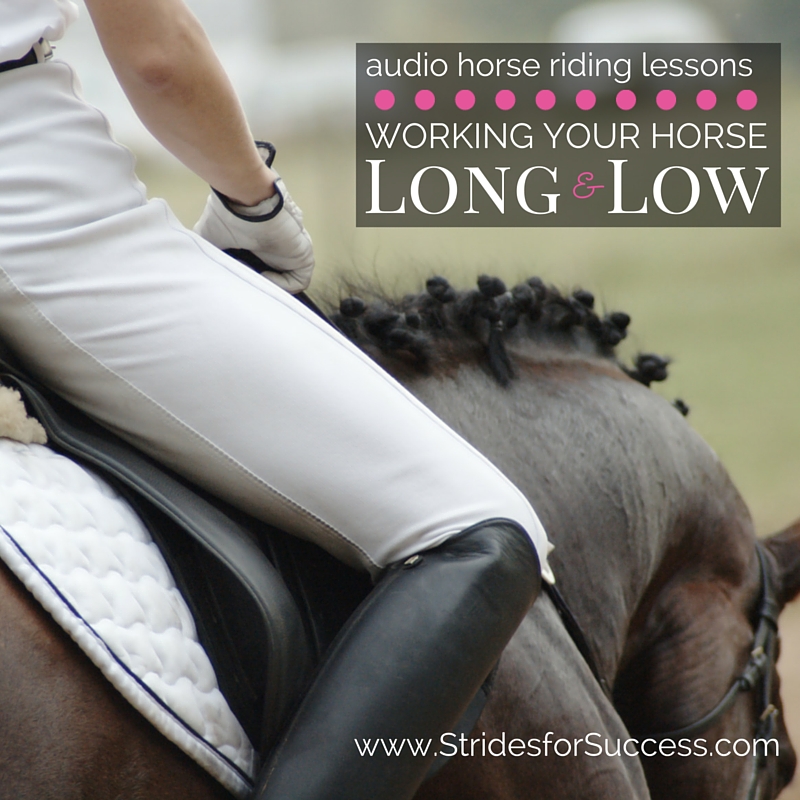
    Working Long and Low

    [fusebox_track_player url=”https://op3.dev/e/traffic.libsyn.com/dailystridespodcast/SFA481-Working-Your-Horse-Long-and-Low.mp3″ title=”Working Your Horse Long and Low” social_linkedin=”true” social_pinterest=”true” social_email=”true” ]

    So often when we are riding, relaxation for both ourselves and our horse is one of the goals for the ride.  This being so, you may have tried working him long and low. And probably during warming up or cooling off.

    However, you may also have noticed that asking your horse to work long and low can be pretty hit and miss…  He might get faster and faster as he becomes really unbalanced and begins falling onto his forehand…

    What is Long and Low?

    Working your horse long and low involves stretching and elongating his topline, from the tail to the poll.  

    It helps to build his topline, strengthening the ‘suspension’ muscles underneath you and also, create more longitudinal suppleness, which will benefit your horse greatly while being ridden.  So often when riding we think of suppleness as bending and flexing from left to right and while this is true, this is lateral suppleness.

    Working your horse long and low helps with his elasticity and flexibility from tail to poll, along his back, which is essential to his correct development.

    Riding your horse long and low

    Increasing Flexion with Long & Low

    When riding your horse in a long and low frame, you will feel his hindquarters swinging underneath you.  This is due to the muscles in his back becoming more supple and loosening up.  This can only happen when your horse relaxes enough through is back, allowing the energy to flow and connect.

    This results in your horse developing an increased range of flexion and movement in his joints, which will allow for a bigger, more flowing, step or stride. And a more sound horse!

    Your horse should remain balanced, in rhythm and have a consistent forward movement while he is working in the long and low way, whether in walk, trot or canter

    Riding ‘the Rainbow’

    When you are correctly working long and low, think of your horse’s back as being a rainbow. And you’re perched on the top of that rainbow!  And just like with a rainbow where the ‘colour stripes’ begin at one end and follow through right to the other end, your horse’s energy should do the same.

    From the hindquarters, right through the back and to the contact with your hand in front.

    First Forwardness…

    First and foremost, there must be forward energy or impulsion happening in the gait.  This must come from the horse’s hindquarters coming in underneath him and ‘pushing’ off with each step.  It is also vitally important to maintain contact with your horse’s mouth.

    As your horse reaches forward and stretches down, your hands must follow.  Otherwise, you restrict him and may cause him to lean and get on his forehand.  

    Your job is to help keep the impulsion and the contact consistent while the horse is working long and low, all the while being light in the saddle. This is so his back can rise up and almost ‘arch’ underneath you.

    However, often riders do not understand the mechanics behind this frame and this generally results in a few different ‘variations’ of the movement. A lot of these ‘variations’ will result in your horse failing to maintain the balance, rhythm and forwardness that is required.

    Front-Wheel Drive Verus Rear Wheel Drive

    If the hindquarters are not stretching in underneath him, your horse will quite simply be in ‘front-wheel drive’. This is when he is pulling himself along using his shoulders rather than ‘rear wheel drive’; pushing from behind.  Horses that are in front-wheel-drive cannot then elevate their back due to there being no real support behind for the ‘suspension’ to happen.  They also cannot elevate their front end, which must lighten if true connection and suspension are happening.

    Simply put, if there is no forward energy or impulsion coming from the hindquarters to keep pushing that energy through, the ‘rainbow’ that is your horse’s back will cease to exist, making long and low impossible.

    Dropping the Contact

    Another incorrect method of the long and low movement being ridden that is often seen is the rider literally throwing the reins at the horse and hoping this will result in the horse stretching himself.  The rider completely fails to keep contact with their horse’s mouth.

    When asking your horse to transition into a long and low shape, the contact with your horse’s mouth is essential at all times.  Your horse must stretch into and reach for that contact.

    Even though your horse’s head and neck are much lower than where they are usually positioned when working, maintaining a consistent contact is essential if you are to contain the energy that is being created behind.  

    Your horse will reach down and almost stretch into the contact, which will see you lengthening your reins gently, stride by stride, as your horse stretches more and more.  However, your lengthening of the reins must happen in unison with your horse stretching, and most certainly not before!

    Blocking with Your Body

    One of the other, often seen ‘variations’ is the rider leaning forward with their upper body. They somehow think that if they themselves stretch long and low, their horse will follow suit!   Not only will this inevitably unbalance both the rider and the horse, but you are also literally ‘blocking’ your horse’s back from rising up to meet you.

    Remember, part of your horse working in the long and low frame comes from him engaging his tummy muscles to lift himself.  

    You must rather think of your riding position as lightning up with your horse. However, it is more of an up stretch, allowing for your horses back to then come up and meet you there than a forward lean.

    Start when Cooling Down

    I suggest that if you and/or your horse are new to this way of going to rather try after you have finished working your horse and are cooling down.  This way your horse is more inclined to want to stretch his back into the long and low shape and also, you will more likely to be working nicely in a balanced, rhythmic movement.

    While you can ask your horse to work like this in walk, trot and canter, I personally think trot is generally the easiest gait to ask in.

    This is due to the walk often not moving forward enough (with a great potential to get sticky and choppy) and the canter going the opposite way and moving too forward initially!

    When you are asking your horse initially, begin by doing something ‘different’ with how you ride, so your horse can see a difference.  One way of creating this difference is by positioning your hands differently.

    Try keeping your hands wide and lowered, but again, only as your horse reaches down into the contact.

    Maintain Forwardness & Flexion

    Remember to keep the forward energy happening throughout the movement.  Use a circle or bend to help with the flexion and suppleness, which even though more lateral, will help him also loosen up longitudinal as well.  You can begin to encourage this by using your inside rein to ask for some flexion through his poll towards the inside of your circle.

    Only ask for  3 or 4 strides of long and low initially, as your horse will have to develop himself to carry this frame for any length of time.

    Maintain Your Posture

    Keep in mind that you must be sitting up and allowing him to arch his back and bring it up. This is as his hindquarters come underneath him and as he stretches his head and neck down.

    If you are heavy or collapsed in the saddle in any way, you will block this energy resulting in your horse hollowing his back rather than lifting or arching it.

    Stay in rising trot rather than sitting trot.  This is because if you tend to bounce, the sitting trot will cause you to ‘dig’ into his back and encourage him to duck and hollow his back away from you, not lift his back up underneath you

    Maintain Contact

    Focus on keeping an unbroken line from your elbow to your horse’s mouth.  As your horse lowers his head and neck, you too will have to lower your hand to maintain this line.

    However, equally as important to remember not to completely straighten your elbows as this will cause a jarring effect on your horse’s mouth and again, result in him becoming hollow along his back and trying to evade your contact rather than trust it.

    When he has begun to drop his head and neck and stretch down, focus on your position.  Feel his back rising or growing in height underneath you and use this to remind yourself to continue to sit tall in the saddle and stay light.  Focus on balancing your shoulders above your hips, not leaning forwards, backwards or to either side.

    You’ll Know When You Feel It…

    Finally, remember to enjoy the amazing sensation when your horse correctly works long and low.  If you are wondering if you got it right or not, trust me, it is one of those things that once you achieve it, you will definitely feel it :)

    How long it takes your horse to understand what you are asking will really depend on your horse.  Some horses have become so used to leaning on the rider’s hands. Travelling on the forehand like this will take some time for them to build up the trust and strength to work long and low.  Other horses love it and almost naturally transition there after work to ‘stretch out’ their muscles.

    Either way, you must remain consistent through your aids and patient while asking your horse.

    Your horse must first learn to accept your contact before you can begin asking him to work in a long and low frame.  

    From there, it is up you to maintain the impulsion and forward movement that is necessary to maintain the balance and rhythm, that will result in your horse reaching for the contact and truly stretching his topline.

    Happy Riding
    Lorna

    Additional Resources on This Topic

    Working Long and Low

  • Increasing Your Horses Suppleness

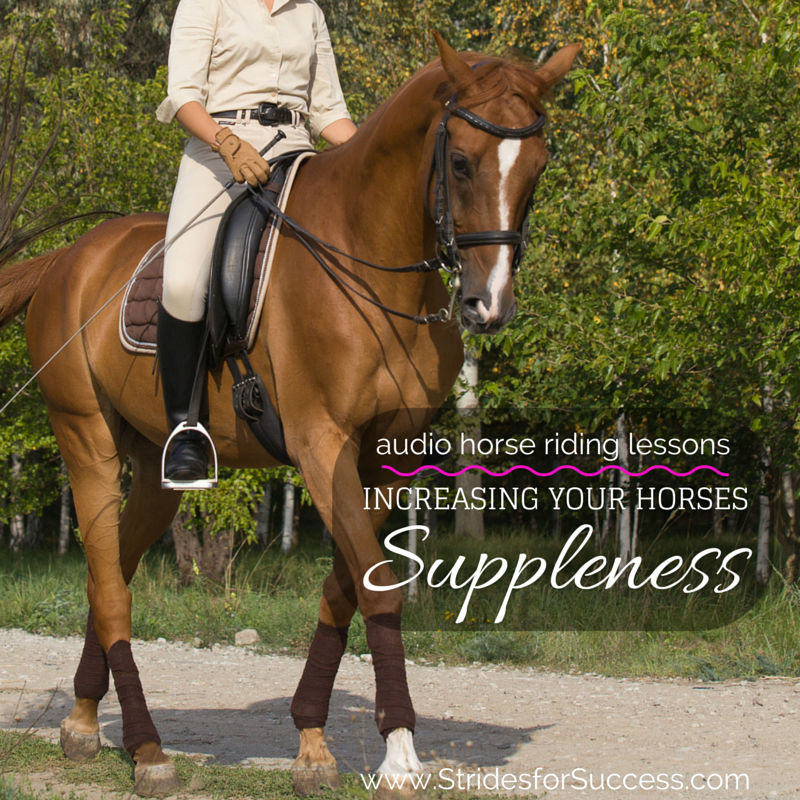
    Increasing Your Horses Suppleness

    Have you ever ridden a horse and they feel so wonderfully loose and pliable underneath you?  Perhaps you can remember how your horse was able to really and truly use his body and how the suppleness made it feel like he was performing movements in the best possible way that his body, fitness and confirmation allowed?

    [smart_track_player url=”https://op3.dev/e/traffic.libsyn.com/dailystridespodcast/SFA431-Increasing-Your-Horses-Suppleness.mp3″ title=”Increasing Your Horses Suppleness” social_linkedin=”true” social_pinterest=”true” social_email=”true” tweet_text=”Loosey Goosey… That feeling you get when your horse is warmed up, ‘bendy’ and ready to go… ” hashtag=”Supple #TrainingScale #Equestrian” twitter_username=”strides_success” ]

    True suppleness allows your horse to bend without stiffness and work freely without excess tension or stiffness throughout his back and muscles.   This enables him to perform smoother movements and transitions with greater balance which leads to building strength, development of muscles and growing confidence in both horse and rider.

    Increasing Your Horses Suppleness

    As riders, we are seeking true flexibility or suppleness in our horses, and should always work towards trying to establish, and then allow, elasticity throughout the horse, particularly the jaw, poll, back shoulders, knees, hips and hocks.

    However this is often difficult to understand due to the simple fact that we will not achieve suppleness by ‘fixing’, ‘forcing’ or ‘restricting’ our horses in any way.  Rather than forcing your horse into unnatural frames or positions trying to promote this relaxation and flexibility, think of asking your horse to stretch himself in a natural way, little by little in slight increments, to grow the natural pliability of his muscles and joints.

    Also, when he is flexing or bending, if you are ‘fixing’ him or holding him there, he is not truly supple himself.  When riding , ask your horse for a small about of flexion or bend and then allow him to carry on with the movement himself for a period of strides or seconds.

    As his strength grows, he will become more flexible and his ability to carry himself for longer periods will also increase.

    Suppleness can be thought of in both a forward movement capacity and a sideways or lateral capacity. It is important to ride exercises that boost the development of both. Your horse will not achieve true suppleness if only using his body a certain way. In fact over-development of one will  often result in stiffness in the other.

    Another advantage of working to increase relaxation and suppleness is that it can have a positive effect on your horse mentally and emotionally as well. Often we try to ‘relax’ our horses by speaking to them in a soothing manner, however, if we think about life, feelings follow actions (it is rarely the other way around), so by relaxing the body, we can often dissipate anxiety and stress in the mind and put that energy to better use elsewhere.

    In riding, we are thought to think from the back of the horse to the front of the horse.  Energy created in the hind quarters and then sending it to the front of the horse.  However, we should think of loosening or relaxing our horses the other way around, from front to back.

    There are many horses that are flexible, pliable and supple through their backs and limbs, however they are ‘stuck’ at the poll or jaw which causes that flow of energy to also become stuck or blocked and makes true connection  impossible.

    When working on increasing your horses suppleness, I suggest starting with the poll and jaw.  Place two poles parallel to each other across the center line about 1 meter apart.  In walk, bring your horse between the poles and ask for halt. Try to keep him straight, using the poles for guidance and reference. Then, remembering to keep his neck straight, as him to flex his poll, first one way and then the other.  Use your inside hand and turn your wrist slightly so as the underside is more on top and your thumb is about 45 past the vertical to the outside. Gently squeeze with your ring finger.

    When asking for the movement, keep in mind it is very slight flexion in the poll, not bending though the neck. Ask to the right and then back to center, and then back to the left. You can repeat this quite a few times, all the while noticing any resistance or stiffness. If this shows up, rather invest more time over the coming weeks and months, slowly asking for the flexion and then working it out.

    Don’t force it! Suppleness does not happen overnight, it takes time for your horse to soften, relax and become flexible

    Once you have mastered this in halt and your horse understands, you can begin to incorporate it into walk, trot and eventually, canter.  Use the center line, and if necessary, place some parallel ground poles to work between school to help keep you ‘straight’ and on target for where you want to go.  Remember, you are only flexing your horses poll, not bending the neck.  In walk, ride up the center line and begin asking you horse to flex left then back to straight and then left.

    Pay attention that his shoulders are not ‘swinging’ where you are flexing to which will give your horse the appearance of being slightly inebriated!  Also, focus on keeping him straight through his back, not allowing the hind quarters to fall in or out

    As mentioned, it is important to work all parts of your horses body, so I recommend beginning to incorporating some large circles into your work.  how well your horse can maintain the bend in their body on the circle, will depend on how supple your horse is.  the smaller the circle, the more difficult it will be for your horse, so stick to large circles initially in walk or trot.

    Increasing Your Horses Suppleness

    When riding the circle, Establish and maintain a consistent bend to the inside, all the way from neck to tail. The degree of the bend will depend on the size of the circle as you will follow the arc of the circle.

    Notice if your horse is falling in or out through this shoulders.  Often, when we ask for the horse to bend to the inside, he will begin to literally fall in towards the center of your circle, rather than maintaining the ‘line’ of the circle and his back replicating the arc of the circle.  If this is the case, use your inside leg to encourage him to stay ‘out’ on the circle, however once he is there, he must learn to balance himself so you are not all the time supporting him on the circle or bend.

    There is nothing more exhausting that riding a horse which you have to hold up with your legs

    Again, start your circles in walk and once he understands and has a nice equal bend through his body, go forward to trot and later canter.  Work on both directions and pay attention to any stiffness, tension or lack of balance on one side more than the other.

    If you do notice any problems, see working in it as a long-term project that will be successful if you consistently work little by little at stretching and loosening up your horse

    You can also begin to incorporate some serpentines into your schooling.  Obviously work on your bend while riding the loops, but also focus on your straightness as you cross the center line.  Transition in and out of the two by beginning to ask for some flexion through the poll for 2 to 3 strides before and after the center line.  As you round your ‘loop’ again, straighten the body with just the poll flexed and as you cross the center line, straighten your horse, so you can then change the flexion in order to ride the next loop.  Work the serpentines from both sides, again walk, trot and then canter if necessary.

    You can also incorporate some halts into the serpentine, as you cross the center line, and spend the time in halt flexing the poll again in order to flex the poll and reinforce the principle, in both your head and your horses!

    Finally, you can begin to add some counter bend to your circles.  Ride a large 20 meter circle in walk and once you have established bend to the inside, see if you can ‘change’ the flexion to the outside, paying close attention that the shoulders do not come off the track of the circle.

    The flexion to the outside will be very slight at first, and not held for long periods.   Work on a quarter circle to the outside, then change to a half circle to the inside and then returning to a quarter circle to the outside.  Slowly, your horse will begin to increase his suppleness and flexibility throughout his body and from there, you can begin to make the circle smaller or begin working in trot and, again, later canter

    Suppleness is something that must be continuously and consistently worked on in order to maintain and improve with your horse

    Just like us, if our horses become restricted and only use their body in a certain fixed movement, over time they will lose their ability to bend and be pliable..

    It will take time to build true suppleness, and it will have to become an integral part of your training program to maintain it

    Happy Riding
    Lorna

    [wp-tiles post_type=”post” orderby=”date” order=”DESC” grids=”Simple”]

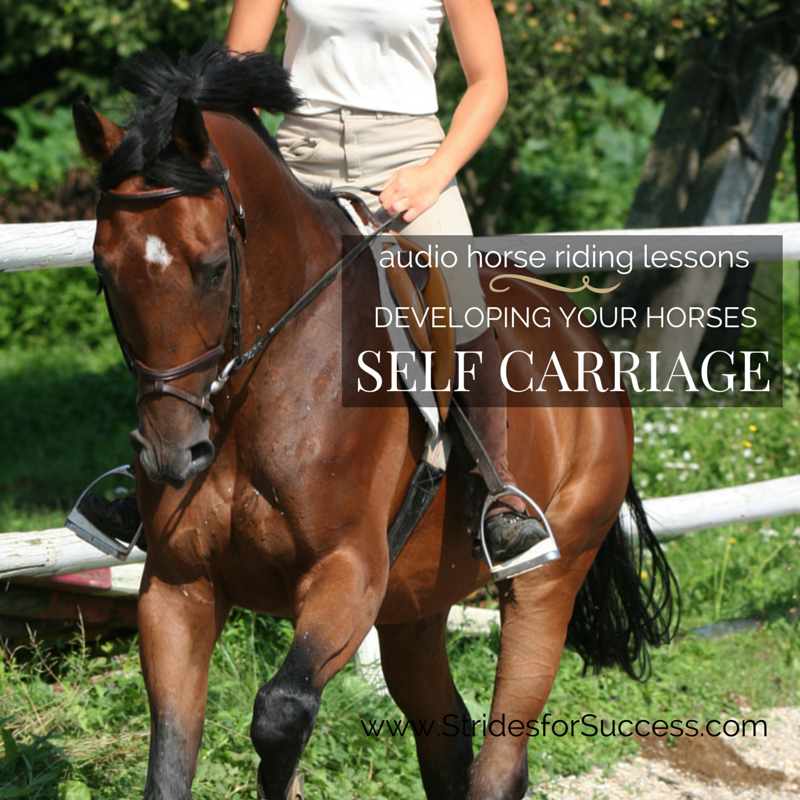
  • Developing Your Horses Self Carriage

    Developing Your Horses Self Carriage

    When you are riding, is your horse carrying himself, or are you in-fact carrying him? 

    Self carriage in horses can be explained as your horse carrying himself, without needing support from or relying on you, the rider, in order to continue and maintain the movement he is performing.

    [smart_track_player url=”https://op3.dev/e/traffic.libsyn.com/dailystridespodcast/SFA391-Developing-Self-Carriage-in-Your-Horse.mp3″ title=”Developing Your Horses Self Carriage” social_linkedin=”true” social_pinterest=”true” social_email=”true” tweet_text=”Does your horse carry himself? Does he know how?! ” hashtag=”Equestrian #SelfCarriage” twitter_username=”strides_success” ]

    Your horses ability to carry himself comes from him being responsible for his own body, balanced physically and also mentally because he understands what is expected of him and is confident that he can do it.

    Developing Self Carriage in your horse

    As you ride, stop directing for a few strides; will your horse be confident, competent, balanced and able to maintain the correct amounts of impulsion and tension to ‘hold’ what he is doing, until you come back with further instructions?

    Unfortunately, for most riders the answer is no! In fact, most horses are ridden in such a way that they may never be truly able to achieve and maintain a degree of self carriage in higher levels of performance and work.

    Self carriage comes from your horse being encouraged to work by himself, confident in his own abilities and your consistent correction only when he gets things wrong.  Self carriage is really self motivation on your horses part and his knowing that when you ask for something it is his job to respond and then continue until asked to do differently.

    However this simply cannot happen if you, as the rider, are micro-managing every movement.

    The riders job is not to support the horse through every stride, but rather to influence the horses movements and balance, which will then, over time, allow the horse to develop the necessary strength to support himself, and achieve true self carriage.

    Another important aspect is the level of trust which must develop between both horse and rider and also, the horses confidence in himself and the same of the rider in herself.

    This is where developing ‘feel’ as a rider is important.  You must be able to feel that he is about to go wrong, or about to lose his balance, or about to stop what is being asked and then act on this before it happens.  Once you have given the aids to get your horse back on track, again, stop giving them and allow him to perform the movement.

    There is a blog post and audio lesson on Improving Your Feel in the Saddle HERE.

    Self carriage requires the horse to be balanced, supple, have the required level of physical strength and his being capable of using this in a controlled and consistent way every time.

    Self Carriage

    Often we see horses in the paddock or field with wonderful self carriage, prancing around, 100% control of their body. They display athletic abilities and prowess that often, as the rider, we can only dream of emulating while in the saddle.

    The disconnect comes because under the saddle, the riders influence pays a huge part.  Rider are often asking their horse for completely different movements, unbeknownst to them, by moving around in the saddle. Unfortunately, if there is not a high level of understanding and awareness on the riders part as to how to control their body while riding, these questions may conflict each other, ruining any hope of obtaining true self carriage.

    It takes calmness of mind from both horse and rider to achieve true self carriage and also the knowledge that self carriage in a young, green or preliminary level horse looks and feels different to self carriage in a well schooled, experienced grand prix level horse.

    When schooling our horses, it is important to introduce new movements slowly and gradually. Remember that the level of balance, for new exercises, will be in direct proportion to the muscles strength and ability while being used that way.  When balance is lost, apply the correct aids quickly to correct your horse, and over time allow him to hold this balance longer and longer in the movement.

    Also remember that self carriage will require different use of the muscles depending on what movement is being performed. Extended trot will both look and feel very different to collected trot and so on.

    Developing self carriage, I feel, begins by the rider working on gaining full control of their aids and developing the ability follow when their horse responds correctly.

    If he responds immediately and correctly to what you are asking… stop asking!  Bring your aids back to neutral and allow him to do what you have asked of him.  If he begins to lose what you have asked or if he wanders (both mentally or physically) off track from what you are asking, then use your aids to correct him.  As soon as he responds and is back where you want, shift back to neutral again.

    Riders, whether consciously or not, often nag their horses continuously while riding.  This will work against your horse developing himself enough to achieve self carriage.  It is important to develop the skills to ask and then allow your horse to perform his movements.  A horse that can only work when his rider is controlling every little micro movement is, in all disciplines, not going to be a successful one and, in some cases may even become downright dangerous to ride.

    The first thing you can do to help your horse to achieve self carriage is carry yourself and make sure your position is correctly applied in order to support your horse and cause as little distraction and hindrance as possible.

    Ask your horse to halt.   Rather than worrying about the quality of the halt for now,  rather notice if is happy to stop where you ask and then wait for further instruction.  If he is jig jogging, side stepping, pulling, leaning, walking on, reversing, do a quick check of your position and what aids you are applying.

    Do the same when you ask him to walk on.  Notice how quickly he responds and if you have to ask more than once, back this up with your whip or spur.  Once he is indeed walking, just allow him to walk.

    One of the most difficult things to do as a rider is nothing!  Nothing is just being neutral and rather only applying aids when necessary.

    • Pay attention to what you are asking, are you nagging?
    • Are you being heavy?
    • Are you fidgeting or nudging, patting, tapping, and just micro managing your horses every move?

    If so, you need to control yourself and only ‘talk’ when you are required to do so!  Again, bring your horse back to halt and notice if he does as you ask and then awaits further instruction or if he is continuously moving and fighting.  If so, correct quickly and then return to neutral.  Repeat the exercise again until you are confident that your horse is responding in a timely and proportionate manner to each question you ask.

    We said at the beginning that self carriage becomes possible as your horse develops his balance and suppleness.  A way to do this is by working and developing his top-line.

    You can do this by working on a 20m circle in a long and low frame.  He must work from behind, pushing with his back end. Make sure you are not continuously correcting and ‘holding’ him in position, but rather guiding and correcting before it becomes necessary.

    Notice how balanced he feels and once he is reaching down for the contact, stretch your hands to him for 1 or 2 strides.  Notice if he can hold himself, in this self carriage, even if just for a second or two to begin with and then work on lengthening the time he can support himself.

    Happy Riding!

    FREE 30 Day Rider Fitness Challenge