Tag: transitions

  • When Your Horse ‘Runs’ From the Trot into the Canter

    When Your Horse ‘Runs’ From the Trot into the Canter

    Riding, just like life, is about enjoying the journey rather than just the destination.  However, when you’re transitioning from the trot into the canter – and your horse seems determined to show you just how fast he can actually trot beforehand; well, the journey is not all that enjoyable!

    I don’t know of a single rider who enjoys the ‘rush’ of a horse running from trot to canter. It is bouncy, unbalancing, and, sometimes, scary.  Also, it more often than not sets up a canter that feels like all of the above as well.

    The good news is that there are a few things you can do, starting today, to begin re-schooling this behavior; for you and your horse.

     1. Improve Your Suppleness, Coordination, and Balance

    This can seem pretty obvious.  However, for many riders, the struggle to transition from the trot into the canter is down to their lack of suppleness.  The suppleness required for a mediocre trot is not the same as what is required for a forward-thinking and moving canter.

    And as you begin to set up the canter, the increased energy and intention inside both you and your horse can become blocked by your lack of suppleness

    This shows up as excess tension in the rider’s body; the more energy they feel, the more than ‘hunker down’ and try to ‘control’ both themselves and their horse. This will naturally lead to more bouncing, less balance, and a breakdown in the coordination of your aids.

    Devote some time to practicing how you respond when you create more energy within just the trot. Work on channeling that energy, rather than ‘holding it’. 

     2. Spend Time Developing the Trot

    This leads me to the next point.  Developing a more rhythmic, spacious, and forward trot will really help you transition from the trot into the canter with greater ease and balance.  The trot is the gait where we often simply accept what we have been given with regard to our horse’s way of going.

    Most horses will have a natural rhythm in the trot, and it is important to keep in mind that you can positively influence this further.

    Work on forwardness (both thinking and going), responsiveness, lightness, and creating more space inside of each stride.  From here, you can then begin to ‘test’ yourself using the sitting trot.  If you are struggling to remain balanced, relaxed (correct tension), and coordinated inside of a better-quality trot, revisit the first point again!

    Working between walk and trot will also help you here as you can practice what you are doing before, during, and after the upward and downward transitions.  More on that in point number 4.

     3. Get Clear on EXACTLY What You Want

    Yes, you want to get from the trot into the canter.  And, if that is all you want, that is probably what you will get; and any way possible! Not ideal and often not enjoyable either. Okay, so if you were to rethink this, what do you actually want regarding this transition?

    Where do you want it to happen? How would you like it to feel? What type of canter are you looking to create when there? And what is the focus for the actual transition as training for you or your horse?

    When you are working with a younger horse or a green horse, you can be a little more relaxed with regards to getting things ‘exactly’ as you want them.  However, the longer you are working together, the more specific you should become on what you want and how you want it.

    I feel that ‘balanced’ is always a good outcome to work towards.  So too is accuracy. Lightness really does help it all feel better. As well as straightness throughout…

     4. Transition From Trot into the Canter

    When you know what you want, you can now go and make it happen. Start by modeling everything you expect your horse and the transition to be, through your own body and actions.  Ride the transition exactly as you want it to happen.

    Straighten yourself in the saddle.  Carry yourself and remain ‘light’, especially with your upper body. Be accurate and timely with your aids. And respond in a way that allows your horse to do what you ask him to do. 

    When you feel the trot beginning to deteriorate, change the focus.  Rather go back to balancing the trot again. Once you have it back to a quality you are happy with, set it all up and ask again.  Pushing on through for the sake of pushing on through is rarely the right way to develop a better transition from the trot into the canter.

    When you feel the quality of the trot, and therefore the transition begins to deteriorate; rather focus on improving that first. From this reestablished place, try again. 

     5. Allow the Canter to Flow

    The more attention to detail you devote to what happens in the lead-up to the transition, and through the transition, the better each transition will become over time. However, getting from a trot into the canter is a 3 part process.

        1. Establish a good quality trot
        2. Ask for a clean, timely, balanced, and light transition
        3. Allow the canter to go forwards

    As riders, we can often become confused with our role in each of the questions we ask when riding.  The canter is no different.  So many riders think that they have to ‘do’ canter in order to canter!

    Your job is to ask your horse to canter, and then get out of the way and allow him to canter. You do not canter; he does. 

    This means that leaning forward, especially with the shoulders to the inside, is not helping your horse.  In fact, it’s probably doing the exact opposite and blocking his inside shoulder. Similarly, collapsing into the back of the saddle to stop bouncing is equally unhelpful.  It blocks the flow of energy from back to front.  This prevents any connection, lightness, and self-carriage from happening.

    The canter is a gait that you can see an almost instant improvement in when you know what to look for and do. All it takes is some dedication, focus, and the right guidance.

    Happy Riding
    Lorna

    Improving Your Canter

    If you are keen to develop your canter more, I would love to help you. YOU CAN FIND ALL THE DETAILS HERE for a 4-week program on the canter. Using a blend of audio horse riding lessons, and video, you will receive step-by-step guidance on how to improve your canter.

    Created with riders who are working alone without a trainer or coach, you will learn how to improve both yourself and your horse. Getting into, riding the actual canter, and transitioning out of it too.

    The course is self-study, and you get lifetime access to all of the materials, meaning you can go back and refine things over and over again. Created with the goal of 3 focused rides a week to work on your canter, this program can transform how you think about, ride, and develop the canter. For you and your horse. CLICK HERE FOR MORE DETAILS

    Get Support & Guidance in Your Riding

    More on this Topic

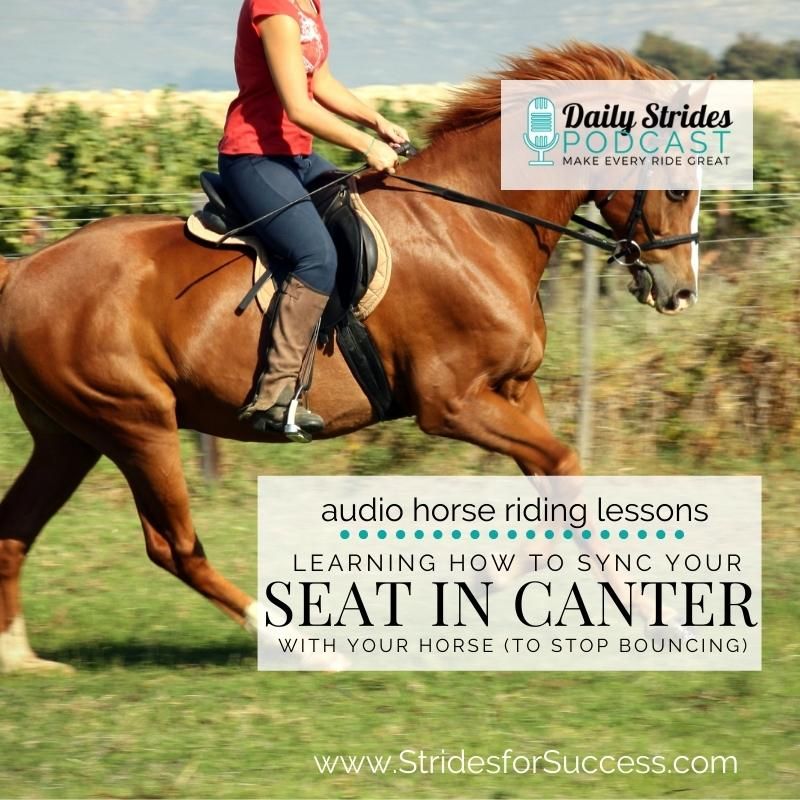
  • Syncing Your Seat in the Canter with Your Horse

    Syncing Your Seat in the Canter with Your Horse

    [fusebox_track_player url=”https://op3.dev/e/traffic.libsyn.com/dailystridespodcast/1231_Syncing_Your_Seat_in_the_Canter_with_Your_Horse.mp3″ title=”Syncing Your Seat with Your Horse in the Canter – To Stop Bouncing!” social_linkedin=”true” social_pinterest=”true” social_email=”true” tweet_text=”Bouncing in the saddle? Check this podcast out…” hashtag=”horseridingpodcast” twitter_username=”strides_success” ]

    All riders can be put into one of two categories when it comes to the canter… Those who can move their seat in the canter with their horse – and those who can’t. This is a bitter pill to swallow for those on the ‘can’t’ side of the fence.  And yet, it is something that they would secretly love to be able to do.

    Having the ability to control your seat in the canter completely changes how much influence you have in the gait – and it is a lot more comfortable. 

    So, if you’ve been stuck in the ‘can’t’ camp for longer than you would like, this is how to finally move forwards into the ‘can’ camp…

    It’s All About Practice

    And not just any old practice.  I am talking perfect practice.  Doing the same, middle-of-the-road things over and over again, hoping for a different result is madness.  Rather spend less time, but more intention and focus in order to make your practice work for you.

     1. Start with syncing your seat to your horse’s hindquarters in the walk

    This is something that will happen naturally if you have already learned to ‘follow’ your horse. Another way of saying this is that you are willing to allow your horse to ‘lead’ you.  This requires suppleness and self-carriage on your part.  It also requires a good quality rhythmic walk.

    Devote time and practice to perfect your ability to know what is moving when underneath you at any given time.  Remember to carry yourself so that you can simply allow your seat to move unhindered.

     2. Work on Your Alignment, Posture, and Position

    The head, shoulder, hip, heel line should remain visible throughout your flatwork with your horse.  This is true for halt, walk, trot, or canter.  Also throughout your transitions into and out of each gait.

    This correct alignment will allow you to be in the best possible position to accurately and effectively use your aids to communicate with your horse. And to control your seat in the canter. 

     3. Weight Dropped into the Heel

    When in the canter, many riders tend to ‘pull their leg up’.  I feel that trying to ‘grip’ is the cause.  It doesn’t help!  Work on lengthening your leg.  Think about allowing them to ‘drape’ over your horse.  This means that they are in direct contact, but not squeezing or gripping.

    Weight into the heels will allow you to remain balanced, centered, and effective as you move with your horse in the canter. 

    As you canter, focus on allowing the weight to remain in the heel. Especially the inside heel, as this will help you to also connection your inside seat bone.  it is common for the inside seat bone to ‘migrate’ to the outside of the saddle in the canter.  Especially when on circles and bends.

     4. Carry Your Shoulders, Arms, and Hands

    There seems to be something about the canter that, as soon as riders get into it, they want to drop the whole upper body.  Collapsing your upper body will not help you or your horse.  In fact, this is one of the big reasons riders ‘bounce’ in the canter.

    The lack of alignment, causes their seat and hips to become ‘squashed’ by the upper body – preventing any meaningful movement. This blocks the energy, which causes the bounce. 

    Carrying your shoulders, arms, and hands feels exactly as it sounds.  Simply engage your core, open your chest, allow your arms to fall down from the shoulders, bend the elbows, and carry the hands.  It’s as simple as that. This applies to both the canter and the transitions in and out of the canter as well.

     5. Notice the ‘Scoop’ Feeling

    This always reminds me of ice cream!  You know one of those metal scoops that ‘rolls’ the hard ice cream up into a nice little ball, ready for serving?  Your seat in the canter can feel like this.

    Dig or scoop too deep and you will get ‘stuck’ due to you blocking the energy. Don’t scoop enough and you literally skim over the top with nothing gathered or collected.

    Practice finding the right amount of ‘scoop’ for the work you are doing at any given time with your horse. This will help you to, later, begin influencing the canter itself using your seat.

    6. Lead with Your Belly Button

    This goes back to posture and alignment, self-carriage, and moving with your horse. When you truly begin to move your seat in the canter with your horse, it will feel like your belly button is ‘going first’.

    Think of it as every new canter stride, your seat (and belly button) are getting their first – the rest of you is following. 

    Your seat and your hands are connected.  Whatever your seat does, your hands will mirror a split second later.  Many riders get this sequence confused.  They want to lead with their hands and have their seat follow.  This is when you see riders dipping up and down, back and forth, with their shoulders in the canter.

    You rather want your shoulders to remain quiet, and your seat to move with your horse in the canter.  Seat before hand.  Always. 

    This can only happen when you are in correct alignment, have great posture, and are willing to allow your seat to be led by your horse first.

    Your Seat in the Canter

    From this place, you can then truly begin to use your seat to influence your horse in a more positive way.  When you can truly sync your seat, it becomes a tool – rather than a hindrance.

    If you are still struggling to ‘sit’ in the canter, try taking your feet out of your stirrups.  This can help you to brace less using your legs and, therefore, ‘swing’ more using your seat.

    Canter takes work.  It also takes time, patience, consistency and correct practice. And, just like the trot, once you have it – you have it :)

    From there it just becomes a case of how you can control your aids more, to have an overall more positive effect on your horse’s way of going.

    Happy Riding
    Lorna

    More Help on This Topic:-

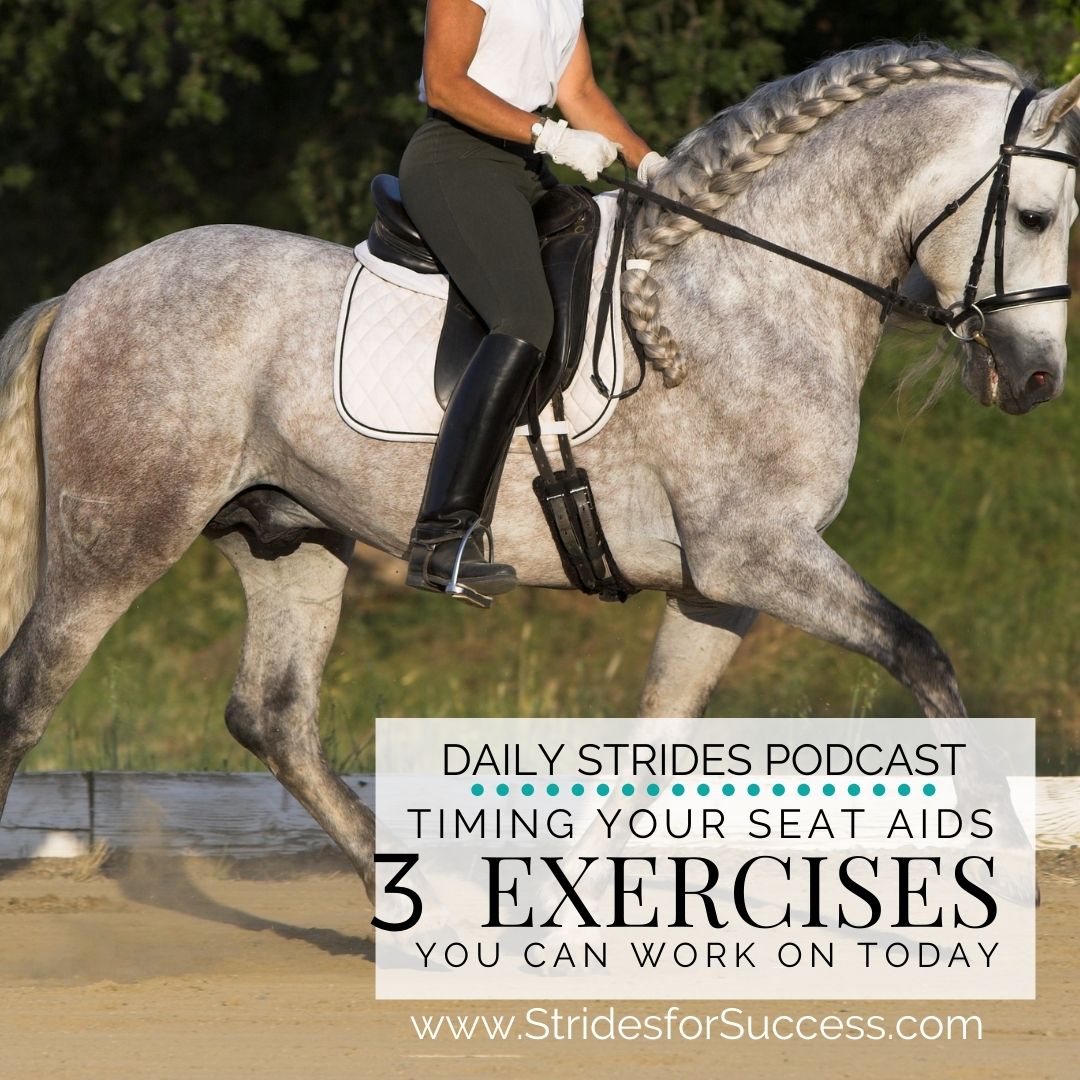
  • Timing Your Seat Aids – 3 Ways to Do This Today When You Ride

    Timing Your Seat Aids – 3 Ways to Do This Today When You Ride

    [fusebox_track_player url=”https://op3.dev/e/traffic.libsyn.com/secure/dailystridespodcast/1184_Timing_Your_Seat_Aids_3_Exercises_to_Help_Today.mp3″ title=”Improving the Timing of Your Seat Aids – 3 Exercises You Can Ride Today” social_linkedin=”true” social_pinterest=”true” social_email=”true” ]

    Timing… It’s an important element of great conversations.  You can give all the correct responses, but if the timing is off – they are not as meaningful.   And this affects the connection and flow. Horse riding is the same.

    After all, horse riding is just a word we use to describe the conversation between the rider and the horse.

    As a rider, it takes time to learn how to move one part of our body while having minimal influence on other parts.  Part of improving your ability to do this is to work on developing your aids independently of each other.  And the other part is to become very aware of what you are saying and when. It takes time to develop your independent aids and, as a result, your independent seat.

    However, while you are working on doing these, you can also start to become more aware of when you are communicating.  You can work on the timing of your seat aids.

    In this episode, I want to focus on the ‘when’ part of your conversation.  And specifically, the aid that we tend to get most muddled up about – your seat.

    Exercise 1:- Feeling in the Walk

    I spend a lot of time with my novice riders working on this.  I think that understanding what is happening underneath you from the beginning, makes developing your timing (and coordination) so much easier as the weeks and months go by.  However, regardless of how long you have been riding, becoming mindful about what is happening underneath you will always help improve your skills as a rider.

    Your seat bones will move like the pedals of a bicycle if you were peddling backward.  Down and forward, up and back. 

    Once you can feel this happening, I want you to begin merging this with what your horse’s back legs are doing.  As your horse’s right back leg moves forward, your right seat bone will drop down slightly and swing forward as well.  While this is happening, you and your horse’s body will be moving over your horse’s left back leg.  It will be on the ground bearing the weight.  This will cause your left seat bone to feel like it is moving backward while raising up slightly.

    If you’re struggling to feel anything, try taking your feet out of your stirrups.  You can also if it is safe to do so, close your eyes.  Finally, you can glance at your horse’s shoulders and go from there.

    Exercise 2:- Walk to Trot Transition

    The second exercise to help with developing the timing of your seat aids is working on that often overlooked transition from the walk into a trot. This is one of the earliest transitions we ride when we just get started.  And, often, because of this, we don’t tend to work on developing it a whole lot! Which is a pity – there’s a lot to be learned from riding this transition.

    To practice this, I first am going to suggest getting off your horse and onto a firm ‘dining’ type chair. Then feel what you do with your core as you’re about to ‘stand up’ out of the chair.

    It is important to be mindful that you are not using your arms or hands to stand up.  Just your core and then, your legs. Feel the shift that happens just before you stand.  The engagement of the core.  This feeling is what you will then take with you into the saddle.

    Practice creating that same feeling with your core in the saddle.  The feeling of asking for the trot, from the walk, and just as your horse takes that first step, ‘lightening’ your core. 

    The more you do this, the better you will become at timing it to just the right time where you allow the energy to flow underneath you. This same technique can then be modified and practiced with other upward transitions.

    Exercise 3:- Walk to Canter Transition

    This is maybe one of my favorite transitions to work with riders on.  Particularly when it comes to refining the timing of the aids to coordinate with the horse’s movement. Start in the walk and noticing, using exercise 1, what is moving when at any given time. Then, combine this with exercise 2, allowing the energy to flow when you ask.

    It is very easy to tell if you get your timing right when asking for the walk to canter transition. Failing to do so usually results in a little ‘double step’ from your horse

    The goal is to ride a ‘clean’ transition. The preparation was done. You asked at the right time. And then you allowed with your seat as the horse stepped into the canter.

    Connection Between Seat & Hands

    Finally, as you are working on all of the above, pay attention to how your seat leads your hands.  Often riders get this backward.  They allow their hands to lead the seat.  Timing is important.  Paying attention to this will help you become more mindful of how you are using your aids and when.

    Practice this… And see how you develop it over a matter of days with your horse.

    Happy Riding
    Lorna

    Additional Resources:-

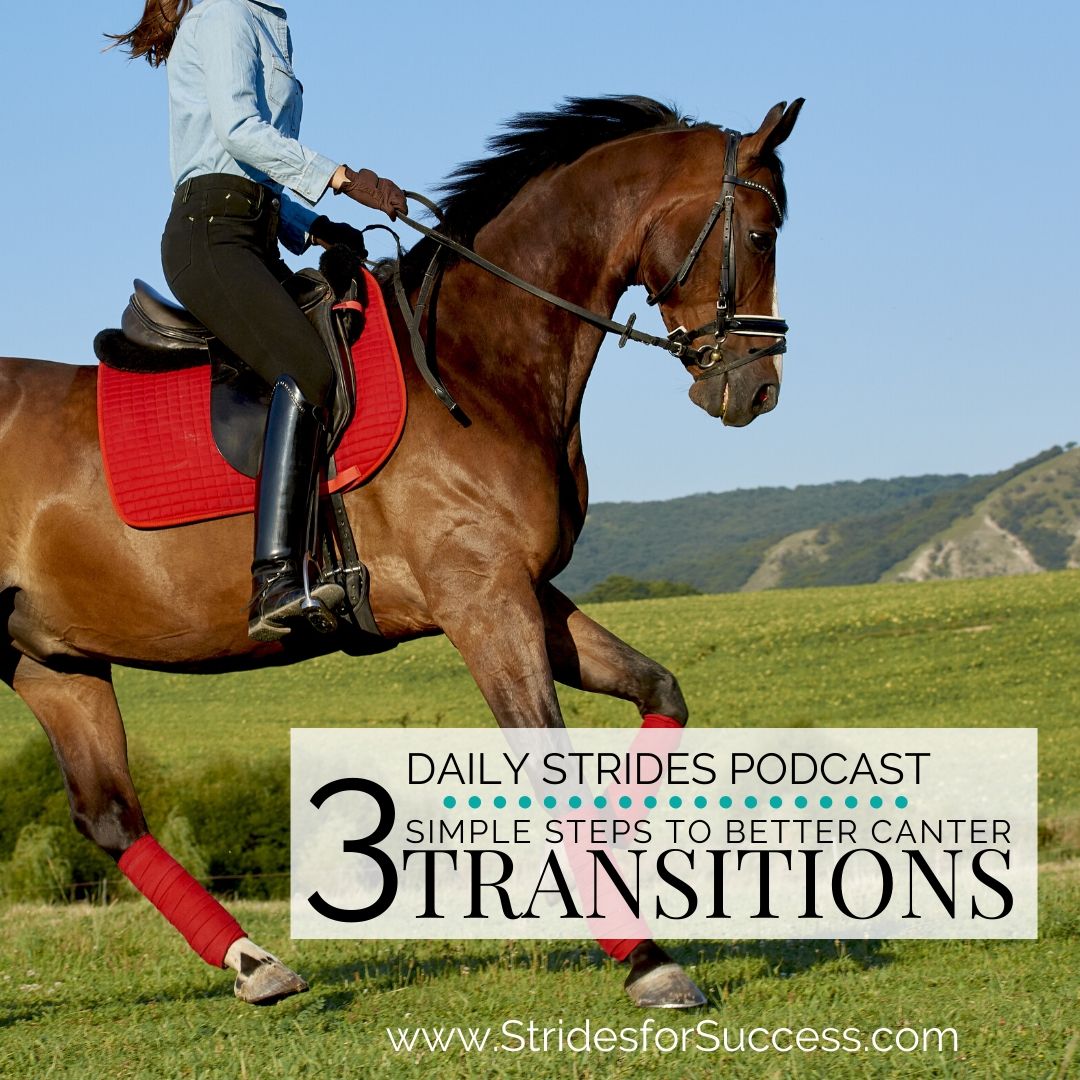
  • 3 Steps to Better Canter Transitions

    3 Steps to Better Canter Transitions

    3 Steps to Better Canter Transitions
    Have you ever felt that feeling?  The feeling you get when you’re trotting and you ask for the canter.  Rather than your horse simply striking cleanly from the trot to the canter, you experience this extremely uncomfortable and unbalanced trot.  A trot that gets faster and faster until finally you almost fall into a canter. Not a great feeling, eh?!
    Or perhaps, your experience of getting into canter is a little different.  Maybe you feel like you are getting thrown forward every time your horse transitions to canter?  Different, but equally as unpleasant!
    [smart_track_player url=”http://traffic.libsyn.com/dailystridespodcast/1135-3-Steps-to-Better-Canter-Transitions.mp3″ title=”3 Steps to Better Canter Transitions” social_linkedin=”true” social_pinterest=”true” social_email=”true” tweet_text=”Yep; better canter transitions are just 3 simple steps away for you and your horse ” hashtag=”equestrian #podcast” twitter_username=”strides_success” ]
    In this episode of the Daily Strides Podcast, I want to cover a topic that I feel so many riders struggle with.  Successful canter transitions.  I’m going to give you 3 simple yet effective actions that you can implement today, which I guarantee you will improve your canter transitions.
    And, the good news is that, I believe that you can improve this very quickly; you just need to know what to do…

    1 . Plan, Plan, and Plan again!

    Planning is so important. Now I know you may be thinking “Really, Lorna? I knew that”.  If so, great.  Are you implementing it every time you ride?  When we are talking about all things canter transitions related, planning is important for both horse and rider.  It allows you to set your horse up for the upcoming transition.  It also gives you time to get clear on sorting your body out and making sure your body is where it needs to be.
    Remember, one of your jobs, as team captain, is to set things up as well as you possibly can.  Then simply allow your horse to the job you have asked him to do.
    Start by choosing an exact place where you begin to sort yourself out, both physically and mentally.  You then need to make sure you have your horse’s attention using your half-halt.  Your half-halt basically serves to tell your horse: “Excuse me, something is going to happen soon and I need you to pay attention to me.”
    It’s also important to make sure that you have established a good quality trot.  An easy way to assess this is to ask the question, ‘could I jump a jump from this current trot?’.  If the answer is yes, you’re golden!  If not, you have a little work to do before you can ask for the canter transition.

    2 . Get Out of the Way

    The next part is simply to get out of your horse’s way.  Remember, your job is to set it up and ask your horse to canter.  That’s it!  Your horse must actually transition into the canter, not you.  I have seen so many riders who set it all up and then when it comes time to canter, they look like they are physically trying to canter for their horse!  Often they end up leaning forward, lying on the horse’s neck or leaning over the inside shoulder, or all of the above.
    Changing this starts with your basic position.  Your shoulders should be above your hips.  Maintaining that as you move into and through the transition is often enough to get out of your horses way. 
    Keeping your shoulders above your hips and not throw yourself forward or leaning to one side will make a huge difference to your canter transitions.  In fact, if you can maintain a correct position, you’re already halfway to creating better canter transitions.  However, I also know that often this is one of those ‘easier said than done’ things!
    A simple way to keeping this fresh in your mind when you ride is to imagine a large egg.  The egg is sitting on the pommel of the saddle.  It is large enough that it comes all the way up to your chest.  Your goal, as you prepare to and then transition into canter is not to break that egg.  This will help you to maintain your position throughout your canter transitions.
    1. Allow Your Horse to Canter

    The third step to better canter transitions is to actually allow your horse to canter.  If you are leaning forward or to one side, you aren’t really allowing your horse.  You’re hindering them as they make the transition from the trot into the canter and beyond.
    Your horse’s shoulders have to go somewhere when you are asking for a canter.  If you’re sitting on their shoulder, you’re actually shutting down the shoulder.  What I see happening with so many riders is that they plan, they set it all up and then they ask for the canter.
    Unfortunately, when the horse begins to canter, it looks like they suddenly change their minds!   
    This can be pulling on the reins.  Often the rider becomes heavy in the saddle; they hunker down.  In fact, sometimes it seems that the rider is doing everything physically possible to stop that horse going forward into canter!  It’s almost as if they’re thinking: “Whoa, this isn’t what I asked for!”, Even though it was.
    Now believe that, most times, this is caused by something the rider is thinking or feeling, playing out physically in the transition.  Whatever the cause, can you imagine how confusing it is for their horse?  He has obliged his rider by doing what was asked of him and is now frantically receiving signals to stop.  Would you blame the horse if over time, he decides simply not to canter at all when his rider asks?
    Allowing your horse to do what it is you have asked him to do is vitally important to his training and development.  It is also important for your nerves!

    Imagining Successful Canter Transitions

    I want you to imagine this now.  You’re trotting down the long side of the arena, and you’re going to ask for a canter in the corner.  You know that the first thing you need to think about is planning.  So you begin half halting. This allows you to also consider whether or not it’s a good quality trot.
    The half-halt is also a great place to make sure that you are in the best position to ask and then allow your horse to canter.  Take the opportunity to straighten your body, through your shoulders and back.  Also, straighten vertically by checking that your shoulders over your hips.
    Now, choose the exact place that you want our horse to canter, and quickly think about what you need to do to communicate this to your horse.   
    Maybe change in sitting trot.  Definitely ask for a little bit of flexion to the inside.  Use your inside leg and imagine that you are filling up the outside rein.  All while your inside hand is asking for that little flexion.  Then move your attention to your outside leg. Imagine using it to ‘tag’ your horses outside back leg, indicating to him to ‘strike’ with that leg.

    Moving with the Canter Transitions

    As your horse begins to actually perform the transition, your job now becomes maintaining your own body and moving with him into the canter.  Are your shoulders above your hips? What about your imaginary egg?  Is it safe in front of you and are you keeping out of its space?! Consider are you carrying yourself?   And carrying your hands?
    Finally, as your horse takes that first, balanced step into the canter, imagine how it feels when you allow with your seat and follow him into it.  Doesn’t that feel great?! Your horse is finally able to canter!
    These 3 things that we’ve spoken about today are things you can continue to refine and refine.  They will require you to revisit them regularly in your riding.  Plan, get out of the way, and actually let the horse canter!  The three steps to better canter transitions.
    Happy Riding,
    Lorna

    Other Resources to Help with This Topic:-

  • How to use the Training Scale with Transitions

    How to use the Training Scale with Transitions

    How to Use the Training Scale with Transitions in Your Riding

    What this episode is all about & how it can help you:-

    • Relaxation and Rhythm
    • Suppleness and Contact
    • Impulsion and Straightness
    • Putting it all together

    [smart_track_player url=”https://op3.dev/e/traffic.libsyn.com/dailystridespodcast/1046-How-the-Training-Scale-works-with-Transitions.mp3″ title=”How The Training Scale Works With Transitions” social_linkedin=”true” social_pinterest=”true” social_email=”true” tweet_text=”Ever wondered about the training scale and how it can help you ride better transitions? This episode from the Daily Strides Podcast will help” hashtag=”Equestrian #Podcast” twitter_username=”strides_success” ]

    The Training Scale is an important principle when it comes to riding and working with horses.  It is particularly important to consider the training scale when it comes to riding good transitions.

    However, you may find yourself thinking “How could I possibly fit the Training Scale into a couple of seconds?”…  That is what this episode of the Daily Strides Podcast is all about.We are going to begin at, well the beginning, the very start of the Training Scale which is Relaxation.

    Relaxation and Rhythm

    Relaxation is a principle that a lot of riders tend to become confused about.  This is often due to how we see relaxation in our everyday life and how we use the word relaxation in day-to-day living.  That is not this!  Please keep in mind that they are not the same thing – at all!

    Relaxation is the foundation of everything when it comes to riding and working horses.  I find that relaxation goes hand in hand with rhythm.   In fact, you will find that in some variations of the Training Scale they are somewhat interchangeable depending where they are and what they are doing.

    The first step to a good transition is the setting-up and preparing of your transition.  This simply means that whatever you are doing at the point before the transition must be ‘good’ and of a high quality.  You can usually assess this by assessing the overall quality of relaxation and rhythm in that exact movement and moment.

    The Catalyst for Your Transitions

    Have you ever thought about the word transition.  It means ‘change’.  As you ride through the transition, things are going to have to change.  However, in order for things to change, there must be a catalyst.  Something which, when added to the ‘mix’ will produce a change.

    In riding, the catalyst is very often the amount of tension present in the horse and rider. 

    This tension is not excess tension, which will show up as a loss of relaxation and rhythm.  Rather it is a change in how the energy is used, the tension, in order for the change to happen.

    However, when we focus on developing relaxation based on our day-to-day idea of it, the transition is going to suffer.  Many riders fail to see this difference.  They think things must remain the same.  However, if things remain the same – well they will stay the same!

    Your job as the rider is to manage this change of tension.  You can do this through your half halt before the transition and your ‘allowing’ after the transition.   You create the necessary tension and, also, you then smooth everything out afterwards. 

    They key is to manage tension so much so, that to those watching on the ground, it will appear relaxed all the way through.  From the original movement, through the transition and on to the next movement or gait.

    One of the best ways to measure your success in doing this, is to keep an eye on the rhythm.  Generally speaking, if the relaxation goes then the rhythm will follow suit.  These are the basics of the training scale that everything else is built on.

    Suppleness

    I believe true suppleness is two-fold.  You must be supple in the way you are approaching the transition mentally and physically.  The suppleness of the approach comes into the balance of your aids, and how you are going to ride this transition, to make it the best it can be.

    Suppleness in transitions, from your horse’s point of view, is the ability to manage that energy change. 

    The energy change comes through when the horse is literally changing what he is doing.  This could be that he is lengthening or shortening his strides.  It could be that he is moving between gaits.  Maybe that he is going from being straight to having slight flexion.  Whatever the case may be, there is a change happening.

    Working on your horses suppleness through that transition is working on how he is managing to allow that energy to flow through him, while this change is happening.  The more successful he is, the more supple he remains through the transition. 

    The more smooth it looks. The less energy is lost.

    Contact and Connection

    The next step of the traditional training scale is contact and connection.  Simply put, this is looking at how successful you are at keeping the energy connected through the transition.

    One of the easiest ways to simplify this is to think about your contact and connection in day-to-day life; it is simply your communication with other people.

    The trouble is that many riders think that contact is only to do with the reins, the bit and the hands.  It is not!  You are in contact and communicating with your horse in so many other ways – your legs, your seat.  You can influence your horse with your body, your voice, your thoughts.  All of these are contact points with your horse.

    So, rather than thinking about contact and connection as just being to do with your hands and arms, think of it as being more holistic. How am I communicating? 

    Here are a few questions you can ask yourself next time…  How am I connecting with my horse at this point through this transition?  How am I setting up this transition?  How do I do this in a way that as we move through this transition?  How am I connecting and communicating with my horse?  What is the contact and connection looking like, all the way through?  Is it consistent all the way through?

    Obviously, the consistency will not be the same all the way through, it must change because a transition is a change.  Therefore being able to balance your aids, balance the contact and connection all the way through the change of the transition, is what you are looking for.

    Impulsion

    Impulsion simply means that there is enough energy being created and held inside of the system that is ‘you & your horse’ to make something happen.  In this case it is the transition itself.

    My big piece of advice when it comes to training scale, impulsion and transitions is to make sure that you are not forgetting that the transition must go somewhere – you are transitioning into something else. 

    Sometimes riders can become so focused on the transition itself, that they forget to focus on what needs to happen afterwards.  Impulsion is there to make sure that you are having this continuation of energy all the way through.  It also ensures that whatever you are transitioning into, will have enough available energy there to carry it forward and maintain.

    Your job as the rider is to ensure that you are managing the impulsion.  You are setting things up so there is enough available energy there.  It is a balance.  If there is too much energy you will feel things become a little, well, volatile!  If there is not enough energy, it is not going to carry you through the transition.  There is a very fine balance that must be maintained all the way through.

    Straightness

    One of the ways to balance this by maintaining true straightness true your transitions.  Your straightness is really your channel.  It is your way of ensuring that the energy you create is directed, or channelled, where you want it to go.

    Leaks are where this energy is lost.  You can prevent leakages through focusing on the straightness.  The other thing you can manage, and hopefully prevent, are ‘explosions’!  If there is too much energy bundled up and it is not allowed to flow through, there are going to be ‘explosions’!

    I suggest that you think of straightness as not just channelling the energy, but consistently flowing the energy on to something else. 

    Your straightness through the transition is making sure that the energy is getting through to where you want to go.  Remember, the end point is what you are transitioning into.

    Collection

    The final step on the training scale is collection.  I don’t really feel that collection in and of itself, is necessary.  But where I would see the collection coming into each transition is the balance, or control, of all the above.  The half halt could perhaps be used to just re-balance as you are working through that as well.

    Collection is almost the gauge of the strength and obedience.  It is outcome when you are able to combine all the other pieces together in a balanced way.

    Putting It All Together

    We have covered a lot today.  In fact, each of these topics truly deserve a post or episode to themselves!   But if you can try to approach each transition by thinking about having all those elements and factors present.

    I really feel that understanding the connection between each of the steps of the training scale will help you as a rider; regardless of your level of experience.  With the Training Scale, one piece can never really be worked on in isolation.  There should always be a holistic approach to each of the steps as you are working with them with your horse.

    Start at the beginning with the basics, but have your eye on riding them through the filter of eventually developing the top level steps as well. 

    Happy Riding

    Lorna

    Links mentioned in the episode:-

  • Smoothing Out the Ups and Downs in Your Riding

    Smoothing Out the Ups and Downs in Your Riding

    Smoothing Out the Ups and Downs in Your Riding

    What this episode is all about & how it can help you:-

    • Begin noticing where the ups and downs are happening
    • Take responsibility, rather than looking for a quick fix
    • Learn to Balance Your Aids Correctly
    • Using a Split Second to Smooth Out Your Riding

    [smart_track_player url=”https://op3.dev/e/traffic.libsyn.com/dailystridespodcast/1045-Smoothing-Out-the-Ups-and-Downs-in-Your-Riding.mp3″ title=”Smoothing Out the Ups and Downs in Your Riding” social_linkedin=”true” social_pinterest=”true” social_email=”true” tweet_text=”Are your rides a little to ‘turbulent’ for your liking? Here is how you can begin smoothing things out today…” hashtag=”equestrian #podcast #transitions #smoothsailing” twitter_username=”strides_success” ]

    Do things feel a little ‘touch and go’ when it comes to your riding?  You touch on how you want it to feel, but that feeling is all too brief.  It’s there for a few strides and then it is gone again.  Would you like to maintain that feeling for longer?  Smooth out your riding?

    This episode is focused on learning how to influence your horse more to create a more balanced, smoother ride for both of you.  A more polished finished to your riding.

    Horse Riding is Never ‘Done’

    I want to begin by warning you of a trap that so many riders make the mistake of falling into.  They finally ‘get’ something in their riding; and they then think that their work regarding that topic is done.

    Horse riding, by its very nature, is never ‘done’.  It is ever evolving.  There are challenges at every level that will lead to us having to re-navigate past topics from your new perspective or where you are now.

    Very often the key to overcoming new challenges in horse riding is going back to the basics – and applying those to the new challenge.

    Begin by Noticing Where the Ups and Downs are Happening

    You can do this by paying close attention to your rhythm and tempo.  Notice where they are lacking.  Can you maintain both consistently through a movement?  Can you maintain them through a transition?  At what point are they changing?  Is this every time, or only in a certain place or on a certain rein etc.

    A second way you can become more mindful about the basic quality of your rhythm and relaxation is by ‘testing’ your riding on a straight line.  When you are riding a longer straight line, perhaps on the road or trail, how well can you maintain? Do things tend to become faster, or slower.  Is there more or less tension the further you travel.  Or, is there a greater sense of ease?

    You can also pay attention to your aids and you in general in the saddle. What influence are you having with your riding?  Is it positive or negative. 

    Remember, you are always influencing your horse, regardless of if you are intentional about it or not.  Therefore, it makes good sense to become mindful on what you are doing – and making that influence a positive one.

    Taking Responsibility, Rather than Searching for the Quick Fix

    When you do begin to notice where things are not being well maintained, the second trap a lot of riders fall into is thinking that there is a ‘quick fix’.  A different bit, or a new noseband.  A change of martingale, or feeding plan…

    Keep in mind that often the easiest thing to ‘fix’ is the most obvious.  You, the rider! 

    Showing up and claiming ownership of your riding, faults and all, is an important part of becoming a responsible rider.  It is also the one thing that you truly have control over when communicating with your horse.

    Looking in and taking ownership of the fact that you are consistently either positively or negatively influencing your horse will go a long way to smoothing things out.  Keep in mind that your thoughts are also influencing your horse, so be mindful.

    Yes, sometimes you may have to change the bit, or martingale, the fact of the matter is that you are the single greatest influence.  So my advice to you is to check in with yourself first!

    Learning to Balance Your Aids in Your Riding

    Each of your individual aids, the ways that you communicate with your horse, are part of the bigger picture of an overall conversation.  No aid should be used alone, and as a whole, the proportions are always changing as well.

    Balance, by definition, is ever shifting.  The balance of your aids in your riding is an ever-changing way of maintaining the conversation with your horse. 

    What worked for one transition may have to be refined and ‘tweaked’ a little for the next.  What goes into each transition with you and your horse is different and what comes out of each transition is different.  Your aids need to be applied with this in mind.

    Think of it as being a large pie or pizza.  The ‘My Ways of Communicating with My Horse’ Pie.  Each aid has a slice.  These slices are continuously changing in size and proportion depending on the circumstances of each movement or transition.  If every thing you do on your horse was shown on one of these pies, you will see that very rarely are any two pies the exact same.

    Your responsibility as the rider is to tailor each communication with your horse so as your aids are balanced for what he needs at that exact moment.  This will happen all through the ride. 

    Using a ‘Split Second’ to Smooth Our Your Riding

    As a rider, I am sure that you are familiar with how important your half halt is.  It is the rebalancing of both you and your horse, throughout your ride. But, another place we can have a huge influence over the smoothness of the overall ride is within the transition itself.

    You are riding transitions the whole time in your riding.  A transition is simply a change.  Straight to bend, long to short, trot to walk…  Everywhere.  

    So, it makes sense to work on smoothing out the transitions themselves in order to even out the whole ride, doesn’t it?

    Inside of every single transition, there is a split second where you have the power to begin smoothing things out.

    Every change needs a catalyst to make it happen.  In riding, this can often be described as pressure or tension.  Your job through the transition is to find that ‘split second’ where you can smooth out what was needed, the catalyst, in order to make the whole transition appear relaxed.

    Start thinking about and looking for that door of opportunity within each transition as you go forward.  If you want to find out more, you can join me on the 2nd of June 2018 in my upcoming workshop on Relaxation in Your Riding.

    Happy Riding

    Lorna

    Links mentioned in the episode:-