Author: Lorna Leeson

  • Simple Tips to Improve Your Hands & ‘Fixes’ for Those Habits…

    Simple Tips to Improve Your Hands & ‘Fixes’ for Those Habits…

    [fusebox_track_player url=”https://op3.dev/e/traffic.libsyn.com/dailystridespodcast/1271_Simple_Tips_To_Improve_Hands_and_Fixes_for_Bad_Habits.mp3″ title=”Simple Tips to Improve Your Hand Aids and Correct Bad Habits” social_linkedin=”true” social_pinterest=”true” social_email=”true” tweet_text=”Better hand aids for riding with this podcast episode” hashtag=”horsepodcast” twitter_username=”strides_success” ]
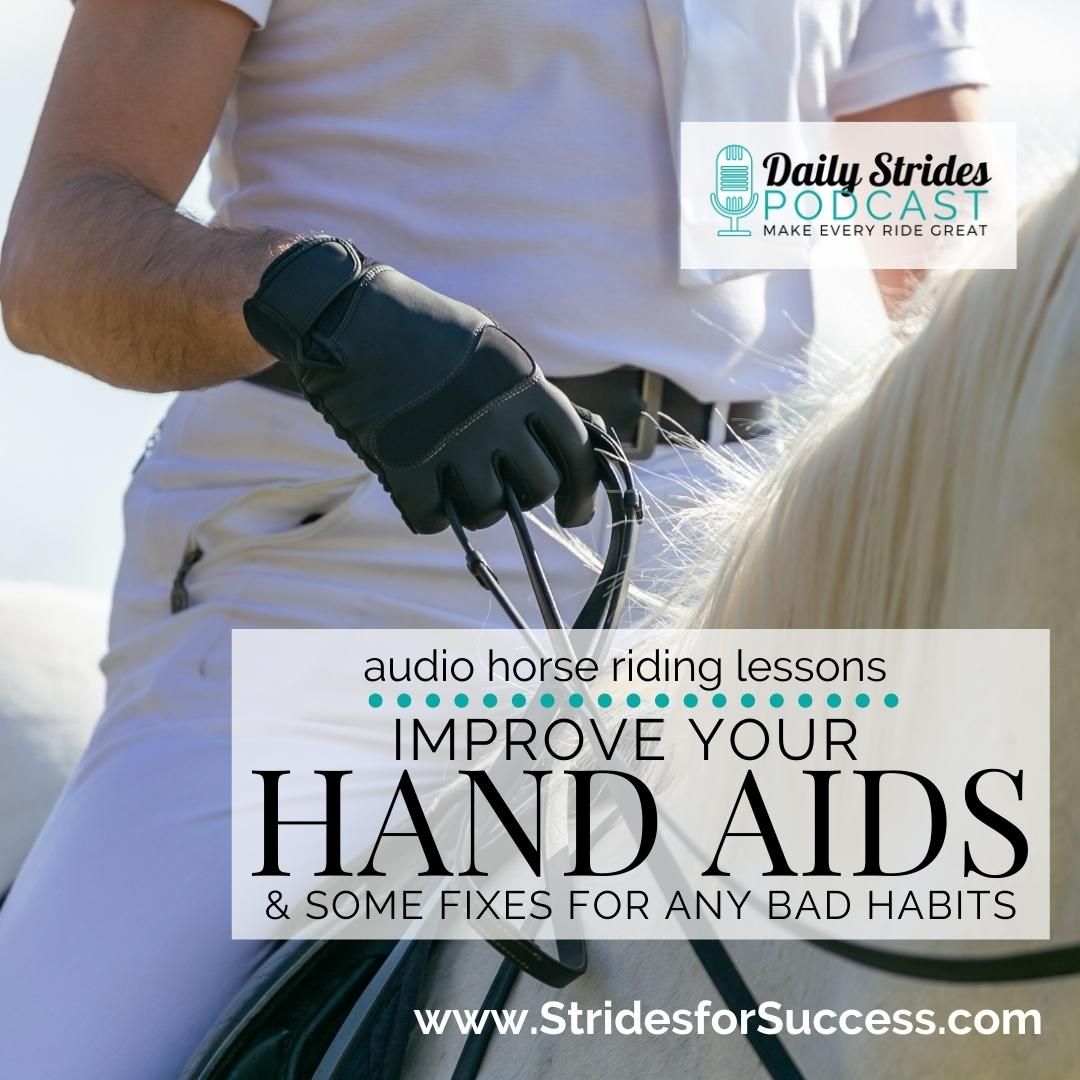
    Your hands are an aid in your riding. So understanding why the way you hold your reins and how to judge the height of your hands when riding is important. And realizing how much your hand aids are impacting and affecting your riding can change everything.
    As riders, one of the first things we learn is how to ‘hold’ the reins.  However, often the ‘why’ behind all of this is never really explained to us.

    Your Hands Connect

    So, it’s obvious that your hands are the connection between you and your horse’s mouth through the reins.  And it would be an awful pity if that connection ended there! As riders, one of our greatest responsibilities is to refine communication.
    When you refine your hands and how you use them with your horse, you can truly help to enhance the whole conversation between you and your horse.
    So just like with all of your aids, a great place to begin when refining your hands is their position. Being in the ‘right place’ will allow you to give more precise aids to your horse. And when we can create more clarity in our communication, it shows in our riding.

    What to Aim for with Your Hands

    Before we go any further it is worth mentioning that each horse and rider combination is a unique and individual blend.  However, there are a number of basic guidelines you can follow to really begin refining your hand aids.  And of course, develop better contact and connection with your horse.

    Thumbs on Top

    This is one of those really small details that makes a MASSIVE difference to your riding.  Holding the reins while in the saddle should feel like carrying two cups of tea (or coffee, hot chocolate, etc.).  If you were to carry the cups or mugs with your knuckles on top, there wouldn’t be anything left to drink when you finally go to take a sip.

    A great experiment is to literally pretend you’re riding and both carry your hands with your thumbs on top. Your hands will be around your belly button height in front of you.  Now, from this place, turn your wrists so that your knuckles are on top.  And feel the difference down and through your arms.

    Turning your hands so that your knuckles or the back of your hand is on top will create instant tension down through your arms.  When riding, this tension is passed through the reins to your horse’s mouth.  Not good! 

    Side View – Elbow, Wrist, Thumb, Rein, Mouth

    The first thing to look for is a relatively straight line from your elbow to your horse’s mouth when viewed from the side.  Now, I get that this can be difficult to really ‘see’ when you’re the one riding the horse!  However, if you don’t have mirrors, there are other options available.  Review some photos or videos of yourself while riding.
    The important thing to note here is that this ‘line’ should be there regardless of what gait you’re working in, or what moment of that gait your horse is currently in when the photo was captured. 
    This will indicate if your hands are truly fluid, elastic, and supple.  Your ability to ‘follow’ your horse or ‘stay with’ your horse through your hand aids is vital to really developing true and lasting contact.

    Overhead View – Wrist, Thumb, Rein, Mouth

    This second ‘view’ is one you can do all the time when riding.  The key is to ‘glance’.  Not LOOK! Looking will create a whole host of other habits that you don’t want to fall into habits with! Okay, so to check this you will, as you ride your horse, glance down at your hands.

    Notice how straight the line is from your wrist through to your thumb and then on down the reins to your horse’s mouth.  If you notice any ‘curling’ or ‘twisting’ simply straighten things out. 

    This particular ‘line’ is very much dependent on your thumbs being ‘on top’ as you ride.  If your hands have turned so that your knuckles are on top (like riding a motorbike) or your fingernails are on top, revert back to thumbs on top.  It will look and feel like you’re carrying two cups of tea :)

    If Your Hands Are Too Low

    This is the most common challenge I see with riders when it comes to their hands. Riders are trying to work their horses and improve the overall way of going, but literally ‘blocking’ their success!  Riding with your hands too low can be caused by a few different things.  Often it is a habit that was created due to holding onto the pommel or a neck strap.
    Another reason riders tend to carry their hands too low comes down to a lack of understanding regarding contact and ‘on the bit’.
    Many riders feel that when they lower their hands and then apply pressure quickly from each alternative rein, their horse will magically go ‘on the bit’.  And yes, the horse might tuck their head in to try and get away from the discomfort of the rider’s hands.  But this is definitely not being ‘on the bit!’.
    Hands that are too low can be corrected by simply bending the elbows and ‘carrying’ the hands more. Doing this will allow for greater elasticity and suppleness. Both are essential for correct contact. 

    If Your Hands Are Too High

    This is, thankfully, not as common as the low hands. And I say thankfully because this particular habit can often lead to a lot of needless discomfort for the horse.  High hands really change how the bit interacts with your horse’s mouth – and usually not in a great way.  Especially if not intentionally done.
    I think the big reason riders can develop this habit is due to a lack of balance. Very often, when the rider carries their hands too high to be effective as an aid, they are doing so to try to either remain balanced – or stay on!
    Excess tension in the rider’s body due to nerves or fear can cause them to raise their hands higher than what would be normal when riding.  The irony of doing this is that the horse usually becomes hollow through the back, which causes the rider to experience more bumps, wobbles, and bangs as the horse moves.

    If Your Wrists Are ‘Twisted’

    This is when you ‘glance down’ (important to emphasize – we are not LOOKING; just glancing) and you see that the line from your lower arm to the rein is not straight.  This lack of straightness can vary from anything like a slight ‘kink’ to a complete ‘lightning bolt’ shape!  True story!  The key to changing this is to first identify it.
    If you glance down and things are less than straight, focus on thinking about your lower arm (hand to elbow) as being an extension of the rein. Then just ‘straighten’ that rein out. 

    By creating that ‘straightness’ from the elbow, through the wrist and thumb, and then onto the rein, you create clarity with your questions. Clarity with your aids. This issue often comes up when a rider doesn’t want to necessarily ‘pull’, but they still feel the need to apply a lot of pressure with their hands. It can be a difficult habit to break, but one that is worth persevering with.

    If Your Knuckles Are On Top

    Ohhhh, this is something I personally resonate with.  I spent a couple of years doing ‘work riding’ for a racing yard.  This was coupled with teaching and actively eventing.  It did not all blend well.  I’m pretty sure that there are so many riders who can make this work – and let’s be honest, I did at the time.  But if I knew then what I know now… A completely different approach would have been taken!
    For me, this particular habit developed in my left hand.  I’m right dominant, so perhaps this was the reason? Either way, it became a MASSIVE issue for me later in my riding. 
    My left hand would just, on its own, revert to ‘knuckles on top’ when riding.  This, obviously, affected the contact between me and, well, any horse! And yet, it took me quite a few ‘seasons’ in my riding for this to be noticed. And a far few longer for it to be corrected!
    Trust me; knuckles on top changes EVERYTHING between you and your horse when riding. From how you move your arm, to how it feels in his mouth… EVERYTHING 
    If you find yourself with this habit, one or both hands (mind was just the left hand), focus on this first.  Think of carrying cups of tea and not allowing an ounce to fall… There is a certain way we move our bodies when we’re carrying cups of tea (or whatever). If we put that same fluidness into our riding… #Winning!

    Your Hands as Your Aids

    We connect with our horses on so many levels.  Our legs, our seats, our hands, our mood, our attitude, our intentions, our focus… And on and on it goes.  Yet, if we don’t develop our hand aids past what we learn in that very first lesson, we are doing both ourselves and our horse a disservice
    Your hands are your connection to something your horse NEEDS; his mouth
    His mouth is an absolutely essential part of his health, life, and experience every single day.  So it makes sense to spend time refining this aid… Maybe to the point where it becomes ‘feather light’ and ‘feather soft’.
    And in between, do all you can to remove any excess tension will definitely help :)
    Happy Riding
    Lorna

    More on This Topic:-

    More Training & Support

  • Fear and Horse Riding

    Fear and Horse Riding

    [fusebox_track_player url=”https://op3.dev/e/traffic.libsyn.com/dailystridespodcast/1270_Fear_and_Horse_Riding.mp3″ title=”Fear and Horse Riding” social_linkedin=”true” social_pinterest=”true” social_email=”true” tweet_text=”Getting over fear about riding or horses” hashtag=”horseriding” twitter_username=”strides_success” ]
    Has fear or lack of confidence ever held you back in your riding? If so, you will know how debilitating this can be.  Sometimes it’s caused by a past experience. Or it can be created when we think of all the things that ‘can’ potentially happen.
    Whatever the cause, I think that it is important to recognize that this particular challenge won’t simply vanish on its own.  Sure, sometimes it can seem like it has shifted or even disappeared.  But more often than not, it is simply buried and will rear its unwanted head again as soon as there is even a whiff of ‘danger’ or ‘warning’ in the air.
    I am a firm believer that confidence is something that we build over time.  Couple time with consistent repetition, self-awareness, and taking the correct action and there’s a good chance that you can overcome the fear and begin thriving again in your horse riding.

    What Are You Afraid Of?

    I think that it is important to actually name what you’re worried about in order to begin the work of changing your thoughts around it.  There is a big difference between “I’m afraid to ride” and “I’m worried my horse will spook, spin, and dump me on the ground so hard that I break something”.
    Often when we actually speak about the exact thing that we fear when it comes to our riding, we can begin to dismantle that fear in our minds
    If we take the second statement mentioned above, there are a few key areas we can begin to work on BEFORE we ever even consider hopping into the saddle. “I’m worried my horse will spook, spin, and dump me on the ground so hard that I break something”.
        1. Remind yourself that your horse, usually, doesn’t want to ‘dump you’ on the ground; especially in this particular situation
        2. What specific triggers have you noticed that your horse has reacted this way too?
        3. How can you avoid these triggers?
        4. What can you do to actually develop your horse’s confidence in himself?
        5. Is there a way you can develop your horse’s confidence in you more?
        6. Where can you ride that the chances of this happening are less?
        7. What can you do to potentially limit the severity of the fall, if it were to happen?
    When we really begin to look at the fear we have, we can also begin to approach it from a different perspective – one of curiosity.

    What Can You Control?

    Now, for years I have been preaching that the only thing you can control when it comes to riding is yourself.  However, this is not really true for this particular situation.  Firstly, when your mind is telling you terrible stories, often all sense of self-control flies out the window!
    And, secondly, I believe that there are actually external factors you can control in order to logically lessen the risks involved with riding.  It’s just that we sometimes overlook these things because we are so caught up in the ‘fear’ itself.
    You can work towards controlling things like:-
        • The time of day you ride (this often has an impact on the energy levels of both horse and rider, as well as external factors like traffic, bystanders, other horses in the arena, etc.)
        • Who you are riding with
        • Where you ride
        • What feed your horse is receiving
        • How balanced and coordinated you are
        • Creating planned responses instead of fear-based reactions
    You can also begin to develop a greater influence over things like:-
        • How fit or fresh your horse is
        • The thoughts in your head…
        • How fit and supple you are
        • Increasing the trust and partnership of your relationship with your horse
        • Developing your horse’s confidence in himself
    The key here is to actively decide to change things and then create a plan of action in order to make it happen.  Wishing, hoping, and praying won’t work in this situation!

    Maybe Don’t ‘Just Do It’…

    Now, up until this point, we have been doing the ‘thinking’ work. And while this is both important and necessary, there comes a time when action is needed. A lot of trainers and coaches will force riders to ‘just do it’. And, to be fair, this often does work in the actual moment. It also can sometimes actually be the exact thing that is needed to unmask the fear forever for the rider.
    The issue I have with the ‘just do it’ approach is that while you may get a quick win under your belt, often the underlying cause has not been resolved; and will come up again when pressure is applied!
    Pressure, in this situation, is anything that causes you or your horse to experience a little emotional or physical discomfort. It’s usually emotional. Maybe a spook for your horse. Or a lack of time for you. These are the exact moments when you don’t want to experience fear!

    What’s Comfortable Now?

    Start by figuring out where you and your horse both feel good and relaxed right now when you’re together. This could be riding together inside of an enclosed space, like an arena. However, it could also be dismounted, on the ground, with a door or a gate between you and your horse!
    It makes absolutely no difference what this is for you both now. What is important is to find that point in the conversation together where everyone feels relaxed, at ease, and enjoying the moment.
    Now, rather than mindlessly allowing these moments of true enjoyment and relaxation to simply pass, begin paying attention to how you ‘are’ in these moments.
    When you can begin to define truly what ‘relaxed and at ease’ is for you and your horse, you will begin to more easily recognize leaving that ‘comfortable’ space. And, how it feels to return to it.

    Building Confidence and Easing Fear

    So, with this point in mind, begin thinking about how you could intentionally plan to make things a little more mentally uncomfortable for you and your horse. What could you actually plan and make happen that would intentionally make you feel discomfort? It sounds bizarre, but this is truly the key to gaining confidence and overcoming fear.
    The key to planning this work BEFORE you actually do it is that you will create ‘pressure’ circumstances that can easily and quickly be reversed.
    Meaning that you can turn it on and then when you choose to, switch it off. Sounds so simple! But we can do this in our riding as well. Maybe it is walking for 20 meters with someone leading you out of the arena and back to the stables. It could be standing beside your horse holding the lead rope, with the door or gate open.
    The goal is to create a situation where you will feel that mental discomfort and commit to staying in it for 20 or 30 seconds. Then, calmly returning back to the ‘comfort zone’ and ‘safety’ again.

    Consistency, Repetition, Awareness, & Action

    Doing this once or twice won’t be enough to ‘reset’ your comfort zone. This work needs to happen consistently in order to be effective. The good news is that, over time, you will find the discomfort getting less and less.
    When the previously uncomfortable piece feels relaxed and easy, it is time to expand the ‘zone’ further. Find the next action that will build on the previous one and start the work again.
    By doing this over and over, both you and your horse will develop confidence in your own abilities. You will also begin to trust each other more, which will strengthen the partnership.
    Unfortunately, there are no quick fixes to overcome fear and develop confidence. And yet, the time invested in doing the work can yield so much more for you in your riding… It is well worth the investment.
    Happy Riding
    Lorna

    Similar Past Episodes

    Online Community & Support

  • Today’s Riding Plan for You and Your Horse…

    Today’s Riding Plan for You and Your Horse…

    [fusebox_track_player url=”https://op3.dev/e/traffic.libsyn.com/dailystridespodcast/1269_Todays_Riding_Plan_for_You_and_Your_Horse.mp3″ title=”Today’s Riding Plan for You And Your Horse” social_linkedin=”true” social_pinterest=”true” social_email=”true” tweet_text=”Step by Step ‘what to do today’ for exercising your horse” hashtag=”horsepodcast” twitter_username=”strides_success” ]

    “So, what are you planning on doing today?”. It’s a question I ask at least 5 or 6 times a week to different riders.  And, let’s be honest here, so often the answer is not all that great! “I’m not sure.  We’ll see when we start working.”  If that’s you right regarding your next ride with your horse, I am giving you ‘the look’!  The look I reserve for riders who say they want to achieve and do all of the things… But they continue to wing it when it comes to their training and their responsibilities as the trainer for their horse.

    So, rather than just moan, I am going to give you a step-by-step riding plan today that you can follow so you can truly make the most of your next ride with your horse :)

     1. Pick a Filter While Tacking Up

    Now, this may seem a little random, but if this plan is going to work and actually help you and your horse in your riding, you MUST do this part. So, what’s a filter?  This is the overall theme or intention for your session together.  There are many things that this could be, it will really depend on where you are in your training and what you and your horse need right now.

    A few examples of ‘filters’ for your riding are:-

          • establishing and maintaining correct relaxation throughout
          • developing suppleness through staying ‘on track’ (no falling in or out)
          • increasing responsiveness to a split second (I ask, and she/he responds appropriately)
          • improving accuracy in the timing of my aids
          • refining my aids so all become more subtle
          • cleaner transitions
          • maintaining rhythm before and after transitions
          • improving self-carriage and better contact


    The list is endless as to what you want to focus on.  However, it is absolutely essential that you choose something to focus on.  Otherwise, you will just be riding through the motions aimlessly.

    Click here to subscribe

     2. Riding Plan; Minutes 0 – 10

    This is the warm-up.  If you’re really keen to improve things, you will actually have completed a quick ‘stretch’ of your own body BEFORE jumping into the saddle.  But, either way, the goal for the first 5 to 10 minutes is to get the blood flowing in your horse’s body and your body.

    How long you spend warming up will depend on your situation. Some horses need longer and this will depend on many factors. When in doubt, go longer! 

    While warming up, use the time to begin ‘syncing’ your movements to your horse.  Focus on identifying when each of your horse’s hind legs is moving, and where, and notice how this feels in your seat. This will become very important later.

    Also, work on moving forward and, during the second half of this warm-up, begin ‘fine-tuning’ the responsiveness between you and your horse. 

    For this warm-up I suggest:-

          • Walk 2 circuits of the arena on the left rein
          • Walk 2 circuits of the arena on the right rein
          • 20m circle – x2 in the walk on the left rein
          • 20m circle – x2 in the walk on the right rein
          • BEGIN PICKING UP MORE CONTACT WITH YOUR HORSE
          • Walk a figure of 8
          • Go large again on the left rein
          • Walk to halt to walk transitions (10 strides walk to 3 seconds of halt)
          • Change rein across long diagonal
          • Again, walk to halt to walk transitions (10 strides walk to 3 seconds of halt)

     3. Riding Plan; Minutes 10 to 15

    From here, in your riding plan, you can begin to work in trot. I always like to start off in the rising trot (posting to the trot). I feel that it gives both horse and rider more of an opportunity to warm up and begin working together. Focus on both your rise and your ‘fall’ (the ups and the downs).

    When in the rising trot, keep the idea in your head that you are ‘creating space’ under your backside and saddle for your horse’s back to move into. Keep your movements as light as you can…

    Also, remember to keep the energy and thinking moving forwards. Rather have things a little ‘sloppy’ initially but with the energy of ‘forward’ and then tidy it up later as you really begin to engage and work.  Looking for everything to be polished from the start often leads to the energy becoming ‘stuck’.

    So, in rising trot, you can ride a:-

          • 20m circle x3 on the left rein
          • go large on the left rein
          • change rein across the long diagonal
          • on the right rein ride the short side and up the long side of your arena
          • 20m circle x3 on the right rein
          • go large and then at A or C begin a three-looped serpentine
          • on completion go large
          • change rein across the long diagonal
          • track large on the left rein
          • at A or C ride three looped serpentine

    Click here to subscribe

     4. Riding Plan:- Minutes 20 to 30 (or 35)

    Once you are warmed up, this is where you can begin to transition into the ‘work’ part of the session.  This is where you will ask specific questions, and look at what happens as it relates to your theme or focus for the ride.

    So, for example, if the focus was on maintaining rhythm before and after transitions, you can begin asking for intentional transitions between trot and walk, walk and halt, halt and walk, walk and trot, and trot and canter. By working up and down the scale between the different ‘gears’ with a specific focus on maintaining rhythm, you will work on improving each transition you ride or ask for.

    I suggest keeping the exercises as simple as you can; rather let the focus be on the quality of the work.  I also think 2 to 3 different exercises are more than enough during this part of the training. 

    So, you could ride the previous ‘layout’ again, but this time adding transitions or lateral work, or whatever movements you feel will help you reach your intended outcome or goal. The key is having something planned BEFORE you reach this part of the work.  By building to something intentional, you will be more inclined to use the warm-up as a base.

    Remember, there shouldn’t be a marked difference between ‘end of warm-up’ and ‘start of training’. They should just blend together and flow from one into the other. 

    So my suggestion for this part of the ride are:-

          • 3 to 5 minutes on exercise 1
          • A short break for you and your horse
          • 3 to 5 minutes on exercise 2
          • A short break for you and your horse
          • 3 to 5 minutes on exercise 3

     5. Riding Plan:- Minutes 35 – 45

    This is where you transition into the cool-down period.  Now, sometimes, depending on what you are working on, there may be a very definite ‘stop work’ part of your ride.  This often happens if you have been jumping.  You will ride the final exercise, grid, or track, and then finish ‘working’.

    However, if you are working on flatwork, you can actually make more of a gradual transition into the cool down and ask for more stretching from your horse.  Many riders will associate this type of transition with working ‘long and low’. That is also okay. And remember, just like when you were warming up in the trot, think about allowing ‘space’ for your horses back underneath you.

    During the cool-down, you may find that moving out of the arena can help your horse to mentally ‘finish up working’. This can also be helpful for the rider.  

    Regardless of what you choose to do, the goal here is for your horse’s heart rate to return to normal and for him to stretch things out a little.  I also find that this is a great time for the rider to reflect on the training session and make mental notes of what was important.  Of course, all of this information will then be recorded in their riding journal… Nudge nudge!

    1269 - Today's Riding Plan for You And Your Horse

    Adapting This for Your Horse

    Now, obviously, this plan must be adapted for your horse and the level of training he is comfortable with.  This plan assumes that your horse already has achieved a certain level of fitness and is working at a certain level in his training.  Unfit or very young/green horses should not be worked for long periods; slow and steady wins.

    Using this basic riding plan, you can begin to tweak it as needed so that you have a clear focus for working with your horse. It will allow you to focus on the quality of the work, rather than worrying about what you have to do! 

    Make sure you record how it went so that you can begin to see patterns over time. This will further help you to discover what works for your horse – and you.  You will also begin to see what needs to change regarding your training sessions.

    Happy Riding
    Lorna

    Click here to subscribe

    More on this Topic:-

    More Training & Support

  • What is ‘Doing It’ for You and Your Horse?

    What is ‘Doing It’ for You and Your Horse?

    [fusebox_track_player url=”https://op3.dev/e/traffic.libsyn.com/dailystridespodcast/1268_What_Will_You_Do_This_Year.mp3″ title=”Figuring Out What’s Important for You And Your Horse – and Doing More of It!” social_linkedin=”true” social_pinterest=”true” social_email=”true” tweet_text=”Get inspired with your horse for 2023″ hashtag=”horsepodcast” twitter_username=”strides_success” ]
    It’s always the same.  The same sentences are being spoken and written about the same things. And I’ve been thinking about why it is this way.  Why do most riders make the same ‘resolutions’ year in and year out?  Rather than growing, building, and developing so that they get to create something different each year they are together?
    How about this year, you try something different for you and your horse?  Something that you can feel a sense of accomplishment about?

    Commit to ‘Doing It’…

    Now, I get that ‘doing it’ is fairly vague!  It’s one of those phrases that can mean anything to anyone. And this is where the magic lives.  It is as individual and unique as you and your horse are when working together. Which allows you to make it anything that you want it to be.
    I am going to suggest that from today, you begin to think about what ‘doing it’ is for you and your horse.
    Start with thinking about what ‘being an equestrian’ means for you.  Does it mean a deeper connection with your horse?  Perhaps it is with horses in general.  Maybe it is riding skills and training skills that really define an equestrian for you.  Or the number of hours spent with horses on a weekly basis…
    ‘Doing’ horses or being an equestrian can mean a lot of things to a lot of people. However, all that really matters is what it means for you…
    Click here to subscribe

    Start Making Small Tweaks

    Once you have defined this for you and your horse, begin thinking about small things you can do on certain days to move you closer to ‘being’ this in your life.  Maybe it is something as simple as listening to an episode of your favorite equestrian podcast (hopefully the Daily Strides Podcast😉 ) about something you want to work on or learn more about.
    It could be something as simple as buying a bag of carrots and committing to giving two a day to your horse and having some ‘quiet time’ together…
    Often the thing that holds us back from achieving our version of ‘doing it’ is that we expect absolute perfection from the start! Anything that is not 100% like the picture in our heads just doesn’t make the cut, and therefore doesn’t get done.
    And yet, it is these small imperfect but intentional actions that move us closer to actually someday realizing that we are indeed ‘doing it’ and ‘being an equestrian’.

    What’s Your Version?

    So, with all of that said, my question to you today is ‘What does your version of “we’re doing it” look like when it comes to you and your horse?’.  What will you focus on doing more, so that you can feel proud, accomplished, satisfied, and content when it comes to your next riding review?
    Or when, 11 months from now, it comes to looking back over the year that was 2023?  What will prove to you that you and your horse ‘did it’?
    That is where to start… Begin focusing your energies and attention there and see where it takes you going forward🙂
    Happy Riding
    Lorna
    Click here to subscribe

    More on this Topic

  • Making the Most of Time with Your Horse

    Making the Most of Time with Your Horse

    [fusebox_track_player url=”https://op3.dev/e/traffic.libsyn.com/dailystridespodcast/1267_How_to_Make_The_Most_of_Time_with_Your_Horse.mp3″ title=”Making the Most of Time with Your Horse” social_linkedin=”true” social_pinterest=”true” social_email=”true” tweet_text=”How to make the most of 15, 30 or 60 mins with your horse” hashtag=”horsepodcast” twitter_username=”strides_success” ]

    There are certain times of the year when circumstances mean you can find yourself with either more or less time with your horse. December, August, and April are just a few that pop into my mind.  Some riders find they have more time, and other riders have significantly less! It just depends on your unique circumstances and situation.

    What is key to remember is that whatever side of the time conundrum you find yourself on, making the time with your horse count is important. Especially if you hope to continue to move forward in your training together.  Can you really afford to lose a month of training – and set your momentum back to zero?

    So, to help you get this all figured out and continue to grow and develop your skills as a rider, here are a few ideas on how you can make the most of your time with your horse. However much time that happens to be for you.

    15 Minutes or Less

    Oh yes, there is so much you can do in 15 minutes (or 5 minutes) with your horse.  The key is to think about the time difference.  My ‘go to’ training method when time is short is to focus on the groundwork.  It requires absolutely minimal equipment – so no ‘getting ready’,

    The key to making the most of time, especially when it is short, is to have a clear goal for what you want to achieve in that time.

    Things such as a square halt, a turn on the forehand that remains in rhythm, working over some basic ground poles for coordination and suppleness, or rein back are just a few things that can be worked on and accomplished in a short period of time.

    When you only have a few minutes, ask yourself the question “What can I ask my horse to do, while I’m on the ground beside him, that will move our training forward?” 

    15 to 30 Minutes

    Now, for many riders, this may still seem like a bit of an impossible feat; we all know how fast 30 minutes can go by, right?! However, again, if you can become REALLY intentional with what you are doing, you can achieve so much in that time with your horse.

    Now, a lot of what you do with your 30 minutes will depend on how your yard is set up…  If you have to walk 10 minutes just to catch your horse from the field, well, that has to be factored in.  If your horse is already in the stable or stall and waiting for you, you have a lot more options.

    I find that the most effective way to train my horse in 15 to 30 minutes is through lunging. However, this is only effective if I have a clear focus for the session…

    So, again, having a plan is key to making the most of this time with your horse.  Think about it, if you can combine 10 minutes of groundwork (as your warm-up) with 15 minutes of lunging… You have just had a fantastic training session with your horse – and you still have 5 minutes for hugs and kisses ;)

    30 Minutes to an Hour

    Okay, so once we get to the point where we have a little more time, we can begin thinking about riding. Yes, you can ride if you have 30 minutes, however, I find that it usually ends up feeling rushed and stressed.  Not a great feeling when we want to model being present for our horses! So, I prefer to wait until I have a little more time before I will actually tack up and ride.

    Depending on the length of time I have, I will choose something relevant to focus on.  Remember, you also have to allow for both your warming up and your cooling off.

    This means that if I want to work on maybe canter or jumping, I will do these on the days when I do have a full hour.  On the days when I have 40 minutes, I might rather work on lateral work, bending and suppleness, or contact. Things that I can do quite a bit of the work in walk and trot, which then means that the cool down and ‘aftercare’ won’t take as long.

    Over an Hour…!

    Finally, those special days when I have all the time in the world – well, sort of!  These are the days I plan bathing, massage, walking together, a long luxurious groom… As well as riding and maybe some groundwork or lunging as well.

    Alternatively, I find that these longer sessions are great for getting out of the arena and ‘exploring’ with my horse. There is no hurry, meaning that we can spend time ‘greeting’ any of the scary things we come across along the way.  Unrushed and feeling calm.

    I think all riders have a running list of ‘things I would love to do with my horse but need more time for’.  The only way you will actually get to do any of these things is, again, planning in advance! 

    Planning Time with Your Horse

    As I have been preaching for years, the only way that you will really begin to see improvements in your riding and your relationship with your horse is by becoming intentional.  As I said at the beginning, we all have times and periods when our usual routine or schedule doesn’t apply.

    In order to continue to move forward with your horse, make sure you are planning for these times, so that you can continue to develop with your horse.

    Happy Riding
    Lorna

    More on this Topic

    More Training & Support

  • Safely Including Jumping in Your Horse’s Training

    Safely Including Jumping in Your Horse’s Training

    [fusebox_track_player url=”https://op3.dev/e/traffic.libsyn.com/dailystridespodcast/1266_Safely_Including_Jumping_In_Your_Training_Program.mp3″ title=”Safely Including Jumping in Your Horses Training” social_linkedin=”true” social_pinterest=”true” social_email=”true” tweet_text=”Safely getting started with jumping” hashtag=”jumping #horse” twitter_username=”strides_success” ]

    Whether you enjoy jumping or not, the fact of the matter remains… When approached correctly and consistently, jumping can greatly benefit both horses and riders in a long-term training program. Even if there is no intention of actually ‘jumping’ competitively. And this is true regardless of discipline, training level, and experience.

    When introduced the right way, and then strategically used jumping is a great way to add diversity to the training – and physically and mentally develop the team.  

    So, here are three simple ways you can get started and begin using jumping this week in your current training program with your horse. And, keep in mind, nothing has to be ‘higher’ or ‘bigger’ than 30cm (12 inches), deal? ;)

    Exercise 1 – Pole on the Ground

    This is exactly how it sounds, a simple pole on the ground between two uprights or ‘wings’.  Now, if you don’t have any fancy uprights, you can use pot plants or something else to create the ‘wing’ for your ‘jump’.  Poles on the ground are a great way to include jumping in your horse’s training – without the risk of injuries.  They also allow both you and your horse to develop your abilities and confidence before tackling a ‘pole off the ground’! ;)

    Focus on the line you take and make sure it remains straight before, over, and after the pole.  Pay attention to the rhythm on the approach and the get away from the pole as well. 

    The line is important as this will begin to ‘train’ both of your eyes to ‘see a line’.  And the ability to ‘ride a line’ is vital in all forms and disciplines when training horses and riders. Notice the turn onto the line; are you overshooting it, or maybe undershooting it?  And what about the getaway from the jump? By consistently using jumping in your horse’s training you will develop greater rhythm and flow to your overall ride.

    Work over your pole on the ground in walk, trot, and canter. Then begin to add more poles to your ‘track’. Test your ability to stay on the track and maintain rhythm between the poles. 

    Exercise 2 – Working Over a Cross Pole

    Who doesn’t love a nice cross pole?!  They are so helpful, inviting, and friendly to both the horse and rider. Cross poles come in all sizes.  From the center of the jump (the cross) being just 15cm (6 inches) in height, to the center being closer to 90cm in height (3 feet).  Regardless of size, most of the benefits remain the same, which is what makes this a super addition when including jumping in your horse’s training.

    A crosspole will help to develop you and your horses straightness further by inviting you both to the centre of the jump. 

    When you couple this with your training over the poles on the ground, it will allow you and your horse to really being developing strength and suppleness.  Cross poles also ‘seem’ smaller or lower than uprights. It makes me laugh how often a rider will happily jump a 45cm (18 inches) cross pole, but balk at riding an upright of the same height! Looks can truly be deceptive when it comes to cross poles, which is why they are great for building confidence.

    Focus on establishing a rhythm before the approach, such as on a 20m circle. Then work on maintaining that rhythm as you ride the straight line to your crosspole.

    Then work on your straightness after the fence. And finally, transition onto another 20m circle – this one on the other side of your jump.  The goal will be to keep the same rhythm and forwardness throughout the exercise. Simple and can be worked over quite a few times without the risk of injury, and effective :)

    Exercise 3 – Adding Another Fence

    Have you ever noticed how your interactions with your relations, in general, can often encourage (force) you into growing and developing as a person?! True story! Well, jumps that are related to each other can do a similar thing for you and your horse.  They encourage you to take what you have and what you can do and then develop it further.

    The key to safely adding another fence when using jumping in your horse’s training is to figure out what your horse is comfortable with right now. How much ground does he comfortably cover each canter stride…?

    Comfortable is a keyword here. Yes, later in your training you can use distances that don’t quite suit your horse to ask him to lengthen or shorten.  However, when you are just getting started with introducing jumping to your horse’s training, it is vital that your horse decides the distances.

    Again, start with a cross pole to a single pole on the ground.  Find out what distance really feels comfortable for your horse.  Then begin to build the pole on the ground into another cross pole. Once you and your horse are happily and comfortably jumping the two fences, you can begin to refine what you are doing. The options are endless here.  And the key is to build slowly.

    Try Some Jumping in Your Horse’s Training

    So, regardless of what your chosen discipline is, working over small fences can really help both horse and rider improve their connection and their training. From developing more feel for timing, to actually trusting each other more, riding over fences can be an amazing experience for all involved.

    Happy Riding
    Lorna

    More On This Topic:-

    More Training & Support