Author: Lorna Leeson

  • Groundwork for Horses and Rhythm in Training

    Groundwork for Horses and Rhythm in Training

    [fusebox_track_player url=”https://op3.dev/e/traffic.libsyn.com/dailystridespodcast/1259_Groundwork_for_Horses_and_Rhythm_in_Training.mp3″ title=”Groundwork for Horses and Rhythm in Training” social_linkedin=”true” social_pinterest=”true” social_email=”true” tweet_text=”Something different to work on with your horse…” hashtag=”equestrianpodcast” twitter_username=”strides_success” ]

    Rhythm is genuinely one of those things that can seem so simple on the surface.  And, don’t get me wrong, rhythm is a fairly simple concept. However, when we begin applying it to horses and riding, it is truly eye-opening just how deep we can go with the idea. A little like groundwork for horses…

    And, because rhythm is something we can approach from different perspectives and filters, the possibilities are pretty endless. So when we combine rhythm and groundwork for horses, we can really begin to develop and train. Both ourselves, and our horses.

    When working with your horse using groundwork, you can actually begin to both ‘see and feel’ how important rhythm is. 

    Syncing Your Body with Your Horse

    I am a firm believer in modeling or demonstrating things for your horse. To do this, we must first become aware of our body and how we are using it to communicate with our horses.  Become aware of your actions, breathing, rhythm, and energy in general. Once you are aware of your own physical presence, you can begin to ‘sync’ this with your horse.

    Try to coordinate your legs and footsteps with your horse’s hind legs and hind feet. Similarly, your shoulders with your horse’s shoulders. This is both for movement and, often, placement as well. 

    Start in the walk.  As you walk, move your feet in sync with your horse’s hind feet. Once you are both ‘in sync’, you can begin experimenting with how you can influence this part of your horse.  The rhythm and the length of stride.

    You can also begin to influence how the weight is carried by applying the half halt while on the ground, next to your horse. 

    Half Halt and Rhythm

    Rhythm, in and of itself, is generally pretty easy to establish. Finding a repeating sequence of footfalls is not too difficult.  However, very often the quality of the initially easily discovered rhythm can leave a lot of room for improvement. And this is where, as riders (whether in the saddle or on the ground) we must work on improving our abilities to ‘balance’ things a little more.

    Improving your skills as a rider means that you improve your coordination, your feel, and your understanding so that you can have a greater positive influence over your horse. 

    A half halt is a key tool when you’re working on this.  Being able to walk beside your horse and effectively ask for the half halt is a skill that takes time to refine. Doing this in a way that your horse understands is also pretty important! So, it makes sense that you understand your aids, and how to time them correctly. I have a full episode on this topic “Your Half Halt on the Ground with Your Horse” that goes deeper into this topic. 

    When you can use a combination of your aids, including your weight aids, at the right time to ask your horse to half halt while beside him/her on the ground, you can begin to ask bigger questions

    Groundwork for Horses

    Once you can begin to identify what is moving concerning our horse’s legs and bodies, and we understand how it is moving… We can place more focus on our influence over the movement.  And the options are limitless for how to develop this further. I am a firm believer that most of what we can do in the saddle, can be worked on while on the ground, whether this is true groundwork or lunging.

    And just like riding, groundwork takes dedication, consistency, time, and focus.  It requires both you and your horse to learn new things and is a great opportunity to grow your partnership together.

    From working in the stable while grooming and tacking up, to working in the arena, groundwork for horses is as versatile as it gets from a training perspective. In fact, I am pretty sure that if there is something you are struggling with in your riding, by finding a way to work on it, directly or indirectly, through groundwork, you can improve or transform it in your riding.

    I have created a full 4-week self-study program for you to use to really begin achieving results in your riding – and all while on the ground. There are audio horse riding lessons for you to use each day to develop your horse and improve your skills as a rider. And all are created with the intention to improve your riding as well. All of the details are HERE

    Happy Riding
    Lorna

    More on Groundwork for Horses

    Join Our Online Community of Equestrians

  • 3 Keys To More Consistent Contact

    3 Keys To More Consistent Contact

    [fusebox_track_player url=”https://op3.dev/e/traffic.libsyn.com/dailystridespodcast/1258_3_Keys_to_Consistent_Contact.mp3″ title=”3 Keys to Consistent Contact” social_linkedin=”true” social_pinterest=”true” social_email=”true” tweet_text=”Hi, you might enjoy this podcast episode about contact with your horse…” twitter_username=”strides_success” ]

    Contact can often look effortless for some horses and riders. And yet, for many other riders, consistent contact can seem like an enigma. Any efforts at consistency tend to lead to heaviness. Or a complete lack of any contact!  So where is this fine line between consistent, quality contact and washing lines?

    In order to develop contact with your horse, I feel that you must first understand what a ‘good’ contact is. This can often be confusing for many riders, so let’s start there…

    What’s Needed for Consistent Contact?

    Contact, for many riders, has to do with the reins.  And, yes, the reins do play a part in the contact conversation.  However, a good quality consistent contact is more than just the two strips of leather between your hand and your horse’s mouth.

    Contact is really the result of a lot of other things successfully working together first in your riding. Relaxation, rhythm, and suppleness are the obvious ones.

    As you begin to put all of the parts of your training together, over a period of time, you will see that contact begins to happen.  And this can be the challenge initially, maintaining contact.  Because, as you know, maintaining all of the other steps of the training scale that occurred before it, can also be a challenge! Especially when a bigger question is asked.

    Along with the obvious prerequisites for good consistent contact, are some more overlooked necessities. Things like your position, timing, and aids. And then your horse’s acceptance, and ability to take responsibility also need to be present.

    Click here for Free Half Halt Audio Lesson

    How It All Works Together

    Imagine being in a good position to ask a well-timed question and then allow the answer to happen.  There is the right amount of energy entering the channel that you and your horse create together (the container). Your horse is responsive and wants to work with you.

    You can feel the energy being created in his hindquarters and travel underneath you, along his back. As it does so, you can feel the lightness of the shoulders, head, and neck. The energy connects through to the ‘contact’ and then is harnessed to be reused again going forward. 

    The self-carriage you feel from both yourself and your horse is a key element to true, sustainable contact.  This self-carriage will only develop over time through correct and consistent practice. And this is a responsibility that both you and your horse share.  Each of you committed to carrying yourself so that the other ‘team member’ can do what they must do in order for you to both works together. That is true contact.

    True contact is an agreement that you both mutually respect and work towards sustaining as you develop together as a team. It’s the connection between horse and rider. 

    You can begin working towards this today by making sure that you are consistent with these three elements in your riding. This will allow your horse to begin working in a more consistent way as well.

     1. Hold with Thumbs, Not Fingers…

    It often amazes me how many riders have never been shown how to hold the reins properly.  They simply grab them with their hands and off they go. I’ve seen reins being held ‘backward’. Reins that are only connecting with the very tips of the rider’s index finger and thumb, almost yoga-like.  And I’ve seen other riders with their thumb wrapped around white knuckle fingers in an attempt to ‘keep’ the rein.

    While there are many ways to ‘use’ the rein, there really is only one effective way to hold it. And that is by passing it over the index finger and then ‘pinching it’ or ‘pressing it’ with the pad of your thumb. 

    The knuckles of your thumbs will be slightly bent, like a ‘roof’. And it is the thumb that holds the rein in place in your hand, not your fingers. By holding the reins this way, your fingers are instantly free to be used as a variation of the rein aids.  A squeeze.  Maybe a wiggle.  Often a vibration.  All are able to happen because they are not holding the rein.  Your thumb is.

     2. Your Hand is Not Yours…

    This can sound like an odd one!  But if you can begin to see everything below your elbow a little differently, it will help you and your horse create a softer, more consistent contact. I’ve already mentioned that self-carriage is one of the prerequisites for creating good quality, sustainable contact.  And this applies just as much to the rider as it does to the horse.

    By focusing on bending your elbows and carrying your hands, you allow a straight line to exist from each elbow to your horse’s mouth.  These are the true ‘reins’. Your elbows, all the way to your horse’s mouth. A straight channel. 

    This is the all-important second line that creates a position where you can be effective and allowing when riding your horse. When you drop your hands too low, this line will become a v shape.  If you lift your hands too high, the line will become an upside-down V.  Both will create a ‘break’ in the flow of the energy, which will result in energy either falling out or becoming blocked.

     3. Engage Your Other Aids

    It pains me to continue to see horses’ mouths being sawed left and right by misguided riders trying to get horses ‘on the bit’. If contact truly is an agreement, a mutually beneficial agreement, then sawing your horse’s mouth so that he moves away from the pressure (pain) cannot be part of it.

    Click here for Free Half Halt Audio Lesson

    Remember, contact is the RESULT of other things being present and having an influence. Contact is not your horse running around with his head ‘tucked in’ or your horse being ‘in a frame’. 

    One of the biggest parts riders misses when it comes to creating sustainable, consistent contact is the fact that energy must be both present and be replaced with new energy as it is being used. Meaning your horse must be going forwards. Forward does not just mean moving. It means thinking, being engaged, and moving with purpose.

    There is an essential relationship between your legs, seat, and hands that needs to be created and maintained as a rider. It will also need regular ‘upgrades’ and ‘tweaks’ as you develop. 

    Failing to take your legs and seat into account when it comes to successfully creating consistent contact will result in a heavy, dull, and lifeless pulling on the horse’s mouth. This is not true contact.

    Creating Consistent Contact

    As you begin working on this with your horse the next time you ride, remember that contact must be developed over time. Both you and your horse must have the necessary strength and development physically and mentally in order to maintain true contact.

    There are numerous audio horse riding lessons available to you inside of Connection that you can use to create this with your horse. Get started working on this today by joining HERE

    Happy Riding
    Lorna

    Click here for Free Half Halt Audio Lesson

    More on This Topic

    More Training & Support

  • Introducing the Canter to Walk Transition

    Introducing the Canter to Walk Transition

    [fusebox_track_player url=”https://op3.dev/e/traffic.libsyn.com/dailystridespodcast/1257_Introducing_Canter_to_Walk_to_Your_Training.mp3″ title=”Introducing the Canter to Walk Transition in Your Riding” social_linkedin=”true” social_pinterest=”true” social_email=”true” tweet_text=”Interesting episode on the canter…” hashtag=”horsepodcast” twitter_username=”strides_success” ]

    So you are a place in your canter where you want to begin to do a little ‘more’.  After a quick ‘google’ of all the different exercises, you see a canter to walk pop up a few times. Canter to walk?! Without a handbrake?!  Yes, and even better, this will begin to prepare you and your horse for so much more to come.

    The canter to walk transition can seem daunting when we begin to think about it first. However, once you and your horse have begun working successfully in a few key areas, it does not have to be as complicated as maybe you believe it is.

    The First Few Canter to Walk Transitions

    So, before we go any further with this, I feel that it’s important to realize that the first few transitions probably won’t be your best work!  It is completely normal for your horse to include a few, usually wobbly, steps of trot in before he reaches walk. This is okay.

    Very often, the first few attempts at the canter to walk, even with all of the preparations, can look and feel a little like a child learning to walk!  Hesitant, unbalanced, and looking for support.

    Keep in mind that canter to walk is not something your horse will do a lot by himself.  And going direct from canter to a balanced, rhythmic walk is definitely not something you will see happening among horses in a field!  This means that you will have to both explain and encourage your horse to perform this transition. And, depending on where you are in your training, that may take some time.

    Half Half in the Canter

    I suggest beginning to work on this transition by developing your half halts in the canter. Focusing on developing your ability to identify where you are inside of each canter stride. From here, the level of independence you have gained regarding your aids will play a big role.

    Click here to subscribe

    Begin by identifying the ‘1’ in the canter stride.  The point when the outside back leg has touched down. This, or just before it, is always a good place to half halt in the canter

    A key part to half halting in the canter is to remember to release and allow the ‘2’ to ‘swing’ forward. This is really where you can engage the energy and channel it forward.  Riders often make the mistake of ‘holding’ the half halt for too long and they cause the ‘2’ beat to become sticky and hollow.

    Then focus on repurposing and rechannelling the energy back into the next stride as you and your horse ‘reset’. The reset happens during the moment of suspension when the horse travels over the inside front leg and prepares to step into a new stride again.

    1257 Introducing Your Horse to the Canter to Walk Transition

    Shortening and Lengthening

    Once you can sync your half halts to your horse’s phase of the canter, you can begin playing with the influence you have. Start by lengthening the canter a little for a few strides. Key words in that sentence were ‘little’ and ‘few’! Too much too soon leads to a flat canter!

    Use the ‘2’ beat of each stride and your inside seat bone to ask for a little ‘more’ regarding the length of the stride. And remember that just 2″ longer is still longer… Lengthening takes development! 

    Once you can feel that you are both covering a little more ground in each stride, rebalance and come back to the ‘normal’ stride. Then, prepare again, but this time to shorten the stride slightly. I cannot overstress the importance of self-carriage and posture here. For you! If you model it, your horse will follow your lead.

    Just like you used your inside seatbone to ask for a longer stride, you can use it to do the same for a shorter one. Keep in mind that no one aid will work alone; your other aids are supporting and balancing all of the time. 

    Testing Your Progress

    Adjusting the stride length inside of the canter is not as easy as it seems. It will require your horse to develop more strength both in his hindquarters and through his back and core. As you begin to make progress, you can begin to hold the shortened stride for longer periods.  Initially, 1 or 2 strides in true rhythm and relaxation will be a great achievement. From there, begin working towards riding some movements and exercises there.

    A simple way to ‘test’ your progress is to see how short can you shorten without breaking into a trot. Again, I stress that the key is to maintain both rhythm and relaxation here. Another way to see how well your horse is doing is to offer the inside rein. As you offer it forward for him, he should be able to both maintain forwardness and balance.  As well as a level of collection inside the canter.

    This ‘collection’ is what you need to develop in order to be successful with the canter to walk transition. If your horse is truly balanced, he will be able to maintain a level of collection in his canter; without you ‘holding’ him there with the rein

    Now, a word of warning here… Collection is not slowing down! They are different things. Collection is when the same amount of energy or forwardness is there; it simply feels like it’s going ‘up’ instead of ‘out’.  Collection is also not you hanging on the reins pulling your horse into some strange contorted shapes! Collection is you and your horse working together, carrying yourselves, and engaging.

    Click here to subscribe

    Riding the Canter to Walk Transition

    A correct canter to walk transition is balanced, forward, and ‘light’.  Keep in mind that your horse really will need a certain level of development in his hindquarters so that he can both carry and balance himself. Trying this transition on a green or young horse is not going to produce the outcome you had hoped for; and will probably feel tense, heavy, and, therefore, ‘sticky’.

    As with all things riding-related, timing is a big part of the equation! When you ask for the transition will depend on how responsive your horse is. And how ‘suspended’ the canter is; how much space is inside of each stride. 

    Ideally, you will ask on the ‘part 4’ of the canter, the moment of suspension. Or the ‘roll’. This is when your horses outside back leg is coming back underneath him and preparing to ‘touch down’ again. However, if your horse is a little less responsive or a little ‘flat’ you can work on asking when the inside front leg is on the ground. The 3rd beat in the canter stride. Just be aware that you can cause things to become a little heavy by doing this.

    1257 Introducing Your Horse to the Canter to Walk Transition

    Start by Learning Control in the Canter

    First, learn to create more space and have more influence within the canter itself.  Remember, your horse must develop physically in order to ride the more complicated transition of canter to walk.  Being able to carry a little more weight on his hind quarter is key to this.

    Use your half halt inside of each canter stride to begin encouraging this in your horse. You can ask either on the 1st beat of each canter stride or just before that when your horse is in the air (part 4 of the stride).

    As you begin to have more influence over the canter itself, you can then start to ask questions.  A longer stride, for most horses, will usually be easier than a shorter one initially. And keep in mind that 2 inches longer is still longer! From there, begin working on shortening the strides in the canter. Initially, you may only be able to maintain the rhythm, forwardness, and balance for a couple of strides of lengthened or shortened canter. Work on developing this more over time.

    As you work on developing the canter itself, keep the end goal in sight. Your horse should begin to use is hind quarters more to balance inside of the canter, and rely less on his head and neck. 

    Then Work on Canter to Trot Transitions

    As you begin to develop and prepare your horse for the canter to walk transition, focus on both responsiveness and straightness.  Any buckling or wobbling in the canter to trot transitions will usually point to a lack of strength and development in horse and rider. Focus on riding timely, light as possible transitions from the canter into the trot.

    Once in trot, choose a set number of strides to ride before asking for the transition into the walk. Again, this will depend on you and your horse’s training and development. I would suggest starting with more and then working down to less. 

    Once you can successfully ride canter to trot, then trot for 5 strides before transitioning into a light and forward walk, begin to decrease the number of strides in trot. Ask for 4 trot strides the next time. And when that works well, try 3. And so on.

    Keep in mind that the chances of you and your horse getting the canter to walk transition correct the first time you try it are fairly slim! This is something that takes consistent work and focus from both of you. 

    The Canter to Walk Transition

    When you feel that you and your horse are now ready to ride the canter to walk transition, Start by riding a smaller circle close to the boundary fence or railing of the arena. Make sure that you are carrying yourself, your chest is open, and your hips are able to move unhindered by the weight of your upper body.

    Pay attention to how well you can maintain a balanced, rhythmic canter on the circle. Often just saying can-ter, can-ter, can-ter in rhythm with your horse’s stride can help with this. 

    Ask for the downward transition on the circle as your horse approaches the boundary railing or fence. You can use this artificial aid to help your horse understand what you are asking for.  I also strongly suggest using your voice aids, even if you don’t usually do so when riding.  A simple ‘Woah’ or ‘steady’ can really help your horse to understand you want him to ‘step down’ into the canter.

    From here, change how you move your seat with him in the canter. Think about not ‘swinging’ forward and, in doing so, telling your horse to stop doing the same. Rather think about ‘walk’ and move that way

    Click here to subscribe

    Focus and Self Carriage

    A key part of successfully riding any transition is to be aware of what you are doing throughout it. Many riders fall into the trap of just pulling back to create a downward transition. This will only help your horse to become heavy on the forehand, and unbalanced there as well!

    Continue to carry your body both in the preparation for the transition and through the transition.  Make sure you don’t throw yourself forward, intentionally or otherwise.  Remember, your horse’s front end must lighten to ride a well-balanced transition,  and it can’t do this if you are on top of it!

    Train yourself to think about what you are doing inside each part of the transition.  Become really mindful of what you are telling your horse. This will help prevent you from becoming heavy and ‘dead weight’ in the saddle.

    The final part of the transition is to connect your seat to your hands and mirror through them what you are doing with your seat.  Make sure that you are not grabbing or pulling on the contact as you prepare for and ask for the downward transition from canter to walk.  Also, that you remember to ‘give’ slightly as your horse steps into the walk to smooth out any excess tension.

    Time and Consistency

    Finally, make sure you are giving both yourself and your horse all the support you need as you work on this,  Remember, canter to walk is not the easiest thing you can ask your horse to do.  He, most likely, does not do this himself when in the paddock with his friends!

    He has to learn to move his body a different way, coordinate his legs, and remain balanced… This won’t happen overnight!  Be consistent with your training in the days, weeks, and even months prior to introducing it.

    If you can remain dedicated to helping you both develop in a way that does this, you will see success over time in working on this with your horse.

    Happy Riding
    Lorna

    Work Towards a Better Canter Today

    I realize that the canter to walk transition can seem daunting. However, with correct guidance and practice, you can make this a reality for you and your horse; whatever your canter currently looks like!  I can help you do this, step by step, starting with the walk to canter transition, and all on a private podcast feed that you can use when you ride your horse. My online membership for equestrians, Connection, is for riders who are working alone a lot of the time without a trainer or coach.

    It will help you to put the training into practice, while your ride yoru horse – without forgetting any of the pieces along the way. 

    Try it for a month (it’s a cancel anytime policy, no questions asked), and see how you go…  And if it’s canter you’re looking for, make sure you check out all of the content from September 2022… Trust me, one month of working on this can transform your riding and your horse’s training.

    Free Half Halt Riding Lesson

    If the canter to walk seems a little too daunting, I would love to help you begin seeing changes where you are right now in your riding. The half halt is the perfect place to begin this process. You can begin today by signing up for my free audio horse riding lesson
    on the topic.

    Click here to subscribe
    Created so that you can listen while you ride; you and your horse together, this training will help both you and your horse become more responsive and ‘working together’. Get your free audio horse riding lesson HERE

    More Episodes on the Canter

    Get Support & Guidance in Your Riding

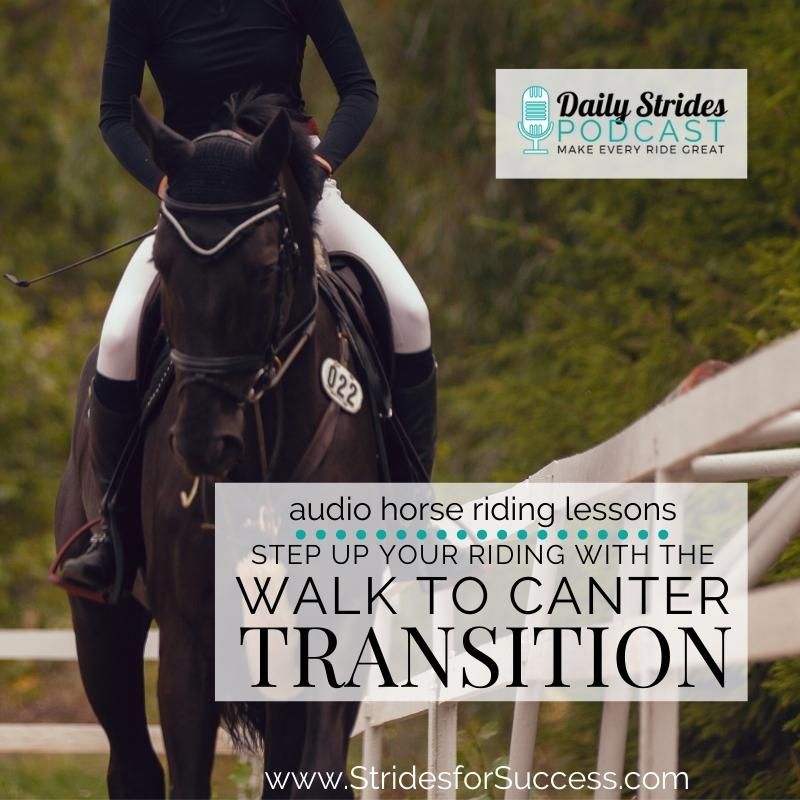
  • Step Up Your Riding with the Walk to Canter Transition

    Step Up Your Riding with the Walk to Canter Transition

    [fusebox_track_player url=”https://op3.dev/e/traffic.libsyn.com/dailystridespodcast/1256_Step_Up_Your_Riding_With_The_Walk_To_Canter_Transition.mp3″ title=”Step Up Your Riding with the Walk to Canter Transition” social_linkedin=”true” social_pinterest=”true” social_email=”true” tweet_text=”Something fun to try this week riding your horse…” hashtag=”walktocanter ” twitter_username=”strides_success” ]

    This transition is a personal favorite of mine.  To ride and to help other riders as well. I really do believe that the walk to canter transition can help you and your horse to connect more to each other.  It can help you to have more clarity over your canter aids, and your horse to become more responsive. And you both to develop so that your training can progress forward.

    In fact, the walk to canter can help horses and riders progress in ways that they don’t even realize they are.  It introduces a certain level of collection to the ride. For many riders, this is one of the best introductions to this as it feels very natural and ‘in flow’.

    You can begin introducing, or refining, the existing transition from the walk to canter today in your training by focusing on a few different elements.

    Your Canter Aids

    One of the reasons the walk to canter transition is so good for riders is due to the speed of the walk.  Many riders can feel flustered, bounced, rushed, or tense when preparing for and riding the trot to canter transition. Which is one of the reasons I love helping riders to effectively use the walk to canter transition in their training.

    The walk to canter transition allows riders enough time and space to identify the point in the stride to ask for the transition, as well as actually apply their aids in a meaningful and effective way. 

    I have an article and Daily Strides Podcast episode HERE that details the aids to ask for the canter that you might find useful for your riding.

    Timing Your Aids to Ask for Canter

    One of the biggest challenges riders have when it comes to getting into a canter with their horse is timing.  When you ask the question makes a huge difference to how your horse responds. If we ask at a point in the stride where he simply can’t respond, this can lead to excess tension, rushing, or just being ignored!

    When using the transition from walk to canter to really work on the timing of their ‘ask’ for the canter, it allows both horse and rider to begin riding cleaner transitions

    I would suggest spending some time on the walk familiarising yourself with what is moving where underneath you.  When you feel your right seatbone swing down and forwards, it means that your horse’s right back leg is also moving forwards.  As this is happening, your left seatbone will have moved up and is ‘moving backward’. This is because your horse’s left back leg is, at this moment, on the ground. His body is moving over the back leg, creating the ‘up’ feeling through your seatbone.

    You will ask for the canter as the outside back leg is moving forward and preparing to step down into the stride.  This will allow this leg to become the 1 in the 1,2,3 that makes up a canter stride. 

    I have another article and an episode of the Daily Strides Podcast HERE that goes into much more detail when it comes to timing your aids to ask for the canter.

    Increasing Responsiveness

    So often, we make the mistake of assuming this is a horse issue.  ‘My horse is not responsive enough’ is a common complaint among riders! I truly think this has more to do with you first.  And when you begin to become more responsive and intentional, your horse will respond by improving how well he listens.

    Begin building responsiveness by becoming very focused on what you want to make happen, when you want it to happen, and where you want it to happen – and stick to those decisions. 

    A great exercise you can use to help you work on increasing responsiveness is to ride set numbers of strides in each gait.  So, for example, 10 strides of walk followed by 10 strides of trot. Then back to 10 strides of walk again. As you and your horse improve the communication between you both, begin playing with the number of strides between each transition.

    The more responsive you both become, the easier you will find it to ride fewer strides in each gait while still maintaining your relaxation, balance, and suppleness.  

    This is when you know that you and your horse are on the same page, listening to each other, and ready to ‘step up’ into the canter from the walk.  I have a previous article and episode of the Daily Strides Podcast HERE that will help you to improve your responsiveness in your riding.

    Riding the Walk to Canter Transition

    Once you and your horse are clear on the aids, clear on the timing, and responsive towards each other, you can prepare to ask for the walk to canter transition. Start by focusing. on the rhythm of the walk, the energy inside of the walk, and the flexion.

    From here use your half halt to firstly get your horse’s attention, and then, from there, to gather and channel the energy a little more inside of the walk

    This will feel like a slight collection and your horse will need this in order to successfully make the transition from walk to canter. Your job in all of this is to set things up and then allow your horse to actually perform the transition. So many riders think it is their job to canter. It’s not. Make sure you engage your core, work on your posture, and allow your horse to simply ‘step into’ the new gait when you ask.

    I have a previous article and episode of the Daily Strides Podcast HERE on how important your posture is to a successful transition into the canter.

    From here, it is simply a matter of ‘asking’ and then allowing your horse to respond.

    Happy Riding
    Lorna

    Riding a Smooth & Timely Walk to Canter Transition

    Some exercises can have a ripple effect all through our riding when we dedicate some time and energy to making them better.  I believe that the walk to canter is one of those exercises and I am excited to help you master the transition this month with your horse.

    This group of episodes is available for you to begin working with today, inside of Connection. They are suitable for all horses and riders who are able to canter. They will help you both become clearer on the aids, and more focused on timing and its importance.  And more balanced and responsive as well. 
    Riding a Smooth and Timely Walk to Canter Transition

    More About Canter Transitions:-

    Get Support & Guidance in Your Riding

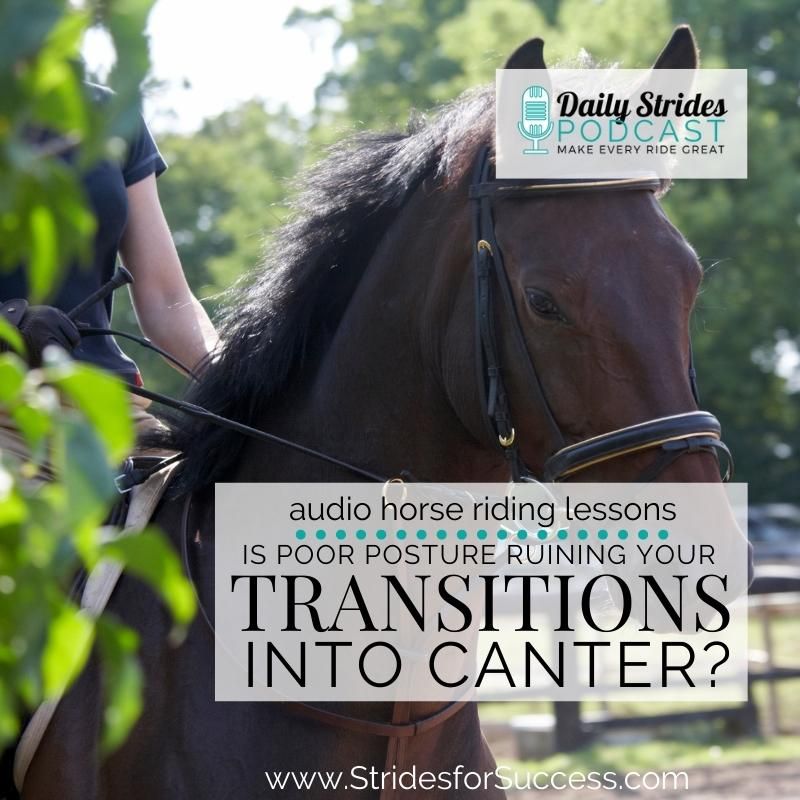
  • Could Poor Posture be Ruining Your Transitions to Canter?

    Could Poor Posture be Ruining Your Transitions to Canter?

    [fusebox_track_player url=”https://op3.dev/e/traffic.libsyn.com/dailystridespodcast/1255_Is_Poor_Posture_Ruining_Your_Transitions_Into_Canter.mp3″ title=”Could Poor Posture Be Ruining Your Transitions into Canter?” social_linkedin=”true” social_pinterest=”true” social_email=”true” tweet_text=”Here’s how to get better transitions into canter…” hashtag=”horsepodcast” twitter_username=”strides_success” ]

    The transition into canter is one that always gives us opportunities to develop and improve as riders. And it can do the same for our horses as well. And yet, for many riders, improvement is frustratingly slow! The good news is that it doesn’t have to be this way.

    Canter and transitions into the canter are one aspect of horse riding that can improve quickly, often with just the smallest of tweaks applied.

    The key is to be strategic about what you are tweaking. And be willing to look out for the effect it has on yourself, your horse, and the transition in general. One of the simplest ‘tweaks’ you can apply is around improving your posture when you ride.  By simply ‘sitting differently’ you can transform the transition for the better.

    Self-Carriage as a Rider

    Self-carriage is a big topic when it comes to horse riding. It’s something we are always trying to cultivate and improve in our horses.  And rightly so, as when your horse develops both the understanding and the ability to carry himself a little better, it opens doors to so many new opportunities for you both to work together.

    I think that if you are asking your horse to carry you, and he obliges. Well, the least we can do as a rider is to take responsibility for making that as easy as possible for him to do. Carry ourselves. 

    Unfortunately, terms like ‘shoulders back’ have been shouted for so long to so many riders, that true self-carriage has become a little, well, confused in our heads!  Rather than thinking about ‘shoulders back’, I suggest visualizing ‘opening your chest’.  So from the point of your one shoulder across the front of your chest to the point of your other shoulder. Open this space up.

    Couple this with the feeling of creating ‘space’ between your ribs and your hips.  Elongating your body. This is self-carriage (and engagement) through your body as a rider and it will help your transitions to canter.

    Poor Posture & Its Results…

    When you are in true self-carriage, coordinating and using. your aids become so much easier.  Meaning when we are heavy, slouched, and too relaxed (not enough engagement or tension) through our bodies, things can become muddled up very quickly!

    Your body becomes harder to move. Some aids are impossible to move independently.  And you can no longer move with the energy your horse is creating. 

    When riding, especially transitions to canter, you are either working with the energy or working against it. If your horse, because he is the kind soul that he is, does actually canter when you ‘ask’ we need to be in self-carriage. When we are not, by blocking this energy, you are telling your horse that his response to your ‘ask’ for the canter was the wrong one!

    Horses become confused very quickly when riders say ‘go’ only to quickly follow it with a ‘no’! Poor posture causes your body to say ‘no’ to his doing what you asked him to do… Not a good result! 

    1255 Could Poor Posture be Ruining Your Transitions to Canter

    Lack of Independence

    The other downside to poor posture, especially as you ask for transitions to canter is your lack of independence. This means that you are dependent on either your other aids for balance or support. Or your horse.  Either way, it will cause issues as your horse moves from the walk or the trot into the canter.

    If you are using your hands to balance in the saddle, this will make true contact impossible.  As well as stop the forward flow of energy your horse needs when performing transitions to canter.

    If you are dependent on your horse for support and balance, the upward energy created through transitions to canter will throw you off balance.  Both of these situations will cause both the transition and the canter that happens afterward to become tense for the horse and rider.

    Relaxation is the foundation of everything when riding. Creating excess tension due to a lack of independence through seat and aids will ruin your transitions to canter. 

    Light Transitions to Canter

    Begin by modeling, through your body, what you want your horse to do.  In the transitions to canter focus on carrying yourself. By doing this you will both communicate with clearer aids and create the space and balance necessary for the transition to happen.

    The transitions to canter are ‘upward’.  They feel like a step up into the new gait. If we block that upward movement of the energy, our horses cannot respond as we would like them to. 

    As your horse ‘steps up’ into the canter, allow your seat to follow first. Then your hands, and finally the rest of your body.  Work on strengthening the connection between your seat and your hands.  Whatever your seat does through the transition, and in the canter itself, let your hands do the same.

    By practicing this consistently and preparing your transitions to canter beforehand, you will find that you will not only have a better transition. But you will also your canter will improve as well.

    Happy Riding
    Lorna

    Improve Your Canter

    Improve Your Canter is a 4-week program you can use to help develop both you and your horse in the canter. It is suitable for riders working alone without a trainer or coach. In there you will learn what is happening underneath you and why. You will also put this into practice using audio horse riding lessons. tailored for each day of the program, with your horse.

    CLICK HERE TO JOIN TODAY

    More About Canter Transitions:-

    Get Support & Guidance in Your Riding

  • Have More Success When Training Your Horse Alone

    Have More Success When Training Your Horse Alone

    [fusebox_track_player url=”https://op3.dev/e/traffic.libsyn.com/dailystridespodcast/1254_More_Success_When_Training_Your_Horse_Alone.mp3″ title=”Creating Success When Training Your Horse; Even When Working Aone” social_linkedin=”true” social_pinterest=”true” social_email=”true” tweet_text=”Here’s a step by step to use when training your horse alone” hashtag=”horsetraining” twitter_username=”strides_success” ]

    Are all the months starting to look and feel the same for you and your horse? Especially if you have been training your horse alone! Have you been experiencing a case of ‘same ride again’ on repeat, over and over again?  If so, here are 5 tips to help you to achieve more when training your horse.  Especially if you are working alone without a trainer or a coach to help.

    More Success When Training Your Horse Alone

    Let’s be honest here, we all want ‘more’.  We want to do things in as little time as possible, and in the easiest way possible as well.  And while the following pointers will certainly help you to do this, it is also really important to remember 2 other key ingredients when training horses.

    You must factor in time and consistency when working with your horse. If either one of those is missing, any results you achieve will most likely be short-term.

    So, while you begin working and using the following formula for each training session, make sure you are coupling it with those two most important of important elements as well.

     1. Focus on One Thing

    This is one of those ‘simple to say, but not all that easy to do’ things when it comes to riding. I mean, how hard could it possibly be to focus on one outcome for each ride?  Oh… More difficult than you think!

    Distractions are everywhere when working with your horse. You will notice ‘other things’ that need attention literally crop up around every single corner! 

    One of your greatest responsibilities as your horse’s trainer is deciding if each of those ‘other things’ is something that needs to be worked on immediately when training your horse alone.  Is it something that, without first really working on it, will actually prevent you from whatever it is you do want to achieve in that ride? Or is it something that can be the focus of another training session at another time?

     2. Be Intentional Before You Mount Up

    Regardless if you give your horse a 10-minute’ lick and a promise’ groom, or a 30-minute luxurious make-over, there is always more you can do inside of each session.  When you know what you will work on in the arena, you can begin to incorporate elements into your time before mounting up.

    For example, if your focus for the upcoming training session together is to create cleaner transitions into the canter, you could work on a little responsiveness while grooming.  Things like asking your horse to move ‘over’. Or asking for him to move ‘back’.

    It is worth remembering that you are ALWAYS training your horse, alone or not. From the moment he knows that you are there, the conversation has begun… 

    1254 More Success When Training Your Horse Alone 2

    3. Use Your Warm-Up

    The first 10 minutes of each ride with your horse have the potential to set the tone for whatever follows. So rather than letting it all unfold by chance, it makes sense to become more intentional with it.  If you already know what you will be working on inside of the actual working part of your riding session with your horse, use this time to visualize how it will look and feel when you achieve it.

    One of the best things we can do to support ourselves as riders is to begin taking the actions of someone who has already achieved what we want. 

    Maybe that looks like sitting up taller.  Or use the time to ‘fine tune’ your position and aids. It might involve some breathing exercises.  Closing your eyes and really get to feel what your horse is doing underneath you. The list is endless, and we have not even begun to mention your horse in the list!

    Your warm-up and cool-down periods are valuable time you can work on improving, connecting with, or developing your relationship with your horse, or your skills as a rider. 

    4. Dedicate 15 to 20 Minutes

    I think the biggest mistakes riders make are doing too much in a single session and then losing hope when they cannot sustain or see the results they were after for very long.  As I mentioned at the beginning, when you’re training your horse alone, time is an important part of the process.

    You will achieve more when training your horse alone if you can create more short, quality, focused sessions together. Rather than long, tiring rides that are too far apart. 

    When you know what you want to work on, commit to 15 or 20 minutes of quality work on it.  This will allow both you and your horse to develop your concentration, physical strength, and fitness.

    Regularly doing things will also allow you both to develop your confidence; in yourselves and each other. Both are key when successfully training your horse alone.

    5. Keep Track of Your Training

    Finally, as your horse’s trainer (yes, you are!), it is your responsibility to record and track your rides and your progress.  Relying purely on feelings and emotions when it comes to training is a recipe for disaster.

    It is only when you have actual evidence of each ride, and you review this evidence, that you can begin to see patterns that you can use to make even more progress. 

    It is also worth noticing what happens after you track for a significant period of time; your ideas about what works and what doesn’t become more clear.  You will begin to instinctively know, without even having to think, what to do in most situations you find yourself with your horse.

    The longer you track, the more you can begin to trust your feelings and emotions regarding your riding… And more ‘in tune’ you will become with both yourself and your horse. 

    For me, that makes all of the effort initially required to track worthwhile :)

    Happy Riding
    Lorna

    Find in the Gaps In Your Horse’s Training

    If you are interested in learning more about where you might be missing pieces in your riding, sign up for my new free training “ FIND THE GAPS IN YOUR HORSE’S TRAINING.  This audio training can be listened to, via podcast app, to help you figure out where to begin working with your horse.

    You can sign up and get it, for free, HERE

    More on this Topic:-

    Get Support & Guidance in Your Riding