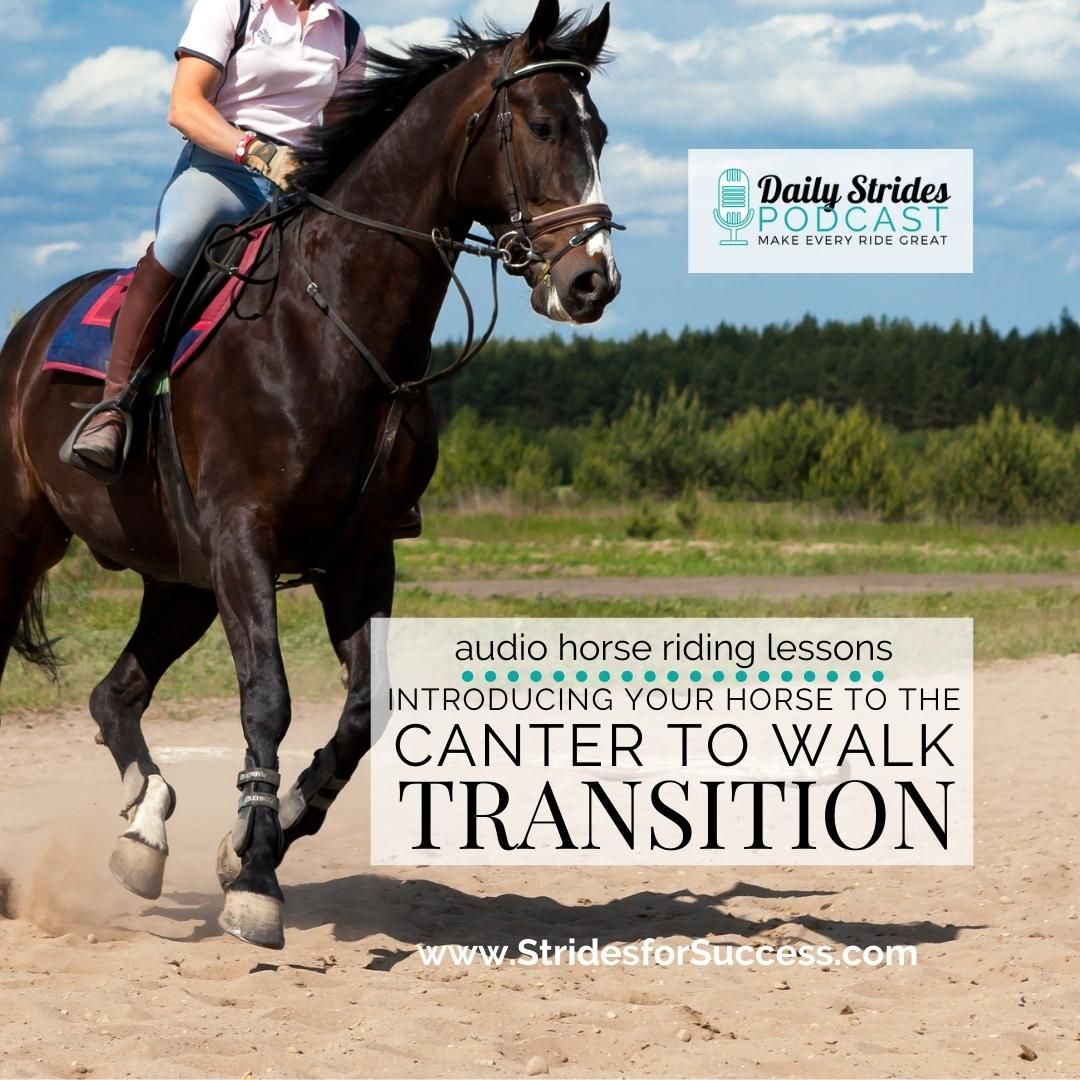
So you are a place in your canter where you want to begin to do a little ‘more’. After a quick ‘google’ of all the different exercises, you see a canter to walk pop up a few times. Canter to walk?! Without a handbrake?! Yes, and even better, this will begin to prepare you and your horse for so much more to come.
The canter to walk transition can seem daunting when we begin to think about it first. However, once you and your horse have begun working successfully in a few key areas, it does not have to be as complicated as maybe you believe it is.
The First Few Canter to Walk Transitions
So, before we go any further with this, I feel that it’s important to realize that the first few transitions probably won’t be your best work! It is completely normal for your horse to include a few, usually wobbly, steps of trot in before he reaches walk. This is okay.
Very often, the first few attempts at the canter to walk, even with all of the preparations, can look and feel a little like a child learning to walk! Hesitant, unbalanced, and looking for support.
Keep in mind that canter to walk is not something your horse will do a lot by himself. And going direct from canter to a balanced, rhythmic walk is definitely not something you will see happening among horses in a field! This means that you will have to both explain and encourage your horse to perform this transition. And, depending on where you are in your training, that may take some time.
Half Half in the Canter
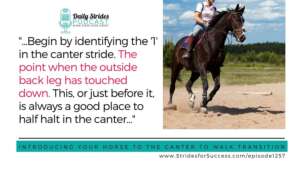
I suggest beginning to work on this transition by developing your half halts in the canter. Focusing on developing your ability to identify where you are inside of each canter stride. From here, the level of independence you have gained regarding your aids will play a big role.

Begin by identifying the ‘1’ in the canter stride. The point when the outside back leg has touched down. This, or just before it, is always a good place to half halt in the canter
A key part to half halting in the canter is to remember to release and allow the ‘2’ to ‘swing’ forward. This is really where you can engage the energy and channel it forward. Riders often make the mistake of ‘holding’ the half halt for too long and they cause the ‘2’ beat to become sticky and hollow.
Then focus on repurposing and rechannelling the energy back into the next stride as you and your horse ‘reset’. The reset happens during the moment of suspension when the horse travels over the inside front leg and prepares to step into a new stride again.
Shortening and Lengthening
Once you can sync your half halts to your horse’s phase of the canter, you can begin playing with the influence you have. Start by lengthening the canter a little for a few strides. Key words in that sentence were ‘little’ and ‘few’! Too much too soon leads to a flat canter!
Use the ‘2’ beat of each stride and your inside seat bone to ask for a little ‘more’ regarding the length of the stride. And remember that just 2″ longer is still longer… Lengthening takes development!
Once you can feel that you are both covering a little more ground in each stride, rebalance and come back to the ‘normal’ stride. Then, prepare again, but this time to shorten the stride slightly. I cannot overstress the importance of self-carriage and posture here. For you! If you model it, your horse will follow your lead.
Just like you used your inside seatbone to ask for a longer stride, you can use it to do the same for a shorter one. Keep in mind that no one aid will work alone; your other aids are supporting and balancing all of the time.
Testing Your Progress
Adjusting the stride length inside of the canter is not as easy as it seems. It will require your horse to develop more strength both in his hindquarters and through his back and core. As you begin to make progress, you can begin to hold the shortened stride for longer periods. Initially, 1 or 2 strides in true rhythm and relaxation will be a great achievement. From there, begin working towards riding some movements and exercises there.
A simple way to ‘test’ your progress is to see how short can you shorten without breaking into a trot. Again, I stress that the key is to maintain both rhythm and relaxation here. Another way to see how well your horse is doing is to offer the inside rein. As you offer it forward for him, he should be able to both maintain forwardness and balance. As well as a level of collection inside the canter.
This ‘collection’ is what you need to develop in order to be successful with the canter to walk transition. If your horse is truly balanced, he will be able to maintain a level of collection in his canter; without you ‘holding’ him there with the rein
Now, a word of warning here… Collection is not slowing down! They are different things. Collection is when the same amount of energy or forwardness is there; it simply feels like it’s going ‘up’ instead of ‘out’. Collection is also not you hanging on the reins pulling your horse into some strange contorted shapes! Collection is you and your horse working together, carrying yourselves, and engaging.

Riding the Canter to Walk Transition
A correct canter to walk transition is balanced, forward, and ‘light’. Keep in mind that your horse really will need a certain level of development in his hindquarters so that he can both carry and balance himself. Trying this transition on a green or young horse is not going to produce the outcome you had hoped for; and will probably feel tense, heavy, and, therefore, ‘sticky’.
As with all things riding-related, timing is a big part of the equation! When you ask for the transition will depend on how responsive your horse is. And how ‘suspended’ the canter is; how much space is inside of each stride.
Ideally, you will ask on the ‘part 4’ of the canter, the moment of suspension. Or the ‘roll’. This is when your horses outside back leg is coming back underneath him and preparing to ‘touch down’ again. However, if your horse is a little less responsive or a little ‘flat’ you can work on asking when the inside front leg is on the ground. The 3rd beat in the canter stride. Just be aware that you can cause things to become a little heavy by doing this.

Start by Learning Control in the Canter
First, learn to create more space and have more influence within the canter itself. Remember, your horse must develop physically in order to ride the more complicated transition of canter to walk. Being able to carry a little more weight on his hind quarter is key to this.
Use your half halt inside of each canter stride to begin encouraging this in your horse. You can ask either on the 1st beat of each canter stride or just before that when your horse is in the air (part 4 of the stride).
As you begin to have more influence over the canter itself, you can then start to ask questions. A longer stride, for most horses, will usually be easier than a shorter one initially. And keep in mind that 2 inches longer is still longer! From there, begin working on shortening the strides in the canter. Initially, you may only be able to maintain the rhythm, forwardness, and balance for a couple of strides of lengthened or shortened canter. Work on developing this more over time.
As you work on developing the canter itself, keep the end goal in sight. Your horse should begin to use is hind quarters more to balance inside of the canter, and rely less on his head and neck.
Then Work on Canter to Trot Transitions
As you begin to develop and prepare your horse for the canter to walk transition, focus on both responsiveness and straightness. Any buckling or wobbling in the canter to trot transitions will usually point to a lack of strength and development in horse and rider. Focus on riding timely, light as possible transitions from the canter into the trot.
Once in trot, choose a set number of strides to ride before asking for the transition into the walk. Again, this will depend on you and your horse’s training and development. I would suggest starting with more and then working down to less.
Once you can successfully ride canter to trot, then trot for 5 strides before transitioning into a light and forward walk, begin to decrease the number of strides in trot. Ask for 4 trot strides the next time. And when that works well, try 3. And so on.
Keep in mind that the chances of you and your horse getting the canter to walk transition correct the first time you try it are fairly slim! This is something that takes consistent work and focus from both of you.
The Canter to Walk Transition
When you feel that you and your horse are now ready to ride the canter to walk transition, Start by riding a smaller circle close to the boundary fence or railing of the arena. Make sure that you are carrying yourself, your chest is open, and your hips are able to move unhindered by the weight of your upper body.
Pay attention to how well you can maintain a balanced, rhythmic canter on the circle. Often just saying can-ter, can-ter, can-ter in rhythm with your horse’s stride can help with this.
Ask for the downward transition on the circle as your horse approaches the boundary railing or fence. You can use this artificial aid to help your horse understand what you are asking for. I also strongly suggest using your voice aids, even if you don’t usually do so when riding. A simple ‘Woah’ or ‘steady’ can really help your horse to understand you want him to ‘step down’ into the canter.
From here, change how you move your seat with him in the canter. Think about not ‘swinging’ forward and, in doing so, telling your horse to stop doing the same. Rather think about ‘walk’ and move that way
Focus and Self Carriage
A key part of successfully riding any transition is to be aware of what you are doing throughout it. Many riders fall into the trap of just pulling back to create a downward transition. This will only help your horse to become heavy on the forehand, and unbalanced there as well!
Continue to carry your body both in the preparation for the transition and through the transition. Make sure you don’t throw yourself forward, intentionally or otherwise. Remember, your horse’s front end must lighten to ride a well-balanced transition, and it can’t do this if you are on top of it!
Train yourself to think about what you are doing inside each part of the transition. Become really mindful of what you are telling your horse. This will help prevent you from becoming heavy and ‘dead weight’ in the saddle.
The final part of the transition is to connect your seat to your hands and mirror through them what you are doing with your seat. Make sure that you are not grabbing or pulling on the contact as you prepare for and ask for the downward transition from canter to walk. Also, that you remember to ‘give’ slightly as your horse steps into the walk to smooth out any excess tension.
Time and Consistency
Finally, make sure you are giving both yourself and your horse all the support you need as you work on this, Remember, canter to walk is not the easiest thing you can ask your horse to do. He, most likely, does not do this himself when in the paddock with his friends!
He has to learn to move his body a different way, coordinate his legs, and remain balanced… This won’t happen overnight! Be consistent with your training in the days, weeks, and even months prior to introducing it.
If you can remain dedicated to helping you both develop in a way that does this, you will see success over time in working on this with your horse.
Happy Riding
Lorna
Work Towards a Better Canter Today
I realize that the canter to walk transition can seem daunting. However, with correct guidance and practice, you can make this a reality for you and your horse; whatever your canter currently looks like! I can help you do this, step by step, starting with the walk to canter transition, and all on a private podcast feed that you can use when you ride your horse. My online membership for equestrians, Connection, is for riders who are working alone a lot of the time without a trainer or coach.
It will help you to put the training into practice, while your ride yoru horse – without forgetting any of the pieces along the way.
Try it for a month (it’s a cancel anytime policy, no questions asked), and see how you go… And if it’s canter you’re looking for, make sure you check out all of the content from September 2022… Trust me, one month of working on this can transform your riding and your horse’s training.
Free Half Halt Riding Lesson
If the canter to walk seems a little too daunting, I would love to help you begin seeing changes where you are right now in your riding. The half halt is the perfect place to begin this process. You can begin today by signing up for my free audio horse riding lesson
on the topic.
Created so that you can listen while you ride; you and your horse together, this training will help both you and your horse become more responsive and ‘working together’. Get your free audio horse riding lesson HERE
More Episodes on the Canter
Get Support & Guidance in Your Riding
-
-
- Free Half Halt Training – To Use While Riding Your Horse
- Join Connection today and transform your riding journey
- Improve Your Canter – 4 Week Program
- Online community for equestrians working on their mindset & Fitness
- Online Community for equestrians focusing on re-schooling horses (and ex-racehorse
-
Leave a Reply