Tag: Aids

  • 3 Ways to Use the Your Half Halt in Your Riding

    3 Ways to Use the Your Half Halt in Your Riding

    [fusebox_track_player url=”https://op3.dev/e/traffic.libsyn.com/dailystridespodcast/1173-3_Ways_to_Use_the_Half_Halt_in_Your_Riding.mp3″ title=”3 Ways to Use the Half Halt in Your Riding” social_linkedin=”true” social_pinterest=”true” social_email=”true” tweet_text=”Not just for steadying… Here are 3 ways to use the half halt in your riding” hashtag=”equestrianpodcast” twitter_username=”strides_success” ]

    Can you put into words what the half halt is? Let’s say you are speaking with your friend, who is not a horsey person, and you’re telling her all about the half halt. What would you say? This week I had two eye-opening conversations. One with a rider and one with my sister… I drew a similar conclusion from both conversations.

    My conclusion? There are a whole lot of riders out there who don’t really know what the half halt is, or why everyone goes on and on about it…

    So, back to you and your version of the half halt… It might be easier to start with what it is not. A half of a halt! But, you knew that, didn’t you. And yet, there are many riders who are surprised at that. “It’s kind of slowing down, but not actually letting the horse stop…, I think…” No, that’s not quite it.

    What is the Half Halt

    The half halt is a few things in riding. However, we can simplify things by dividing the purpose of the half halt into three simple categories

    1. An effective ‘intercom’ system between you and your horse
    2. A little ‘fixer-upper’
    3. An effective way to help you and your horse maintain balance, focus, and forwardness

    I am a firm believer that most riders can take the number of current half halts they ride every time they’re in the saddle and double or triple that number. And that is just to get started with! We are simply not doing enough half halts. And the irony is, that when you are getting started with it, the more you do, the less you will have to do it later.

    The half halt is really one of those things that you can do a lot of the work up front and reap the benefits later.

    1. “Can I Have Your Attention Please”

    Notice it is not a question, but rather a statement. The intercom does not say, “erm, excuse me, erm, can you listen to what I’m about to say please?”. No, the Ding Dong that goes before the announcement is just that. A noticeable and interrupting Ding Dong. And thank goodness for that! Can you just imagine how many flights, buses, trains alone would be missed if it merely ‘asked’ for your attention, rather than simply demanding it?!

    Your half halt is your Ding Dong to your horse. It is your way of telling your horse that you are about to say something of importance and he had best listen and pay attention.

    Now, obviously, just like the Ding Dong, it is your horse’s choice as to whether or not he listens. However, over time, as you begin to really consistently work on your timing and your effectiveness of your Ding Dong, you will get a higher ‘effectiveness’ rating.

    Your job is to begin making sure that whatever you are following up your half halt with, is clearly communicated and worth your horses time and attention to listen to.

    2. Whoops! Let’s Get Back on Track; Shall We?

    The second use of the half halt is to help correct when things go a little ‘wonky’ or go wrong. It is an effective way to regroup and, from this newly focused place, continue on the journey. And that is a key piece of information; continue on.

    You see, the half halt is not the end. It is not a stop. It is simply a ‘let’s all get on the same sheet and move forwards again’.

    Every ride you have is a little like a patchwork quilt. A piece where things worked. Then a break. Then a piece where it worked again. Followed by another adjustment. It is a continuous course correction. From the first stride to the last. The half halts, in this case, are the joins that help get you onto the next block.

    3. Let’s Maintain This While We Can…

    The third use of the half halt is to balance or rebalance your horse and yourself in the saddle. Things are still ‘on track’ and going as you would like. However, there is something coming up that might require a little more attention. A little more finesse. There is a chance that things could go wrong…

    You can use a quiet, refined half halt to help ‘steady the ship’ and ride through something that might otherwise result in you losing the energy, forwardness, and rhythm of the movement. In this case, the half halt simply acts as a reminder for both horse and rider to focus.

    It helps you both to work together as a team in order to maintain what you are doing at that moment.

    Adding To, Not Taking From, the Conversation

    The half halt is rarely a ‘one time only’ event.

    It is so important to remember that one half halt will almost never stand alone. There will be a few, in close and quick succession. Depending on how green the horse is or the rider’s aids are, there can be a lot more than a few in the same quick succession.

    Smoothing out your half halts takes time. The half halt itself must be smooth and only contain as much energy as is needed for the purpose.

    But between the half halts must also be smooth. And, often this has a steeper learning curve than the half halt itself. Failure to ‘smooth things out’ results in j.e.r.k.y and c.h.o.p.p.y riding for horse and rider. Yes, the half halt will be effective, however, it also takes from the whole conversation.

    Most riders don’t struggle with the half halt. They struggle to balance the half halt. To balance their aids and the application of their aids with what is required at that exact moment in the conversation.

    This is why no two half halts will be the same…

    If you would like more help with your half halts, join me inside of Connection today.

    Happy Riding
    Lorna

    Additional Resources for Equestrians:-

  • 4 Actions to Maintain ‘Forward’ in Your Riding

    4 Actions to Maintain ‘Forward’ in Your Riding

    [fusebox_track_player url=”https://op3.dev/e/traffic.libsyn.com/dailystridespodcast/1169_4_Actions_to_Maintain_Forward_in_Your_Riding.mp3″ title=”4 Actions to Maintain Forward in Your Riding” social_linkedin=”true” social_pinterest=”true” social_email=”true” tweet_text=”Have you a habit of getting ‘stuck in the mud’ when it comes to your riding? Here’s how to get ‘unstuck’” hashtag=”equestrianpodcast” twitter_username=”strides_success” ]

    Have you ever considered that, if something is not ‘working’ in your riding, the reason might just be a lack of forward? We spend a lot of our focus on making sure we have established relaxation and rhythm. Yet, working forward is actually essential for either of those two to be present and working for you in your riding.

    Here are 4 simple actions you can take every time you ride to help you begin to both establish and maintain forward in your riding.

    Firstly, What Is Forward?

    Forward is when you and your horse are going somewhere with a sense of purpose. It is the opposite of going nowhere slowly! It is the energy, the intention, and the momentum that must be present in order for anything else to work.

    You must think forward. You must feel confident moving forward and you must then take action on the forward. It is mental, emotional, and physical.

    I believe that forward must be present and established before relaxation and rhythm. And yet, forward is not rushing and racing. It is not frantic or chaotic. Nor is it excessive tension. It is mental, emotional, and physical.

    1 . Look Where You Want To Go

    Sage wisdom! And yet, when the going gets rough, so many riders forget all about this one simple action that can help them move through and past the challenge. When you look where you want to go, it helps you to continue to take action to get there.

    When you ride today, notice how often catch yourself staring at your hands or your horse’s head/neck.

    This is something I notice time and again when working with riders in the arena. They become obsessed with their horse’s head and neck, particularly when they feel mental discomfort concerning what they are working on.

    Another bad habit many riders have developed is to continuously look down at their hands. As though expecting something to appear there… It won’t. And you are simply making it more difficult to maintain forwardness when you do this in your riding.

    2 . Carry yourself with purpose

    Posture is important when riding. It is also vital when establishing and maintaining forwardness in your riding. However, when we feel unsure about something, often we have to mindfully change our posture. You know what I am speaking about.

    The rider who feels confident and is thinking forward looks very different to the rider who is ‘stuck’ in the moment or movement.

    When you are in the saddle today, be present to what you are thinking and how this is impacting your posture. Notice when you are ‘playing small’. And then actively change that. Sit tall in the saddle. Open your chest and shoulders. Allow your seat to move with the horse. Open your hips and knees. Let your joints become shock absorbers…

    Carrying yourself is one of the simplest yet most effective things you can do to positively impact your conversation with your horse.

    3 . Develop the Relationship Between Your Seat and Your Hand

    Your riding aids are important when establishing and maintaining forwardness in your riding. There is a connection between your seat and your hands. Your seat will ‘set up’ the actions you take with your hands. By acknowledging this connection exists, and then cultivating it, you can begin to firstly ‘allow’ the forwardness and, later, direct the forwardness.

    Often we ‘say’ forward to our horse, but because we feel unsure of our own abilities to handle the situation, we then say ‘whoa’ with our aids. I spoke about this in THIS PREVIOUS EPISODE all about blocking with your seat.

    Think about the relationship between your seat and your hand every time you ask a question to your horse. Develop the connection between the two.

    Watch how it will help you to not only establish forwardness but to maintain it as well. Even when things don’t go exactly to plan. Or you are not feeling ‘comfortable’.

    4 . Plan Your Next Move

    The final action item you can put into practice today in the saddle to help you maintain forward is to plan your moves. No more deciding to canter at the drop of a hat. Or making a handbrake turn because you suddenly realized you should do something different.

    Planning each move allows both you and your horse to learn to trust the forwardness.

    It will help you to more intentionally, and therefore accurately, direct the energy. This leads to a smoother ride and a ride that feels aligned, throughout. This is particularly important when those movements of discomfort show up.  Think through each movement. See yourself and your horse happily completing it and working forward from it.

    Learn to Notice Your Discomfort

    When we feel emotionally uncomfortable in our riding, we often sacrifice forward. We do this in life as well. It feels easier to hunker in and hid, rather than doing the work and moving on through.

    Keep in mind that things often have to become a little messy before they become what we want.

    Learn to become comfortable with the messy, and by taking consistent action, move through it.
    Happy Riding
    Lorna

    Additional Resources for Equestrians

  • Learning to Stop Blocking with Your Seat While Riding – Part 2

    Learning to Stop Blocking with Your Seat While Riding – Part 2

    Are you guilty of saying one thing to your horse, when you actually mean another?  You’re not alone!  This is the second part of a 2 part series all about blocking with your seat, and how to stop doing it! Part 1 is HERE

    [fusebox_track_player url=”https://op3.dev/e/traffic.libsyn.com/dailystridespodcast/1167-Learning-to-Stop-Blocking-with-Your-Seat-Part-2.mp3″ title=”Learning to Stop Blocking with Your Seat – Part 2″ social_linkedin=”true” social_pinterest=”true” social_email=”true” tweet_text=”3 exercises to help you stop blocking your horse with your seat when you ride…” hashtag=”equestrianpodcast” twitter_username=”strides_success” ]

    Before we dive into the actual riding exercises you can do to discover if you have been blocking.  And then, using those same exercises to actually begin allowing.  Let’s get clear on what we mean when we say ‘blocking’.

    Blocking is when you mean to say ‘carry on’, but instead you say ‘whoa’. It is applying the resisting force of your seat when you actually want to simply allow your horse to really move your seat.

    Are You Blocking with Your Seat While Riding? Part 2

    Exercise 1:- Allowing in the Walk

    A lot can be learned about your influence on your horse in the walk. Slight changes and tweaks to what you are doing can have a big and, very important, noticeable impact on your horse’s way of going. Use this to your advantage and test yourself…

    In halt, take both feet out of your stirrups. From here, ask your horse to walk forward. Your goal is to simply follow your horse with your seat. Like dancing. Your horse is the lead partner. You are literally a split second ‘behind’ your horse’s movement and yet moving with him – not being dragged!

    As your horse walks, pay close attention to the rhythm of the walk and how much ground he is covering with each stride.

    From here, notice which leg is moving when underneath you. Your left seat bone will dip down (lower) and move forwards when your horses left hind leg is in the air and moving forwards. When this is happening, your right seat bone will rise up and move backward. This corresponds with your horse’s right hind foot being on the ground and his body moving over it.

    Get To Know Your ‘Gears’

    As mentioned in the previous episode and blog post HERE, you have 3 basic ways you can use your seat when riding. Go, whoa, and neutral. You can ask for ‘more’, you can steady or slow things down, or you can affirm what your horse is doing and tell him to ‘carry on’.

    Begin playing with the ‘three gears’ of your seat. Go, whoa, and neutral. Driving, resisting, and allowing.

    Go versus Neutral

    Start with ‘go’ first. Again, notice the movement of your seat and how this corresponds with your horse’s hind legs. Remember that when asking for more, there can be a temptation to ‘drive’. As in, dig a hole! Resist this temptation! Simply think about ‘encouraging’ your horse forward a little more through the energy of your seat.

    Go will not be used all the time. Riders begin ‘driving’ when they confuse ‘go’ and ’neutral’. They confuse driving and allowing.

    You will only say ‘go’ when you either need to add more energy or you are changing what you are doing. Riding in ‘go’ or driving for the entire ride will result in your horse ignoring your aids. This then results in the rider doubling down on their efforts. Go is not allow!

    Whoa versus Neutral

    From here, play with resisting. Again, it is often easiest to begin this by thinking of a swing and how you would ‘stop’ the swing with your body. Like go, whoa is only used when you are either balancing or changing what you are doing. Otherwise, you should, again, ride in neutral.

    Blocking occurs when riders are riding the whole ride, or a vast proportion of it, in whoa.

    Playing with Your Gears in Walk

    Once you can feel how each ‘gear’ feels in the walk, begin playing with them. Be intentional about when and how you use them. Notice what influence each ‘gear’ has over your horse’s way of going.

    As with all aids, your seat aid will not just ‘stand-alone’ when you use it.

    Notice the balance of your seat aid with your other aids and how you can begin tweaking the pressure, the sequence, and the timing of each aid. Also, play with which aid has a ‘lead role’ and which has a supporting role in each question you ask of your horse. All horses are different. Therefore each horse will respond to your aids in a slightly different way.

    Dedicate time to discovering which aids your horse prefers when communicating, and then begin refining those aids.

    Exercise 2:- The Sitting Trot

    Oh, this one is a biggie when it comes to riders. In my experience, the more movement in a rider’s upper body when riding the sitting trot, the more likely they are blocking with their seat. This is usually the case for canter as well.

    Many riders learn early on that the easiest way to avoid being bounced around in sitting trot is to ‘hunker down’.

    They collapse their upper body completely. So much that it literally squashes their seat area (belly button to upper thighs), in an attempt to stop bouncing around in the saddle as the horse moves. When the horse is moving slowly or with no energy or forwardness, you will get away with this. It is probably the ‘easiest way’ to ride the sitting trot.

    However, the issues begin to appear when more energy is put into the container that makes up horse and rider. When more ‘swing’ is required. More suppleness.

    The literal ‘heaviness’ of the collapsed upper body will block the lower torso from moving, and in doing so, block the horse.

    Start with Carrying Yourself

    I mentioned in the previous episode and blog post that the term ‘sitting’ in the saddle is a confusing one. Yes, you are technically sitting. However, your core should feel more like you’re standing. It should be engaged and carrying you.

    Begin in a slow sitting trot that is perhaps lacking the forwardness it should have. Work on carrying your upper body. Simply put, create space between your lower ribcage and your pelvis or hips. Elongate your body.

    As your horse moves, notice that your seat (belly button to upper thighs) moves like a hinge, rather than simply up and down.

    We often think of up and down in trot because most riders are introduced to trot and trotting with the words up and down being used a lot to encourage posting or rising. However, as we begin to create a more independent seat, we notice that it is less upend down and rather forward and back. Like a hinge.

    What is important to notice is that your lower torso, your seat, is doing the moving. Not your upper body, your shoulders, and chest.

    Play with Your Gears

    From here, begin experimenting with the same 3 basic gears. Go, whoa, and neutral. Work on go first. It is often the one most riders are familiar with. Remember not to drive, but to simply ask a question. Driving is, again, when you are saying go all the time. It is when you get stuck in the ‘go’ gear!

    Then play with whoa. Resisting. Notice how you will only resist for a split second and then allow again. To continually resist will cause the tension level, or relaxation, to change to where it is no longer useful for you and your horse. For some horses, they become frustrated, excessive tension. For others, they simply do what you ask and slow down or stop, inadequate tension.

    The goal is to simply ‘allow’ your horse to work forward while you remain in the sitting trot. To move with your horse, rather than pushing or pulling with your seat.

    Exercise 3:- The Canter

    I know, I said two exercises, but this one is also a great one for really showing you if you’re guilty of blocking with your seat while cantering. Take a video of yourself. Focus on the canter itself. I would suggest cantering a 20m circle or similar for two or three circuits. This is long enough to really see what happens when you ‘get going’ in the canter.

    When you watch it, notice if you’re guilty of some questionable 1980s style shoulder movements while riding the canter.

    For many riders, the first few strides are good. They allow through the transition into a canter and move with the horse. However, then they feel that they have to ‘do something’. And this is where all that upper body movement begins. Lots of ducking and, often, swinging with one shoulder ahead of the other. Like the ‘Dem Bones’ song goes “Hip bone connected to the backbone, Backbone connected to the shoulder bone”.

    The shoulder movement is happening because the hips are blocking the energy. And the energy has to go somewhere!

    As soon as you begin noticing your shoulders ‘swinging’, think about firstly carrying your upper body. Engage your core just like you would while standing. From there, focus on allowing your seat to move and your shoulders remaining ‘still’. Obviously, you are on a horse and moving. They are not going to be completely stationary. However, they won’t be ‘swinging’.

    Finally, work on then allowing your hands to literally follow your seat. So that your seat and hands are following your horse…

    Allowing With Your Seat

    Allowing or neutral is so important to understand in your riding. It is also a place where bad habits can creep in and then negatively influence all areas of your riding. Learn to pay attention to your horse’s rhythm and the amount of ground he is covering with each stride.  They will show you the influence you are having over him using your seat.

    By clearly identifying the driving and resisting (go and whoa), you will begin to more clearly identify neutral. 

    And remember, you will spend the most time in neutral… The others are simply to ask questions or to correct.

    Happy Riding
    Lorna

    Additional Resources on This Topic

  • Are You Blocking with Your Seat While Riding? Part 1

    Are You Blocking with Your Seat While Riding? Part 1

    So you say go. But immediately follow it up with whoa. And all because you’re blocking with your seat. It’s like trying to drive a car with the handbrake on! And you continue to blame the car for not going forward…

    [fusebox_track_player url=”https://op3.dev/e/traffic.libsyn.com/dailystridespodcast/1166_Are_You_Blocking_With_Your_Seat_While_Riding_Part_1.mp3″ title=”Are You Blocking with Your Seat While Riding? Part 1″ social_linkedin=”true” social_pinterest=”true” social_email=”true” tweet_text=”Riding with the handbrake on?!” hashtag=”equestrianpodcast” twitter_username=”strides_success” ]

    For many riders, the even more frustrating part of it is that it can be hard to notice. If you are blocking with your seat, you probably don’t even realize you’re doing it.  I have 2 exercises for you to ride that will help you feel if you are indeed blocking with your seat or not…

    2 Exercises To Find Out If You're Blocking with Your Seat While Riding - Part 1

    But before you begin riding, I first want to make sure we are on the same page with regards to your seat…

    Understanding Your Seat

    There are basically 3 basic ways your seat can be used to influence your horse. Go, whoa, and neutral. Driving, resisting, and allowing. It is the ‘allowing’ part that so many riders struggle with. Go or driving is when you use your seat to ask for forward or more. Resistance is how you ask your horse to steady, slow down or stop using your seat

    Allowing is the equivalent of telling your horse to ‘carry on’. It means that the energy can move underneath you, through your horse’s body, on its path from the backend to the frontend.

    Obviously there are numerous ways each of these three principles can be used, and communicated, in your riding. It all comes down to your hips and your core. The angle of your hips, coupled with your use of core strength will determine how your horse experiences your seat.

    Blocking with Your Seat

    The trouble begins when you want to allow, and say ‘yes’, but due to either incorrect position or lack of suppleness, you actually block and say no.

    Blocking with your seat stops you from giving basic confirmation to your horse that, yes, he correctly understood your aids and is now doing what you want him to do.

    And, blocking with your seat even also takes this one step further. It tells your horse to stop doing this thing. Because blocking works like resistance. If you mean to go, but you say stop… The confusion is real 😉

    Fix Your Position Before You Begin

    Many riders think of their seat as only being their seat bones. I believe that, as a rider, your seat is everything between your belly button and about a third of the way down your thighs.

    So, that being said, your seat will only work as well as you position it to. Begin all of these exercises by first correcting your position. Think of your two lines; head, shoulder, hip, heel and elbow, wrist, rein, mouth. Ensure that you are indeed correctly sitting on your seat bones.

    When in the saddle, it should feel like standing, not sitting. This will engage your core, which will result in you carrying your upper body.

    Keep in mind that many riders do not position their seat (hips) correctly when they are in the saddle. They either sit like ducks in the saddle (overly arched lower back leading to closed hips) or like the letter C (rounded back and sitting on the back of their seat, rather than on their seat bones).

    Sit on your seat in a way that would position it if you were standing, erect and engaged, on the ground beside your horse.

    Practice, Practice, Practice

    At the beginning of this post, I mentioned 2 exercises to help you identify and then begin improving your allowing seat in your riding.  These exercises will be available in next week’s episode of the Daily Strides Podcast.

    And in the meantime, work on improving and strengthening  your position in the saddle and check out some of the previous episodes that relate to this topic below

    Happy Riding
    Lorna

    Additional Resources on This Topic

  • Leg Yielding to Refine Your Asking Aids in the Saddle

    Have you ever considered that, when riding, you have been thinking about things all wrong? You have been trying to move your horse; rather than asking your horse to move. One of the areas I see riders trying to move their horse is when working laterally. Leg yielding is a great example. Riders will try to push and shove their horse across the arena.

    [fusebox_track_player url=”https://op3.dev/e/traffic.libsyn.com/dailystridespodcast/1165_Leg_Yielding_to_Refine_Your_Asking_Aids_in_the_Saddle.mp3″ title=”Leg Yielding to Refine Your Aids in the Saddle” social_linkedin=”true” social_pinterest=”true” social_email=”true” tweet_text=”Have you been trying to move your horse, rather than asking your horse to move? ” hashtag=”equestrian” twitter_username=”strides_success” ]

    You don’t move the horse. You ask your horse to move. If you began to actually implement this in your riding, it has the power to change everything.

    Efforting does not equal results. Especially where lateral work is concerned. The key is to have built responsiveness to a point that you can ask a question of your horse, and your horse will simply respond.

    Leg Yielding to Refine Your Asking Aids in the Saddle

    Loss of Forwardness

    It is easy to spot a rider who is trying to move their horse. The physical effort it requires to move the mountain results in any forwardness being lost. And leg yielding, as I teach it, is ‘forward and sideways’. Notice the forwards comes first in that sentence.

    When you begin shoving or pushing your horse sideways, you mentally stop focusing on moving forwards

    This then physically manifests in your horse’s way of going. Yes, maybe your horse will continue to edge up the arena or along the road, but the rhythm and sense of purpose that was taking you there are lost. In fact, most horses become resistant and overly tense because of the change in how the rider is riding.

    Shoving, pushing, jabbing, or kicking your horse anywhere does not show a whole lot of respect, and your horse will probably respond accordingly!

    Opening Doors

    I really believe in using doors, particularly open doors, to demonstrate where we would like the energy to flow. It helps riders get things clear in their head about what they are asking. And it helps horses to understand where the rider would like them to move.

    With leg yielding, it is easy for riders to get all caught up on their inside aids, while completely forgetting about their outside aids.

    Yes, your inside aids are important for flexion and asking. However, if you could use your outside aids to more clearly express where you would like your horse to go, that would really support the work of the inside aids. Opening doors using your outside aids is easier than you think. However, it does require you to be intentional and mindful initially.

    You can use your outside seat bone and your outside rein to open two obvious doors for your horse when leg yielding

    Part of the aids for leg yielding requires you to ‘weight’ your inside seat bone. If done correctly, you will naturally open a door with your outside seat bone. This will allow your horse to step over or across more naturally. It makes things clearer for him. You can also open a door with your outside rein by simply putting more distance between it and your inside rein. Literally opening it to allow his shoulders to step ‘over’.

    When you open doors, you are allowing your horse to actually respond to your ‘ask’ to move over

    Timing Your Questions

    It is so important to consider that when you ask your horse to do something, such as move over, there is a good time to ask. So many riders are asking questions when the horse simply cannot respond. The riders take this feedback of delayed or late response to mean that their horse is not listening. And that can often be when the forcing or shoving begins.

    Start noticing what is moving when underneath you. Learn how your horse moves and then begin asking the right questions at the right time in order to allow your horse to respond.

    For example, if you ask your horse to move ‘over’ with his inside back leg, but he has just put his inside back leg on the ground, he won’t be able to respond. Similarly, if you ask him to balance the movement by weighting his outside back leg on the ground a little more when that leg has just been picked up to swing forward, he cannot respond.

    Get clear on what you’re asking, how you’re going to ask, and when you’re going to ask.

    Allowing Space for Your Horses Response

    Once you are clear that you are asking the right questions, at a time when your horse can take action on them, you can begin looking for your horse’s responses. Are they what you want or do they need to be changed or tidied up a little? Often things will have to be worked on before they will be exactly what you want them to be. That is fine. In fact, that is the natural progression when working with horses.

    The key thing to remember is that you are not moving your horse. You are simply asking your horse to move.

    You can begin working on the answers your horse is giving you by offering feedback. “Yes, that is exactly what I wanted, keep going”, or “No, that’s not quite it, let me explain a little better”.

    When you begin taking responsibility for your lack of clarity when asking questions, you can begin changing the outcome of the answers you receive.

    Over time, when you are consistently taking responsibility for the quality of the questions you are asking, your horse will begin to feel more confident about his ability to give clear answers. Clear, correct answers. This is how the relationship develops. It all begins with you understanding your role in the saddle and taking action based on that.

    Leg Yielding is a Team Effort

    When you claim responsibility for everything that happens in the ride, there is no space for other players. It’s not teamwork; it’s a dictatorship! Teamwork is when each of you is clear on the different responsibilities that you are bringing to the movement. And each of you is confident in taking action on those things.

    When you begin riding from a place of asking rather than shoving or pushing, you give your horse the opportunity to really respond.

    Less efforting on your part results in a much more enjoyable experience in the saddle. And let’s be honest, expecting your body to actually physically move another body that outweighs you by 10 to 1 using sheer force is a really big expectation! And exhausting!

    Happy Riding
    Lorna

    Additional Resources on this Topic

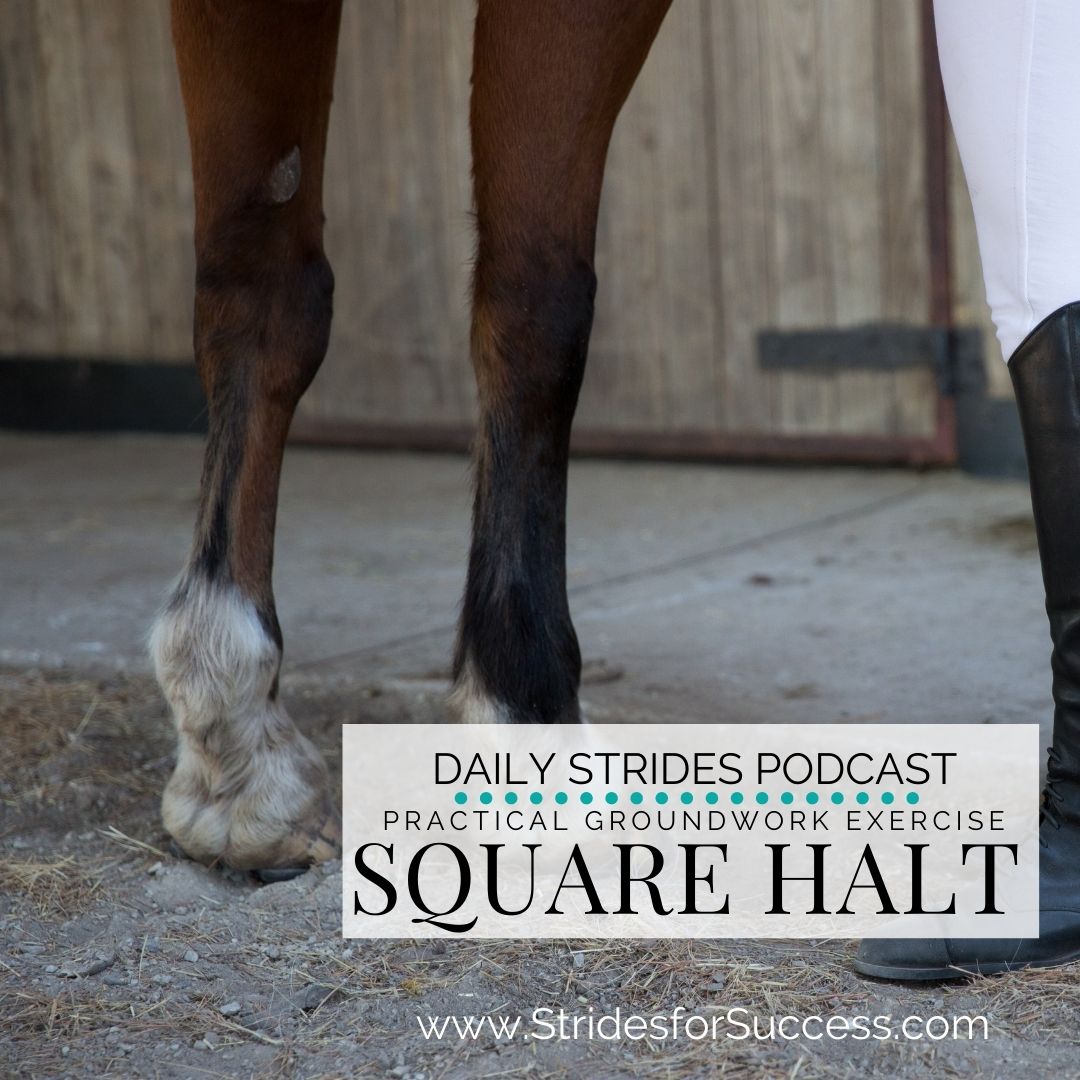
  • A Square Halt on the Ground

    A Square Halt on the Ground

    Think about the last time you were with your horse. How many times did you ask him to halt while working with him on the ground? Before you mounted up? Was it 4?  Maybe 10? And what about after you dismounted?

    When interacting and working with our horses, so much of it happens on the ground. Beside your horse. Here is how you can begin using this in a way that will help you when you do mount up in the saddle.

    All conversations with your horse start and end on the ground. Before you mount up and when you dismount after each ride. So it makes sense to use this daily interaction to intentionally help your riding.

    A Square Halt on the Ground

    What is a Good Quality Halt?

    It is a halt that holds or contains the energy inside of it. I know, that seems a little abstract, however, imagine this… There are 2 horses halted side by side. One is carrying himself, looking as regal and exquisite as he possibly can and all in a focused, alert, and yet calm manner. He is literally ready to move forward to the next thing, while still happy to remain in the halt.

    [fusebox_track_player url=”https://op3.dev/e/traffic.libsyn.com/dailystridespodcast/1163-A-Square-Halt-on-the-Ground.mp3″ title=”A square halt on the ground” social_linkedin=”true” social_pinterest=”true” social_email=”true” tweet_text=”Something to try with your horse, that doesn’t involve mounting up…” hashtag=”equestrianpodcast” twitter_username=”strides_success” ]

    The other horse is ‘chillin’ like a villain’… It looks like someone dragged him into a halt! Long. Strung out. Half asleep or even asleep! Legs everywhere. His back looks like one of those rope bridges, except this bridge extends from ears to tail. Long and loopy… Can you see the difference in your mind?

    The halt that contains energy and is forward-thinking, even when stationary in the halt is the better quality halt. This horse is ready to move out of the halt.

    Okay, now I want you to begin thinking about your horse and how he halts when you are leading him. Does he resemble Horse A or Horse B? This is where you can begin working on the ground, and in doing so, actually working on improving what’s happening during the actual ride as well.

    Getting Clear on What you Want to Make Happen

    The first part of beginning to improve your halt on the ground is to get clear on what you want to happen. Both of the above examples are technically halting. The horse is stopped and standing stationary. However, they are also completely different. Clarity about what is acceptable and what’s not is the beginning.

    A good place to begin is requiring that your horse be ‘square in front’ in each halt.

    Basically, this means that his two front feet will be in line with each other when he is standing still. An easier way to describe this is to first understand what completely ‘square’ is. To do this I want you to imagine a rectangle marked out on the ground. When your horse is halted square, each of his hooves will be in a corner of this rectangle.

    Square in front is when his front two hooves are correctly placed in the front corners of your imaginary rectangle for your horse.

    I think is a really ‘do-able’ goal for a single session when working on the ground with your horse. It is simple to make happen and easily understood by your horse. It also translates really well across to your riding.

    Understand What Aids You Are Using

    So many riders never think of their aids for this movement. I think this is due to this being a movement we do with our horses every single day when we are with them. And when we do something all the time, we tend to put those things on ‘autopilot’. Which is great. Except, you need to revisit and update autopilot regularly! This is something I help you to do regularly inside of Connection.

    The less thought that goes into a movement, the fewer aids we tend to use to make that happen!

    This is why, when asking a horse to halt while leading him, most riders overly rely on their hand aids. They pull or lean on the horse’s head, mouth, or nose (depending on what they are leading with) in order to get the horse to stop.

    Your hands are an important aid when leading and asking for the halt, but they should be part of a whole group of aids, which will include your thoughts, your voice, your body language, your position, and your seat (core) to name a few.

    A lot… I know. And this is where you get to really begin refining your aids and your conversation with your horse. By beginning to use more subtle aids, you can literally create a better quality halt, with minimum effort.

    Once You In the Halt…

    Okay, so assuming you have now halted your horse, I want you to rate the halt out of 5.  5, in this case,  is an absolutely perfect example of what a halt should look like and 0 representing ‘he fell into it’!  By being honest with yourself about where you and your horse are right now, you have created a place to begin working from. So be honest 😉

    Are your horse’s front feet ‘square’? If so, you can then begin working on squaring the back hooves. Or perhaps working on straightness through the halt itself. Many horses have a tendency to ‘crunch’ into the halt, which results in a hoof stepping out to the side.

    Falling out or falling in is also a thing to watch for when moving in and out of the halt.

    Your Work Begins; Refining…

    If your horse’s front feet are not square, note where they are. When you ask your horse to walk forward again and then repeat the halt, I want you to think about your aids and how you can begin to be clearer about where you want him to put his feet. For example, if his right front foot has stepped more forward, perhaps you can use the right rein a little more to emphasize a boundary there. Or if his right front foot has not ‘closed’ the halt, you could use your voice to encourage him to do so with a click.

    Refining, in this case, is noticing and then tweaking your aids. The aids themselves, the timing, pressure, sequence, release.

    When you are looking to improve your horse’s way of going, the first step is to improve the communication coming from you. Have more clarity about what you want. Be clear about how you ask. And then assess each response and give feedback to your horse.

    Then simply rinse and repeat. As I said, this can be worked on every single day. And once you have mastered this on the ground, use the same technique to begin working on this from the saddle as well.

    Happy Riding
    Lorna

    Additional Resources on this Topic:-