Tag: balance

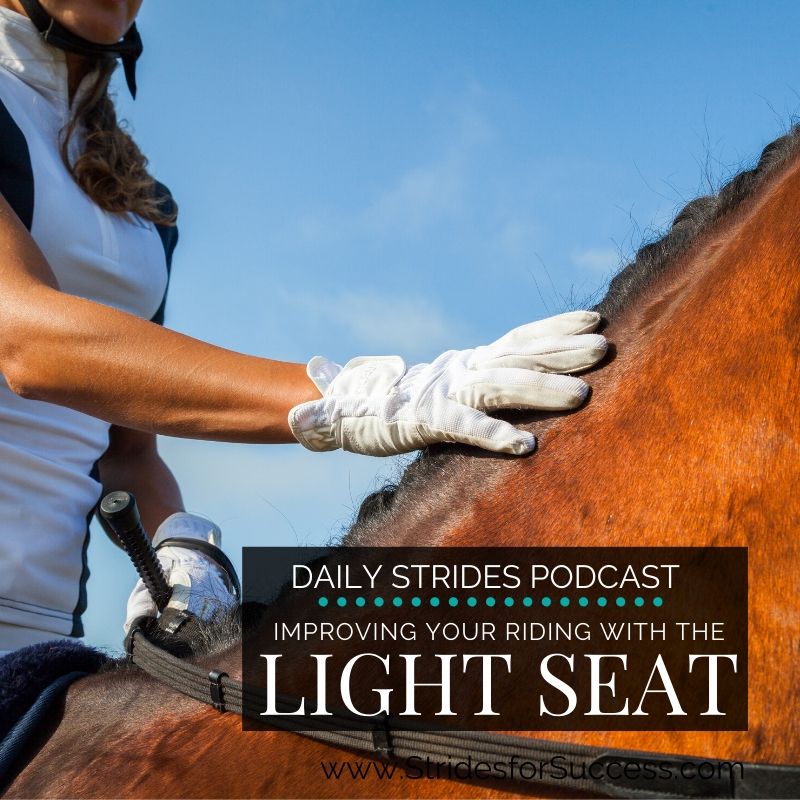
  • Improving Your Riding with Your Light Seat

    Improving Your Riding with Your Light Seat

    Have you ever considered how much you are either helping or hindering your horse when you’re riding?  Do you wonder what you could do, today, to begin improving your influence in the saddle?  Well, I am going to give you something fun to do in the saddle that will improve your riding – and put a smile on your face as well.
    I want you to begin figuring out how independent you are in the saddle when riding. You are going to do this by riding the light seat or two-point seat.  Your bum out of the saddle as you ride.  Some lovely daylight between the arse of your trousers and the seat of your saddle.
    [smart_track_player url=”http://traffic.libsyn.com/dailystridespodcast/1125-Improving-Your-Riding-with-Your-Light-Seat.mp3″ title=”Improving Your Riding with Your Light Seat” social_linkedin=”true” social_pinterest=”true” social_email=”true” tweet_text=”Something fun and different that will help you to improve your balance in the saddle…” hashtag=”equestrian #podcast” twitter_username=”Strides_Success” ]
    I already know that many riders will have clicked away by now, but if you are still here; good on you!  This exercise is for ALL riders.  Improving your balance will always improve the overall conversation with your horse, regardless of the discipline that conversation occurs in.

    What Is the Light Seat?

    The light seat happens when you are riding.  It involves you actually ‘standing’ on your own two feet while working your horse.  It requires you to balance yourself.  This means no leaning, holding on or crouching down on your horse’s neck, a neck strap or breastplate, or the pommel of the saddle.  Also, no holding onto the mane.
    Your stirrups will have to be short enough so that you can support your weight into your heels while having that all-important clearance between your bum and the saddle. 
    From here, you simply ride like you would normally do, but with your bum no longer putting weight on your horses back.  There are varying degrees of how much ‘daylight’ you have between your bum and the saddle.  However, I usually recommend a good amount of daylight when riders are starting off working in the light seat and this is due to it being a little more difficult to ‘cheat’ that way!

    Why the Light Seat?

    There are lots of reasons to use the light seat in your riding.  Probably the most commonly used one is when cantering or galloping in open spaces.  Sitting in your normal upright seat can get a little tiring and, well, bumpy!  The light seat allows the horse to move underneath you – and allows you to enjoy the experience.
    The light seat is also really useful when working over ground poles or small raised poles with your horse.  It allows your horses back to engage, without the rider being heavy and working against it. 
    The light seat is also useful when you find yourself partnering with a horse who is feeling enthusiastic and excited about working!  It lets the horse ‘work off’ some of the energy without fighting against him.  It also allows the energy to flow out if necessary to dissipate any excess energy that the horse may be carrying.
    Finally, the light seat is an excellent way to improve rider balance, fitness and overall coordination.  It allows riders to ‘test’ themselves and their abilities in the saddle, and have fun while doing so. 

    Your Base of Support

    So the first thing you want to do before you transition into the light seat is to make sure the weight is in your heels.  You will be ‘standing’ on your heels in the light seat. In order for this to happen your lower leg must be underneath you.  Not in front of you, or behind you.
    Simply put, if I was with you in the arena and I clicked my fingers and made your horse vanish – you would land on your feet. 
    Your foot must also be correctly positioned in your stirrup.  So many riders ‘square’ the iron with their foot.  However, the iron must rather be diagonally under your foot.  From the ball of your foot, diagonally across to the nail on your little toe is a good basic way of thinking about this. When your foot is correctly positioned in the stirrup, it allows your ankles, knees, and hips to become effective ‘shock absorbers’.
    Put differently, correct stirrup placement allows you to move with the energy of your horse, rather than bouncing against it. 
    As you move in and out of the light seat, remember to continuously check and improve your base of support.  Weight into your heels.  Lower leg underneath you and foot correctly placed in the stirrup iron.  If anyone of these three elements is missing or ‘off’, you will have problems with the light seat.

    Lifting Your Bum Out of the Saddle. 

    The big moment.  Liftoff!  And for so many riders this is one of those ‘easier said than done’ moments! However, there are a few things you can do which will help make it easier for you.  Firstly, think about engaging your core.  Your abdominal muscles.  Also, your back, both upper and lower.
    For many riders, engaging their upper back becomes easier when they focus on opening their chest.  Imagine if we held a measuring tape on your one shoulder and we wanted to measure the distance, across your chest, to your other shoulder. Make that distance as wide as you can by opening your chest.  This will help you engage your upper back.
    It will also help you to ‘open’ your arms, thereby becoming a whole lot clearer with your aids when communicating with your horse. Big deep breaths in and out.  Feel the expansion in your chest area.

    Straightening Your Back

    When you engage your back, it will become more straight.  This is important as it allows the energy to flow through your body.  Many riders, when they initially transition into the light seat, ride with an almost C shape through their back.  They curl their shoulders.  Which effectively collapses their upper body.
    When you focus on remaining engaged and straight through your back, you are committing to carrying yourself.  Your own weight, your own arms and hands.  It also allows you to carry your head – and focus on where you’re going. 
    If you are finding it difficult to straighten your back in the light seat, think about ‘sticking your bum out’ behind you. I know, it sounds so odd and, well, irrelevant.  But trust me, if your back keeps going into full ‘hamster mode’ and curling or collapsing, sticking your bum out behind you will help engage your lower back.
    When in the light seat, your lower back provides important support to your upper back.  Your core is fully engaged and working in order to help you remain balanced and moving with your horse.

    Independent Hands and Reins

    The negative effect of ‘leaning on’ or using your horse’s neck for balance cannot be overstated here.  in order to ride a true light seat, your hands and arms must be independent.  This is so you can continue to engage in the contact with your horse.
    There seems to be a misconception surrounding the light seat which many riders believe there is no contact when in it.  This couldn’t be further from the truth…
    Contact is just as important in the light seat as it is throughout the whole ride. 
    If your hands are touching anything except the leather of your two reins, you are leaning or depending on your horse for support.  Also, be careful that you are not leaning on the reins themselves for support.  You should be supporting you because you have a solid base.  You should not be relying on your horse for your balance.
    If you are struggling to balance, go back and reassess your base of support. Your heels, your lower leg and your foot in the stirrup.  Then asses your back and shoulders.  If they are all correct, you have a fitness issue – not a support issue!

    What Should Your Hands Be Doing?

    Your hands should be engaging in the conversation with your horse.  They should be ready to establish the contact from the energy that is now flowing more freely through your horses back.  This is where so many riders become confused with the light seat.
    They believe that their horse will ‘take off’.  Or that there is no real benefit because their horse is not working. However, I am going to challenge you to think a little differently about this.
    You can do almost everything you can do in your normal ‘upright, from a good quality light seat. 
    But you MUST balance yourself first if your light seat is to become an effective tool in your riding.  If you keep dropping your contact, every time you transition into the light seat, your horse won’t ‘work’ when you are in it.  Couple this with the fact that the reason most riders are dropping the contact is that they are leaning on the horse’s neck.
    One of the great things about the light seat is you allow your horse to truly engage his back, without hindrance from the rider. If you are leaning on his neck, this becomes impossible for the horse.
    Leaning puts a whole human worth of extra weight on the area of your horses body you are actually asking him to lighten…

    Transitioning In and Out of the Light Seat

    You go in and then you go out… In and out… Out and in…  This requires suppleness from the rider.  Strenght to support themselves through the transition and then suppleness to allow the flow of energy while they ‘hold’ the position.
    Practice moving in and out of your light seat while maintaining the contact and gently redistributing your weight.  
    You can also play with the amount of fold you are allowing through your hips.  More ‘fold’ will result in your chest moving closer to your horse’s withers. Remember, your back will remain straight.  Curling your back is very different from folding your hips!
    Also, when working your horse, realize that you probably don’t need as much fold as you think in order to be effective.  The light seat is so versatile, you can really experiment and see what suits you and your horse best.
    Happy Riding
    Lorna

    Other Resources to Help You With This Topic:-

  • How to Keep Your Heels Down When Horse Riding

    How To Keep Your Heels Down when Horse Riding

    It is possibly one of the first things you heard when you initially took up the reins. Yet, it is one of the most enduring struggles riders have in the saddle. And even when it is mastered on the flat, it seems to crop back up again when a jump is required!

    Heels down is one of the most important things to ‘do’ when riding a horse. There are a lot of reasons why mastering this seemingly simple thing is vital to developing as a rider. I say ‘seemingly’ because, if it was so simple we wouldn’t be having this conversation, would we?

    So many riders struggle to firstly ‘get’ their heels down and then keep them there. It feels like as soon as they take their attention away from it, they just pop straight back up again!

    [smart_track_player url=”https://op3.dev/e/traffic.libsyn.com/dailystridespodcast/1113-How-to-Keep-Your-Heels-Down-When-Riding.mp3″ title=”How to Keep Your Heels Down while Horse Riding” social_linkedin=”true” social_pinterest=”true” social_email=”true” tweet_text=”Are you more ‘twinkle toes’ than Mark Todd where your heels are concerned in the saddle?!…” hashtag=”equestrian #horseriding” twitter_username=”strides_success” ]

    However, keeping your heels down, whether on the flat or over fences, doesn’t have to be that difficult…

    Why Heels Down Matters So Much

    If we get back to the real basics of horse riding, staying on is probably the first and the most important element to riding. Keeping your heels down is the best and easiest way to ensure this happens *most* of the time!

    When your heels are down, you are taking responsibility for your own balance. Meaning that regardless of what is going on underneath you, you will stay in balance and in the saddle.

    Now, of course, there are a few exceptions to the rule; your horse falling over is the big one. However, the simple fact of the matter is if you can master your ‘heels down’ your rate of falls will decrease dramatically.

    Staying on is not the only benefit of keeping your heels down. As I mentioned, heels down help balance you in the saddle. This balance is how, later in your riding, you can help support and develop your horse.

    Think of when riders are most unbalanced; transitions, landing over a jump etc. This is the times when riders also struggle most with keeping their heels down.

    Foot Position is Everything

    If you are struggling with keeping your heels down, it may be due to how your foot is positioned in your stirrup. Often we hear that the stirrup should ‘rest under the ball of your foot’. However, in practice, this simply doesn’t work.

    The stirrup should rest diagonally underneath your foot. From the ‘ball’ of your foot across towards your little toenail.

    By having the stirrup at this more diagonal angle, you now allow your ankle joint to move. Your ankle joint is essential to your ‘shock-absorbing system’ when riding your horse.

    Again, think of when things can get a little ‘bumpy’ in your riding… This is where many riders lose their stirrups and it is due to the ankle joint being unable to work effectively.

    How Your Foot is in the Stirrup

    It is also important to recognize that how the stirrup is turned will also play a big part in your success with heels down. So many riders put their foot into the stirrup the wrong way around. It prevents you from using your ankle joint effectively.

    But also, having the stirrup turned the wrong way can cause your foot to become stuck in the stirrup if you do take a fall. Being dragged by your foot is not what any rider wants.

    To prevent this from happening, simply make sure you turn the stirrup out as you place your foot in it. As the stirrup falls down from the saddle, the side closest to your horse’s nose is where your little toe will be. The side closest to your horses tail will be on the side of your foot by your big toe.

    Simply put, make sure you turn the front (as in closest to your horse’s shoulder) of the stirrup out and then place your foot in it.

    Your Ankle as a Hinge

    So how does your ankle joint work as a hinge? An easy way to see this in action is to find a small step. Put your foot on the edge of the step, where the stirrup would be placed if you were in the saddle.

    Make sure that your knee is above your toes. This part is vital in order for you to really feel what will be like when riding. Then simply push down on your heel. ‘Weight your heel’.

    Can you feel how your ankle now allows your heel to move up and down? This is how it will work when you are actually riding and shifting your weight to remain balanced while you ride.

    Obviously the movement will be slight; the aim is always to refine ourselves so that the conversation is a ‘secret’ one between rider and horse.

    But that movement does have to happen in order for you to effectively move, and balance, while in the saddle. In order for you to effectively ride your horse.

    So, Heels Down; How Far Down?

    Now, this is a matter of opinion… I often see riders with their heels wedged down as far as they can possibly go. The sole of their boot is as close to verticle as they can get it! This is not what we want to aim for with our heels down!

    When riding flatwork on a balanced, well-schooled horse, your heels can be just marginally lower than the ball of your foot. To the eye in the arena, it will look as though the sole of your boot is horizontal.

    Having your heel weighted does not always require you to have it pushed down.

    However, if riding a young, ‘naughty’ or ‘spooky’ horse, I would suggest having your heels noticeably down. This will firstly help you to remain balanced. But also, it allows you to use your thighs to keep you in the saddle if needed. Maybe if the horse throws a buck or jumps to the side…

    I also believe having your heels more noticibly down over jumps is essential to allow your ankle joint to work correctly.

    Putting Heels Down into Practice

    This is one area that I absolutely feel it is essential you get on ‘autopilot’ in your riding. Your heels need to fall down without you having to continuously think about putting them there. It will take effort initially.

    Use areas of the arena to ‘remind’ yourself to put your heels down. Corners, half halts, posts, lights – choose something that you do or pass by regularly and associate that with checking your heels.

    Once you have it on the flat, you can then begin to do the same over jumps. I see so many riders flying over jumps, leaning on their horse’s necks. This is wrong!

    Your horse needs you to remain balanced, on your own, over jumps so that he can do his job. Look at photos of yourself on the flat and over fences. If you applied the ‘Click Your Fingers Rule‘, what would the outcome be?

    Remember, that even if all else is in correct alignment, it is REALLY difficult to remain balanced on something that is moving while standing on your tippy-toes…

    Working On It

    Start small; in the walk perhaps. Build to the trot, then the canter. Pay attention to those areas where bigger questions are being asked of your balance; transitions, the sitting trot, jumping over fences…

    The Two-Point-Seat is a great way to practice this while feeling how important the stirrup position and your ankle is to get it right.

    And this is definitely one of those ‘things’ that is well worth getting right…

    Happy Riding

    Lorna

    Other resources to help you with this topic:-

  • Finding Balance in Your Riding

    Finding Balance in Your Riding

    Balance; Finding Yours in Riding

    What this episode is all about and how it can help you:-

    • Realise what true balance is when riding
    • See that both you and your horse are responsible for balance
    • Begin working on establishing balance
    • See how maintaining balance is a long term goal

    It is a pretty important element of riding; if only from a ‘staying on’ point of view. However, as you well know, balance is so much more than keeping the horse between yourself and the ground.

    It is a word we hear over and over again in the saddle. Balance. Whether we are telling ourselves, or having a trainer or coach remind us. Balance the horse. Look for balance. Maintain balance. Re-establish the balance…

    And yet, balance is often an misunderstood concept. Especially when we are taking things further than just ‘staying upright’.

    [smart_track_player url=”https://op3.dev/e/traffic.libsyn.com/dailystridespodcast/1106-What-is-Balance-in-Riding.mp3″ title=”Balance; Finding it in Your Riding” social_linkedin=”true” social_pinterest=”true” social_email=”true” tweet_text=”Balance is so much more than the ability to stay in the saddle…” hashtag=”equestrian #horseriding” twitter_username=”strides_success” ]

    In this episode of the Daily Strides Podcast you will learn what true balance is and how you can begin to work towards it in your day to day riding.

    Balance is an Intention

    We can talk all things balance until the cows come home; however it does all rest on one simple truth. Your horse will never be truly balanced if you are not balanced.

    I believe that in order for you to truly show balance, you need to figure out two things; where you are and where you are going.

    Your balance is the result of a consistent intention in the saddle. Your intention to be part of a ride that is, for the most part, balanced will help both you and your horse to achieve this.

    You Must Know Where You Are Now

    I want you to imagine that your horses back is a plate. You, while riding your horse, are like a marble or stone on that plate. Balance is when the plate and the stone can move together, while maintaining a particular relationship with each other. We don’t want the plate to ‘tip’ thereby cause the stone or marble to roll off the plate.

    The challenge appears when riders focus solely on the plate not tipping over, without considering the fact that if the stone or marble may be causing the plate to tip to begin with…

    Be careful of falling into the trap of just assuming that the horse is causing you both to lose balance. Be open to the fact that your lack of alignment may be causing the lack of balance you feel in your horse.

    Working on Your Alignment

    If you are correctly aligned in the saddle, you are not tipping or leaning one way or the other. Horses respond differently to riders tipping or leaning. Some will try to get underneath you, presumably to prevent you both from falling over! Others will merely observe you ‘tipping’ and see it as a great opportunity to go the opposite way!

    Either way, the horse will change its way of going in order to compensate for your lack of alignment.

    Your alignment comes down to your basic position. Work on your position. Make sure that you remain aligned at all times when riding. This is especially true when riding transitions or changes of any type…

    Your Horses Ability to Balance

    When the horse is doing different things while being ridden, the balance will continuously shift and change. And this is really the true meaning of balance.

    Balance is the ability to adapt and shift to things that are ever changing and moving, all the while remaining stable and, in this case, upright.

    Begin observing what your horse is doing at any given point. Ask yourself what is required from the horse in this particular part of the ride. If we think about a downward transition, often what we see happening is the horse ‘falling’ onto the forehand.

    If we again imagined the plate and the marble, well the marble would roll right off that plate!

    This is often reversed in upward transitions. The rider becomes a little left behind. The marble rolls to the back of the plate and affects the balance…

    Know Where You Are Going at All Times

    We said how it is important to know where you are. However, equally as important is knowing where you are going. You must make the necessary adjustments in your body in order to try maintain the balance from ‘here to there’.

    We have already mentioned transitions and, obviously, balance can be an issue through them. However, balance must also be worked on in order to maintain at all points in the ride.

    Imagine trotting down the long side of your arena. You need to be aware of where you have come from (riding through he corner). Also, where you are going to and what is required of you both there. And finally, the journey between the two.

    Imagine You are the Marble

    So you are trotting along, thinking of yourself as this marble. Be aware of where you are in the saddle. Are you centered? Think of how you might be rolling (or tipping) to one side or one area of the plate.

    Your job initially is to use your body to positively influence your horses balance.

    This is where your intention becomes so important. If you have a set intention, it will help you to instantly recognise when you stray away from that.

    Making Consistency a Must in Your Riding

    I know, you have heard it a million times already. However consistency is really that important when it comes to riding. It has the power to change everything – for good or bad!

    If you or your horse are pretty new to riding, or ‘working’ while riding, you will probably find that one or both of you will be pretty much unbalanced more often than not.

    Your intention will be to consistently try to get back to that balanced state.

    However, if you and your horse are more developed physically, mentally and emotionally it will differ. Your intention will then be consistently trying to remain in a balanced state for as long as possible.

    Either way, it is the intention coupled with the consistency that will drive the results you get.

    It All Comes Down to Doing the Basics Well

    Where ever you find yourself in your riding, balance really does come down to perfecting the basics as much as possible. Initially ‘getting it right’ will be when doing one single thing. Trotting down the long side for example.

    Once you have mastered your basics there, you can begin to look at putting pieces together while working on maintaining balance. Transitions both between gaits and within the gait is a good example of this.

    The basics can be summed up as alignment. You position is your physical alignment. Your mindset and thoughts is your mental and emotional alignment.

    True Balance is Possible; for You & Your Horse

    Once you have mastered your basics, this is where you can then begin positively influencing your horses balance. When you are responsible for your balance, the focus can shift to your horse.

    Over time, you can expect your horse to also become responsible for his own balance throughout the ride.

    Balance; it’s pretty important!

    Happy Riding

    Lorna

    Other posts, episodes and resources that relate to this topic:-

  • Applying the ‘Click Your Fingers Rule’ to Your Position While Riding

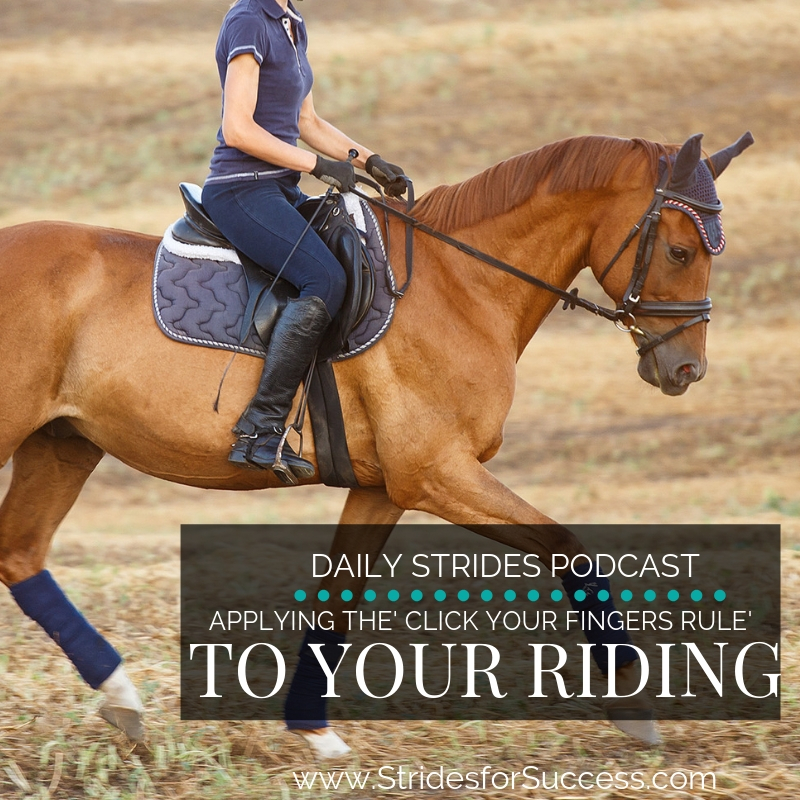
    Applying the ‘Click Your Fingers Rule’ to Your Position While Riding

    Applying the Click Your Fingers Rule to Your Position While Riding

    What this episode is all about & how it can help you:-

    • Use this simple ‘rule’ in your day-to-day riding
    • Know ‘when’ to apply this rule in your riding
    • Begin to take responsibilities for your own balance in the saddle
    • Make the necessary transition in your riding, from passenger to rider

    [smart_track_player url=”https://op3.dev/e/traffic.libsyn.com/dailystridespodcast/1085-Applying-the-Click-Your-Fingers-Rule-to-Your-Riding.mp3″ title=”Applying the Click Your Fingers Rule to Your Riding” social_linkedin=”true” social_pinterest=”true” social_email=”true” tweet_text=”The simple ‘rule’ involving your position that will help you in your riding’” hashtag=”equestrian” twitter_username=”strides_success” ]

    Imagine if there was something you could actively ‘do’ every moment you’re in the saddle that would almost guarantee that you’re in the ‘right place at the right time’..  There is. And it involves abiding by a non written ‘rule’ regarding your position.

    This episode of the Daily Strides Podcast is all about that rule and how you can use it, beginning today, in your riding.  Your position is so important

     What is the ‘Rule’

    Well, imagine we (you and I) were in the arena together. You are travelling along on your horse, whether that be in walk, trot or canter.  In fact, you could even be jumping, halfway through a transition – it makes no difference what you are doing.  So, there you are, riding along and then I apply this ‘rule’ to you and your riding…

    I ‘click my fingers’ and make your horse vanish.  Yes, disappear into thin air from underneath you.  Gone.  The question you have to ask yourself is: “would I land on my feet?”.

    Now, obviously this is not going to happen.  I’m good, but I’m not that good!  However by imagining the horse is suddenly not there, the questions becomes ‘where and how would you land?’.

    If the answer is on your face or on your bum, it simply means that you are depending on your horse for balance, rather than being responsible for your own balance.

    Who Are You Depending on For Balance?

    When we start out riding initially, we do tend to rely a lot on our horses for balance. Thank goodness for all the school horses and ponies in the world with their endless patience! But in order for your riding to progress, this is something that you have to begin accepting responsibility for.

    You are responsible for your own balance in the saddle.  Applying this ‘rule’ to your riding will help you achieve that.

    Relying on your own body, and therefore your own actions and responses, for balance will allow you to begin developing independent aids.  Independent aids lead to clearer communication with your horse.  They also lead to an independent seat.  This ‘rule’ regarding your position will help you start working towards all of these things in your riding.

    Applying the Rule

    There is are two simple ‘checks’ you can do every time you’re in the saddle to begin effectively applying this rule to your position and your riding.  The first to make sure that you are indeed sitting correctly in the saddle.

    Use your seat bones for guidance. Are they directly underneath you, pointing straight down? Many upper body issues and lower leg issues are due to this basic principle being wrong or missing.

    The second ‘check’ applies to the ‘lines’ to your position. Particularly the line that should run through your head, shoulder, hip and heel.  If these elements of your body are aligned, you are usually ‘carrying’ yourself, which means that you are, for the most part, assuming responsibility for your own balance.

    Being aware of the ‘rule’ will allow you to consistently reminding yourself to apply it to your riding, regardless of what you’re doing.

    When Does This Rule Apply to Your Position?

    The simple answer is ‘all the time’. Yes, really! Regardless if you are walking, trotting, cantering and even galloping.  Or if you are riding on the flat, up or down hills.  It is all the same. You are responsible for your own balance.  Even when you are approaching a jump, starting the jumping effort, landing or a stride or two after the fence, this rule will apply.

    If the horse was to vanish at any given point, anywhere in your ride, you should land on your feet.

    Applying this to your Position & Riding

    I’ve already mentioned checking your seat.  Is it truly ‘underneath‘ you?  From here, focus on keeping your legs under you at all times. A weak lower leg will swing, meaning that it can often be too far ahead of you, closer to your horses elbow or shoulder. Or too far behind you, closer to your horse’s flank area.

    Neither of the above scenarios would result in you landing or standing on your own two feet if your horse was to vanish!

    The final suggestion I have for consistently implementing this ‘rule’ in your riding regards your body when in the jumping position or two point seat.  Think of your torso as being almost like a traditional weighing scales. Your shoulders are one end and your ‘bum’ is the other. Use your bum to keep your shoulders balanced.

    A straight back is essential for this to happen, and this is where your core strength will really be essential to your overall balance.

    Making the Transition in Your Riding

    The ‘click your fingers rule’ is one that will, when applied consistently, change your riding.  You will literally go from being dependent on your horse for support, to being able to actually support your horse when he needs it.

    That is where you really begin to make the transition to being a true ‘rider’ in the saddle.

    I am hosting a free, live online training for riders looking to begin making that transition in their riding; from passenger to rider. You can find out more and register HERE

    Happy Riding
    Lorna

    Other Posts and Episodes that Relate to This Topic:-

  • Serpentines; Making Them Work for You in Your Schooling

    Serpentines; Making Them Work for You in Your Schooling

    Serpentines, Making them work for you in your schooling

    What this episode is all about & how it can help you:-

    • Understand the difference between controlling versus influencing
    • How markers can help you become more mindful throughout the movement
    • Why I suggest slowing things down initially
    • How to begin working on improving your serpentines today

    [smart_track_player url=”https://op3.dev/e/traffic.libsyn.com/dailystridespodcast/1057-Serpentines-Making-them-Work-for-You-in-Your-Schooling.mp3″ title=”Serpentines; Making them Work for You In Your Schooling” social_linkedin=”true” social_pinterest=”true” social_email=”true” tweet_text=”Are you ‘flying’ through your serpentines – or are they a well thought out school movement for you and your horse?” hashtag=”Podcast #Equestrian” twitter_username=”strides_success” ]

    Serpentines really are the exercise or movement that ‘have it all’ when it comes to working or schooling your horse in the arena.  Suppleness, straightness, rhythm, relaxation and a whole host of other principles in between.

    Yet, so many riders fail to make the most out of their serpentines and never really get further than ‘flying’ around the loops full speed ahead!  In this episode of the Daily Strides Podcast I am going to give you a few ideas on how you can get the most out of this basic schooling movement in your riding.

    Deciding on Which Serpentine Suits You

    First of all, let’s quickly chat about what a serpentine is and deciding how many loops is right for you and your horse.  The serpentine is, simply put, like riding the letter s in the arena, but with extra loops added in where necessary.

    The amount of loops in your serpentine will be determined by the size of your arena and how developed both you and your horse are in your training.

    The more loops in your serpentines, the more suppleness will be required to maintain the forwardness and the ‘shape’ of the movement over all.

    Most riders start out with a traditional 3 looped serpentine.  Any odd number of loops will see you finish the movement on the same rein you begun.  An even number or loops will have you change rein when you complete the movement.

    Controlling Versus Influencing in the Saddle

    Many riders have the mindset that they must ‘control’ their horse.  Control every movement, every step.  The rhythm, the forwardness… Even down to how their horse moves and uses his body.  If you are one of these ‘controlling’ riders, I’m afraid I’m going to have to burst your bubble…

    The only thing you can control while riding is yourself.  You cannot control your horse.  However, by controlling yourself, you can learn to have more influence over your horse…  

    One of the aims of correct training with your horse should be getting to the point where your horse takes responsibility for his own movements and actions.  You will ‘control’ yourself and he will control his self.

    Controlling everything is exhausting and results in your focus being place on the wrong things when riding.  Holding your horse up with your inside leg.  Or creating a fixed or rigid ‘frame’ for your horse to work in and therefore removing all suppleness.

    Correct Rather than Control

    As you ride your serpentines over the coming weeks, think of asking your horse to do something and then allowing him to do it.  Don’t be the rider who is always looking over your horses shoulder waiting for him to make a mistake!

    If he goes off track, or makes a ‘mistake’, yes, correct him – but then try to get out-of-the-way again and allow him to continue on.

    This way, you are allowing your horse to begin thinking for himself and taking responsibility for his own actions.  Shifting your mindset around this topic is the is the beginning of working towards self carriage with your horse.

    Using Markers to Help Your Accuracy

    Very often when riders set out to ride a serpentine, they get a little off track with the true shape of the movement they want to ride.  It can end up looking more like a zig-zag rather than a series of equal bends connected by straight lines.

    Before you ride your next serpentine, rather go out and mark the exact track that you want to ride.  The loops, the track as you cross the arena.  The shape, the sizes, the centre line. 

    You can use anything at all, once it is safe, to mark out the path you want to ride on.  Tyres, cones, stones, poles, uprights.  My only concern with using poles or uprights is that sometimes the horse can ‘cling’ to them a little.

    Slowing Down and Starting from Walk

    Once you have your path marked out, I then suggest getting into the arena on your horse and begin working on riding the movement.  Start in walk.  Ride the movement a few times in the walk and begin being mindful to what is going on underneath you.

    Serpentines have a lot of different moving parts as you ride through them and taking the time to notice each stride in walk will help you begin getting the most out of the exercise.

    Notice where you begin, the middle of the short side of your arena.  Pay attention to how you transition between straight and flexed.  How well is your horse ‘staying on track’ through the exercise itself.

    If there was a drone above you, taking a video, would your horses back, from tail to poll, be on the same track all the way through as the one you laid out?

    Most riders think about transitions as going up and down between gaits or gears.  However, a transition is simply a change.  I am going to recommend that, as you ride through the serpentine, becoming really mindful on how you are transitioning between the loops.

    Incorporating Serpentines into Your Schooling

    From here, begin thinking about the best way you can ask  your horse to actually ride the serpentines and then getting out of his way and allowing him to do just that.  No leaning or shoving or holding things up.

    It is common for riders to become a little too enthusiastic with your inside rein as you ride the basic serpentine…

    Notice the suppleness and the bend.  Notice how your horse is coping with the transitions between loops and if you are truly helping him or hindering the process.

    Once you have mastered the exercise in walk, I would then suggest taking things a step further by riding the exercise in trot.  Keep your focus on the ‘eye in the sky’ and how it would look if viewed from above.

    Also make sure you are not ‘controlling’ everything, but rather setting things up and then allowing them to happen. 

    There are so many other ways to add variations to your serpentines.  We have a whole collection of trainings inside of Daily Strides Premium themed around doing just this, which you can begin working on today when you join.

    Happy Riding

    Lorna

    Links mentioned in the episode:-


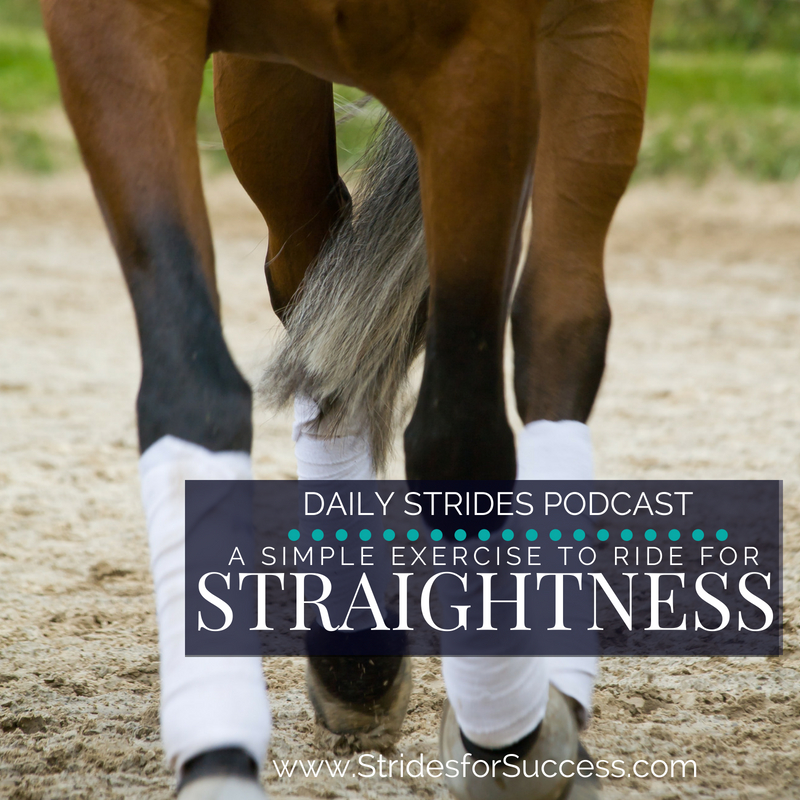
  • A Simple Exercise for Straightness

    A Simple Exercise for Straightness

    A Simple Exercise for Straightness

    What this episode is all about & how it can help you:-

    • Get clear on the importance of straightness
    • Understand your responsibility as the rider
    • Begin using straightness from day 1
    • Use your quarter lines to assess your horse

    [smart_track_player url=”https://op3.dev/e/traffic.libsyn.com/dailystridespodcast/1050-A-Simple-Exercise-for-Straightness.mp3″ title=”A Simple Exercise for Straightness” social_linkedin=”true” social_pinterest=”true” social_email=”true” tweet_text=”Looking for a basic exercise you can ride with your horse to work on suppleness and straightness?” hashtag=”#MakeEveryRideGreat #Equestrian #Podcast” twitter_username=”strides_success” ]

    Straightness.  It is one of the top elements of the traditional Training Scale when working with horses.  Yet, is it also something that we touch on regularly here inside of the Daily Strides Podcast.

    The question for many riders is ‘How can I work on straightness, if it is such a ‘high level’ concept?”  In this episode of the Daily Strides Podcast, I will give you a simple exercise you can begin working on today.  It is an exercise you can use, regardless of where you and your horse are in your training.

    Why Straightness?

    Straightness is simply a way of assessing symmetry in you and your horses way of going.  It is how the energy is brought into the ride and how it is distributed throughout the ride.

    I have explained straightness in more detail on a previous episode of the Daily Strides Podcast.  You can find that episode HERE and I strongly suggest popping on over if you are not fully understanding this exercise or straightness in general. 

    The symmetry comes from equal energy being created in both hind legs and propelling the horse forward.  If one side is stronger, or weaker, than the other the energy input will be different, causing crookedness or excess tension in how the horse goes.

    Straightness is also important when looking at how the energy is used, or the output of the energy.  Again, any weakness or tension on one side over the other will cause the energy to be ‘spent’ differently.  The result, again, will be crookedness or excess tension as the horse tries to constantly compensate or correct.

    Your Responsibility as the Rider

    So, that all being said, how can you begin riding with the intention of developing straightness?  The key word to consider here is ‘developing’.  Your horse will not go straight from day 1.  In fact, if you have ever ridden a young or green horse, it can sometimes feel like riding an eel!

    Their ‘speed-wobbles’ in straightness cause a lack of balance and a loss of rhythm.  It can also cause excess tension as they try to ‘hold’ themselves straight, but lack the physical strength or development to do so. 

    In the previous Daily Strides Podcast episode, we spoke about your responsibility to create a symmetrical ‘mould’ in order to channel your horse’s energy.  It is also important to remember that the sides of your arena, or the rails, are not what should keep you both straight.

    Straightness is a way of travelling.  As your horse develops more correctly, he will be able to travel more straight by just, well, travelling!

    What is important is that you are all the time working toward the ideal.  If you horse is weaker (which most horses are) on one side over the other, rather work on strengthening him in shorter but more correct sessions.

    Straightness From Day 1?

    This can be worked on in simple exercises performed as correctly as possible. Attention to detail is key when schooling horses, regardless of where they are in their journey.

    Riding on the quarter lines, or just 2 meters in off the track will get you started when it comes to noticing straightness.  

    Ensuring that the hind quarters are truly behind the shoulders regardless of if you are on a straight line or a bend.  Over time this will ‘switch’, in that the shoulders will be in front of the hind quarters.  However, this takes more ‘feel’ on your part as the rider.  It also takes more engagement and strength from your horse in order to lighten the front end.

    If you are also just beginning to work on straightness for the first time, becoming mindful about what you can actually see – and what is directly in front of you – is often a little easier. Hence my recommendation of shoulders followed by hind quarters to get you started. 

    The Quarter Line

    Let’s start with this simple movement.  Riding down the quarter line with your horse.  The quarter line is the imaginary line half way between the long side of the arena and the centre line.  There are two of them in any arena!

    Many riders will call the second one the three-quarter line. However regardless of which you ride and what you call it, riding on the quarter line means there is no rails, posts or fences to guide you and your horse.

    What I have noticed is that most riders, as they ride the second half of the line, will begin to ‘fall in’ around the upcoming bend or corner. They ride a large oval or egg shape, rather than a rectangle. 

    Instead of riding to the end of the line and riding the 90 degree bend or corner, the blend everything together.  The corner is no longer defined.  The shoulders, followed by the hind quarters, just veer off track until they get to the short side.

    The straightness on the quarter line was not defined, which resulted in the straightness through the corner not being defined. 

    Rather focus on riding straight, right up to the corner. From there, think about the quality of the bend.  The suppleness through your horses body.  The ‘tracks’ created by your horses inside legs and his outside legs.  The ‘mould’ your body is creating for your horse to travel through the bend.

    This can be started in walk and later worked on in trot and even canter.

    Defining the Line using Poles or Markers

    If you are still struggling to stay on track, I suggest defining things a little more using poles or markers.   I will be running a free ‘mini-course’ in July 2018 where you can get the printable outline for this exercise and what it looks like.  Of course this is just one of the exercises we will be using.  You can sign up to join us HERE


    My one tip for today if you are using poles or markers is to start with ‘wide’ poles.  A less defined track.  Then as your horse develops you can ask for a tighter and more defined track or line. 

    Suppleness

    One of the greatest ways to develop straightness is to focus on increasing true suppleness.  I personally believe that suppleness and straightness are directly related.

    You cannot be truly straight without being supple – ask anyone who practices yoga!

    You want to make sure that rather than your horse falling in or out through the shoulders or hind quarters, derailing, he is truly bending through his body.  Through the 90 degree corner you are riding at the start of and the end of each quarter line.

    Initially he may be ‘tight’.  There may be a lack of bend and this is where you’re focusing on increasing the overall suppleness will have a huge effect.

    Most horses ‘derail’ around corners because it is easier than bending through their body to remain on track. 

    Notice how, when you ask for the bend, is there any loss of rhythm or relaxation.  This is a good indicator that your horse is not as supple as you think he is.  Notice how well he transitions from straight to flexion to bend.  Notice how well he cope if you add circles into the exercises at the corners.

    Noticing the Difference

    By defining what is straight and what is a corner.  What is a rectangle and what is an oval.  By consistently asking for better quality line and then allowing your horse to ride on those lines, you will begin to develop him more evenly through his body.

    The result will be greater strength in propelling you both forward.  Equal thrust from the hind quarters, which will lead to a stronger, more correctly developed horse.

    Helping Your Horse

    Many riders almost look like they are trying to ride the bend.  They twist, contort, shuffle, pull, squeeze… You name it!  They interfere with the horse as he is travelling and moving forward.

    Your job as the rider to set things up and then allow the horse to actually ride through the bend himself.  You simply facilitate him travelling through the bend. 

    Part of straightness is balance.  Part of balance is finding the mid-point.  Becoming stable.  Set things up.  Put your horse in the best possible position to make it correctly through the bend.  And then simply allow him to do just that.

    Will you have to step in and assist from time to time?  Yes!  However assisting is different from doing it for your horse.  Assisting is first allowing him the space to try, and then gently guiding where necessary.

    Have a line in mind and try your best to ride that line.

    Happy Riding

    Lorna

    Links mentioned in the episode:-