Tag: balance

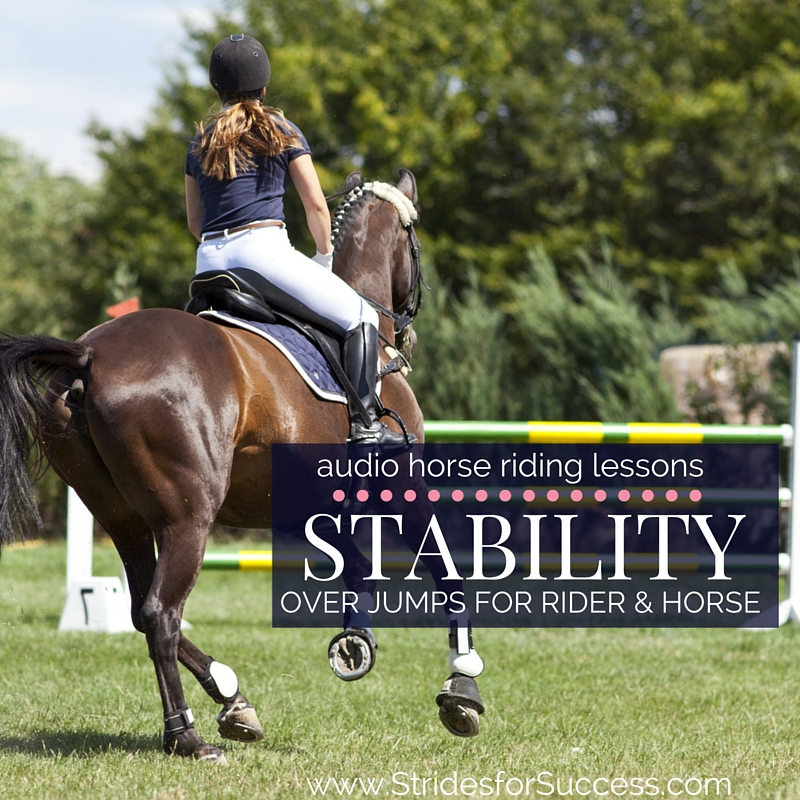
  • Stability Over Jumps for Rider & Horse

    Stability Over Jumps for Rider & Horse

    More stability in the saddle – as riders we are all guilty of being a little like Oliver Twist when it comes to it; we want more, please sir! This is none more true than when it comes to jumping as it is often the activity that makes us feel most unbalanced and ‘wobbly’ in the saddle.

    As riders we want to be as effective as possible in the saddle. We are working towards having aids and general communication that cannot be confused or misunderstood by our horse.

    [smart_track_player url=”https://op3.dev/e/traffic.libsyn.com/dailystridespodcast/691-Improving-Stability-over-Jumps-Rider-and-Horse.mp3″ title=”Increasing Stability over Jumps for Horse and Rider” social_linkedin=”true” social_pinterest=”true” social_email=”true” tweet_text=”Struggling to remain balanced over the fences?! This will help… for horse and rider” hashtag=”Horseriding #jumping #stayingon” twitter_username=”strides_Success” ]

    One of the most rewarding results of developing better stability is that riders find their effectiveness and overall application of their aids increases dramatically.  This is due to  the rider being ‘quieter’, which allows the horse to distinguish better between an actual aid and a random move or shift.

    An easy way to see the benefits of a stable load is to imagine having a schoolbag or backpack strapped over both shoulders; and then going for a jog. If the bag does not fit correctly, perhaps the straps are too loose or there is too much play inside the bag itself, it is going to bounce around quite a bit as you run. This is going to have a direct effect on how you run and also your balance while running. Imagine trying to jump a fence or jump with this same loose, moving backpack – pretty difficult, right?  This is similar to how it feels for your horse when you are unstable or unbalanced in the saddle.

    However, when it comes to riding, there is the added problem of your horse having to try to decipher between your actual aids and your ‘speed wobbles’

    He is also going to become more unbalanced himself, as he struggles to keep both of you upright while working through certain movements while being ridden, regardless of if they include jumps or not.  This is often very obvious through corners and transitions.

    Very often when riders progress plateaus it can be traced back to the rider being less balanced in the saddle than they should. The impact of which, as mentioned, is very often muddled and conflicting aids being given to the horse.

    So it goes without saying that these challenges are compounded where jumping is concerned. It is not unusual to see riders who have a somewhat secure seat when working on the flat experience a major lack of stability when fences are introduced.  All balance and stability is completely undone as soon as a pole or jump is attempted.

    Become familiar with your 2 point seat

    One of the best ways riders can begin to develop more stability in general in the saddle is to work in a correct 2 point seat. It is difficult for many riders initially to hold and ride.

    However, the 2 point seat will allow you to become very secure in the saddle, through literally standing on your own two feet. It requires a secure and correct lower leg in order for it to work; which overtime will strengthen.

    The 2 point seat is also a great way to both see and feel the relationship between different parts of your body. For example, how an open chest can directly influence your backsides position in the saddle. Or how the position of your lower legs will dictate how balanced the rest of the body is while the horse moves underneath.

    Your chest area will basically balance out your backside when in the 2 point seat. If you don’t have the correct ratio of balance between the two, you will lose your balance in the saddle

    Your brain needs time to ‘recalibrate’ the factors needed to keep your body balanced when in the saddle. Riding in the 2 point seat helps this process to happen a little faster; and for the rider to understand the process as well.

    Improving Stability over Jumps for Horse and Rider

    Realising ‘Cause and Effect’ is Happening

    When we are jumping we need to be in complete control of our body, so we do not feel like the loose backpack to our horse. A lot of riders make the mistake of relying on the horse for balance over the fences.  They will lean on the horse’s neck or ‘hunker down’ into the saddle, which will inevitably hinder how the horse can use himself over the jump.

    Of course, the added problem with using the horse for balance is if the horse stumbles, runs out or perhaps has a refusal at the fence. The rider is completely ineffective to help; and often ends up on the ground because their balancing aid – the horse – suddenly stops working!

    Developing a secure lower leg is key to beginning to take responsibility for your own stability and balance when riding your horse. The 2 point seat, and the ‘burn’ that often accompanies it, is a fantastic way of working this part of your body in the saddle.

    Knowing how to adapt the use and position of your lower leg when in the saddle, will directly affect what happens to the rest of your body in the saddle.

    The difference between ‘secure’ and ‘fixed’

    When initially beginning to work on this particular aspect of riding, many riders mistakenly try to ‘fix’ themselves in the saddle. They become rigid and stiff. This, unfortunately, will result in a marked decrease in their overall stability and balance.

    You definitely don’t want your leg doing the ‘hokey pokey’ when you are riding – but fixing your leg in one place will not work either.

    You need to rather focus on suppleness through your body and leg. When you are supple in the saddle, you will be able to move with your horse, all the while remaining in the best possible position for your body to make the micro adjustments needed to stabilise and balance you in the saddle.

    You need to allow and move with your horse, rather than fix and bump against your horses motion

    This suppleness comes from your joints; ankles, knees and hips. Working in the 2 point seat will help you notice and then begin to use your joints to stabilise your position and body in the saddle as your horse moves underneath you.

    I think it is also worth mentioning at this point that your contact is important when working in the 2 point seat. Many riders seem to think that the 2 point seat is rather a jumping position on the flat. It is not!

    Your contact will remain consistent with your horse throughout your 2 point seat, which will allow you to, again, effectively communicate with your horse while you ride

    Once you have begun to master the 2 point seat on the flat, through walk trot and then canter, you can begin adding some ground poles to your exercises.

    Becoming more secure on the flat is the key to being able to move with your horse in a balanced way, rather than relying on, your horse over fences. The ground poles will allow you to work up to some jumps later; but I strongly suggest waiting to move forward with your training when you have mastered this on the flat initially.

    Happy riding
    Lorna

    This podcast episode is the first in a series of 5 on the topic, available for you inside of Daily Strides Premium. The remaining 4 lessons will take you step by step through different exercises that will help you become more secure and balanced in the saddle.

    Those audio programs can be downloaded onto your phone and then listened to as you ride your horse. They are filled with reminders on what to do, step by step instructions on how to do it – can have the added bonus of being replayed over and over again! You can find out more about Daily Strides Premium by visiting www.stridesforsuccess.com/join/.

    [wp-tiles post_type=”post” orderby=”date” order=”DESC” grids=”Simple”]

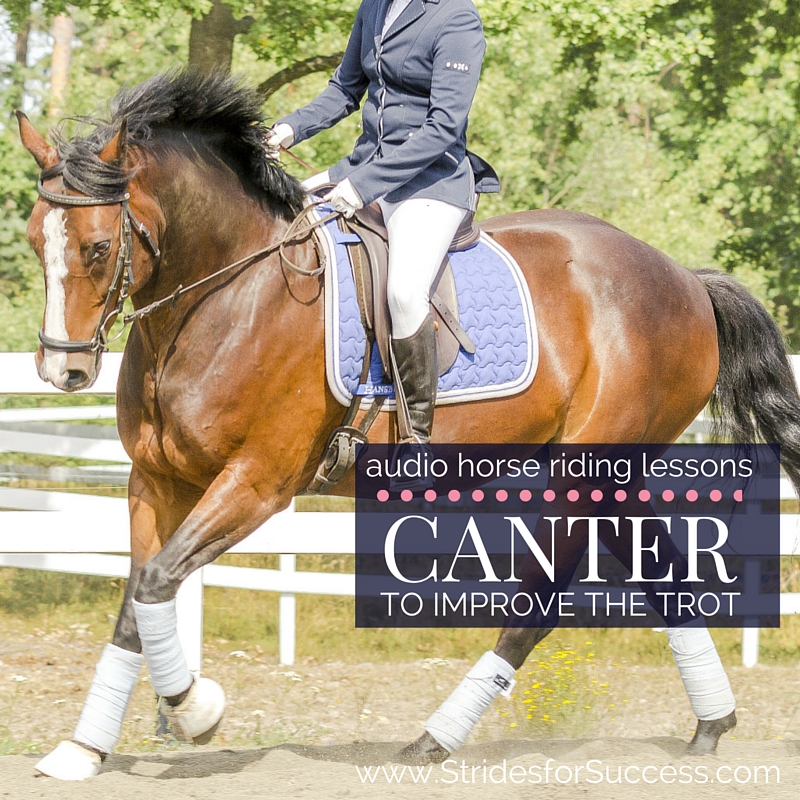
  • Canter to Improve the Trot

    Canter to Improve the Trot

    🌟🐴  Get the Improve Your Canter Program TODAY and transform your riding – and your training 🐴🌟

    Have you noticed how, very often, there are only two ‘gears’ when trotting; a good, forward trot or a bland, shuffle trot? However, changing from the latter to the former can often be one of the more difficult aspects of trotting.  If so, have you ever considered using the canter to improve the trot?

    Sounds too good to be true, but very often a good, forward canter can be the simple catalyst from that mediocre flat shuffle, to that wonderful springy and engaged trot.

    [fusebox_track_player url=”https://op3.dev/e/traffic.libsyn.com/dailystridespodcast/676-Using-the-Canter-to-Improve-the-Trot.mp3″ title=”Canter to Improve the Trot” social_linkedin=”true” social_pinterest=”true” social_email=”true” ]

    However, like everything worth doing in life, the canter must be of good quality, and the transitions both into and out of the canter from the trot will often dictate just how effective this technique will be to your horse’s schooling.

    What Makes a Good Trot?

    So, before we go any further, let’s chat quickly about what exactly makes a good trot.  The trot itself is usually quite easy to establish a rhythm, the 1.. 2.. 1.. 2.. almost setting itself up each stride.  The trouble for many riders is then regulating the tempo of that rhythm.

    If the rhythm is the 1.. 2.. 1.. 2.. the tempo is how often that 1.. 2.. rhythm occurs in any set period of time or distance.  

    For example, take the long side of a 60m arena.  By adjusting the tempo of the trot rhythm, you can either have a lot of ‘quick’ 12121212s occurring, or you can have fewer 1…… 2…… 1…… 2……. happening in the same distance.

    So when many riders begin trotting, establishing the rhythm and tempo is often not a problem.  But as soon as they begin to make adjustments to the trot, one (usually the tempo) or both can very quickly become erratic.   Those adjustments can be half halts, shortening the stride, lengthening the stride, or asking for a transition either up or down to a different gait, or within the gait itself.

    In fact, even just beginning to activate the hind quarters and connect the horse a little more very often results in a loss of rhythm and tempo.  This is where we see many horses either begin to run in the trot, or become heavy and lean on the rider’s hand.

    Canter to Improve the Trot

    Riding the canter to improve the trot will help riders to firstly become more quiet in the saddle. It also improves the riders skills in noticing if the gait itself is a quality one to begin with

    Because of the transitions between trot and canter, riders may want to rather ride in a sitting trot when riding the trot.  However, I strongly suggest just using the sitting trot for the actual transition.  Post or rise to the trot when working in the trot.  The reason I say this is because, in order to improve the quality of the trot, the horse must first engage his hindquarters.

    For this to happen, the energy being created there must be allowed to connect through, underneath the rider and saddle, from the back to the front

    Using Your Energy Wisely

    However, it has been my experience that when working between trot and canter for any length of time, riders tire quickly.  This causes them to begin ’slouching’ through their upper body and this, in turn, results in them ‘shutting down’ that flow of energy necessary for the horse to truly work in a quality trot.

    So, for the duration of this exercise, I suggest working in rising or posting to the trot where you can, to give both yourself and your horses back a little break!

    Start with ‘Forward’

    Start by asking your horse to work in what you would consider a forward-going ‘working trot’.  Focus on the rhythm and then the tempo, particularly as you work through corners or change rein.  Can your horse remain to maintain consistency in both?  Many riders wonder if the trot is indeed a ‘working trot’.

    The next part of the exercise will quickly tell you either way if your trot is working, or shuffling!

    Using Canter to Improve the Trot

    Using Half Halts to Prepare

    Begin to prepare your horse for canter.  Use your half halts, but all the while paying close attention to the aforementioned rhythm and tempo.  I also think noticing how straight your horse remains through the transition is important.  Do his hindquarters swing or drift?  Does he ‘curl’ around your inside leg?  Or perhaps he is bracing against your inside leg…?  If you notice any of the above, take this as your cue to begin working through these more basic evasions, before you allow your horse to canter.

    You may find maintaining the rhythm and, in particular, tempo as your horse transitions into canter from the trot rather difficult.  This is what your focus should be on throughout the schooling session.

    Think of ‘you ask – he responds’

    Working Forward in the Canter

    Once in the canter, firstly make sure the canter is moving forward and actually taking you somewhere.  One of the reasons we can use the canter to improve the trot is because the canter often has naturally more energetic and rolling energy with it.  Having to push and kick at every stride is not forward.  But it is important to note that allowing your horse to run like a wild thing around the arena is also not a forward canter.

    The canter can be classed as ‘forward’ if the energy is taking  you somewhere and that somewhere is dictated by you.  You can influence where it goes and how much is allowed ‘out’ at any give time in the gait

    The Canter to Trot Transition

    Once you have indeed established a forward canter, you can begin thinking about transitioning back into the trot.  Again, maintaining the rhythm and tempo is vitally important.  What is also important is the fact that you ‘allow’ your horse to trot.

    There is a split second, that you will feel, when your horse actually takes that step that transitions him from the canter into the trot.  In order to do this he must ‘land’ into the trot. And you must ‘allow’ or ‘soften’ through your hand so he can indeed move forward into the trot

    This is also where I suggest posting or rising from the first step.  This way, when you have ‘allowed’ him to continue to move forward, that energy in his hind quarters can indeed connect with the front end.  It will feel like he is ‘swinging’ underneath you.

    Feeling the Difference to the Trot

    Many riders find that the first time they really ride a good trot with their horse, the bounce is a little too much for them.  Again, rising or posting will help you initially.  Then, later, as you become more supple and allowing through your body, you can start moving with your horse and this new energy in sitting trot.

    You can use the canter to improve the trot both in the saddle and on the ground.  The same principles can be applied when lunging your horse with the added bonus of actually being able to see the results, rather than feel them

    Keep in mind that in order for your horse to improve and develop himself, it is your responsibility to establish and maintain that straightness, rhythm, and tempo.  Work towards being able to move up and down, through your horse’s gears, without losing any of the above.

    It is also vital that your horse continues to ‘move forward’ at all times; taking you somewhere.

    Happy Riding
    Lorna

    Improve Your Canter Program

    4 weeks of self-study with easy-to-follow audio horse riding lessons that will help you to transform your canter – and your aids in your riding. Suitable for riders who are just getting started with canter, and riders who want to improve both their abilities and their horse’s canter.

    And with lifetime access, you can dip in and out of the program again, and again… All of the details are HERE

    Connection; The Online Resource for Riders

    This podcast is the first in a series of five on this specific topic which were created for Daily Strides Premium, now know as Connection.  Every month you will get audio horse riding lessons to listen to as you work your horse. Connection is created to help riders working alone, without a trainer or coach, to continue to both improve their riding AND train their horse.

    All of the audio programs are step-by-step instructions for you to follow while riding your horse.  All of your lessons are available, on your phone, using a Private Podcast Feed. 


    All of the details are available at https://stridesforsuccess.com/join.  The membership is risk free, with no contracts.  You can cancel any time. I would love to have you on a lesson soon :)

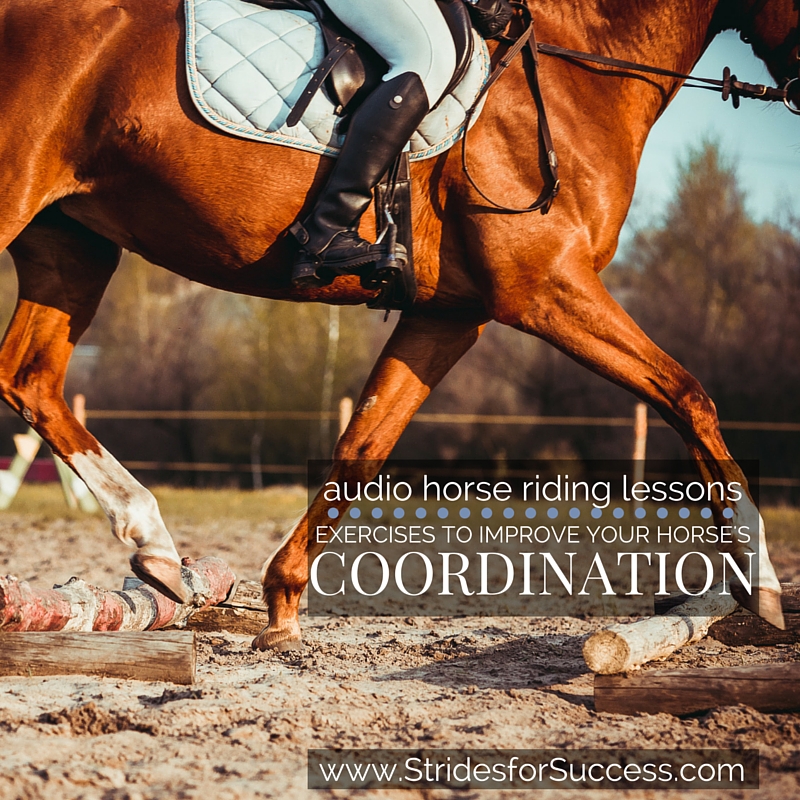
  • Exercises to Improve Your Horses Coordination

    Exercises to Improve Your Horses Coordination

    Have you ever experienced moments when ‘lack of coordination’ seems to be the best description for you while in riding  your horse?  It often leads to feelings of clumsiness and a general lack of confidence in your abilities, right?  Well, imagine how it feels when your horse suffers a similar lack of coordination; lack of balance leading to an uncomfortable ride for both of you.

    This lack of coordination in horses is often associated with fitness and general conditioning, and this is partly true.  Your horse’s general fitness levels, or lack thereof, can play a large part in his overall ability to remain in a balanced way of going.  However, there are other factors that also play a large part in how well your horse can use his body, particularly when in a different or unfamiliar situation.

    [fusebox_track_player url=”https://op3.dev/e/traffic.libsyn.com/dailystridespodcast/646-Exercises-to-Improve-Your-Horses-Coordination.mp3″ title=”Exercises to Improve Your Horses Coordination” social_linkedin=”true” social_pinterest=”true” social_email=”true” ]

    Take your own coordination as an example; if you were to do a task that you do regularly, such as making a cup of tea or coffee in your own kitchen, you would find that your actions happen as though your body is on autopilot.  However, if I asked you over to my house to make some tea; you would find it much more difficult to do pretty simple tasks.

    The same principles apply to your horse, if it is something he does a day in and day out, his body has already figured out the best and most effective way for it to do that particular movement or task.  It is smooth and probably looks graceful and simple because it is done in balance in a way he feels comfortable.   However, just like your own tea making capabilities, when you begin to add different factors to your horse’s schooling, or change scenarios, things can become rather wobbly quite quickly!

    You have to agree that most young horses look wonderfully coordinated while in the field however, as soon as a rider is placed on their back it suddenly seems becomes a rather large effort to continue with one foot in front of the other without falling over!  This is the horse having to learn or adapt to a different situation – this particular one being having a rider on board

    We also see older horses struggling with coordination.  Particularly when they are ridden all the time in a beautifully manicured and maintained arena.  They are used to having perfect footing underneath.  But if you take them out of the arena, maybe on the trail or into an appropriate paddock or field; well things are very different.  The rhythm and balance are suddenly lost and it almost feels like the horse has forgotten all his past training.  Sure, you will have moments where it feels good, but for the most part, it is a disjointed effort that pales in comparison to when he is working in his comfort zone.

    When we are in the saddle, it is always a great advantage when your horse can adapt immediately to different situations you may find yourself in, quickly and without a break in balance or rhythm

    So the first step in improving your horse’s coordination is highlighting the quality of your transitions. This is something you can begin working on immediately when riding your horse the next time.  Focus on the balance and consistent rhythm of each individual transition.  Pay attention that your horse is not speeding up the tempo of the gait he is in before the transition.  Also, work on establishing the new gait as quickly as possible after the transition.   By becoming more concise and specific about how you prepare, and then ride each individual transition, you can begin conditioning your horse to balance himself better and adapt to different situations with greater ease.

    Don’t make the mistake of only working in the more exciting transitions, such as trot to canter and canter to trot.  Transitions that include halt, walk, and trot are equally as beneficial and often easier for the rider to be more consistent through.  Again, focus on the quality of the gait leading up to the transition, maintain that gait right the way until the transition occurs.  The transition itself should be coordinated, straight and smooth, and then followed by a good quality gait afterward as well.

    Imrpoving Your Horses Coordination

    The second thing you can do is working some lateral movement into his schooling routines.  Think of the transitions as really working him while moving in a straight line, tail to head.  The lateral movement then works him sideways, so working his body differently and forcing him to balance differently.  Very often horses that can adapt and who have good coordination are able to remain in balance while moving sideways.  Practicing this in the arena will begin to develop your horse’s ability to do this as well, with you on his back.

    One of the other ways to improve your horse’s coordination is to work him over ground poles.  He must become very aware of how he is moving his body and where he is placing his hooves.  Groundpoles also helps coordination by improving the physical strength of your horse’s back.  They ask more of his joints, his back, and his whole topline in general.  All this while remaining balanced and moving forward in a rhythmic manner is excellent for him.

    You can use single groundpoles placed randomly around the arena, with your horse having to ride different shapes to reach.  You can also use basic trotting poles, either flat on the ground or raised, and later you can build simple grids.

    Regardless of how you use the poles, they will definitely help your horse to become more aware of his feet and legs while being worked in the arena and build muscle and strength while doing so

    The final suggestion I have for you to begin improving your horse’s coordination is hill work.  I am not talking about steep, grueling inclines that exhaust your horse; rather mild inclines that ask him to use himself slightly differently, but in doing so, strengthen and condition his body.   You can work up and down the hills, and later once you are both happily walking and trotting up and down, you can begin asking different questions by introducing transitions into his hill work.

    Maintaining the rhythm of the gait while working and down hills is difficult for many horses.  It is also different because most hills will be either on the trail or in a paddock or field, making the footing or terrain a little less accommodating as well

    So improving your horse’s coordination won’t happen overnight, it will take time.  By working some of these exercises into your daily schooling, or warming up and cooling down, you will help your horse reach a greater level of coordination throughout his body, which will make riding more enjoyable for both of you in the long run.

    Happy Riding
    Lorna

    This blog post and podcast episode is an introduction to 5 audio programs on this specific topic, taking you step by step through exercises you can ride that will improve your horse’s coordination. The other programs are created with riding in mind and listening to them is literally like having a riding instructor with you while you school your horse. The lessons are easy to download onto your phone and then use when in the arena.

    To find out more about how you can get this week’s lessons, as well as over 600 others, you can visit www.stridesforsuccess.com/join/.


    [wp-tiles post_type=”post” orderby=”date” order=”DESC” grids=”News”]

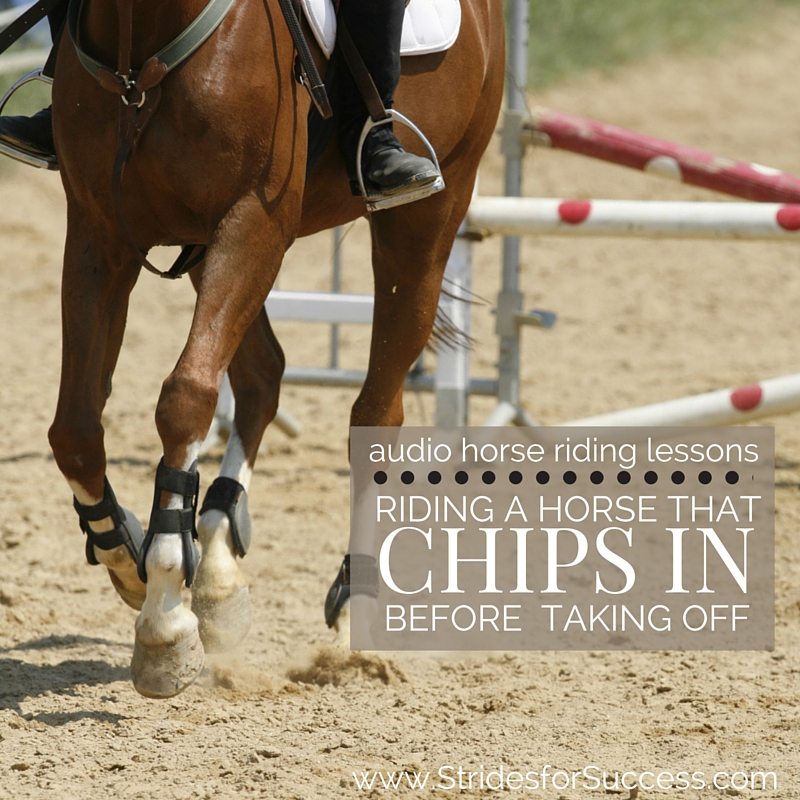
  • Riding a Horse with a ‘Chip In’ Habit at Take Off to a Jump

    Riding a Horse with a ‘Chip In’ Habit at Take Off to a Jump

    You are cantering towards the jump… 3… 2… 1… But instead of the ‘Jump’ that should have followed the 1; you get a chip in.  A moment where your usually trusty horse decides to test both of you by inserting a little ‘half stride’ in there before takeoff!

    The result is you do a great Thelwell impression and your horse does his best helicopter move; straight up and straight down…  Not a good feeling for anyone!

    Riding a horse that regularly includes a chip in or three is not enjoyable for anyone; the rider, the person watching, or the horse.  Of course, it can happen to anyone, we call have days where we get the stride to the fence wrong. However, for some horses, it becomes a habit that can seem almost impossible to break. That extra little half stride…

    [fusebox_track_player url=”https://op3.dev/e/traffic.libsyn.com/dailystridespodcast/636-Ridig-a-Horse-that-Chips-In-Before-Take-Off.mp3″ title=”Riding a Horse That Chips in Before Take Off” social_linkedin=”true” social_pinterest=”true” social_email=”true” ]

    What A Chip In Looks & Feels Like

    This habit is uncomfortable and does little for building confidence to clear a course of fences safely.  However, before we look at how to begin working with a horse who adds a little stride here and there, let’s back up. It is important to first realize what this is and why it might be happening.

    When a horse chips in before a fence, he has literally fitted an extra stride into a space. A space that there was really not enough room for that stride…

    He decided that, rather than taking off where he initially met the base of the fence, he would get creative.  He would add a quick little half stride in there and then take off.  It often results in a ‘cat jump’ which is all four legs really taking off and touching down at the same time, due to the loss of impulsion or energy.  It can also result in a ‘helicopter jump’, which is a jumping effort, but with an extremely steep up followed by an extremely steep down, with just the width of the fence in the middle!

    In both these situations, the horse is not using his back or body to the best of his abilities and it feels really uncomfortable for the rider.   Because of the loss of ‘flow’ in the stride, the rider very often ends up either too far ahead of the movement or left behind.  Both scenarios will usually result in both horse and rider not being correctly prepared for the next, upcoming jump.

    Why Your Horse Might Chip In

    There are lots of reasons your horse may chip in before a jump or fence.  It is also worth remembering that most horses will do this at some point in their training.  However, we are dealing today with a ‘chip in addict’, or a horse that does it more times than not.  In order to identify why we must first look at the horse’s approach to the fence…

    Is it rushed?  Maybe he leaning or pulling on the reins and being heavy on the forehand?  Or is he moving forward? Perhaps are you literally scrubbing and kicking every stride just to get to the base of the fence?  

    With regards to the rushing or leaning, this may be due to a lack of training.  This will often result in a lack of confidence in your horse.  He may be off the mindset that he must ‘just get it done’ as quickly as physically possible.  Unfortunately when this happens, the rider’s reaction and how they deal with it plays a big part in not only the result for that particular fence but also the long-term as well.

    Retracing some basic steps in his training is very often the way to begin overcoming this challenge

    If your horse is on the other side of this coin, he is not taking you to the fence at all, this can also be a training issue.  However, again, it may also show signs of a lack of confidence in his abilities.  I strongly suggest that, whatever the cause, take things back to basics.  It truly is the key to building and developing correctly.  And to show your horse that he can indeed successfully make it from A to B over a fence.

    Could It Be You?

    Sometimes, a horse that chips in is doing so because of how he is being ridden by the rider…  A nervous rider often tends to throw themselves into their jumping position a little early.  This will encourage the horse to ‘chip in’ before the fence.  Unfortunately, this is often a difficult and vicious cycle to break.

    The rider is nervous because the horse is rushing, the horse begins to chip and rush even more because the rider collapses before the fence and ‘drops him’, both emotionally and physically. This causes the horse to rush even more.  And so it goes on and on…

    If you feel that this is the issue, I would strongly suggest working over a single pole and practicing your timing and your balance.  The light seat is wonderful and will help you do this.

    Riding a Horse that Chip In before Take Off at Jumps

    Begin By Improving Flatwork

    So, once we have discovered why your horse chips in before a fence, we can then look at how to begin working through it so we can get a good take-off point and reach each fence in the best possible way.

    A good place to start working with your horse on the flat and improving his general responsiveness and understanding of your aids in the saddle.  Does he listen when you half halt?   Or do you find yourself pulling and hauling to get him to ‘steady’ a little?

    Does he move forward when asked to do so from your leg?  Or do you have to kick and click like a crazy person to get any sort of movement happening?!  These are basic training issues and need to be addressed before we even think of turning our hoof to jumping.  It sounds repetitive, but this is because it is true… You have to have the basics mastered before you can move on to more ‘exciting’ things in the saddle!

    Your ability to balance things with a half halt while keeping your horse moving forwarding is vital to being able to approach any fence successfully.  Keep in mind that a horse who chips in every now and then is a horse who is not so confident in jumping.  He needs a rider who can allow him to build his confidence in a controlled, systematic and patient environment

    Figure Things Out for Himself

    So, once you have the basics working, I suggest beginning to allowing your horse to figure things out on his own, without a rider, in a controlled environment.  This can either be lunging or loose schooling, but the word controlled is the important one in the previous sentence!

    Loose schooling or lunging a horse over fences does not mean chasing them into a frenzy around the arena at dizzying speeds.  

    It is simply creating a situation that is conducive to an optimum jumping effort, either one or two fences.  Then allowing your horse to approach and work things out himself.

    The benefit of loose schooling is that you can have two jumping efforts, 2 measured and correct stride lengths apart from each other.  The first jump, a cross pole, is to set your horse up correctly for the second fence, which can also be a cross pole or an upright or parallel. Due to consistently meeting the second fence at the correct distance, your horse will begin to figure things out himself.

    Distance & Spacing of Poles & Jumps

    It is also important to remember that the ‘correct distance’ is what is correct for him, not trying to force him into a standard jumping distance.  Rather allow him to first build his confidence in his own abilities using a distance that suits his current way of going or current stride.

    Once he is able to begin ‘picking’ a correct take off point, without any anxiety, you can then slowly begin working over adjusted distances

    Also, don’t see the loose schooling or lunging as a once-off occurrence.  Rather, try to incorporate them into his training for as long as necessary.  Very often with horses, it is a lack of balance that causes them to be unsure of the jump, leading to a chip in here and there.  The rider will definitely affect this balance or lack of, so allow him time and space to work it out alone before then adding a rider into the equation.

    Using Groundpoles while Riding

    As well as the above, you can begin working over ground poles in the saddle with your horse.  Laying out a single ground pole and cantering over it can be a helpful exercise for both horse and rider.  With regards to the horse, we are looking for a balanced and rhythmic approach and also, a canter that is taking you to the fence, rather than you having to ask and push for every stride.  Try to keep the rhythm as consistent as possible, and the hindquarters underneath the horse.

    You can also use this to begin training yourself to see a better stride before the fence.  Simply counting backwards from where you think there will be three strides before take off is a fantastic exercise to get you in rhythm with your horse and begin seeing the stride.  Only when you can actually see the stride can you then look at adjusting the stride.  Before that it is just the luck of the draw – never a good idea when there are jumps involved!

    As you canter in on your ‘approach’ to the fence start 3…  2…  1…  Jump.   If you get in wrong the first few times, don’t worry.  Just keep trying to gauge that point where you are three strides away.  Later you can make things a little more difficult for yourself with 5…  4…  3…  2…  1…  Jump.  You will find that the more you ‘tune’ your eye into the approach, the further out you will be able to see if the take-off point is a good one or is a little too far away or close.  This will give you time to adjust the strides in between which will, in turn, allow you to arrive at the jump in a better position to clear it comfortably.

    Related Distances

    From here you can add more poles on the ground at ‘related distances’ to each other.  Work at maintaining the forwardness of the canter while keeping the rhythm and balance all the way through.  Also, work on your timing of the jumping position.  As I mentioned earlier, it is tempting to get into it a little early if your horse is rushing, but this will only make the problem worse.

    Try to use your 3…  2…  1… to steady yourself and only allowing your body to follow your horse at the ‘Jump’ part

    Once both you and your horse are more comfortable and have stopped any added strides or half strides before the pole, you can begin to build some small fences where the poles are.  Remember that if your horse chips in,  a lot of the time it is a confidence issue, so don’t be tempted to push him further than he is comfortable.  Just because he is ‘able’ does not mean he is comfortable doing it!

    Your horse’s ability to see a stride takes time to establish, just like yours.  Give him that time and it will pay dividends later when you are out on the track.  Count yourself down to the base of each fence, 3… 2… 1… at all times initially (in your head when in the company of others if you want!), but use it as a way to balance both of you on the approach to the fence.

    Happy Riding
    Lorna

    Connection for Equestrians

    If you are interested in finding out more about how you can begin re-schooling your horse in all aspects of riding, Connection might just be what you are looking for. Each week you will receive 5 audio ‘lessons’, where I give you step by step instructions.  You can listen using a free app on your phone, on your computer, or via your favorite podcast app.

    This makes it really handy to use and listen to while riding your horse; in the saddle.

    We cover loose schooling, working over single poles, related distances, and also working on improving your eye to see a stride. There are also diagrams with the actual distances for you to replicate in your arena.

    Find out more over at https://stridesforsuccess.com/join

  • Riding a Bounce to Improve Overall Strength

    Riding a Bounce to Improve Overall Strength

    Have you ever experienced popping over a jump with your horse, when he suddenly realises he needs a little ‘more’ if he is going to clear the jump?  He stretches, or pushes, a little farther than you expected and suddenly you find yourself very much behind the movement and bracing for the inevitable ‘thud’ that your backside connecting with the saddle will create on landing!

    Or perhaps your horse has a frustrating habit of hanging a hoof here and there over fences, which leads to poles on the floor and a less ribbons than you would like hanging on your wall!

    [smart_track_player url=”https://op3.dev/e/traffic.libsyn.com/dailystridespodcast/601-Correctly-Riding-a-Bounce-to-Improve-Overall-Strength.mp3″ title=”Riding a Bounce to Improve Overall Strenght” social_linkedin=”true” social_pinterest=”true” social_email=”true” tweet_text=”Do you include bounces in your pole work with your horse? Here’s how to get started…” hashtag=”equestrian #jumping” twitter_username=”Strides_success” ]

    Developing both you and your horse’s physical strength is essential for successful, safe and injury free jumping.  But doing so without ‘jumping the legs off’ your horse is often a challenge for many riders.  This is where incorporating a simple bounce or two into your schooling, initially as ground poles and later as actual jumping obstacles, can help you both become stronger and more in control of your body over jumps and fences.

    For many riders, the thoughts of riding a horse into a bounce is a daunting one.  However, it need not be and in fact, will help you not only become stronger, but also give you a greater understanding of how your horse uses his body both before, during and after a fence, and how you must move to stay in sync with him throughout the effort

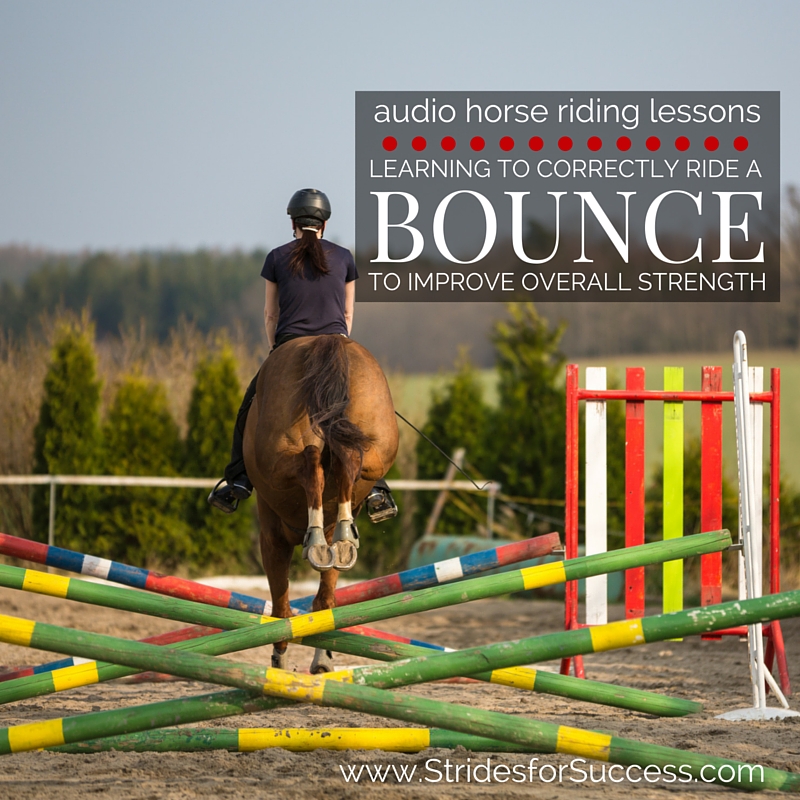
    A bounce, simply put, is when a horse lands from one jump (or canter stride) and as he touches down, immediately takes off again over a second jump or ground pole.  There are no ‘non jumping strides’ between the two obstacles; the front feet will touch down and then as the back feet near landing, the front feet will pick up again to jump the second jump.

    Successfully navigating a bounce requires quite a bit of athleticism from your horse, as well as quick thinking.  They are a super way of teaching horses to ‘snap up’ their front legs and also, to use their hind quarters over a fence and on landing to propel them forward again.

    Learning to Correctly Ride a Bounce to Improve Overall Strength

    For the rider, the bounce requires balance and micro adjustments throughout the body in order to stay with the horse, poised over the saddle, rather than getting too far ahead of the movement, or being left behind.

    It also helps riders to react quicker to what is happening underneath them as the horse is continually having to shift the weight between back and front throughout the sequence

    Riding through a grid containing more than one bounce also requires the rider to understand impulsion and how the horse’s energy must be controlled.  If the horse is ‘chased’ through the fences, he will not have time to make the necessary adjustments to successfully clear the obstacles.  Similarly, if the riders fails to create enough impulsion or energy, the horse will be unable to make it through the line without having poles down along the way.

    Before you begin introducing your horse to a bounce, it is important that he is confident jumping both individual fences and also related fences, such as doubles with one or two non jumping strides in between.  The rider must also be able to stay with the horse over fences and have a secure and balanced jumping position when jumping related distances.

    Start by placing a single pole on the ground and cantering over it.  Feel how your horse moves over the pole, and also, how you remain balanced, while getting off his back, as he canters over the pole.  Once you are both comfortable with this, you can then add a second pole between 3m and 3.7m or 10′ and 12′ away from the first.  Canter your horse over the poles and make adjustments to the distance as necessary.

    Work over the poles on both reins, approaching from different directions.  Working over the bounce when still only ground poles is a great way to test your horse’s rhythm and balance.

    See if you can maintain a consistent rhythm before, during and after the poles

    This is also a great opportunity to see how well you can follow your horse before increasing the difficulty.  I suggest keeping the weight dropped into your heels, your back straight, your shoulders open across your chest and your seat moving with your horse and ‘hovering’ when actually moving over the poles, in a light seat.  You can also use this exercise to assess your hands and shoulders.  Are they ‘following’ your horse’s mouth, continuing to maintain a consistent contact with your horse at all times?

    It is tempting to try avoid landing heavily on your horse’s back, or catching him in the mouth by ‘over preparing’ yourself for the jump.   Over preparing will result in you getting into your jumping position too early, and will see you leaning on your horse’s neck and shoulders for support.  Use your practice over the ground poles in order work on this, rather than when there are actual jumps involved, as it will make it much more difficult for your horse to lift his shoulders and perform a clean jumping effort.

    Remember to wait for your horse to begin over the pole, and then follow his lead

    Also notice how centered your horse is over the poles.  Later, when you are both comfortable popping through the bounce, you can begin to build cross poles, which will help keep your horse centered through the line.   But for now, notice if there is a tendency to drift one way or the other.

    Keep in mind that your horse is always influenced by your position in the saddle, so make sure you are riding in a balanced way through the line yourself

    It is common for riders to ‘duck’ one side or the other of the horse’s neck over fences…  Not a good habit to cultivate, so if it is there, nip it in the bud now!  Think about keeping your chin centered over your horse’s neck or mane as you move with your horse through the bounce.

    Once you are both comfortable riding through a single bounce of ground poles, you can begin to add more poles to the line.   Continue to assess the distance and adjust it to suit your horse’s comfort levels.  Later, as you both become stronger, you can then begin asking more difficult questions of your horse by asking him to adjust to set distances, but to begin with, build his confidence levels by building the lines for him and his preferred lengths.

    You then begin to build actual jumps where the poles are.  Depending on the height of the jumps, you may have to adjust the distances again for your horse, and always move through the line from both directions to help keep your horse fresh.

    Keep in mind that riding a bounce takes concentration and strength from your horse; therefore riding a line of bounces is quite taxing.  Don’t over do it, rather work through it and then leave it for a while, to return later when your horse is fresher.  Working your horse through this when he is tired, either physically or mentally, will only lead to mistakes and injuries.

    Happy Riding
    Lorna

    If you are interested in finding out more about bounces and how they can help you and your horse, perhaps the four other audio horse riding programs about this topic can help you. You can get theses, and hundreds more lessons, in Daily Strides Premium.  You can find out more by visiting https://stridesforsuccess.com/join/.

  • Weight Aids & Seat Bones for Turning & Bending

    Weight Aids & Seat Bones for Turning & Bending

    The bend is approaching and you begin preparing both you and your horse to ride straight and accurately through the turn. However, as you ‘shift’ your seat bones into ‘position’ your horse begins, well, almost side stepping… The further you get through the turn, the further your horse is from the path you had planned; in fact, he has derailed altogether from the ideal ‘train tracks’ you had intended to stay on as you rounded the bend.

    As riders we learn early on about how important our weight distribution is to our horses way of going. We learn about positioning our seat bones, so we can indicate to our horses what exactly the next movement should be. We also learn that our weight aids are fundamental to all aspects of successful communication with our horses in the saddle.

    [smart_track_player url=”https://op3.dev/e/traffic.libsyn.com/dailystridespodcast/591-Weight-Aids-and-Seat-Bones-in-Relation-to-Turning.mp3″ title=”Weight Aids and Seat Bones for Bending and Turning” social_linkedin=”true” social_pinterest=”true” social_email=”true” tweet_text=”Weight Aids and Seat Bones for Bending and Turning Your Horse” hashtag=”Podcast #equestrian #horse” twitter_username=”strides_success” ]

    What we don’t learn is awareness of how the other parts of our body directly or indirectly affect how and where our weight aids are applied with our horse. There is also not a lot of time spent on figuring out how loud or how quiet we can communicate with our horses through our weight aids. In fact, most riders seem to think that a ‘one size fits all’ approach is sufficient regardless of the circumstances, situation or horse involved.

    Learning to correctly feel and then master your weight aids in the saddle is key to developing good feel as a rider. Those subtle shifts and movements, which happen when you direct your muscles to move, rather than your actual weight or bones themselves. This is very much apparent when turning your horse and that is what I want to focus on today.

    So let’s begin with focusing on how your carry yourself in the saddle. Many riders make the mistake of going a little too overboard when told to ‘relax’ through their body.

    Relaxation is key to good riding, however the level of relaxation is also important to consider; particularly when it comes to how it affects your weight aids and seat bones in the saddle when riding

    Ideally you want your muscles to ‘carry’ you in the saddle, enough that your hips and seat are free to move with your horse and follow the motion. Following when riding is a little like following when dancing. The dancer that is following must remain in control of their body, walking that fine line between too relaxed or ‘slack’ and too tense or ‘rigid’. All the while they are looking for cues from their partner and then taking the responsibility on themselves to respond to those cues in the agreed manner.

    Riding is the same. Following does not mean you slouch in the saddle, looking like you have had one too many before you mounted. It rather means you carry your upper body, so your hips and seat are then willing and able to follow the horse’s motion as he crosses the ground.

    Bending and Turning Your Horse Using Your Weight Aids and Seat Bones

    Think about it, your hips and seat bones can not possibly be free to perform a full range of motions if your upper body is heavy and slouching on top of it. Many riders mistake this for ‘shoulders back’, which is unfortunate as this only serves to increase the excess tension and therefore rigidness in the body, rather than simply carrying yourself, through your ribcage and positioning your body in the best possible place from which to begin asking your horse to turn using your weight aids.

    Once you are sure that you are indeed carrying yourself and, as a result, correctly following your horse wiht your seat, you can then begin looking at how subtle changes in different areas of your body will affect your weight aids and therefore what you communicate to your horse through your seat.

    So to begin with, let’s focus on the half halt.  One of the reasons we apply the half halt is to bring your horse’s attention back to you and let him know something is coming up.

    In fact, you can almost think of your half halt as being a big flashing arrow, directing your horse’s focus to your seat so he can begin to get further directions on what to do next

    Not using your half halt will probably result in your horse’s attention being elsewhere and therefore, any subtle movements with your seat to communicate with your horse will have a good chance of being ignored.

    That being said, it is also worth noting that applying the half halt and then following it up with an incorrect, overly exaggerated or heavy use of the seat and weight aids is just as ineffective as not using the half halt at all.  Think of your half halt as the opening part of the sentence which will then, in turn, lead up to the actual question you wish to ask your horse.   Become clear on what you want to ask, before you draw your horse’s attention to your seat to begin with!

    Once you have his attention, think about what you want of your horse as he rounds the bend.  Ideally, your horse’s spine should replicate the arc of the bend or circle.

    Your horse’s spine will stay on the arc all the way through, from his poll or ears to his tail or dock.  Similarly, your spine will too stay centered over your horses, not leaning one way or the other, not twisting and not collapsing to either the inside or outside.

    His hips will travel along parallel either side along this arc, however his inside hip will come slightly forward or ahead of his outside hip.  Your hips or seat bones will be in this same position.  Then look at the shoulders; again, they should remain parallel to the central arc or track as he moves along (like train tracks), however the outside shoulder will have to move a little more forward in order to do so and, therefore, so must your shoulders.

    It seems like an awful lot to remember, and when starting out, it is!  I have found it easier for some riders to rather remember where their legs should be through the turn.  Because your legs are connected to your hips, by moving them into the desired position, your seat bones will generally follow suit and automatically also ‘slot’ into position.  However, as you become used to the inside and outside being dictated by your horse, regardless of where you are in the arena, you can begin rather making the subtle shifts with your seat bones, and then allowing your legs to follow suit.

    So back to how we can use our muscles, either for good or bad, to influence our weight in the saddle.  Find a hard chair or stool and sit down with a hand under each of your seat bones.  Now, begin by moving your shoulders, the right one forwards the left one back and then vice versa.  Notice how a very small movement of only an inch or so, will change how the pressure being exerted on your hands from your seat bones feels.  Similarly, think about ‘weighting’ one of your seat bones.  Many riders will literally ‘bear down’ on that particular seat bone, shifting their upper body to do so.  However, feel that when this happens, your seat bones actually begin ‘sliding’ towards the opposite side.

    Now, rather think of ‘weighting’ that seat body through a combination of elongating the muscles on that side of your torso, and sending a tiny bit more weight or pressure to the heel of that leg.  Notice the subtle change in the pressure being applied on your hand.  It only takes small but precise adjustments with your muscles to ‘weight’ the seat bone.  The more you can learn to control your muscles, the clearer your communication will become with your horse.

    Very often riders use their weight aids in the wrong way; namely leaning with the upper body while will result in their seat shooting to the outside

    The result is that your horse will move completely differently to how you had planned, because he is trying to remain balanced and, literally, stay underneath you.  If you find this happening a lot, go back to making sure you are symmetrical, balanced and straight in the saddle and, once you are sure of that , begin insisting on it from your horse also. Always think about your own body and what you are communicating with your horse while riding  through the corner.

    I really think that being a little ‘picky’ or obsessive about riding in the correct position will help you to make sure that your body is in the best possible place to apply the correct aids for any given movement or direction.  It will take concentration and consistent effort on your part initially, but as your ‘feel’ increases, you will find that merely thinking about it will result in your body shifting slightly in the saddle – and the more consistent you are with always riding in the correct way, the more effective your horse will be at reading the small, subtle changes in your weight and position.

    Happy Riding

    Lorna

    I have written another blog post on applying your weight aids HERE >>

    Get to know your core muscles better which will give you more control over them by joining the FREE 30 Day Rider Fitness Challenge…