Tag: balance

  • Retraining a Horse Who is Heavy on Your Hand

    Retraining a Horse Who is Heavy on Your Hand

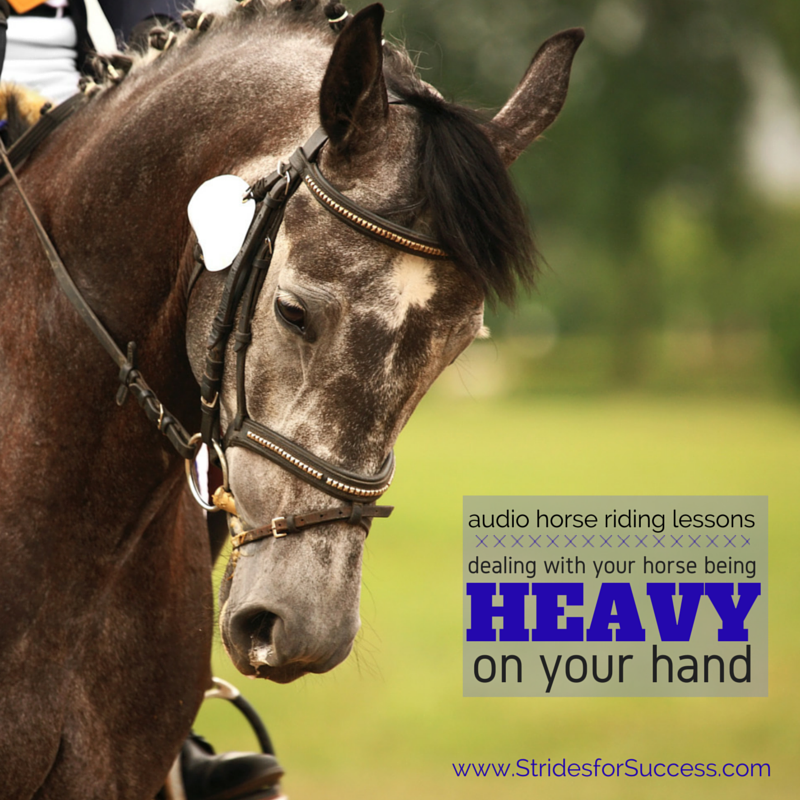
    Dealing with a Heavy Horse
    Have you ever had the experience of riding a horse who was so heavy on the forehand, it felt as though your arms were a couple of inches longer by the time you dismounted?!

    [smart_track_player url=”https://op3.dev/e/traffic.libsyn.com/dailystridespodcast/SFA436-Dealing-with-Your-Horse-being-Heavy-on-Your-Hand.mp3″ title=”Retraining a Horse who is Heavy on Your Hand” social_linkedin=”true” social_pinterest=”true” social_email=”true” tweet_text=”Does your horse tend to get a little heavy in the hand? This may help…” hashtag=”equestrian #podcast #makeeveryridegreat” twitter_username=”strides_success” ]

    The whole experience is exhausting!  It feels as though you are literally carrying the horse’s head and neck by bracing your shoulders and arms against him the whole time…  Not a fun ride!

    Horses that are heavy or lean on your hands are unfortunately more common than not.  It is usually the result of the horse not been thought to yield to the pressure of the bit.  Or a horse who has been wrongly trained or retrained by a rider to lean on the bit.

    Why This Doesn’t Work for Your Horse Either

    When your horse is heavy in front, he will find it difficult to perform correct, balanced transitions.  He will have trouble bending consistently throughout his body.  His lateral work will usually be stiff and ‘jerky’ and his jumping abilities will also suffer as more weight than usual is on the forehand and shoulders.

    You will also find it difficult to engage the hind quarters and bring them ‘underneath’ your horse.

    In fact, when you are riding, it will feel as though all the energy is falling out the front end of your horses body.  Plus the fact remains that no amount of pulling on your part will actually go towards fixing the problem!

    The lack of balance that is a result of this leaning will become even more evident later, when more difficult questions are asked of your horse.  ‘Heavy’ horses, generally, end up beginning to rely on the riders hands for support and balance throughout the ride.  This, of course, just exaggerates the problem even further!

    Is it a Bit Problem? Nope, Not Usually!

    Most riders will try to remedy the problem by shoving a stronger bit into the horse’s mouth.  The thinking is that it will give them more ‘leverage’ to haul on the horse even further…

    However, this will generally will only worsen the problem as the true cause for the leaning has not been dealt with.

    The Most Common Reason for This Happening

    Horses being heavy or leaning on the hand often become like because of their rider.  More specifically being ridden by a rider who lacks an independent seat or lacks confidence.  The unstable rider will use the horse’s mouth for balance and support.  This then trains the horse to firstly ignore the rein aids and, even worse, lean into in the contact.

    Anxious or nervous riders will tend to hang on to the reins often as reassurance that they are ‘in control’ of the situation.  

    Again, this leads to the horse’s mouth becoming hardened to the hand aid.  The result often being that the horse moving more and more onto the forehand.

    Very often the stiffness and dependency of the rider carries through and is passed to the horse.  This creates a similar stiffness and co-dependency in the horse.  The horse begins to use the riders hands for physical and mental support.

    The Never Ending Battle

    After being ridden like this for a while, the horse will learn to begin to ride into the pressure.  This will soon transition to pulling against it.  Which is what makes this such an exhausting experience for the rider who encounters a horse like this…  The rider will never win against a 600kg horse!

    The cycle is self-perpetuating.  The heavier the horse becomes, the more the rider hangs on trying to bring their head and neck up.  Which causes the horse to pull more; causing the rider to haul more… 

    Other Reasons for this Occurring

    Heaviness can also manifest itself in the horse becoming over bent through the poll.  This causes the horse to become ‘locked’ in an unnatural frame, behind the vertical.  This is often the result of too harsh a bit having been applied to the mouth.

    It can also be due to a rider who is obsessive about being ‘on the bit’ without actually using their legs and seat correctly to first engage the hind quarters.

    A horse that moves like this may ‘look pretty’ to an uneducated eye.  But really they are just forced into, and learn to hold, a shape which inhibits their natural movement.  This results in their training stalling and going stagnant.

    Due to horse being fixed in this unnatural shape, he learns to brace against his riders hands to hold himself there.

    Starting Your Re-Schooling of Your Heavy Horse

    Re-schooling a horse to lighten up in front takes time and consistency from a rider.

    Before you begin focusing on your horse, make sure your seat is indeed truly independent.  Especially that you are not dependent on the reins for support or confidence.   Also, begin paying more attention to your aids.  The ‘how, when and where’ you are applying them.

    Confusion on either you or your horses part will almost always result in a loss of balance.  This will only ‘tip’ your horse further onto his forehand.

    Working With All of Your Aids

    Each time when you are asking your horse for something, begin to apply and use your aids in a sequence.  Seat, then legs and finally hands…  There are many different situations and circumstances that we find ourselves in while riding.

    Doing things this way will allow you to prepare both yourself and your horse in a way that will interfere the least with the natural flow of energy and balance.

    Schooling Using the Walk to Halt Transition

    Start by working in walk and begin asking for halt using your seat and core muscles.  Then use your legs to support your horse and make him ‘close’ the halt with his hind quarters.

    Your horse must step into a halt, not fall into one! 

    Finally, close your ring fingers on the rein, resist with your hand.  Many riders will have been advised at some point to lift up their hand as they give the rein aid.  Rather think about closing your ring finger and as you do, allowing a little movement in your wrist which will bring your finger nails ‘up’ more.

    As soon as the horse responds, even a step, reward by softening the rein.  Softening does not mean throwing the reins at your horse or dropping the contact.  It merely has you softening the pressure by relaxing your ring finger again and ‘allowing’ a little with your arm.

    Understanding the Balance of Your Aids

    If your horse insists on walking through your hand and ignoring you, apply a stronger aid, asking for a very firm ‘stop’.  Be sure to reward as soon as he does so.  Sometimes you will have to be quite stern on your horse, particularly if he has become quite good at ignoring you!

    Make sure that while you are being firm, you are also holding your correct position and asking correctly for the halt – just applying more pressure as you do so.

    Once your horse has halted, ask him to stand for a few seconds.  Use this time to reevaluate your position and correct it if necessary.  Your horse should not need you to keep applying the ‘hand brake’ while he is halted.  He should merely wait patiently for your next question and then respond accordingly in a timely fashion.  No dilly dallying!!

    Repeat as Necessary

    When you are satisfied that you are sitting correctly, ask him to walk on again, using your seat and legs. Make sure that although you have a contact, you are allowing him to step into the walk, not resisting with hard hands or arms… Soft, Soft, Soft.

    Walk for 5 strides and again, using sequence of the seat, then legs and finally hands, ask for halt again.

    Be firm if necessary, but make sure that you are not leaning back and hauling.  Let the firmness come from your core, with your legs underneath you, rather than having a tug of war leaning backwards and hauling for all your worth!

    Working on Suppleness

    Once you have established a good baseline for halt, using the seat, legs then hands sequence, ask for halt again.  Once there, open your right hand away from your horse’s neck and ask him to bend his head and neck a little to the right by ‘having a conversation’ with your ring finger.  You can do this by squeezing the ring finger two or three times.

    As soon as your horse yields to the pressure and bends the head and neck reward him.  Do this softening the rein and using the voice if necessary to reward.


    Repeat to this same exercise to the left.  If you horse is more hesitant one way or the other, make a note of this.  I suggest working some suppling exercises into his schooling sessions to begin remedying the problem.  Also, some horses can become so stiff through their heads and necks because they are leaning so much that only the slightest of ‘gives’ is all you will see.

    Reward any small step in the correct direction.  Then use this as your measuring stick to gauge how much progress you are both achieving over time.

    Balance in the Halt Itself

    Your horse should continue to remain in a square halt while he does the above exercises.  You may find that he wants to move his shoulders to try counter balance himself.  Use your legs to hold him in a square halt.  Again, remember to only ask for small movement in the head and neck to begin with.

    You can also begin to add some trot in to the schooling, particularly transitioning between walk and trot.  Choose an amount of trot strides you want to ride, perhaps 5 or 6, each time and make sure it is an active working trot that you are riding.  Use the same downward aids that you applied in asking for halt to ask for the walk.  Walk for 5 or 6 strides and then forward to trot.

    Consistency and Time are Essential

    Continue to move up and down between the gaits, focusing all the time on not participating in any tug of wars or leaning matches.

    It will take time to retrain your horse and also you the rider, however it is essential if you want to move forward and progress with your training.  A horse that resembles an arrow aiming for the ground while being ridden will never achieve the lightness and self carriage in front that is essential to them becoming the best version of themselves.

    Happy Riding
    Lorna

    Links to Related Articles & Freebies Which You May Find Useful:-

  • Developing Your Horses Self Carriage

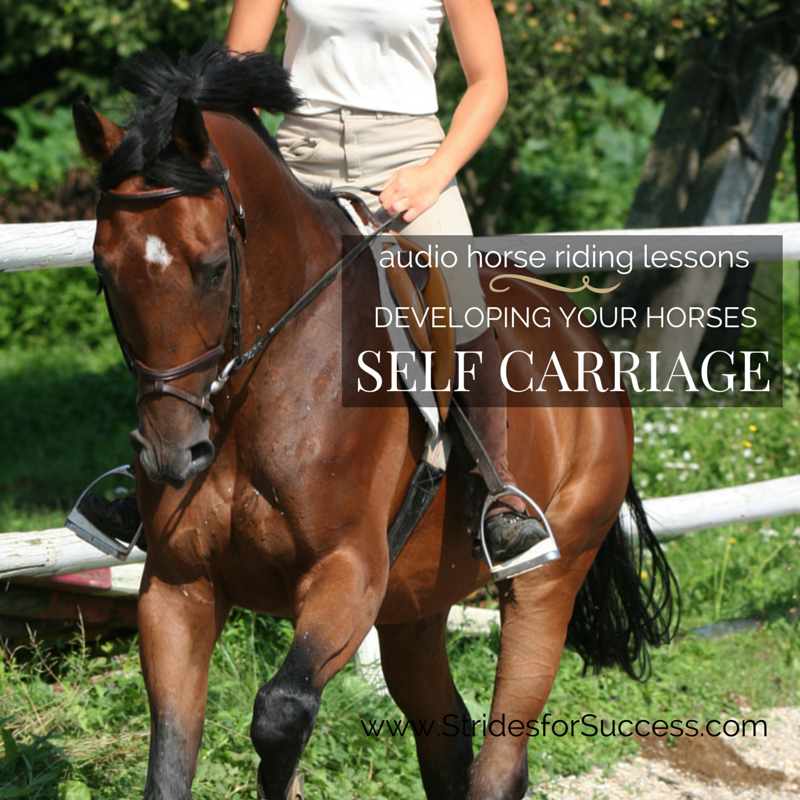
    Developing Your Horses Self Carriage

    When you are riding, is your horse carrying himself, or are you in-fact carrying him? 

    Self carriage in horses can be explained as your horse carrying himself, without needing support from or relying on you, the rider, in order to continue and maintain the movement he is performing.

    [smart_track_player url=”https://op3.dev/e/traffic.libsyn.com/dailystridespodcast/SFA391-Developing-Self-Carriage-in-Your-Horse.mp3″ title=”Developing Your Horses Self Carriage” social_linkedin=”true” social_pinterest=”true” social_email=”true” tweet_text=”Does your horse carry himself? Does he know how?! ” hashtag=”Equestrian #SelfCarriage” twitter_username=”strides_success” ]

    Your horses ability to carry himself comes from him being responsible for his own body, balanced physically and also mentally because he understands what is expected of him and is confident that he can do it.

    Developing Self Carriage in your horse

    As you ride, stop directing for a few strides; will your horse be confident, competent, balanced and able to maintain the correct amounts of impulsion and tension to ‘hold’ what he is doing, until you come back with further instructions?

    Unfortunately, for most riders the answer is no! In fact, most horses are ridden in such a way that they may never be truly able to achieve and maintain a degree of self carriage in higher levels of performance and work.

    Self carriage comes from your horse being encouraged to work by himself, confident in his own abilities and your consistent correction only when he gets things wrong.  Self carriage is really self motivation on your horses part and his knowing that when you ask for something it is his job to respond and then continue until asked to do differently.

    However this simply cannot happen if you, as the rider, are micro-managing every movement.

    The riders job is not to support the horse through every stride, but rather to influence the horses movements and balance, which will then, over time, allow the horse to develop the necessary strength to support himself, and achieve true self carriage.

    Another important aspect is the level of trust which must develop between both horse and rider and also, the horses confidence in himself and the same of the rider in herself.

    This is where developing ‘feel’ as a rider is important.  You must be able to feel that he is about to go wrong, or about to lose his balance, or about to stop what is being asked and then act on this before it happens.  Once you have given the aids to get your horse back on track, again, stop giving them and allow him to perform the movement.

    There is a blog post and audio lesson on Improving Your Feel in the Saddle HERE.

    Self carriage requires the horse to be balanced, supple, have the required level of physical strength and his being capable of using this in a controlled and consistent way every time.

    Self Carriage

    Often we see horses in the paddock or field with wonderful self carriage, prancing around, 100% control of their body. They display athletic abilities and prowess that often, as the rider, we can only dream of emulating while in the saddle.

    The disconnect comes because under the saddle, the riders influence pays a huge part.  Rider are often asking their horse for completely different movements, unbeknownst to them, by moving around in the saddle. Unfortunately, if there is not a high level of understanding and awareness on the riders part as to how to control their body while riding, these questions may conflict each other, ruining any hope of obtaining true self carriage.

    It takes calmness of mind from both horse and rider to achieve true self carriage and also the knowledge that self carriage in a young, green or preliminary level horse looks and feels different to self carriage in a well schooled, experienced grand prix level horse.

    When schooling our horses, it is important to introduce new movements slowly and gradually. Remember that the level of balance, for new exercises, will be in direct proportion to the muscles strength and ability while being used that way.  When balance is lost, apply the correct aids quickly to correct your horse, and over time allow him to hold this balance longer and longer in the movement.

    Also remember that self carriage will require different use of the muscles depending on what movement is being performed. Extended trot will both look and feel very different to collected trot and so on.

    Developing self carriage, I feel, begins by the rider working on gaining full control of their aids and developing the ability follow when their horse responds correctly.

    If he responds immediately and correctly to what you are asking… stop asking!  Bring your aids back to neutral and allow him to do what you have asked of him.  If he begins to lose what you have asked or if he wanders (both mentally or physically) off track from what you are asking, then use your aids to correct him.  As soon as he responds and is back where you want, shift back to neutral again.

    Riders, whether consciously or not, often nag their horses continuously while riding.  This will work against your horse developing himself enough to achieve self carriage.  It is important to develop the skills to ask and then allow your horse to perform his movements.  A horse that can only work when his rider is controlling every little micro movement is, in all disciplines, not going to be a successful one and, in some cases may even become downright dangerous to ride.

    The first thing you can do to help your horse to achieve self carriage is carry yourself and make sure your position is correctly applied in order to support your horse and cause as little distraction and hindrance as possible.

    Ask your horse to halt.   Rather than worrying about the quality of the halt for now,  rather notice if is happy to stop where you ask and then wait for further instruction.  If he is jig jogging, side stepping, pulling, leaning, walking on, reversing, do a quick check of your position and what aids you are applying.

    Do the same when you ask him to walk on.  Notice how quickly he responds and if you have to ask more than once, back this up with your whip or spur.  Once he is indeed walking, just allow him to walk.

    One of the most difficult things to do as a rider is nothing!  Nothing is just being neutral and rather only applying aids when necessary.

    • Pay attention to what you are asking, are you nagging?
    • Are you being heavy?
    • Are you fidgeting or nudging, patting, tapping, and just micro managing your horses every move?

    If so, you need to control yourself and only ‘talk’ when you are required to do so!  Again, bring your horse back to halt and notice if he does as you ask and then awaits further instruction or if he is continuously moving and fighting.  If so, correct quickly and then return to neutral.  Repeat the exercise again until you are confident that your horse is responding in a timely and proportionate manner to each question you ask.

    We said at the beginning that self carriage becomes possible as your horse develops his balance and suppleness.  A way to do this is by working and developing his top-line.

    You can do this by working on a 20m circle in a long and low frame.  He must work from behind, pushing with his back end. Make sure you are not continuously correcting and ‘holding’ him in position, but rather guiding and correcting before it becomes necessary.

    Notice how balanced he feels and once he is reaching down for the contact, stretch your hands to him for 1 or 2 strides.  Notice if he can hold himself, in this self carriage, even if just for a second or two to begin with and then work on lengthening the time he can support himself.

    Happy Riding!

    FREE 30 Day Rider Fitness Challenge


  • Using Ground Poles in Schooling

    Using Ground Poles in Schooling

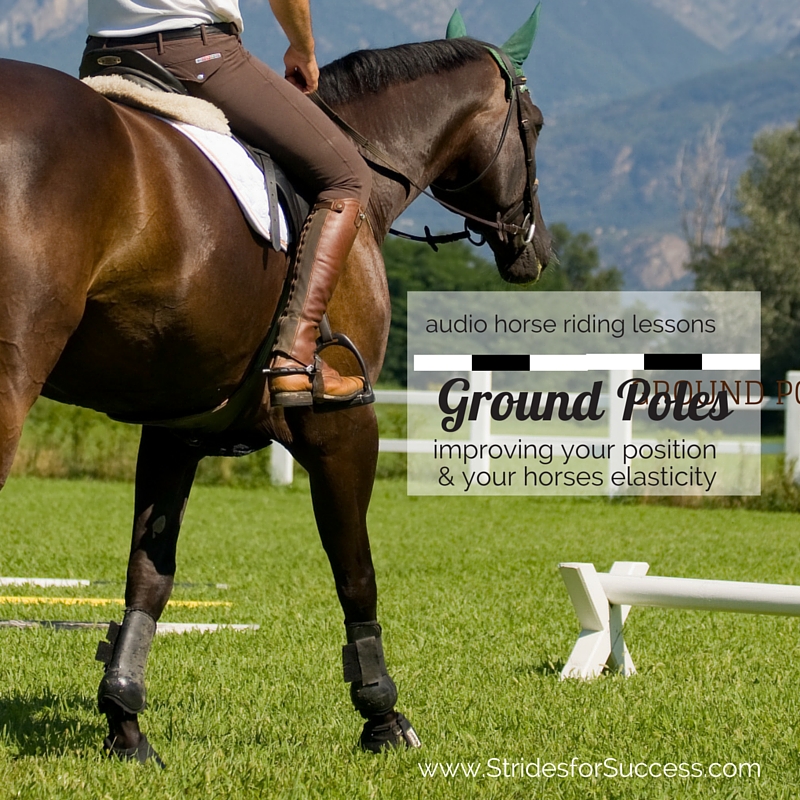
    Ground poles for improving position, elasticity

    Have you used ground poles in your schooling before?  Do you perhaps think ground poles are only really useful for jumpers or competition horses?

    Ground poles are a fantastic tool for horses of all disciplines.  They help to improve self-control, balance, focus, suppleness, elasticity, coordination (including hoof / eye) and strength in both the horse and the rider.

    Another added benefit of working over ground poles, is that your horse will use his back more correctly.  The poles will also encourage greater flexibility or bend in his joints and, over time, the poles can be used as exercises when shortening and lengthening strides in different gaits.

    Ground poles can also be used also as a training aid, which you can regularly return to when loosening up older stiffer horses.  They can also, if used correctly, encourage a horse with a shorter stride to gradually, inch by inch, lengthen or stretch their strides without rushing and losing their balance.

    Jumpers will often incorporate days of schooling over ground poles rather than jumping as it saves the horses joints while keeping them fit, ready and tuned up for show ring.  Use of the ground poles encourages the horse to push more off their hind quarters, instead of pulling with shoulders & front end and also helps develop confidence over distances and an awareness of the legs and feet.

    The beauty of the ground poles is that basically no jumping is performed.  However the horse and rider both still receive the benefits…  

    Poles can be used to get your horse to begin balancing themselves using their hind quarter more, instead of total reliance on using the head & neck to maintain balance.

    As I mentioned, ground poles can be used with horses of all disciplines, whether it be dressage for greater ability to balance, lengthen and shorten, or jumping.  They are equally as beneficial for trail horses as they can help develop ‘sure footedness’ in a horse due to increased coordination.

    Both Horse & Rider Must Work Over the Poles

    So, we have discussed just a few of the numerous benefits for the horse, however it is worth remembering that all this can be undone if the rider does not do their job efficiently!

    If you don’t focus on where you are going… You’re probably going to find yourself some place else!

    In other words, look up when going over the ground poles, not down.  Plan your route or line and then as you approach the pole itself, look up and on to either the next pole or wherever it is you are continuing on to.

    Ground poles are excellent for teaching you, the rider, to maintain a steady rhythm and tempo in walk, trot & canter.  They also teach patience, with riders learning to wait.  

    A big part of using ground poles successful in your schooling  is allowing your horse to think for himself and figure things out… Which will in time make him a much safer mount in difficult situations.

    It is important that before you start each session, you have a clear goal in mind and also an end point.  Working over poles can be tiring for your horse, so make sure you are not hammering on and on as tiredness leads to mistakes and bad habits.

    Also keep in mind that although the poles are on the ground it makes good horse sense to ensure your horse is dressed for jumping, whether that means extra leg protection or different tack etc, as sometimes horses can get exuberant over the poles and may knock themselves or injure themselves.

    Start with Single Ground Pole

    So, to start I suggest beginning to work in walk over a single pole.  Try to use this exercise to firstly build your horses confidence and introduce him to poles, but then also to begin ‘training’ your body how to respond to the different feeling as your horse navigates the pole.

    Too often riders do not put the appropriate time in to doing the simpler exercises, and this almost always leaves the door open for problems further down the line in a horses education or career.

    Once you are both comfortable navigating the pole in walk, begin to trot back and forth over the pole.  When riding this, try to keep posting, adjusting your body to accommodate the different feeling over the single pole.

    Remaining balanced in the Saddle over the Poles

    Ground poles will test your balance and independence of seat, whether it is over true ‘ground’ poles, or over raised poles later.

    Remaining balanced while your horse navigates the pole is often easier said than done, particularly if it is the first time you are riding over a pole.  This is because your horse is using himself, particularly his back-end, more.  His hind legs have to lift more up and under him in order to successfully clear the pole.

    It is vital that you make sure your knees and ankles are free to absorb this extra bounce and movement…   Any excess tension or ‘fixed’ positions will cause you to become stiff and rigid.  This is what leads to you becoming the proverbial ‘sack of potatoes’ on your poor horse’s back.

    Click here to subscribe

    I initially make my riders get off the horse’s back into a light seat all the way through.  I have a detailed descriptions of how to correctly do this HERE and HERE

    The reason I suggest the light seat is due to the increased suspension or bounce as the horse navigates the poles.  Novice riders in particular struggle with this and it can often result in them getting left behind and become heavy and burdensome on the horse’s back.

    This will enviably result in the horse hollowing his back instead of rounding and using his back-end.  However if you feel you are balanced enough to absorb the added energy, post through it, and use the posting to help maintain the tempo of the trot.

    The Poles Must be Adjusted; Not the Horses Stride

    Finally, it is important to remember that your horse is an individual.  The suggested distances of the poles, when you begin to work over more than one pole at a time, are just that – suggestions.

    The poles must be adjusted to your horse’s stride, and not vice versa.   You can use the suggested distance to build the initial exercise, however once you see how your horse handles it, it is vitally important that you adjust the poles to suit your horses stride.

    Your horse will not have the strength, the confidence or the ability to adjust his stride at the beginning stages of working over poles.

    In order for ground poles to be an effective schooling aid, your horse must have confidence in what he is doing… And allowing him to feel comfortable going over them is the key to creating this.

    Small increments rather than huge changes are what will bring you success when working with ground poles.

    This is the first of two blog posts on this topic.  The second blog post contains actual exercises using ground poles which you can use when riding your horse.  You can read Part 2 HERE

    Happy Riding
    Lorna

    Have you taken the challenge yet? Join thousands of riders all over the world in the 30 Day Rider Fitness Challenge – your horse will thank you!

  • Riding Your Horse Bareback

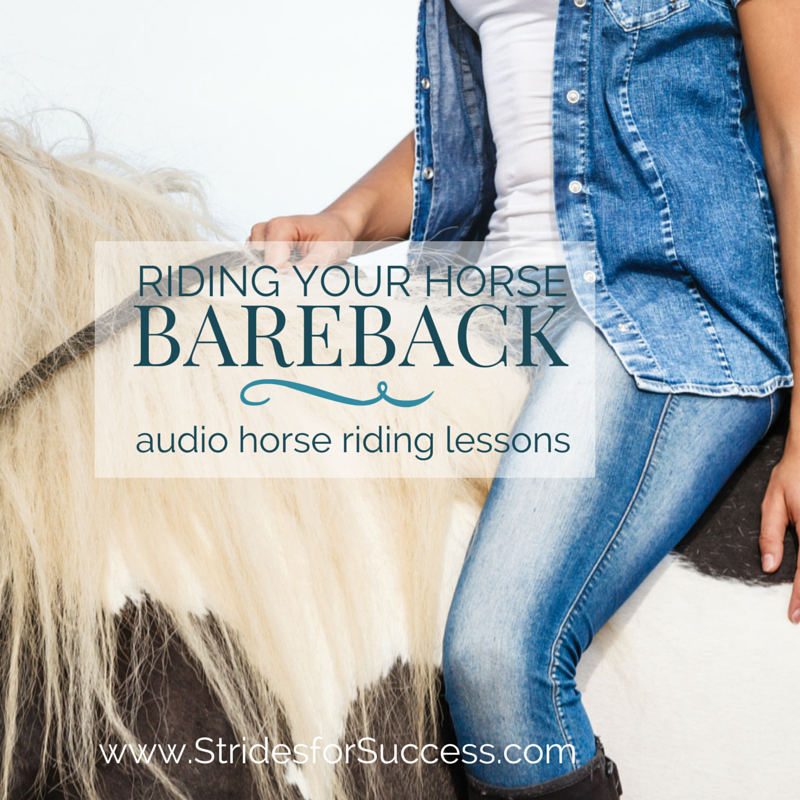
    Riding Your Horse Bareback

    [fusebox_track_player url=”https://op3.dev/e/traffic.libsyn.com/dailystridespodcast/SFA356-Riding-Your-Horse-Bareback.mp3″ title=”Riding Your Horse BareBack” social_linkedin=”true” social_pinterest=”true” social_email=”true” ]

    Have you tried it? For many riders, the mention of riding bareback is enough to see them running to the tack room for a saddle!  However, for those that pluck up the courage – it can change so much…

    Bareback riding is a super way to improve your posture and position as well as balance, skills, and feel. However often the greatest challenge we must first overcome in order to achieve these benefits is our minds telling us we cannot possibly do it!

    Riding bareback is not as difficult as you may think and this week I challenge you to push the boundaries of your comfort zone and try it, if only for a few minutes initially. Then gradually build your confidence and time spend ‘sans’ saddle!

    Start When Cooling Off Your Horse

    Perhaps a good place to start is once a week, after your lesson.  Simply remove your saddle to cool down your horse. His back will be already warmed up and you are both relaxed.

    Another is to ride him bareback back to the field or paddock or stable after your schooling session… little steps!

    In order to get off on the right footing I strongly advice beginning with a quiet schoolmaster who has 3 really comfortable gaits and a ‘well sprung’ or comfortable back! There are fewer things more uncomfortable than riding a not so well fleshed horse bareback!

    You should also try to ensure that the horse has smooth strides, not too bouncy and also not too hot or ‘goey’.

    Your initial few rides without your saddle should be spent focusing on your position and posture, rather than on slowing your horse or not bouncing off.

    Your Horses Comfort & Enjoyment…

    Often when we initially ride bareback, we are so concerned with our own comfort and safety that we overlook our horses. Saddles are designed to disperse your weight more evenly and over a greater area of the horse’s backs.

    Without the saddle, your weight will become more focused on a smaller space and may hurt or cause discomfort to your horse.

    If you are new to bareback riding or feel that your balance or weight may be a negative factor for your horse, start small. Rather begin fitting in a few minutes every now and then. This will get both yourself and your horse used to bareback riding.

    Once you become more balanced and better able to carry yourself, you can spend longer on your horses back.
    Riding Your Horse Bareback

    Bareback = No Stirrups!

    There are bareback pads you can get which apparently help with dispersing the pressure, however there are mixed feelings on their actual benefits, so proceed with caution.

    I strongly advise not using a bareback pad with stirrups due to the lack of a properly engineered tree.

    They may apply pressure where there should not be any and the possibility of hurting or damaging your horses back is quite high. Also, the whole point of riding bareback is to develop your seat and balance… So no stirrups!

    A neck-strap may be used if you really feel that you need something other than the mane to hold onto if things get hairy…! Simply take one of your stirrup leathers off your saddle, remove the iron, and use the leather as a neck-strap.

    1. Choose A Small Area to Ride In

    Okay, so once you are good to go, find a small space such as a lunging ring or small 20 x 40 arena. Somewhere you feel safe and comfortable to start in. Also, choose a day where things are quieter around the yard and perhaps also a day where you won’t have too big of an ‘audience’ watching you!

    Comfort is key to building your confidence

    2. Focus on Carrying Yourself

    Once mounted, make sure you are sitting up correctly, light in the saddle. Pay attention that you are not slouching. A lot of people, when riding bareback, slouch. However, this is not good for your back, or for your horses back.

    Stretch up through your waist area. Then allow your legs to drape over your horse’s sides, with the weight being focused into your heel.

    As you ride, think of not allowing creases across your tummy or your jersey/jacket/top. This is better than arching backwards with your shoulders. Keeping the front of your torso ‘crease free’ will help you to concentrate on carrying yourself, particularly through your waist and chest area.

    Imagine a child that wants to be picked up by an adult, versus one that does not. The one that does makes themselves ‘light’, the one that doesn’t make themselves ‘heavy’. Be the ‘light’ person by making sure you are carrying yourself.

    Think about being light on your horses back which will allow the horse to move underneath you. It also allows you to feel more of which individual muscles are moving and are being used for specific movements or tasks.

    3. Begin In Walk

    Begin in walk and allow your body to adjust.  Feel the deeper, more connected seat. And allow your legs to adjust as well. You will find that your legs fall into a more natural ‘underneath’ you position without your saddle.

    Try to discern what muscles, tendons and ligaments you are using to achieve this, so you can try replicate it when you do have your saddle back again.
    Riding Your Horse Bareback
    I do realize that it all sounds so simple.  However, just as when you begin riding without stirrups, you will find that while riding without a saddle can initially be daunting, it soon becomes easier and you will actually ride better when you do take your saddle back again

    4. Notice Your Thoughts

    The key is to gradually push the boundaries of your comfort zone.  Once out there, allow yourself to get back to the safe place again. Little by little, your ‘safe’ place will move as your boundary moves. However, it takes time and never try anything that you feel you honestly cannot do. Take things slow and steady, day by day, week by week.

    Once you are comfortably walking around the arena begin assessing your riding. Are you using your reins for stability?

    If so, perhaps building a ‘shoot’ using poles down one of the long sides of your arena may help. You can slowly lengthen your reins as you walk down the shoot so you can concentrate on what your body is doing, rather on directing the horse with just your reins.

    Often it is a mind ‘thing’ and overcoming the fears in your head is a big part of relaxing and being successful without a saddle for support

    5. Remain Relaxed Through your Body

    Also, don’t grip with your legs to stay on or to feel secure. It is a false security and one that will contribute to a complete lack of balance and far too much bounce when you begin to trot or canter. Also, your horse will not appreciate being in a vice grip all the while you are on his back! Your legs should remain loose, but against your horses side; cultivate your balance to stay on board.

    Another important point is to ensure you are not gripping with your knees… EVER! Enough said!

    Just focus on riding as you would normally do. I mentioned earlier that your leg may be slightly more underneath you and this is important to remember if you are on a more sensitive horse where you would normally perhaps ride with your leg off…

    Start in a smaller space so your horse can become used to this ‘new’ and more correct leg position.

    Keep your hands and arms supple and soft, don’t drop your hands and try not hold onto the mane or neck-strap as it usually causes people to round their shoulder and pivot forward a little. Only use the mane or neck-strap in case of emergency!

    6. Ride Simple Transitions

    Begin with simple transitions; walk – halt, halt – walk

    Notice how your body can influence your horse and how you can ‘feel’ each muscle of your horse moving under you. Pay close attention to your horses reactions to both you and external influences…

    Feel the sequence of movement underneath you and, after time, you will begin to be able to almost predict what your horse will do next, and respond accordingly.

    Once you are comfortable travelling in straight lines, begin working on a circle, paying attention to keeping your shoulders above your hips… If you lean, this may just be the cure you have been seeking! Also, on the circle, play with your aids and notice your horses reaction in walk. Spiral the circle bigger and smaller, feeling all the time how your horse moves and how he is reacting to your subtle questions.

    Are you over depending on your hands (you will feel your horses back stiffen and brace against you)? Are you forgetting to apply your outside leg? Notice the shape of the circle and your horses ability to maintain a bend and rhythm as you travel around it.

    Feel how your movement interacts with that of your horse and then use this knowledge the next time you mount up with your saddle

    Happy riding
    Lorna

    Additional Resources for Equestrians

    Have you joined us for the FREE Equestrian Fitness Challenge yet?  It will definitely help strengthen your core and legs, so being unbalanced will soon become a thing of the past.  Click the picture below to join in the ‘fun’ today!

    Connection For Equestrians

    This topic is just one of over 100 that are waiting for you inside of Connection.  In this particular group of lessons, I challenge you to spend at least twelve minutes each day without your saddle.   The lessons are filled with step by step instructions for you to ride simple exercises that will maximize the benefits, so you can commit to making this part of your riding schedule on a weekly or fortnightly basis.

    We also put the focus on transitions, particularly of the downward variety, and how you can really understand and feel what a good transition is during your time without your saddle. This will help you when you are back in the saddle in the future.  There are helpful tips, ideas, and exercises that will help you ride better downward transitions, after all, they tend to be the ones that cause us as riders to lose our balance the quickest!

    Finally, the lessons will challenge you to begin adding a little trotting and, later, cantering into your bareback routine! And don’t worry, we encourage you to take your time (even over the space of a few weeks) because it will mean that when you get to perform some faster gaits without a saddle, you are confident, secure, and balanced enough to enjoy them.  You can find out more about Connection HERE >>

  • Why is Your Horse Falling In?

    Why is Your Horse Falling In?

    [fusebox_track_player url=”https://op3.dev/e/traffic.libsyn.com/dailystridespodcast/SFA336-Why-is-Your-Horse-Falling-In.mp3″ title=”Why Is Your Horse Falling In?” social_linkedin=”true” social_pinterest=”true” social_email=”true” ]

    Why is your horse falling in?  More importantly, how do you know if your horse is falling in?

    The quickest and easiest way I can explain falling in is to imagine you are riding a circle. One that you have planned out beautifully in your head. However, as your horse travels around it you seem to be getting more and more off track with each passing stride. In fact what started out as a 20m circle is soon resembling a 10m triangle, drawn by a three-year-old…

    Another area where this problem can tend to rear its ugly head is when traveling around a corner and, again,  just like before you have set the course. You half halt, but your horse’s actual path and the one you envisioned in your head are worlds apart.

    The initial problem is then compounded by the frustration that it is happening so regularly, there being 4 corners in every arena and all.  

    Welcome to the world of falling in… Which is almost exactly what it sounds like.   You set a course, and instead of following it, your horse ‘falls in’ on the shape.

    What Causes Falling In?

    Now while we may initially blame ourselves for bad planning or awful usage of basic shapes, this is often not the root cause.  Because, very often, after we reach for our markers to help guide us along, we begin to realize that far from this being our inability to correctly execute a circle, this issue stems more from our horse’s inability to balance himself while being ridden on the said circle.

    This is a frustrating and annoying problem that  may represent a fundamental flaw in a horse’s basic training. What is actually happening is your horse cannot balance himself correctly.

    The Ineffective Quick Fixes…

    Now, most riders’ first reactions are to pull the ‘outside rein’ and try to get back on track.  This causes horses to flex incorrectly to the outside and often has the effect of the body continuing to fall in while the head and neck are poking out having a good look at everything outside the arena or circle…

    When this happens, riders will turn to the next tool in their box; coupling their outside rein with a few well-placed ‘kicks’ of the inside leg. And, to be fair, often this is enough to get their horse back out to the original track.  The problem comes when instead of it being an enjoyable circle, you are now having to use every ounce of strength and concentration to keep him there…

    You begin to literally hold him up with your legs and reins. You have become his stabilizers or support for when he is not feeling balanced

    In doing this ‘quick fix’ the problem has just been made worse by training your horse to balance on your hands/reins. This means that he will not become strong or correctly muscled enough to rely on himself for balance… Which, as we mentioned, is usually the core of the issue, to begin with.

    Straightness on the Circle

    So how can be we begin rectifying the problem in a way that will build a solid foundation for you to build on in the future?

    By learning to go ‘straight’ on a circle. Back feet tracking corresponding front feet – not inside back foot slightly more to the outside (hind end swinging out).

    When asking for true straightness, your horse will begin to work correctly and use himself for balance.   Only by consistently maintaining this ‘straightness’ on a circle, will the necessary muscles develop to balance and carry you both in more complicated work and movements

    Get Clear on Your Track and Your Aids

    The first thing I would suggest is becoming very clear in your head about what you should be doing on the circle, and being consistent in not straying from that path, no matter what!  This can be difficult, as it is so tempting to ‘fix’ your horse back onto the correct circle, but your horse must learn to ‘fix’ himself!  Make sure you keep a correct position on the circle, you are asking the correct questions, and then keep persevering by riding from your inside leg to your outside rein.

    Your inside leg is not a prop for your horse, so don’t allow it to become one.  

    The same applies for your outside rein.   Try keep your leg and hand position as close to where they should be as possible, however initially, you may have to open your outside hand or rein to encourage your horse back out to it.

    Developing Your Horse

    Your horse must develop equal muscles on both sides of the body in order to carry himself and the rider.  This will take time and consistent correct action, so don’t expect it all to happen in one day.

     Rather spend a few minutes each day working correctly on both reins; slow and steady will win the race.

    Initially, you may just end up going on smaller circles, but if you remain calm and true to your correct position, all the while keeping a sharp focus on not allowing him to ‘run’ forward and continuously speed up, your horse will soon begin to realize that the bigger circle, ridden correctly, is generally the easier way to go… Small circles are hard work, especially when your rider is no longer propping you up with reins and legs!

    When you are riding correctly, you are not supporting the horse with your reins.  

    This means no neck reining or crossing your hands over (your right hand must stay on the right-hand side, and vice versa!)… Rather guiding or indicating when necessary, but then allowing him to figure it out for himself.   Maintaining your correct position and consistent use of correct aids at the appropriate times will soon nullify this bad habit that may develop.

    His Hindquarters & Falling Out…

    Finally, make sure you are using your outside leg in a correct manner to prevent his hindquarters from falling out. This is often what will happen if you manage to ‘fix’ the front end.  Your horse must learn to be truly straight on the circle. Meaning that the inside back leg is on the same track as inside front leg and same for the outside legs.  If your horse’s inside back leg is following his outside front leg, he is falling out through his hindquarters.

    If you find this all overwhelming, try breaking things down into steps, and be persistent in working through them, step by step, until it becomes second nature.  Just, again, make sure you are correct in your riding and position before graining a habit in yourself!

    The final piece of advice I can offer is to regularly, or as much as you can,  jump onto a horse that is well-schooled so you can feel what it is like and how your body is perhaps compensating for your horses lack of balance, without you even being aware of it.  Often we can become the ‘enabler’ to our horse’s bad habits… Make sure you are not falling into this trap.

    Happy Riding
    Lorna

    Additional Resources to Help with This Topic

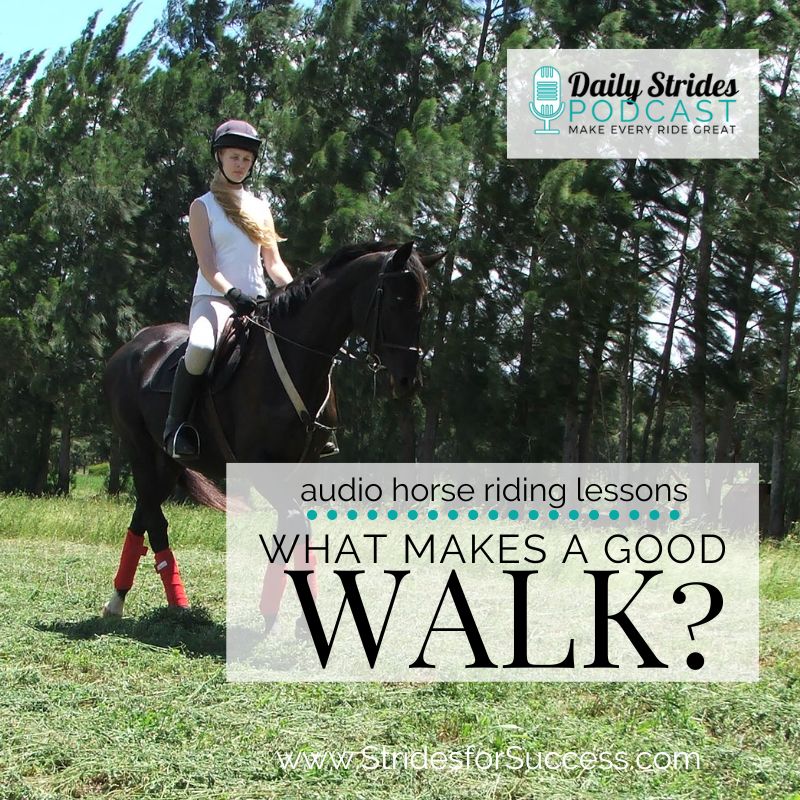
  • What Makes a Good Walk?

    What Makes a Good Walk?

    [fusebox_track_player url=”https://op3.dev/e/traffic.libsyn.com/dailystridespodcast/SFA321-What-Makes-A-Good-Walk.mp3″ title=”What Makes a Good Walk?” social_linkedin=”true” social_pinterest=”true” social_email=”true” tweet_text=”How to improve the walk with your horse…” hashtag=”horsepodcast” twitter_username=”strides_success” ]

    Walking… Does your horse do it with a sense of purpose, or is he rather resembling a slowly rolling ball of jelly; going nowhere slowly?  The problem many riders have is when we ask our horse to ‘walk on’, he becomes tense and stiff…

    The walk, when it is a good walk, should be forward-moving, unrestricted, and natural. There should be a sense of purpose to it; evident in both horse and rider. 

    Unfortunately, as riders, we can often have a very negative influence over this gait, causing our horses to begin shuffling rather than walking! Here’s how you can begin to nurture what your horse naturally does in the walk, and create a good walk for both of you.

    The Rhythm of the Walk

    The first thing to do is begin identifying the rhythm your horse has in the walk. The walk is a 4-time beat. This means that each hoof is placed on the ground at a different point during each stride. The left back hoof is first, followed by the left front hoof. After which the right back hoof and, finally, the right front hoof.  This means that the two hooves on one side of the body go first, followed by the two hooves on the other side.

    When a horse has learned to adapt or change his way of going in the walk, often the hooves on either side of the body can seem to almost move together. 

    So instead of the regular 1…2…3…4…1…2…3…4…1…2…3…4… your horse’s rhythm begins to sound a feel more like 1.2…3.4…1.2…3.4…1.2…3.4… Now, essentially, this is also a rhythm. It’s a pattern that is repeating.  However, it’s not a great quality rhythm! Meaning it’s not a good walk. This is where I would recommend beginning when you are assessing your horse’s natural rhythm in the walk.

    Ask yourself; Are there four distinctive hoof beats? And are they all equally spaced? Meaning that all are given equal ‘time’ within each stride?

    Seatbones and Hooves

    What you can begin doing today is syncing your seat bones with your horse’s hooves.  There is a direct connection between them and when you begin to understand it, you can be having a more positive influence. Your seat bones can help develop your horse’s walk. To begin creating a good walk.

    Your left seatbone is, basically, moved by your horse’s left hip. Meaning that you can beign to know where your horse’s back left hoof is at any point in the stride by paying attention to what your left seatbone is doing. 

    By knowing what is happening underneath you, you can begin to time your aids more effectively in order to have a better influence. Things like asking for the trot. Or even the canter. Your half halt. Noticing straightness or bending. When you begin syncing your seat bones to your horse’s hips, you have the potential to become more effective.

    Creating a Good Walk

    I go into much more detail in more recent episodes of the Daily Strides Podcast on how to do this and so much more. I will link to them all here and I highly suggest you give them a listen and begin improving things today.

    And, finally, if you would like to go further with your riding I highly suggest you give my free training series a go…Find the Gaps in Your Horses Training using this free audio series available for you to listen to in a private podcast feed – so just as easy as listening to the Daily STrides Podcast :) You can sign up for free HERE or visit https://stridesforsuccess.com/free

    Happy Riding
    Lorna

    Get Audio Horse Riding Lessons and Begin Training Your HorseToday!

    Right now, there are so many lessons, on all different topics, available for you on a Private Podcast Feed that delivers them straight to your phone, so you can listen as you ride your horse. Your own time, your own arena, your own horse… More Details HERE

    Connection is an online membership for equestrians working alone to train their horse without a coach or trainer.

    Get Support & Guidance in Your Riding