Tag: balance

  • More Advanced Exercises for a Young Horse

    More Advanced Exercises for a Young Horse

    [fusebox_track_player url=”https://op3.dev/e/traffic.libsyn.com/dailystridespodcast/586-More-Advanced-Exercises-for-a-Young-Horse.mp3″ title=”More Advanced Exercises for a Young Horse” social_linkedin=”true” social_pinterest=”true” social_email=”true” ]

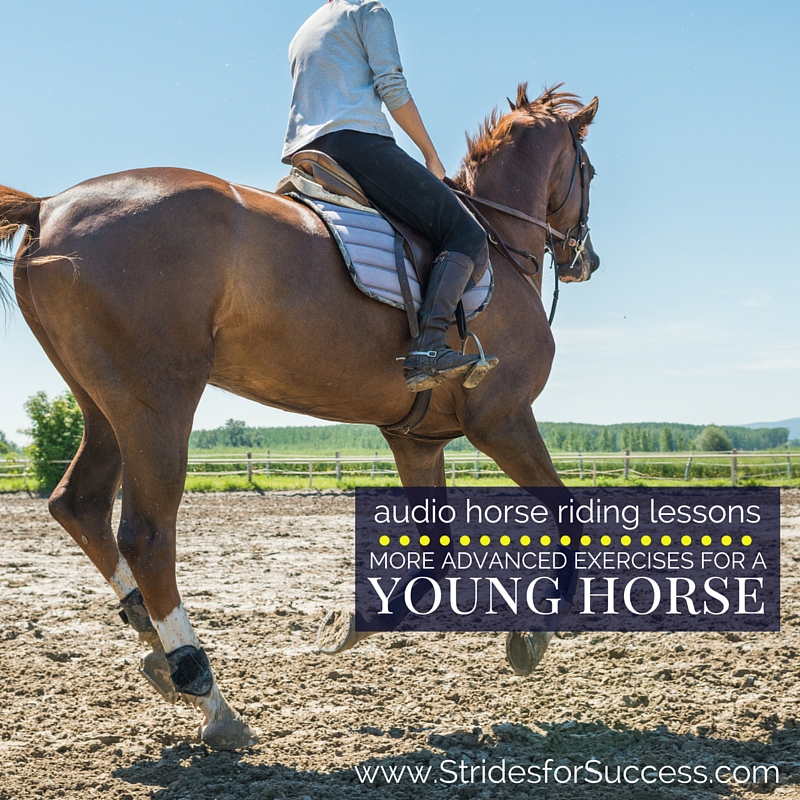
    You have spent the past few months diligently improving your young horse’s standard of education. A lot of time invested on the basics of moving forward in a balanced rhythmic way.  He is happy, you are happy and the next natural progression is to ask for the canter.

    However, it seems all those carefully cultivated hours in the arena fly out the door as soon as you ask for the upward transition.

    Your horse begins running on his forehand, each trot stride becoming longer and faster… He eventually breaks into a canter of sorts, but nothing like what you imagined it to be!  Unbalanced, uncoordinated, and no rhythm whatsoever!

    Introducing ‘New’ To Your Young Horse

    Often it seems that no matter how much preparation we put into preparing our young horse for his first departure from a trot into a canter, the canter falls a little flat and well below our expectations.   But rather than becoming frustrated and demoralized with your horse’s apparent lack of understanding, see this as being the next step of the ladder with regards to your horse’s education. And one that, if he graduates from, will see him in a great position to really begin working from.

    Just like when you first began riding your young horse in walk and trot, your horse is going to feel very unbalanced and unsure of himself when you do ask for the canter when in the saddle.  

    This is due to the canter having a three-timed beat which depends on your horse’s outside back leg starting and propelling the rest of his footfalls and body forward in each stride.  In the trot, it is far easier to remain balanced. This is due to the effect the diagonals have on balancing him with each stride. However, the canter is almost one-sided and extra strength and development are required of your horse in order to really ‘power’ into.  Power into it and then remain balanced through each stride.

    Preparing the Transition

    As with most things concerning riding, the preparation that leads up to the transition will have a massive outcome on the success of the transition itself

    See the trot as now being the foundation for setting up the canter.  Not only from a rhythm and balance point of view. But also with regards to developing strength through his body.  Use your half halts in the trot to begin asking for his hind legs to engage a little more. This may only be for a stride or two each time. However, it will allow him to begin building the muscles necessary for a good canter later.

    More Advanced Exercises for Your Young Horse

    Be Patient Through the Transition

    When you feel that you have prepared the trot enough, you can start thinking about the canter transition itself.  It is tempting to ‘push’ your horse into the canter at first. Using your upper body in particular.  However, throwing your upper body forward will only serve to unbalance him even further.

    Rather think of sitting up tall. 

    Then asking with the correct aids.  Including, perhaps most importantly, your voice and seat.  And, from here, allowing him to break into the canter himself.

    He may run for the first few strides of trot before then almost falling into the canter, but this is to be expected initially.  Your job is to remain balanced and ‘quiet’ throughout. This will help to build his confidence in his ability to actually move into the canter under the saddle.

    Make sure you follow through your body and also your hands and arms.  Catching him in the mouth or bouncing on his back, particularly in the first few transitions, will only serve to punish him. It may also cause him to associate the canter with anxiety and tension

    Once in the Canter

    Once he has actually transitioned into the canter, remain quiet but keep him moving forward.  Very often with a young horse, the canter may be a little ‘fast’ at first if forwardness is to be maintained.  This, again, is to be expected and rather allow him this. It will help him to begin to settle into this new gait and find his balance and rhythm himself.

    The canter requires quite a bit more effort from him than the trot, so he will probably tire quickly.

    Try to ask for the downward transition into a trot before he naturally breaks into trot himself.  

    You will usually feel the lack of energy in the canter, it will seem to become more strung out, rather than bounding forward.  Again, make sure you are balanced and quiet through the transition, using your voice and seat first.

    Re-Establish, Rinse & Repeat!

    As soon as he has come back into trot, begin the work of re-establishing a balanced rhythmic trot.  It may take quite a few strides initially, particularly after the first few canter to trot transitions… However, keep in mind that working forward in a balanced and rhythmic trot is something that your young horse knows how to do. So insist on it!

    Working in and out of the canter initially is a great way to begin developing your young horse for more prolonged and balanced canters.  

    Be sure that the trot is balanced and working before asking for the canter again each time.  Also, try to be consistent and regular with your aids both into the canter, while cantering, and then back into the trot.

    Developing Over Time

    Over time, your horse will begin to strengthen up and carry himself for longer periods, in a more balanced and rhythmic canter. The lenght of time will depend on many things.

    However, how mature your horse is and/or how much time you have spent working on the more foundational aspects of his schooling, will play a big role in how quickly he progresses, both physically, mentally & emotionally

    Continue to use the walk, trot, and halt to reinforce the aids and responsiveness.  Only when he has truly mastered the canter for longer periods can you then begin thinking about making adjustments within the canter itself.

    Initially, you will only ask for short canter periods each time, perhaps 5 or 6 strides of a better quality canter rather than laps of ‘racing’ and running around the arena, which will only serve to teach him how to incorrectly maintain the canter when being ridden.  Then slowly you can begin to apply the half halt in the canter itself, so to shorten the canter strides.

    Remember that forwardness is the foundation to all his gaits, so make sure that you keep him moving actively and with energy regardless of what you are asking.

    Schooling your young horse in the canter takes time and consistency. However, all the initial investment will pay off handsomely when your horse is able to maintain a balanced, forward-moving canter from which you can begin to make adjustments.

    Happy Riding
    Lorna

    Additional Resources for Equestrians

    Are you looking for step by step instructions to listen to as you ride your young horse? I have created 5 audio horse riding programs specifically focusing on this topic. To find out how you can get these lessons (and hundreds more) visit https://stridesforsuccess.com/join/

  • Turn on the Forehand; How to Ride a Balanced One

    Turn on the Forehand; How to Ride a Balanced One

    Have you ever found yourself halfway through a turn on the forehand; either purposely or not?  Perhaps you were out hacking and there was a gate… You tried a little turn on the forehand, just like you had heard about, to open it, but ended up dismounting!  Or maybe your instructor or trainer mentioned it, you tried it with the best of intentions, but the final result looked nothing like how they explained it?!

    Turn on the forehand is often seen as the very first introduction to lateral work for you and your horse.  It is a great movement to begin introducing the concept of ‘yielding’ to your horse and because of this, is one of the best ways to set your horse up for leg yielding.  It requires discipline, balance, and coordination from your horse and it is a wonderful way of assessing those same qualities; discipline, a balanced seat, and coordination of aids, in the rider too.

    [fusebox_track_player url=”https://op3.dev/e/traffic.libsyn.com/dailystridespodcast/571-A-Balanced-Turn-on-the-Forehand.mp3″ title=”Riding a Balanced Turn on the Forehand” social_linkedin=”true” social_pinterest=”true” social_email=”true” hashtag=”equestrianpodcast” twitter_username=”strides_success” ]

    More Than ‘Entry Level’

    However, because it is seen as the ‘entry-level’ lateral movement, most riders do not spend enough time really mastering this movement before moving onto other, ‘more exciting’ things in the saddle!  In fact, because the turn on the forehand has been ridden so badly for so long by so many riders, a lot of instructors and trainers no longer use this tool when training riders and horses.

    This is a pity because while turn on the forehand might only be the beginning or first step of the lateral ladder, it does not mean that it is the easiest movement in the book to master.  

    In fact, the mere fact that you are introducing something new to your horse and then will use the same principles to build your further lateral movements should dictate that the ability to ask for and then ride a turn on the forehand should be of much greater importance when training riders and horses.

    I have found that the reasons many riders struggle with turn on the forehand is due to a lack of understanding about setting it up, confusion regarding the aids to work through it and also, lack of clarity on exactly what the horse should be doing with his body and feet to correctly perform the movement

    What is Turn on the Forehand?

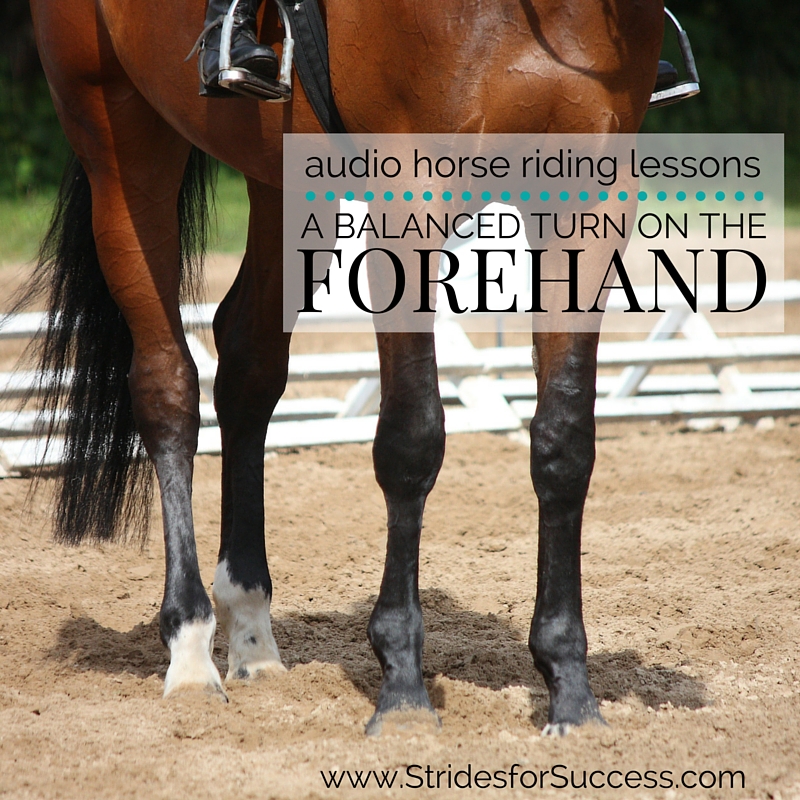
    So, what is turn on the forehand?  Well, the simple explanation is that the horse’s hindquarters or back legs move in an arc or circular shape around the front legs, which remain very close to where they started for the duration of the movement.  So imagine your horse has halted square and you prepare to ask a turn on the forehand to the left.  Using your left leg, your horse will begin to move his hindquarters away, yielding, to your requests.  All the while, his front feet will remain in the same area as he moves his hindquarters around them.

    Picture the face of a clock and then the center of the clock, where the arms are attached to the clock face.  Your horse is the ‘clock arm’ and his front feet in the halt are exactly at the point, in the center of your clock, where the arms are secured. 

    Now, pick a place on the actual arc of the clock itself (where the numbers are on the clock face).  This is where the hindquarters are currently positioned at the halt.  The turn on the forehand is simply moving the hindquarters mark further around the circle, perhaps from the 9 o’clock mark, around to the 12 o’clock mark and even on to the 3 o’clock mark.  The front legs stay at the center of the clock at all times.

    Encouraging Flexion

    Your horse’s back should remain straight throughout the movement, so no curving or bending.  However, he will have a slight flexion at the poll to the inside, which he will maintain throughout the movement.  He will also step with all four feet, in sequence to walking, but with only the hind feet really covering any ground.   The front feet will merely march or keep time on the spot for all of their steps.

    A BALANCED TURN ON THE FOREHAND

    The rider must remain balanced throughout the movement.  They must ask for the flexion with the inside hand, weight the inside seat bone slightly, ask for ‘over’ with the inside leg, and then use the outside rein to balance that movement.  The outside leg will act as a ‘barrier’ of sorts, but also will help to keep the activity in the ‘steps’ as the horse moves across in turn on the forehand.

    When written in black and white, this all sounds simple enough, but such a simple explanation leaves the door wide open for a lot of different variations and wrong practices within the movement itself.

    Left or Right? Depends on Flexion

    The first part that can be confusing for many riders is the actual direction of the turn on the forehand itself.  If you are asked to ride a turn on the forehand to the left, your horse’s poll will flex slightly to the left – making this the inside -, his head will travel to the left during the movement and this, in turn, means the hindquarters will actually swing to the right (hence the confusion).

    So the named direction of the turn is the same as the flexion of you horse while he is performing the turn.  Your horse will be flexed to the inside, which is the leg you will ask your horse to move away from or yield to. So a turn on the forehand to the left will see your horse flexing through his poll to the left while moving to the right off your inside (left) leg

    Front Legs; Stationary or Not?

    Many riders are concerned that teaching their horse the turn on the forehand, with the front legs remain almost stationary, will surely mean that there is no forward movement happening – and this goes against everything they learn about riding.  However, I think this misconception comes from the fact that many riders think of turn on the forehand as just the back legs moving, the inside across in front of the outside, as the horse turns, with the front legs twisting along afterward, and forced to eventually move.  This is incorrect.  A true turn on the forehand will keep the rhythm and footfalls of the walk while it is happening.

    Think of it like the inside hind leg moves across in front of the outside hind leg, and in order to maintain alignment with the direction of the body, each of the other feet will step up, straighten out and put down, where they realign with a ‘square’ and also so as to keep the horse and rider balanced.

    So, while the horse is certainly not moving forward in the true sense of the word, the activity should be maintained throughout the movement

    Inside Leg to Outside Rein

    Another way to think about creating forward energy is by emphasizing the relationship between your inside leg, your horse’s inside hind leg, and the outside rein while the horse is performing the movement.

    Your inside leg will ask for the sideways movement, the horse will lift his inside hind leg and as he swings it across in front of his outside hind leg, your outside hand will subtly connect with that energy and tell him where to put it down.  

    Your outside leg will help to maintain the forwardness by reminding your horse, if necessary, to straighten up or align his outside back foot with the new position of the body.

    Balance of Aids

    I also want to highlight how the riders balanced seat and coordinated aids play a big part in successfully riding a turn on the forehand.  Many riders try to shove and push their horse around in this movement.  They collapse their inside shoulder and, consequently, their core muscles on that same side.  This causes their weight to shift to the outside of the saddle and is often the cause of the horse scrambling to get back under the weight of the rider to try to maintain balance for both.

    Remember to sit up through your body and ask for your horse to yield to your leg, not force.  

    I suggest that all horses are thought to yield to his pressure on the ground first, whether it be in the stable or through groundwork exercises in the arena.  Then, if your horse still struggles to understand, ask a person on the ground to help you.  Keep in mind that if your horse is confused, the chances of him doing the correct thing and, importantly, realizing what that was are very slim!

    Also, think of sitting up through your body and carrying yourself, so that when your horse does move sideways you are giving your body the best possible chance of, gracefully and subtly, following him there.

    Happy Riding

    Lorna

    Additional Resources on This Topic:-

  • Exercises for a Young Horse

    Exercises for a Young Horse

    Young horses!  It is such an honour as a rider to be one of the first people they get to work with, however can sometimes feel like you are riding an eel!  They are moving up and down in the rhythm and if there is a dance that you are both moving to, it quickly becomes evident that no one is really sure of the correct moves or steps!

    Horses need to be allowed the time and space to begin working out how they can carry themselves, with all this new equipment and also, how they can then carry the added weight of a rider on board their backs as well.  When given the necessary time and when the correct guidelines are there to help, your horse will soon become more confident in his abilities to carry you and confidence is key for balance.

    The reason the ‘dance’ seems so staggered is due to the lack of true balance.  So, in saying this, balance is first and foremost for young horses.  However very often riders try to do this job for their horse, rather than allowing the horse to figure it out on their own.  This usually results in a horse that insists on holding on to or grabbing the contact and being unable to relax enough through their backs to truly use themselves correctly.  This, as I am sure you can imagine, will inevitably lead to all sorts of trouble and problems further down the line.

    [smart_track_player url=”https://op3.dev/e/traffic.libsyn.com/dailystridespodcast/541-Exercises-for-Working-with-a-Young-Horse.mp3″ title=”Exercises for a Young Horse” social_linkedin=”true” social_pinterest=”true” social_email=”true” tweet_text=”Do you have a young horse? Here’s a couple of useful exercises to try today ” hashtag=”horseriding #younghorse” twitter_username=”strides_success” ]

    Before we go any further, it is important to stress that the rider must be experienced, sympathetic and patient. Young horses should not be ridden by riders who lack a balanced and independent seat.  It will only make the horse’s job much more difficult and very often results in a loss of confidence, that will have repercussions all through their riding career.

    When working with a young horse, remember it is the quality of the work, rather than the quantity that is important.  Ride for shorter periods and rest often throughout each ride

    Many factors will influence how quickly your horse progresses, such as age, breed, build, confirmation, groundwork, consistency and even his upbringing.  Remember, even if your horse is the ‘ideal age’ to start, he may still not be physically or mentally ready to begin work.  Again, slow and steady will win out over pushing your horse to do things he is not ready for.

    So assuming that you have assessed the situation and have deemed it the right time in your horse’s life to begin introducing him to a more ‘structured’ training program, I suggest by starting off on a long rein.  You can begin teaching your horse this on the lunge initially and then, when you’re on his back.  The long rein will allow him to stretch out his back muscles and overall body, which will encourage relaxation and rid him of any excess tension

    Start at the lunge.  This will allow your horse to loosen up, and also work out any excess energy that he might be ‘storing up’.  It also gives you a great opportunity to assess him further which will then help you to create a more structured plan.  Which gait is the most balanced and comfortable for him?  Which rein, if any, does he prefer?  You can then use this information when you mount up to help relax him and start by doing something he enjoys and working on the side he goes better on.

    Keep in mind that lunging is not just chasing him around the ring; he must begin with relaxing, just like he would if on a long rein and then slowly beginning to work into a contact, with emphasis on moving forward at all times.  You can also use the time on the lunge to reinforce the voice aids.

    Exercises for a Young Horse

    When riding a young horse, the focus should begin on rhythm and balance within that rhythm.  As I mentioned before, you as the rider must be balanced in your seat and able to move with your horse as he works forward.  At no point should you begin trying to ‘shorten’ him or force him into a ‘frame’.  If he is to develop correctly he must learn to balance himself and from there, then look for your contact and accept it happily while moving forward all the time.

    Another thing to keep in mind when riding a young horse is that he will be naturally a little ‘downhill’.  His body must strengthen, over time, before he can begin to transfer that weight back onto his hind quarters, and during this period it is your responsibility as the rider not to add to the weight being carried by his front end by leaning or slouching

    When working in the arena, vary the work and sprinkle breaks or rest periods throughout the ride, which will allow him to relax and stretch out on a long rein again.  This will help to make sure he does not become stiff or tense which will in turn, ruin the work you are trying to achieve.

    Work on basic school figures such as large circles, all the time trying to establish the rhythm in the gait.  You can also work in some transitions, however I find that it is better to work in a chosen gait for a few minutes, allowing him to become confident in his balance and rhythm, rather than chopping and changing gaits.  Transitions are a wonderful tool when schooling horses but I have found that if too many are incorporated into the early rides, the horse can tend to become a little choppy, short and tense through his work, rather than moving forward in a relaxed  and loose fashion.

    Keep in mind that you are there to guide; he must learn to balance himself.  So correcting him is important, but it should be only that, a correction, rather than a constant support or aid

    After a few weeks or months, depending on your horse, and once he is happily carrying you around the arena you can begin introducing ground poles into his schooling sessions.  You will know the time is right when he has found a certain rhythm and balance to his way of going, which he can adjust in and out of with ease.  Like everything else, incorporating the poles too early will only serve to do more harm than good, so proceed with caution and only when you are confident that he is confident!

    Start with a single pole on the ground, which you can allow him to walk over.  Walk over it, from both directions quite a few times until it becomes a non-event in your horse’s head.  Keep in mind that your horse might just jump the pole on the first few occasions and take the precautions to avoid any discomfort for him or you if this happens!  Make sure that you do not punish him when he successfully navigates the pole by catching him in the mouth or becoming heavy on his back.

    Once he is happily walking over the single pole, you can then begin trotting up to and over the pole.  Again, we want him working over the poles happily and relaxed before you move on to anything more complicated.  This may take a few rides, however your patience while he is finding his way here will be worth it later.

    Poles can be used in all sorts of ways when riding a young horse, as both obstacles to navigate over and also guiding rails to ride between or around.  Depending on your horse, you can use them to help reinforce a concept and also, to ask for more flexion and a way of asking him to ‘use’ himself more.

    Riding young horses can be a challenge, but when done with patience and kindness as well as consistently, it pays off as both a rewarding for the rider and it sets the horse up for a happier, healthier working life as well.

    Happy Riding!

    Exercises for Riding a Young Horse

  • Retraining a Horse that Evades Your Contact

    Retraining a Horse that Evades Your Contact

    [fusebox_track_player url=”https://op3.dev/e/traffic.libsyn.com/dailystridespodcast/526-Retraining-a-Horse-that-Evades-Your-Contact.mp3″ title=”Retraining a Horse that Evades Your Contact” social_linkedin=”true” social_pinterest=”true” social_email=”true” ]

    Are there days where your horse’s camel impression is worryingly accurate?  He lounges along, his back all strung out resembling a cable that’s sole purpose is to work against you.  His neck stretched out in what must be an extremely uncomfortable way, his nose pointing skyward…  And it seems that all your efforts to establish a correct contact are falling on deaf ears?!

    Or perhaps your horse is the other end of the spectrum? As soon as you pick up a contact he curls his head so his lips are close to touching his chest… Leaving you with loopy reins that have no contact at all with said horse’s mouth?!

    The unfortunate fact is that horses evade contact in many different ways and for many different reasons which all have the potential to ruin a good performance or ride.  However before we go any further, let’s get clear on what is correct, ‘true contact when riding a horse…

    What is True Contact?

    Contact is your connection with your horse through your rein aid.  You must offer a stable, consistent contact through your hand and rein, which in turn, your horse will then accept with his mouth.  However, the contact that we can ‘see’ in the above description is merely the end result of a lot of other communications and aids.

    Things that are ongoing and happening between horse and rider. Their culmination is what produces a consistent, soft, and accepting contact.

    In order to create correct contact, the horse must be moving forward from behind.  So the rider must first work on activating the hindquarters, then allowing that energy to connect through to the front, before they can then harness and direct it using their contact.

    Responsibility and Responsiveness

    In order to achieve correct contact you need to be responsible and your horse must be responsive.

    This means that you are conscientious in how you ask for and respond to your horse’s contact that will cause no discomfort or pain to your horse.  He must be perceptive and reactive to your aids when he receives them.

    Very often riders forget or just don’t know about the first, vitally important, responsibility on their part in order to achieve a correct contact. Because of this, they become focused on ‘head carriage’.  Or if their horse is ‘on the bit’.

    Instead, I want you to think of contact as being the result of a carefully set up and orchestrated use of your different aids when in the saddle. And this culminates in your horse accepting your conscientious, soft, and elastic contact.

    How Does a Horse Evade the Contact?

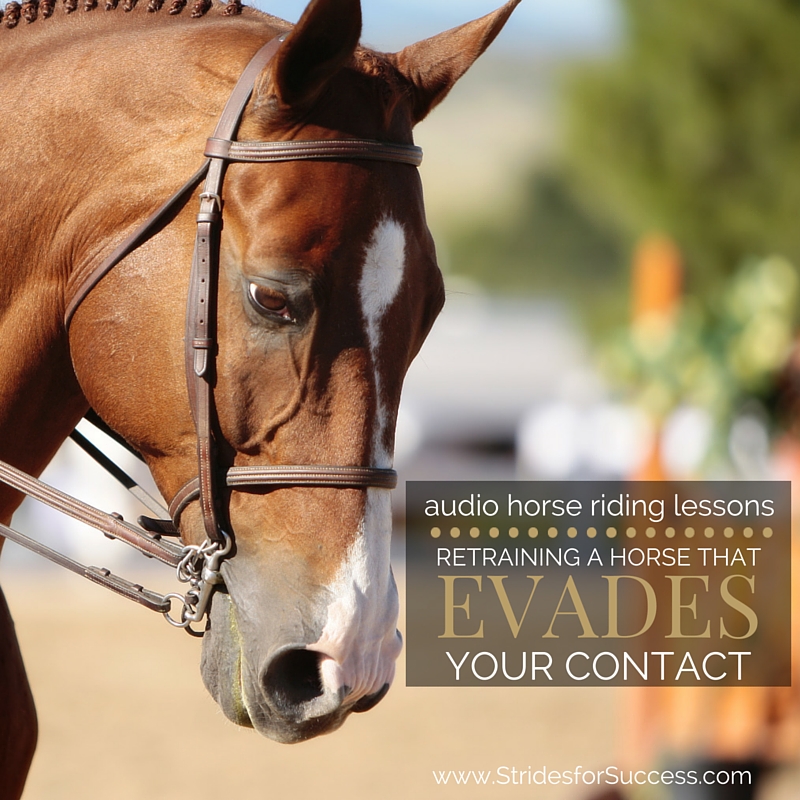
    So, how does a horse evade the bit or contact?  Horses generally do this in a few different ways.  They either become ‘above the bit’. This is where their noses are ‘skyward’ and the whole back, from tail to ears, is hollow.

    Or they can also become ‘behind the bit’. This is when they begin to curl their head and neck back towards their body, nose to chest, which leaves the rider very little options when it comes to contact at all.

    Lastly, there are some horses that when you have ‘closed’ all open doors, will still try to evade by wriggling around, never truly connecting with the rider through the reins at all.  It feels like someone has replaced your horse with an eel!

    Retraining a Horse that Evades Your Contact

    Why Does a Horse Evade the Contact?

    All of the above descriptions lead to a less than pleasant picture to look at. And all also look extremely uncomfortable for the horse!  So what is it exactly that brings them to act like this?

        • The rider is asking incorrectly – This can be due to ignorance or incorrect training on the riders part.  Very often riders will only focus on their horse’s head and where it is, rather than what is happening underneath them that is leading their horse to travel like that.
        • Unsteady contact from the rider – Many riders continue to do this, even though they understand and know about the importance of a steady and ‘safe’ contact for their horse.

    Some riders continue to use the reins as a safety harness rather than work on developing an independent seat.

        • The horse is unbalanced – Young and underdeveloped horses will find it difficult to accept a contact for any great length of time.  This needs to be worked on and developed slowly, over time, using correct aids and techniques, in a way the horse can understand and trust.
        • Over or incorrect use of a gadget or training aid – This is particularly evident with the usage of draw reins, where horses begin to evade the contact by coming behind the vertical or bit.
        • The horse’s conformation makes him more inclined to travel like this initially
        • Physical discomfort – Such as pain in the back due to tack or another disease or injury.  Also problems with teeth and correct fitting of the bit.  All physical discomfort should be ruled out before continuing on with and retraining your horse.

    Contact as a Development Step

    So often we think of contact as being just holding the reins, however the contact that you create is so much more than that.  This is both in terms of communication between horse and rider and also as a vital piece to moving on up the training scale with your horse later.

    It is your job as the rider to create or provide a contact that is consistent, kind, soft, following yet effective.  

    Once you have done this, your horse can then accept this contact and trust you that you won’t catch him in the mouth or drop him by releasing and letting go of the contact.

    Your level of contact will depend on how much energy you are asking your horse to create with his hind quarters.  Contact is merely gathering up and then giving that energy some focused direction of where to go

    Therefore it is impossible to have contact if you horse is not using his hind quarters to push himself forward  and having forward energy.  It is the lack of this forward momentum that causes a horse to begin to lean or become heavy on your hand and essentially evade the bit.

    Reschooling a More Correct Contact

    So assuming that you have an independent seat and your hands are thoughtful and balanced, once a horse has begun to evade how can you then begin to re-school or retrain him to a better way of going? Nne where he is happy to accept your contact?

        • Forwardness & Responsiveness
        • Rhythm
        • Suppleness
        • Straightness

    Begin working on assessing how responsive your horse is to your aids.  If you ask for more, does he respond and begin creating a little more energy into his movement?  Is this response immediate or does he think about it for a few steps?  If his response time is a little ‘wanting’ I suggest carrying a schooling whip and backing up your leg aids with it each time he shows begins to procrastinate or ignore your aids.

    Once he is responsive then make sure he is indeed moving forward, pushing from behind.  It is impossible to direct what is not there, so make sure your horse is using his hindquarters with each stride.

    Then work on creating a rhythm in the gait you have chosen.  I suggest working on a 20m circle, and using half halts and transitions on the circle to further engage the hindquarters as your horse is working.

    Straightness to Enhance Contact

    Straightness is important.  Firstly to correctly channel the energy where you want it to go. But also so you can quickly lock any doors that your horse will try to open once you have blocked his initial ‘evade of choice’!

    Many horses will look for another way of evading when you shut down the initial window of opportunity!

    Finally, don’t be afraid of creating contact with your horse while riding.  Many riders are worried about hurting their horse’s mouth, or pulling on the reins and never truly get to experience and feel how wonderful it is to communicate with their horse in a consistent, safe, following contact.

    Happy Riding

    Lorna

    Additional Resources for Equestrians:-

    Retraining a horse that Evades Your contact

  • Maintaining Balance Between Jumps

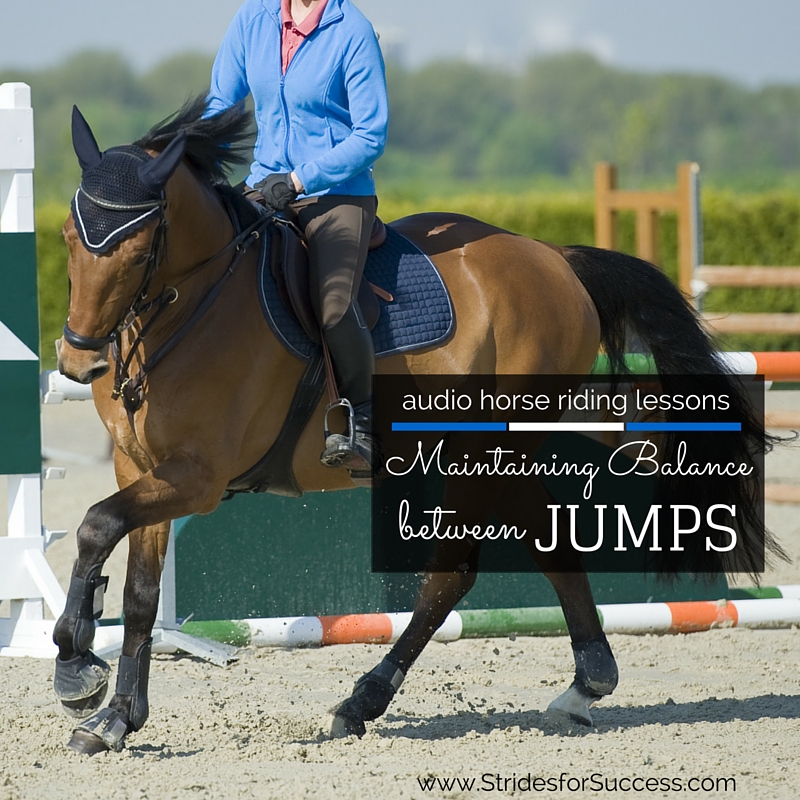
    Maintaining Balance Between Jumps

    The bell rings, you set off aiming for the first fence, you pop over it… And suddenly it’s like everything begins to speed up and rather than being the pilot, you have somehow been relegated to passenger status.  All the ‘if this then that’ scenarios you have spent months practicing are just gone and you are hoping that somehow, through the grace of God, you will make it through the two finish flags, still on board!

    [smart_track_player url=” https://op3.dev/e/traffic.libsyn.com/dailystridespodcast/SFA466-Maintaining-Control-Between-Fences.mp3″ title=”Maintaining Balance Between the Fences” social_linkedin=”true” social_pinterest=”true” social_email=”true” tweet_text=”The most important part of jumping? Successfully riding between each of the fences…” hashtag=”truestory #equestrian” twitter_username=”strides_success” ]

    Jumping tracks or courses is what many riders aspire to achieve with their horse . However, the majority of riders who love jumping and want to jump spend so much time focusing on the actual jumping part and so little on polishing up their technique between fences, that when they reach their goal of completing a course of jumps, the fact that they are on the ground, navigating from one fence to the next, for about 95% of the round, results in luck (as opposed to planning and skill) that dictates if the poles stay up or not (and if the rider remains mounted!).

    Maintaining Balance between the jumps

    Much of our success jumping tracks or a course of jumps comes from the quality of flatwork preparation we put in before hand, rather than time spent actually jumping.  Maintaining balance, rhythm and control around the track is what makes the difference between consistent clear rounds and having the odd sporadic moment of success amid usually disappointing rounds peppered with poles down and refusals.

    I believe this must be mastered in two parts. Firstly, perfecting your position over a fence (which I have exercises you can use HERE >> ) and then secondly, once you can seamlessly shift in and out of your jumping position, you can begin working on remaining in control for the entire duration of the ride!

    Courses are made up of jumps that are connected together with either straight lines or turns between them.  The problems begin when your horse begins to speed up on the straight lines which can use you, the rider, to become anxious and nervous. This is also what leads to a lot of run-outs and flattening over fences which can bring the poles down. Riding a course of connected jumps also magnifies problems with bending, turning and suppleness. Any issues here will result in your horse losing balance around corners which often results in a loss of overall control while riding the track and you becoming flustered with just too many things to do to bring it all back where you want!

    One of the reasons that jumping is broken up into different phases or parts is to show riders that each separate piece must be mastered in its own right before being put together. The phases are; the approach, the take off, the jumping, the landing and the getaway. When all pieces are ridden correctly the result is an effortless, graceful jump that sets you up perfectly for the next obstacle on your course.

    As mentioned, today we are chatting about the part between the fences. Many riders just focus on maintaining control between the fences, however they go about achieving this the wrong way. Constant pulling on their horse’s mouth will only result in the horse falling onto the forehand and pulling back. By failing to also factor in balance and rhythm, is often leads to a loss of rhythm and impulsion, which results in a loss of balance.

    Here are some exercises you can do to really establish and then maintain that all important balance and rhythm around your tracks.

    I suggest beginning by working over poles on the ground, and once you have gotten the knack of regulating and maintaining your horse over the poles, only then begin to build small jumps. I also recommend beginning each exercise in trot, so you can focus on your position and how you are riding the line or pole, before cantering the exercises. If you encounter any problems, take it back to trot again and work through the problems.

    Sometimes our desire to ride more complicated and challenging work with our horse results in us rushing over basic training issues. These same problems are easily masked when the stakes (or jumps) are low. However, ignoring basic training flaws will inevitably always result in an even bigger problem later down the line, when more difficult questions are being asked.

    Take the time to correct any basic issues early in your horse’s training; focus on building a strong correct foundation to work from

    Begin by setting up a pole or a jump on the centerline approximately 6 to 8 meters before X. As you ride up the centerline toward the pole, focus on maintaining your rhythm and not allowing your horse to speed up or slow down.
    Also pay attention to how straight your horse is on approach and, how easy it is to keep him on that straight line. If he tends to wander or weave left or right, use your legs to bring him back and then continue to ride the line you have chosen.

    Also consider how well you can continue to preserve the rhythm after the pole and around the bend when you reach the top of the arena. There should be no visible difference in your horse’s stride, energy or your level of control throughout the line, both before and after the pole.

    Once you feel comfortable doing this in trot and canter, you can begin to work in more difficult turns and bends. Ride the same pole on the centerline, pop it and continue on straight again until you reach X or just afterwards. Once there, begin tracking right, in a half 10m circle. When you reach the outside track again (the long side of the arena), immediately track right taking you across the centerline on a diagonal line. As you reach the other side of the arena (just before the corner), track left and if you have continued to maintain the rhythm and balance, when you reach the middle of the short side of the arena repeat the exercise again, instead this time on the other side (track left after X).

    Again, begin in trot and only when you can truly maintain the rhythm, balance and control, practice in canter. If you cannot perform a flying change, ask for trot as you cross the diagonal each time and then pick up the opposite canter lead, in preparation for the next corner.

    There are many variations of this exercise you can do while riding, and of course building an actual jump instead of the ground pole is part of adding to this exercise.

    The second exercise I recommend is focused more on controlling your horse while continuing to create impulsion after the fence. Using the same pole or jump, approach in canter and on landing, allow your horse 7 canter strides, before bringing him back to trot. However, you will only keep the trot for 5 strides, before picking up canter again.

    As you become more in tune with controlling your horse while continuing to create energy, you can ask for the trot at 5 canter strides after the fence. What you are looking to do here is regain control of your body as quickly as possible after the fence, so you can correctly ride the getaway and begin building a good approach to the next fence.

    The last exercise I suggest can be built on from this. Once you have tracked left or right at the top of the arena, after popping your pole or jump, ride a 10 or 15 meter circle in the corner. Again, the focus is on maintaining the rhythm and balance. Your horse should not fall in on the circle, or rush around the circle.

    You can then begin to add a 10m circle in the corner before you begin your approach to the fence as well. It should be a fluid progression all the way, around the circle, down the line, over the fence, after the fence and again round the circle. No speeding up, no breaking into a different gait, no falling out through the shoulders, no swinging of the hind quarters, just a correct, forward going, balanced rhythm throughout the exercise.

    Lastly, I feel it is vitally important to understand how courses are built and the flow that the course builder has envisioned happening as different horse and rider combinations navigate the track. Take the time to study courses of jumps. Look at how they ride, the bends, the turns, the opportunities to rebalance the horse. By doing this, you will subconsciously begin to make subtle changes as you ride the jumps that will, if you have that correct foundation, make all the difference between a clear round and 4 penalties.

    Happy Riding
    Lorna

    Maintaining Balance Between the Jumps

    [wp-tiles post_type=”post” orderby=”date” order=”DESC” grids=”Featured”]

  • Maintaining Control After Jumping

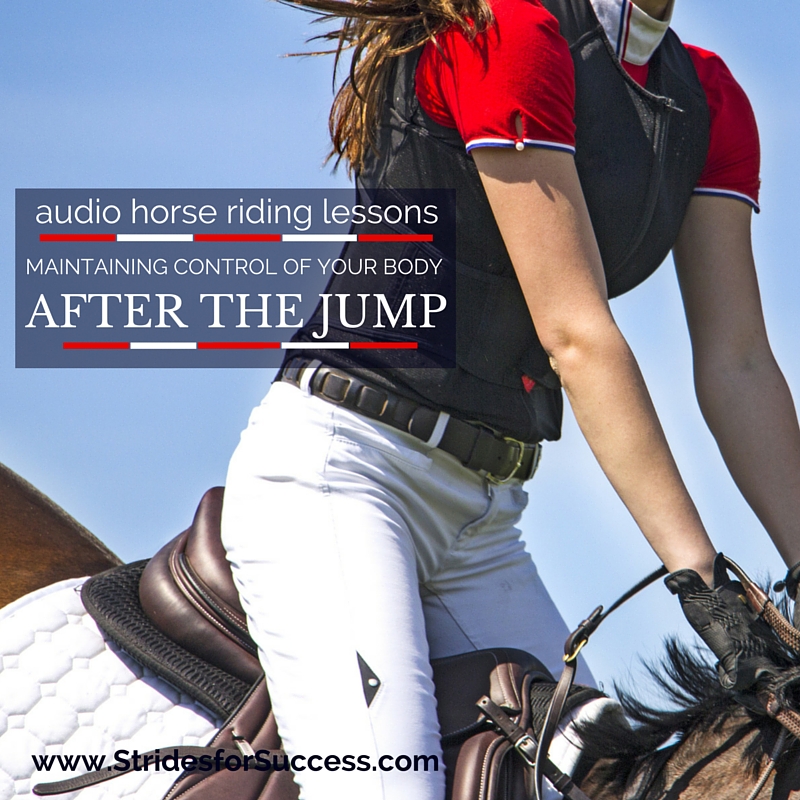
    Maintaining Control After Jumping

    You’ve just popped the fence and, in your mind, it was a success. Mostly because you managed to stay on board for it!  However, as soon as your horse lands, you are beginning to think that your ‘upright seat’ is becoming more and more of a fantasy…

    In fact, every stride your horse takes is literally bumping you further and further onto his withers… Your lower leg is coming up and back. And you’re pretty sure that you’re on the verge of losing your stirrups.

    Who knew that jumping meant such an up-close and personal view of your horse’s neck?!  You glance up, and low and behold, you are approaching the corner; fast!!

    Let’s Remove ‘Forward’ From Your Position!

    This is a really common problem. And one that often begins when we first begin jumping and the word ‘forward’ is used to encourage the position.  Couple this with a really strong desire not to ‘catch your horse in the mouth’…

    The result is you diving forward, leaning on your horse’s neck with your hands (which are filled with as much mane as they can physically hold), and just being a heavy passenger both over and after the jump.

    Maintaining Your Position After the Jump

    Jumping…  It is really one of the most fun things to do on a horse, but if you are not in control on the ground, between the fences, things have a terrible habit of going from bad to worse very quickly!

    Things Get Worse As Fences Get Higher!

    What compounds the problem more is that, generally speaking, when we are jumping over smaller fences, this ‘technique’ works quite well.  You manage to get from A to B. And your horse is in possession of all his back teeth at the end of the lesson.

    However, the problems begin to show up when the jumps become a little higher. Or there are a few of them added together to form a track or course of fences.

    Having an independent, balanced seat both over and after the fence is essential for you to efficiently pilot your horse over all the obstacles. And achieve that all important clear round.

    What Your Horse Does When Jumping

    I think the first part of either preventing this from becoming your jumping technique, or correcting an already formed habit, is to fully understand what happens to your horse when he jumps.

    As he approaches the jump, your horse should begin to transfer his weight a little more back onto his hocks and hindquarters, rather than his shoulders.  This is in preparation for lifting his shoulders and front end off the ground when beginning his jumping effort.

    He will then, when at the fence, with his hind legs moving under him, lift his shoulders, head, and neck to begin his jumping effort.  His hind legs will then come under him, push-off the ground, and ‘propel’ him on, up, and over the fence.

    His head and neck will stretch out and down a little, his shoulders will pull his front legs up and his knees should ideally ‘snap’ up to clear the fence.

    His hindquarters will fold up underneath him. There will be a point where he will be suspended in mid-air over the jump.  Once he is ‘over’ the fence, he will get the landing gear out, so to speak.  He will stretch out his front legs. And, to balance himself, raise his head and neck in anticipation for the first getaway stride after the fence.

    With his head and neck raised, his front legs can touch down and then move forward again into the first stride leaving space for his hind legs to land.  And then he will push-off again with the hind legs to continue cantering after the fence.

    How We Can Interfere With Jumping

    There are a number of different times when we riders have a great potential to get in the way. This can cause problems with our horse’s technique.  Here are some of the more common mistakes we can be guilty of:-

        • Getting ahead of the movement, to begin with on the approach
        • Diving too early when we reach the jump, resulting in us ‘jumping before the horse’
        • Using our horses head and neck over the fence for support and balance – leaning on our horse
        • Collapsing on our horse’s neck on landing
        • Tipping forward on the landing stride and continue to tip more forward with every stride thereafter

    So in order to control our position after the fence, we need to first control our position in front the fence. I suggest that wherever you previously used the word ‘Forward’; substitute it with ‘Back and Down’.

    Adjusting Your Jumping Position

    Next time you approach a pole or a fence, imagine trying to create an open space in front of you. Think of from your chin to your horse’s withers. Focus on making this space as big and empty as possible.

    Open your chest wide from the shoulder point to shoulder point. Sit up through your waist (no creases in your tummy). And, finally, open the angle between your thigh and your tummy as much as you can.

    Then begin creating energy with your legs. Keep asking. However, instead of letting the ‘energy’ run out the front end, imagine that energy coming from your horse’s back hoof in a line towards his ears. It is ‘filling’ that space you created earlier in front of you. And as it does, you use your hands, and in particular, your outside rein, to contain it and direct it where you want it to go.

    You will have to continuously check that you are carrying yourself and your hands in order for there to be enough ‘space’ for this energy to come up.

    Keep this ‘space’ in mind as you approach your jump or pole or even better; Your marker…

    Choose ‘Markers’ in Your Arena

    The first thing I would suggest you do when working on improving your jumping technique does not involve jumping at all. Simply pick different places around the arena and pretend there is a jump there.

    I and my sister done this for years when hacking out (on the trail). We used the posts from fences as ‘markers’. Alternatively, we used telephone poles, or trees, shadows, signposts, other jumps that we rode past. The list was and is endless.

    As you ride past your marker each time, try to imagine where your horse would take off if that was an actual real jump.

    Keep in mind that you will only then follow your horse after he has actually begun to lift off… Not throw yourself at the fence. It is often helpful to say, either in your head or out loud “Wait, Wait, Wait – Lift”. (I know you may feel a little silly, but it really does help!)

    Practice Your ‘New’ Jumping Position

    Then shift into your jumping position over the ‘fence’ (your marker).  Work on coming back into your normal, upright seat afterward, just as quickly as you would if you were indeed jumping a fence.

    Begin in walk… And really pay attention that when you are moving into your jumping position, it is a correct position.

        1. Weight into the heels
        2. Lift your bum a little out of the saddle
        3. Make sure your bum ‘reverses‘ – REALLY IMPORTANT!
        4. As your bum goes back, fold your hips bringing your upper body closer to the pommel of the saddle or withers
        5. Make sure your back is straight
        6. Keep your chest open – the point of each shoulder stretched away from each other across your chest
        7. Give with your arms and hand, through your shoulders
        8. Look up!

    Carry Your Upper Body

    What I often see happen is that although people get out of the saddle, heels down, etc, etc… Because they don’t support and carry their upper body (open the chest), they are leaning on the horse’s neck for support. This is REALLY difficult to get up out of after the jump when the horse is moving.

    It also causes the rider to squeeze with their knees. From here, the lower leg pivots, the upper body comes more down, They usually lose the stirrups… And on, and on, and on :(

    Put A Basic Position on Autopilot

    Once you are getting in and out of your jumping position easily in walk and it should become something that you don’t have to think about.  However, at the beginning of each session do a mental checklist that you are doing each of the above parts. Practice the exercise with no poles.  Only your imaginary ‘markers’.

    Work in walk, in trot and, when that is good, move to canter.

    Then begin working over a pole on the ground… Use the same principle… And lastly, you will be well able to hold your own over a fence and support and balance yourself all the way.

    The super thing about being able to do that is that your horse will also be able to jump better because you’re not shifting all your weight onto his shoulders :)

    Happy Riding
    Lorna

    Additional Resources for Equestrians