Tag: balance

  • Confidently Getting Started Over Jumps

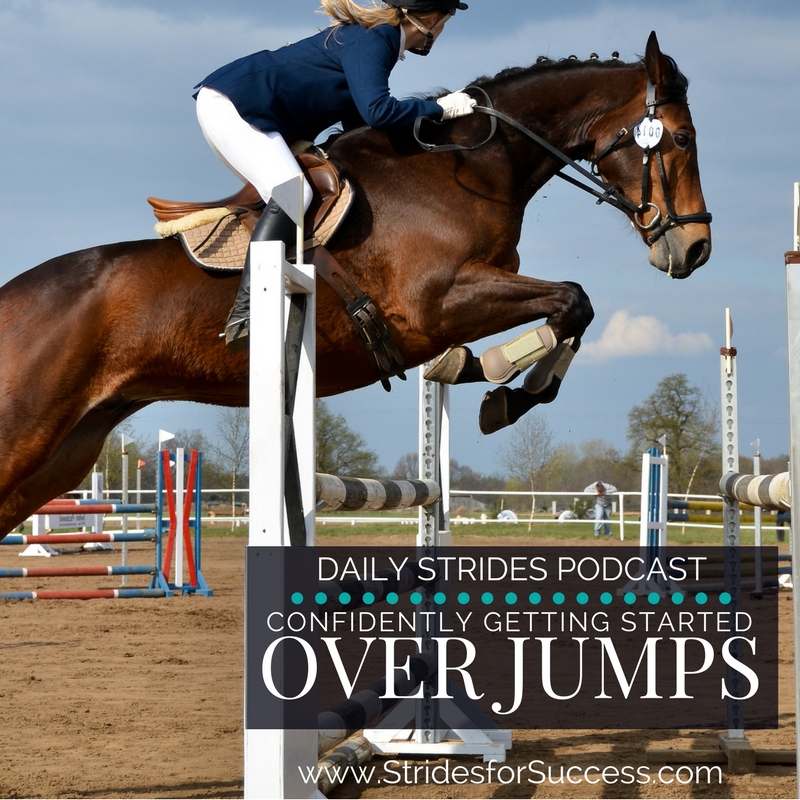
    Confidently Getting Started Over Jumps

    Confidently getting Started Over Jumps

    What this episode is all about & how it can help you:-

    • Why the basics still apply
    • Why balance is essential; for both you and your horse
    • Think of helping your horse, rather than hindering
    • How to begin perfecting over small jumps first

    [smart_track_player url=”https://op3.dev/e/traffic.libsyn.com/dailystridespodcast/1038-Getting-Started-Over-Jumps.mp3″ title=”Confidently Getting Started Over Jumps” social_linkedin=”true” social_pinterest=”true” social_email=”true” tweet_text=”Thinking about jumping but feeling a little overwhelmed about the ‘up and over’? Here is how to confidently get started over jumps” hashtag=”equestrian” twitter_username=”strides_success” ]

    Does the thought of jumping with your horse fill you with excitement?  Is that excitement mixed with a dash of fear?  Like most riders, you probably have thought about jumps and jumping.  And yet thoughts of the ‘up and over’ tends to keep you, and them, away from it.

    This episode is all about jumps and, more specifically, getting you started over jumps in your riding.

    Working over jumps can be beneficial for both you, the rider, and horse.  It helps to keep things fresh and interesting.  It works both the brain and the body in a slightly different way.  But there can be the limiting perception of a ‘barrier to entry’ for many riders.  A very high barrier that perhaps you feel that you cannot get over in order to make it happen.

    I’m here today to tell you that you can not only get over the barrier, but enjoy yourself along the way as well.

    Jumping is really and truly just like riding a very big canter stride.  I am basing todays training on the prerequisite that you have a fair working knowledge of the canter;  how it works, what’s happening, what you should be doing and what your horse should be doing.

    From canter, beginning to jump is simply placing a pole underneath that canter stride.  I know this sounds like a very simplified description, but bear with me here.   My goal is to lower your anxiety towards jumps and jumping by at least a couple of notches!

    The Basics Apply Still – Especially Rhythm & Relaxation

    Successful jumping is built on the basics of good flatwork, with principles such as relaxation and rhythm being extremely important when it comes to jumping.  One of the most obvious ways riders start off on the wrong track when it comes to working over jumps is the tendency to confuse speed with impulsion.  Bounding towards a jump at great speed becomes scary for all involved; the rider, the horse and even the spectators.  It is definitely not how it should be done.

    Jumping is all about relaxation and rhythm, and that is why you should try to eliminate any anxiety as it shows up.

    Balance is Essential; Both You and Your Horse

    Start by cantering over a single pole.  Focus on your on balance as you do this.  Balance between and over the jumps is essential for both you and your horse.  Where many riders tend to fall short in the balance department, is that they depend on the horse to balance them.

    A good basic jumping position will help you to remain balanced using your own body.  You can practice this on the flat, before trying it out over a pole or, later, a fence.   

    It is important that you keep the weight into your heels, keep your leg underneath you, and you use your bum to basically balance the upper half of your body – a little like a weighing scale effect.  Lastly, your horse must be given enough freedom through his head and neck, for him to stretch out and make it over the canter pole, or whatever you are doing.

    Allowing does not mean that you throw everything at him and with a ‘best of luck’ attitude.  Remember, think about balance here.  Your horse also needs to remain in balance.  It is no good you being balanced, if your horse is not.  Your job as rider is to help your horse remain balanced as well.  You can practice all of this while cantering over a single pole on the ground.

    Think of Helping Your Horse, Rather than Hindering

    This is a largely misunderstood principle in jumping.  Many riders, when they start jumping, think only of themselves.  They launch themselves forward towards the horse’s head, without a single consideration for how this will feel for their horse.

    If you have ever jumped anything yourself (on your two legs) with a backpack on your back, you are going to understand what I mean here.  Imagine yourself with your backpack on your back and some things inside.  This particular backpack is loose and is moving around – meaning it’s not very secure.  Jumping anything in this set of circumstances is hard work!

    However, let’s now change that backpack for a more professional type of backpack that hikers would use  One that is stabilised at the front as well as the back, where it fits correctly, and is shaped to suit the body of the person wearing it.  Everything is snugly packed inside and is not moving around, it is balanced and secure.  It now becomes a whole lot easier to jump something, with that on your back.  That is how you need to become for your horse.

    You need to become balanced and secure over the fence, rather than loose and floppy.  I know, simple words – but sometimes simple is easiest to understand!

    Your horse needs to lift his front legs to get over the fence.  If you launch yourself in the general direction of the horse’s head, you are make it very difficult for your horse to truly lift and use himself correctly.

    Resisting the Temptation to Throw Yourself Forward!

    Throwing yourself at your horse’s head means you are no longer balancing yourself, simply because your legs are no longer underneath you!  Your legs will be left behind in the saddle with the rest of your body on the horse’s neck.   Your weight is now being added to his own body weight that he has to lift in order to clear the fence.

    I think this happens because a lot of riders want to model their position on top show jumpers. However there is one big difference between a lot of riders and the top showjumpers – the height of the jumps! 

    You don’t really have to do a whole lot at all going over a small pole, the bigger factor here is that you are remaining balanced.  Balanced will help your horse, launching yourself will hinder.

    Make Perfect Over Small Jumps First

    Finally, I am strongly suggesting that you perfect things over the little jumps, even the pole on the ground, before you start building up.  If you can get it right over the smaller ones, you are inevitably going to get it right over the bigger ones.

    This way you will also get to build your confidence.  In building your confidence, you build the relaxation.   When you build the relaxation, you will also find that the rhythm becomes more natural as well. 

    The result will be an approach that feels good, a correct take off and you and your horse feeling balanced and ‘a team’ as you are going over the fence. Everything is in balance, relaxed and rhythmic.  From there you are perfectly poised to either go on to your next fence, or whatever you want to do.

    The Benefits of Starting Working Over Jumps

    Unfortunately a lot of riders may feel that working over jumps is not for them.  However, if shown the value of including this in their schooling, a lot reconsider.  Values such as engaging a different sets of muscles within the horse and the rider.  Being prepared on the trail or a hack to pop over something you meet.

    Jumping also gives you a greater sense of this balance and this communication.  It is a real feeling of teamwork between the horse and the rider, that they must work together to get over this obstacle that is in the way.

    I suppose the important thing to remember is to take it slow and steady.  Work over smaller jumps initially before building to bigger, higher and more complex.   This way, you and your horse can successfully work out jumping, and get it working for both of you.

    Happy riding

    Lorna

    Links mentioned in the episode:

  • Understanding the Balance of Your Aids

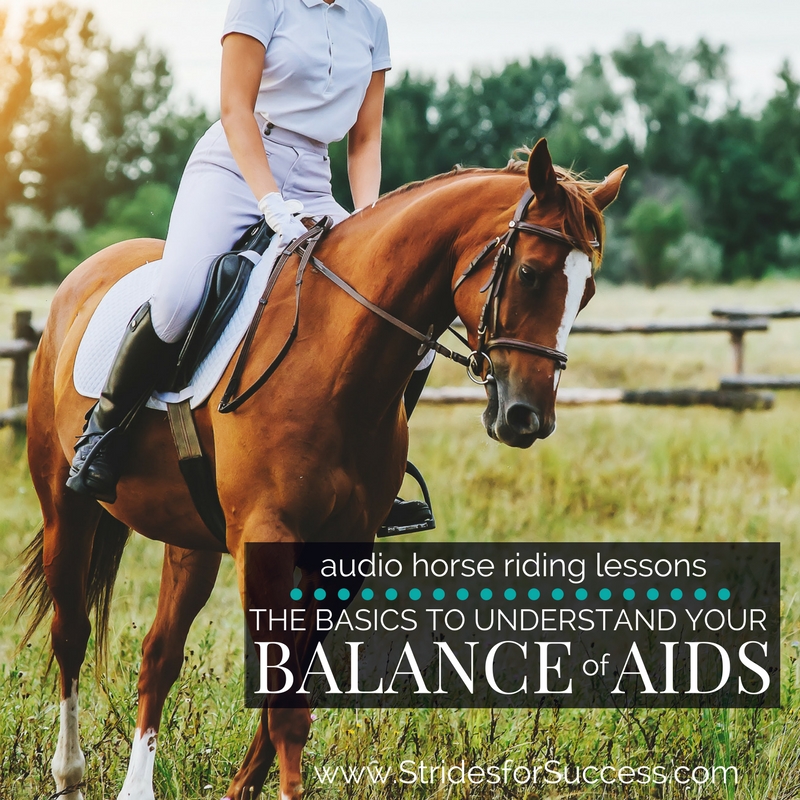
    Understanding the Balance of Your Aids

    Understanding the Balance of Aids

    What this episode is all about & how it can help you:-

    • Why focusing initially on your seat usually won’t work
    • Understanding pressure and how it varies
    • Solving the inside leg to outside rein puzzle
    • How improving your balance can improve your responsiveness

    [smart_track_player url=”https://op3.dev/e/traffic.libsyn.com/dailystridespodcast/1027-Understanding-the-Balance-of-Your-Aids.mp3″ title=”The Basics to Understanding the Balance of Aids” social_linkedin=”true” social_pinterest=”true” social_email=”true” tweet_text=”Balance – a huge part of horse riding, especially the balance of aids in the saddle…” hashtag=”Equestrian #Podcast” twitter_username=”strides_success” ]

    Balance.  It is a concept that always shows up when discuss the important things in life. Balance blends the important parts together.  Balance, if adhered to, makes things work more seamlessly together.  Many riders think of balance as staying on…

    However, today I want us to focus on that important blending; the balance of aids.

    Every good relationship is built on communication, so it stands to reason that you should work on building your communication channels with your horse.  When in the saddle, this is achieved via your aids.

    Why Focusing Initially on Your Seat Usually Won’t Work

    When we initially learn to ride, things are often explained to us in a very simplistic manner, and of course it must be otherwise we would give up on the first day.  But then as we begin going deeper into the aspects of horse riding, we begin to understand that our seat is the most important aid we have when communicating with our horse.

    However, knowing that your seat is important and then riding in a way that conveys that to your horse, are two very different things!  Your seat is important “IF” you can control everything else!

    Which brings us to this balance of aids.  When you are learning to ride, through the different stages of your progress as a rider, that balance changes.

    Initially, your seat is not going to be so important as a clear aid.  Now, I realise that some people will argue with me here and insist that “Of course it is important”.  But no, really it is not because most riders cannot control their seat at that point.

    If you were to try to communicate with your horse using your seat when you first start riding, you are just going to be talking absolute gibberish to your horse.  Complete nonsense, which he can’t understand.  The result is the horse ignoring the rider, or becoming anxious by a ‘busy’ rider, which will inevitably result in both of you becoming extremely frustrated with the process.

    To counter this, when we learn to ride initially, the balance or aids gives a greater emphasis to our legs, hands and voice. 

    Then, as we refine our riding skills then the balance changes and the seat becomes more important.  Now, it is worth bearing in mind that your seat is not completely null and void at the beginning, but if you could imagine a pie chart of your aids, the seat ‘slice’ would be significantly smaller than the other pieces when we start our journey as riders.

    This is where I see the frustrations of a lot of riders.  They are not yet at the point where their seat can work effectively for them as a communication tool with the horse, and yet they are trying to do that, and it ends up negatively impacting so much in the saddle.

    So, keep in mind that if you are in the early stages of your riding journey, or coming back to riding after a break, your seat probably should not have such a big piece of the balance pie, when it comes to all your aids together.

    Understanding pressure and how it varies

    As you become more adept and more refined as a rider,  your aids are going to change.  The balance of aids is always changing, that is the nature of balance.

    However, it is also the balance inside of the aids themselves that is part of this change as well.  Simply put, this is the pressure at which you apply your aids.

    How much pressure you apply with a particular aid is going to depend on a few different factors.

    • What you are doing
    • Your abilities as a rider
    • The horse itself on that day
    • The responsiveness of the horse
    • The situation or circumstances you are riding in

    Every day this will change depending on the specific set of circumstances surrounding each ride.  An example of this is the difference between riding a horse in the arena and, the same horse, in an open field.   Even though it is the same horse (and maybe even the same day), the aids need to be applied differently in order to be effective.

    The pressure of each individual aid changes.  But so too does the sequence or how the aids are being applied together.  Everything can vary and it is this balance which must be considered every time we sit on a horse.

    Most riders have a goal of improving their ‘feel’ in the saddle.  ‘Feel’ is that point where you are no longer thinking or planning your adjustments.  You have the ability to keep your aids in balance regardless of the situation, the circumstances, the horse, whatever the case may be.

    Solving the Inside Leg to Outside Rein Puzzle

    One of the most misleading concepts regarding balance of aids is the inside leg to the outside rein.  Due to the focus being so much on the inside leg and the outside rein, many riders completely forget about the outside leg and the inside rein.

    All the aids play a big part in this concept working correctly, including the seat.  It’s just that the balance of aids has shifted slightly. 

    Let’s think of the pie chart again.  If we divide up our pie-chart based on how much relevance is going to be given to each individual aid, the inside leg to outside rein pie chart would not only contain two pieces, or halves.  All the other aids are still in there, playing a role; balancing.  However, the pressure exerted by them must vary depending on how the horse responds.

    If you were to just ride from the inside leg to the outside rein for example, and not use anything else, the concept will not work.  All the other aids must be there, the balance, in order to maintain the straightness and the connection with the horse.  Missing aids lead to lack of balance, which leads to being lopsided!

    How Improving Your Balance can Improve Your Responsiveness

    This brings me to the final piece of the balance puzzle.  When you begin to improve the balance of your aids, you are also going to find that overall responsiveness, both you and your horse, will improve.

    Realising that a balance is always there and always in play will ensure that you are working on refining it every day in the saddle.  This begins with self-awareness in the saddle.

    Begin noticing the ’cause and effect’ of your thoughts, movements and aids. “When I do this, in this way, I get this result”.

    By doing this, you will begin to see patters in how your horse associates specific aids with certain actions he must respond with.  The connections he has formed in his mind between two things.

    As you become more aware of those connections, you can then begin refining your aids more and more.  Playing with the balance and discovering what works best in particular situations.

    The final piece of this is devoting less time on thinking about your aids and more time on tweaking or refining the outcome to get the results you desire.  This is that ‘feel’ I spoke about earlier.

    It is a little like fine-tuning an old radio using the dial.  It can be a little frustrating at the beginning. Snippets of muffled communication, coupled with a lot of static.  It is only by making micro, minute changes to the dial that the communication and overall experience improves.  Then when it is correct, the result is instant.  Clear sound flows from the radio.

    Your balance of aids is similar.  it is fine tuning, tweaking, paying attention.  When you get it right your horse can hear you perfectly.  You can also ‘hear’ your horse

    It is also worth remembering that the perfect balance might be fleeting at the beginning.  That is the nature of balance; the stable spot when everything is moving. However, as you become better able to read and adjust your aids, you will find that staying in balance for longer becomes easier.

    Happy Riding

    Lorna

    Links mentioned in the episode:-


  • Working Towards a Consistently Better Quality Trot

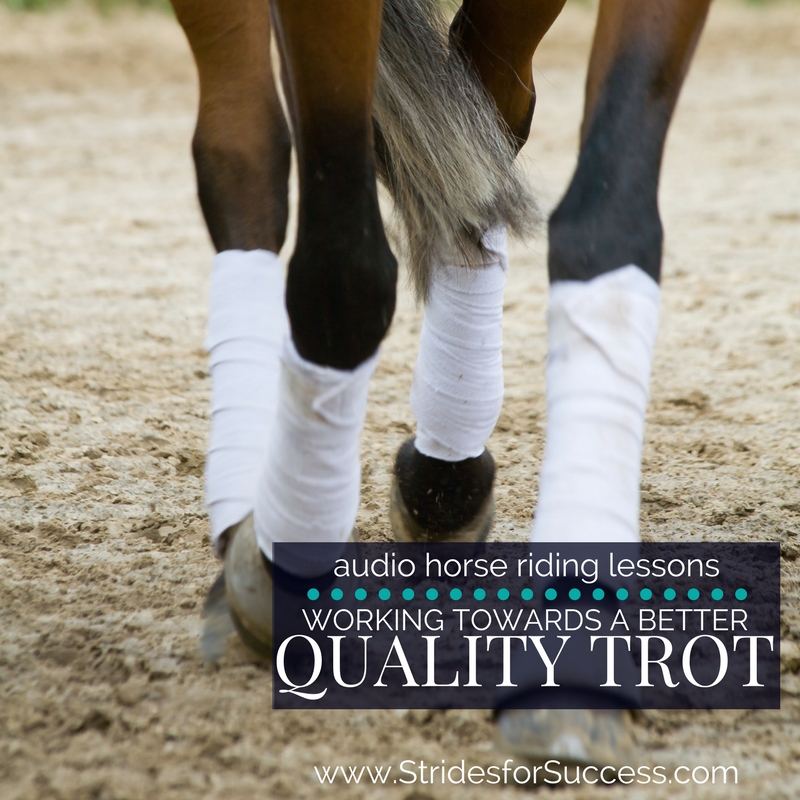
    Working Towards a Consistently Better Quality Trot

    Working on a Consistently Better Quality Trot

    What this episode is all about & how it can help you:-

    • The importance of establishing Forwardness in the Trot
    • How you can begin encouraging more responsiveness
    • Why you must Activate the Inside Hind Leg & outside hind leg
    • How you will know when it is ‘working’

    [smart_track_player url=”https://op3.dev/e/traffic.libsyn.com/dailystridespodcast/1025-Working-Towards-a-Consistently-Better-Quality-Trot.mp3″ title=”Working Towards a Consistently Better Quality Trot” social_linkedin=”true” social_pinterest=”true” social_email=”true” tweet_text=”Trotting – we do it most times we’re in the saddle; here’s how you can make it better…” hashtag=”equestrian #horseriding” twitter_username=”strides_success” ]

    When was the last time you went out riding with the sole intention of improving your trot?  Trotting is a gait we spend a lot of time in when in the saddle.  Yet, for many riders it is an afterthought in their schooling plan…

    I think the reason for this is due to most riders feeling like they have ‘mastered’ the trot when they can managed a few ‘up-downs’ without being bounced out of the saddle!  It tends to get put on auto-pilot after that point; and promptly forgotten about it!

    If this has been the case for you and your horse, today is the day we take the trusty trot off of auto-pilot and begin consciously working on establishing and maintaining a better-quality gait.

    The Trouble with Auto-Pilot Too Soon

    As I said a lot of riders put their trot onto auto-pilot.  They get into the saddle and the auto-pilot part comes from the fact that they allow the horse to dictate the posting.  The ‘Up-Downs’.  The Rising.  The horse will move the rider, rather than the rider moving with or influencing the horse if necessary.

    Becoming stronger through your position, particularly where core strength is concerned, will allow you to hold or carry yourself.   This will in turn place you in a good position, which will allow you to easily communicate with your horse.

    As you become stronger in your position, particularly in trot, you will soon see how you can begin to influence the horse as opposed to the other way around.

    The Importance of Establishing Forwardness in the Trot

    It is easy to become lulled into a false sense of ‘purpose’ when it comes to the trot.  In fact, one of the most common challenges many riders face in trot is the is a lack of forwardness.  Forwardness is essential to developing a good quality trot, so start here.

    I realise that ‘forwardness’ has the potential to scare a lot of riders.  But rather than seeing forwardness as speed, see it as moving with a sense of purpose.

    Our aids help us channel the horse’s energy from the back to where we want to go.  You cannot channel anything, if it not there to begin with.  Make sure that your horse is working forward and that you are thinking forward as well.

    How Your Posting Can Influence the Overall Trot

    Once you have established forwardness in your trot, you can then begin to turn your attention towards ‘tidying’ things up a little.   This starts will encouraging responsiveness, in both you and your horse.

    I suggest working with your half halt and transitions.  While you are shifting up and down gears, become aware of how you are posting or rising in the trot.  You should be balancing yourself and moving your own body, rather than using the horse’s energy and momentum to ‘bump’ you up and down.

    In order to begin working on a better quality trot you must be able to positively influence your horse, rather than the other way around…

    Allowing your horse’s energy to bump you up out of the saddle, followed with allowing gravity to assist your ‘coming down’ is not posting.  That is bobbing along!  Focus on moving with your horse.  Meeting him half way. Think of dancing – you are moving together, but each person is responsible for their own part of the dance.

    When you learn to take responsibility for your own movement in the saddle, you can then begin influencing your horses movements.  A small ‘stretching out’ of the ups or downs to steady things.  A quickening of your movement to energize things.  There are so many things you can do when posting correctly to influence your horses way of going.

    Working on Encouraging Responsiveness

    I recommend using basic half halts and transitions to fine tune the communication between you and your horse.  Stick to basic transitions between walk and trot initially.

    Work on refining the transitions so much, that your horse feels like he is just waiting to do what you ask. 

    Depending on both your level of riding skill and your horses training, you can refine this exercise to the point where there are two strides of walk and then trot.  Maintaining the quality of the transition from the trot to walk is important here.  So too is are the two strides of the walk.  Finally, ensuring that the trot is pushing it forward again, forwardness…

    Why you must Activate the Inside Hind Leg & outside hind leg

    Activating your horse’s hind quarters is a vital part of a good quality trot.  The hind quarters are made up of the inside leg and the outside leg of your horse.  Depending of which way your horse is flexed, or bending, you have an inside and an outside.  When thinking about the hind quarters, it is important to also think about straightness.

    Straightness is, when speaking about the hind quarters, both hind quarters using the same amount of thrust as they are pushing your horse forward. 

    Many riders focus their attention on the inside back leg, but it is important not to forget about the outside back let.  Don’t allow it to just do its own thing.   In order for there to be a good quality trot, both hind legs must be present and pushing forward.

    Trot is a fantastic gait to work on this because, in trot, all things are equal.  Your horses legs move in diagonal pairs, and each diagonal is moving the same as the opposite pair.  This gives you a good opportunity to really develop this equal push.

    You can use your half halt to connect both back hooves to the ground.  The hoof on the ground is important to think about here, because this is where your horse pushes from.  Each stride sees his hoof is landing on the ground. This is followed by his leg (and body) moving over that hoof and then being propelled forward by his hoof pushing off the ground.

    If your horse is not pushing equally from both hind legs, he will not be straight through his movements.  Learning to tell which hind leg is on the ground and which is moving through the air at any given time is the start of influencing one or the other.  When you can do this, you can begin to truly influence the trot.

    How will You Know when the Trot Starts to Improve?

    Many riders begin with experiencing these wonderful ‘moments’.   Fleeting glimpses of how things should feel all the time.  It often feels like you are both ‘pausing’.  It does not feel like you are going faster, or slower.

    A good quality trot feels like there is more room in it.  More space available for you and your horse to use yourselves more each stride.

    You will also notice that your horse will begin to strengthen and develop more behind; his hind quarters.  This in turn feels like he can lighten the front end a little bit more, which in trot gives you that lovely expressive movement from the front legs; the ruler many riders hold their horses trot up against!

    All of this requires your position to be as correct as possible.  You will also have to develop an awareness for what you are doing in the saddle.   As you are posting, working on using each post as an area where you can start to influence the trot.

    Improving your trot is really and truly something that will have an impact on both your walk and your canter.  It also allows the rider to experience an almost instant change in how their horse is going, which helps inspire them to work on it more.

    Happy Riding

    Lorna

    Links mentioned in the episode:-

  • Understanding and Refining Your Half Halt

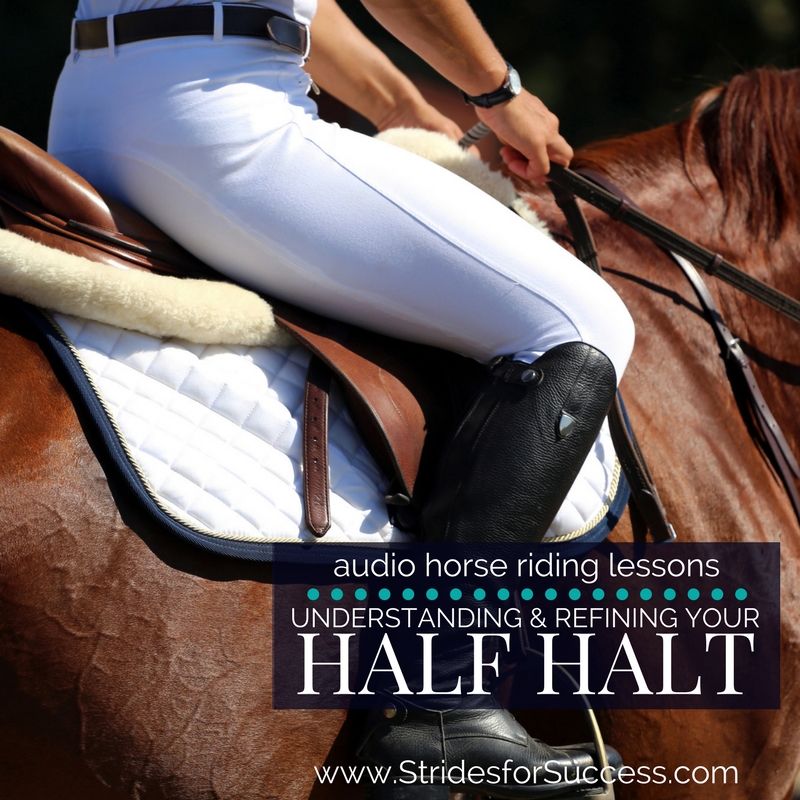
    Understanding and Refining Your Half Halt

    Understanding and Refining the Half Halt - Strides for Success

    What this episode is all about & how it can help you:-

    • Understanding how the half halt is like an intercom system for your horse!
    • Timing, Timing, Timing and why you are probably doing too much for too long…
    • Thinking about riding into your hand, rather than against it
    • Working towards slowing the front end to ‘catch up’ the back-end

    [smart_track_player url=”https://op3.dev/e/traffic.libsyn.com/dailystridespodcast/1021-Understanding-and-Refining-Your-Half-Halt.mp3″ title=”Understanding and Refining Your Half Halt” social_linkedin=”true” social_pinterest=”true” social_email=”true” tweet_text=”Thinking ‘half’ when it comes to the half halt ” hashtag=”equestrian #horseriding #halfhalt” twitter_username=”strides_success” ]

    Riding horses is all about balance.  It’s a balance between your aids, it’s actual balance sitting on your horse.  However one of the most essential, yet difficult balancing acts is the half halt.  There is an ever shifting balance between the aids, the rider and the horse.  In this episode I want to dig a little deeper into the half halt with some practical advice you can use immediately to get results.

    What is the half halt?

    The half halt is a communication aid between you and your horse.  It is your way of bringing your horses attention back to you, in order for you to then give directions about what you want him to do.

    Unfortunately what often ends up happening many riders is that they are so busy babbling to their horse – via the seat, legs, reins and fingers – that when they ride a half halt, their horse has completely tuned out.  He is no longer part of the conversation at all.

    Simply put, the half halt is all about bringing your horses attention back to you, so you can then convey something to the horse. 

    It all happens much quicker than most riders imagine…

    I like to think of the ‘half’ part in the name ‘half halt’ as pertaining to the amount of time it takes to ride the aid.   No longer than half a stride.  You can then take it a step further when you think about performing the aid within one footfall of your horse.

    Many riders hold the half halt for too long, and rather than it being that fine balance we mentioned at the beginning, it becomes an anchor in the sand.  Doing this has an obvious effect on the horses way of going.

    Rather work on getting your half halt to the point where it is so refined that nobody can see you doing it, and nobody can see the effect on the horse.

    It is also important to keep in mind that your goal should be to apply the half halt BEFORE things start to fall apart.  Many riders leave it too late and this results in an almost panicked and rash use of the aids in order to rebalance.

    How should you apply the half halt?

    Firstly, there must be a clear difference between what you are doing now and what you are going to do when you apply the half halt.  This difference is often missing due to the rider being too stiff and tense in the saddle.

    Think of ‘allowing’ through your seat and back in particular.  If you can establish and then maintain a lovely looseness before you apply the half halt it will make all the difference.  The half halt is that little bit of resistance for that split second.  When used correctly and consistently your horse will feel the change.  The difference.

    It is also worth remembering that it is a ‘slight’ resistance.  Subtle.  Quiet.  This is why developing a strong core can make a difference to your communication with your horse.

    The next part is that the horse shouldn’t change course from what’s happening.  He must be moving forward before you apply the half halt aids.  Once applied, he shouldn’t slow down, he shouldn’t stop.  This is where your leg aids come into play.  With them, you will ask your horse to continue moving forward.  This all happens in a split second (that one footfall) – leg on, leg off – and ridden in a way so that you are not bumping the horse.  It must be a subtle increase in pressure, and then a decrease in pressure, all inside that split second.

    Understanding the role of your hands in the Half Halt

    The third part of this simplified explanation is your hand.  A lot of riders make the mistake of bringing their hand back in the half halt, in other words they come against the horse.

    Rather think about your legs bringing the horse into your hand. 

    Your hand will not move back.  Rather think about the resistance that began in your lower back spreading up, across your shoulders and down through your arms.  Your arms will also have a certain amount of tension, resistance, in them.  That resistance is there to meet the energy that comes through when apply your leg aids.  It is truly a balance of your aids.

    The relationship between the front end and the back-end

    The half halt is what you can use to connect the back-end to the front end.  If ridden correctly, it will cause the front end to lighten so the back-end can come under it.   In order for this to happen, the back-end must be coming forward from behind.

    The result is a lovely lightning.  It is your horse re-balancing, re-adjusting, re-calibrating everything in order to lighten and carry itself a little better. 

    It is an every changing and evolving aid

    The half halt will be ridden differently for every horse and every situation.  The balance of the aids must be adjusted to fit the current scenario.

    When working with young or less experienced horses, or less experienced riders, the lightness will not happen straight away.  It takes physical and mental development in both horse and rider in order to really tap into the true power of a subtle half halt.

    However, these instances the answer is to perform a lot more half halts than a more experienced pairing or team of horse and rider would require.

    Summing up the Half Halt in a few simple steps

    Next time you are on your horse, think about the one footfall – that you should allow first through your back before you can ask for that little bit of resistance through your back.

    How your leg is then asking the horse to continue to move on so that it is bringing the energy in, but then your hand is there to meet that.

    Your hand is not coming up against the horse, your horse is rather coming into your hand, you are holding it for a split second and then you are releasing.

    That is the half halt in a nutshell.

    Happy Riding

    Lorna

    Links mentioned in the episode:-

    Links to other content that will help with this topic:-

    Click here to subscribe

  • Basic Exercises Using Ground Poles

    Basic Exercises Using Ground Poles

    Basic Exercises Using Ground Poles

    Do you find yourself shying away from using ground poles in your riding because you think they are ‘only for jumping’?  Perhaps you know all the benefits of using ground poles, but are completely unsure about how to use them effectively?

    Many riders want to include ground poles in their schooling, but are unsure about how to get started in a way that is safe for both them and their horse.

    This blog post is Part 2 of the initial Using Ground Poles in Schooling post which you can read HERE.  The first post contains more detailed instructions on how to get started with ground poles for the first time. I strongly suggest you pop over and have a read of it, before you jump into the exercises mentioned in this post.

    Building up to a Number of Trotting Poles

    Once both you and your horse feel comfortable riding over a single pole, you can begin to expand the number of poles.  This is where you can add more poles to build a line of trotting poles.

    Start with 1 extra pole, and then 2, and then 3 and then 4 and so on and so forth.  The poles should be a comfortable distance for your horse and this is generally around 4’6″ or 1.35m apart from each other.

    I suggest that when trotting over a set of trotting poles for the first time rather get off your horses back into the light seat, so he can use his back more.  

    However it is important to note that you must not shift all your weight forward onto his withers or front end… He has to lift those to clear the poles!  There is a full description of how to successfully do this HERE and HERE

    [smart_track_player url=”https://op3.dev/e/traffic.libsyn.com/dailystridespodcast/861-Basic-Exercises-Using-Groundpoles.mp3″ title=”Basic Exercises Using Groundpoles” social_linkedin=”true” social_pinterest=”true” social_email=”true” tweet_text=”Do you use groundpoles in your riding? Here is an awesome freebie to get started…” hashtag=”equestrian #makeeveryridegreat” twitter_username=”strides_success” ]

    So assuming that you are nicely balanced and allowing your horse to use himself over the poles, you will probably find that your horse will easily navigate 2 or 3 poles in a row.  Sometimes he might misjudge and get the striding wrong, but allowing him the space to figure it out is vitally important.

    Introducing Additional Poles

    I suggest only adding a fourth or fifth pole once he can confidently navigate the three poles.   This is because he may have to make minor adjustments through the poles in order to successfully navigate the exercise.  Allowing him to think for himself through the more basic exercises will enable him to confidently make adjustments where necessary.

    This is why your balanced, independent seat is vitally important.  Remaining balanced and poised rather than bouncing around on his back will enable him to focus on using himself correctly through the poles…  Rather than trying to get out from under your backside hammering away on his back

    Later, as you both of your strenght and balance increased, you will find it easier to move with and follow your horses ‘exaggerated’ movement through the poles.  When this happens you can actually begin to navigate the poles in rising trot, or posting.

    In fact, eventually you may even be able to stay in sitting trot as you move through the poles, but this will require a truly independent seat and a strong, balanced, developed horse.

    Raised Trotting Poles or Caveletti

    When both you and your horse feel confident and comfortable working through the trotting poles, you can begin to introduce raised trotting poles or caveletti to the schooling session.

    Raised poles are great for teaching horses to go straight, keep regular tempo and introduce more suspension, which means they have to use themselves more.  

    That raised suspension is also superb at allowing you, the rider, to experience that extra energy underneath you and begin focusing your riding on being able to move with the energy, rather than bouncing against it.

    This exercise also encourages your horse to really use his back.  It also can contribute to greater development of the topline, more flex in joints as the legs must be raised or lifted higher to get through the sequence and also, more thinking and responsiveness from your horse.

    However… This will require a much greater effort from your horse, so don’t over do.  Asking too much can result in the muscles can becoming strained rather than strengthened.

    It is also worth keeping in mind that this exercise will also require more effort from you, the rider! Keep the weight dropped into your heel and keep your shoulders square and chest opened.  Make sure your hands are soft and following and that you are allowing your horse to move both his head and neck, but also to use his back.

    Try not to fall backwards behind the movement while riding over the poles.  Make sure you are using your body to carry yourself.  I often suggest pinching some mane or a neck-strap if it is the first venture for a rider over the raised poles.

    Use the same trotting poles that you are comfortably working through and begin by raising alternatives sides on each of the poles in the sequence.  The poles are only raised by 3 or 4 inches.

    I find that raising just one side, lets say the left side, of the first pole, and then the right side of the second pole and so on, builds a ‘funnel’ which you can also use to encourage straightness in your horse through the sequence.  Later, once you are both comfortable, you can also raise both sides of each pole if you want.

    Start initially with raising 1 and then build up from there.  You may need to shorten the distance between poles initially ( again inch by inch) as often horses don’t have the necessary strength and co-ordination to both maintain the stride and lift their legs higher to clear the poles.  But you will feel this as you go.

    Progress Must be Slow & Steady

    Don’t stress your horse.. All changes must be gradually done to ensure your horse is confident and happy in his ability.  You also want to ensure that he continues to use himself correctly through the exercise.  Often if he begins to tire, the quality of the work will lower and mistakes will be made.

    You may find your horse will try to run through the poles, as he feels uncomfortable and not so confident with this new exercise.  If this happens, take things back a step or two.

    Slow and steady will build both of your confidence.  It is also important to use your half halt throughout.  Let him realise that it is better to wait, engage his back end and then power through slowly and concisely, rather than rushing forward.

    But again, if you sense any anxiety or nervousness on your horses part, take things back a step or two to where he is comfortable and ask again from there.

    Click here to subscribe

    Ground Poles in Canter

    Ground poles can also be used in the canter.  Once again, it is important that you focus on where you are going, rather than looking down.  It is also important to work over the pole in a simple light seat.

    Focus on establishing a rhythm and then maintaining the tempo and balance while working over the poles in the canter.

    I suggest setting up a 20m circle with 4 poles at each of the quarter markers of the circle.  If the circle was a clock the poles would be at 12,3,6 and9 o’clock.  Choose 1 pole to start over initially, bypassing the others as you complete each circuit of the circle in canter.

    Pay attention that your horse is balanced both over the pole and throughout the circle, using his hind quarters and keeping a consistent tempo in the canter all the way through.  

    Lack of balance will result in changes to the tempo or rhythm.  Loss of balance may also result in flying changes or breaking back into trot.

    Focus also on your position that you are moving with him and asking for the bend to the inside without leaning or tipping your body.  Keep in mind that your horse will be able to better navigate the poles if you remain balanced and quiet in the saddle.

    As he becomes better at just the 1 pole, introduce a second pole – the one directly opposite the first one ( the 6 for the 12 or the 9 for the 3 on a clock).  Pay attention to reaching the centre of all the poles when you reach them on every circuit you ride.

    Adding more poles to your circle

    As both of your confidence increases, you can introduce the 3rd pole and work up including all 4 poles in your circle.  However, this may take some time to build up to and rather get 1 pole correct before moving on.

    For a second exercise in the canter, I suggest building the cantering equivalent of trotting poles.  Again, begin with just 2 poles, about 3.3m apart and then make any minor adjustments to the distance to suit what your horse is comfortable with.

    Once you are both happy over 2 poles, begin adding additional poles in a straight line and you can also begin to raise the poles, again alternating the sides between each following pole to create a funnel of sorts through the poles for your horse to canter through.

    As always, try not to pull or interfere and pay close attention to being as light in the saddle as possible.  Allow your hose to figure it out!

    Imagine every canter pole is a jump and ride it accordingly, which is a super exercise without the stresses of actually jumping.  Fine tune your riding and your horses going bit by bit, pole by pole without jumping the legs off your horse.

    Regardless of how you begin to incorporate ground poles into your riding, remember to try and finish on a good note.  It is also worth repeating that when your horse becomes tired – stop.  Working a tired horse, mentally or physically, over poles is a recipe for disaster.  

    Slow and steady is the way to proceed in order to build both of your strenght, balance and confidence. 

    Happy Riding
    Lorna

    Have you taken the challenge yet? Join thousands of riders all over the world in the 30 Day Rider Fitness Challenge – your horse will thank you!

  • Conscious Transitions Between Walk & Trot

    Conscious Transitions Between Walk & Trot

    [smart_track_player url=”https://op3.dev/e/traffic.libsyn.com/dailystridespodcast/521-Concious-Transitions-Between-Walk-and-Trot.mp3″ title=”Conscious Transitions Between Walk and Trot” social_linkedin=”true” social_pinterest=”true” social_email=”true” tweet_text=”Working on Walk with your Horse? This will help :) Walk and trot – the most overlooked transition in horse riding!” hashtag=”focusonthebasics #equestrian” twitter_username=”strides_success” ]

    So there you are, walking along and at some point or another, you find yourself having to ask for trot.  You might walk a little faster, perhaps include a little jig jog or two until, 4 or 5 seconds later, you are finally trotting.

    This is not ideal at all!  But what is it about transitions between walk and trot, and not just walk to trot, but also trot to walk, that has a lot of us think they are not so important?

    Is it because it is the first real transition up the gears that we usually get to grips with when learning to ride? Most riders will have experienced going from walk to trot within the first lesson or three.  Or is it because we become so used to the trot being a wee bit bouncy to begin with that we are less than careful about trying to create a smooth transition into it?

    Whatever the reason, the transitions between walk and trot are some of the most overlooked by riders and it’s a pity because it is a transition that when given the attention it deserves, it can really and truly change your whole experience in the saddle and help you create that seamless communication between rider and horse.

    Begin where you are – the walk

    As with most things, the quality of the transition will only be as good as the gait leading up to it. invest time in establishing and maintaining a good quality walk with your horse.  Your horse should walk on and use himself correctly.

    Next time you are on your horse in walk begin to question the quality of the walk.

          • Is your horse responsive and listening to you?
          • Are you having to force him forward?
          • Are your connections with your horse equal?
          • Do you have an actual plan for what you want to happen?!

    Assess your past attempts at transitions

    Next, turn your attention to your past transitions and how they were…

          • Does it take your horse 4 or 5 ‘asks’ to eventually fall into a trot?
          • Or perhaps he is the opposite and shoots forward into the trot
          • Does your horse hollow his back as he picks up trot?
          • Does your horse ‘fall’ a little to one side or the other as he steps into the trot

    Most of the time our horse is responding to what we have allowed to continue, either with our lack of consistency or our ignoring the smaller, but essential details.

    One of the biggest reasons for poor transitions between walk and trot is a lack of responsiveness from both horse and rider.  Responsiveness is something that is mirrored in horse and rider – meaning that it is generally both parties at fault when it is less than ideal…

    Fine-tuning the responsiveness

    If your horse is a little dead to your leg, have a schooling whip on hand to back up your leg. You will probably find that 2 or 3 well-timed taps with the schooling whip is enough to send a message that your leg is something he should listen to.

    You may find that initially, he will run forward when you apply the whip, he will soon learn that there is no need to run away and charge forward.  The whip is merely a signal that he must pay attention to your leg and, therefore, begin to ‘step’ into the trot from your leg.

    Of course, the opposite of this is being a little too sensitive to the leg. If you experience this,  I suggest rethinking a little about how you are riding your horse. Are you teaching him that your leg is only used when he must go faster?

    If so, you need to begin reintroducing him to the fact that your leg is not something to run away from.  You can do this by being consistent with how and when you use your leg.  It is also good to be aware of what your leg is doing when it’s supposed to be relaxed (hint; this does not mean daylight between it and your horse’s sides!)

    You can also evaluate at your seat. Perhaps your horse is sensitive enough to begin reading your seat aids to move forward. If this is the case, you need to begin being more mindful about how and when you are applying them.

    Putting effort into your Preparation

    Preparing to trot from a walk requires just that; preparation. You need to begin to think about how you are signaling to your horse with your seat that he must move into a trot.

    Think about ‘allowing’ the energy to begin flowing underneath the saddle a little more.

    Practice how using your seat and weight aids can communicate either a whoa or a go to your horse and becoming consistent with applying them each and every time.

    Conscious Transitions Between Walk and Trot

    Understanding and Correcting Bad Habits

    Very often the hollowness which is generally accompanied by short, pottery or choppy strides is because we are simply not allowing our horses to trot. We often think of ‘allowing’ as being everything to do with our reins and hands, however, keep in mind that your rein aids are connected to your seat aids, so you must also allow through the seat.

    Rather than becoming a close peg and clamping down with your pelvis and thighs on your horses back when he begins to trot, think about opening up and allowing that energy to flow through your legs.

    Very often the reason people ‘clamp’ is because they are worried about the bounce they will experience when their horse takes the first few strides of trot. The irony of this is that the trot is far more uncomfortable when your horse is taking those short, choppy pottery steps – which a lot of the time is happening because your seat, legs, and upper body are like a vice grip on him!

    If you can relax and think about ‘carrying’ yourself into the trot, your horse will then be able to get his back legs underneath himself and push himself forward, rather than pull himself forward.

    A Good Transition – Every Transition

    Finally, I have mentioned consistency in cultivating a better transition a few times now, but it is important to stress that you must be consistent EVERY TIME you go from walk to trot, not just in the arena.

    Picture your horse actively walking around, and then beginning to push off into the trot correctly using his hindquarters. He will continue to carry himself, his shoulders will be free to swing along in the trot and you will experience a wonderful rhythmic trot from the word go.

    The Downward Transition

    The same thought and effort must also go into the reverse transitions, the trot to walk. All too often a nice trot is ruined by a rider literally dropping an anchor and hauling their horse back into walk.

    Just like you had to think about allowing the energy to flow while still continuing to move with it going up a gear, you must now begin to think about containing that energy, while still moving with it – more influencing it than controlling it – to get a wonderfully smooth transition that sets up a great walk.

    A lot of horses will fall into the walk.  Others will raise their head and neck and pull against their riders as they are asked to walk.  Another common sight is the horse that will hollow their back, hold their ‘head carriage’, but the whole hindquarters disengages.  All of these are usually rider faults.

    Horses that pull against their riders, generally do so as a result of riders pulling against their horse! Think of your reins as an influence, not a hand-break!

    It is important to set the transition up with lots of half halts. It signals to your horse something is going to happen and it shifts the hindquarters a little more underneath your horse.  This allows the horse to use their body more correctly as they ‘gear down’, carrying and balancing themselves better.  It also ensures that the is forward energy is maintained into the walk.

    Taking Responsibility for Your Body

    Lastly, don’t mistake hunkering down with your body for using your seat when asking for a downward transition. Very often the hollowness in the horse’s back is from a rider that simply makes themselves heavy in the saddle, which results in the horse moving away from underneath them.

    Be sure to continue to carry yourself, and be prepared to then immediately follow your horse into the walk as he steps into it. This is with seat and hand.

    I challenge you over the coming week to really focus on the quality of your walk to trot and trot to walk transitions. Not only will you see an overall improvement in how you and your horse communicate with each other, but also an improvement in both gaits, walk and trot, as a result of this as well.

    Happy Riding
    Lorna

    Finding the Gaps in Your Horses Training

    And, finally, if you would like to go further with your riding I highly suggest you give my free training series a go…Find the Gaps in Your Horses Training using this free audio series available for you to listen to in a private podcast feed – so just as easy as listening to the Daily Strides Podcast :) You can sign up for free HERE or visit https://stridesforsuccess.com/free

    Get Support & Guidance in Your Riding

    Get Audio Horse Riding Lessons and Begin Training Your HorseToday!

    Right now, there are so many lessons, on all different topics, available for you on a Private Podcast Feed that delivers them straight to your phone, so you can listen as you ride your horse. Your own time, your own arena, your own horse… More Details HERE

    Connection is an online membership for equestrians working alone to train their horse without a coach or trainer.