Tag: balance

  • Begin to Transform Your Riding using ‘Autopilot’

    [fusebox_track_player url=”https://dts.podtrac.com/redirect.mp3/pdcn.co/e/traffic.libsyn.com/dailystridespodcast/1361-Start-Transforming-Your-Riding-Using-Autopilot.mp3″ title=”Begin to Transform Your Riding Using Autopilot” social_linkedin=”true” social_pinterest=”true” social_email=”true” ]

    Have you ever caught yourself mid-ride, wondering, “Wait, what am I even doing right now?”  You’re trotting along and suddenly realise your reins have slipped, your heels are up, or you’re staring at your horse’s neck. Riding on autopilot isn’t a bad thing – if what’s running in the background is actually helping you. In fact, putting the right things onto autopilot can really transform your riding.

    Because here’s the thing… You’re already riding on autopilot. The question is, what exactly is on your autopilot? Be honest, if I were to watch a short video of you riding today, and compare it to one from six months ago, would there be a positive change? Not just in your horse, but in you, the rider?

    In this episode of the Daily Strides Podcast, I want to walk you through the steps you can take to make sure that when you “zone out” in the saddle, the habits you fall back on are ones that are actually serving you. Not random things you picked up somewhere and stuck with because they “kinda worked”.

    This is the same process I guide riders through inside Connection and my live trainings. It’s how you can begin to rewire your default riding behavior — so your autopilot becomes your greatest ally, not your biggest hurdle.

    Step 1: Make It Easy

    Look — changing a habit doesn’t always require a big overhaul. Often, it starts with something as simple as checking your setup.  In fact, you could begin to transform your riding today if you paid closer attention to this… Do your gloves make it hard to feel the reins? Get a pair that actually grip. Are your reins smooth and slippery? Try ones with stops or rubber coating. Struggling to keep your heels down? Maybe your stirrups are too long. Riding on the cantle of the saddle every time? Try adjusting your stirrup length first.

    So many riders are struggling in the saddle simply because they haven’t made it easy for themselves to succeed

    Make it easier to do the right thing. So much of good riding is about removing resistance to good habits.

    Your Action Step:

    Look at your most persistent issue. What’s one small change you can make today to support a better habit? Tweak it. Set yourself up for success.

    Step 2: Use Checkpoints

    Changing habits isn’t just about doing something new — it’s about remembering to do it. That’s where checkpoints come in.  Checkpoints are anything in your riding environment that you can associate with a quick check-in. Think floodlights, poles, fence posts, shadows, jump uprights, and the corner letters in your arena.

    You already ride past the same things every day. Start using them to your advantage

    Every time you pass your chosen checkpoint, do a quick scan: How are your hands? Your seat? Your posture? Are you still riding with intention?  The more consistent you are with these mini check-ins, the faster your good habits will become automatic.

    Your Action Step:

    Pick 2–3 things you ride past consistently and assign a check-in to each one. Make it simple. Make it repeatable.

    Step 3: Stack Your Habits

    This idea became popular through James Clear and Atomic Habits, but I’ve been teaching it to riders for years. You already do things in your ride on autopilot. Things like warming up, cooling down, checking the time, or walking to the mounting block. Why not use those moments to also check in on a new habit you want to develop? Trust me, to transform your riding, you need to pay attention to these every day things.

    You’re already doing some things automatically. Why not build better habits on top of them?

    For example, during your warm-up walk, focus on aligning your posture. During your cool-down, stretch your legs and check your rein length. Every time you check your watch, scan your hand position. Simple, low-effort ways to upgrade your riding with zero extra time required.

    Your Action Step:

    Choose one routine you already have in place and attach a new habit to it. Start there and build.

    Step 4: Track & Reward

    Progress isn’t always obvious. That’s why tracking it matters.  You need a way to see your improvement over time — even if it’s slow. I recommend using a riding journal to note what went well, what you worked on, and what you’re aiming for.

    We don’t celebrate our progress nearly enough in the saddle. That needs to change

    Tracking also helps you know when you deserve a reward. Not a pat on the back, though those help!  I’m talking about something that motivates you. It might be a nice hack out, a new piece of tack, or a peaceful morning hike. You decide.

    Your Action Step:

    Start a riding journal and use it regularly. Celebrate the small wins. Give yourself a reward when you earn it.

    Step 5: Consistency, Not Perfection

    Most riders give up on new habits because they expect perfection. That’s not how this works.  Start small. Choose one habit. One change. Focus on doing it more often than not. Perfection is unrealistic — especially in horse riding, where every moment is fluid and unpredictable.

    Riding is rarely perfect — but it can be consistently better. Your riding will never be 100% perfect. That’s okay. What matters is that it’s consistently improving.

    Your Action Step:

    Pick one riding habit to focus on for the next two weeks. Just one. Work on it consistently, and notice how everything else begins to shift.

    Transform Your Riding with Autopilot

    You are already riding on autopilot. The question is: What habits have you programmed into it?  Start small. Adjust your setup. Build in checkpoints. Stack new habits onto old ones. Track your wins. Stay consistent. This is how you reset your default behavior and actually enjoy the process along the way!

    If you’re nodding along and thinking, yes — this is what I need, make sure you’re on the waitlist for my Returning to Riding program. I’ll be hosting a live training soon, and this is exactly what we’ll be diving into.

    Happy Riding
    Lorna

    More Episodes on This Topic

    Online Training to Help Your Riding

    Connect with Lorna online:-

  • Developing Independent Aids in Your Riding

    Developing Independent Aids in Your Riding

    [fusebox_track_player url=”https://op3.dev/e/traffic.libsyn.com/dailystridespodcast/1321_Developing_Independent_Aids_in_Your_Riding.mp3″ title=”Developing Your Independent Aids in Your Riding” social_linkedin=”true” social_pinterest=”true” social_email=”true” ]
    Ask any rider what they want to make happen when it comes to their riding aids and, hopefully, creating truly independent aids will be high up there on that list.  Because, let’s face it, your aids can only be as clear and useful in direct relation to how independent they are. But saying you want independent aids and working towards developing independent aids are two very different things.
    Especially when, as a whole, your aids are almost always used in conjunction with each other – not independently on their own…
    And yet, for each aid to become a useful member of your team of aids, I believe that you should first isolate each one and develop it intentionally and individually. Having one ‘strong’ independent aid when the rest are flapping about won’t be enough to create clear conversations with your horse.
    Each aid must be strengthened in its own right and then be allowed to contribute to the overall team effort.

    Intentionally Isolating Your Aids

    How well can you use your left leg without moving your right leg at the same time? Or for you, perhaps it’s your inside hand that, when actively engaged in communicating with your horse, causes an involuntary movement from your inside leg?
    When we can’t easily move one body part without unconsciously moving another, there is no way that our aids can be truly classed as independent.
    And yet, this can be quite a challenge for most riders initially – until they begin developing each aid in its own right and then putting them together. I prefer starting riders off with their more obvious aids first.  Their hands and legs. I bring their attention to previously unconscious and unintentional linked movements between these aids.  And whether you are just getting started on your riding journey, or you’ve been at this for a while, it can be eyeopening once these related movements – and their overall influence on the horse – are pointed out.

    Obvious Versus Subtle Aids

    As a rider, your aids can be loosely grouped into two different categories.  Subtle and Obvious.  As mentioned, your obvious aids are the ones that anyone can see and pick up on if they were watching you ride.  Bigger movements happening in your limbs are the obvious ones.  But so could your voice and position if not carefully applied.
    Your ‘obvious aids’ are usually the ones you rely on most when starting your riding journey.  So it makes sense that you work on creating independence in them first as a rider.
    Your subtle aids will then, over time, begin to take on a bigger role in your and your horse’s communication and conversation. These have more to do with your weight, your seat, and your thoughts. The things that are not as easily picked up on by an observer or cannot be seen at all.
    Your subtle aids will create the secret conversation between you and your horse and require true, independent aids to make a reality.

    Start with Obvious Aids First

    Next time you’re in the saddle, ask your horse to walk a 15m circle in the walk.  Spend a few strides making sure that you are in the correct position up there in the saddle.  Check your lines (‘head shoulder hip heel’ line and also the ‘elbow, wrist, thumb, rein, bit’ line).
    Then check that you have your obvious aids in the right place to create a channel or flow for your horse’s body and energy. 
    When on that circle, use your aids to ask for appropriate bend and flexion through your horse’s body while asking your horse to continue to move forward.  So, for example, your outside leg will be slightly behind or further back than your inside leg.
    Once you are correctly positioned, begin experimenting with using a single aid without it having an effect on your other aids. 
    Can you slide (or swing) your outside leg back without moving your hands or tilting/twisting your upper body?  What about gently squeezing the outside rein without lifting or gripping with your inside leg?  Or are you able to ask for ‘over’ using your inside leg without shoving with your seat?  How about asking for a canter using your legs and seat without tipping forward through your upper body?

    Then Work on Subtle Aids

    Why? This question runs through most riders’ heads when they are told to wait before developing their more subtle aids.  And I get it… The subtle ones are the ‘fancy’ ones. They are the aids that everyone speaks about. So why the wait?  Diving into developing independent ‘subtle aids is a complete waste of your time until those more obvious ones are under your control!
    The rest of your body must first learn to be ‘quiet’ in the saddle, so that your horse can really ‘hear’ your more subtle aids, such as your seat, weight aids, breath, etc. 
    You can of course begin training yourself to be in the best position to use these aids from Day 1 in your riding. So ensure that your seat, position, and posture are good. But to truly be fair to your horse, it’s best to have everything else under control and like I said, quiet.

    Your Independent Aids

    My final piece of advice for you developing your independent aids is to develop your physical fitness… And not just in the saddle.  When you are fitter and have more stamina, you will naturally have more control over your body.  And I find that when riders take the time and work on this OUT OF THE SADDLE, it really benefits them in the saddle.
    When you gain more control over your own body, and then understand your aids, you will naturally increase your ability to communicate effectively with your horse…
    And this is why I am rebooting the Equestrian Fitness Challenge for 2024.  Make sure you are on the list to get this year’s brand new challenge sent straight to your inbox by signing up HERE. This year we are focusing on walking… Yep, walking and expanding our knowledge, enthusiasm, and confidence in our abilities as a rider.
    Visit https://equestrianfitnesschallenge.com/24 to get the brand-new challenge!
    Happy Riding
    Lorna

    Equestrian Fitness Challenge ’24

    Let’s walk together for 21 days and have a chat about how you can do much more than you think you can as a rider and an equestrian… I am so excited to bring you along on this journey for the 100% FREE 2024 Equestrian Fitness Challenge
    There will be a daily walk, a 10 minute daily yoga practice, and lots of tips, ideas, exercises, and ways to improve so that you can show up as the best version of you – for you and your horse.
    Sign up today and let’s transform your riding – one stride at a time! 100% FREE 2024 Equestrian Fitness Challenge
    Have a super day
    Happy Riding
    Lorna

    Resources for Riders:-

    Connect with Lorna online:-

    Get Going in Your Riding:-

    Daily Strides Premium is back! You can use the first and original audio horse riding lessons to improve your riding, train your horse, keep things interesting, and have fun… Even if you don’t have a trainer or coach

  • Breaking the Habit of Poor Posture in Your Riding

    Breaking the Habit of Poor Posture in Your Riding

    [fusebox_track_player url=”https://op3.dev/e/traffic.libsyn.com/dailystridespodcast/1320_Breaking_the_Habit_of_Poor_Posture_in_Your_Riding.mp3″ title=”Breaking the Habit of Poor Posture in Your Riding” social_linkedin=”true” social_pinterest=”true” social_email=”true” ]

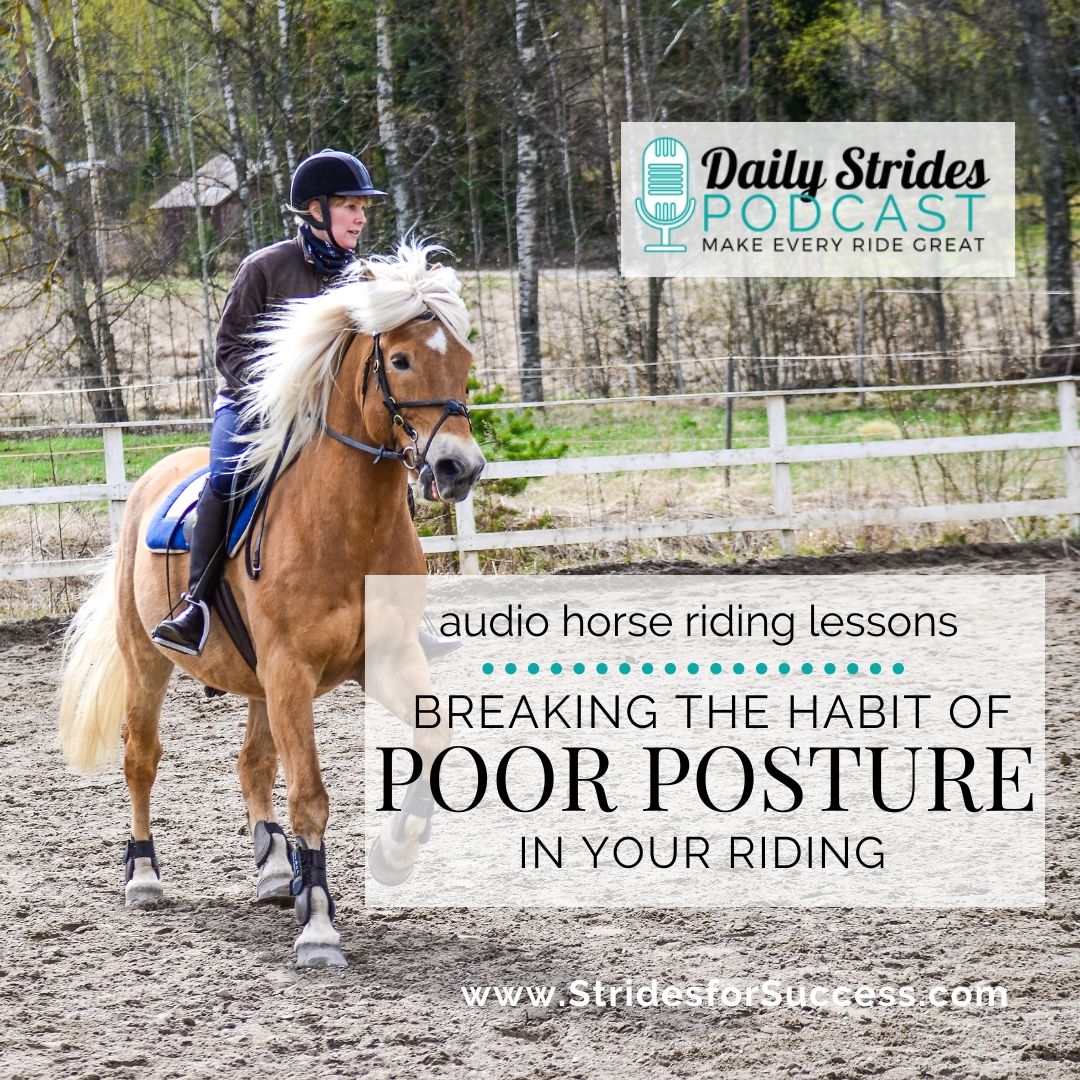
    Whether you realize it or not, incorrect or bad posture is hurting your riding. And your horse’s way of going. And this habit will usually continue unchecked for sometimes years.  I don’t believe that riders ever initially set out to ride in a way that will negatively impact things. Usually what happens is that riding a certain way either produces a certain outcome or solves a particular challenge at some point… And then turns into a habit!

    But, what happens if you get stuck there?  Stuck with thinking the thoughts that cause you to use or carry your body a certain way…  Usually never good things!

    There are lots of reasons why you might have developed less than great posture when in the saddle.  Luckily, there are also lots of ways you can begin to both identify what’s going on – and how to begin remedying it in your riding.

    Symptoms of Poor Posture in Riding

    If you have started to ‘slip’ a little where posture is concerned in your riding, there will be signs!  Definite and obvious signs.  This is good because when you know what to look for, it makes it easier to begin to make those small tweaks that can make all the difference for you and your horse.

    Lack of Balance in the Saddle:

    It stands to reason that if you are struggling to carry yourself in the saddle, your balance will be affected.  You may feel yourself tipping or tilting.  This can be to the front, so tipping forward… Or it can be tipping backward, which then feels like you are being left behind.  You may also notice this around bends, corners, or circles as a sideways tilt or collapse.

    Whatever way you are tipping or tilting, you will also most likely notice that your horse will struggle with this as well.  Your lack of balance can really negatively impact your horses own balance. 

    He may speed up (especially through transitions or bends/corners).  Or he may slow down.  He can also fall in or fall out to try and compensate for your tilting to the side.  Finally, if you are regularly tilting back, he may being to hollow through his back to avoid any associated discomfort…

    Tension and Stiffness

    Poor posture will inevitably create issues with tension, and maybe stiffness in certain areas of your body.  And of course, your horse’s body if allowed to go uncorrected for any length of time. Many riders notice this in their shoulders, lower back, or hips.  However, this can also show up across your chest, your elbows, knees, and even calves.

    Last week I spoke about ‘opening up’ and practicing expansion as a rider.  This can really be helpful for this, especially if you focus on your posture as well. And, keep in mind that incorrect tension can go both ways; excessive tension OR a lack of tension… Both can lead to poor posture in your riding and block or prevent your horse from moving and working forward.

    Closed Down or Shut Down Position

    Otherwise known as the hamster effect we least expect…! This is the reason I actually wanted to really address this topic today; too many riders are resembling hamsters while in the saddle! So what do I mean by this?   Well, if you are crumpled, contracted, hunched over, closing your shoulders and chest, riding with your hands touching each other, gripping with your knees, and overall ‘rolled up’, you are riding like a hamster!

    Often this starts as a defense mechanism – although it only makes things worse, so it’s incredibly ineffective!  Maybe there was a time when you felt fear or anxiety when riding.

    The natural thing to do is ‘play small’, roll into a ball, and wait it out.  Except, when we are riding, this is ineffective – and often downright dangerous.  Again, I am going to point you to last week’s episode on Opening Up and Practicing Expansion in the Saddle.

    Ineffective Aids and Communication

    If poor posture is something you’ve been struggling with, you are also most likely having communication issues with your horse.  Responsiveness, or the lack thereof, is something that is most likely showing up.  Coupled with your horse understanding your aids. Unfortunately, this often then increases the initial problem of poor posture and tension issues as the rider ‘doubles down’ on ‘making’ their horse do whatever it is they are trying to communicate… Frustration can run high; for both horse and rider… Not an ideal situation.

    Back and Muscle Discomfort

    Did you realize that your lack of posture can actually be contributing to muscle fatigue in your riding?  When you are not setting your body up to use itself in the best way, it gets tired – very quickly!  And then continual poor posture can even result in back pain or injuries over time. This will 100% take away from how much you enjoy your time in the saddle – and can even cause you to eventually stop riding!

    Unable to Effectively Use Your Core

    We all know how important your core is when it comes to riding.  It really does impact EVERYTHING.  Good and correct posture requires core strength and engagement. And, without this, you will find it difficult to be independent through your seat and aids.  This can lead to confusion between you and your horse – and can actually set you up for a fall or an accident in the long run.

    Improving Your Poor Posture

    Okay, so there are so many ways this can show up and none of them are beneficial when it comes to improving your skills as a rider or training and developing your horse. So, let’s work on actually improving your posture in the saddle.  Investing time here will both enhance your riding experience and help you more effectively train your horse.

    Body Awareness

    Again, we chatted about this last week HERE.  When you begin to become more aware of your body’s alignment and position while riding, you will begin to feel and notice when things are not ‘right’. This is also where practicing exercises off the horse can help.  Especially those that promote body awareness, such as yoga or Pilates.  And they have the added bonus of strengthening your core muscles and improving your flexibility.

    The 100% FREE 2024 Equestrian Fitness Challenge will help you with this.  This year’s challenge includes a daily yoga practice from Emma-Jane Leeson (yep, my sister), a qualified yoga teacher.  And an equestrian just like you :) Make sure you get signed up for the 2024 Equestrian Fitness Challenge HERE

    Riding Lessons with Focus on Posture

    Get help when you need it most by investing in lessons with a proven instructor or trainer who can assess your posture and provide corrective feedback. I realize that this can be a challenge for many riders, especially when time/schedules and location are an issue.  If this is the case, think about video reviews or live virtual online lessons.  Both of these are available for riders inside of Connection; My Online Membership for Equestrians.

    Regular riding lessons with a focus on proper alignment in the moment and balance can significantly improve your posture over time.

    Using Mirrors or Video

    I know, in an ideal world, we would all have mirrors strategically placed around the arena.  If you do have, make use of them by paying attention to your posture and alignment.  If you don’t; use video.  You can either invest in something like a PIVO – use THIS LINK to get $20 off your purchase (this is an affiliate link and we will receive a commission on your purchase but it won’t affect how much you pay).

    Being able to watch back over your work will allow you to begin to see where things are falling out of alignment, and where you can make improvements. 

    Of course, you can also use the PIVO (affiliate link) to have virtual lessons in real-time online with a coach or trainer (again, this is part of the Connection Membership with me)

    Increasing Fitness & Stamina

    Do you walk? Walking is one of the easiest and most effective ways of moving your body and improving your overall well-being and fitness.  I LOVE walking.  Whether it’s on the road, on the trail, hiking, or just out to the fields to collect or turn out the horses. It helps to keep my body toned, and move my hips, and it is hands down amazing for my mental health and well-being.

    If you would like to walk a little more and see where it takes you and your riding; the 2024 Equestrian Fitness Challenge is ALL about walking.  Join me for 21 days as we take a daily walk together and chat about all things riding and training horses related :) It’s 100% free and it has the potential to transform your riding. CLICK HERE
    to sign up


    Mindfulness & Connection Techniques

    Recently, I ran an in-person program on my farm here in South Africa all about connection and energy techniques on the ground with your horse.  The results were amazing.  The difference then in the rider’s and horses’ performance when being ridden afterward was mindblowing.

    Just a simple practice of grounding before working with your horse can be transformational for both of you.  Couple this with the power of intention…

    I have packaged up this full program into a short email course that you can use with your horse.  The Connection Partnership Program Mini-Course lays out all of the techniques in step-by-step audio episodes.  And all delivered via your email.  You can get more details HERE

    Improving Your Poor Posture

    Phew, that was a lot.  I would love for you to take just one of these resources this week and begin working on it to help change any habits you may have in the saddle.  Remember, improving your overall posture and alignment in the saddle will not only help you but also have a positive impact on your horse as well.

    And, over time, improving your posture will result in better communication, clearer aids, and increased understanding between you and your horse when working together.

    Happy Riding
    Lorna

    List of Resources for This Episode:-

    Connect with Lorna online:-

    Get Going in Your Riding:-

    Daily Strides Premium is back! You can use the first and original audio horse riding lessons to improve your riding, train your horse, keep things interesting, and have fun… Even if you don’t have a trainer or coach

  • Smoother Downward Transitions

    Smoother Downward Transitions

    [fusebox_track_player url=”https://op3.dev/e/traffic.libsyn.com/dailystridespodcast/1280_Removing_the_Handbrake_During_Downward_Transitions.mp3″ title=”Smoother Downward Transitions” social_linkedin=”true” social_pinterest=”true” social_email=”true” ]

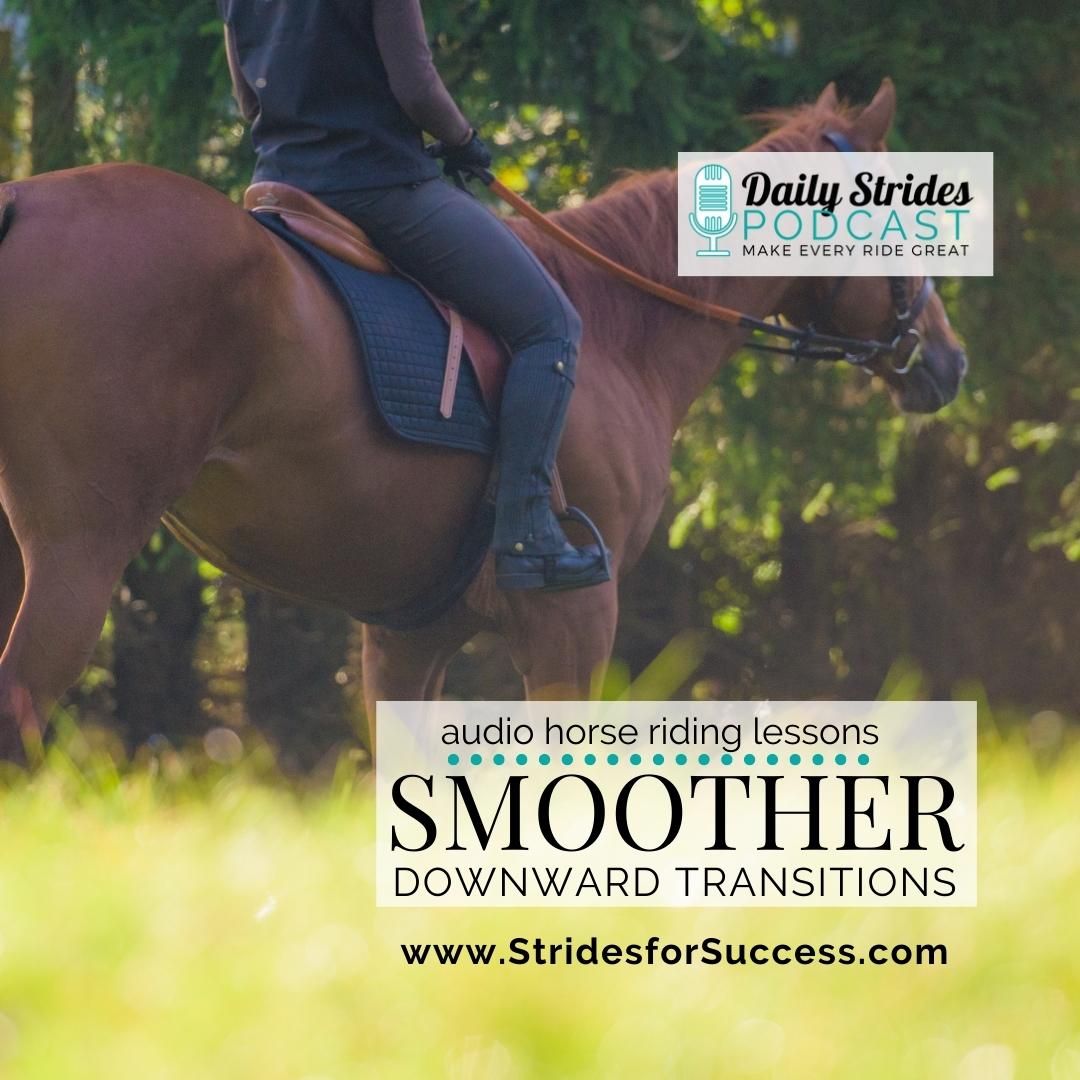
    There is a tendency for riders to ‘hold’ a little too much during the downward transitions.  And while the half halt is essential to the preparation and transition itself… Too much can lead to a very ‘stuck’ feeling when the horse actually makes it into the new gait!  A little like ‘stuck in the mud’.

    In this episode, I am releasing a Connection Bonus Live Call from June 2021.  This is due to an ongoing hoarse voice!  I hope you enjoy the ‘episode’ and that it is useful for you in your riding.

    The focus for the month inside of Connection was self-carriage through downward transitions.  In this particular call, I discuss ‘releasing the handbrake’, especially through the seat and hands, while riding the transition.  I do hope that you find this helpful for your downward transitions.

    Happy Riding
    Lorna

    Get All Of The Training

    Join Connection today and get all of the audio horse riding lessons on this topic (and all the others I mention here today) to begin using in your riding.  Everything comes straight to your phone, via a private podcast feed.  There’s also extra bonus live training (like the excerpt above), live Q&A and so much more. All the details are over at https://stridesforsuccess.com/connection

    More on This Topic:-

    Additional Resources:-

  • Making the Most of Time with Your Horse

    Making the Most of Time with Your Horse

    [fusebox_track_player url=”https://op3.dev/e/traffic.libsyn.com/dailystridespodcast/1267_How_to_Make_The_Most_of_Time_with_Your_Horse.mp3″ title=”Making the Most of Time with Your Horse” social_linkedin=”true” social_pinterest=”true” social_email=”true” tweet_text=”How to make the most of 15, 30 or 60 mins with your horse” hashtag=”horsepodcast” twitter_username=”strides_success” ]

    There are certain times of the year when circumstances mean you can find yourself with either more or less time with your horse. December, August, and April are just a few that pop into my mind.  Some riders find they have more time, and other riders have significantly less! It just depends on your unique circumstances and situation.

    What is key to remember is that whatever side of the time conundrum you find yourself on, making the time with your horse count is important. Especially if you hope to continue to move forward in your training together.  Can you really afford to lose a month of training – and set your momentum back to zero?

    So, to help you get this all figured out and continue to grow and develop your skills as a rider, here are a few ideas on how you can make the most of your time with your horse. However much time that happens to be for you.

    15 Minutes or Less

    Oh yes, there is so much you can do in 15 minutes (or 5 minutes) with your horse.  The key is to think about the time difference.  My ‘go to’ training method when time is short is to focus on the groundwork.  It requires absolutely minimal equipment – so no ‘getting ready’,

    The key to making the most of time, especially when it is short, is to have a clear goal for what you want to achieve in that time.

    Things such as a square halt, a turn on the forehand that remains in rhythm, working over some basic ground poles for coordination and suppleness, or rein back are just a few things that can be worked on and accomplished in a short period of time.

    When you only have a few minutes, ask yourself the question “What can I ask my horse to do, while I’m on the ground beside him, that will move our training forward?” 

    15 to 30 Minutes

    Now, for many riders, this may still seem like a bit of an impossible feat; we all know how fast 30 minutes can go by, right?! However, again, if you can become REALLY intentional with what you are doing, you can achieve so much in that time with your horse.

    Now, a lot of what you do with your 30 minutes will depend on how your yard is set up…  If you have to walk 10 minutes just to catch your horse from the field, well, that has to be factored in.  If your horse is already in the stable or stall and waiting for you, you have a lot more options.

    I find that the most effective way to train my horse in 15 to 30 minutes is through lunging. However, this is only effective if I have a clear focus for the session…

    So, again, having a plan is key to making the most of this time with your horse.  Think about it, if you can combine 10 minutes of groundwork (as your warm-up) with 15 minutes of lunging… You have just had a fantastic training session with your horse – and you still have 5 minutes for hugs and kisses ;)

    30 Minutes to an Hour

    Okay, so once we get to the point where we have a little more time, we can begin thinking about riding. Yes, you can ride if you have 30 minutes, however, I find that it usually ends up feeling rushed and stressed.  Not a great feeling when we want to model being present for our horses! So, I prefer to wait until I have a little more time before I will actually tack up and ride.

    Depending on the length of time I have, I will choose something relevant to focus on.  Remember, you also have to allow for both your warming up and your cooling off.

    This means that if I want to work on maybe canter or jumping, I will do these on the days when I do have a full hour.  On the days when I have 40 minutes, I might rather work on lateral work, bending and suppleness, or contact. Things that I can do quite a bit of the work in walk and trot, which then means that the cool down and ‘aftercare’ won’t take as long.

    Over an Hour…!

    Finally, those special days when I have all the time in the world – well, sort of!  These are the days I plan bathing, massage, walking together, a long luxurious groom… As well as riding and maybe some groundwork or lunging as well.

    Alternatively, I find that these longer sessions are great for getting out of the arena and ‘exploring’ with my horse. There is no hurry, meaning that we can spend time ‘greeting’ any of the scary things we come across along the way.  Unrushed and feeling calm.

    I think all riders have a running list of ‘things I would love to do with my horse but need more time for’.  The only way you will actually get to do any of these things is, again, planning in advance! 

    Planning Time with Your Horse

    As I have been preaching for years, the only way that you will really begin to see improvements in your riding and your relationship with your horse is by becoming intentional.  As I said at the beginning, we all have times and periods when our usual routine or schedule doesn’t apply.

    In order to continue to move forward with your horse, make sure you are planning for these times, so that you can continue to develop with your horse.

    Happy Riding
    Lorna

    More on this Topic

    More Training & Support

  • Introducing the Canter to Walk Transition

    Introducing the Canter to Walk Transition

    [fusebox_track_player url=”https://op3.dev/e/traffic.libsyn.com/dailystridespodcast/1257_Introducing_Canter_to_Walk_to_Your_Training.mp3″ title=”Introducing the Canter to Walk Transition in Your Riding” social_linkedin=”true” social_pinterest=”true” social_email=”true” tweet_text=”Interesting episode on the canter…” hashtag=”horsepodcast” twitter_username=”strides_success” ]

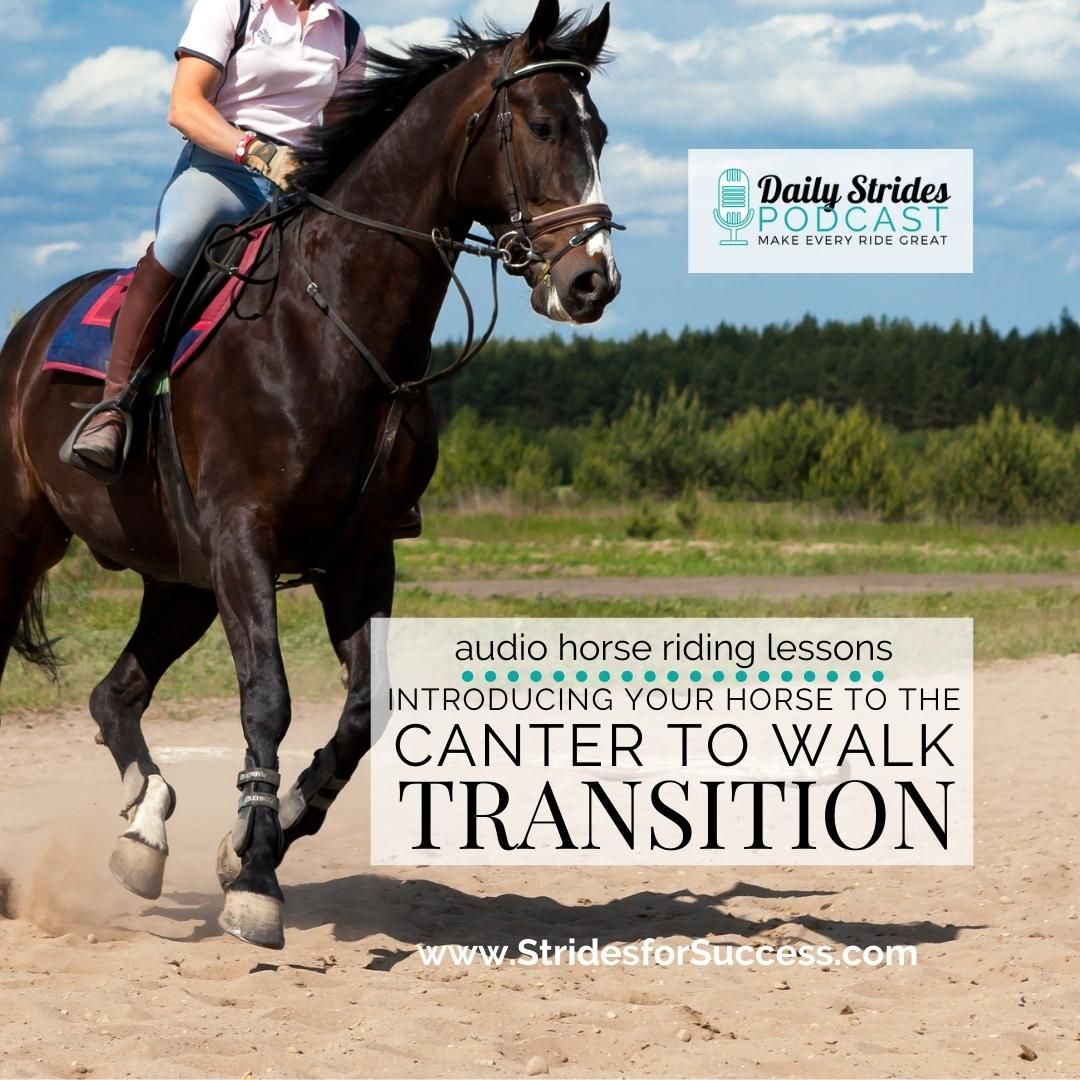
    So you are a place in your canter where you want to begin to do a little ‘more’.  After a quick ‘google’ of all the different exercises, you see a canter to walk pop up a few times. Canter to walk?! Without a handbrake?!  Yes, and even better, this will begin to prepare you and your horse for so much more to come.

    The canter to walk transition can seem daunting when we begin to think about it first. However, once you and your horse have begun working successfully in a few key areas, it does not have to be as complicated as maybe you believe it is.

    The First Few Canter to Walk Transitions

    So, before we go any further with this, I feel that it’s important to realize that the first few transitions probably won’t be your best work!  It is completely normal for your horse to include a few, usually wobbly, steps of trot in before he reaches walk. This is okay.

    Very often, the first few attempts at the canter to walk, even with all of the preparations, can look and feel a little like a child learning to walk!  Hesitant, unbalanced, and looking for support.

    Keep in mind that canter to walk is not something your horse will do a lot by himself.  And going direct from canter to a balanced, rhythmic walk is definitely not something you will see happening among horses in a field!  This means that you will have to both explain and encourage your horse to perform this transition. And, depending on where you are in your training, that may take some time.

    Half Half in the Canter

    I suggest beginning to work on this transition by developing your half halts in the canter. Focusing on developing your ability to identify where you are inside of each canter stride. From here, the level of independence you have gained regarding your aids will play a big role.

    Click here to subscribe

    Begin by identifying the ‘1’ in the canter stride.  The point when the outside back leg has touched down. This, or just before it, is always a good place to half halt in the canter

    A key part to half halting in the canter is to remember to release and allow the ‘2’ to ‘swing’ forward. This is really where you can engage the energy and channel it forward.  Riders often make the mistake of ‘holding’ the half halt for too long and they cause the ‘2’ beat to become sticky and hollow.

    Then focus on repurposing and rechannelling the energy back into the next stride as you and your horse ‘reset’. The reset happens during the moment of suspension when the horse travels over the inside front leg and prepares to step into a new stride again.

    1257 Introducing Your Horse to the Canter to Walk Transition

    Shortening and Lengthening

    Once you can sync your half halts to your horse’s phase of the canter, you can begin playing with the influence you have. Start by lengthening the canter a little for a few strides. Key words in that sentence were ‘little’ and ‘few’! Too much too soon leads to a flat canter!

    Use the ‘2’ beat of each stride and your inside seat bone to ask for a little ‘more’ regarding the length of the stride. And remember that just 2″ longer is still longer… Lengthening takes development! 

    Once you can feel that you are both covering a little more ground in each stride, rebalance and come back to the ‘normal’ stride. Then, prepare again, but this time to shorten the stride slightly. I cannot overstress the importance of self-carriage and posture here. For you! If you model it, your horse will follow your lead.

    Just like you used your inside seatbone to ask for a longer stride, you can use it to do the same for a shorter one. Keep in mind that no one aid will work alone; your other aids are supporting and balancing all of the time. 

    Testing Your Progress

    Adjusting the stride length inside of the canter is not as easy as it seems. It will require your horse to develop more strength both in his hindquarters and through his back and core. As you begin to make progress, you can begin to hold the shortened stride for longer periods.  Initially, 1 or 2 strides in true rhythm and relaxation will be a great achievement. From there, begin working towards riding some movements and exercises there.

    A simple way to ‘test’ your progress is to see how short can you shorten without breaking into a trot. Again, I stress that the key is to maintain both rhythm and relaxation here. Another way to see how well your horse is doing is to offer the inside rein. As you offer it forward for him, he should be able to both maintain forwardness and balance.  As well as a level of collection inside the canter.

    This ‘collection’ is what you need to develop in order to be successful with the canter to walk transition. If your horse is truly balanced, he will be able to maintain a level of collection in his canter; without you ‘holding’ him there with the rein

    Now, a word of warning here… Collection is not slowing down! They are different things. Collection is when the same amount of energy or forwardness is there; it simply feels like it’s going ‘up’ instead of ‘out’.  Collection is also not you hanging on the reins pulling your horse into some strange contorted shapes! Collection is you and your horse working together, carrying yourselves, and engaging.

    Click here to subscribe

    Riding the Canter to Walk Transition

    A correct canter to walk transition is balanced, forward, and ‘light’.  Keep in mind that your horse really will need a certain level of development in his hindquarters so that he can both carry and balance himself. Trying this transition on a green or young horse is not going to produce the outcome you had hoped for; and will probably feel tense, heavy, and, therefore, ‘sticky’.

    As with all things riding-related, timing is a big part of the equation! When you ask for the transition will depend on how responsive your horse is. And how ‘suspended’ the canter is; how much space is inside of each stride. 

    Ideally, you will ask on the ‘part 4’ of the canter, the moment of suspension. Or the ‘roll’. This is when your horses outside back leg is coming back underneath him and preparing to ‘touch down’ again. However, if your horse is a little less responsive or a little ‘flat’ you can work on asking when the inside front leg is on the ground. The 3rd beat in the canter stride. Just be aware that you can cause things to become a little heavy by doing this.

    1257 Introducing Your Horse to the Canter to Walk Transition

    Start by Learning Control in the Canter

    First, learn to create more space and have more influence within the canter itself.  Remember, your horse must develop physically in order to ride the more complicated transition of canter to walk.  Being able to carry a little more weight on his hind quarter is key to this.

    Use your half halt inside of each canter stride to begin encouraging this in your horse. You can ask either on the 1st beat of each canter stride or just before that when your horse is in the air (part 4 of the stride).

    As you begin to have more influence over the canter itself, you can then start to ask questions.  A longer stride, for most horses, will usually be easier than a shorter one initially. And keep in mind that 2 inches longer is still longer! From there, begin working on shortening the strides in the canter. Initially, you may only be able to maintain the rhythm, forwardness, and balance for a couple of strides of lengthened or shortened canter. Work on developing this more over time.

    As you work on developing the canter itself, keep the end goal in sight. Your horse should begin to use is hind quarters more to balance inside of the canter, and rely less on his head and neck. 

    Then Work on Canter to Trot Transitions

    As you begin to develop and prepare your horse for the canter to walk transition, focus on both responsiveness and straightness.  Any buckling or wobbling in the canter to trot transitions will usually point to a lack of strength and development in horse and rider. Focus on riding timely, light as possible transitions from the canter into the trot.

    Once in trot, choose a set number of strides to ride before asking for the transition into the walk. Again, this will depend on you and your horse’s training and development. I would suggest starting with more and then working down to less. 

    Once you can successfully ride canter to trot, then trot for 5 strides before transitioning into a light and forward walk, begin to decrease the number of strides in trot. Ask for 4 trot strides the next time. And when that works well, try 3. And so on.

    Keep in mind that the chances of you and your horse getting the canter to walk transition correct the first time you try it are fairly slim! This is something that takes consistent work and focus from both of you. 

    The Canter to Walk Transition

    When you feel that you and your horse are now ready to ride the canter to walk transition, Start by riding a smaller circle close to the boundary fence or railing of the arena. Make sure that you are carrying yourself, your chest is open, and your hips are able to move unhindered by the weight of your upper body.

    Pay attention to how well you can maintain a balanced, rhythmic canter on the circle. Often just saying can-ter, can-ter, can-ter in rhythm with your horse’s stride can help with this. 

    Ask for the downward transition on the circle as your horse approaches the boundary railing or fence. You can use this artificial aid to help your horse understand what you are asking for.  I also strongly suggest using your voice aids, even if you don’t usually do so when riding.  A simple ‘Woah’ or ‘steady’ can really help your horse to understand you want him to ‘step down’ into the canter.

    From here, change how you move your seat with him in the canter. Think about not ‘swinging’ forward and, in doing so, telling your horse to stop doing the same. Rather think about ‘walk’ and move that way

    Click here to subscribe

    Focus and Self Carriage

    A key part of successfully riding any transition is to be aware of what you are doing throughout it. Many riders fall into the trap of just pulling back to create a downward transition. This will only help your horse to become heavy on the forehand, and unbalanced there as well!

    Continue to carry your body both in the preparation for the transition and through the transition.  Make sure you don’t throw yourself forward, intentionally or otherwise.  Remember, your horse’s front end must lighten to ride a well-balanced transition,  and it can’t do this if you are on top of it!

    Train yourself to think about what you are doing inside each part of the transition.  Become really mindful of what you are telling your horse. This will help prevent you from becoming heavy and ‘dead weight’ in the saddle.

    The final part of the transition is to connect your seat to your hands and mirror through them what you are doing with your seat.  Make sure that you are not grabbing or pulling on the contact as you prepare for and ask for the downward transition from canter to walk.  Also, that you remember to ‘give’ slightly as your horse steps into the walk to smooth out any excess tension.

    Time and Consistency

    Finally, make sure you are giving both yourself and your horse all the support you need as you work on this,  Remember, canter to walk is not the easiest thing you can ask your horse to do.  He, most likely, does not do this himself when in the paddock with his friends!

    He has to learn to move his body a different way, coordinate his legs, and remain balanced… This won’t happen overnight!  Be consistent with your training in the days, weeks, and even months prior to introducing it.

    If you can remain dedicated to helping you both develop in a way that does this, you will see success over time in working on this with your horse.

    Happy Riding
    Lorna

    Work Towards a Better Canter Today

    I realize that the canter to walk transition can seem daunting. However, with correct guidance and practice, you can make this a reality for you and your horse; whatever your canter currently looks like!  I can help you do this, step by step, starting with the walk to canter transition, and all on a private podcast feed that you can use when you ride your horse. My online membership for equestrians, Connection, is for riders who are working alone a lot of the time without a trainer or coach.

    It will help you to put the training into practice, while your ride yoru horse – without forgetting any of the pieces along the way. 

    Try it for a month (it’s a cancel anytime policy, no questions asked), and see how you go…  And if it’s canter you’re looking for, make sure you check out all of the content from September 2022… Trust me, one month of working on this can transform your riding and your horse’s training.

    Free Half Halt Riding Lesson

    If the canter to walk seems a little too daunting, I would love to help you begin seeing changes where you are right now in your riding. The half halt is the perfect place to begin this process. You can begin today by signing up for my free audio horse riding lesson
    on the topic.

    Click here to subscribe
    Created so that you can listen while you ride; you and your horse together, this training will help both you and your horse become more responsive and ‘working together’. Get your free audio horse riding lesson HERE

    More Episodes on the Canter

    Get Support & Guidance in Your Riding