Tag: feel

  • The Correct Diagonal In Trot

    The Correct Diagonal In Trot

    Finding the Correct Diagonal in Trot

    There you are, happily trotting around the arena, delighted at the fact that you can ‘post’ correctly; until someone goes and bursts your bubble by pointing out that you are on the wrong diagonal…  “Sit for two” they shout your way…  And you’re thinking ‘Come again?’!

    [smart_track_player url=”https://op3.dev/e/traffic.libsyn.com/dailystridespodcast/SFA486-Finding-the-Correct-Diagonal-in-Trot.mp3″ title=”Finding the Correct Diagonal in Trot” social_linkedin=”true” social_pinterest=”true” social_email=”true” tweet_text=”Struggling with your diagonal in the trot? This will help (no looking required!) ” hashtag=”trotting #horseriding #equestrian” twitter_username=”strides_success” ]

    What is the Diagonal in the Trot?

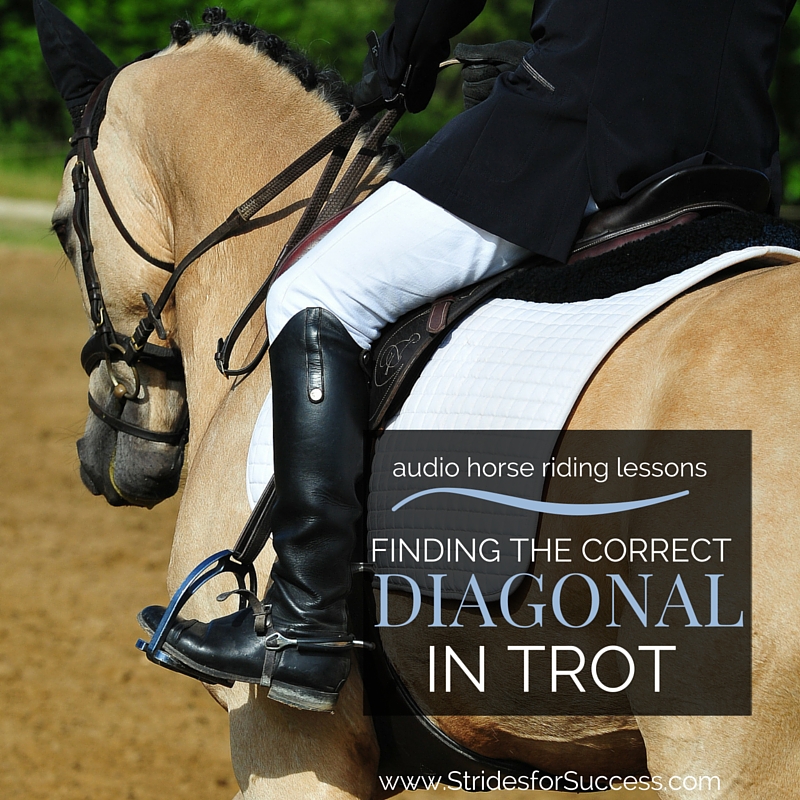
    Being on the correct diagonal is to do with rising or posting to the trot.  We know that when our horse trots, his legs move in diagonal pairs, the front inside with the back outside and the front outside with the back inside.

    Your horses way of travelling, in diagonal pairs, is what creates the two-time beat that we experience in trot.  The 1,2,1,2,1,2…  or, when we rise or post to the trot, the up, down, up, down, up, down.

    Posting or rising on the correct diagonal in trot is when you are sitting or down when your horse’s outside shoulder (and inside hind leg) are on the ground.  This means that you are rising or posting when the same outside shoulder and inside hind leg and moving forward.

    There is a well-known ‘rhyme’ to help riders remember which diagonal pair is the correct one to post.  It goes ‘Rise and fall to the leg by the wall’.  This pertains to the front leg closest to the wall, or the outside shoulder, which when we are first being introduced to a diagonal, is the easiest way to establish if you are correct or incorrect.

    So, Why Worry About Which Diagonal You’re On?

    Remembering which diagonal is the correct one is important.  However, understanding the reason you ride on one diagonal or the other will help you move forward in your riding training.

    It actually has little to do with the outside front leg, or shoulder.  It has more to do with the inside hind leg, the other half of the diagonal pair to the outside front leg, which is creating the energy and impulsion in the trot.

    As your horses inside hind leg comes onto the ground, this is the point where he is most balanced.  

    Your being ‘down’ at this point will help to maintain this balance, particularly around turns, bends and circles.

    Using Diagonals to Help with Equal Development

    The other consideration or factor with riding the correct diagonal is that you are equally conditioning or working your horse’s back and hind end.

    As your horse trots, his hind legs are constantly pushing him forward.  If you were to always ‘sit’ or be in the ‘down’ part of your rising trot on the same hind leg, that constant one sidedness would begin to show itself over time in a lack of suppleness through your horse’s back.

    Therefore, while you are in an arena or an enclosed space and assuming you are working your horse equally on both sides, you can use the wall or fence as your ‘outside’ reference.  

    However, as soon as you leave the arena and perhaps are on the trail or the road, there is no ‘outside’ or ‘inside’.  When posting to the trot along a long straight road, it can be easy to forget about diagonals.  This can potentially be an issue for your horse.  This is because your outside and inside may not change for long periods, if ever.

    Therefore it is important that you are consistently changing your diagonal periodically throughout the ride.

    Learning to Feel which Diagonal You Are On

    Learning to feel which diagonal you are on at any given time takes consistent effort and focus on your part.  You should aim to eventually be able to literally feel which diagonal you are riding on at any given stride.  I will explain more about that later in this post.

    However, initially I recommend using  your eyes to make sure you are indeed riding on the correct diagonal.  Seeing is much easier than feeling initially. And you can use your sight to ‘train’ your feel over time. 

    I suggest beginning in walk where you can learn to distinguish, using a glance of your eyes, where your horse’s outside shoulder is at any given time.   The term glance is an important one here/  This is because if we begin to lean or even tilt our head down to see what is going on with the shoulder, it changes our weight in the saddle.  This will, in turn, unbalance our horse.

    So, while you are walking, glance down at the outside shoulder and notice it going back and forward.  Many instructors will recommend noticing the forward and coupling this with your ‘rise’ or ‘post’.

    In my experience it is far easier for you as a rider to notice the ‘back’ part of your horse’s stride.  Once you have that pinpointed, you simply couple this with the ‘down’ or ‘sit’ part of your rising trot.

    While in the walk practice your posting or rising to correlate or synchronise with your horse’s outside shoulder position in every stride.  It also helps to say it out loud; “back,    back,    back,     back” and again, match this with your ‘down’ action.

    Putting This into Practice in the Trot Itself

    From here you can begin to pick up working trot.  However, this time, before you give any notice to your horse’s shoulder, I recommend you say “back” each time you are down or sitting as you are going through the motions of your posting or rising to the trot.  Saying it out loud, will help as well.  Once you have been repeating this for a few strides, where it becomes almost like a rhythmical mantra of sorts, you can then begin to glance down and see where your horse’s shoulder is.

    The reason I suggest repeating your new ‘back, back, back” mantra out loud is that you may find it difficult to keep paying attention to what you are doing, while also figuring out where your horse’s shoulder is!  It all happens quite fast when actually working through this.

    So, while you are repeating “Back” each time you sit, you can begin to see if this does indeed align with your horse’s shoulder being back at the same time.   If it does, fantastic, you are on the correct diagonal.

    Changing Your Diagonal

    However, if you see that you are rising on the incorrect diagonal, you can simply sit for two.  This means that as you are going up, down, up, down, up, down with the trot, you will put two downs in there.  Your sequence will be up, down, up, down, down, up down, up, down.  

    By sitting for two beats, or indeed any even number (four, six, eight etc) you will swap your diagonal and when you go ‘up’ again, it will be on the opposite diagonal.

    Developing Your ‘Feel’ For Your Diagonal

    Once you are able to tell which diagonal you are on with just a quick glance, you can begin to develop your ability to feel the correct diagonal.  Again, I am going to suggest beginning in the walk.

    First notice how your seat bones move backwards and forwards.  It can initially feel like they are moving together, but try to isolate this a little more; they are actually moving individually.

    Then begin to take notice of how they move up and down as well.  For example, as your left seat bone moves forward, it will have ‘dipped’ lower than your right seat bone. As this is happening, your right seat bone will also be on the move.  It will be moving backwards, and will be higher than your other seat bone.

    This backwards, forward, up and down feeling you are noticing is happening because your horse is moving.  His hips are moving your hips and seat bones.  What is important is to recognise that his hips are moving, because his hind legs are moving.

    Therefore, if you start to become mindful of how your seat bones are moving and where they are moving to, you will know exactly what is happening with your horses legs.

    Feeling the Movement in the Sitting Trot

    Once you can feel this movement in the walk, you can begin working in sitting trot.  Many riders think of sitting trot as being a purely up and down movement, however, this will change when you begin to focus your attention on your hips and what they are doing as you ride the sitting trot.

    You will feel that at each ‘bounce’ (beat one) of the trot stride, one of your hips will be higher than the other one.  The next bounce (beat two) will produce the same result, but on the opposite side.

    This is caused by the diagonal pairs of your horse’s legs in the trot moving underneath you.  From here, you can begin to isolate what your outside hip is doing.  When it is up, you can begin to rise at that point in the trot.  This will be the posting part of your trot.

    You rise as your horse’s inside hind leg is moving forward underneath you and as his outside shoulder is moving forward.  You will then ‘sit’ as your horse’s inside hind leg and outside shoulder are on the ground and your horse’s body is moving over them.

    The Correct Diagonal Impacts Your Horses Development

    As mentioned, when you are riding on the correct diagonal, your horse more balanced on turns and circles.  However, the correct diagonal will also affect your horses way of ‘going’.

    When on the correct diagonal, as his inside hind leg moves up and forward, you are rising along with it out of the saddle.  This literally frees up more ‘space’ for your horses inside hind leg to move into.  

    The more developed both you and your horse become, the greater the importance of this ‘space’.  As riders, we want to give our horse instructions, aids, when they will be most effective for our horse to take action on.

    How our horse engages or uses his inside hind leg is one of the biggest factors in the quality of the gaits our horse produces.  The balance, rhythm, tempo and just overall performance.  Therefore knowing where your horse’s hind legs are at any given time, regardless of the gait you are in, will help you to begin timing the application of your aids more effectively. 

    Developing Your Ability to Ride the Correct Diagonal in Trot

    Effective application of aids and timing of aids leads to clearer communication between horse and rider.  It has a direct impact on the overall quality of the conversation in the saddle.

    Therefore it makes sense to take the time to begin learning what is moving when underneath you; and then implementing that in your day-to-day riding.

    Happy riding!

    Lorna

    Links to related content & freebies:-

  • Improving Your Feel in the Saddle

    Improving Your Feel in the Saddle

    Developing Your Feel in the SAddle

    [fusebox_track_player url=”https://op3.dev/e/traffic.libsyn.com/dailystridespodcast/SFA376-Improving-Your-Feel-In-The-Saddle.mp3″ title=”Developing Feel in the Saddle” social_linkedin=”true” social_pinterest=”true” social_email=”true” ]

    Feel…  A hugely important component of successful horsemanship and something that is often considered as a talent that you are either gifted at birth with or your not!

    From years spent helping and watching people ride, I do agree that some people seem to have a more natural feel than others. However, I have also found that, often, riders who seemingly lack natural feel can learn it. They can develop it with consistent effort and diligence.

    What Is Feel?

    So what is feel?  My explanation of feel is the ability to know the right time to ask a question of your horse without having to consciously think about it.  It is also the skill of reacting correctly, in a timely fashion, to almost all situations without, again, having to think too long or hard about it.

    True feel is not a conscious thought, rather a subconscious response to the present situation to affect the outcome you want.

    However, often the frustration felt while trying to find your ‘feel’, is the very thing that will prevent you from developing your riding skills and mastering your body. This prevents you from getting in tune with your horse and dancing the same dance.

    Warm Up Before Riding

    Firstly, before you hop into the saddle, invest some time warming up your body.  This will ensure that you are just as ready to work as your horse is.  I think as riders we can definitely improve our own personal performance in the saddle if we invest even a quarter amount of the time and dedication we spend on warming up our horses, warming up our own bodies!

    Some initial simple stretches & exercises can be a huge game-changer when you do then mount up.

    Correct Your Position & Posture

    When in the saddle, begin by engaging your core. Then make sure your shoulders, pelvis, and legs are aligned as they should be.  More times than not, a locked pelvis or hip joint is what works against you developing your natural feel as a rider.

    Pay attention that your legs are not too far back, leaving you sitting on your crotch. Also that you are not squeezing or pinching with your thighs or legs which stops you from releasing your knee.  Allow your legs to hang. Then look at ‘wrapping’ them around your horse, keeping your knee off so your legs do not ‘stick out’.

    Relaxation is, as always, of the utmost importance in order for you to be receptive to the horse & his movement.  Excess tension in either you or the horse will stop most of the feel between horse & rider. And stop you from absorbing the movement as it happens.

    It is also important to remember that your horse must be allowed to move forward. When he does you,as the rider, should follow your horse. Make adjustments based on what you are feeling, when, and with each body part.  Only when you, the rider, can truly feel the horse underneath you can you then actively begin to make adjustments based on what is happening, or what you desire to happen.

    Developing Your Feel in the SAddle

    Increase Your Awareness

    You need to become aware of your horse and be sensitive to their every movement.  I suggest taking things back to walk. Then, with your feet out of your stirrups, allowing your legs to drape over your horse’s sides. From here,  begin counting each footfall in each stride your horse takes.

    Begin to notice which hoof is the 1, which is the 2, the  3 and the 4 of each stride.

    Once you can accurately tell which hoof is moving when in the sequence, begin paying attention to your body. Notice how your horse’s moving is affecting & influencing your movement. If you are in a safe, enclosed space with a horse you trust, you can even close your eyes. This will help you to block out other distractions and really allow you to feel what is going on underneath you. So, as your horse is walking, first begin to feel the rhythm of the walk, the 1, 2, 3, 4…

    Notice The Hind Legs Moving

    Once this is established, begin focusing on which of the beats is your horse’s inside back leg moving forward (before) he puts his hoof on the ground.  Your left hip (on that same side) will dip down as his leg lifts off the ground to move forward underneath you both.

    This is because his barrel will swing out to the opposite side to make room for the leg coming under him.  Often this is an easy way to remember this…

    Concentrate and focus on the movement, rhythm, and beat.  If necessary, have a person on the ground first tell you when this is happening.  Then notice and remember how your body reacts to this movement.   If you are not fortunate enough to have a reliable person on the ground and you are still struggling to feel, it often helps if you place your hands on your upper thighs and feel which thigh goes up and down, and when.

    Only through correct repetition of this exercise in a calm, relaxed manner will you begin to enhance your powers to feel what is happening and from there, begin to move with your horse as a real team.

    Happy Riding
    Lorna

    This topic is just one that we regularly cover inside of Connection. If you are interested in finding out more about Connection, have a look HERE >>

    Additional Resources for Equestrians

  • Riding Your Horse Bareback

    Riding Your Horse Bareback

    [fusebox_track_player url=”https://op3.dev/e/traffic.libsyn.com/dailystridespodcast/SFA356-Riding-Your-Horse-Bareback.mp3″ title=”Riding Your Horse BareBack” social_linkedin=”true” social_pinterest=”true” social_email=”true” ]

    Have you tried it? For many riders, the mention of riding bareback is enough to see them running to the tack room for a saddle!  However, for those that pluck up the courage – it can change so much…

    Bareback riding is a super way to improve your posture and position as well as balance, skills, and feel. However often the greatest challenge we must first overcome in order to achieve these benefits is our minds telling us we cannot possibly do it!

    Riding bareback is not as difficult as you may think and this week I challenge you to push the boundaries of your comfort zone and try it, if only for a few minutes initially. Then gradually build your confidence and time spend ‘sans’ saddle!

    Start When Cooling Off Your Horse

    Perhaps a good place to start is once a week, after your lesson.  Simply remove your saddle to cool down your horse. His back will be already warmed up and you are both relaxed.

    Another is to ride him bareback back to the field or paddock or stable after your schooling session… little steps!

    In order to get off on the right footing I strongly advice beginning with a quiet schoolmaster who has 3 really comfortable gaits and a ‘well sprung’ or comfortable back! There are fewer things more uncomfortable than riding a not so well fleshed horse bareback!

    You should also try to ensure that the horse has smooth strides, not too bouncy and also not too hot or ‘goey’.

    Your initial few rides without your saddle should be spent focusing on your position and posture, rather than on slowing your horse or not bouncing off.

    Your Horses Comfort & Enjoyment…

    Often when we initially ride bareback, we are so concerned with our own comfort and safety that we overlook our horses. Saddles are designed to disperse your weight more evenly and over a greater area of the horse’s backs.

    Without the saddle, your weight will become more focused on a smaller space and may hurt or cause discomfort to your horse.

    If you are new to bareback riding or feel that your balance or weight may be a negative factor for your horse, start small. Rather begin fitting in a few minutes every now and then. This will get both yourself and your horse used to bareback riding.

    Once you become more balanced and better able to carry yourself, you can spend longer on your horses back.
    Riding Your Horse Bareback

    Bareback = No Stirrups!

    There are bareback pads you can get which apparently help with dispersing the pressure, however there are mixed feelings on their actual benefits, so proceed with caution.

    I strongly advise not using a bareback pad with stirrups due to the lack of a properly engineered tree.

    They may apply pressure where there should not be any and the possibility of hurting or damaging your horses back is quite high. Also, the whole point of riding bareback is to develop your seat and balance… So no stirrups!

    A neck-strap may be used if you really feel that you need something other than the mane to hold onto if things get hairy…! Simply take one of your stirrup leathers off your saddle, remove the iron, and use the leather as a neck-strap.

    1. Choose A Small Area to Ride In

    Okay, so once you are good to go, find a small space such as a lunging ring or small 20 x 40 arena. Somewhere you feel safe and comfortable to start in. Also, choose a day where things are quieter around the yard and perhaps also a day where you won’t have too big of an ‘audience’ watching you!

    Comfort is key to building your confidence

    2. Focus on Carrying Yourself

    Once mounted, make sure you are sitting up correctly, light in the saddle. Pay attention that you are not slouching. A lot of people, when riding bareback, slouch. However, this is not good for your back, or for your horses back.

    Stretch up through your waist area. Then allow your legs to drape over your horse’s sides, with the weight being focused into your heel.

    As you ride, think of not allowing creases across your tummy or your jersey/jacket/top. This is better than arching backwards with your shoulders. Keeping the front of your torso ‘crease free’ will help you to concentrate on carrying yourself, particularly through your waist and chest area.

    Imagine a child that wants to be picked up by an adult, versus one that does not. The one that does makes themselves ‘light’, the one that doesn’t make themselves ‘heavy’. Be the ‘light’ person by making sure you are carrying yourself.

    Think about being light on your horses back which will allow the horse to move underneath you. It also allows you to feel more of which individual muscles are moving and are being used for specific movements or tasks.

    3. Begin In Walk

    Begin in walk and allow your body to adjust.  Feel the deeper, more connected seat. And allow your legs to adjust as well. You will find that your legs fall into a more natural ‘underneath’ you position without your saddle.

    Try to discern what muscles, tendons and ligaments you are using to achieve this, so you can try replicate it when you do have your saddle back again.
    Riding Your Horse Bareback
    I do realize that it all sounds so simple.  However, just as when you begin riding without stirrups, you will find that while riding without a saddle can initially be daunting, it soon becomes easier and you will actually ride better when you do take your saddle back again

    4. Notice Your Thoughts

    The key is to gradually push the boundaries of your comfort zone.  Once out there, allow yourself to get back to the safe place again. Little by little, your ‘safe’ place will move as your boundary moves. However, it takes time and never try anything that you feel you honestly cannot do. Take things slow and steady, day by day, week by week.

    Once you are comfortably walking around the arena begin assessing your riding. Are you using your reins for stability?

    If so, perhaps building a ‘shoot’ using poles down one of the long sides of your arena may help. You can slowly lengthen your reins as you walk down the shoot so you can concentrate on what your body is doing, rather on directing the horse with just your reins.

    Often it is a mind ‘thing’ and overcoming the fears in your head is a big part of relaxing and being successful without a saddle for support

    5. Remain Relaxed Through your Body

    Also, don’t grip with your legs to stay on or to feel secure. It is a false security and one that will contribute to a complete lack of balance and far too much bounce when you begin to trot or canter. Also, your horse will not appreciate being in a vice grip all the while you are on his back! Your legs should remain loose, but against your horses side; cultivate your balance to stay on board.

    Another important point is to ensure you are not gripping with your knees… EVER! Enough said!

    Just focus on riding as you would normally do. I mentioned earlier that your leg may be slightly more underneath you and this is important to remember if you are on a more sensitive horse where you would normally perhaps ride with your leg off…

    Start in a smaller space so your horse can become used to this ‘new’ and more correct leg position.

    Keep your hands and arms supple and soft, don’t drop your hands and try not hold onto the mane or neck-strap as it usually causes people to round their shoulder and pivot forward a little. Only use the mane or neck-strap in case of emergency!

    6. Ride Simple Transitions

    Begin with simple transitions; walk – halt, halt – walk

    Notice how your body can influence your horse and how you can ‘feel’ each muscle of your horse moving under you. Pay close attention to your horses reactions to both you and external influences…

    Feel the sequence of movement underneath you and, after time, you will begin to be able to almost predict what your horse will do next, and respond accordingly.

    Once you are comfortable travelling in straight lines, begin working on a circle, paying attention to keeping your shoulders above your hips… If you lean, this may just be the cure you have been seeking! Also, on the circle, play with your aids and notice your horses reaction in walk. Spiral the circle bigger and smaller, feeling all the time how your horse moves and how he is reacting to your subtle questions.

    Are you over depending on your hands (you will feel your horses back stiffen and brace against you)? Are you forgetting to apply your outside leg? Notice the shape of the circle and your horses ability to maintain a bend and rhythm as you travel around it.

    Feel how your movement interacts with that of your horse and then use this knowledge the next time you mount up with your saddle

    Happy riding
    Lorna

    Additional Resources for Equestrians

    Have you joined us for the FREE Equestrian Fitness Challenge yet?  It will definitely help strengthen your core and legs, so being unbalanced will soon become a thing of the past.  Click the picture below to join in the ‘fun’ today!

    Connection For Equestrians

    This topic is just one of over 100 that are waiting for you inside of Connection.  In this particular group of lessons, I challenge you to spend at least twelve minutes each day without your saddle.   The lessons are filled with step by step instructions for you to ride simple exercises that will maximize the benefits, so you can commit to making this part of your riding schedule on a weekly or fortnightly basis.

    We also put the focus on transitions, particularly of the downward variety, and how you can really understand and feel what a good transition is during your time without your saddle. This will help you when you are back in the saddle in the future.  There are helpful tips, ideas, and exercises that will help you ride better downward transitions, after all, they tend to be the ones that cause us as riders to lose our balance the quickest!

    Finally, the lessons will challenge you to begin adding a little trotting and, later, cantering into your bareback routine! And don’t worry, we encourage you to take your time (even over the space of a few weeks) because it will mean that when you get to perform some faster gaits without a saddle, you are confident, secure, and balanced enough to enjoy them.  You can find out more about Connection HERE >>

  • Improving Your Ride With the Half Halt

    Improving Your Ride With the Half Halt

    The half halt is possibly one of the most important tools riders have when communicating with their horses.  It is also probably the most under-utilized!  And this is particularly true where novice riders are concerned.

    As a trainer, I believe that if you can become more conscious of how and when you are using your half halt, you can begin improving it with every single ride going forwards.

    I have a free resource HERE for you to use while you ride to really begin doing this.  Or just pop your details in below and I’ll send it straight to you :)

    [convertkit form=2682886]

    Why do we use the Half Halt?

    The half halt can be used for a couple of different reasons;

        1. Balancing or ‘steadying’ your horse
        2. Letting your horse know or indicating to your horse that something is about to be asked of him
        3. Bringing your horse’s attention back to you and what you are asking him

    It is a vitally important movement that should precede all other movements and tasks.  From transitions to bending, from jumping to halting

    What becomes confusing about this aid is the fact that the word ‘halt’ is in its name… It really has nothing to do with halting.  Rather it has everything to do with focusing and regrouping you and your horse. This applies to both before each new question and throughout the movement itself.

    In fact, I am a fan of renaming this powerful aid “Let’s pause and regroup a moment”…

    How Long to Ask with the Half Halt?

    The aid itself, when applied, should only be used for a split second and then released.  An easy way to think of this is ‘one foot fall’ of your horse within each stride.  You can use multiple half halts one after the other to achieve what you want.

    However, it is vital to release each one immediately.  Hold and then release.  Repeated.  Simply ‘holding’ will result in your horse learning to lock himself against you and become heavy in your hand.

    I have more detailed free training, articles, and Daily Strides Podcast episodes listed below to help you with this:-

    And My Half Halt Will Improve?

    Once you have the basic foundation of a good quality half halting in place, you can begin to use this throughout each and every interaction with your horse.  From groundwork to lunging, and from long-lining to riding.  By performing this simple movement correctly throughout your ride, you will experience

        • More improved feel in the saddle throughout the ride
        • A more successful outcome for each ride due to increased focus (both horse and rider)
        • A better basic position for you to communicate your aids more successfully with your horse
        • More accurate transitions
        • Better quality transitions (halt, walk, trot, and canter)
        • The ability to transition within the gait itself (lengthening and shortening)

    The “let’s pause and regroup” is truly a game-changer in your riding and I am looking forward to helping you both understand and ride better ones going forward.

    Make sure to get the free resource to use next time you’re in the saddle HERE

    Happy Riding
    Lorna

    Additional Resources To Help Equestrians:-

  • Using Your Core Muscles To Correctly Follow Your Horse

    Using Your Core Muscles To Correctly Follow Your Horse

    Using Your Core to Follow Your Horse

    Horse riding is really one long conversation between horse and rider.  One of the ways that we look to improve our riding is by being in constant harmony with our horses.

    The ability to ‘follow your horse’ and be a balanced, conscientious rider comes from our ability to balance and control our own bodies… Core strength.

    [smart_track_player url=”https://op3.dev/e/traffic.libsyn.com/dailystridespodcast/SFA276-Using-Your-Core-Muscles-Correctly-To-Follow-Your-Horse.mp3″ title=”Using Your Core to Follow Your Horse” social_linkedin=”true” social_pinterest=”true” social_email=”true” tweet_text=”Following your horse is not as difficult as it seems…” hashtag=”equestrian #horseriding” twitter_username=”strides_success” ]

    The Ability to Carry Yourself While Riding Your Horse

    It seems strange to think about this, but carrying yourself while in the saddle is essential for becoming a balanced, effective rider.  Many riders will bemoan the fact that they have ‘no core’ or a weak core.  They allow this perception to hold them back from improving.

    However if you can walk over to your horse, before you mount up, you already have the necessary core strength to carry yourself in the saddle. 

    It may not be a strong or developed as you would like, however carrying yourself simply requires that you engage your core. If you can walk to your horse unaided and unassisted, you can begin to follow your horse today.

    Think of Standing Up Rather than Sitting Down

    For most riders, as soon as their bum makes contact with the saddle they ‘sit down’.  Unfortunately for most of us, sitting down means that we are slouched.  Bad posture and completely relaxed.

    One of the simplest ways to carry yourself when in the saddle is to engage your core as though you are ‘standing’ rather than sitting.  

    Yes, you are still sitting in the saddle.  However, your core will feel and act as though you are standing.  This way you will remain aligned, your posture will become more correct.  There will also be the necessary ‘space’ between your ribs and your hips that is necessary for your seat to follow your horse’s movements.

    Working to Follow Your Horse While in the Saddle

    I suggest beginning to work on improving your ability to follow your horse in the walk.  Keep the emphasis on relaxing through your body, and allowing your horse to move underneath you.

          1. Relaxing our hips and pelvis
          2. Relaxing our leg, without tension or gripping
          3. Sitting up through your body, making sure your rib cage and upper body are not ‘crushing’ your organs and pelvis.

    If all these points are in place, in harmony, with each other, you can then begin to concentrate on following your horse.  Doing so will help you to become a more independent and skilled rider

    Following Is Different Than Driving or Shoving!

    Keep in mind that when you follow your horse, it does not mean that you are driving, shoving, or pushing!  So many riders confuse ‘digging a hole’ with their seat bones, and just being supple enough to follow.

    Relax enough that your horse can bring you along with him.  Then, simply allow the movement to happen.

    Happy Riding

    Lorna

    Articles & freebies that Relate to this Topic:-