Tag: feel

  • Your Riding Isn’t Improving? Learning More Might Not Help…

    [fusebox_track_player url=” https://dts.podtrac.com/redirect.mp3/pdcn.co/e/traffic.libsyn.com/dailystridespodcast/1377_Your_Riding_Isnt_ImprovingHeres_Why_Learning_More_Might_Not_Help.mp3″ title=”Your Riding Isn’t Improving? Learning More Might Not Help…” ]

    If your riding hasn’t changed, it’s probably not because you haven’t learned something new. It’s more likely because you haven’t committed to doing something new.  I know, that might seem a little harsh! And if it stings a little for you, perhaps there is a morsel of truth in there?

    In fact, if your riding isn’t improving, this might be exactly what you need to finally shift from stuck to riding with purpose again.

    Whether you’re coming back to riding after a long break, working with your horse alone, or you’ve just fallen into the scroll-save-binge-repeat cycle of collecting riding content without actually using any of it, this is for you!  Let’s chat about what’s really holding your riding back. And how to change it, starting today.

    The “Learning Loop” That’s Slowing You Down

    We’re living in the ‘golden age’ of information. Just the other day, I was thinking about how, if I didn’t know the answer to something back in the 90s, getting answers could sometimes be quite the challenge!

    However, today, there are podcasts (hello to the Daily Strides Podcast for Equestrians), YouTube videos, ‘the Google’, blog posts, ChatGPT, downloadable PDFs, social media… And all just waiting, mere seconds away, at our fingertips.  And, let’s be honest, this can be great. I will happily admit that I have (and you have most likely as well) consumed a lot of it.  Things like:-

          • Saved dozens of riding exercises on your phone
          • Have piles of magazines with dog-eared articles,
          • Stacks of books with bookmarks or Post-it notes sticking out of random pages!
          • Nodded along to riding podcasts while mucking out
          • Made mental notes during webinars and masterclasses

    Putting Things into Practice

    And yet…. When it comes to the actual riding part?  It feels like things are not changing. You either freeze, overthink, or completely procrastinate on doing the things you ‘know’ you should do. And, because of that, your riding isn’t improving!

    It’s not that you don’t care, or that you’re lazy.  It’s that you’re stuck in the ‘content collecting’ trap. You’ve confused learning about riding with actually riding.

    I see it all the time, and I’ve been there myself.  It’s a sneaky little trap because it feels productive.  In fact, your mind gives you a little ‘boost’, making you ‘think’ that you’re actually doing something productive.

    I had to either find a good book, ask someone experienced, or figure it out through trial and error. Every option required time, effort, and action.But the fact of the matter is that learning alone doesn’t make you a better rider. Learning combined with doing does.

    How This Shows Up for Real Riders

    Let me share three stories from riders I’ve worked with inside Restart & Reschool Private Coaching. These are all lovely, dedicated horsewomen who made real progress, not by cramming more info into their heads! But by taking one uncomfortable (usually only in their head) but intentional action.

    My first rider began working with me feeling afraid! So anxious that she hadn’t even put her foot in the stirrup for over a year.  Her challenge wasn’t physical; it was emotional.  She told me that every time she even began to think about riding, the “what ifs” took over:

          • What if my horse spooks?
          • What if I fall again?
          • What if I’ve forgotten everything?

    She had all the theory.  In fact, she was regularly eventing with her previous horse ‘in a past life’. But a few unfortunate and unlucky falls had her stuck in the cycle of fear. And it wasn’t like she was not trying to overcome this. She’d listened to this podcast, written riding plans, practiced groundwork… So much groundwork! But she wasn’t riding.

    Stop Learning and Start Doing

    So, we worked on getting her out of her head and into action. Her first big action?  Figuring out what she wanted!   “I want to enjoy riding my horse again without anxiety.”  Fantastic :) So, now to begin with the tiny steps to make this happen. We started building small wins:

          • 5 minutes of groundwork
          • 10 minutes in the saddle
          • Staying on when her thoughts got loud

    This rider didn’t need more information. In fact, that was keeping her stuck. What she needed was actions to take through the fear. That’s what got her back in the saddle.

    ‘Knowing’ But Not ‘Feeling’

    Another rider I had the pleasure of working with recently really knew her stuff. In fact, she knew so much about all of the ‘things’ that her struggle was actually being present and ‘feeling’ how things were going when working with her horse. She was caught up in the ‘do this’ and ‘do that’ cycle of her aids and exercises.

    She showed me her notebooks full of exercises, and ‘ideas’ about how to get her horse to work in better contact… But in the saddle? She was 100% stuck in analysis paralysis!

    Her breakthrough came when I asked her to do less. I actually gave her Week 1 of the Original Returning to Riding Program, all about ‘feeling’ what is happening underneath you in the saddle (use THIS LINK to get 50% off the 6-week audio program), and told her to work on that – no more! Now, I could tell you that this all went well… But, in reality, she worked herself into a panic! “But if I’m not checking every second whether I’m doing it right, how do I know it’s right?!”

    I reminded her to trust the process… And, lo and behold, her horse began to soften! The ‘contact’ that she technically knew inside and out but that had been eluding her for years began to appear. Because she stopped overthinking – and simply allowed.

    More knowledge about the topic was not what she needed. It was being present in the ‘doing’ that helped her put the pieces together – after years of wondering why her riding isn’t improving! 

    The Value of Small Chunks of Time

    Then there is a rider who I can 100% see myself in. Her struggles are very similar to mine. We’ve got the horses, got the equipment, got the know-how… But it so often feels that time is not our friend! She actually would write on our 1 to 1 chat pretty regularly something along the lines of “I only have 20 minutes. Is it even worth it?”. My answer (which is advice I give myself pretty regularly), “YES! Let’s GO!”

    I think the issue here is that because she knows what she knows, and she has the physical resources to make things happen, she tends to get stuck in the trap of thinking that everything must be perfect and ‘correct’.

    It’s the knowledge of how things ‘could’ be that is holding her back from taking action when she perceives that anything is less than that. When all the ducks are not lining up perfectly…

    Her belief seems to be around, “If I can’t ride for 45 minutes, there’s no point.”.  The work became her challenging herself to rethink that. And, using all of the things that she ‘knows’ to make the best of 10 or 20 minutes when the opportunity presents itself. So we gave it a bash…

          • Walking bareback using legs and seat as the ‘starring role’ aids
          • Improving the rhythm of lateral work by practicing on the ground beside her horse
          • Apply some basic massage techniques to areas of her horse where she’s noticed stiffness or tightness

    And, I know, they might not seem like the most exciting suggestions initially; however, after just one week, she could see a huge change in how her partnership with her horse was developing. And rather than being all about the ‘competing’ and ‘working’, just being with her horse became fun and enjoyable again.

    “Those 10 minutes feel better than any 45-minute ride I’ve done in years. I’m focused. He’s listening. We’re actually connecting again.”

    This rider was allowing all that she already ‘knew’ to hold her back from taking actions that mattered. And, in the end, it became less about having more time and more about implementing what she already knew with purpose.  

    Riding Isn’t Improving? Take Action!

    I cannot stress to you enough how important this is. Stop waiting until everything is perfect. In fact, some of your best riding days will happen when things are definitely ‘less than’ how you would like them to be! And stop waiting until you ‘feel confident’. You’re only going to begin growing your confidence by doing. Not by learning more and worrying!

    Work on taking action and doing what you can with what you already know. Begin improving your ability to be present for it all. And then watch how things begin to shift and change for you and your horse. 

    Your Signature Ride Challenge

    So here’s your moment to do the same.  If you’ve been waiting for a sign, this is it!  The FREE Your Signature Ride Challenge is a simple, powerful way to have a whole lot of fun with your horse – while applying the things you already know.

    And the best part? You can complete it in one short ride, and then work on improving your outcome every ride thereafter! 

    The challenge is absolutely free and can be done in an arena or field (or a wide road?!). It’s for English and Western riders… And you don’t need anything other than your phone (with a free app on it), and your creativity :). When you sign up, you’ll receive:-

          • A free guided audio riding lesson
          • A printable workbook to help you plan ‘your signature’
          • A fun GPS-based challenge to “write your name” using mostly  your seat and leg aids

    There’s no pressure, just a fun activity to do with your horse while warming up and cooling down. Think of it as a way to relax, have fun, but also connect with your horse in a deeper way from the saddle. Sign up for FREE by CLICKING HERE

    Restart and Reschool

    And if you are looking for something more. My eyes on you and your horse, working together… Restart and Reschool Private Coaching might just be the thing for you. You’ll not only get the full ‘OTTB; From Racetrack to Ready Program’, but also fornightly private lessons with me to move you forward in your riding.

    We can work on anything you would like; from groundwork, to lunging, to riding, to jumping… With the virtual private lessons, we can do all of these things – and more.  If you would like to find out me, you can let me know a little more about you HERE and I will then reach back out and we can chat!

    This is the support, training, and accountability you’ve been missing to finally follow through and start seeing progress. No fluff. No overwhelm. And as flexible as you need for your lifestyle. 

    Whatever you decide, I’m going to challenge you this week to stop saving all of the exercises and movements! Stop spending all of your ‘horse time’ learning… And start doing! Get in action and get riding. Then, using the feedback you create for yourself, your next ‘learning session’ will actually be something you can put to use in your very next ride.

    Take action today and don’t let another week go by where you think about riding more than you ride.

    Happy Riding
    Lorna

    More on This Topic:-

    Online Training & Coaching

    Connect with Lorna online:-

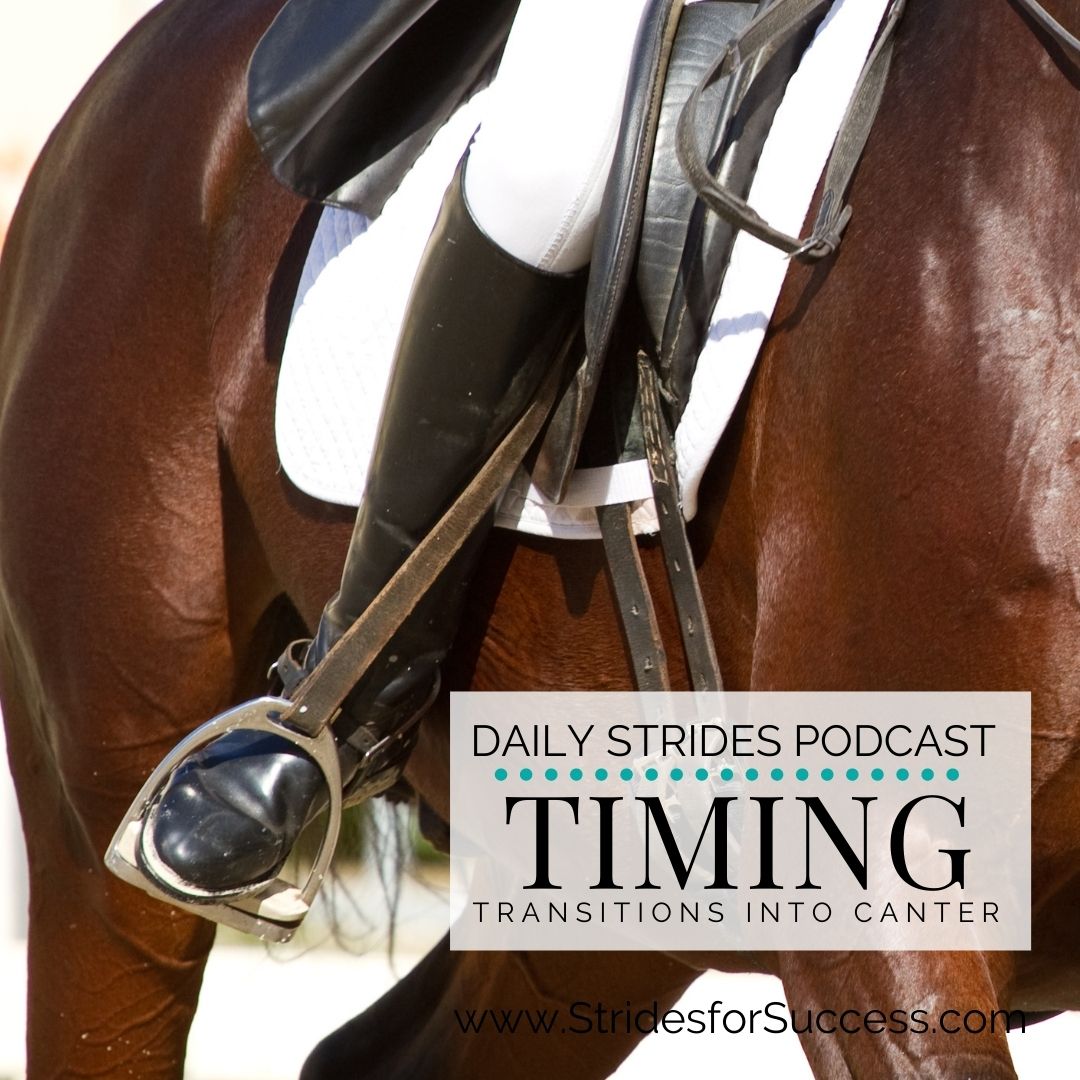
  • Timing Your Transition into Canter

    Timing Your Transition into Canter

    Timing is something we all understand.  When it is working for us, it feels good.  If it’s a little off, things tend to feel rushed or stressed. I think our horses feel the same mixed bag of emotions and tension when the timing is off.  In fact, bad timing often is the very thing that causes a ‘hop, skip, and jump’ into the canter.

    So, if timing the ask of your canter transitions is so important, why can it often feel so hard?!  And why, is it that what so many people say is ‘easy’ to feel, seems like a mystery to most riders?

    Excess Tension

    The first suggestion I am going to give you when it comes to timing your canter aids is to give your physical body a quick scan.  There is one reoccurring theme I see with novice riders, the world over when it comes to the canter.  Really; this one issue really trips so many riders up!

    When they begin to think about canter, they allow excess tension to creep into their body as they overthink the upcoming transition. 

    It can be subtle or it can be more obvious, depending on the situation and the rider.  However, it is very often there and present.  My suggestion for you when beginning to prepare your transition into the canter is to pay attention to your body.

    Tension is neither good nor bad.  It just is.  And, in fact, it is essential to keep you upright on the horse!  It is when there is too much tension present for the task at hand, that the challenges show up.

    One way to tell if this is happening to you is when your horse seems to either understand English (so when someone tells you to canter, he changes what he’s doing). Or if he seems to read your mind. It’s probably neither.  He’s simply responding to you…

    Feeling the Movement

    From here, begin working on identifying what you are feeling.  It’s all well and good to say ‘my horse is walking’ or ‘my horse is trotting’.  However, you need to begin going a little deeper.  You need to know what is moving when and where underneath you.  And, preferably, without having to look or glance.  Pure feel.

    Start with the rhythm.  Identify the beat.  Then begin imagining in your mind the sequence of hoof falls that make that beat in the gait you are in.  Apply this to your horse.

    Regardless of where you are in your riding journey, you will be able to either feel or hear the hoofbeats of your horse.  Especially in the walk. Feel into that 1,2,3,4, 1,2,3,4, 1,2,3,4…  Do the same in the trot.  Don’t overthink it.  Just simply allow it to happen and be mindful of it.  ‘Oh, there’s the 1’.  Or ‘interesting, that was different between the 2, and 3, than the previous stride’.

    If you are not completely sure of the sequence of your horse’s feet as he walks or trots, learn!  Make it your mission to understand each gait, so you can begin merging the rhythm to what is happening underneath you.

    Noticing the Swing

    From here, I suggest starting to develop your seat by noticing that there is both a ‘forwards and back’ movement happening in the walk and trot and, also, lifting and lowering.

    Notice how, when in the walk, as your left seat bone slides forward, it also lowers a little.  And, as this is happening, your right seat bone will be sliding back and it will be lifted slightly higher.

    Often, when explaining or teaching the transition into the canter, instructors will talk about a scoop of your seat.  This is setting things up for the scoop.  And it is one of the keys to knowing ‘when’ to ask for the transition into the canter.

    Your Horses Barrel

    Okay, this is where you can begin seeing little signals from your horse that this is the right place to ask.  Pay attention to your horse’s barrel as he walks.  As your left seat bone slides forward and dips down, his barrel will swing to the right.

    Now, let’s pretend that you are on the left rein, so moving around the arena anticlockwise.  If you were to ask for a canter, we can assume you will ask for the left lead, right?  So, your aids for the transition itself will include your inside leg being ‘on’ and your outside leg playing ‘tag’ and sliding back to ask for the transition… Okay?

    Well, notice how, when your horse is standing on his outside hind leg (your outside seatbone will be sliding back, and up and over it), his barrel literally pushes into your outside leg.  It ‘prompts’ it to take action. 

    Now, obviously, your horse is not doing this on purpose.  He is simply making space for the inside back leg to move into as it travels forward.  However, if you have done your homework, you will know that to ‘strike’ the canter, he will start with his outside back leg.  So it makes sense to ask when this is on the ground and ready to ‘push off’ into the canter.

    Another way you can look at this, is from the scoop persepective.  If your outside seatbone is travelling backand is higher, it makes sense that your inside seatbone is travelling foward and is… Lower.  Which helps with that ‘scoop’ aid. 

    Transition into Canter From Trot

    I always suggest that riders, if possible, work on perfecting their timing for the transition into canter using the walk to canter.  There is time for them to really settle into it and be mindful and present to all of it.  However, I also know that, at some point, you will want to begin practicing the transition from trot to canter.  This is a little different and, in my opinion, requires a little more coordination and feel.

    One of the best ways of getting clear about what is moving when underneath you as you trot is to pay attention to your diagonals.

    Rise and fall with the shoulder by the wall is how the saying goes.  And because your horse moves his legs in diagonal pairs when he trots, once you know what his outside shoulder is doing, you automatically know that his inside hind leg is doing the same thing.

    Which allows you to figure out where his outside hind leg is at any given time in the stride.  You can tell this, again, by understanding how your horse moves.

    From here, simply apply your aids at the time when your horse will find it easiest to take action on them.

    Happy Riding
    Lorna

    Additional Links to Help You:-

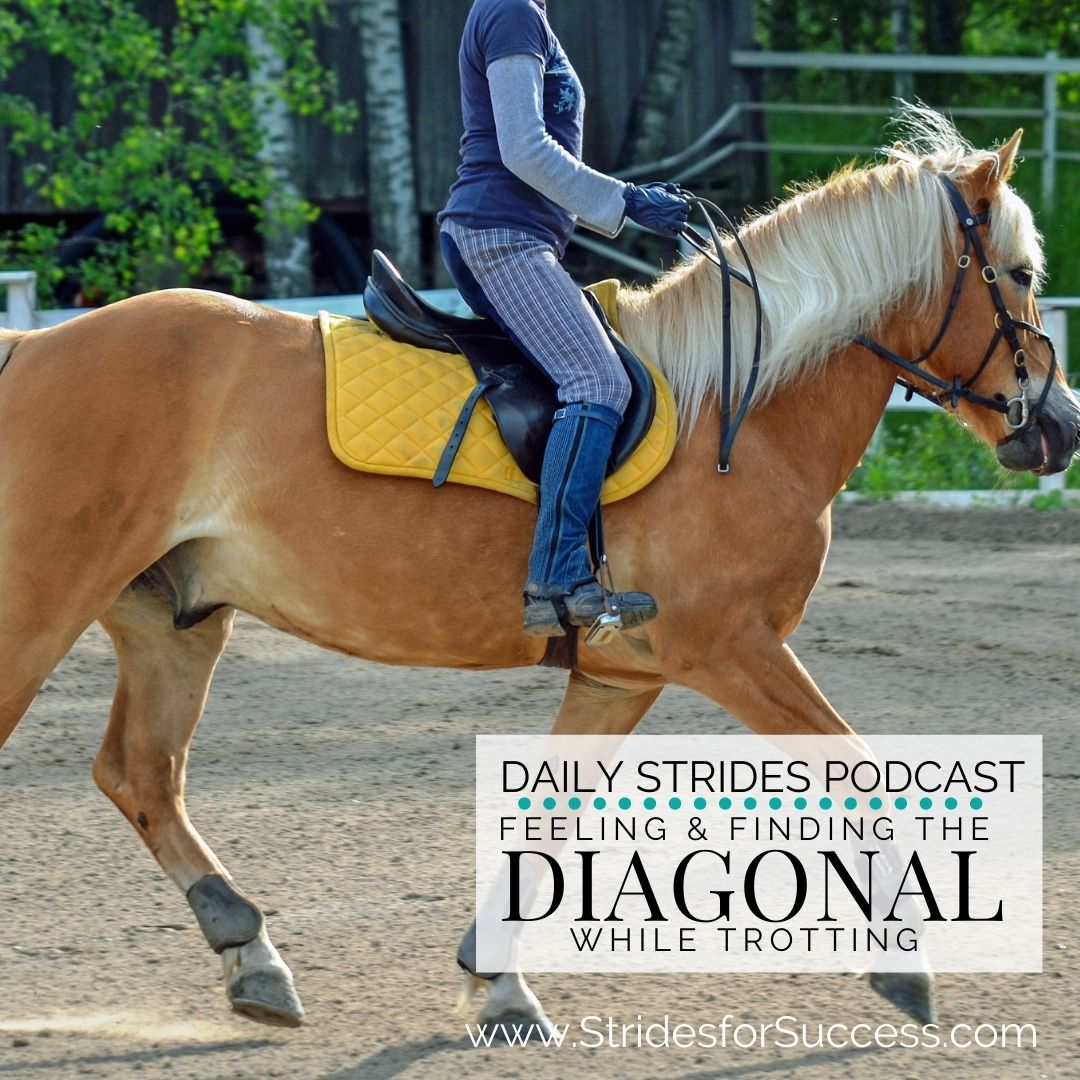
  • Feeling and Finding The Correct Diagonal in the Trot

    Feeling and Finding The Correct Diagonal in the Trot

    [fusebox_track_player url=”https://op3.dev/e/traffic.libsyn.com/secure/dailystridespodcast/1183_Feeling_and_Finding_The_Correct_Diagonal_in_the_Trot.mp3″ title=”Feeling and Finding the Correct Diagonal in the Trot” social_linkedin=”true” social_pinterest=”true” social_email=”true” ]

    Landing on the correct diagonal can be hit and miss for many riders. Let’s face it, there’s a chance you’ll get it right 50% of the time! And while most riders are pretty well versed on their diagonals in the trot… It’s ‘feeling’ the diagonal that causes confusion.

    Trotting has a two-time beat. The 1,2,1,2,1,2,1,2,1,2 that you experience and feel when you’re in the saddle. If you do sitting trot, it will result in a sit,sit,sit,sit,sit,sit,sit,sit rhythm. However, most riders can ‘tire’ a little when it comes to riding a constant sitting trot! And so, we learn to post or rise in the trot.

    The 1,2,1,2,1,2 is matched with an up,down,up,down,up,down of the riders backside. The rhythm of up-downs and the rhythm of the trot are a perfect match.

    The Correct Diagonal

    The reason your horse creates the 1,2, rhythm in the trot is because of how he moves his legs while he is trotting. The right-back foot moves with the front left foot. This is the ‘1’ part of the rhythm. Then the left-back foot moves with the right front foot. This is the ‘2’ part of the rhythm.

    The trot is very ‘even’ with regards to what is moving where… This is also the reason it can be hard to ‘feel’ what diagonal you are on at any given point!

    The correct diagonal is when you are moving with the inside hind leg – and, by association, outside front leg – of your horse. There is a little rhyme, ‘rise and fall with the shoulder by the wall’. That about sums it up. As your horse’s outside shoulder is forward, you want to be ‘up’. As this shoulder moves back, you want to be down.

    I have a post and an episode HERE about how to identify the correct diagonal through sight and voice…

    Up/Down versus Forward/Back

    So, part of the confusion is the ‘up – downs’ we all learn when we start rising or posting to the trot. Because we learn up and down, we tend to think of the trot as being ‘up and down’. It’s not. It’s actually ‘forward and back, with a little up and down thrown in for good measure!

    Your horse’s legs move forward when he trots. They appear to move ‘back again’ in the second part of the stride, but this is actually just his body moving over the previously just moved forward limbs. This is important to learn how to feel your diagonal.

    As you ride sitting trot, notice how the movement is less ‘up and down’ and more ‘forward and back’. From here, notice how your seat bones are actually moving independently of each other.

    Your left seat bone will move forward and dip slightly down as your horse’s left back leg moves forward. This will coincide with your horse’s right shoulder moving forward. As this happens, your right seat bone will move ‘back’ while also coming up a little. This is as you and your horse’s body moves over his right hind foot on the ground.

    It’s a little like imagining the pedals of a bicycle peddling backward. As one goes down and forward, the other comes up and back.

    It is a quick movement and one that is easily missed – especially if we are only allowing ourselves to think in terms of ‘up and down’ when we think of trotting.

    Click here to subscribe

    Start in Sitting Trot

    I am going to suggest starting in sitting trot and using what you can see to guide you initially. You can glance at your horse’s shoulder. Pay attention to the outside one. Let’s for the sake of this example, say that you are riding anticlockwise around the arena. On the ‘left rein’. Your horse’s outside shoulder is his right shoulder in this example.

    Practice glancing down and being able to identify when the shoulder is moving and where it is moving to.

    From here, begin to build a relationship in your head between what that shoulder is doing, and what it means the diagonal back leg is doing in the trot. In this case, it is the left back leg. When your horse’s outside (right) shoulder is forward, it means that his inside (left) hind leg is also moving forward. The same for when it is back.

    From here, begin noticing how this feels in your body. Can you feel the slight ‘dip’ of your inside (left) seat bone? How about the slight forward swing of your inside (left) seat bone?  And what about your upper body? Can you feel any difference there as your horse moves this diagonal pair you are focusing on in the trot? Play with this for a while. Change diagonal often and look for the differences.

    Learning how to feel what is happening underneath you in the trot takes time. It won’t happen if you won’t commit the time to learn!

    Test Yourself Often

    Once you feel that you can, indeed, tell what is moving where test this theory. Feel into it. Identify the correct diagonal pair that you want to move with. Once you think you have identified the pair, begin ‘moving with’ it.

    Moving with the correct diagonal pair simply means rising and falling in time to the movement of those legs.

    As the two legs on your chosen diagonal pair move forward, you move forward. You rise or post. And, as they begin moving back, you do too in that you ’sit’ or ride the ‘down’ part of your rising trot. Remember, your horse’s legs don’t actually move backward, it is simply you and your horse moving over the legs as you travel forward.

    The final part is glancing down to the outside shoulder and seeing if you chose correctly.

    Mastering Your Diagonal

    Choosing the correct diagonal every single time can seem daunting at first. However, the good news is that it’s one of those things in horse riding that is hard until it’s not!

    Meaning, once this ‘clicks’ for you, you will wonder how you could not feel this before.

    If you want step-by-step audio training to listen to as you learn to master this skill, join Connection; the online membership for equestrians. In there you can get the Diagonal audio horse riding lessons. And a whole lot more training, coaching, and riding plans to use with your horse.

    Happy Riding
    Lorna

    Additional Resources:-

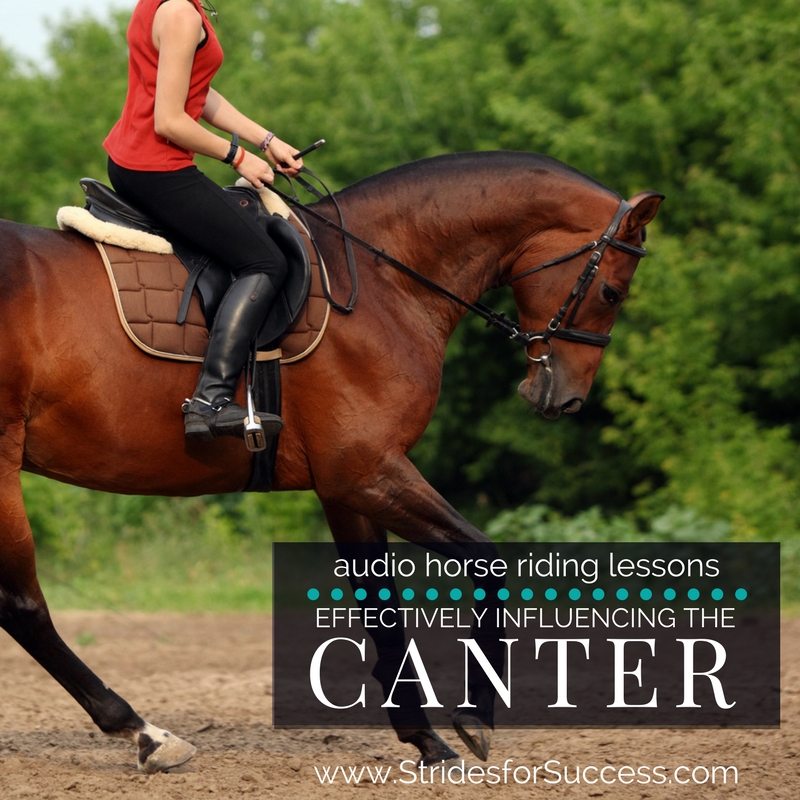
  • Using Your Body to Effectively Influence the Canter

    Using Your Body to Effectively Influence the Canter

    Effectively Influencing the Canter with Your Body

    What this episode is all about & how it can help you:-

    • Understand the difference between being influenced and doing the influencing
    • Being able to ‘roll’ with the canter first
    • How feeling the reach of your seat is the start of understanding your influence
    • The part your legs and hands play

    [smart_track_player url=”https://op3.dev/e/traffic.libsyn.com/dailystridespodcast/1030-How-to-Begin-Influencing-the-Canter-with-Your-Body.mp3″ title=”Using your body to influence your horses canter” tweet_text=”Are you influencing or being influenced by your horse in the canter? Here’s how you can start having more say in the saddle in canter…” hashtag=”equestrian” twitter_username=”strides_success” ]

    What happens when you get into canter with your horse?  Do you find that you are more of a passenger than a rider?  Simply put, are you influencing the canter, or are you allowing the canter to influence you?

    Today we will start figuring out what is going on in your canter, so you can begin to have more of an influencing effect on it.

    The Difference between Influencing the Canter and Being Influenced by the Canter

    The canter is a gait which can potentially have a lot of energy inside of it.  For many riders, being influenced by the canter feels like this energy is causing them to ‘bounce’ or ‘bump’ in the saddle each stride.

    Unfortunately, many try to correct this problem by gripping on or holding down into the saddle.  This only makes things more uncomfortable for both horse and rider.

    In order for the rider to begin influencing the canter through their aids and actions, they must first understand the canter.  Understanding what is happening underneath them.  This all begins with learning to first follow the horse.  Allowing the horse to influence.  Only then can they begin to focus on influencing the canter by what they are doing in the saddle.

    Being Able to ‘Roll’ with the Canter First

    A lot of what happens in the canter happens through the riders seat.  The seat is important to both transition into the canter, but also then to ‘roll’ with the canter.

    However, many riders, rather than ‘rolling’, they try to hold themselves in the canter.  I think that this often comes from some anxiety being present around canter.  Regardless of the reason behind this anxiety, the result is often that by the time they get into canter, they have a lot of excess tension in their body.

    This excess tension can often be seen by riders gripping with their thighs. In doing so they shut down any and all movement in their hips.  Simply put, there cannot be any roll.  It can also show up as a stiffness though their lower back. 

    Whichever one is happening, the experience is generally not going to be as smooth as the rider would like.  Every stride of the canter as it continues tends to result in the rider becoming a little more ‘bumped’ out of the saddle.

    However, if the rider could just relax and allow their body to move with, rather than gripping against, the result is them achieving the rolling motion.

    The good news is that once you can really move with the canter, you have overcome the first barrier to entry to a good canter.  Meaning you are on your way to effectively influencing the canter. 

    If you are at the stage that you have not mastered this rolling motion the following is going to seem a little counter intuitive.  But trust me, it works! The less you grip and the less stiffness in your lower back, the more you will stay with the horse.  Remember, when you try to dictate the roll before you truly understand how to move with it, it is very difficult to get into the same momentum and movement as the horse.

    Feeling the Reach of Your Seat Within Each Roll

    Assuming you have mastered the rolling motion, I then recommend that you bring your attention back to what your seat bones are doing.  Remember the rolling motion comes from your pelvis and hips.  In fact, the whole lower torso and upper thighs are moving with the horse.

    Identifying your seat bones and where they are at any given point in the canter is the beginning of being able to ‘feel’ in the saddle.  What I want you to feel is the reach. The arc your seat bones travel or move ever single stride. 

    Think of this ‘roll’ for a moment.  It will always result in your seat coming back to a ‘starting point’ and then setting off on the next ‘roll’ each stride.  It feels like a circular or oval motion.

    What I want you to focus on here is the reach, meaning the ‘starting point’ and then the ‘furthest point’ your seat travels as it continues on its roll.

    Once you can feel that, you can start playing with it.  You can start allowing the seat bone to perhaps reach a little bit further.  Or you can bring it back, so that the seat bone is not reaching as far.  It is really important that you maintain your posture and position throughout this; otherwise you will block or shut down the free movement in your seat.

    The Part Your Legs and Hands Play

    One of the helpful aspects of plugging your seat in correctly in the saddle, is that a lot of other things just fall into place naturally afterwards.  Your legs are one of these things!

    When you have any excess tension in the saddle, particularly around your seat or your thighs, your leg position becomes affected.  When in the saddle, you want your legs to simply fall down your horse’s sides.  Of course, when your horse begins moving there is a little work required in order to keep them still while your horse is moving.

    Once your legs are draping the horse, they are in the correct position to most effectively influence and communicate with the horse. 

    However, when there is tightness through our pelvis, our legs are generally too far forward.  Or if we are gripping with our knees our lower legs tend to go too far back.  A lot of ‘leg problems’ can be remedied by simply ensuring that the seat and pelvis is allowing the movement to happen when in the saddle.

    Maintaining Consistent Connection through Your Arms and Hands

    The final piece of influencing the canter is your hands and your arms.  Your hands and arms must follow the horse.  I like to think about your hands and arms being connected to your seat.

    It is important to understand that when the horse canters, there is a lot of natural movement happening.  You must be able to discern that movement and then begin following the horse.  This will ensure there is no resistance on your part through your hand or through the bit & rein.

    It is through this quietness that you can begin to influence the canter. The hands and arms are engaged in the communication, but they are not overpowering the communication.

    You will often see riders ‘pump’ with the top half of their body.  Rather try to ‘still’ through your shoulders, while allowing the movement through your elbows, and of course your wrists and hands.

    Your job is to try to keep your shoulders nicely balanced so that they are carrying you.  You almost want to think of your shoulders as a clothes hanger with a long garment hanging from them.  The garment is the rest of you.  But the clothes hanger is there providing the support.  Now imagine the wind moving the garment.  The wind is the horses movement or energy, the clothes hanger is your shoulder.

    Once again, once you can move with the horse and then understand that movement, then you can begin influencing the canter.

    Happy Riding

    Lorna

    Links mentioned in the episode:-

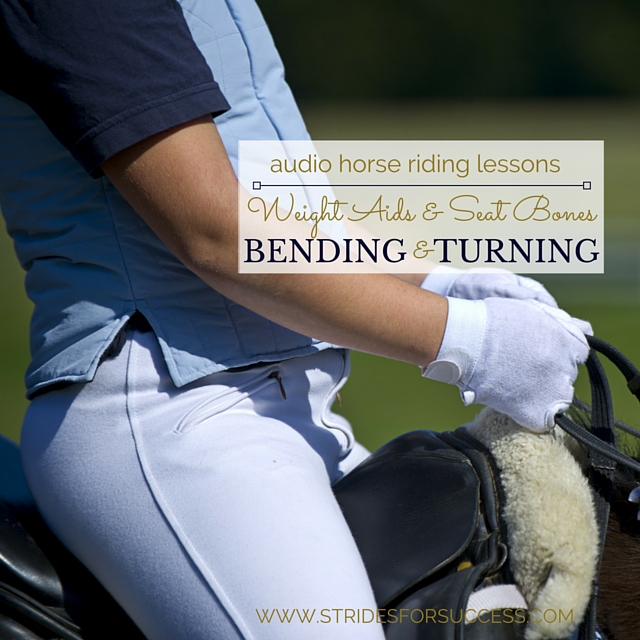
  • Weight Aids & Seat Bones for Turning & Bending

    Weight Aids & Seat Bones for Turning & Bending

    The bend is approaching and you begin preparing both you and your horse to ride straight and accurately through the turn. However, as you ‘shift’ your seat bones into ‘position’ your horse begins, well, almost side stepping… The further you get through the turn, the further your horse is from the path you had planned; in fact, he has derailed altogether from the ideal ‘train tracks’ you had intended to stay on as you rounded the bend.

    As riders we learn early on about how important our weight distribution is to our horses way of going. We learn about positioning our seat bones, so we can indicate to our horses what exactly the next movement should be. We also learn that our weight aids are fundamental to all aspects of successful communication with our horses in the saddle.

    [smart_track_player url=”https://op3.dev/e/traffic.libsyn.com/dailystridespodcast/591-Weight-Aids-and-Seat-Bones-in-Relation-to-Turning.mp3″ title=”Weight Aids and Seat Bones for Bending and Turning” social_linkedin=”true” social_pinterest=”true” social_email=”true” tweet_text=”Weight Aids and Seat Bones for Bending and Turning Your Horse” hashtag=”Podcast #equestrian #horse” twitter_username=”strides_success” ]

    What we don’t learn is awareness of how the other parts of our body directly or indirectly affect how and where our weight aids are applied with our horse. There is also not a lot of time spent on figuring out how loud or how quiet we can communicate with our horses through our weight aids. In fact, most riders seem to think that a ‘one size fits all’ approach is sufficient regardless of the circumstances, situation or horse involved.

    Learning to correctly feel and then master your weight aids in the saddle is key to developing good feel as a rider. Those subtle shifts and movements, which happen when you direct your muscles to move, rather than your actual weight or bones themselves. This is very much apparent when turning your horse and that is what I want to focus on today.

    So let’s begin with focusing on how your carry yourself in the saddle. Many riders make the mistake of going a little too overboard when told to ‘relax’ through their body.

    Relaxation is key to good riding, however the level of relaxation is also important to consider; particularly when it comes to how it affects your weight aids and seat bones in the saddle when riding

    Ideally you want your muscles to ‘carry’ you in the saddle, enough that your hips and seat are free to move with your horse and follow the motion. Following when riding is a little like following when dancing. The dancer that is following must remain in control of their body, walking that fine line between too relaxed or ‘slack’ and too tense or ‘rigid’. All the while they are looking for cues from their partner and then taking the responsibility on themselves to respond to those cues in the agreed manner.

    Riding is the same. Following does not mean you slouch in the saddle, looking like you have had one too many before you mounted. It rather means you carry your upper body, so your hips and seat are then willing and able to follow the horse’s motion as he crosses the ground.

    Bending and Turning Your Horse Using Your Weight Aids and Seat Bones

    Think about it, your hips and seat bones can not possibly be free to perform a full range of motions if your upper body is heavy and slouching on top of it. Many riders mistake this for ‘shoulders back’, which is unfortunate as this only serves to increase the excess tension and therefore rigidness in the body, rather than simply carrying yourself, through your ribcage and positioning your body in the best possible place from which to begin asking your horse to turn using your weight aids.

    Once you are sure that you are indeed carrying yourself and, as a result, correctly following your horse wiht your seat, you can then begin looking at how subtle changes in different areas of your body will affect your weight aids and therefore what you communicate to your horse through your seat.

    So to begin with, let’s focus on the half halt.  One of the reasons we apply the half halt is to bring your horse’s attention back to you and let him know something is coming up.

    In fact, you can almost think of your half halt as being a big flashing arrow, directing your horse’s focus to your seat so he can begin to get further directions on what to do next

    Not using your half halt will probably result in your horse’s attention being elsewhere and therefore, any subtle movements with your seat to communicate with your horse will have a good chance of being ignored.

    That being said, it is also worth noting that applying the half halt and then following it up with an incorrect, overly exaggerated or heavy use of the seat and weight aids is just as ineffective as not using the half halt at all.  Think of your half halt as the opening part of the sentence which will then, in turn, lead up to the actual question you wish to ask your horse.   Become clear on what you want to ask, before you draw your horse’s attention to your seat to begin with!

    Once you have his attention, think about what you want of your horse as he rounds the bend.  Ideally, your horse’s spine should replicate the arc of the bend or circle.

    Your horse’s spine will stay on the arc all the way through, from his poll or ears to his tail or dock.  Similarly, your spine will too stay centered over your horses, not leaning one way or the other, not twisting and not collapsing to either the inside or outside.

    His hips will travel along parallel either side along this arc, however his inside hip will come slightly forward or ahead of his outside hip.  Your hips or seat bones will be in this same position.  Then look at the shoulders; again, they should remain parallel to the central arc or track as he moves along (like train tracks), however the outside shoulder will have to move a little more forward in order to do so and, therefore, so must your shoulders.

    It seems like an awful lot to remember, and when starting out, it is!  I have found it easier for some riders to rather remember where their legs should be through the turn.  Because your legs are connected to your hips, by moving them into the desired position, your seat bones will generally follow suit and automatically also ‘slot’ into position.  However, as you become used to the inside and outside being dictated by your horse, regardless of where you are in the arena, you can begin rather making the subtle shifts with your seat bones, and then allowing your legs to follow suit.

    So back to how we can use our muscles, either for good or bad, to influence our weight in the saddle.  Find a hard chair or stool and sit down with a hand under each of your seat bones.  Now, begin by moving your shoulders, the right one forwards the left one back and then vice versa.  Notice how a very small movement of only an inch or so, will change how the pressure being exerted on your hands from your seat bones feels.  Similarly, think about ‘weighting’ one of your seat bones.  Many riders will literally ‘bear down’ on that particular seat bone, shifting their upper body to do so.  However, feel that when this happens, your seat bones actually begin ‘sliding’ towards the opposite side.

    Now, rather think of ‘weighting’ that seat body through a combination of elongating the muscles on that side of your torso, and sending a tiny bit more weight or pressure to the heel of that leg.  Notice the subtle change in the pressure being applied on your hand.  It only takes small but precise adjustments with your muscles to ‘weight’ the seat bone.  The more you can learn to control your muscles, the clearer your communication will become with your horse.

    Very often riders use their weight aids in the wrong way; namely leaning with the upper body while will result in their seat shooting to the outside

    The result is that your horse will move completely differently to how you had planned, because he is trying to remain balanced and, literally, stay underneath you.  If you find this happening a lot, go back to making sure you are symmetrical, balanced and straight in the saddle and, once you are sure of that , begin insisting on it from your horse also. Always think about your own body and what you are communicating with your horse while riding  through the corner.

    I really think that being a little ‘picky’ or obsessive about riding in the correct position will help you to make sure that your body is in the best possible place to apply the correct aids for any given movement or direction.  It will take concentration and consistent effort on your part initially, but as your ‘feel’ increases, you will find that merely thinking about it will result in your body shifting slightly in the saddle – and the more consistent you are with always riding in the correct way, the more effective your horse will be at reading the small, subtle changes in your weight and position.

    Happy Riding

    Lorna

    I have written another blog post on applying your weight aids HERE >>

    Get to know your core muscles better which will give you more control over them by joining the FREE 30 Day Rider Fitness Challenge…

  • Correctly Applying Your Weight Aids

    Correctly Applying Your Weight Aids

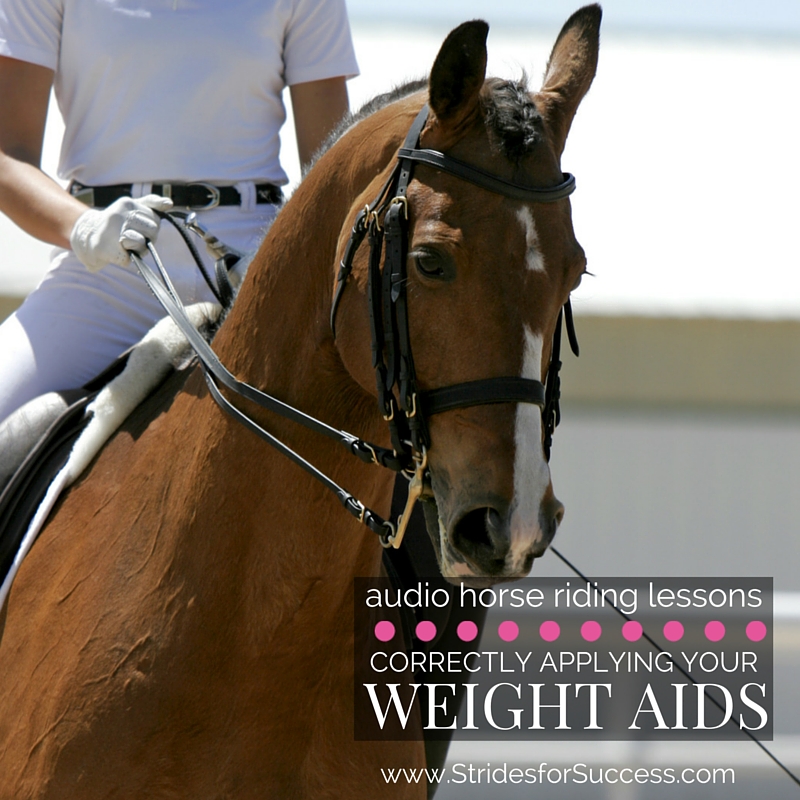
    When we begin riding, we are generally told about this almost magical ability that we have to communicate with our horse, known as the weight aids.   However, it soon becomes apparent that we have to master many other aspects of riding before we can hope to use our weight to communicate with our horse…

    Unfortunately for many of us, this takes too much time to achieve, so instead we begin happily throwing our weight around in the saddle and then getting upset when our horse does something completely different to what we ‘asked’.

    [smart_track_player url=”https://op3.dev/e/traffic.libsyn.com/dailystridespodcast/516-Learning-to-Correctly-Apply-Your-Weight-Aids.mp3 Feedback” title=”Learning to Correctly Apply Your Weight Aids” social_linkedin=”true” social_pinterest=”true” social_email=”true” tweet_text=”Learning to Correctly Apply Your Weight Aids in the Saddle” hashtag=”horseriding #equestrian” twitter_username=”strides_success” ]

    So first and foremost, what are your weight aids?  The term ‘weight aids’ refers to where and how you are using your core to distribute your weight in the saddle.  Your weight aids are controlled with subtle movements which shift the pressure and weight of the seat bones in a way that communicates a certain instruction to your horse.

    You use your weight aids in all aspects of riding, from slowing down or stopping, to asking for more energy or moving forward.  Weight aids are an important part of transitions, bending, turning and even just riding a straight line.  Learning how to control your weight aid is a vital and essential part of good riding.

    It is only when we learn to develop a truly independent seat that those aids really can become useful to both us and our horse

    An independent seat is when you can move your legs or other parts of your body without affecting your overall balance & position in the saddle.  An independent seat is also something that is really earned by spending consistent time in the saddle, riding correctly and practicing correct movements and sound techniques.   A rider also needs a certain level of fitness and body awareness, so as to be able to use their muscles, and therefore shift their weight, as desired or required.

    If we do not first cultivate that independent seat, our weight aids can often work against us and our horse.  They can also when applied incorrectly, whether due to lack of knowledge or lack of control, contradict the other aids being applied which leads to our horse not performing as we think he should.

    Applying Your Weight Aids

    Many riders think that they are applying their weight aids correctly, however something as simple as not sitting straight in the saddle is enough to change the application and meaning of a particular movement.  Often riders will sit to one side, or favour one side of their body, when in the saddle and the problem then begins to compound when they begin shifting their weight around, giving a total different feeling to their horse than what the rider thinks they are asking

    Another way that the weight aids can begin to work against the rider if not correctly understood and applied is that often riders get a little ‘over enthusiastic’ in the application of the aid.  So rather than that subtle shift we mentioned in the beginning, they either begin ‘shoving’ or ‘pushing’ their horse, or they begin leaning…  Never Lean!  We can also incorrectly apply the weight aids, particularly when turning, by lifting our outside seatbone off the saddle…

    Keep in mind that both seat bones must remain seated if you want to give a correct and easily understood weight aid!

    The final issue I want to warn you of before we carry on is incorrect timing of the aid.  As with all things riding related, the weight aid being given will only be as good as the preparation leading up to it and the timing of it.  No matter how well-balanced, or finely tuned your seat may be, if you apply the aid at a moment when your horse physically cannot respond to it, the aid will never get anywhere near the result you desire.

    It is when you can combine a true independent seat with correctly applied subtle weight aids & a perfect sense of timing you will begin to master what we call ‘feel’ in the saddle

    To get an idea of just how subtle your weight aids and the ways you affect them are, I suggest beginning off your horse.  Find a firm surface you can sit on, and gently put a hand under each of your seat bones.  Feel how just applying a little more tension to the different muscles in your core, affects the distribution of the weight applied by your seat bones on your hands.

    Move your body as you would when in the saddle performing a half halt; feel how your seat bones would ‘block’ a river of energy that would flow underneath you through your horse’s back when you are in the saddle.  However, then begin to see how, my making slight adjustments,  you can soften that aid or smooth it out.

    Once you can begin feeling these subtle differences, try it with how you would move when you ask your horse to move forward, whether it be to transition up a gait, or within a gait.  Again, imagine the river of energy flowing underneath you and how, when applied correctly, your weight aids will ‘open’ and allow that energy to flow a little more.

    Of course, when you apply your weight aids you are not necessarily ‘blocking’ or ‘allowing’, just rather suggesting this to your horse, who with time, will understand and make adjustments as required

    Once you have a good feeling and understanding of the ’cause and effect’ of your body movements out of the saddle, then you can begin experimenting in the saddle.  Unfortunately however, many riders will experience that their horse is not all that attentive to their weight aids initially.  This is usually due to the fact that the rider has been guilty of literally ‘throwing their weight about’ in the saddle!

    However, all is not lost and you can begin to re-school or retrain your horse to your newly acquired subtle weight aids.  To do this you will have to be consistent and mindful of where you are sitting in the saddle and also that each movement or change is set in motion by applying the correct, subtle, weight aid first.   Your horse will, given time, begin to associate that particular weight aid with that instruction and soon, begin responding to the weight aid when it is applied.

    Really effective communication with your horse through your weight aids will take time and patience, however is really worthwhile in the end.

    Happy Riding

    Lorna

    Applying Your Weight Aids