Tag: lateral

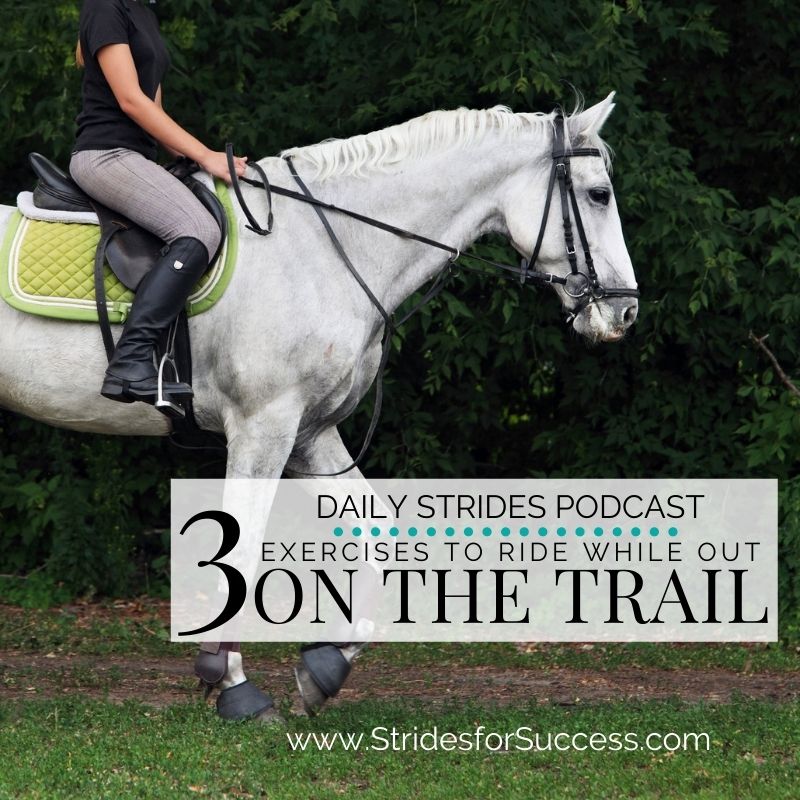
  • 3 Exercises to Ride While Out On the Trail to Develop Your Horse

    3 Exercises to Ride While Out On the Trail to Develop Your Horse

    [fusebox_track_player url=”https://op3.dev/e/traffic.libsyn.com/secure/dailystridespodcast/1214_3_Exercises_to_Ride_While_Out_on_the_Trail_With_Your_Horse.mp3″ title=”3 Exercises to Ride when Out on the Trail with Your Horse” social_linkedin=”true” social_pinterest=”true” social_email=”true” tweet_text=”Are things feeling a little flat in the arena? Get out on the trail and use these 3 exercises today…” hashtag=”horsepodcast” twitter_username=”strides_success” ]

    There is an energy that we experience when we are out on the trail with our horses. It can feel like an added enthusiasm from both horse and rider.  And, maybe, blended with the thought of unlimited possibilities.

    Whatever the reason for it, as riders we can begin to use this energy to develop our horse’s training and our own riding skills. 

    Things that were perhaps feeling flat, or sticky when working on them in the arena become more fluid.  And points in the session when we were struggling to maintain flow, can be transformed when we work on them while out on the trail.

    Here are 3 exercises you can try with your horse the next time you’re out of the arena and on the trail.

     1. Straight Transitions on the Trail

    Begin by assessing your own straightness here. Are your hands level? Or have you a habit of carrying one lower than the other?  Are your reins equal length?  And your thighs and knees, are they symmetrical? Or is one more forward, higher, or lower than the other?  What about your shoulders? Are they the same distance from your ears?  Perform a few simple ‘checks’ with your own body first.

    Often when we are on the trail, we can become a little complacent with our own position.  Check both your position and your posture before you begin assessing your horse.

    From here, assess your horse’s straightness in whatever gait you are in at that moment.  Are his shoulders positioned directly in front of his hips?  Are both left hooves on one track and both right hooves on the other?

    Once you have established a certain degree of straightness in the gait you are in, begin preparing for a transition.  Use your half-halt to firstly get your horse’s attention, and then to indicate something is about to change.

    As you ride the transition itself, notice how well your horse can maintain straightness.  

    Once you have a baseline, you can begin working up and down through your gaits.  Halt, walk, trot, and (if safe to do so) canter can all be incorporated into your work.  Pay close attention to how any extra energy is being channeled or lost throughout each transition.  The energy on the trail can work for you if you use it wisely.

     2. Flexion Through the Poll

    Once your horse is feeling a little looser and warmed up, you can begin to work on developing more suppleness through both yourself and your horse.  I love starting with simple poll flexion questions.  Do this by asking your horse to ever so slightly flex to the right or the left.

    The goal is for him to achieve flexion while maintaining forwardness, rhythm, and straightness. Pay attention to achieving flexion through his poll, while making sure his shoulders don’t ‘derail’ off the chosen track. 

    Work between asking to the left and then coming back to the center, or straight.  Then repeating this to the right.  You may find that one side is easier than the other.  Take this information back to the arena with you and use it to develop a training plan to help strengthen your horse equally.  This exercise can be ridden in halt, walk, and trot.

     3. Riding Laterally on the Trail

    Lateral work is possible on even the most narrow of trails.  In fact, often the narrow trail will help you keep you moving ‘straight’ while asking ‘sideways’ questions!  You can ask your horse to leg yield, shoulder-fore, shoulder-in, and haunches-in while on the trail.  You can also use gates as the perfect opportunity to practice turn on the forehand.

    I find that many horses who tend to lose rhythm while working laterally in the arena, do not have the same problems while on the trail.  The path and the energy both tend to help them to continue moving forward.

    While working on a certain movement, remember to remain vigilant about your track and line.  The magic of lateral movement is asking your horse to remain accurate while moving differently.  Your job is to facilitate this movement, not move your horse!

    Remember to continue to engage the energy into the contact as you ask.  Also, make sure you are being consistent with your position and posture.  A heavy seat will often block any lateral energy from flowing. 

    Engaging the Energy


    The next time you find yourself struggling with something in the arena, make a change.  The simple change in scenery that being out on the trail provides will immediately shift the energy for both you and your horse.  This shift is often all that is needed to begin truly focusing and working.

    Take full advantage of the energy available to you and your horse.  Practice ‘difficult to do in the arena things’. Or ‘that often feels flat in the arena’ while out on the trail. 

    This truly has the potential to transform your riding and your horse’s training.  And, all the positive benefits will be felt when you do get back into the arena again.

    Happy Riding
    Lorna

    Additional Resources:-

  • Leg Yielding to Refine Your Asking Aids in the Saddle

    Have you ever considered that, when riding, you have been thinking about things all wrong? You have been trying to move your horse; rather than asking your horse to move. One of the areas I see riders trying to move their horse is when working laterally. Leg yielding is a great example. Riders will try to push and shove their horse across the arena.

    [fusebox_track_player url=”https://op3.dev/e/traffic.libsyn.com/dailystridespodcast/1165_Leg_Yielding_to_Refine_Your_Asking_Aids_in_the_Saddle.mp3″ title=”Leg Yielding to Refine Your Aids in the Saddle” social_linkedin=”true” social_pinterest=”true” social_email=”true” tweet_text=”Have you been trying to move your horse, rather than asking your horse to move? ” hashtag=”equestrian” twitter_username=”strides_success” ]

    You don’t move the horse. You ask your horse to move. If you began to actually implement this in your riding, it has the power to change everything.

    Efforting does not equal results. Especially where lateral work is concerned. The key is to have built responsiveness to a point that you can ask a question of your horse, and your horse will simply respond.

    Leg Yielding to Refine Your Asking Aids in the Saddle

    Loss of Forwardness

    It is easy to spot a rider who is trying to move their horse. The physical effort it requires to move the mountain results in any forwardness being lost. And leg yielding, as I teach it, is ‘forward and sideways’. Notice the forwards comes first in that sentence.

    When you begin shoving or pushing your horse sideways, you mentally stop focusing on moving forwards

    This then physically manifests in your horse’s way of going. Yes, maybe your horse will continue to edge up the arena or along the road, but the rhythm and sense of purpose that was taking you there are lost. In fact, most horses become resistant and overly tense because of the change in how the rider is riding.

    Shoving, pushing, jabbing, or kicking your horse anywhere does not show a whole lot of respect, and your horse will probably respond accordingly!

    Opening Doors

    I really believe in using doors, particularly open doors, to demonstrate where we would like the energy to flow. It helps riders get things clear in their head about what they are asking. And it helps horses to understand where the rider would like them to move.

    With leg yielding, it is easy for riders to get all caught up on their inside aids, while completely forgetting about their outside aids.

    Yes, your inside aids are important for flexion and asking. However, if you could use your outside aids to more clearly express where you would like your horse to go, that would really support the work of the inside aids. Opening doors using your outside aids is easier than you think. However, it does require you to be intentional and mindful initially.

    You can use your outside seat bone and your outside rein to open two obvious doors for your horse when leg yielding

    Part of the aids for leg yielding requires you to ‘weight’ your inside seat bone. If done correctly, you will naturally open a door with your outside seat bone. This will allow your horse to step over or across more naturally. It makes things clearer for him. You can also open a door with your outside rein by simply putting more distance between it and your inside rein. Literally opening it to allow his shoulders to step ‘over’.

    When you open doors, you are allowing your horse to actually respond to your ‘ask’ to move over

    Timing Your Questions

    It is so important to consider that when you ask your horse to do something, such as move over, there is a good time to ask. So many riders are asking questions when the horse simply cannot respond. The riders take this feedback of delayed or late response to mean that their horse is not listening. And that can often be when the forcing or shoving begins.

    Start noticing what is moving when underneath you. Learn how your horse moves and then begin asking the right questions at the right time in order to allow your horse to respond.

    For example, if you ask your horse to move ‘over’ with his inside back leg, but he has just put his inside back leg on the ground, he won’t be able to respond. Similarly, if you ask him to balance the movement by weighting his outside back leg on the ground a little more when that leg has just been picked up to swing forward, he cannot respond.

    Get clear on what you’re asking, how you’re going to ask, and when you’re going to ask.

    Allowing Space for Your Horses Response

    Once you are clear that you are asking the right questions, at a time when your horse can take action on them, you can begin looking for your horse’s responses. Are they what you want or do they need to be changed or tidied up a little? Often things will have to be worked on before they will be exactly what you want them to be. That is fine. In fact, that is the natural progression when working with horses.

    The key thing to remember is that you are not moving your horse. You are simply asking your horse to move.

    You can begin working on the answers your horse is giving you by offering feedback. “Yes, that is exactly what I wanted, keep going”, or “No, that’s not quite it, let me explain a little better”.

    When you begin taking responsibility for your lack of clarity when asking questions, you can begin changing the outcome of the answers you receive.

    Over time, when you are consistently taking responsibility for the quality of the questions you are asking, your horse will begin to feel more confident about his ability to give clear answers. Clear, correct answers. This is how the relationship develops. It all begins with you understanding your role in the saddle and taking action based on that.

    Leg Yielding is a Team Effort

    When you claim responsibility for everything that happens in the ride, there is no space for other players. It’s not teamwork; it’s a dictatorship! Teamwork is when each of you is clear on the different responsibilities that you are bringing to the movement. And each of you is confident in taking action on those things.

    When you begin riding from a place of asking rather than shoving or pushing, you give your horse the opportunity to really respond.

    Less efforting on your part results in a much more enjoyable experience in the saddle. And let’s be honest, expecting your body to actually physically move another body that outweighs you by 10 to 1 using sheer force is a really big expectation! And exhausting!

    Happy Riding
    Lorna

    Additional Resources on this Topic

  • Turn on the Forehand; A Basic to Revisit This Week

    Turn on the Forehand; A Basic to Revisit This Week

    Forward and sideways. And yet, without leaving the spot you’re in… It can feel so contradictory and, maybe even asking for the impossible! But no, It is all possible. And pretty simple to get started with. You’re simply beginning to really work on turn on the forehand with your horse. So many riders fail to include the ‘forward’ part of the equation when working on this basic movement.

    And the power really does lie in the ‘forward’ aspect of this, especially when you take the time to revisit it from a more developed and more progressed place in your riding journey.

    If you are at a loose end with your horse this week, I am going to suggest incorporating turn on the forehand into your training somewhere. Whether it is on the ground, in groundwork. Or on the trail at a gate or fence. Maybe you’ll go the traditional route and practice in the arena. Whatever you decide, this versatile movement can help you and your horse at all stages in your development and work together.

    [fusebox_track_player url=”https://op3.dev/e/traffic.libsyn.com/dailystridespodcast/1162_Turn_on_the_Forehand3B_a_Basic_to_revist_this_week.mp3″ title=”Turn on the Forehand; A Basic to Revisit This Week” social_linkedin=”true” social_pinterest=”true” social_email=”true” tweet_text=”Looking for a basic to revisit this week with your horse? Try this…” hashtag=”horseriding #equestrianpodcast ” twitter_username=”strides_success” ]

    Turn on the Forehand; A Basic to Revisit This Week

    What is Turn on the Forehand?

    Simply put, turn on the forehand is when your horse moves his back legs in an arc around his front legs, which remain stationary in one place. Obviously, in order to do this, your horse must turn his front feet as he is moving around so that his body remains aligned.

    And alignment is one of the keys to a good quality turn on the forehand; the energy must remain inside of the container of horse and rider.

    Imagine you are riding on the right rein around your arena. You halt on the track, by the rail; so your horse’s body is parallel to the rail or arena fence. Now, from this place, your horse will move his hindquarters to the right, towards the center of the arena. For the sake of this example, I want you to imagine that his hindquarters do a full semi-circle. A half-circle. This will mean that when he has finished he will, again, be parallel to the rail of your arena. But now you will be on the left rein, facing the opposite direction. And all without his front hooves moving too far from the original place they began from the initial halt.

    I have another post all about the mechanics of turn on the forehand HERE

    Thinking Forward ‘and’ Sideways

    One of the confusing elements of a turn on the forehand for many riders is how to incorporate the forwards into the movement. Forwards while really not going anywhere can be a difficult concept for many riders. However, this is really what makes the turn on the forehand so valuable to have as a basic you revisit and improve over time.

    Forwards begins in the heads of both horse and rider. Both must think forward first. Turn on the forehand, while not technically moving forward, requires forwardness in order to maintain rhythm.

    As the horse moves through the turn on the forehand, he moves in the sequence of the walk. His feet should follow the same pattern of movement that would happen if he was walking forward. Left hind, left front, right hind, right front, left hind, left front, right hind, right front…

    The goal is to maintain the sequence and rhythm of the walk. Except instead of moving forward, his back hooves move sideways. And his front lift up, rotate slightly and are put down as close a possible from where they lifted from.

    This requires ‘forwardness’, even if you never technically leave the spot you are working from…

    An Arc Inside of an Arc

    So, with the end goal being the front feet remaining ‘stationary’ while the back end moves around them, this is definitely something to work towards in your riding. Initially, you will probably find that your horses front feet do move a little. They will form their own smaller arc inside of the bigger arc created by the back feet.

    Part of the work of revisiting this basic movement in your training is to begin introducing the principle of collection to both yourself and your horse.

    Yes, the basic turn on the forehand is one of the simplest ways you can begin introducing this concept to your horse. Collection is a big topic. There is a reason it is at the top of the traditional training scale; it requires a lot of development from both horse and rider in order to correctly achieve. And yet, when you think about turn on the forehand, the movement of the front legs, if done right, requires collection.

    Collection is when the energy moves more ‘up’ than ‘out’. The front feet in a correctly performed turn on the forehand do just this; up not out.

    So look for an arc within the arc initially. However, as you revisit this movement again and again over the coming months and years, begin thinking about collection. Forwardness while staying in the same place. The up rather than the out.

    You Ask Your Horse To Move

    Another great benefit to incorporating turn on the forehand into your regular revisiting of the basics is that you fine-tune your ‘asking’ skills. So many riders try to move their horse using their aids. It is exhausting and distracting to both horse and rider.

    Your aids were never created to move an animal that outweighs you 10 to 1. Your aids simply ask your horse to move. You ask. He moves.

    And yet, riders want to literally shove their horse across the arena. Turn on the forehand really gets you thinking about the true work of your aids. To clearly communicate what it is that you want your horse to do.

    As a rider, you can only ever hope to better influence your horse. You cannot and should not try to physically move your horse!

    The Concept of Inside and Outside

    The final reason I love turn on the forehand is that it gets riders thinking differently. For most riders, up to the point where turn on the forehand is introduced, inside and outside is dictated by the horse’s position in the arena. The side closest to the railing is the outside. And the side closest to the center of the arena is the inside.

    Turn on the forehand requires the rider to think in terms of the flexion in order to identify inside and outside

    And this thinking about flexion and bend is the basis for clearer communication regarding suppleness, aids, channel, contact and so much more for the rider. It forces a new perspective in order to achieve a simple result. Over.

    Revisiting This Basic Regularly

    I am a big believer in the basics. They are the foundation for all the fancy and complicated ‘stuff’ that riders want to achieve later in their riding. However, they must be revisited from each new level you reach as a rider. From each new perspective.

    I am going to suggest getting turn on the forehand into your training with your horse on a regular basis. And doing so from the new perspective each time.

    Turn on the forehand can seem basic. It can seem like a means to an end. The end being more complicated and fancy lateral movements. however, this humble movement is important in its own right. And it is often simple enough to give you and your horse a quick win while moving the whole conversation forward.

    Happy Riding
    Lorna

    Additional Resources on This Topic:-

  • Using Lateral Work to Improve Your Walk

    Using Lateral Work to Improve Your Walk

    Using Lateral Work to Improve Your Walk

    What this episode is all about & how it can help you:-

    • Recognise what a ‘stuck’ walk looks and feels like
    • Understand why the walk can so easily deteriorate in horses
    • See the benefit of using lateral work to begin improving the walk
    • Start to become more aware of how you are asking questions of your horse

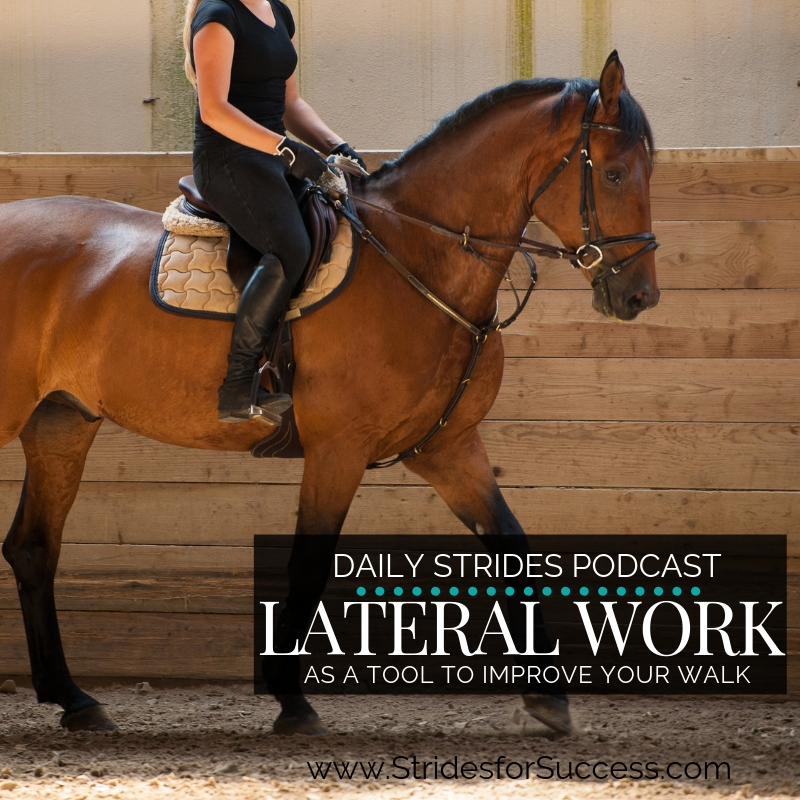
    Funny how, sometimes, it is the more basic things that cause us to become ‘stuck’.  The walk is a good example of this!  It is probably the first thing most of us do on a horse, and yet, it often becomes a real ‘sticking point’ for horse and rider.

    [smart_track_player url=”https://op3.dev/e/traffic.libsyn.com/dailystridespodcast/1098-Using-Lateral-Work-to-Improve-Your-Walk.mp3″ title=”Using Lateral Work as a Tool to Improve Your Walk” social_linkedin=”true” social_pinterest=”true” social_email=”true” tweet_text=”Is your horses walk feeling more ‘stuck in the mud’ than graceful and forward? Here is how lateral work can help get you & your horse unstuck” hashtag=”equestrian #horseriding” twitter_username=”strides_success” ]

    Even stranger is that most riders don’t really understand or realise this until it is too late.  Too late for what?  Well, the walk is the one gait that riders have a real ability to negatively impact in their horses training.  Unfortunately this can have long-term repercussions in the horses way of going.  Maybe even long after the rider has began working on improving things. 

    In this episode of the Daily Strides Podcast you will learn how you can use simple lateral work to begin either improving or maintaining the quality of your horses walk.  Simple exercises and movements that will help both you and your horse get ‘unstuck’ in the walk. 

    Why the Walk Can Become Stuck for Many Riders

    I think that many riders fail to see how important it is to ride a good walk.  Usually this is because it was one of the first things they ‘successfully’ managed to do when in the saddle.  However, being able to remain in the saddle while the horse moves is not really a true measure of success as the journey progresses. And yet, we often fail to revisit the walk in our training.

    We forget to include it when assessing how effective we are using the energy.  And we see it as the ‘rest’ between the work, rather than the work itself.

    You probably use the walk to learn a lot of different movements or techniques in your riding.  The walk is also used to ‘practice’ things, in a slower sequence, before trying them out in trot or canter.

    Because of this, the walk is the one gait we tend to make a lot of our mistakes.  Repeatedly.  Mistake after mistake, slower and slower.  All in a bid to get things right in our head and body.

    This is why I feel the walk needs even more of your attention when developing your riding.  Focusing on riding a good quality walk is essential for your horses foundation, and yours as a rider.

    The Walk is Different to Other Gaits

    Okay, so I realise this is pretty obvious!  It is, after all, not the trot, canter or gallop.  However, it is also different because there is no ‘moment of suspension’.  It lacks the same energy that the other gaits have to move them forward.

    Once the forwardness has been blocked or is not included in the horses way of going, the gait itself tends to change – and this is rarely positive.  

    Riders really have to work hard to change the natural rhythm of a horses trot or canter.  If they are successful, any changes are usually only temporary.  The energy within the trot or canter itself will usually result in the horses natural way of going rising to the top when the rider stops interfering .

    This is why it is so important to be mindful that your horse is propelling you both forward in the walk.  Every stride, the hind legs are swinging underneath you and thrusting you both forwards. 

    What a Bad Walk Looks Like

    The walk should include your horse swinging through his back and moving with a sense of purpose.  When these vital elements are missing things quickly become ‘stuck’.  The movement will lack rhythm.

    The steps almost become erratic and ‘pottery’ to watch and listen to.  Often the horse is weaving and wandering.  It just lacks ‘enough’ energy.  

    If we dig a little deeper into the ‘bad walk’ we will see that often the horse is not connected through their back.  Meaning that the hind quarters have fallen out behind the horse.  This is when the horse switches into ‘front wheel drive’.

    The shoulders pull the horse forwards, rather than the hind quarters pushing the horse forwards. 

    The lack of connection leads to a hollow back, due to a lack of strength and development.  And this, in turn, leads to an ineffective and often heavy contact between the horse’s mouth and the riders hands.  It is not a pretty picture and doesn’t inspire anyone!

    Why Lateral Work Can Help Improve the Walk

    There are lots of ways to either begin ‘undoing’ the bad habits that have crept in, or improving things with your horses walk.  However one of the best ways I have found is using lateral work.  It really can be used with riders of most levels, as well as horses at most levels of their training.

    Lateral work literally demands the focus and attention of both horse and rider.

    There are no real half measures with it.  You are either both working together on the movement or you are not.  Also, in order for you to successful ride a lateral movement, the gait leading up to the movement itself must be of a good enough quality.  Meaning that you are already working on the walk before the lateral movement is asked for.

    The second reason I find lateral work to be so beneficial for both horse and rider is down to one simple requirement.  Rhythm.  If rhythm is lost or broken, it was not a correct movement.

    Lateral work NEEDS rhythm to be present in order to be deemed ‘successful’.

    To Move Laterally is to Move Forwards and Sideways

    The third reason that I feel lateral work is often the best way to improve the walk is pretty simple.  Lateral is forwards and sideways.  Not sideways and forwards.  So many riders think of lateral work as being sideways.  Moving across.  It is not lateral work if it is not first moving forwards.

    Forwards is key to successful lateral work and successfully working in the walk. Making them the perfect combination to improve the walk

    This can be confusing because some lateral work, such as turn on the forehand, don’t actually require forward movement.  However, the forwardness here is how the horse and rider thinks. There is a correct sequence that must happen in each movement, in order for it to be successful.  Thinking forwards is the foundation to each of those sequence, whether moving forwards or not.

    Less Shoving, More Asking

    So, lets say you are going to begin by working on turn on the forehand.  The number one mistake riders make is to ‘shove’ their horse over using their seat.  Make sure that your seat bone does not become a shovel digging a hole in your horses back!

    This can often be one of the ways the walk can be negatively impacted to begin with, shoving rather than asking. 

    When you ‘shove’, whether it be in walk or moving laterally, your horse will begin to hollow out through his back.  He does this to get away from the discomfort caused by your overly enthusiastic seat bones digging into his back!

    When your horse hollows his back, the connection between back and front is broken.  The energy ‘leaks out’. 

    The result is a lack of forwardness, which negatively impacts whatever you are doing.  Walking or moving laterally.  As you are working on your turn on the forehand, focus on ‘asking’ rather than shoving your horse around!

    Asking Questions that Allow Responses

    The final thing I want to touch on in this post is how you are asking questions of your horse.  Are you allowing him the room or time to respond?  Or are you asking and then becoming upset when he is not quick enough with a response?

    The reason I ask is that, often, riders are not asking the right questions at the right time.  They are asking when it is practically impossible for their horse to respond. 

    Timing is so important in riding.  Walking is a great place to begin working on your timing.  Become aware of what is moving where underneath you at any given time.   For example, when your horses foot has begun moving is a good time to ask him to ‘change’ or ‘modify’ that movement.  Rather than when his hoof is bearing weight on the ground.

    The walk is perfect for becoming great at feeling what is moving where underneath you at any given time.  Lateral work is perfect for using this information to ask specific questions at the right time.

    Start Small and Build Up Daily

    You spend so much time in the walk.  I am going to suggest that, beginning today, you become a little more intentional with your walk.  It is not just a rest period.  It is a gait that deserves to be worked in just as much as any of the others.

    Each time you are in the saddle, focus on how ‘forward’ your walk is.  Notice if there is a rhythm present.  Are you allowing the energy to flow, or are you ‘shoving’ it somewhere else?

    By consistently working on developing a more active, correct, rhythmic, forward moving walk you can begin improving your horses walk, regardless of how far down the path of ‘stuck’ he has become.

    Happy Riding

    Lorna

    Other posts, episodes and resources that relate to this topic:-

    Daily Strides Premium

    So I mention turn on the forehand quite a bit in this post, however that is just one of many ‘lateral movements’ you can use to begin working on your walk.  If you would like step by step help and reminders (such as ‘don’t shove, ask’) as you begin incorporating these into your riding, I am going to suggest joining Daily Strides Premium today.  In there, you will have instant access to audio trainings on all the different lateral movements, as well as so much more as well.

    Trainings you can use and listen to where ever you can take your phone… And all easy to pop onto your phone.  You can even use them in the saddle. 

    Couple This with Built In Accountability…

    When you join a Daily Strides Premium Member you will get built-in accountability.  A real person from our team will be reaching out to you on a fortnightly basis to help you build and then maintain momentum with your progress in the saddle.

    Couple this with the live Q&As, the monthly review and planning live calls and the members only private group ~ we are here to help you remain accountable as team leader for you and your horse.

    Daily Strides Premium is packed full of step by step trainings for you to use in the saddle. All the trainings are easily accessed using your phone, meaning that you can take them with you where ever you are going.  These trainings and so much more are available for you immediately when you join Daily Strides Premium. Find out more HERE

  • Turn on the Forehand; How to Ride a Balanced One

    Turn on the Forehand; How to Ride a Balanced One

    Have you ever found yourself halfway through a turn on the forehand; either purposely or not?  Perhaps you were out hacking and there was a gate… You tried a little turn on the forehand, just like you had heard about, to open it, but ended up dismounting!  Or maybe your instructor or trainer mentioned it, you tried it with the best of intentions, but the final result looked nothing like how they explained it?!

    Turn on the forehand is often seen as the very first introduction to lateral work for you and your horse.  It is a great movement to begin introducing the concept of ‘yielding’ to your horse and because of this, is one of the best ways to set your horse up for leg yielding.  It requires discipline, balance, and coordination from your horse and it is a wonderful way of assessing those same qualities; discipline, a balanced seat, and coordination of aids, in the rider too.

    [fusebox_track_player url=”https://op3.dev/e/traffic.libsyn.com/dailystridespodcast/571-A-Balanced-Turn-on-the-Forehand.mp3″ title=”Riding a Balanced Turn on the Forehand” social_linkedin=”true” social_pinterest=”true” social_email=”true” hashtag=”equestrianpodcast” twitter_username=”strides_success” ]

    More Than ‘Entry Level’

    However, because it is seen as the ‘entry-level’ lateral movement, most riders do not spend enough time really mastering this movement before moving onto other, ‘more exciting’ things in the saddle!  In fact, because the turn on the forehand has been ridden so badly for so long by so many riders, a lot of instructors and trainers no longer use this tool when training riders and horses.

    This is a pity because while turn on the forehand might only be the beginning or first step of the lateral ladder, it does not mean that it is the easiest movement in the book to master.  

    In fact, the mere fact that you are introducing something new to your horse and then will use the same principles to build your further lateral movements should dictate that the ability to ask for and then ride a turn on the forehand should be of much greater importance when training riders and horses.

    I have found that the reasons many riders struggle with turn on the forehand is due to a lack of understanding about setting it up, confusion regarding the aids to work through it and also, lack of clarity on exactly what the horse should be doing with his body and feet to correctly perform the movement

    What is Turn on the Forehand?

    So, what is turn on the forehand?  Well, the simple explanation is that the horse’s hindquarters or back legs move in an arc or circular shape around the front legs, which remain very close to where they started for the duration of the movement.  So imagine your horse has halted square and you prepare to ask a turn on the forehand to the left.  Using your left leg, your horse will begin to move his hindquarters away, yielding, to your requests.  All the while, his front feet will remain in the same area as he moves his hindquarters around them.

    Picture the face of a clock and then the center of the clock, where the arms are attached to the clock face.  Your horse is the ‘clock arm’ and his front feet in the halt are exactly at the point, in the center of your clock, where the arms are secured. 

    Now, pick a place on the actual arc of the clock itself (where the numbers are on the clock face).  This is where the hindquarters are currently positioned at the halt.  The turn on the forehand is simply moving the hindquarters mark further around the circle, perhaps from the 9 o’clock mark, around to the 12 o’clock mark and even on to the 3 o’clock mark.  The front legs stay at the center of the clock at all times.

    Encouraging Flexion

    Your horse’s back should remain straight throughout the movement, so no curving or bending.  However, he will have a slight flexion at the poll to the inside, which he will maintain throughout the movement.  He will also step with all four feet, in sequence to walking, but with only the hind feet really covering any ground.   The front feet will merely march or keep time on the spot for all of their steps.

    A BALANCED TURN ON THE FOREHAND

    The rider must remain balanced throughout the movement.  They must ask for the flexion with the inside hand, weight the inside seat bone slightly, ask for ‘over’ with the inside leg, and then use the outside rein to balance that movement.  The outside leg will act as a ‘barrier’ of sorts, but also will help to keep the activity in the ‘steps’ as the horse moves across in turn on the forehand.

    When written in black and white, this all sounds simple enough, but such a simple explanation leaves the door wide open for a lot of different variations and wrong practices within the movement itself.

    Left or Right? Depends on Flexion

    The first part that can be confusing for many riders is the actual direction of the turn on the forehand itself.  If you are asked to ride a turn on the forehand to the left, your horse’s poll will flex slightly to the left – making this the inside -, his head will travel to the left during the movement and this, in turn, means the hindquarters will actually swing to the right (hence the confusion).

    So the named direction of the turn is the same as the flexion of you horse while he is performing the turn.  Your horse will be flexed to the inside, which is the leg you will ask your horse to move away from or yield to. So a turn on the forehand to the left will see your horse flexing through his poll to the left while moving to the right off your inside (left) leg

    Front Legs; Stationary or Not?

    Many riders are concerned that teaching their horse the turn on the forehand, with the front legs remain almost stationary, will surely mean that there is no forward movement happening – and this goes against everything they learn about riding.  However, I think this misconception comes from the fact that many riders think of turn on the forehand as just the back legs moving, the inside across in front of the outside, as the horse turns, with the front legs twisting along afterward, and forced to eventually move.  This is incorrect.  A true turn on the forehand will keep the rhythm and footfalls of the walk while it is happening.

    Think of it like the inside hind leg moves across in front of the outside hind leg, and in order to maintain alignment with the direction of the body, each of the other feet will step up, straighten out and put down, where they realign with a ‘square’ and also so as to keep the horse and rider balanced.

    So, while the horse is certainly not moving forward in the true sense of the word, the activity should be maintained throughout the movement

    Inside Leg to Outside Rein

    Another way to think about creating forward energy is by emphasizing the relationship between your inside leg, your horse’s inside hind leg, and the outside rein while the horse is performing the movement.

    Your inside leg will ask for the sideways movement, the horse will lift his inside hind leg and as he swings it across in front of his outside hind leg, your outside hand will subtly connect with that energy and tell him where to put it down.  

    Your outside leg will help to maintain the forwardness by reminding your horse, if necessary, to straighten up or align his outside back foot with the new position of the body.

    Balance of Aids

    I also want to highlight how the riders balanced seat and coordinated aids play a big part in successfully riding a turn on the forehand.  Many riders try to shove and push their horse around in this movement.  They collapse their inside shoulder and, consequently, their core muscles on that same side.  This causes their weight to shift to the outside of the saddle and is often the cause of the horse scrambling to get back under the weight of the rider to try to maintain balance for both.

    Remember to sit up through your body and ask for your horse to yield to your leg, not force.  

    I suggest that all horses are thought to yield to his pressure on the ground first, whether it be in the stable or through groundwork exercises in the arena.  Then, if your horse still struggles to understand, ask a person on the ground to help you.  Keep in mind that if your horse is confused, the chances of him doing the correct thing and, importantly, realizing what that was are very slim!

    Also, think of sitting up through your body and carrying yourself, so that when your horse does move sideways you are giving your body the best possible chance of, gracefully and subtly, following him there.

    Happy Riding

    Lorna

    Additional Resources on This Topic:-

  • Exercises to Help Loosen a Stiff Horse

    Exercises to Help Loosen a Stiff Horse

    Exercises to Loosen a Stiff Horse

    Does your horse find doing things on one rein a lot easier than on the other?  Or perhaps you’ve noticed ‘something’ as you round a corner or bend?  Maybe even as you ask for a lateral movement?

    It feel like, rather than responding how you want him to, he bulges to the wrong side or against you?

    Horses, just like humans, become stiff in certain areas of their bodies for many reasons.  When we say the word ‘stiff’, we are referring to a lack of suppleness in that area.  A certain looseness and ease that is missing when performing a particular movement or exercise.

    [smart_track_player url=”https://op3.dev/e/traffic.libsyn.com/dailystridespodcast/551-Exercises-to-Loosen-a-Stiff-Horse.mp3″ title=”Exercises to Loosen a Stiff Horse” social_linkedin=”true” social_pinterest=”true” social_email=”true” tweet_text=”Is your horse not as ‘loosey goosey’ as you would like? This will help supple things up…” hashtag=”equestrian #horseriding #makeeveryridegreat” twitter_username=”strides_success” ]

    In this episode of the Daily Strides Podcast I discuss stiffness in your horse.  Stiffness is a lack of suppleness; which is essential to your horses correct development.

    What is Suppleness?

    Suppleness is basically a measure of how loose, flexible or pliable your horse is through his body.  A lot of horses, just like us,  need to loosen out quite a bit before they can use their body to the fullness of its potential.  This is why a good, well planned and then ridden warm up is vitally important to set the tone for the quality of work that will happen in the schooling session.

    Your horse needs to work through any stiffness if he is to be able to fully use his body to perform any tasks you require.

    Very often stiffness shows up in bad behaviour.  An unwillingness to do what is asked.  It can also be reason for loss of balance or rhythm.

    A lack of suppleness is tightness or tension in an area when asked to stretch, lengthen or even, in more pronounced cases, move in general.

    Working With Your Horse – Not Against

    Confirmation can play a large part in how your horse uses his body and it is important to realise this when working with your horse.

    Work to his strengths rather than focusing on his weaknesses.

    You will never change a short neck, however you can learn how to work with it!  Keep in mind that all horses can be improved upon with time and consistent, correct, sympathetic exercises which help loosen up any areas that they are experiencing a lack of flexibility in.

    Types of Suppleness in Your Horse

    When supplying our horses, we must think both longitudinally and latitudinally, so as our horse can fully perform his job to the best of his ability

    Longitudinal suppling is from tail to head over the topline of your horse.  It helps to loosen out the back as well as the joints in the legs and can be done with stretching long and low, raising the back, and basic transitions up and down between the gaits.

    Latitudinal suppling is sideways movements.  Asking your horse to cross one back leg, or one front leg, in front of the other and so on.  This helps to loosen the shoulders, and hips as well as the leg joints and, to some degree back as well.

    Latitudinal suppling exercises can also help to loosen up the poll and neck areas of your horse through sideways flexion.

    Noticing Where Your Horse is Stiff

    Very often knowing where to begin will become evident when you pay close attention to how your horse performs the same movement or exercise on both reins.  Is the movement and way of going equal on both sides?  Or is there any bracing or loss of balance and rhythm on one side over the other?

    Stiffness is far more common than most riders realize.  In fact, a lot of issues that are often put down to a lack of discipline or attentiveness or just being downright naughty is actually the result of a horse being stiff.  Being stiff will cause the horse to be unable to really perform the movement in the first place

    So we have already mentioned that your horse may show resistance if stiff.  Or he may be unable or unwilling to bend and flex if any stiffness is present.  There may also be a shorter range of motion in that area.

    So whether it be through the muscles, or joints, stiffness will feel like your horse is ‘resisting’ you.  It becomes even more evident if you ask him to ‘use’ himself and move out of what your horse perceives as his comfort zone.

    Identifying the Stiffness & the Cause…

    Unfortunately with many riders, the initial reaction is to use the reins, particularly the inside rein, to ‘fix’ the problem.  They do this by essentially forcing the horse into the desired shape…  This will inevitably lead to more stiffness in other areas as the horse tries to compensate.  It also can often cause your horse to ‘bulge’ even more!

    So once we have identified any stiffness, and before we begin working particular exercises into warm-ups and schooling sessions, it is important to find the cause of the problem so you can remove it if possible

    • Have the tack, particularly the saddle, checked by a qualified saddler
    • Make sure that you are not sitting lopsided or crooked in the saddle
    • Assess yourself for stiffness – I highly recommend Yoga – which you may be transferring to your horse
    • Rule out any physical problems such as joints, hooves, teeth, back etc

    And once you are sure that there is nothing external or internal adding to the problem, you can then begin working towards loosening your horse out by formulating a long-term plan or program to help him

    Working with a Stiff Horse

    Take things right back to basics and back to the beginning.  Notice when any resistance or stiffness shows up as you perform simple movements.  This is important both during both your warm up and when schooling.  Take note of which side is the stiffness more pronounced and what type of movement it is more evident; lateral or longitudinal.

    More than anything, keep in mind that consistency is king and time will play a huge part in working through any hardness or stiffness that your horse is experiencing.  Consistency in how you ask and how you respond.  This means asking the correct way and then expecting a certain result.  Remember to reward any move in the right direction, no matter how small.

    If you have ever experienced any stiffness in your own body, you will know that while you can do a lot in one day, generally the problem will resurface again the next day, and will require just as much attention and patience to loosen out again

    Also keep in mind that if the stiffness is due to age, a past injury or wear and tear, you may have to find ways to work around it rather than thinking of ‘fixing’ it

    Where to Begin Loosening Your Horse

    Start by aiming to loosen your horse along his back and topline.  Transitions up and down between halt, walk and trot to help longitudinal supplying.  Later lengthening and shortening within the gait itself will also help to eradicate any excess tension or stiffness that is lurking there.

    You can then begin adding some sideways, or latitudinal, suppling into your warm up or schooling sessions.  Bending your horse left and right, both while keep your horse straight – such as on a circle or center line –  or while moving sideways such as shoulder in or haunches in will help him.  Also the slight flexion required for leg yielding works well to help him begin moving more freely through his body.

    Working Through Any Stiffness – The ‘Right’ Way

    Whatever you decide to do, it is really important that you take time, and lots of it!  Don’t just drill your horse for hours and hours constantly stretching the ‘stiff’ area.  Rather than loosening your horse up, this will most likely cause an injury or end up creating another problem elsewhere as your horse tries to compensate for the discomfort you are causing him.

    Rather work a few small but correct steps in throughout the overall session and then, as he begins to loosen up over the coming weeks, increase the difficulty for him – step by step and inch by inch.  If you feel you are forcing him into an uncomfortable or difficult position, you are pushing too far.

    Slowly and consistently riding correct exercises is what will work best in the long run to help your horse either work out or manage any stiff areas in his body.

    Happy Riding

    Related posts, episodes and freebies you may enjoy:-