Tag: seat

  • Feeling and Finding The Correct Diagonal in the Trot

    Feeling and Finding The Correct Diagonal in the Trot

    [fusebox_track_player url=”https://op3.dev/e/traffic.libsyn.com/secure/dailystridespodcast/1183_Feeling_and_Finding_The_Correct_Diagonal_in_the_Trot.mp3″ title=”Feeling and Finding the Correct Diagonal in the Trot” social_linkedin=”true” social_pinterest=”true” social_email=”true” ]

    Landing on the correct diagonal can be hit and miss for many riders. Let’s face it, there’s a chance you’ll get it right 50% of the time! And while most riders are pretty well versed on their diagonals in the trot… It’s ‘feeling’ the diagonal that causes confusion.

    Trotting has a two-time beat. The 1,2,1,2,1,2,1,2,1,2 that you experience and feel when you’re in the saddle. If you do sitting trot, it will result in a sit,sit,sit,sit,sit,sit,sit,sit rhythm. However, most riders can ‘tire’ a little when it comes to riding a constant sitting trot! And so, we learn to post or rise in the trot.

    The 1,2,1,2,1,2 is matched with an up,down,up,down,up,down of the riders backside. The rhythm of up-downs and the rhythm of the trot are a perfect match.

    The Correct Diagonal

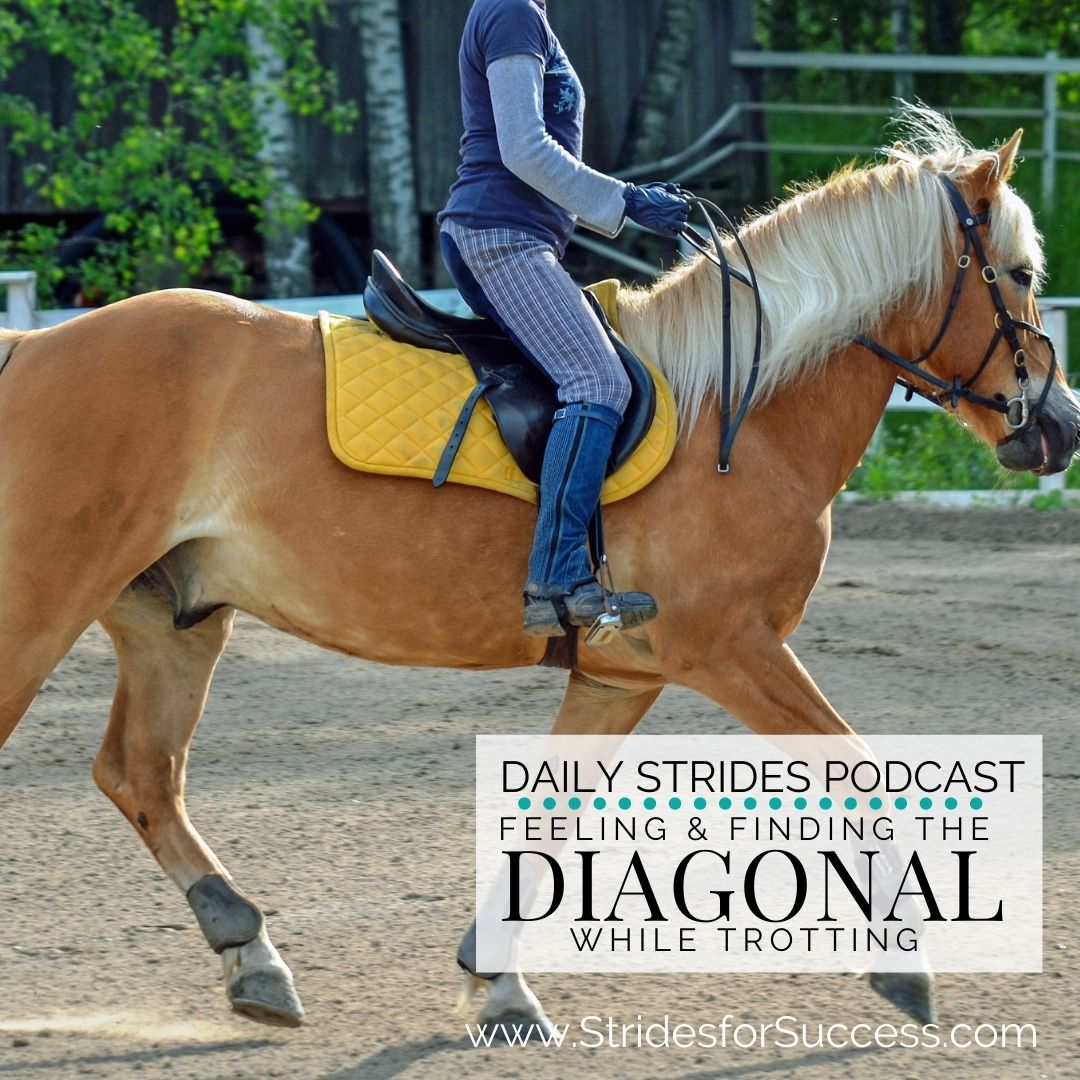
    The reason your horse creates the 1,2, rhythm in the trot is because of how he moves his legs while he is trotting. The right-back foot moves with the front left foot. This is the ‘1’ part of the rhythm. Then the left-back foot moves with the right front foot. This is the ‘2’ part of the rhythm.

    The trot is very ‘even’ with regards to what is moving where… This is also the reason it can be hard to ‘feel’ what diagonal you are on at any given point!

    The correct diagonal is when you are moving with the inside hind leg – and, by association, outside front leg – of your horse. There is a little rhyme, ‘rise and fall with the shoulder by the wall’. That about sums it up. As your horse’s outside shoulder is forward, you want to be ‘up’. As this shoulder moves back, you want to be down.

    I have a post and an episode HERE about how to identify the correct diagonal through sight and voice…

    Up/Down versus Forward/Back

    So, part of the confusion is the ‘up – downs’ we all learn when we start rising or posting to the trot. Because we learn up and down, we tend to think of the trot as being ‘up and down’. It’s not. It’s actually ‘forward and back, with a little up and down thrown in for good measure!

    Your horse’s legs move forward when he trots. They appear to move ‘back again’ in the second part of the stride, but this is actually just his body moving over the previously just moved forward limbs. This is important to learn how to feel your diagonal.

    As you ride sitting trot, notice how the movement is less ‘up and down’ and more ‘forward and back’. From here, notice how your seat bones are actually moving independently of each other.

    Your left seat bone will move forward and dip slightly down as your horse’s left back leg moves forward. This will coincide with your horse’s right shoulder moving forward. As this happens, your right seat bone will move ‘back’ while also coming up a little. This is as you and your horse’s body moves over his right hind foot on the ground.

    It’s a little like imagining the pedals of a bicycle peddling backward. As one goes down and forward, the other comes up and back.

    It is a quick movement and one that is easily missed – especially if we are only allowing ourselves to think in terms of ‘up and down’ when we think of trotting.

    Click here to subscribe

    Start in Sitting Trot

    I am going to suggest starting in sitting trot and using what you can see to guide you initially. You can glance at your horse’s shoulder. Pay attention to the outside one. Let’s for the sake of this example, say that you are riding anticlockwise around the arena. On the ‘left rein’. Your horse’s outside shoulder is his right shoulder in this example.

    Practice glancing down and being able to identify when the shoulder is moving and where it is moving to.

    From here, begin to build a relationship in your head between what that shoulder is doing, and what it means the diagonal back leg is doing in the trot. In this case, it is the left back leg. When your horse’s outside (right) shoulder is forward, it means that his inside (left) hind leg is also moving forward. The same for when it is back.

    From here, begin noticing how this feels in your body. Can you feel the slight ‘dip’ of your inside (left) seat bone? How about the slight forward swing of your inside (left) seat bone?  And what about your upper body? Can you feel any difference there as your horse moves this diagonal pair you are focusing on in the trot? Play with this for a while. Change diagonal often and look for the differences.

    Learning how to feel what is happening underneath you in the trot takes time. It won’t happen if you won’t commit the time to learn!

    Test Yourself Often

    Once you feel that you can, indeed, tell what is moving where test this theory. Feel into it. Identify the correct diagonal pair that you want to move with. Once you think you have identified the pair, begin ‘moving with’ it.

    Moving with the correct diagonal pair simply means rising and falling in time to the movement of those legs.

    As the two legs on your chosen diagonal pair move forward, you move forward. You rise or post. And, as they begin moving back, you do too in that you ’sit’ or ride the ‘down’ part of your rising trot. Remember, your horse’s legs don’t actually move backward, it is simply you and your horse moving over the legs as you travel forward.

    The final part is glancing down to the outside shoulder and seeing if you chose correctly.

    Mastering Your Diagonal

    Choosing the correct diagonal every single time can seem daunting at first. However, the good news is that it’s one of those things in horse riding that is hard until it’s not!

    Meaning, once this ‘clicks’ for you, you will wonder how you could not feel this before.

    If you want step-by-step audio training to listen to as you learn to master this skill, join Connection; the online membership for equestrians. In there you can get the Diagonal audio horse riding lessons. And a whole lot more training, coaching, and riding plans to use with your horse.

    Happy Riding
    Lorna

    Additional Resources:-

  • Are You Blocking with Your Seat While Riding? Part 1

    Are You Blocking with Your Seat While Riding? Part 1

    So you say go. But immediately follow it up with whoa. And all because you’re blocking with your seat. It’s like trying to drive a car with the handbrake on! And you continue to blame the car for not going forward…

    [fusebox_track_player url=”https://op3.dev/e/traffic.libsyn.com/dailystridespodcast/1166_Are_You_Blocking_With_Your_Seat_While_Riding_Part_1.mp3″ title=”Are You Blocking with Your Seat While Riding? Part 1″ social_linkedin=”true” social_pinterest=”true” social_email=”true” tweet_text=”Riding with the handbrake on?!” hashtag=”equestrianpodcast” twitter_username=”strides_success” ]

    For many riders, the even more frustrating part of it is that it can be hard to notice. If you are blocking with your seat, you probably don’t even realize you’re doing it.  I have 2 exercises for you to ride that will help you feel if you are indeed blocking with your seat or not…

    2 Exercises To Find Out If You're Blocking with Your Seat While Riding - Part 1

    But before you begin riding, I first want to make sure we are on the same page with regards to your seat…

    Understanding Your Seat

    There are basically 3 basic ways your seat can be used to influence your horse. Go, whoa, and neutral. Driving, resisting, and allowing. It is the ‘allowing’ part that so many riders struggle with. Go or driving is when you use your seat to ask for forward or more. Resistance is how you ask your horse to steady, slow down or stop using your seat

    Allowing is the equivalent of telling your horse to ‘carry on’. It means that the energy can move underneath you, through your horse’s body, on its path from the backend to the frontend.

    Obviously there are numerous ways each of these three principles can be used, and communicated, in your riding. It all comes down to your hips and your core. The angle of your hips, coupled with your use of core strength will determine how your horse experiences your seat.

    Blocking with Your Seat

    The trouble begins when you want to allow, and say ‘yes’, but due to either incorrect position or lack of suppleness, you actually block and say no.

    Blocking with your seat stops you from giving basic confirmation to your horse that, yes, he correctly understood your aids and is now doing what you want him to do.

    And, blocking with your seat even also takes this one step further. It tells your horse to stop doing this thing. Because blocking works like resistance. If you mean to go, but you say stop… The confusion is real 😉

    Fix Your Position Before You Begin

    Many riders think of their seat as only being their seat bones. I believe that, as a rider, your seat is everything between your belly button and about a third of the way down your thighs.

    So, that being said, your seat will only work as well as you position it to. Begin all of these exercises by first correcting your position. Think of your two lines; head, shoulder, hip, heel and elbow, wrist, rein, mouth. Ensure that you are indeed correctly sitting on your seat bones.

    When in the saddle, it should feel like standing, not sitting. This will engage your core, which will result in you carrying your upper body.

    Keep in mind that many riders do not position their seat (hips) correctly when they are in the saddle. They either sit like ducks in the saddle (overly arched lower back leading to closed hips) or like the letter C (rounded back and sitting on the back of their seat, rather than on their seat bones).

    Sit on your seat in a way that would position it if you were standing, erect and engaged, on the ground beside your horse.

    Practice, Practice, Practice

    At the beginning of this post, I mentioned 2 exercises to help you identify and then begin improving your allowing seat in your riding.  These exercises will be available in next week’s episode of the Daily Strides Podcast.

    And in the meantime, work on improving and strengthening  your position in the saddle and check out some of the previous episodes that relate to this topic below

    Happy Riding
    Lorna

    Additional Resources on This Topic

  • Connection in Your Riding; Seat and Legs

    Connection in Your Riding; Seat and Legs

    Connection; Using Your Seat and Leg Aids More

    Have you ever thought about what you can feel, in the saddle as you ride your horse? The physical connection points you have with your horse each time you’re in the saddle.

    [smart_track_player url=”https://op3.dev/e/traffic.libsyn.com/dailystridespodcast/1148-Connection-Points-In-Your-Riding-Seat-and-Legs.mp3″ title=”Connection in the Saddle; Your Seat and Legs” social_linkedin=”true” social_pinterest=”true” social_email=”true” tweet_text=”Your seat and legs do a lot more than just keep you in the saddle… Listen to this episode of the Daily Strides Podcast” hashtag=”equestrianpodcast” twitter_username=”strides_success” ]

    Often we can become so caught up with our aids and what we ‘should’ be doing, that we forget to focus on the actual points of physical connection between you and your horse. And the impact these connection points are having on each ride.

    Mount Up & Begin Walking

    The first thing I am going to suggest is to actually mount up and simply allow your horse to walk. It is amazing how often we forget to allow this to happen. We think that because we are in the saddle and the horse is moving underneath us, we are allowing the walk.

    And yet, so often we are blocking or working against our horse doing this simplest of tasks. Walking freely while we are in the saddle.

    How many times have you been in the saddle and focus on ‘getting the horse to walk’? This versus sitting back and actually just allowing the horse to walk.

    Doing Nothing

    One of the biggest challenges riders have is to do nothing. Not that I am telling you to do absolutely Jack Squack in the saddle! Rather any ‘doing’ your ‘doing’ is focused on yourself, rather than your horse. Things like carrying yourself. Another often overlooked part of riding for many riders.

    The simple act of mindfully beginning to carry your upper body, allows your lower body to follow, rather than remain ‘stuck’ between your ribcage and the saddle.

    The ‘doing nothing’ I am referring to is regarding swinging, forcing, shoving or any other ‘ings’ you can do that involve you ‘trying’ to get your horse to walk. Simply make sure that you are in the best possible position to allow your horse to walk; and in doing so, move the part of your body that is connected to the saddle.

    You are allowing your horse to move your seat; not you shoving your seat in order to move your horse

    Remain Independent

    Remaining secure and balanced of your own accord are the basics of independence. A quick test of this, as a rider, is to imagine you could instantly make your horse vanish. How would you land on the ground? On your feet? If so, you’ve got this covered already, congratulations! On your face or bum means that you have an issue with your other connections points; your legs.

    There should not be daylight between your legs and your horse’s sides. This is especially true of your thighs and your lower legs or calves.

    Your independent seat depends on your abilities to balance yourself. This depends on how you have positioned your body in the saddle. Any tipping, gripping, toppling, or leaning means that you are using your horse for balance.

    Using your connection points to hold on means that they cannot be part of the actual conversation. They are no longer aids and are pretty useless when communicating.

    Connection Points Between You And Your Horse

    Once you have positioned yourself so that you are carrying yourself, notice your legs. There should not be daylight between them and your horse’s sides. If there is, it usually means you are gripping or pinching somewhere higher up. Allow your legs to drape. To hang from your hips.

    Your legs are an important part of the conversation between you and your horse. However, because many riders do not use them correctly, they are misunderstood and ignored by the horse.

    Your legs are not to keep you on the horse. Rather to communicates with your horse. No one likes a ‘Cling-on Warrior’; meaning if you are using your legs to hold you on, you are taking advantage of your position. Rather allow your legs to ‘drape’. Let the weight drop down into your heel. And from there, your legs can actually be used for what they do best; to communicate with your horse.

    Your Seat & How it Feels

    Like I’ve said already, your seat is a valuable communication aid in the conversation with your horse. But only if you first learn to ‘allow’ through it. Allow your horse to move your seat, rather than you moving your seat in order to move your horse.

    I want you to zone in on how this feels. Actually, it physically feels. One of the first things you may notice is that there is a rhythm to it. Forwards and backwards rhythm to the physical movement. Stay with this feeling a while.

    Notice how there is also an ‘up and down’ to the movement. It too is in rhythm.

    When I am explaining this to riders, I often think of the pedals of a bicycle. Except when its the horse it is the other way around. Forward and down, backward and up. Rotation of your seat bones. Moving with the horse and allowing the horses back to move them.

    The Rhythm of the Conversation

    Have you ever been part of a great conversation with someone, and someone else will randomly just ‘butt in’ to your conversation? They may or may not be even speaking about the same topic. It doesn’t matter. The simple act of their interruption is enough to work against the natural flow or rhythm of the conversation.

    I think that if you are honest with yourself and begin thinking about your conversation with your horse like this, you’ll notice places where you’re not being as consistent as you would like. Your leg aids. Randomly going between squeezing to stay on and squeezing because it’s now an aid. Your seat; moving between digging, shoving, and the occasional half halt.

    Riders have a habit of ‘butting in’ randomly in the ongoing conversation between them and their horses. The the two most common places this happens is with the aids that form the natural physical connection between them.

    Get Clear on Your Connection & Your Aids

    You can always refine your aids. There are the basics, such as your position, your posture, and using the actual aids themselves, you get to play with the next level of this connection. The timing element. However, you can only begin to do all of this when you wake up to what you are currently ‘saying’ in the saddle, right now.

    Timing is the place that you can really take the conversation to a new level between you and your horse. Using your existing connection and timing how you communicate with it.

    However, it all starts with taking a good hard, honest look at what is currently happening with your seat and legs while you ride. Then mindfully beginning to change how you are using your connection to help enhance the overall conversation.

    Happy Riding
    Lorna

    Additional Resources to Help

  • Developing Your Seat in the Canter

    Developing Your Seat in the Canter

    [fusebox_track_player url=”https://dts.podtrac.com/redirect.mp3/pdcn.co/e/traffic.libsyn.com/dailystridespodcast/1139-Developing-Your-Seat-in-the-Canter.mp3″ title=”Developing Your Seat in the Canter” social_linkedin=”true” social_pinterest=”true” social_email=”true” ]

    The canter can be confusing for many riders. Especially what to do with your seat in the canter. You’re told to ride the horse forward with your seat. But you’re then told to be ‘quiet’ with your seat… So which is it? And how can you begin to develop a more effective seat in the canter?

    It all begins with knowing where you are right now. I feel that there are a few things that decide your success in canter with your horse. How much digging you’re doing is one of them. And how much shoulder action is happening is another.

    1. Start with Carrying Yourself

    I want you to think about a clothes hanger with a dress or something long hanging on it. When the wind blows, the dress is moved by the wind, however, the hanger ensures that the dress doesn’t blow away.

    Now, imagine your shoulders are like a clothes hanger. Your body is the garment hanging on the hanger. And your horse is the wind. The wind should be able to move the garment; your horse should be able to move your seat.

    Your horse’s movement will move your seat, but because you are carrying yourself, you won’t be ‘blown away’ by the horse. When you carry yourself, it requires you to use your core strength in order to maintain your own balance. This allows your horse to do what you have asked; canter.

    I think that canter is the gait that separates ‘fit’ riders from ‘unfit’ riders. It is definitely more difficult to fake strength and suppleness in the canter, hence a lot of riders having trouble with their seat to begin with in the gait. In order to really begin developing your seat, you need to first take responsibility for carrying your own body.

    Think about creating space between the bottom of your ribcage and the top of your hips. Carrying your upper body allows your lower body to move with your horse. It allows the ‘wind’ to ‘move the garment’…

    2. Allow Your Horse To ‘Lead You’ in the Canter

    The basics are something we should revisit over and over again in our riding. And yet, so many riders have resistance to this.

    The canter is a great place to get back to the basics in order to actually move forward and create momentum in your progress.

    Following and allowing are things I speak a lot about when working with riders. In order to really begin developing your seat in the canter, you need to first be able to ‘follow’ your horse. This simply means being supple enough through your body to have your horse ‘move’ it. As your horse moves your body, or more specifically your seat, will then follow him. Not shove him or push him, but simply follow his movement.

    Start in the walk. Slip your feet out of your stirrups and allow your horse to move your seat as you walk along. Notice how ‘carrying yourself’ is essential for this to happen.

    From here, you can begin doing the same in the trot. Again, without the stirrups. Before building up to the canter. Notice how you are not shoving, pushing, forcing, digging in or anything else. You are simply following your horse’s movement. You are letting the horse move your seat.

    3. Begin Refining Your Seat

    Once you can follow, you can then begin to look at having more influence using your seat in the saddle. I recommend starting with the half halt. A huge part of the half-halt is ‘allowing’. This is often overlooked or forgotten by so many riders.

    You ask the question, using the half halt and then you ‘allow’ your horse to answer, in this case through your seat.

    You will probably find that you need to ask quite a few times initially in order to get a response.  However, it is important to give your horse the space to respond each time. Ask and allow. Then repeat. Until you get the desired result.

    Yes, you may have to ask differently if your horse is not understanding or hearing the question. However, once you have found the ‘point’ where he hears you, this is where you can really now begin to shift your focus.

    Developing Your Seat in the Canter

    Think back to when you first began riding. I can bet that your aids then look a lot different to your aids now. When you begin using your seat initially in the canter, it will also be a little different from what you actually want it to be months and years from now.

    However, there has to be a ‘beginning point’. A place where you can start. And, once you have learned to follow with your seat, this is where I suggest you can begin focusing your attention on developing your seat in the canter.

    It is also important to remember what goes on ‘under’ your seat. Your horse’s back is the connection between the back end and the front end of his body. If you find yourself at any point struggling with forwardness or contact, I would suggest turning your attention back to ‘carrying yourself’ and following. This will almost always allow the energy to flow through.

    Canter is a wonderful gait. It does not have to be difficult or hard. And often, it only requires a willingness to ‘go backward’ a little in order to then leap forwards.

    Happy Riding
    Lorna

    Additional Resources to Help with This Topic

  • Developing Your Seat in the Canter

    Developing Your Seat in the Canter

    Developing Your Seat in the Canter

    The canter can be confusing for many riders. Especially what to do with your seat in the canter. You’re told to ride the horse forward with your seat. But you’re then told to be ‘quiet’ with your seat… So which is it? And how can you begin to develop a more effective seat in the canter?

    It all begins with knowing where you are right now. I feel that there are a few things that decide your success in canter with your horse. How much digging you’re doing is one of them. And how much shoulder action is happening is another.

    1. Start with Carrying Yourself

    I want you to think about a clothes hanger with a dress or something long hanging on it. When the wind blows, the dress is moved by the wind, however, the hanger ensures that the dress doesn’t blow away.

    Now, imagine your shoulders are like a clothes hanger. Your body is the garment hanging on the hanger. And your horse is the wind. The wind should be able to move the garment; your horse should be able to move your seat.

    Your horse’s movement will move your seat, but because you are carrying yourself, you won’t be ‘blown away’ by the horse. When you carry yourself, it requires you to use your core strength in order to maintain your own balance. This allows your horse to do what you have asked; canter.

    I think that canter is the gait that separates ‘fit’ riders from ‘unfit’ riders. It is definitely more difficult to fake strength and suppleness in the canter, hence a lot of riders having trouble with their seat to begin with in the gait. In order to really begin developing your seat, you need to first take responsibility for carrying your own body.

    Think about creating space between the bottom of your ribcage and the top of your hips. Carrying your upper body allows your lower body to move with your horse. It allows the ‘wind’ to ‘move the garment’…

    2. Allow Your Horse To ‘Lead You’ in the Canter

    The basics are something we should revisit over and over again in our riding. And yet, so many riders have resistance to this.

    The canter is a great place to get back to the basics in order to actually move forward and create momentum in your progress.

    Following and allowing are things I speak a lot about when working with riders. In order to really begin developing your seat in the canter, you need to first be able to ‘follow’ your horse. This simply means being supple enough through your body to have your horse ‘move’ it. As your horse moves your body, or more specifically your seat, will then follow him. Not shove him or push him, but simply follow his movement.

    Start in the walk. Slip your feet out of your stirrups and allow your horse to move your seat as you walk along. Notice how ‘carrying yourself’ is essential for this to happen.

    From here, you can begin doing the same in the trot. Again, without the stirrups. Before building up to the canter. Notice how you are not shoving, pushing, forcing, digging in or anything else. You are simply following your horse’s movement. You are letting the horse move your seat.

    3. Begin Refining Your Seat

    Once you can follow, you can then begin to look at having more influence using your seat in the saddle. I recommend starting with the half halt. A huge part of the half-halt is ‘allowing’. This is often overlooked or forgotten by so many riders.

    You ask the question, using the half halt and then you ‘allow’ your horse to answer, in this case through your seat.

    You will probably find that you need to ask quite a few times initially in order to get a response.  However, it is important to give your horse the space to respond each time. Ask and allow. Then repeat. Until you get the desired result.

    Yes, you may have to ask differently if your horse is not understanding or hearing the question. However, once you have found the ‘point’ where he hears you, this is where you can really now begin to shift your focus.

    Developing Your Seat in the Canter

    Think back to when you first began riding. I can bet that your aids then look a lot different to your aids now. When you begin using your seat initially in the canter, it will also be a little different from what you actually want it to be months and years from now.

    However, there has to be a ‘beginning point’. A place where you can start. And, once you have learned to follow with your seat, this is where I suggest you can begin focusing your attention on developing your seat in the canter.

    It is also important to remember what goes on ‘under’ your seat. Your horse’s back is the connection between the back end and the front end of his body. If you find yourself at any point struggling with forwardness or contact, I would suggest turning your attention back to ‘carrying yourself’ and following. This will almost always allow the energy to flow through.

    Canter is a wonderful gait. It does not have to be difficult or hard. And often, it only requires a willingness to ‘go backward’ a little in order to then leap forwards.

    Happy Riding
    Lorna

    Additional Resources to Help with This Topic

  • Hokey Pokey or Swinging Legs While Riding

    Hokey Pokey or Swinging Legs While Riding

    Hokey Pokey or Swinging Legs While Riding

    What this episode is all about & how it can help you:-

    • Understand how you are sitting in the saddle might be affecting everything
    • Realise the disastrous effects this can have on your overall position
    • Focus on ‘feeling’ what your leg is doing in order to improve things
    • Work in walk, then trot and then transitions

    [smart_track_player url=”https://op3.dev/e/traffic.libsyn.com/dailystridespodcast/1071-Hokey-Pokey-or-Swinging-Legs-While-Riding.mp3″ title=”Hokey Pokey or Swinging Legs While Riding” social_linkedin=”true” social_pinterest=”true” social_email=”true” tweet_text=”Are you legs doing there own thing when you’re riding? Check out this podcast episode that will help…” hashtag=”horseriding” twitter_username=”strides_success” ]

    Be honest… Are you finding yourself doing the hokey pokey in the saddle more than you would like?  Your right leg is in.  Your right leg is out.  In out, in out, shaking all about…

    Swinging legs are a huge issue for so many riders and what makes it all the more frustrating is that as soon as you begin to ‘fix’ your legs, well they seem to lose all effectiveness as well.

    In this episode of the Daily Strides Podcast we will chat about how you can begin to ‘quiet’ your legs by making some changes that actually have very little to do with your legs themselves.

    I believe that most cases of hokey pokey legs, or swinging legs are actually a symptom of something else, rather than the root problem itself.  Fix the cause and, very often, the symptoms will magically disappear as well.

    Swinging Legs are Frustrating for All Involved…

    There are situations where we want a little daylight between your body parts and the saddle.  However your leg, particularly your lower leg (so everything below the knee) is one of those.  Having your leg literally ‘off’ the horses sides means there is no communication happening.

    It also means there is a lot of instability in the riders basic position, which usually results in the rider depending on the horse for balance. 

    Swinging legs also result in a constant chatter of irrelevant noise being fed to the horse from the riders legs, which results in the horse eventually tuning out from what the rider has to say.

    Responsiveness in horses is generally a direct reflection of the riders technique and consistency (or lack of either) in the saddle. 

    The other frustrating reality of swinging legs is that because the rider is lacking the ability to balance themselves in the saddle, things can become pretty hairy!  The potential for falls is dramatically increased, which leads to a further breakdown of confidence for both horse & rider.

    How You Are Sitting in the Saddle

    One of the most obvious and common reasons for swinging legs is due to the rider sitting incorrectly in the saddle.  Put plainly, they are not sitting on their bum!  A forked seat is when the rider is pitched forward on their crotch, which results in extremely tight and stiff hips, pelvis and thighs.

    This fork seat results in the rider looking like a ‘duck’ in the saddle.  Their bum is sticking out behind them.  Their shoulders are pinned back which results in their back having an uncomfortable and unnatural ‘over arch’ through it.  Even typing this feels rigid and stiff!  Definitely not ideal for a supple, balanced rider.

    Your swinging legs are merely a symptom of a bigger issue, which is your incorrect seat.  The irony is that most riders just focus on ‘stilling’ their floppy leg – which only serves to increase the overall stiffness & tension.

    Resist All Temptation to Grip with Your Knees

    The other issue that often accompanies swinging legs is gripping knees!  Don’t grip with your knees.  Doing so immediately shuts down your ability to stabilise and balance yourself in the saddle.

    Gripping with your knees and a closed, tight hips in the saddle are a little like the chicken and the egg.  It is often uncertain which came first, however the result is always the same – an ineffective and unbalanced rider. 

    If you are worried that you might just be gripping with your knees you can find out pretty quickly by sliding your hand between your knee and the knee roll of your saddle. If you can ‘swing’ your knee out without resistance, you don’t have to worry.

    However, if your knee feels locked on the saddle, consider that it might just be a result of how you are sitting.  Correct your seat in the saddle and try again until you don’t feel the resistance.

    Paying Attention to Your Position

    As already mentioned, one of the major downsides to swinging legs is the loss of position for the rider.  Whether the position is failing due to an incorrect seat or due to the riders lack of balance and confidence will depend on each situation.

    When your position is changed it results in less effective communication between horse and rider. 

    It also means that you have to do more every time you apply an active aid…  A good, correct position is so important to your long-term success in the saddle.

    It is worth mentioning again that your swinging legs are usually only a symptom of something else going on further up your body.  So correcting your basic position can be a simple yet effective way of beginning to gain control of your legs while riding.

    A Quick Position Check From the Ground

    A simple yet effective way of feeling how a correct position is can actually be done off of your horse.  Stand on the ground with your legs wider than hip width apart.  Pretend you are in the saddle, so bend your knees.

    Notice how it feels to remain aligned while holding this position – the head, shoulder, hip, heel line that should be present when you are in the saddle.

    Pay attention to where your seat bones are pointing.  Also pay attention to the angle between the front of your thigh and the front of your tummy.  This is the angle that needs to be open and free in order to allow your thighs to be open, and therefore your knees to be free in the saddle.

    Becoming Mindful of Your Lower Leg as You Ride

    Once you have fixed the cause of your swinging legs, you must now work on developing and strengthening your leg, particularly your lower leg.

    Focusing on a lack of daylight between your lower leg and your horses sides is always a good place to begin.  

    Checking in on yourself throughout the ride by sliding your hand between your knee and the knee rolls to see how open your knees actually are.  Tiredness and tension caused by things not going exactly to plan can cause hold habits to reappear, so it is a good idea to be aware of what is happening the further you are into your ride.

    Paying Attention to Swinging Legs during Transitions

    I am going to caution you here about thinking that the issue is solved only to realise that old habits are truly hard to change when it comes to transitions…  So often I see riders begin to master a more quiet and effective lower leg when ‘going’.  Perhaps they are trotting or walking, or even cantering.

    However as soon as a transition occurs, their leg migrates forward or backwards offering no support to either the rider themselves or the horse!

    Transitions are, in my opinion, an area which demand a lot of attention to detail from the rider.  Try to hold your leg position throughout the transition.  This is obviously with the exception of transitions that require your lower leg to move in order to signal to your horse.

    Very often it is easier to recognise and see the symptoms, those swinging legs, which will let you know that your seat has shifted or your upper body has tilted or tipped again.

    Where to Begin…

    I am going to suggest beginning in walk and correcting your position and aids in the walk.  Obviously then building on to trot and later the canter.  I also suggest, as mentioned, paying particular attention to your lower leg through transitions.

    Correcting this may seem like a bit of an uphill battle initially.  However, once you realise that your swinging legs are a symptom of something else it really does make all the difference. 

    Identifying that root cause is vitally important and changing that, before you try anything else, is the easiest and least frustrating way to remedy those hokey pokey legs.

    Happy Riding

    Lorna

    I am hosting a free live online training on “The 6 Basics to Focus On in Your Riding” and I would love for you to join me there…  If you’re interested, you can register for your seat by CLICKING HERE

    CLICK HERE to save your seat in the free live online training

    Links mentioned in the episode:-