Tag: seat

  • Learning to Stop Driving with Your Seat

    Learning to Stop Driving with Your Seat

    Do you often hear the term ‘electric backside’ being used to describe you when you ride?  Perhaps you have found that usually docile and ‘laid back’ horses become a little more, well, lively when you are in their saddle?  Have you ever considered that perhaps you don’t realise just how much you are communicating to your horse through your seat…

    When I first heard the term electric backside I had visions of lightning bolts shooting out of a riders backside, through the saddle and straight into the horse!  Now as strange as this sounds, the reality of having an ‘overactive seat’ has a very similar effect on how your horse behaves while being ridden.

    [smart_track_player url=”https://op3.dev/e/traffic.libsyn.com/dailystridespodcast/686-Learning-to-Stop-Driving-with-Your-Seat.mp3″ title=”Learning to Stop Driving with Your Seat in the Saddle” social_linkedin=”true” social_pinterest=”true” social_email=”true” tweet_text=”Struggling to ‘quiet’ your seat in the saddle? This will help…” hashtag=”equestrian #horseriding” twitter_username=”strides_success” ]

    When we learn to ride, we very quickly begin to notice that how we sit and move influences the horse and how he goes. This awareness is one of the most important parts of developing ‘feel’ and becoming a good rider. however merely knowing this is not enough. Controlling this important aid in the saddle is, for most riders, a little more difficult to master.

    Being able to influence your horse using your seat is one thing, but knowing how to shift between ‘stop, go and neutral’ and all the important subtleties in between, is quite another.

    For many riders this is where the problems begin to arise.  Riders discover that they are ‘over sharing’ when it comes to communicating with their seat aids.  The result is often that the rider is driving with their seat all the time.

    Before we go any further, it is important to recognise that there are certain situations and scenarios where, yes indeed, you will have to drive your horse forward with your seat.However we are speaking here about riders who have incorporated the habit of scrubbing with their seat, like they are trying to polish the saddle or rub a hole in their horses back with their backside, as the status quo.  It becomes their modus operandi or ‘go to’ method for riding their horse.

    This can result in a few things happening. Usually their horse becomes increasingly hot and lively, or their horse begins to ignore their aids completely.

    After all it’s not much fun being shouted at all the time, and constant driving with your seat is the equivalent of roaring at your horse – the whole ride!

    Think of your seat as being similar to the gears of a car.  You can transition up and down gears, however there is also the all important neutral. And to begin really seeing results in riding you need to be able to do all three of the above.

    Knowing how to disengage your seat or, in the case of the car gears, find neutral is vitally important to becoming more quiet and subtle in how you communicate with your horse.

    In my experience, the canter is very often the easiest place to being noticing if you are indeed being a little over enthusiastic with your seat when in the saddle. When you are really driving your horse with your seat in the canter, the horse may begin to hollow his back out from underneath you. This can often be felt rather than seen when in the saddle. However, unfortunately the tendency is there to only focus on what you see in front of you –  your horse bracing against your hand.  But if this is looked at from the ground, it quickly becomes very obvious that the horse is bracing his whole body away from the rider.

    Constant driving with the seat leads to an often epic battle between horse and rider.  Your horse does not have to be galloping or even cantering for this to happen.  It occurs in all gaits, however (as mentioned above) it is usually easiest to spot in the canter.  The overuse of the seat, hips and pelvis in the canter often causes the riders shoulders to begin to ‘swing’ in the canter as well.

    Another way this can show up is when the horse begins to hollow out from underneath the rider through the actual trot to canter transition itself.  We often hear about ‘scooping’ the horse into canter using the inside seat bone.  If you are prone to being a little heavy-handed with your seat to begin with, that same ‘scooping’ can quickly become uncomfortable for you horse.  The result is often that the horse will strike on the incorrect lead.

    However, perhaps the most obvious, is the horse who starts out quite relaxed in the canter, however due to the riders continuous driving, soon becomes tense and rushed.  What began as a good quality canter rather quickly turns into something resembling the final furlong at Aintree!
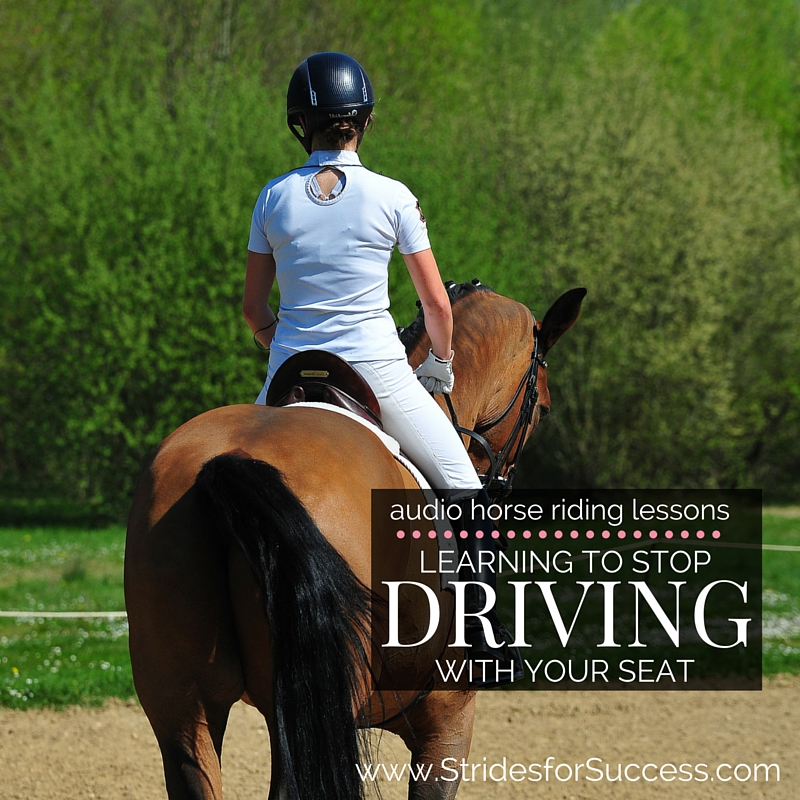
    Learning to Stop Driving with Your Seat

    Now, we know that we cannot effectively communicate and ride our horses if we just sit in the saddle completely stationary.  We realise that we have to move with our horse when in the saddle.

    But moving with the energy and driving the energy are two very different things.

    When we learn to canter, we are often told that we must ‘roll’ our hips with the motion of the horse. When I am explaining this in the arena I will often use my wrist and hand to demonstrate the movement.  The normal canter will be, from the elbow, my lower arm horizontal to the ground moving up and back, followed by forward and down in an almost circular rotation.  As my arm completes the ‘down and forward’ part of the circle, my wrist will flex slightly down, causing the back of my hand to become a little more upright. Then as my arm begins to lift up, in order to come back closer to my body, my wrist will flex up, allowing my hand to become more horizontal again.

    When a person drives with their seat, the circuit is the same, however as my arm is moving forward and down, the heel of my hand is pushing forward as well.  This causes the back of my hand to strain at an almost 90 angle to my wrist. Then as my arm raises up to come back, the action is no longer fluid as my wrist relaxes again.

    I mentioned earlier how an overactive seat is a little like shouting at your horse all the time.  Good riding is an holistic practice; all aids are involved when communicating with your horse.  In order for your horse to hear and understand all the different aids, they must be subtle.

    So what can you do if you in fact have lightning bolts shooting from your backside when you are in the saddle. Well the first thing is you need to start learning to follow.  Now you are probably saying, “Yes, I do follow – I just follow awfully well!”

    If this is the case I would hazard a guess that you are doing less following and more leading.  I suggest going back a few steps initially with your riding and focus on allowing your horse to move.  Let any movement happening in your seat to be guided by your horse.

    Start with walk initially and think about doing as little as possible, while still allowing everything to happen underneath you.  This is neutral.  When you can find neutral and begin getting used to how this feels, you can then begin working on shifting to first gear and so on.

    It is important to keep in mind that neutral and ‘heavy’ are two very different things.  Heavy does not ‘allow’, it rather blocks the flow of energy underneath you.  Neutral is being carried along, understanding that you still have the responsibility of carrying your own body.

    Unfortunately a lot of riders, once they commit to becoming more ‘quiet’ with their seat, begin slouching through their upper body.  Doing this will definitely cause less movement with your seat, but it will also make things uncomfortable for your horse and cause you to become even less effective in the saddle!

    Rather think of elongating or lifting your upper body off of your hips.  This does not mean that you ride with your shoulders around your ears, but rather carrying your ribcage, so to lengthen the space between it and your pelvis.   Doing this will result in your hips and seat being able to move with your horse, in neutral.  From neutral, you can begin experimenting with how you can use your seat to encourage your horse to move forwards.

    From here, you can begin to work on this ‘allowing’ in both trot and canter. Keep in mind that doing nothing is one of the most difficult things to do on a horse, but in order to break that ‘driving’ habit, it is often the very thing you need to learn!

    Your seat is possibly the most important and effective tool you have when riding your horse, however cultivating that all important ‘feel‘ will take time.  Learning the difference between enough and too much is important – and very often you have to go right back to basics in order to do so.

    Happy Riding
    Lorna

    If you are interested in taming your seat in the saddle, there are a few resources I have that may help you.  Firstly, you can join the FREE 30 Day Rider Fitness Challenge.  Over the course of the 30 days, you will strengthen your core, which will allow you better control over your body in the saddle.

    You can also join Daily Strides Premium, where you will find a whole ‘collection’ of audio horse riding lessons on the seat aids, as well as lots of other collections to help you with your riding.  All the lessons are available for you immediately when you join, and it’s as simple as downloading them to your phone, popping your phone in your pocket and off you go!  A riding instructor with you in the arena.   You can find out more when you visit www.StridesforSuccess.com/join/
    [wp-tiles post_type=”post” orderby=”date” order=”DESC” grids=”Simple”]
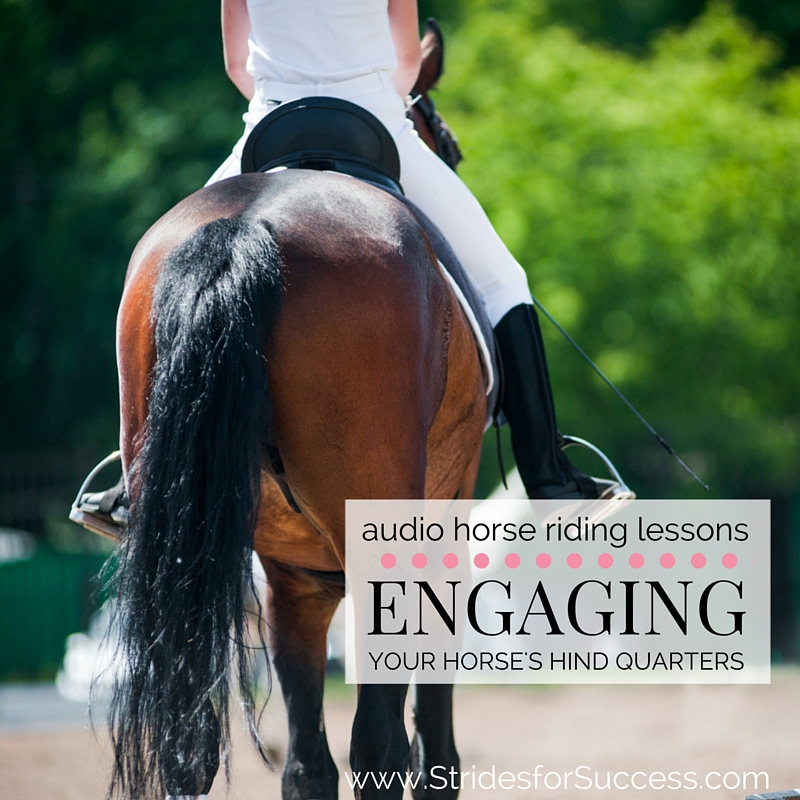
  • Engaging Your Horse’s Hind Quarters

    Engaging Your Horse’s Hind Quarters

    Have you ever looked at photos or videos of your horse and it looks like his hind quarters are, literally, being left behind? They are dragging out behind him, rather than working underneath him. Or perhaps you have gotten the feeling that when you ask for ‘more’ when in the saddle, there is just no way he can provide ‘more’ without speeding up and becoming long…

    Knowing how to activate and then engaging your horse’s hind quarters is vital to his long-term training and development. However for many riders, it can be a little daunting trying to figure out if he is truly in ‘rear wheel drive’ rather than ‘front wheel drive’ while they are working or schooling their horse.

    [smart_track_player url=”https://op3.dev/e/traffic.libsyn.com/dailystridespodcast/631-Engaging-the-Hind-Quarters.mp3″ title=”Engaging Your Horses Hind Quarters” social_linkedin=”true” social_pinterest=”true” social_email=”true” tweet_text=”Struggling to get the back end working? Engaging the hind quarters – step by step..” hashtag=”equestrian #dailystrides #horseriding” twitter_username=”strides_success” ]

    However taking the time to begin asking your horse to work correctly from back to front will be a key factor in his overall development and training and also, the deciding factor between him becoming stronger when being ridden, or just remaining where he is, effectively capping his progress.

    So, first and foremost when we talk about engaging the hind quarters, we are speaking about activating them or getting them to work while we are riding our horse and then connecting the energy produced to the front of his body. Engaged in this sense means to bind or interlock, so engaging the hind quarters is literally interlocking it with the rest of his body. Like I mentioned earlier, your horse being in rear wheel drive, means that his all the time pushing from behind, using his hind quarters. This is far more favourable when being ridden than pulling from the front with his front legs and shoulders.

    Before we go any further it is also worth mentioning that your horse will need time to develop the necessary strength to truly activate and then engage his hindquarters when being ridden. It is up to you, the rider, to make sure you do not push him beyond what he is capable of for his level of training or schooling. Slow and steady wins the race when working with horses…

    Pushing from behind requires your horse to be moving forward in the first place. Many riders seem to think that their horse merely moving is going forward, but in truth, going forward can more be described as your horse moving forward with a sense of purpose. They must have a little ‘pep in their step’ so to speak, rather than ambling along, hooves shuffling and dragging on the ground, each step looking like a momentous task

    Responsiveness is part of the key to having your horse moving forward. A simple ‘You ask; he responds’ system in place which both you and your horse understand that there is a mutual responsibility from all parties if it is to work effectively. You are responsible for making sure that you are clear in what you ask. Your aids and also where you plan on going from that point are well thought out and executed. Your horse must then become responsible for adhering to your aids and directions in a willing and cooperative way.

    If either side of the team, horse and rider, reneges on their individual responsibilities the result is a lack of forward movement, which will result in an inability to engage the hind quarters

    Once your horse is moving forward, it is then up to you to allow that energy being created from behind to connect with the front of the horse, thus actually ‘engaging’ the hind quarters. There are a few different aspects to allowing this to happen, but again, if any are missing it will result in the hind quarters being ‘disengaged’ and left to their own devices, separate to the rest of the horse’s body working with the forward movement.

    Engaging Your Horse's Hind Quarters

    Think of energy as being a little like water or electricity. It will generally always try to find the shortest and easiest route. If you allow your horse to become crooked through his body, the energy will not flow where you want it and rather ‘shoot out the side door’. An example of this is on a circle, the hind quarters being allowed to swing out wide of the tracks the front feet have created. When this happens the energy, rather than pushing forward from behind and connecting to the front of the horse, will be lost out the side door of the horse, resulting in the horse going into ‘front wheel drive’ again.

    When riding you should think of your aids, particularly seat, legs and arms, as being the banks of a river or canal. They will channel the water / energy that is being created in the hind quarters where you want it to go. This will continue to keep the energy moving forward and connecting, from back to front

    This is why straightness is so important when training a horse and rider. Many times we focus on how straight the horse is, but ignore the obvious twisting or tilting of the rider’s body. Any crookedness in either horse or rider will again result in a disengagement of the hind quarters, which will see the energy dissipate and eventually be lost.

    Another important factor to consider when thinking about this engaging of the back to the front of your horse’s body is the idea of ‘allowing’ that energy to flow underneath you through your horse’s back. Some riders really work hard at activating the hind quarters and getting them to work, but then due to a heaviness or tightness in their body, block this energy from connecting through or engaging with the front of the horse

    When we learn to ride initially, we are often told to ‘sit up’, however we are rarely told why; other than the whole falling off aspect of collapsing through your body. But let’s assume you have indeed mastered staying on, however you are still finding it difficult to truly connect the hind quarters to the front end of the horse (through your contact), it may just be because you are blocking this.

    Just as water can be dammed up, blocked or diverted, so too can energy. Sitting heavy in the saddle is the most common culprit here, but so too are shutting things down with your thighs. They can have a vice like effect on your horse if there is excess tension in your body. Also, leaning forward over your horse’s shoulders or withers will be highly effective in shutting down any engagement of the hind quarters.

    Make sure that when you are riding, you are all the time encouraging your horse to use his back by being ‘light’ in the saddle. This is often as simple as sitting up through your rib cage, carrying your upper torso. This simple change is often enough to allow your pelvis to begin moving with the horse, which will in turn allow your horse to use his back.

    Once you have managed to get your horse moving forward from his hind quarters or from behind and then are allowing that energy to flow underneath or through you in the saddle, the final piece of the puzzle is ready to happen…

    To truly engage means to connect, bind or interlock. In the case of the hind quarters, we want to connect them to the rest of the horse like a gear cog. This allows you to truly direct the energy being created there. We do this through our contact with the horse

    The unfortunate part of this is that most people look at the contact part as Step 1, rather than the final piece of the puzzle, or in this case for simplicity sake, Step 3. Contact is just like the responsiveness, there is a responsibility on both horse and rider to fulfil their end of the contract in order for it to work correctly and be effective.

    If either horse or rider try to force it, it will be lost. Similarly, if either side try to evade it, it will be lost. Many times we blame the horse for evading the contact, but I see many riders who also ‘evade’ through reins that are too loose, or fingers that are wide open and look better suited to playing a piano rather than holding their reins.

    Only when all three steps are in place can your horse truly engage his hind quarters and can you then begin to feel the difference between rear wheel drive and front wheel drive. The difference? Night and day! It feels like there is always energy there to perform what is asked. It feels like your horse moving forward with purpose. It looks so much more pleasing to the eye, as both horse and rider are in true agreement with each other, both maintaining responsibility for their individual part in keeping things together.

    There are many exercises you can do to begin asking your horse to use his hind quarters but none will really be successful until you truly understand what it means to engage and connect the back to the front.

    Happy Riding
    Lorna

    This is the first of 5 audio programs on this topic. In the rest of the programs you can listen to while riding for step by step instructions on how to effectively begin engaging your horse’s hind quarters. The exercises are suitable for all levels of riders and can be worked into your usual schooling routine with your horse.

    For more information on how to download the rest of the lessons and gain access to over 600 audio horse riding programs on a whole range of different topics, visit https://stridesforsuccess.com/join/

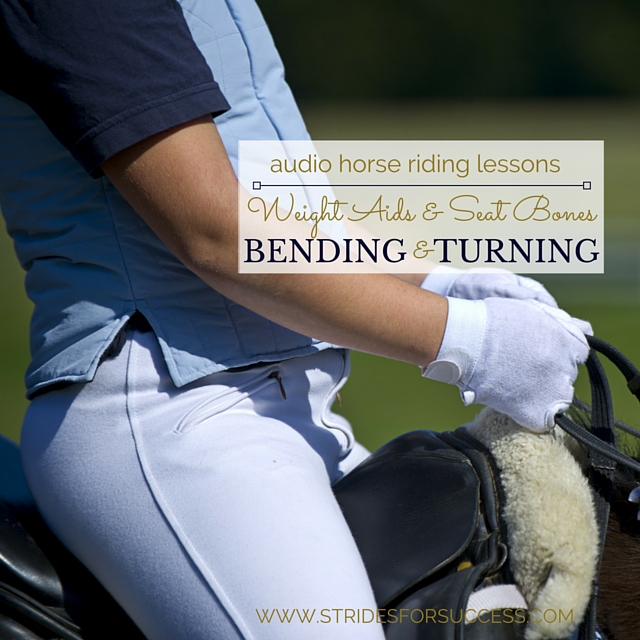
  • Weight Aids & Seat Bones for Turning & Bending

    Weight Aids & Seat Bones for Turning & Bending

    The bend is approaching and you begin preparing both you and your horse to ride straight and accurately through the turn. However, as you ‘shift’ your seat bones into ‘position’ your horse begins, well, almost side stepping… The further you get through the turn, the further your horse is from the path you had planned; in fact, he has derailed altogether from the ideal ‘train tracks’ you had intended to stay on as you rounded the bend.

    As riders we learn early on about how important our weight distribution is to our horses way of going. We learn about positioning our seat bones, so we can indicate to our horses what exactly the next movement should be. We also learn that our weight aids are fundamental to all aspects of successful communication with our horses in the saddle.

    [smart_track_player url=”https://op3.dev/e/traffic.libsyn.com/dailystridespodcast/591-Weight-Aids-and-Seat-Bones-in-Relation-to-Turning.mp3″ title=”Weight Aids and Seat Bones for Bending and Turning” social_linkedin=”true” social_pinterest=”true” social_email=”true” tweet_text=”Weight Aids and Seat Bones for Bending and Turning Your Horse” hashtag=”Podcast #equestrian #horse” twitter_username=”strides_success” ]

    What we don’t learn is awareness of how the other parts of our body directly or indirectly affect how and where our weight aids are applied with our horse. There is also not a lot of time spent on figuring out how loud or how quiet we can communicate with our horses through our weight aids. In fact, most riders seem to think that a ‘one size fits all’ approach is sufficient regardless of the circumstances, situation or horse involved.

    Learning to correctly feel and then master your weight aids in the saddle is key to developing good feel as a rider. Those subtle shifts and movements, which happen when you direct your muscles to move, rather than your actual weight or bones themselves. This is very much apparent when turning your horse and that is what I want to focus on today.

    So let’s begin with focusing on how your carry yourself in the saddle. Many riders make the mistake of going a little too overboard when told to ‘relax’ through their body.

    Relaxation is key to good riding, however the level of relaxation is also important to consider; particularly when it comes to how it affects your weight aids and seat bones in the saddle when riding

    Ideally you want your muscles to ‘carry’ you in the saddle, enough that your hips and seat are free to move with your horse and follow the motion. Following when riding is a little like following when dancing. The dancer that is following must remain in control of their body, walking that fine line between too relaxed or ‘slack’ and too tense or ‘rigid’. All the while they are looking for cues from their partner and then taking the responsibility on themselves to respond to those cues in the agreed manner.

    Riding is the same. Following does not mean you slouch in the saddle, looking like you have had one too many before you mounted. It rather means you carry your upper body, so your hips and seat are then willing and able to follow the horse’s motion as he crosses the ground.

    Bending and Turning Your Horse Using Your Weight Aids and Seat Bones

    Think about it, your hips and seat bones can not possibly be free to perform a full range of motions if your upper body is heavy and slouching on top of it. Many riders mistake this for ‘shoulders back’, which is unfortunate as this only serves to increase the excess tension and therefore rigidness in the body, rather than simply carrying yourself, through your ribcage and positioning your body in the best possible place from which to begin asking your horse to turn using your weight aids.

    Once you are sure that you are indeed carrying yourself and, as a result, correctly following your horse wiht your seat, you can then begin looking at how subtle changes in different areas of your body will affect your weight aids and therefore what you communicate to your horse through your seat.

    So to begin with, let’s focus on the half halt.  One of the reasons we apply the half halt is to bring your horse’s attention back to you and let him know something is coming up.

    In fact, you can almost think of your half halt as being a big flashing arrow, directing your horse’s focus to your seat so he can begin to get further directions on what to do next

    Not using your half halt will probably result in your horse’s attention being elsewhere and therefore, any subtle movements with your seat to communicate with your horse will have a good chance of being ignored.

    That being said, it is also worth noting that applying the half halt and then following it up with an incorrect, overly exaggerated or heavy use of the seat and weight aids is just as ineffective as not using the half halt at all.  Think of your half halt as the opening part of the sentence which will then, in turn, lead up to the actual question you wish to ask your horse.   Become clear on what you want to ask, before you draw your horse’s attention to your seat to begin with!

    Once you have his attention, think about what you want of your horse as he rounds the bend.  Ideally, your horse’s spine should replicate the arc of the bend or circle.

    Your horse’s spine will stay on the arc all the way through, from his poll or ears to his tail or dock.  Similarly, your spine will too stay centered over your horses, not leaning one way or the other, not twisting and not collapsing to either the inside or outside.

    His hips will travel along parallel either side along this arc, however his inside hip will come slightly forward or ahead of his outside hip.  Your hips or seat bones will be in this same position.  Then look at the shoulders; again, they should remain parallel to the central arc or track as he moves along (like train tracks), however the outside shoulder will have to move a little more forward in order to do so and, therefore, so must your shoulders.

    It seems like an awful lot to remember, and when starting out, it is!  I have found it easier for some riders to rather remember where their legs should be through the turn.  Because your legs are connected to your hips, by moving them into the desired position, your seat bones will generally follow suit and automatically also ‘slot’ into position.  However, as you become used to the inside and outside being dictated by your horse, regardless of where you are in the arena, you can begin rather making the subtle shifts with your seat bones, and then allowing your legs to follow suit.

    So back to how we can use our muscles, either for good or bad, to influence our weight in the saddle.  Find a hard chair or stool and sit down with a hand under each of your seat bones.  Now, begin by moving your shoulders, the right one forwards the left one back and then vice versa.  Notice how a very small movement of only an inch or so, will change how the pressure being exerted on your hands from your seat bones feels.  Similarly, think about ‘weighting’ one of your seat bones.  Many riders will literally ‘bear down’ on that particular seat bone, shifting their upper body to do so.  However, feel that when this happens, your seat bones actually begin ‘sliding’ towards the opposite side.

    Now, rather think of ‘weighting’ that seat body through a combination of elongating the muscles on that side of your torso, and sending a tiny bit more weight or pressure to the heel of that leg.  Notice the subtle change in the pressure being applied on your hand.  It only takes small but precise adjustments with your muscles to ‘weight’ the seat bone.  The more you can learn to control your muscles, the clearer your communication will become with your horse.

    Very often riders use their weight aids in the wrong way; namely leaning with the upper body while will result in their seat shooting to the outside

    The result is that your horse will move completely differently to how you had planned, because he is trying to remain balanced and, literally, stay underneath you.  If you find this happening a lot, go back to making sure you are symmetrical, balanced and straight in the saddle and, once you are sure of that , begin insisting on it from your horse also. Always think about your own body and what you are communicating with your horse while riding  through the corner.

    I really think that being a little ‘picky’ or obsessive about riding in the correct position will help you to make sure that your body is in the best possible place to apply the correct aids for any given movement or direction.  It will take concentration and consistent effort on your part initially, but as your ‘feel’ increases, you will find that merely thinking about it will result in your body shifting slightly in the saddle – and the more consistent you are with always riding in the correct way, the more effective your horse will be at reading the small, subtle changes in your weight and position.

    Happy Riding

    Lorna

    I have written another blog post on applying your weight aids HERE >>

    Get to know your core muscles better which will give you more control over them by joining the FREE 30 Day Rider Fitness Challenge…

  • Correctly Applying Your Weight Aids

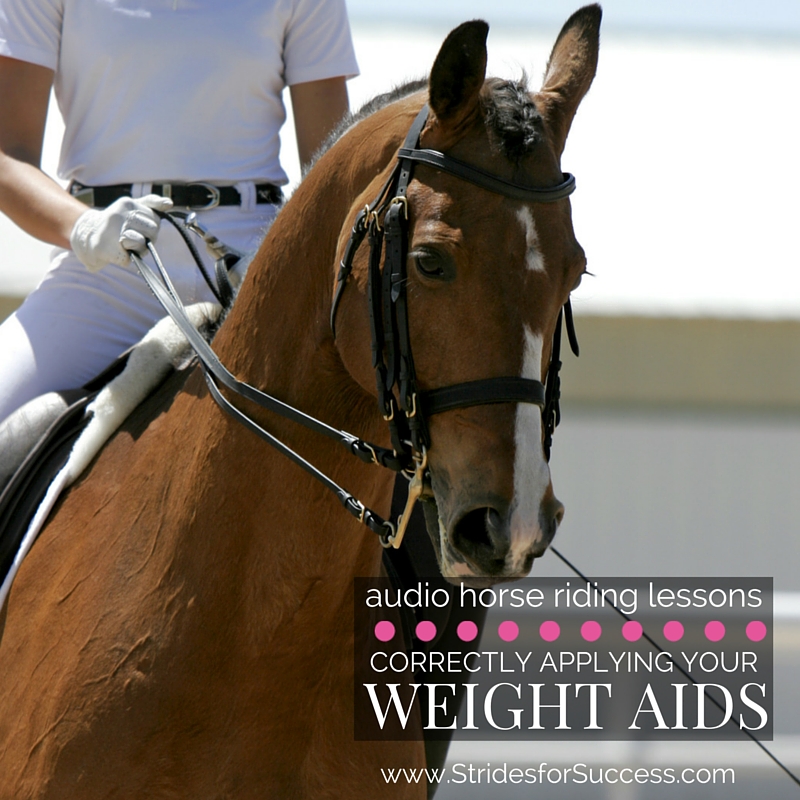
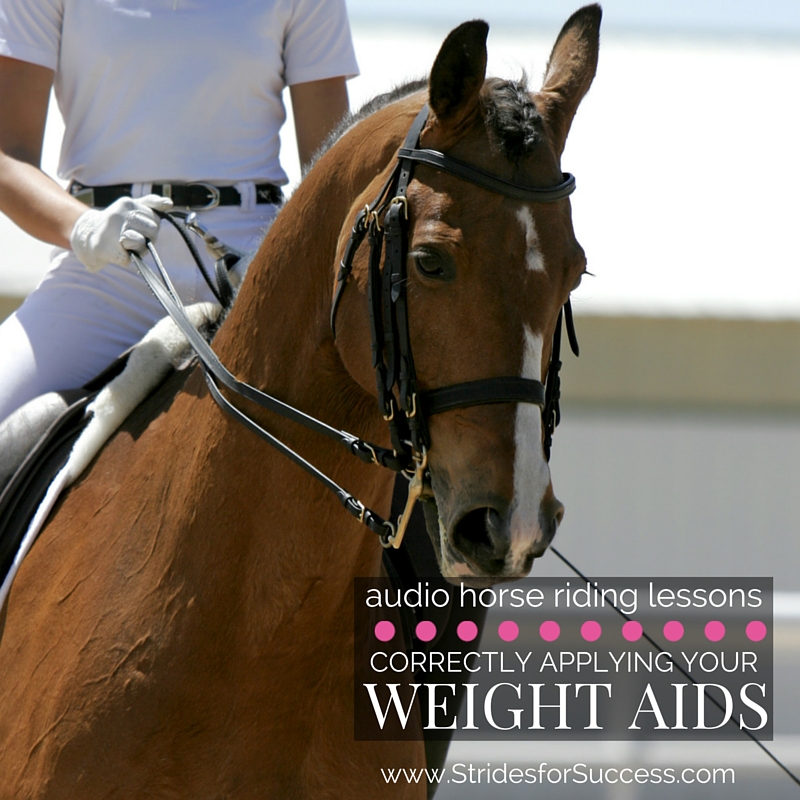
    Correctly Applying Your Weight Aids

    When we begin riding, we are generally told about this almost magical ability that we have to communicate with our horse, known as the weight aids.   However, it soon becomes apparent that we have to master many other aspects of riding before we can hope to use our weight to communicate with our horse…

    Unfortunately for many of us, this takes too much time to achieve, so instead we begin happily throwing our weight around in the saddle and then getting upset when our horse does something completely different to what we ‘asked’.

    [smart_track_player url=”https://op3.dev/e/traffic.libsyn.com/dailystridespodcast/516-Learning-to-Correctly-Apply-Your-Weight-Aids.mp3 Feedback” title=”Learning to Correctly Apply Your Weight Aids” social_linkedin=”true” social_pinterest=”true” social_email=”true” tweet_text=”Learning to Correctly Apply Your Weight Aids in the Saddle” hashtag=”horseriding #equestrian” twitter_username=”strides_success” ]

    So first and foremost, what are your weight aids?  The term ‘weight aids’ refers to where and how you are using your core to distribute your weight in the saddle.  Your weight aids are controlled with subtle movements which shift the pressure and weight of the seat bones in a way that communicates a certain instruction to your horse.

    You use your weight aids in all aspects of riding, from slowing down or stopping, to asking for more energy or moving forward.  Weight aids are an important part of transitions, bending, turning and even just riding a straight line.  Learning how to control your weight aid is a vital and essential part of good riding.

    It is only when we learn to develop a truly independent seat that those aids really can become useful to both us and our horse

    An independent seat is when you can move your legs or other parts of your body without affecting your overall balance & position in the saddle.  An independent seat is also something that is really earned by spending consistent time in the saddle, riding correctly and practicing correct movements and sound techniques.   A rider also needs a certain level of fitness and body awareness, so as to be able to use their muscles, and therefore shift their weight, as desired or required.

    If we do not first cultivate that independent seat, our weight aids can often work against us and our horse.  They can also when applied incorrectly, whether due to lack of knowledge or lack of control, contradict the other aids being applied which leads to our horse not performing as we think he should.

    Applying Your Weight Aids

    Many riders think that they are applying their weight aids correctly, however something as simple as not sitting straight in the saddle is enough to change the application and meaning of a particular movement.  Often riders will sit to one side, or favour one side of their body, when in the saddle and the problem then begins to compound when they begin shifting their weight around, giving a total different feeling to their horse than what the rider thinks they are asking

    Another way that the weight aids can begin to work against the rider if not correctly understood and applied is that often riders get a little ‘over enthusiastic’ in the application of the aid.  So rather than that subtle shift we mentioned in the beginning, they either begin ‘shoving’ or ‘pushing’ their horse, or they begin leaning…  Never Lean!  We can also incorrectly apply the weight aids, particularly when turning, by lifting our outside seatbone off the saddle…

    Keep in mind that both seat bones must remain seated if you want to give a correct and easily understood weight aid!

    The final issue I want to warn you of before we carry on is incorrect timing of the aid.  As with all things riding related, the weight aid being given will only be as good as the preparation leading up to it and the timing of it.  No matter how well-balanced, or finely tuned your seat may be, if you apply the aid at a moment when your horse physically cannot respond to it, the aid will never get anywhere near the result you desire.

    It is when you can combine a true independent seat with correctly applied subtle weight aids & a perfect sense of timing you will begin to master what we call ‘feel’ in the saddle

    To get an idea of just how subtle your weight aids and the ways you affect them are, I suggest beginning off your horse.  Find a firm surface you can sit on, and gently put a hand under each of your seat bones.  Feel how just applying a little more tension to the different muscles in your core, affects the distribution of the weight applied by your seat bones on your hands.

    Move your body as you would when in the saddle performing a half halt; feel how your seat bones would ‘block’ a river of energy that would flow underneath you through your horse’s back when you are in the saddle.  However, then begin to see how, my making slight adjustments,  you can soften that aid or smooth it out.

    Once you can begin feeling these subtle differences, try it with how you would move when you ask your horse to move forward, whether it be to transition up a gait, or within a gait.  Again, imagine the river of energy flowing underneath you and how, when applied correctly, your weight aids will ‘open’ and allow that energy to flow a little more.

    Of course, when you apply your weight aids you are not necessarily ‘blocking’ or ‘allowing’, just rather suggesting this to your horse, who with time, will understand and make adjustments as required

    Once you have a good feeling and understanding of the ’cause and effect’ of your body movements out of the saddle, then you can begin experimenting in the saddle.  Unfortunately however, many riders will experience that their horse is not all that attentive to their weight aids initially.  This is usually due to the fact that the rider has been guilty of literally ‘throwing their weight about’ in the saddle!

    However, all is not lost and you can begin to re-school or retrain your horse to your newly acquired subtle weight aids.  To do this you will have to be consistent and mindful of where you are sitting in the saddle and also that each movement or change is set in motion by applying the correct, subtle, weight aid first.   Your horse will, given time, begin to associate that particular weight aid with that instruction and soon, begin responding to the weight aid when it is applied.

    Really effective communication with your horse through your weight aids will take time and patience, however is really worthwhile in the end.

    Happy Riding

    Lorna

    Applying Your Weight Aids


  • Solving Leg Yield Problems

    Solving Leg Yield Problems

    [fusebox_track_player url=”https://op3.dev/e/traffic.libsyn.com/dailystridespodcast/SFA491-Correcting-Your-Leg-Yielding-Problems.mp3″ title=”Solving Your Leg Yielding Challenges” social_linkedin=”true” social_pinterest=”true” social_email=”true” ]

    How many times have you asked your horse to leg yield, moving forward yet sideways, only for it to become frustratingly obvious a few steps into the moment that what is happening underneath you is definitely not what you had in mind?!

    Asking our horses to leg yield is one of the first introductions they will have to lateral movement.  It introduces our horse to the concept of not just going in straight lines and moving forward, but also adding in some lateral or sideways movement as well.


    It is a wonderful exercise for supplying our horses and has the added benefit of being easy enough to introduce to younger or less schooled and developed horses who have not yet achieved collection in their gaits.

    What is Leg Yield?

    A true and correct leg yield happens when your horse moves forward and sideways, along a diagonal line, keeping their back straight with a slight flexion of the poll away from the direction you are travelling.

    So, if we were traveling down the center line and wanted to leg yield to the right, back to the track…  Your horse will flex his poll to the left. Your left leg and hand will be your inside. While your right leg and hand will be your outside.

    Leg yield is when your horse is moving forwards AND sideways.  While maintaining rhythm, tempo, balance, and forward impulsion or energy in a consistent way throughout the movement. No change…

    Solving Your Leg Yielding Challenges

    What Can Go Wrong?

    While the leg yield is seen as a basic movement and, as mentioned, an introduction to more advanced and challenging lateral movements, there are many factors that can go wrong both before, during, and then after the movement.

          • Your horse’s hindquarters may trail or lead the shoulders
          • Too much bend through his neck or back
          • Loss of rhythm and tempo
          • Loss of forward movement or impulsion
          • Lack of preparation by rider before the movement
          • The rider leaning or ‘shoving’ the horse using shoulders or hips
          • The rider’s reins being too long

    Does Your Horse Understand?

    Before we get into how to solve each of these problems, I think it is important to first make sure your horse understands what is being asked of him as he is performing the movement.  You can do it on the ground. Simply ask for sideways movement.

    For example, in the stable, while grooming, you will ask him to move ‘Over’. As you ask, apply pressure with your hand on the area that you will later apply similar pressure with your leg while riding.

    You can also take your horse into the arena or schooling area and again, using pressure from your hand with the simple ‘Over’ command, ask him to move away from that pressure.  This then translates well into the saddle, when you can again ask for ‘Over’ and apply the pressure with your leg where you have been training your horse to move away from with the same voice command using your hand.

    I have a full program Groundwork for Riding that teaches you how to do this and more HERE

    Improving the Quality of the Leg Yield

    Once your horse begins to recognize and understand what ‘Over’ is and what you require of him to perform the movement, you can then begin focusing on the quality of the movement.

    As mentioned, one of the big challenges is keeping your horse straight throughout the movement.  Simply put, his shoulders must remain square in front of his hind quarters throughout the leg yield.

    It will be your horse’s natural inclination to rather have his hindquarters trailing his shoulders, which will mean that he is either bending through his back or that he is falling out through his outside shoulder.  Keep in mind that your horse must remain straight through his back at all times.

    One of the easiest ways to keep focused on where you are going is to keep your horse’s shoulders square to something while keeping his back parallel to another marker.  This way, you have a reference point of sorts by which to measure the quality of the forward and sideways movement.  

    I suggest beginning on the quarter line, shoulders square to the end of the arena, and then asking for a leg yield back to the track, all the while keeping his back parallel to the outside track while the shoulders remain square to the end.

    Begin in Walk

    Start your preparations in the walk, as like many riding movements, it is easier to perform the leg yield in the walk first and then work up to trot.  Focus on establishing a rhythm that has your horse moving forward in the walk.   Pay attention that you are moving with your horse, following the movement and that you are sitting correctly in the saddle, weight equally distributed across both seat bones.

    As you ask your horse to yield to your leg, keep this phrase in mind…  “Leg yield, not rein yield!”  

    Often we become so focused on our horse moving sideways that we forget it is primarily off the leg rather than the hand or rein. Remember to use your inside rein to merely ask for a slight bend through the poll, a small flexion to the inside (which will be in this case the side your horse is yielding to).  For example, when leg yielding from the left to the right (a leg yield to the right), your left side will be your inside.

    Engage Your Outside Rein

    Also, remember that your outside rein is there to help regulate the rhythm. And also ‘gather up’ the movement created from your inside leg.  Very often when riders are asking their horse to leg yield, they overuse the inside rein. This creates too much bend to the inside, while at the same time completely forget about the outside rein.  This results in a loss of rhythm, perhaps even a break in the gait, and generally allows the energy to fall out through the outside shoulder.

    Your outside rein will help hold the work you have put in during the preparation all together while your horse leg yields

    Another important point to keep in mind is the reason you are asking your horse to leg yield, to begin with.  It is not just a means to an end, but rather an exercise which when ridden correctly will improve your horse’s overall way of going.   This means that while the quality of the leg yield itself is important, so too is how your horse finishes the movement and, even better, if it has improved his overall way of going afterward.

    Your Outside Leg

    Correct use of your outside leg will ensure you reach the end of the leg yield movement with the same impulsion and energy you had created and prepared while going into it.  Very often riders are so focused on their horses yielding to their inside leg, that they completely forget about the outside leg. They only apply it to ‘end’ the leg yield and the sideways part of their horse’s direction.

    Your outside leg is much more than this.  It should be used to make sure your horse’s outside back leg remains engaged, pushing off and creating energy.  

    The inside back leg will cross over in front of the outside back leg each stride if the leg yield is being performed correctly.

    However if the outside back leg is not then coming forward and underneath the horse with each stride, the horse will begin to move more exclusively sideways, rather than forward and sideways… Which is what’s necessary for a true leg yield

    Rhythm; Step by Step…

    Focus on riding the movement step by step.  Rather ride two or three strides of correct leg yield than ten steps of mediocre or even bad quality.  Make sure you are carrying your body, your hands and that your hips and pelvic area are relaxed and supple enough to allow both you and your horse to move.

    Finally, make sure you are not leaning to one side or the other.  

    You should aim to remain perfectly upright, poised, and light in the saddle.  Therefore allowing that improvement in your horses’ way of going that the leg yield will cultivate when prepared and ridden correctly.

    Happy Riding

    Lorna

    Additional Resources on this Topic

    Solving Leg Yielding Challenges

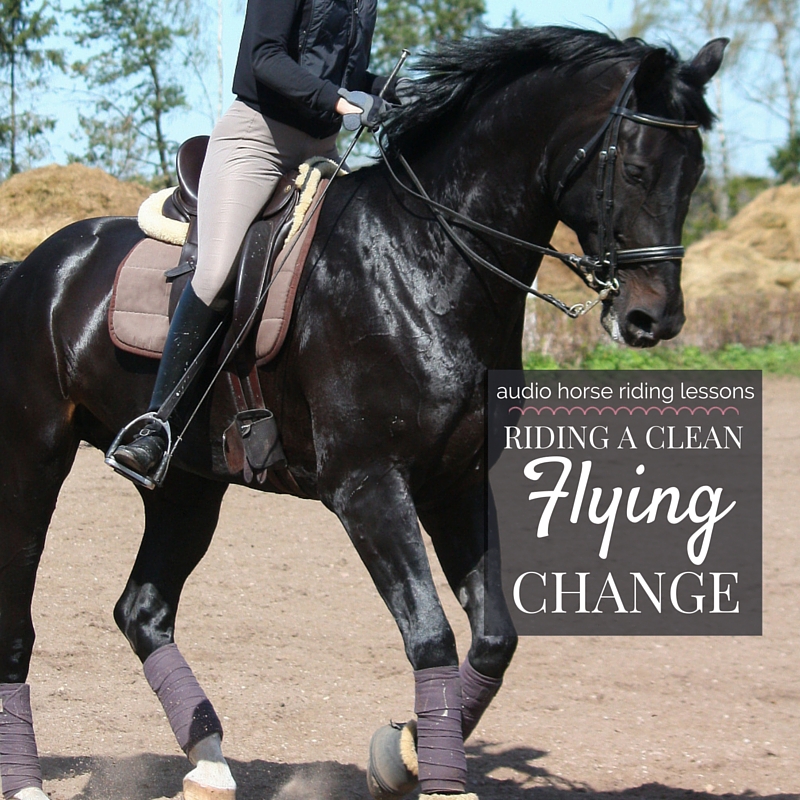
  • Riding a Clean Flying Change

    Riding a Clean Flying Change

    [fusebox_track_player url=”https://op3.dev/e/traffic.libsyn.com/dailystridespodcast/SFA476-Riding-a-Clean-Flying-Change.mp3″ title=”Riding a Clean Flying Change” social_linkedin=”true” social_pinterest=”true” social_email=”true” ]

    Think back to the last time you were cantering along on your horse and a change of rein was coming up.  You began the task of preparing to drop back a gear into a trot to change the canter lead.  “Better than losing rhythm and balance through a flying change…”  However before you even got there, your horse (being the clever guy that he is) decided to take matters into his own hands. And with what felt like a skip, Voila, he had performed the flying change all by himself…

    The flying change is one of those things that we tend to, as riders, overthink in our heads.

    However, the simple truth of the matter is that flawless flying changes happen when we focus on the preparation and then allow our horse to perform the change without interference from us in the saddle.

    Riding a Clean Flying Change

    What is a Flying Change?

    A flying change is when your horse changes from one canter lead (let’s use right canter lead for this example) to the left canter lead without having to return to trot to do so.  It is essentially a ‘skip’ or suspension mid-stride.

    And during this ‘suspension’ your horse will change the sequence of his footfalls resulting in him swapping leads.

    Before you begin working on flying changes it is important to make sure you and your horse are ready.

    Pre-Requisites for Flying Change

    You should be both capable of riding a balanced canter. This means moving with your horse as he moves. Also, you should have an independent seat when cantering.

    I would also insist on the ability to tell, by feel, what leg is where underneath you as your horse canters. This is important for timing the change correctly.  

    Your horse must have sufficient strength for a balanced, rhythmical canter, during which he is truly straight.  He must also be responsive to your aids. As in, waiting for ‘further instructions’ from you throughout the canter.

    It is also an advantage if both of you can correctly lengthen and shorten your strides while cantering, maintaining impulsion, rhythm and balance while doing so.

    Physical Strength & Development

    Asking your horse to perform a flying change before he is physically and mentally ready can result in confusing him and even training him to only half perform the change, changing only in front rather than in front and behind.

    If your horse is not quite ready yet, perhaps he does not have enough physical strength, you can still use the following exercises in walk and trot to build up to a flying change later.

    As I mentioned before, the preparation of the quality of the canter leading up to the flying change is vitally important to ensure a clean change.  This simply means that your horse changes both his front and back legs to the new sequence of footfalls for the new canter lead at the same time.  Investing your training time in this preparation will ensure a clean change when you do eventually ask for it.

    Timing of Your Aids

    The timing of the aids for flying change is also essential and in order for your horse to have enough time to receive your signals and then to act accordingly. SImply put, you must ask for the flying change at the right time.

    The correct time is just before the inside front leg or leading leg touches down on the ground in the canter stride.  This is the 3 in the 1,2,3 beat of the canter.  This is why being able to tell what is happening underneath you at any given time throughout your time in the saddle is so important to clean, balanced transitions and changes.

    I suggest beginning your work on a 15m circle on the left rein in a walk, mimicking your position as it would be in canter.

    By practicing in the walk, you can begin to condition your body to respond in the manner you desire at the correct time.

    Your inside leg (left leg) will be on the girth, your outside leg will be slightly behind the girth.  Your inside seatbone (left seatbone) will be slightly in front of your outside seatbone and your inside shoulder (left shoulder) will be slightly behind your outside shoulder.

    You will have a consistent contact through your outside hand and your inside hand will be soft and offering, so as your horse’s inside shoulder can move forward in the canter stride.

    Practice in Walk & Trot

    Now, as you are on the circle, choose a place where you can at an imaginary X, straighten for 3 strides before tracking right onto a 15m circle to the right.  Don’t move onto the circle initially, but be aware of where the X is as you are riding.

    Beginning planning your ‘change’ by noticing the footfalls.  If necessary, glance down to your horse’s shoulder and to make sure you are indeed ‘asking’ when your horse’s front inside (in this case left) shoulder is moving forward and preparing to touch down on the ground.

    I suggest building to this by riding a few half halts, as you would when you canter and then at the desired place, begin straightening your horse just as the inside front leg reaches forward and quickly and quietly swap your inside to your outside and vice versa.

    Work on moving your legs and hands first, and then following with your seat and shoulders.  Your legs and arms will help straighten your horse through the ‘transition’, while your seat and shoulders will then shift as your horse makes the change, following along with his movement.

    Moving to Canter…

    Work on this a few times in walk and then begin working in trot. Change rein on the circles if necessary to ensure your horse does not become bored.  When you feel you are in control of your body, you can pick up the canter on the circle.

    As mentioned before, the quality of the canter is vitally important. Ride some transitions. Also lengthen and shorten the canter on the circle to help engage your horse’s hind quarters.

    If your horse has a tendency towards a flat canter, you will have to work on adding more ‘bounce’ into the canter in order to perform a clean flying change.  Again, transitions up and down between canter, trot, and walk as well as within the canter gait itself will help with this.  Also, remember to use your half halts to help rebalance and engage the hindquarters.

    Once you feel your canter is of good enough quality, you can begin again planning the change of rein from one circle to the other however you are going to initially ‘gear down’ to walk or trot in order to change canter lead.

    Take the time to ensure your horse does not lose balance and also that you are not shuffling or shifting your weight in the saddle while your horse is in the area around X.

    Pay attention to asking your horse to straighten before asking for the canter on the new lead.  Once you have ridden this a few times, using the walk or trot as a catalyst between canter leads, your horse will begin to anticipate what is happening.  Use this to your advantage.

    Asking for the Flying Change

    Prepare the canter and, making sure you are timing it correctly, make the changes and ask for the flying change.  It should be a clean ‘strike’ which will feel like a skip underneath you. Work on then maintaining the rhythm of the canter on the new lead as you continue around the circle.

    Once you have mastered the flying change between circles, you can begin working them into other areas of your schooling.  Canter down the center line and again, at X ask for the flying change.

    This is particularly eye-opening to see how straight your horse is during the transition and how balanced he is on the new lead.  You can use poles if necessary to help keep you straight as you move down the centerline.

    Things to Watch Out For…

    Make sure that you are not leaning with your upper body through the transition.  Many riders think an over-exaggerated ‘lean’ or ‘push’ with their upper body is the key to riding a flying change. However, this will only serve to unbalance your horse and confuse the situation.

    If your horse is struggling, or if he is changing in front and not behind, take things back a few steps and try again.

    Often, most of the problems that show up surrounding the flying change are a result of not enough ‘suspension’ in the canter, meaning that your horse does not have enough time to change the sequence of footfalls.

    If you are sure that your canter leading up to the change is sufficiently energetic, consider that perhaps you are leaning, particularly with your upper body while asking for the change, which is throwing your horse off-balance.  Focus on sitting up through the transition and ‘allowing’ it to happen underneath you.

    The flying change is a wonderful movement to ride, however asking too early in your horse’s training will do more harm than good in the long run.  once again, make sure your horse is sufficiently strong enough to ride the movement before you start.

    Happy Riding
    Lorna

    Additional Resources to Help with This Topic

    Riding a Clean Flying Change