Tag: position

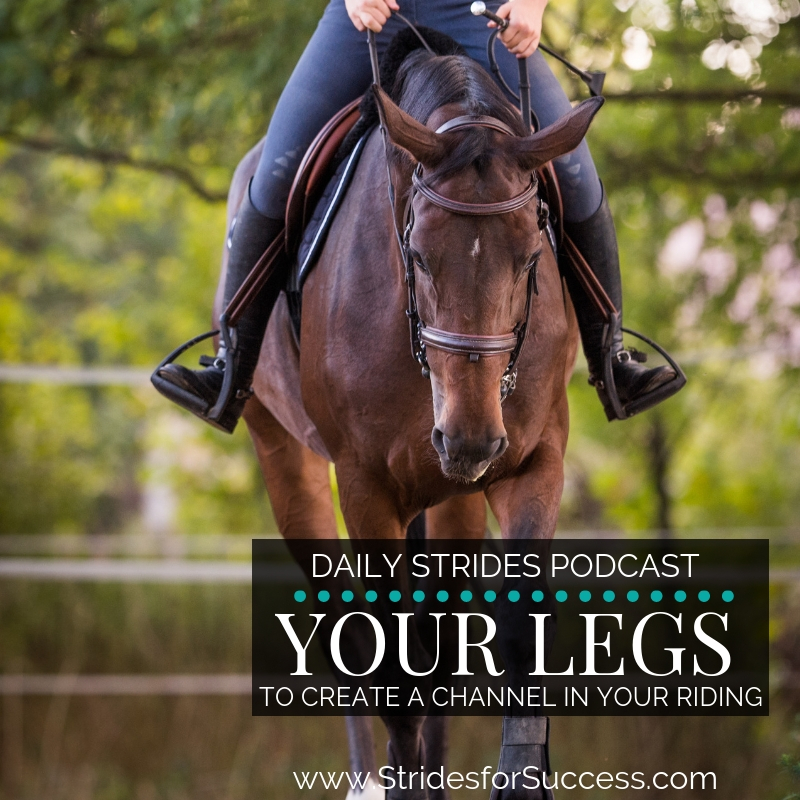
  • Using Your Legs to Create a Channel when Riding

    Using Your Legs to Create a Channel when Riding

    Using Your Legs to Create a Channel when Riding§§

    What this episode is all about & how it can help you:-

    • Sitting straight in the saddle
    • Allowing your legs to ‘drape’
    • Understanding an active aid versus an inactive one
    • Supporting your horse when he needs support

    [smart_track_player url=”https://op3.dev/e/traffic.libsyn.com/dailystridespodcast/1063-Using-Your-Legs-To-Create-A-Channel-In-Your-Riding.mp3″ title=”Creating a Channel with Your Legs in Riding” social_linkedin=”true” social_pinterest=”true” social_email=”true” tweet_text=”Ever wondered what your legs should be doing while you’re in the saddle? Here is the less obvious answer…” hashtag=”Equestrian #Horseriding #Podcast” twitter_username=”Strides_Success” ]

    Remember back to when you were first learning to ride.  You possibly saw your legs as being a ‘go button’ of sorts.  Go forward or go sideways.  However, as you began to improve the conversation, by refining your aids, you realised that your legs have started to also become a channel of sorts…

    A channel for the energy that is created inside of the ‘container’ that is you and your horse together.

    In this episode of the Daily Strides Podcast you will learn all about creating that channel with your legs and how it will improve your overall riding.

    Your Whole Body is a Channel

    I want you to think about this; your whole body is connected.  I realise that this is not a new piece of information, however many riders fail to see how one part of their body has direct influence over other parts.  How the placement of your leg can impact the placement of your seat or vice versa.

    If you are just starting out, I think it is far easier to allow the more obvious body parts to influence the more ‘subtle’ parts.  Your legs to influence your seat, rather than the other way around.

    Later then, as you begin to gain more control over your body in the saddle, you can start ‘swapping’ this out a little.  Your seat to influence your legs.  Your seat will define or indicate where your legs are positioned at given time in the saddle.

    Sitting Straight in the Saddle

    Part of this influence is how straight you are positioned in the saddle.  When I say ‘straight’ in the saddle, it is straight in two ways.

    Firstly that there is an equal amount of you on both the left and the right of the saddle.

    One of the most common ways riders become ‘crooked’ is when they are sitting with one seat bone closer to the centre of the saddle than the other. 

    The second way to ensure you are ‘straight’ is to make sure you are indeed sitting on your seat.  Both of your seat bones centred and pointing straight down underneath you. It is all too easy to fall into the bad habit of sitting either with their pelvis rolled too far forward or too far back.

    Sitting on your fork, or rolled back into a more ‘armchair seat’ automatically shuts down your seat aids.  This will result in your legs not being able to work correctly while riding. 

    Allowing Your Legs to ‘Drape’

    Once your seat is correct, you can allow your legs to ‘drape’ over your horses sides.  This sounds exactly like what it is.  Drapes are often another word for curtains and you want to think of your legs being allowed to hang from your hips like curtains.

    They have their own weight and shape, and yet they will follow the contours of what they are ‘draped’ over.

    For many riders, particularly women, it can be difficult to truly allow legs to ‘drape. This is often due to the fleshy part on the inside of the thigh.  If you suspect this is an issue for you, I have a little exercise you can use to help.

    What I suggest is just put both your legs up as though you were a jockey, touching your knees above your horses withers. Now take your right hand from the back underneath your right leg and pull that fleshy piece out behind your actual thigh.  Then lift your leg out and gently allow your leg to drape down over your horses side.

    When your leg is positioned correctly, you will feel that there is contact all the way down.

    Many riders concentrate on the contact at the knee, but I prefer it if the knee is loose and it is not locked on the horse. What you will now find is that the rest of your leg from your thigh all the way down to your calf and ankle is going to be draped around the horse.

    Understanding an Active Aid Versus an Inactive One

    The next thing to understand is that you have active leg aids as well as inactive leg aids. In other words you can engage your leg aids, or you can disengage them.

    It is important to recognise that when your leg is off and is not engaged (or inactive), it doesn’t mean that there is actual daylight between your leg and the horse!

    Your leg is still ‘on’ the horse, however it is similar to having hit the off switch.  You have disengaged it. You don’t take your actual leg off or away from your horses side. There should never be daylight between your leg and the horse’s sides, but you do want it that the leg is not active.

    The reason that this is important is because later as you and your horse become more developed, you will play less and less of a supporting role to your horse.

    Very often in the beginning we, as riders, have to support our horses. This is not always actual physical support, in that you are holding him up.  It can also be more of a moral support. As soon as your horse’s balance develops and he becomes stronger, you will have to support less and less.

    If your leg were to be active all the time, you would first of all be exhausted and secondly your horse would eventually simply tune out

    Supporting Your Horse When He Needs Support

    Very often at the beginning of our development journey with our horses, riders find themselves supporting their horses.  This can be both a mental and a physical support.  It is a ‘reminder’ to keep things on track when things are going off track a little.

    A lot of the time this is described as ‘balance’.  You will step in initially when your horse loses balance and help him to regain it. 

    However, as confidence and strenght builds, your relationship with your horse will also shift and change.  As you and your horse becomes stronger and you are positioned correctly, you are better able to actively engage the aids when you need to engage them.

    When you engage your aids, you can create energy.  This energy is then put into the channel you have created, so you can best direct it. 

    Understanding and Strengthening Your Channel

    Managing this energy is really your channel.  It can also be thought of as the container that is made up of you and your horse. You actively and mindfully put energy in there.

    Then you decide how, where and when that energy will be used.  Yes, you can use your leg to ask your horse to create the energy, but once it is there you can use your legs to channel that energy as well

    Channeling can be in a directional way by directing where the energy is going to go. The channel can also be how the energy is being used. Is it running out, or is it being held?

    Developing Your Channel

    Of course, as you begin to refine the conversation between you and your horse, your seat will then become a bigger part of your channel.

    Initially it is your legs which are guiding your seat, but what we want is that the seat is doing more of the guiding. You will eventually build to that.  This may look like your seat allowing or resisting.

    However your seat moves and influences, it will become a bigger part of your overall conversation.  Of course your legs don’t completely cease to exist any more, but there is a balance of aids, and the balance will eventually shift.

    In other words it will then become less about your legs and more about your seat

    Your legs will still have to be positioned correctly because your legs dictate your seat, and your seat your legs. But as you become stronger and more developed you will have to think about it less, and it will naturally fall into place.

    That is the channel. Once you have the channel created then you can start strengthening the channel, and you can start creating true impulsion in your riding.

    Happy Riding

    Lorna

    Links mentioned in the episode:-
  • Recognising and Reschooling a Horse who Hollows His Back

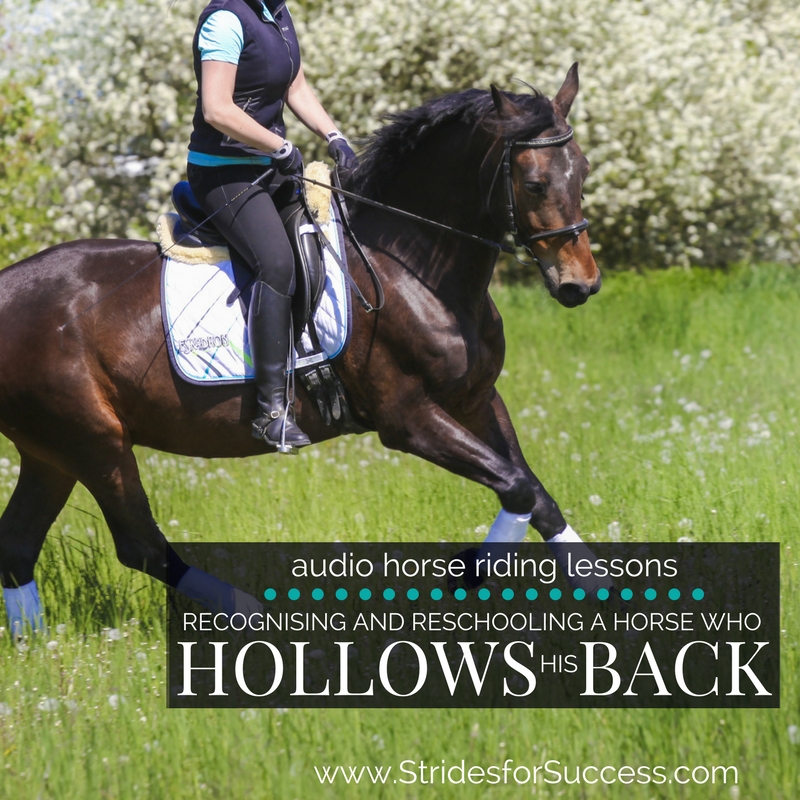
    Recognising and Reschooling a Horse who Hollows His Back

    Recognising and Reschooling a Horse who is hollow through his Back

    What this episode is all about & how it can help you:-

    • Knowing what a hollow back looks and feels like
    • Realising you may be playing a big part in what is happening
    • Understanding the role your own self carriage plays in your horses self carriage
    • Beginning to build on a correct way of going in your rides

    [smart_track_player url=”https://op3.dev/e/traffic.libsyn.com/dailystridespodcast/1035-Recognising-and-Reschooling-a-Horse-Who-Hollows-His-Back.mp3″ title=”Recognising and Reschooling a Horse Who Hollows His Back” social_linkedin=”true” social_pinterest=”true” social_email=”true” tweet_text=”Is your horse a little ‘hollow’ through his back and are you maybe causing it… ” hashtag=”Equestrian #horseriding #selfcarriage” twitter_username=”strides_success” ]

    There you are, happily riding along.  Feeling all those good feelings we feel as riders; until you ask for something different.  Suddenly, it feels like everything has just ‘deflated’ and, to be honest, it has a little because your horse just went hollow through his back. 

    You see, it is not just you the rider who should ‘carry themselves’ and work at having a strong and connected back.  Your horse also needs to work on carrying himself in order to avoid becoming hollow through is back as well.

    Knowing What a Hollow Back Looks and Feels Like

    Being able to pinpoint and feel when your horse begins to hollow his back, and then later take steps to avoid it happening, is key to reschooling through this problem.  When your horse begins to hollow his back, it really feels as though his back is not supporting you any more.

    Think about this, when his hind legs (hind quarters) are engaged and working underneath him, they support you on his back.  When they get ‘left behind’ that support goes away…

    Couple this with the fact that most horses will also raise their head and neck and become resistant to the rein aids as well.  The result is your horse literally hollowing his back from underneath you and you experiencing that ‘sinking feeling’.

    Because the head and neck will usually ‘come up’, the rider can literally feel the horses shoulders brace against the contact and seat.

    This resistance is one of the most obvious signs that your horse has begun to become hollow thorough his back; and should send a few warning bells off in your head regarding what you can do to get things back on track.

    Realising That You May be Playing a Big Part in What is Happening

    Riders the world over tend to get into the saddle with the sole intention of making the horse ‘do’ something.  A good example of this is the all important ‘on the bit’ goal so many riders have, but either way, when we become so concerned with just one ‘goal’, it can be a little like putting blinkers on!

    Riders end up focusing on what they can see in front of them; the horse’s head and neck.  They also ‘see’ their hands and arms…  You must switch your focus from what you can see – to what you can feel, both in your horse and in your aids. 

    Just focusing on one part of the whole picture often results in your position suffering.  It is all the gripping, the squeezing, the twisting the shoving that you are doing to get things ‘looking’ like you think they should look. 

    But remember, from where you are sitting, you are only seeing a third of the picture.  This third should be the ‘result’ rather than the cause part of the overall picture!  When we start to make the front end the ’cause’, the result is never good!

    So, I mentioned that very often when riders get into this mindset and way of riding, they are moving – a lot!  All of this movement only serves to move your position further and further from where it should be. 

    The further you move away from where you should be, the less clear your communication becomes.  The less effective your aids are.  And the less you can balance yourself. 

    Understanding The Role of Your Self Carriage in Your Horses Self Carriage

    It is this lack of balance that causes you to become heavy in the saddle, which in turn can lead to your horse becoming hollow through his back.  He is literally trying to get out from under your unbalanced, ineffective position!  Harsh, but true!

    Instead of carrying yourself, you have become a ‘dead weight’ in the saddle.   Rather than thinking ‘light’ and ‘refined’, you are scrubbing and having to over do the communication through your seat.

    Many riders at this point become frustrated because their horse is not really listening or being responsive to their ‘seat aids’.  So rather than taking things back to basics and allowing their other aids to apply any extra pressure if necessary, they try to knuckle down even more on the already ineffective seat aid.

    It is a vicious cycle that usually leads to all parties becoming frustrated by the lack of understanding and progress!  An overly excited (heavy) seat will also effect the rest of your body and the rest of your aids.

    As the team leader for you and your horse, you need to lead by example when it comes to self carriage.   Learn to first carry yourself in order to feel what is going on underneath you.  It is only by carrying yourself that you can create the space your horse needs to carry himself.


    Beginning to Build on a Correct Way of Going in Your Rides

    Start with the basics, the walk to halt transition.  Work on setting it up correctly and allowing your horse to ‘close’ the halt.  Simply put, allow his space to ‘park’ his back-end underneath his body.

    Think of creating a space that he can easily close the lid of the box that all four of his legs should create when he is in a square halt.  

    Notice any tension through your lower back.  Notice if you are leaning, or becoming heavy.  Start to ‘feel’ if you are indeed creating that space for your horse; and then inviting him to step into it.

    Make a point of thinking light through the transition.  Go over it again and again, making small adjustments each time until you begin to ‘feel’ a difference underneath you.

    From here, start to look for this feeling throughout the other movements in your ride.

    Happy Riding

    Lorna

    Links mentioned in the episode:-
  • Position Faults that are Potentially Holding You Back in Your Riding

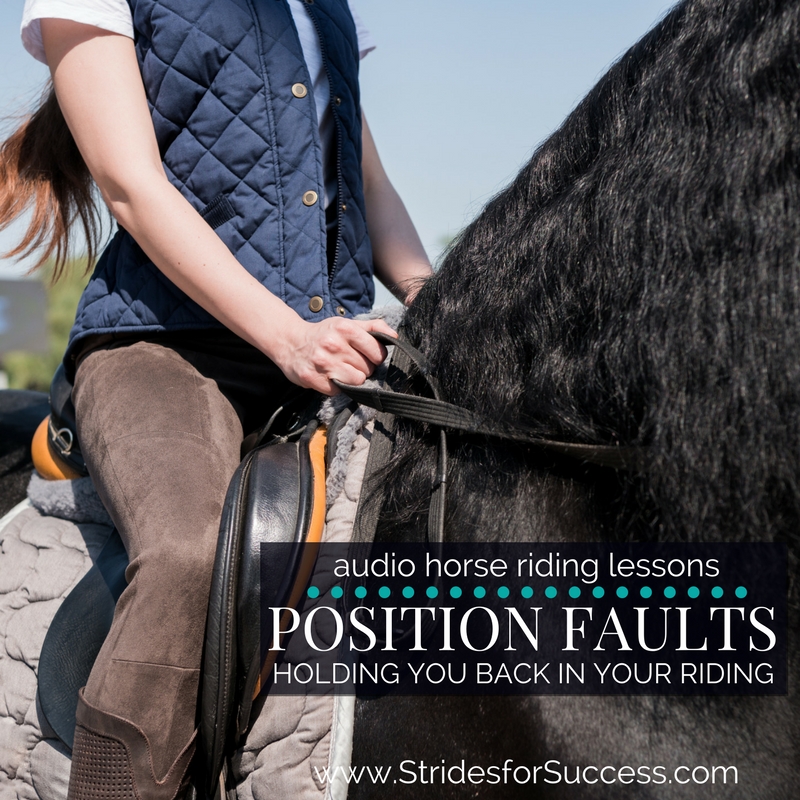
    Position Faults that are Potentially Holding You Back in Your Riding

    Position Faults that could be holding you back in your riding

    What this episode is all about & how it can help you:-

    • Understanding the importance of a good position
    • Your seat and where it should be
    • Your legs and heels and how they affect your stability
    • Your head, shoulders and arms and how they affect your position

    [smart_track_player url=”https://op3.dev/e/traffic.libsyn.com/dailystridespodcast/1026-Position-Faults-that-Could-Be-Holding-You-Back-In-Your-Riding.mp3″ title=”Position Faults the Could be Holding You Back in Your Riding” social_linkedin=”true” social_pinterest=”true” social_email=”true” tweet_text=”How good is your position in the saddle? Could a simple ‘tweak’ change everything for you?” hashtag=”Horseriding #Equestrian” twitter_username=”Strides_Success” ]

    If you were to mark your position in the saddle out of 10, how would you score?  Would you make the perfect 10?  Or would a few simple position faults undo everything for you?  These basic position faults have the potential to put a halt to your progress as a rider.  Yes, they can have that much impact on your overall riding performance.

    The reality of the situation is that without a correct position in the saddle, you tend not to make a whole lot of sense to your horse.

    Your position in the saddle is something that riding instructors the world over focus on daily during lessons.  A lot of riders sadly don’t realise how important their position is to their overall riding, because if they did more effort would go into correcting it.

    Why is Your Position so Important?

    Simply put, a good position puts you in the right place to be able to communicate most effectively with your horse.

    Another advantage of a good position is the dramatic decrease in your risk of unexpected dismounts (falls) because you are more secure in the saddle.  So, if you are working towards an independent seat, it makes sense to devote some time to perfecting your position.

    I want to visit a few areas where your position might be letting you down, and give you a few ideas on how to improve your overall position – and in doing so, improve your riding.

    Your seat and where it should be

    Are you guilty of sometimes treating the saddle as a place to sit, rather than a place to communicate from?  Your seat is probably your most important tool when it comes to communicating with your horse.

    If your seat is not correctly positioned in the saddle, the result is you talking gibberish to your horse! 

    It sounds a little harsh, but it is true.  The right position where your seat is concerned is essential from the first ride.   As you develop as a rider, your seat becomes more and more important to your communication with your horse.

    If your seat position is incorrect, or if you have been allowed to ride one way (which is the wrong way), your seat will be ineffective from the beginning.  These position faults will become amplified further down the line.

    What is ‘Good’?

    That being said, what is a good position when it comes to your seat?  Basically, you should be sitting on your seat bones.  They should not be sticking out behind you, nor should you be leaning back on your tailbone.

    If you could imagine your seat bones being two flashlights.  A good position will see those beams of lights pointing straight now to the ground below where you are sitting in the saddle.  They would not point backwards towards your horse’s hind hooves, and they would do if you were sitting a little forward, or perched in the saddle with your bum sticking out behind you.  Nor would they point towards your horse’s front hooves, which would happen if you were rolled back on your tailbone.

    Your seat affects the rest of your body. When your seat is plugged in correctly it has an almost domino like effect.  Everything else will have a greater success rate of maintaining its position as well. 

    How a Faulty Seat Position Affects Your Legs in the Saddle

    Many riders immediately notice how, once they have corrected their seat position, the their legs feel different.  Your legs cannot function to the best of their ability while riding if your seat is faulty.  The biggest cause for concern is gripping with your thighs and knees due to being perched in the saddle (your bum will be sticking out behind you and your back arched).

    When you are sitting correctly on your seat bones and carrying your body using your core, it allows your pelvis to open.  This, in turn, allows your legs to drape down around your horse’s sides.  This is important, regardless of what discipline you are doing.

    A closed pelvis creates a clothes-peg effect on your horse using your legs.  They become similar to a vice-grip; clamped closed in a bid to keep you in the saddle.    Rather think of actual drapes, material.  Your legs should be in contact with your horses sides, but not gripping or clamping.

    Your Ideal Leg Position

    One of the markers of a good position is the visible line from your head, through your shoulders, through your hip to your heel.   When that line is present in your position you are balanced.

    If you are struggling to imagine this line, try this:-   The next time you are in the saddle imagine you can click your fingers and, like magic, make your horse vanish.  If the line is present, you will land on your feet.  It it is not, you will either land on your face or on your bum.

    The head, shoulder, hip, heel line is the start of learning to become a balanced rider.  It puts you in the best position to use your own body for balance, rather than relying on your horse.

    The Ever Important “Heels Down”

    Oh, it may just be the most uttered phrase in arenas the world over.  But it really is an essential part of developing a good position which will lead to your independent seat.

    How much weight you are going to have in your heels will vary depending on your discipline.  Jumping generally requires a little more than dressage.  What is important here is to recognize that by dropping the weight into your heel, you elongate your leg.

    How a Relaxed Knee Improves the Overall Use of Your Leg

    The final position fault to do with riders legs is squeezing with the knee.  Next time you are in the saddle, I want you to try something.  Slip your hand between your knee and the knee roll of the saddle.  You should be able to swing your knee away from the saddle with very little resistance.

    Notice how, when you do this, your leg remains in contact with your horse.  It remains ‘on’ while your knee can stay relaxed.  

    Why do you not want your knees on?  Two reasons.  Firstly, you certainly don’t want to pivot on them because you would be a little top-heavy, increasing your chances of toppling off!      Secondly, your knees act, along with and ankles, as your shock absorbers.  If they are fixed in any way, this will result in bouncing, loss of position and ineffectiveness in the saddle.

    Your head, shoulders and arms and how they affect your position

    One of the most common position faults in this area is failure to carry the head.  It sounds strange, but a simple way of ensuring this is not the case in your riding is by focusing on creating and maintaining the space between your chin and your chest.

    However, your head can also influence your overall position through the direction it is facing.  Look where you are going and you will find that your head positively influences the position of your shoulders.  This of course will have a domino effect on your arms as well.

    Opening Your Chest and Shoulders

    I personally do not like the term ‘shoulders back’.  I find that it encourages riders to needlessly arch their back, which causes excess tension in both horse and rider. 

    Rather start with a correct seat position.  Then imagine opening or stretching the distance across your chest from point of shoulder to point of shoulder.  This will naturally encourage you to sit a little taller, focus on where you are going and, open your chest up.

    The Elbow, Wrist, Hand, Rein, Mouth Line

    The final part of your position I want to touch on today are your arms.  There is a second line that, when applied, makes all the difference in smoothing out the communication between horse and rider.

    That second line is from the elbow, down through your hand, through the rein to the horse’s mouth.  It should be straight at all times.  No Vs or kinks in it.  Neither the rein or the hand should deviate off that line between the elbow and the bit.

    Riders who work on mastering all of these potential position faults find that their communication with their horse improves dramatically. It is truly amazing how effective a few small changes can be.

    Your Physical Fitness and its Impact on Your Position

    Riding is a Team Sport – you and your horse.   Just like your horse, the stronger and more developed you become physically; the more fluid your movements and “self carriage” become in the saddle.

    Creating a detailed exercise program for your horse, while failing to take your own fitness into account will result in, at best, mediocre results in your riding. 

    Establishing and then maintaining an effective position in the saddle requires strength, suppleness and discipline.  Taking responsibility for your fitness is just as important as assuming responsibility for your horses fitness.

    We are starting a new round of the free 30 Day Rider Fitness Challenge on 1st of February.  This will be different to anything that has gone before; you choose what you want to do based on your unique circumstances. You can sign up HERE

    Happy Riding

    Lorna

    Links mentioned in the episode:-
     

  • Weight Aids & Seat Bones for Turning & Bending

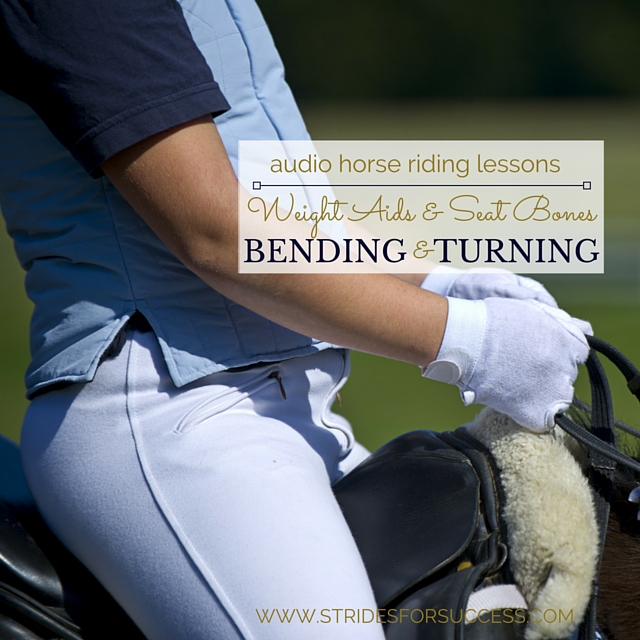
    Weight Aids & Seat Bones for Turning & Bending

    The bend is approaching and you begin preparing both you and your horse to ride straight and accurately through the turn. However, as you ‘shift’ your seat bones into ‘position’ your horse begins, well, almost side stepping… The further you get through the turn, the further your horse is from the path you had planned; in fact, he has derailed altogether from the ideal ‘train tracks’ you had intended to stay on as you rounded the bend.

    As riders we learn early on about how important our weight distribution is to our horses way of going. We learn about positioning our seat bones, so we can indicate to our horses what exactly the next movement should be. We also learn that our weight aids are fundamental to all aspects of successful communication with our horses in the saddle.

    [smart_track_player url=”https://op3.dev/e/traffic.libsyn.com/dailystridespodcast/591-Weight-Aids-and-Seat-Bones-in-Relation-to-Turning.mp3″ title=”Weight Aids and Seat Bones for Bending and Turning” social_linkedin=”true” social_pinterest=”true” social_email=”true” tweet_text=”Weight Aids and Seat Bones for Bending and Turning Your Horse” hashtag=”Podcast #equestrian #horse” twitter_username=”strides_success” ]

    What we don’t learn is awareness of how the other parts of our body directly or indirectly affect how and where our weight aids are applied with our horse. There is also not a lot of time spent on figuring out how loud or how quiet we can communicate with our horses through our weight aids. In fact, most riders seem to think that a ‘one size fits all’ approach is sufficient regardless of the circumstances, situation or horse involved.

    Learning to correctly feel and then master your weight aids in the saddle is key to developing good feel as a rider. Those subtle shifts and movements, which happen when you direct your muscles to move, rather than your actual weight or bones themselves. This is very much apparent when turning your horse and that is what I want to focus on today.

    So let’s begin with focusing on how your carry yourself in the saddle. Many riders make the mistake of going a little too overboard when told to ‘relax’ through their body.

    Relaxation is key to good riding, however the level of relaxation is also important to consider; particularly when it comes to how it affects your weight aids and seat bones in the saddle when riding

    Ideally you want your muscles to ‘carry’ you in the saddle, enough that your hips and seat are free to move with your horse and follow the motion. Following when riding is a little like following when dancing. The dancer that is following must remain in control of their body, walking that fine line between too relaxed or ‘slack’ and too tense or ‘rigid’. All the while they are looking for cues from their partner and then taking the responsibility on themselves to respond to those cues in the agreed manner.

    Riding is the same. Following does not mean you slouch in the saddle, looking like you have had one too many before you mounted. It rather means you carry your upper body, so your hips and seat are then willing and able to follow the horse’s motion as he crosses the ground.

    Bending and Turning Your Horse Using Your Weight Aids and Seat Bones

    Think about it, your hips and seat bones can not possibly be free to perform a full range of motions if your upper body is heavy and slouching on top of it. Many riders mistake this for ‘shoulders back’, which is unfortunate as this only serves to increase the excess tension and therefore rigidness in the body, rather than simply carrying yourself, through your ribcage and positioning your body in the best possible place from which to begin asking your horse to turn using your weight aids.

    Once you are sure that you are indeed carrying yourself and, as a result, correctly following your horse wiht your seat, you can then begin looking at how subtle changes in different areas of your body will affect your weight aids and therefore what you communicate to your horse through your seat.

    So to begin with, let’s focus on the half halt.  One of the reasons we apply the half halt is to bring your horse’s attention back to you and let him know something is coming up.

    In fact, you can almost think of your half halt as being a big flashing arrow, directing your horse’s focus to your seat so he can begin to get further directions on what to do next

    Not using your half halt will probably result in your horse’s attention being elsewhere and therefore, any subtle movements with your seat to communicate with your horse will have a good chance of being ignored.

    That being said, it is also worth noting that applying the half halt and then following it up with an incorrect, overly exaggerated or heavy use of the seat and weight aids is just as ineffective as not using the half halt at all.  Think of your half halt as the opening part of the sentence which will then, in turn, lead up to the actual question you wish to ask your horse.   Become clear on what you want to ask, before you draw your horse’s attention to your seat to begin with!

    Once you have his attention, think about what you want of your horse as he rounds the bend.  Ideally, your horse’s spine should replicate the arc of the bend or circle.

    Your horse’s spine will stay on the arc all the way through, from his poll or ears to his tail or dock.  Similarly, your spine will too stay centered over your horses, not leaning one way or the other, not twisting and not collapsing to either the inside or outside.

    His hips will travel along parallel either side along this arc, however his inside hip will come slightly forward or ahead of his outside hip.  Your hips or seat bones will be in this same position.  Then look at the shoulders; again, they should remain parallel to the central arc or track as he moves along (like train tracks), however the outside shoulder will have to move a little more forward in order to do so and, therefore, so must your shoulders.

    It seems like an awful lot to remember, and when starting out, it is!  I have found it easier for some riders to rather remember where their legs should be through the turn.  Because your legs are connected to your hips, by moving them into the desired position, your seat bones will generally follow suit and automatically also ‘slot’ into position.  However, as you become used to the inside and outside being dictated by your horse, regardless of where you are in the arena, you can begin rather making the subtle shifts with your seat bones, and then allowing your legs to follow suit.

    So back to how we can use our muscles, either for good or bad, to influence our weight in the saddle.  Find a hard chair or stool and sit down with a hand under each of your seat bones.  Now, begin by moving your shoulders, the right one forwards the left one back and then vice versa.  Notice how a very small movement of only an inch or so, will change how the pressure being exerted on your hands from your seat bones feels.  Similarly, think about ‘weighting’ one of your seat bones.  Many riders will literally ‘bear down’ on that particular seat bone, shifting their upper body to do so.  However, feel that when this happens, your seat bones actually begin ‘sliding’ towards the opposite side.

    Now, rather think of ‘weighting’ that seat body through a combination of elongating the muscles on that side of your torso, and sending a tiny bit more weight or pressure to the heel of that leg.  Notice the subtle change in the pressure being applied on your hand.  It only takes small but precise adjustments with your muscles to ‘weight’ the seat bone.  The more you can learn to control your muscles, the clearer your communication will become with your horse.

    Very often riders use their weight aids in the wrong way; namely leaning with the upper body while will result in their seat shooting to the outside

    The result is that your horse will move completely differently to how you had planned, because he is trying to remain balanced and, literally, stay underneath you.  If you find this happening a lot, go back to making sure you are symmetrical, balanced and straight in the saddle and, once you are sure of that , begin insisting on it from your horse also. Always think about your own body and what you are communicating with your horse while riding  through the corner.

    I really think that being a little ‘picky’ or obsessive about riding in the correct position will help you to make sure that your body is in the best possible place to apply the correct aids for any given movement or direction.  It will take concentration and consistent effort on your part initially, but as your ‘feel’ increases, you will find that merely thinking about it will result in your body shifting slightly in the saddle – and the more consistent you are with always riding in the correct way, the more effective your horse will be at reading the small, subtle changes in your weight and position.

    Happy Riding

    Lorna

    I have written another blog post on applying your weight aids HERE >>

    Get to know your core muscles better which will give you more control over them by joining the FREE 30 Day Rider Fitness Challenge…

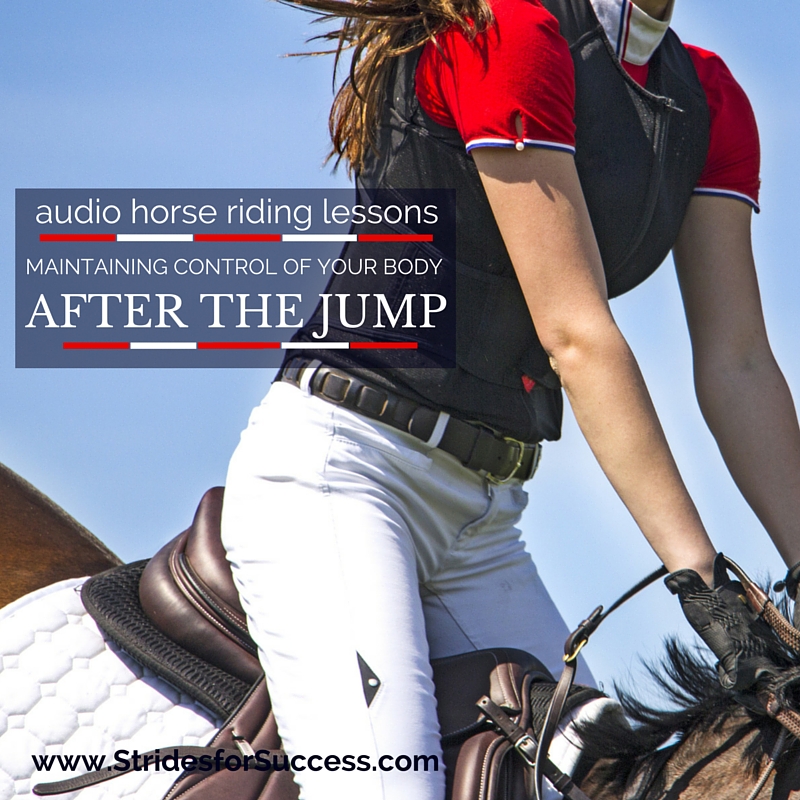
  • Maintaining Control After Jumping

    Maintaining Control After Jumping

    You’ve just popped the fence and, in your mind, it was a success. Mostly because you managed to stay on board for it!  However, as soon as your horse lands, you are beginning to think that your ‘upright seat’ is becoming more and more of a fantasy…

    In fact, every stride your horse takes is literally bumping you further and further onto his withers… Your lower leg is coming up and back. And you’re pretty sure that you’re on the verge of losing your stirrups.

    Who knew that jumping meant such an up-close and personal view of your horse’s neck?!  You glance up, and low and behold, you are approaching the corner; fast!!

    Let’s Remove ‘Forward’ From Your Position!

    This is a really common problem. And one that often begins when we first begin jumping and the word ‘forward’ is used to encourage the position.  Couple this with a really strong desire not to ‘catch your horse in the mouth’…

    The result is you diving forward, leaning on your horse’s neck with your hands (which are filled with as much mane as they can physically hold), and just being a heavy passenger both over and after the jump.

    Maintaining Your Position After the Jump

    Jumping…  It is really one of the most fun things to do on a horse, but if you are not in control on the ground, between the fences, things have a terrible habit of going from bad to worse very quickly!

    Things Get Worse As Fences Get Higher!

    What compounds the problem more is that, generally speaking, when we are jumping over smaller fences, this ‘technique’ works quite well.  You manage to get from A to B. And your horse is in possession of all his back teeth at the end of the lesson.

    However, the problems begin to show up when the jumps become a little higher. Or there are a few of them added together to form a track or course of fences.

    Having an independent, balanced seat both over and after the fence is essential for you to efficiently pilot your horse over all the obstacles. And achieve that all important clear round.

    What Your Horse Does When Jumping

    I think the first part of either preventing this from becoming your jumping technique, or correcting an already formed habit, is to fully understand what happens to your horse when he jumps.

    As he approaches the jump, your horse should begin to transfer his weight a little more back onto his hocks and hindquarters, rather than his shoulders.  This is in preparation for lifting his shoulders and front end off the ground when beginning his jumping effort.

    He will then, when at the fence, with his hind legs moving under him, lift his shoulders, head, and neck to begin his jumping effort.  His hind legs will then come under him, push-off the ground, and ‘propel’ him on, up, and over the fence.

    His head and neck will stretch out and down a little, his shoulders will pull his front legs up and his knees should ideally ‘snap’ up to clear the fence.

    His hindquarters will fold up underneath him. There will be a point where he will be suspended in mid-air over the jump.  Once he is ‘over’ the fence, he will get the landing gear out, so to speak.  He will stretch out his front legs. And, to balance himself, raise his head and neck in anticipation for the first getaway stride after the fence.

    With his head and neck raised, his front legs can touch down and then move forward again into the first stride leaving space for his hind legs to land.  And then he will push-off again with the hind legs to continue cantering after the fence.

    How We Can Interfere With Jumping

    There are a number of different times when we riders have a great potential to get in the way. This can cause problems with our horse’s technique.  Here are some of the more common mistakes we can be guilty of:-

        • Getting ahead of the movement, to begin with on the approach
        • Diving too early when we reach the jump, resulting in us ‘jumping before the horse’
        • Using our horses head and neck over the fence for support and balance – leaning on our horse
        • Collapsing on our horse’s neck on landing
        • Tipping forward on the landing stride and continue to tip more forward with every stride thereafter

    So in order to control our position after the fence, we need to first control our position in front the fence. I suggest that wherever you previously used the word ‘Forward’; substitute it with ‘Back and Down’.

    Adjusting Your Jumping Position

    Next time you approach a pole or a fence, imagine trying to create an open space in front of you. Think of from your chin to your horse’s withers. Focus on making this space as big and empty as possible.

    Open your chest wide from the shoulder point to shoulder point. Sit up through your waist (no creases in your tummy). And, finally, open the angle between your thigh and your tummy as much as you can.

    Then begin creating energy with your legs. Keep asking. However, instead of letting the ‘energy’ run out the front end, imagine that energy coming from your horse’s back hoof in a line towards his ears. It is ‘filling’ that space you created earlier in front of you. And as it does, you use your hands, and in particular, your outside rein, to contain it and direct it where you want it to go.

    You will have to continuously check that you are carrying yourself and your hands in order for there to be enough ‘space’ for this energy to come up.

    Keep this ‘space’ in mind as you approach your jump or pole or even better; Your marker…

    Choose ‘Markers’ in Your Arena

    The first thing I would suggest you do when working on improving your jumping technique does not involve jumping at all. Simply pick different places around the arena and pretend there is a jump there.

    I and my sister done this for years when hacking out (on the trail). We used the posts from fences as ‘markers’. Alternatively, we used telephone poles, or trees, shadows, signposts, other jumps that we rode past. The list was and is endless.

    As you ride past your marker each time, try to imagine where your horse would take off if that was an actual real jump.

    Keep in mind that you will only then follow your horse after he has actually begun to lift off… Not throw yourself at the fence. It is often helpful to say, either in your head or out loud “Wait, Wait, Wait – Lift”. (I know you may feel a little silly, but it really does help!)

    Practice Your ‘New’ Jumping Position

    Then shift into your jumping position over the ‘fence’ (your marker).  Work on coming back into your normal, upright seat afterward, just as quickly as you would if you were indeed jumping a fence.

    Begin in walk… And really pay attention that when you are moving into your jumping position, it is a correct position.

        1. Weight into the heels
        2. Lift your bum a little out of the saddle
        3. Make sure your bum ‘reverses‘ – REALLY IMPORTANT!
        4. As your bum goes back, fold your hips bringing your upper body closer to the pommel of the saddle or withers
        5. Make sure your back is straight
        6. Keep your chest open – the point of each shoulder stretched away from each other across your chest
        7. Give with your arms and hand, through your shoulders
        8. Look up!

    Carry Your Upper Body

    What I often see happen is that although people get out of the saddle, heels down, etc, etc… Because they don’t support and carry their upper body (open the chest), they are leaning on the horse’s neck for support. This is REALLY difficult to get up out of after the jump when the horse is moving.

    It also causes the rider to squeeze with their knees. From here, the lower leg pivots, the upper body comes more down, They usually lose the stirrups… And on, and on, and on :(

    Put A Basic Position on Autopilot

    Once you are getting in and out of your jumping position easily in walk and it should become something that you don’t have to think about.  However, at the beginning of each session do a mental checklist that you are doing each of the above parts. Practice the exercise with no poles.  Only your imaginary ‘markers’.

    Work in walk, in trot and, when that is good, move to canter.

    Then begin working over a pole on the ground… Use the same principle… And lastly, you will be well able to hold your own over a fence and support and balance yourself all the way.

    The super thing about being able to do that is that your horse will also be able to jump better because you’re not shifting all your weight onto his shoulders :)

    Happy Riding
    Lorna

    Additional Resources for Equestrians

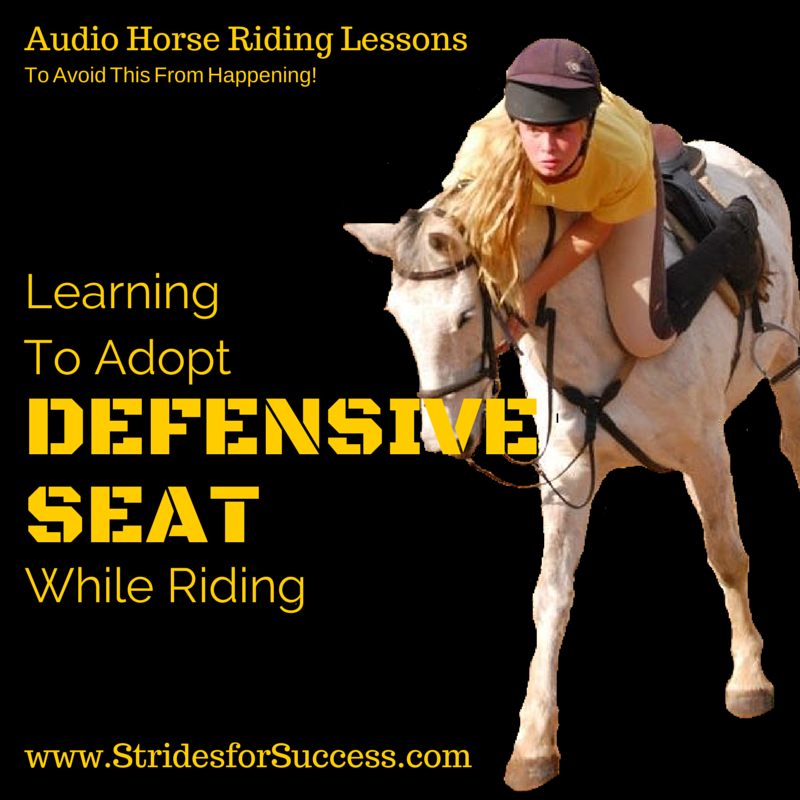
  • Learning To Adopt a Defensive Seat While Riding

    Learning To Adopt a Defensive Seat While Riding

    If there was a soundtrack for having a defensive seat while riding, ‘Jaws’ music would be it!  It would sufficiently set the tone for what is going on in your head.

    Anyone who has been caught off guard by their horse while in the saddle, knows what I mean about this.  It usually begins when your horse does something ‘unexpected’.  You lose your balance a little.  And this all coincides with you beginning to experience that awful feeling of dread in the pit of your stomach.

    You know, the one reserved for when your horse gets his back up a little. And, you just know, that in the next few seconds will begin to show you exactly how athletic and agile he can be!

    Having a horse buck underneath you is not a good thing!  Being able to stay on and ride your horse through this challenge is essential for many riders.  Especially if the horse in question learns to take advantage of the situation!

    Learning to Adopt a Defensive Seat While riding

    A Defensive Seat While Riding

    ‘Staying power’ is a term that describes what many riders wish for in moments like these!  The ability to remain in the saddle, moving and working forward with your horse.  Leanring how to transition quickly into a more defensive seat while riding will help you achieve this.

    So, rather than just accepting your fate.  Simply allowing your horse to push the ejector button when he feels like it, here’s a few suggestions to not only keep you in the saddle but also ride your horse through the bucking and back to working with you in the arena.

        1. Push your heels down (really down!)
        2. Bring your shoulders slightly behind your hips, stretching out the front of your body
        3. Distract your horse by riding him through the problem and get him to use this energy elsewhere!

    I have written some more comprehensive blog posts surrounding this topic that you may find helpful to read or listen to (there is a short 12-minute podcast episode on each as well).

    Happy Riding
    Lorna

    Additional Resources To Help Equestrians:-