Tag: position

  • Improve Your Riding Skills Today With This Simple Exercise…

    Improve Your Riding Skills Today With This Simple Exercise…

    [fusebox_track_player url=”https://op3.dev/e/traffic.libsyn.com/dailystridespodcast/1246_Improve_Your_Riding_Skills_Today_With_One_Simple_Exercise.mp3″ title=”Improve Your Riding Today with One Simple Exercise” social_linkedin=”true” social_pinterest=”true” social_email=”true” tweet_text=”Try this the next time you ride your horse…” hashtag=”audiohorseridinglessons” twitter_username=”strides_success” ]

    Can changing one thing really help you to improve your riding? I think so, and the great news is that regardless of how well you ride, you can begin to implement this the very next time you’re in the saddle.

    This exercise is suitable for you to ride in walk, trot, and canter. It is also something you can use for lateral work and even grids and jumping.

    Begin by Assessing How ‘Straight’ You Are

    Your posture and position are important when you ride. When they are working for you, they allow a clearer use of your aids. So, first and foremost check both and make any corrections.  Take note of what you are having to correct here as well; chances are that the parts which are not working for you have become a habit and will need diligent, consistent attention if they are to work for you and support you.

    Also, assess how ‘equal’ or ‘symmetrical’ you are as you ride. Ideally, you will want to have an equal amount of your body on the left side of the horse as is on the right.

    Any tilting, leaning, collapsing, or crookedness will cause you to incorrectly use your weight aids. And this has the potential to confuse the whole conversation with your horse!

    Your Aids Are the Banks of a River

    From here, begin seeing your aids as being like the banks of a river. The more consistent, symmetrical, and effective they are, the easier it will become to keep the water in the river.

    Notice in particular what happens when you ask something different. Maybe a transition, or a half halt. It could be riding around a bend or riding in a circle. It is easy enough to keep things equal and symmetrical when riding on the straight and doing one thing. It can become a whole different ball game when you add something different to the mix.

    Developing your different aids, independently of each other, will improve your riding.

    Again, take note of areas where you drop something (maybe a hand). Or where you grip with something (like an inside leg?).  Maybe where your seat migrates to somewhere it shouldn’t (hello corners, we’re speaking specifically about you here!).

    Put ‘Water’ Into the River (Energy)

    Once you are pretty aware of your straightness, your symmetry, and your use of all your aids, begin experimenting with putting more ‘water’ into your river. Basically, put more energy into the container that is created by you and your horse.

    When you ask for ‘more’, what notice what happens to that energy… Is there somewhere in particular where it leaks out? Maybe an outside shoulder for example. Or, is the energy simply flowing out too fast; maybe it’s all running out of the front end?

    When you create more energy and actively look for the weak points in your ‘river banks’, you can begin to identify where to focus your development and work in your riding.

    Keep Energy Flowing & Inside of the Banks

    Finally, the goal of all of this is to be consistent with allowing the energy to flow inside of the banks you have created using your aids. Notice if your seat is blocking the flow of energy? Or if your inside hand and arm are blocking your horse from ‘stepping into’ the energy more.

    Once you are aware of the energy contained and channeled by your aids, you can begin to experiment with this energy to produce different results.

    You can ask for your horse to restrict the flow momentarily with the half halt. Also, you can ask for the flow to take a different course or track through turning and bends. And, you can ask for lateral work, lengthening, shortening, half halts, transitions, and everything else in between.

    If you start, today, working on this concept every time you’re in the saddle, you can have a huge positive input on how you ride.

    And to how your horse ‘goes’ as well.

    Happy Riding
    Lorna

    Get Support & Guidance in Your Riding

    More, More, More… To Help You :)

  • The 3 Undeniable Effects of Bad Posture when You Ride

    The 3 Undeniable Effects of Bad Posture when You Ride

    [fusebox_track_player url=”https://op3.dev/e/traffic.libsyn.com/secure/dailystridespodcast/1194_3_Ways_Bad_Posture_is_Negatively_Affecting_Your_Riding.mp3″ title=”The 3 Undeniable Effects of Bad Posture when You Ride” social_linkedin=”true” social_pinterest=”true” social_email=”true” tweet_text=”Posture is important when you ride… Here’s Why…” hashtag=”equestrianpodcast” twitter_username=”Strides_success” ]

    Posture. It’s something that many people (equestrians or not) have memories of a parent or teacher correcting them on! And perhaps this is why many riders don’t want to hear about their posture when it comes to their riding.

    However, no matter what way you approach your riding, or what discipline you choose to work with your horse on, posture counts.

    I believe that bad posture in the saddle accounts for 3 big ‘sticking points’ for many riders in the saddle.

    1. Less Effective Aids

    How you carry yourself will decide a lot when it comes to how your horse hears your aids. From the placement of the aids to the pressure to the combination to the clarity of them. Your posture will decide what your horse hears when you ask a question.

    And what your horse hears, is what will determine the response you receive.  

    So many riders will school, and practice, and do the things over and over again.  Meanwhile, they are simply reinforcing the training they don’t want.  If your horse is not doing what you are asking him to do, is it possible that you might have crossed wires somewhere?

    Is it possible that what you ‘think’ you’re asking and what you’re really asking are two different things due to bad posture when you ride?

    2. Blocking or Diverting the Flow of Energy

    The second big repercussion of bad posture when you ride is that you simply stop your horse from doing what you have asked him to do.  Maybe your horse is a wonderful, patient schoolmaster.  He gets it that you’re not always spot on with your aids.  But because he is his wonderful self, he obliges you anyway.

    He does what you tried to ask him to do… Only to be blocked by your body being in the way!

    Here’s a simple way to think of this:- Imagine your horse’s back is a pipe.  And imagine the energy that we want to create and move through our horse as being water.  We want the water to flow through this pipe to get from the back to the front.  In one end of the pipe and out the other side.  Now, imagine you put a big heavy rock on that pipe.  What is it going to do?

    It might completely block the energy; which usually results in things ‘back firing’ spectacularly.  Or it can result in the flow of water not being quite what you want.  A dribble rather than a flow. 

    When we have bad posture as we ride, we become a little like the big rock.  A tonne of potatoes or a sack of coal.  Whatever works best for you ;).  We literally block the energy from flowing or we negatively impact the flow of the energy.  Your horse might just oblige you and do all of the things, but it won’t be close to what he could do if you stopped blocking him.

    What is important to remember is that the simple remedy for all of this is to begin engaging your core and carrying yourself.  

    3. Your Balance when You Ride

    The final point, which is just as important a point as the others, is that your posture affects your balance. If you have been struggling to maintain balance or rhythm when you ride, I am willing to bet that your posture is off.  When I first moved to South Africa, riding on the back of a ‘bakkie’ (a pick-up truck) was a real novelty.  Especially coming from the often wet and sometimes dreary Ireland!

    What I noticed when on the back of a moving bakkie was that if I focused on correct alignment, balancing was pretty easy.  As soon as any slips in concentration caused bad posture, things got a little hairy!  Horse riding is the same.  The more aligned you are, the more self-balanced you can be.  And, simply put, the less you will have to rely on your horse to keep you on board!

    An independent seat is only achievable when we work on actively aligning our bodies for optimum performance.

    Aligned posture contributes more than anything else to self balance for riders.  Trust me, from riding on the back of bakkies, to riding horses, to training thousands of riders, this is true!

    Work on Correcting Bad Posture

    So, now that we have covered why bad posture is so detrimental to your riding, what can you do about it.  The good news is that posture is usually a habit.  Meaning that you will have to simply train yourself to do something else.  Replace it.  I suggest setting aside a month of your riding time for this task.

    You want to put good posture onto autopilot in your riding so that you can replace your ‘doing you absolutely no favors’ bad posture!

    Set checkpoints in your riding area.  If you are on the trail use fencing poles, gates, electricity poles, or anything that shows up fairly frequently to remind yourself to ‘straighten things out’.  If you’re in the arena, use fencing poles, floodlights, corners, jump uprights, or other things to do the same.

    Then simply make it a rule that every time you pass your ‘checkpoint’, you’re going to carry yourself.

    By doing this, you will soon (within one month) dramatically improve any bad posture that has crept into your riding.

    Happy Riding
    Lorna

    Additional Links to Help You:-

  • Applying the ‘Click Your Fingers Rule’ to Your Position While Riding

    Applying the ‘Click Your Fingers Rule’ to Your Position While Riding

    Applying the Click Your Fingers Rule to Your Position While Riding

    What this episode is all about & how it can help you:-

    • Use this simple ‘rule’ in your day-to-day riding
    • Know ‘when’ to apply this rule in your riding
    • Begin to take responsibilities for your own balance in the saddle
    • Make the necessary transition in your riding, from passenger to rider

    [smart_track_player url=”https://op3.dev/e/traffic.libsyn.com/dailystridespodcast/1085-Applying-the-Click-Your-Fingers-Rule-to-Your-Riding.mp3″ title=”Applying the Click Your Fingers Rule to Your Riding” social_linkedin=”true” social_pinterest=”true” social_email=”true” tweet_text=”The simple ‘rule’ involving your position that will help you in your riding’” hashtag=”equestrian” twitter_username=”strides_success” ]

    Imagine if there was something you could actively ‘do’ every moment you’re in the saddle that would almost guarantee that you’re in the ‘right place at the right time’..  There is. And it involves abiding by a non written ‘rule’ regarding your position.

    This episode of the Daily Strides Podcast is all about that rule and how you can use it, beginning today, in your riding.  Your position is so important

     What is the ‘Rule’

    Well, imagine we (you and I) were in the arena together. You are travelling along on your horse, whether that be in walk, trot or canter.  In fact, you could even be jumping, halfway through a transition – it makes no difference what you are doing.  So, there you are, riding along and then I apply this ‘rule’ to you and your riding…

    I ‘click my fingers’ and make your horse vanish.  Yes, disappear into thin air from underneath you.  Gone.  The question you have to ask yourself is: “would I land on my feet?”.

    Now, obviously this is not going to happen.  I’m good, but I’m not that good!  However by imagining the horse is suddenly not there, the questions becomes ‘where and how would you land?’.

    If the answer is on your face or on your bum, it simply means that you are depending on your horse for balance, rather than being responsible for your own balance.

    Who Are You Depending on For Balance?

    When we start out riding initially, we do tend to rely a lot on our horses for balance. Thank goodness for all the school horses and ponies in the world with their endless patience! But in order for your riding to progress, this is something that you have to begin accepting responsibility for.

    You are responsible for your own balance in the saddle.  Applying this ‘rule’ to your riding will help you achieve that.

    Relying on your own body, and therefore your own actions and responses, for balance will allow you to begin developing independent aids.  Independent aids lead to clearer communication with your horse.  They also lead to an independent seat.  This ‘rule’ regarding your position will help you start working towards all of these things in your riding.

    Applying the Rule

    There is are two simple ‘checks’ you can do every time you’re in the saddle to begin effectively applying this rule to your position and your riding.  The first to make sure that you are indeed sitting correctly in the saddle.

    Use your seat bones for guidance. Are they directly underneath you, pointing straight down? Many upper body issues and lower leg issues are due to this basic principle being wrong or missing.

    The second ‘check’ applies to the ‘lines’ to your position. Particularly the line that should run through your head, shoulder, hip and heel.  If these elements of your body are aligned, you are usually ‘carrying’ yourself, which means that you are, for the most part, assuming responsibility for your own balance.

    Being aware of the ‘rule’ will allow you to consistently reminding yourself to apply it to your riding, regardless of what you’re doing.

    When Does This Rule Apply to Your Position?

    The simple answer is ‘all the time’. Yes, really! Regardless if you are walking, trotting, cantering and even galloping.  Or if you are riding on the flat, up or down hills.  It is all the same. You are responsible for your own balance.  Even when you are approaching a jump, starting the jumping effort, landing or a stride or two after the fence, this rule will apply.

    If the horse was to vanish at any given point, anywhere in your ride, you should land on your feet.

    Applying this to your Position & Riding

    I’ve already mentioned checking your seat.  Is it truly ‘underneath‘ you?  From here, focus on keeping your legs under you at all times. A weak lower leg will swing, meaning that it can often be too far ahead of you, closer to your horses elbow or shoulder. Or too far behind you, closer to your horse’s flank area.

    Neither of the above scenarios would result in you landing or standing on your own two feet if your horse was to vanish!

    The final suggestion I have for consistently implementing this ‘rule’ in your riding regards your body when in the jumping position or two point seat.  Think of your torso as being almost like a traditional weighing scales. Your shoulders are one end and your ‘bum’ is the other. Use your bum to keep your shoulders balanced.

    A straight back is essential for this to happen, and this is where your core strength will really be essential to your overall balance.

    Making the Transition in Your Riding

    The ‘click your fingers rule’ is one that will, when applied consistently, change your riding.  You will literally go from being dependent on your horse for support, to being able to actually support your horse when he needs it.

    That is where you really begin to make the transition to being a true ‘rider’ in the saddle.

    I am hosting a free, live online training for riders looking to begin making that transition in their riding; from passenger to rider. You can find out more and register HERE

    Happy Riding
    Lorna

    Other Posts and Episodes that Relate to This Topic:-

  • Staying with Your Horse Over Jumps

    Staying with Your Horse Over Jumps

    Staying with Your Horse Over Jumps

    What this episode is all about & how it can help you:-

    • Understand the importance of a solid position to begin with
    • Realise that timing is everything when it comes to jumping with your horse
    • Feel motivated to learn ‘how’ your horse jumps
    • Get started improving your skills over fences today

    [smart_track_player url=”https://op3.dev/e/traffic.libsyn.com/dailystridespodcast/1083-Staying-with-Your-Horse-Over-Jumps.mp3″ title=”Staying with Your Horse Over Jumps” social_linkedin=”true” social_pinterest=”true” social_email=”true” tweet_text=”This weeks podcast episode is focused on ‘Goldilocksing’ your jumping – getting it ‘just right’” hashtag=”equestrian” twitter_username=”strides_success” ]

    Do you find that your jumping is a little ‘touch and go’?  Some days you are great at staying with your horse over the fence.  However those other days are showing up a little too often for you to be truly confident and positive about your jumping.

    Staying with your horse while he jumps helps you both to feel confident and relaxed.  It allows your horse to use himself fully and correctly.  And it allows you to remain balanced and ride a great ‘get away’ from each jump

    In this episode of the Daily Strides Podcast I want to give you some simple tips and instruction regarding how you can become more ‘hit’ and less ‘miss’ where your jumping in concerned.

    I am going to give you a few ideas to work on when you are in the saddle with your horse, along with some that can be done from the comfort of your home. 

    Your Jumping Position is Constantly Shifting

    I want to begin by pointing out something which I feel is pretty obvious, but often overlooked by many riders when it comes to jumping.  Your jumping position is not ‘fixed’.  There is no ‘plug in and play’ when it comes to your jumping position.

    Think about your position when you are walking, trotting or cantering.  There are subtle shifts and changes happening all the time.

    Every second of each stride involves a slight shift or change in your position in order to remain ‘with the horse’. 

    While most riders apply this to their riding ‘on the flat’, so many riders approach their jumping position differently.  They ‘fix’ themselves in it.  Brace themselves for the jump.  Often this happens long before the horse has every actually jumped. And they remain motionless there until the horse has all 4 feet safely back on the ground, sometimes a stride or four later!

    Developing a Strong Yet Supple Position for Jumping

    While there is a ‘position’ for jumping, this in no way means that you must ‘fix’ yourself in this position.  The more supple you are, the stronger you are and therefore the more you can move with your horse as he jumps.

    Your joints must remain supple enough to make the required small shifts as your horse moves over the jump itself.  Simultaneously, your position must remain strong enough to carry your body throughout the movement as well.

    Strong, yet supple… We have heard that before when it comes to riding, haven’t we?!  However so often it is applied to the horse.  I want you to begin applying it to yourself and your abilities in the saddle.

    I believe the ‘click your fingers’ rule when it comes to your position applies just as much to jumping as it does to flat work.  Basically, at any point before, during or after the jump, if your horse was to magically ‘vanish’ (by someone clicking their fingers) you would land on your feet.

    You are responsible for your own balance throughout the jumping effort. 

    If you are depending on your horse to support or balance you, you have work to do!  I suggest working on the flat initially before starting working over jumps.

    Timing is Everything when Jumping

    As riders, we know that timing is important.  It is necessary for clear communication between horse and rider.  In jumping timing is also essential to allow your horse to actually use himself correctly over the jump.

    One of the most common reasons riders struggle to stay with their horse over a jump is due to ‘ducking’.  Ducking basically means that the rider has transitioned into their jumping position before it was necessary to do so.  This can be a half a second too early, or two strides too early!

    In order for your horse to use himself correctly over fences, you need to get out-of-the-way and allow him to jump! 

    This means waiting until he begins moving up and over the fence before you follow him there.  The important word in that sentence is ‘follow’.

    Set Things Up – Then Follow Him Over

    Your job is not to jump the jump! Your job is to set things up so that your horse has the best chance of successfully jumping the jump. 

    I see riders throw themselves at fences (and therefore, their horses necks) as though the further up the neck they can get, the better the jump.  The irony is that the opposite is true.

    In order for your horse to jump, he has to ‘lift’ his front end.  Having all the rider’s weight been flung onto the very thing he is being asked to lift, makes his job so much harder!

    Rather think of sitting tall in order to give your horse the space he needs when lifting his front end.  As he begins to lift, over the jump, you simply follow.  Let your horse come up to you and then follow him over.

    Learn How Your Horse Jumps

    How much you need to do in order to remain balanced while you follow him will depend on your horse, the jump itself and your abilities as a rider. I think that one of the most basic things you can do as a rider is learn how your horse moves over fences.  Study his body. And the great news is, you can do this from the comfort of your couch!

    Having a clear picture in your head about how your horse is moving over jumps will allow you to feel more confident about how to best move with him while he jumps. 

    Look at his body as he approaches the fence.  Pay attention to the changes in his overall frame, especially on the final stride as he transitions to actually jumping. Look at how he uses his body over the jump.  How he goes from the approach side to the landing side.  Pay attention to how he lands, particularly his head and neck at this point. Finally, look at the first few strides after the fence.

    If you don’t have the opportunity to study your own horses jumping technique, through videos or photographs, look at other horses. 

    Go online and find YouTube videos.  Watch jumping competitions on the TV or go in person and watch them live.  You will begin to see similarities and patterns.  Study how the horses use themselves.  Understand what helps and what hinders.  Then take this knowledge and apply it to your riding and your position over the jump.

    Start Working On It Today

    Jumping is really just a big canter stride.  This is great news if you are feeling less than capable of staying with your horse over each jump.  The reason is, you can actually begin working on it while on the flat.

    The two point seat or light seat is your friend when it comes to developing suppleness and strength for jumping.  Work in it daily when in the arena.  Keep in mind that you are responsible for balancing you.  Your balance is not your horses concern!

    From here, begin working over a single pole.  Practice transitioning in and out of a jumping position over the pole.  Work on your timing and your strides.

    Begin merging what you are feeling through your body in the saddle, with what you know your horse is physically doing underneath you

    Once you are confident walking, trotting and cantering over the single pole, you can begin ‘building’ your jump.  As your jumping becomes more ‘hits’ than ‘misses’ both you and your horses confidence will grow.  So too will both of your enjoyment about jumping.

    Learning to stay with your horse over fences is not a difficult task.  Consistency is key and, like most things in riding, my number one piece of advice is to start small and get the basics right.

    Happy Riding

    Lorna

    Other Posts and Episodes that Relate to This Topic:-

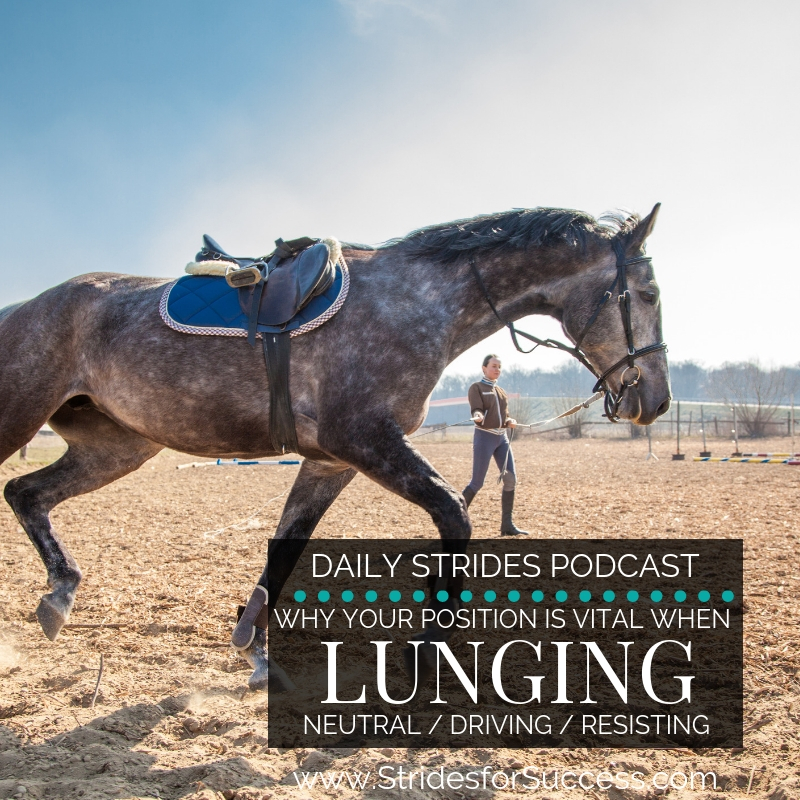
  • Why Your Position while Lunging is Everything

    Why Your Position while Lunging is Everything

    Why Your Position while Lunging is Everything

    What this episode is all about & how it can help you:-

    • Understand the relationship between your position on the ground & in the saddle
    • Identify the difference between ‘Neutral’, ‘Driving’ and ‘Resisting’
    • Know when to move into the ‘driving’ position
    • Know when to move into the ‘resisting’ position

    [smart_track_player url=”https://op3.dev/e/traffic.libsyn.com/dailystridespodcast/1073-Why-Your-Position-in-Lunging-is-Everything.mp3″ title=”Why Your Position while Lunging will Determine how Successful You Are” social_linkedin=”true” social_pinterest=”true” social_email=”true” tweet_text=”Where are you standing when you lunge? Is it affecting how well your horse is going? Daily Strides Podcast episode” hashtag=”horseriding” twitter_username=”strides_success” ]

    Lunging is one of the more popular ways of working horses, especially when time and daylight are in short supply!  It is a fantastic way of maintaining fitness and even moving your horses training forward. I highly recommend it to all riders and their horses. 

    In this episode of the Daily Strides Podcast we are chatting about one of the biggest mistakes riders make when they are working their horse on the lunge.  Namely, not paying enough attention to where they are positioned in relation to their horse as they lunge.

    Your position when lunging is as important as your position when riding.  When riding, a good position means that you can more effectively communicate with your horse.  It is the same when you lunge.  

    What is Your Position when You Lunge?

    I want you to imagine you are lunging your horse right now.  There will obviously be a circle, which is the track your horse will work on while lunging.  You are in the centre of that circle (although when you lunge you are not actually stationary, but rather working on a ‘smaller’ circle within your horses ‘larger’ circle).

    Imagine this circle as being a pizza or a pie.  You and your horse are a ‘slice’ of this pizza or pie. You in the centre, your horse at the edge.  Your lunge line creates one side of your slice and your lunging whip creates the other side of the slice. 

    Your position is where you are standing in relation to your horse at any given time.  Keep in mind that when you lunge, both you and your horse are moving.

    One of your biggest responsibilities as the ‘lunger’ is to be in the correct position so that you can be most effective with your aids.

    Your Position on the Ground and In the Saddle

    When you are in the saddle, your seat is one of the most important elements of your position.  If you are tipped too far forwards, you will ‘pinch’ or block the horse’s energy going forwards.  If you are leaning too far back, it can have a similar effect – or it can drive your horse forwards.

    Your position on the ground while lunging is as important as your seats position in the saddle when you ride.  It is the foundation for the rest of your position and therefore how effectively you can use your aids to communicate.

    When your position in the saddle is less than ideal, your communication with your horse becomes mumbled and, well, less than clear.  Your lunging position has the same impact.

    If you are too far behind or too far ahead of your horse while lunging, it will impact your horses way of going.  If you are too tired to ‘keep up’ with your horse while lunging and rather just allow your horse to run circles, that will also negatively impact your horses way of going.

    Just like when riding, mindfulness over how you are using your position will begin allowing you to refine it and improve it as a positive aid when working with your horse. 

    Neutral, Driving or Resisting

    Becoming mindful of your position while lunging will mean understanding how your body language and position influences your horse.  Are you in neutral, are you driving your horse forwards or are you using your position to create a little resistance to your horse going forwards?

    Your seat can influence your horses way of going and over time will become one of your most influential aid in the saddle.  Your basic position in relation to your horse when lunging can have the same impact on the ground.

    Finding Your ‘Neutral’ when Lunging

    Neutral will be the place you will find yourself in most of the time when you are lunging.  It is the place where you can be ‘quiet’ with your aids and allow your horse to figure things out for himself. Neutral is the easiest place for you to take action if and when needed.

    Think of your seat when it is in ‘neutral’ when riding.  You are not driving, you are not resisting.  You are moving with the horse.  Neutral while on the ground lunging is the same.  You’re not driving, nor are you resisting.  You are simply moving ‘with’ your horse.

    The easiest way to find ‘neutral’ is to position yourself opposite where you would sit when in the saddle.  Too far forward and you will be opposite the horses shoulder or elbow.  Too far back and you will be opposite the flank or hind quarters.

    Think about where your seat would communicate with your horse, and try to place yourself directly opposite there while moving with your horse on the circle. 

    The Balance of Aids while Lunging

    From this ‘neutral’ you can move either way.  You can drive or resist.  Remember, even though you are on the ground, lunging requires you to balance your aids continuously while in the saddle.

    Yes, your aids are slightly different.  You are substituting your legs for a lunge whip and your hands for a lunge line.  However, the combined effect will be the same.

    When riding your seat is not the only aid you communicate with from the saddle.  When lunging your position is not the only aid you will use with your horse.

    Like riding, in order for your other aids to be effective, your basic position must first be balanced and correct.  This is neutral on the lunge. 

    Also, just like riding, there are times in riding when you will have to ask for ‘more’ or drive your horse forwards a little more.  There are also times when you will have to resist or ‘block’ your horse from going forwards.  Changing your basic position in relation to your horse can help you do either, as necessary, when lunging.

    Understanding Your ‘Driving’ Position

    A driving position is often necessary when your ‘neutral’ position is no longer effective in actively encouraging your horse to move forwards.  You may have already used your lunging whip to also encourage (not hit or whip the horse, just suggest) him, just like you would use your legs in the saddle.  However, you find that your horse is still not actively going forward in the way you want.

    Remember that lunging, just like riding, requires your horse to move and think ‘forward’ at all times.  It is essential to make progress in your training.

    By positioning yourself to being opposite the flank or hind quarters, you are now allowing the horse to move ahead of you a little.  This is due to you now being more ‘behind’ the horse and, therefore, able to encourage him forward more effectively.

    You can then use your other aids, from this ‘driving position’ to encourage your horse more forwards. An effective aid can be your body language itself when you take a purposeful step towards your horse.  Or your voice to either encourage him on, or to help set the tempo for the gait.  Your whip can be used in a ‘swishing’ way on the ground to ask him to ‘push’ a little more from behind.

    Your aids applied from this different position will have a different effect than if applied from neutral. They will have a more ‘driving’ and ‘forward’ effect. 

    Understanding Your Resisting Position

    Equally as important is your ability to ‘steady’ or resist your horse going forwards some times.  I find that this ‘resisting’ position is especially important when working with young or inexperienced horses on the lunge.

    The resisting position involves you getting a little ‘ahead’ of your neutral position.  Being opposite your horses shoulder, rather than back where you would sit when in the saddle. 

    Your resisting position is a way you can ‘slow’ your horse down or actually have him halt, without turning into you and the centre of your circle.

    Why I Suggest Not Allowing Your Horse to Turn In on the Circle

    One of the biggest mistakes I see riders make when lunging is allowing their horse to turn in and face them, shoulders squared to the riders shoulders, on the circle.  It seems harmless enough, however it actually really impact the quality of work you can potentially achieve with your horse while lunging.

    Transitions are important when schooling horses. Lunging is no different. In order to really ‘work’ your horse on the lunge, transitions between trot, walk and halt are essential.

    If you allow your horse to turn in and face you every time he transitions into walk or halt, you are breaking the concentration and the ‘contact’ of the work you are doing. You are literally undoing everything that has led up to that point on the lunge!

    Using Your Resisting Position to Positively Impact Your Lunging

    Along with being opposite the horses shoulder, you can also turn your ‘flank’ to your horse.  Turn your side to your horse, your leading shoulder.  You can also take a few steps ‘backwards’ to keep up with the horse.

    If your horse is not slowing down or stopping, whatever you want him to do, you can take this further by using your ‘resisting position’ to walk your horse into the fence around your lunging area.

    By using the fence to stop or slow your horse, he will still technically remain on the circle, not turned in and facing you.  Meaning you can resume the ‘work’ without any break in contact or concentration. 

    Obviously, with all things related to horses, repetition and consistency are the keys to making this work for you.  However, over time when you learn how much pressure to apply with your ‘resisting position’, it will become a handy aid you can turn to while lunging your horse.

    If you are struggling with lunging and would like some simple step-by-step instructions to help get you and your horse off to a good start, make sure you sign up for the “3 Days to Successful Lunging” Guided Audio Training. It is completely free and will have you on the lunge and working with your horse today.

    Happy Riding
    Lorna

    Links mentioned in the episode:-
     

  • Hokey Pokey or Swinging Legs While Riding

    Hokey Pokey or Swinging Legs While Riding

    Hokey Pokey or Swinging Legs While Riding

    What this episode is all about & how it can help you:-

    • Understand how you are sitting in the saddle might be affecting everything
    • Realise the disastrous effects this can have on your overall position
    • Focus on ‘feeling’ what your leg is doing in order to improve things
    • Work in walk, then trot and then transitions

    [smart_track_player url=”https://op3.dev/e/traffic.libsyn.com/dailystridespodcast/1071-Hokey-Pokey-or-Swinging-Legs-While-Riding.mp3″ title=”Hokey Pokey or Swinging Legs While Riding” social_linkedin=”true” social_pinterest=”true” social_email=”true” tweet_text=”Are you legs doing there own thing when you’re riding? Check out this podcast episode that will help…” hashtag=”horseriding” twitter_username=”strides_success” ]

    Be honest… Are you finding yourself doing the hokey pokey in the saddle more than you would like?  Your right leg is in.  Your right leg is out.  In out, in out, shaking all about…

    Swinging legs are a huge issue for so many riders and what makes it all the more frustrating is that as soon as you begin to ‘fix’ your legs, well they seem to lose all effectiveness as well.

    In this episode of the Daily Strides Podcast we will chat about how you can begin to ‘quiet’ your legs by making some changes that actually have very little to do with your legs themselves.

    I believe that most cases of hokey pokey legs, or swinging legs are actually a symptom of something else, rather than the root problem itself.  Fix the cause and, very often, the symptoms will magically disappear as well.

    Swinging Legs are Frustrating for All Involved…

    There are situations where we want a little daylight between your body parts and the saddle.  However your leg, particularly your lower leg (so everything below the knee) is one of those.  Having your leg literally ‘off’ the horses sides means there is no communication happening.

    It also means there is a lot of instability in the riders basic position, which usually results in the rider depending on the horse for balance. 

    Swinging legs also result in a constant chatter of irrelevant noise being fed to the horse from the riders legs, which results in the horse eventually tuning out from what the rider has to say.

    Responsiveness in horses is generally a direct reflection of the riders technique and consistency (or lack of either) in the saddle. 

    The other frustrating reality of swinging legs is that because the rider is lacking the ability to balance themselves in the saddle, things can become pretty hairy!  The potential for falls is dramatically increased, which leads to a further breakdown of confidence for both horse & rider.

    How You Are Sitting in the Saddle

    One of the most obvious and common reasons for swinging legs is due to the rider sitting incorrectly in the saddle.  Put plainly, they are not sitting on their bum!  A forked seat is when the rider is pitched forward on their crotch, which results in extremely tight and stiff hips, pelvis and thighs.

    This fork seat results in the rider looking like a ‘duck’ in the saddle.  Their bum is sticking out behind them.  Their shoulders are pinned back which results in their back having an uncomfortable and unnatural ‘over arch’ through it.  Even typing this feels rigid and stiff!  Definitely not ideal for a supple, balanced rider.

    Your swinging legs are merely a symptom of a bigger issue, which is your incorrect seat.  The irony is that most riders just focus on ‘stilling’ their floppy leg – which only serves to increase the overall stiffness & tension.

    Resist All Temptation to Grip with Your Knees

    The other issue that often accompanies swinging legs is gripping knees!  Don’t grip with your knees.  Doing so immediately shuts down your ability to stabilise and balance yourself in the saddle.

    Gripping with your knees and a closed, tight hips in the saddle are a little like the chicken and the egg.  It is often uncertain which came first, however the result is always the same – an ineffective and unbalanced rider. 

    If you are worried that you might just be gripping with your knees you can find out pretty quickly by sliding your hand between your knee and the knee roll of your saddle. If you can ‘swing’ your knee out without resistance, you don’t have to worry.

    However, if your knee feels locked on the saddle, consider that it might just be a result of how you are sitting.  Correct your seat in the saddle and try again until you don’t feel the resistance.

    Paying Attention to Your Position

    As already mentioned, one of the major downsides to swinging legs is the loss of position for the rider.  Whether the position is failing due to an incorrect seat or due to the riders lack of balance and confidence will depend on each situation.

    When your position is changed it results in less effective communication between horse and rider. 

    It also means that you have to do more every time you apply an active aid…  A good, correct position is so important to your long-term success in the saddle.

    It is worth mentioning again that your swinging legs are usually only a symptom of something else going on further up your body.  So correcting your basic position can be a simple yet effective way of beginning to gain control of your legs while riding.

    A Quick Position Check From the Ground

    A simple yet effective way of feeling how a correct position is can actually be done off of your horse.  Stand on the ground with your legs wider than hip width apart.  Pretend you are in the saddle, so bend your knees.

    Notice how it feels to remain aligned while holding this position – the head, shoulder, hip, heel line that should be present when you are in the saddle.

    Pay attention to where your seat bones are pointing.  Also pay attention to the angle between the front of your thigh and the front of your tummy.  This is the angle that needs to be open and free in order to allow your thighs to be open, and therefore your knees to be free in the saddle.

    Becoming Mindful of Your Lower Leg as You Ride

    Once you have fixed the cause of your swinging legs, you must now work on developing and strengthening your leg, particularly your lower leg.

    Focusing on a lack of daylight between your lower leg and your horses sides is always a good place to begin.  

    Checking in on yourself throughout the ride by sliding your hand between your knee and the knee rolls to see how open your knees actually are.  Tiredness and tension caused by things not going exactly to plan can cause hold habits to reappear, so it is a good idea to be aware of what is happening the further you are into your ride.

    Paying Attention to Swinging Legs during Transitions

    I am going to caution you here about thinking that the issue is solved only to realise that old habits are truly hard to change when it comes to transitions…  So often I see riders begin to master a more quiet and effective lower leg when ‘going’.  Perhaps they are trotting or walking, or even cantering.

    However as soon as a transition occurs, their leg migrates forward or backwards offering no support to either the rider themselves or the horse!

    Transitions are, in my opinion, an area which demand a lot of attention to detail from the rider.  Try to hold your leg position throughout the transition.  This is obviously with the exception of transitions that require your lower leg to move in order to signal to your horse.

    Very often it is easier to recognise and see the symptoms, those swinging legs, which will let you know that your seat has shifted or your upper body has tilted or tipped again.

    Where to Begin…

    I am going to suggest beginning in walk and correcting your position and aids in the walk.  Obviously then building on to trot and later the canter.  I also suggest, as mentioned, paying particular attention to your lower leg through transitions.

    Correcting this may seem like a bit of an uphill battle initially.  However, once you realise that your swinging legs are a symptom of something else it really does make all the difference. 

    Identifying that root cause is vitally important and changing that, before you try anything else, is the easiest and least frustrating way to remedy those hokey pokey legs.

    Happy Riding

    Lorna

    I am hosting a free live online training on “The 6 Basics to Focus On in Your Riding” and I would love for you to join me there…  If you’re interested, you can register for your seat by CLICKING HERE

    CLICK HERE to save your seat in the free live online training

    Links mentioned in the episode:-