Tag: independent seat

  • Getting started Without Your Stirrups in the Saddle

    Getting started Without Your Stirrups in the Saddle

    What this episode is all about & how it can help you:-

    • The benefits of riding without stirrups
    • The difference between a ‘draped’ leg and a vice grip!
    • How relaxation requires a little effort on your part
    • A few ideas about getting started today

    [smart_track_player url=”https://op3.dev/e/traffic.libsyn.com/dailystridespodcast/1006-Getting-Started-Without-Your-Stirrups-in-the-Saddle.mp3″ title=”Getting Started without Your Stirrups in the Saddle” social_linkedin=”true” social_pinterest=”true” social_email=”true” tweet_text=”Worried about riding without stirrups? This will get you started! ” hashtag=”nostirrups” twitter_username=”strides_success” ]

    Riding without stirrups is something many riders won’t even dare to try. They understand how important it is for their riding and the development of their seat, however the fear of the unknown (and potentially slipping off) holds them back from trying.

    Relaxation when riding without stirrups is vital, but not to the extent that your position is compromised. Many riders think relax and instead begin to collapse! This can be seen when riders stop being responsible for carrying themselves in the saddle and, instead, become heavy and a burden on their horse.

    Riding without stirrups is your perfect opportunity to work on draping your legs around your horses sides. Doing this lenghtens your leg, which – over time – will improve your communication with your horse.

    I encourage you to start slowly when it comes to riding without stirrups. Take a step by step – one day at a time – approach and the benefits to your communication with your horse, and to your general riding experience will soon outweigh any initial confidence issues you may have had.

    Happy Riding
    Lorna

    Links mentioned in the episode:-

    Past Daily Strides Podcast episodes that will compliment this topic

  • Weight Aids & Seat Bones for Turning & Bending

    Weight Aids & Seat Bones for Turning & Bending

    The bend is approaching and you begin preparing both you and your horse to ride straight and accurately through the turn. However, as you ‘shift’ your seat bones into ‘position’ your horse begins, well, almost side stepping… The further you get through the turn, the further your horse is from the path you had planned; in fact, he has derailed altogether from the ideal ‘train tracks’ you had intended to stay on as you rounded the bend.

    As riders we learn early on about how important our weight distribution is to our horses way of going. We learn about positioning our seat bones, so we can indicate to our horses what exactly the next movement should be. We also learn that our weight aids are fundamental to all aspects of successful communication with our horses in the saddle.

    [smart_track_player url=”https://op3.dev/e/traffic.libsyn.com/dailystridespodcast/591-Weight-Aids-and-Seat-Bones-in-Relation-to-Turning.mp3″ title=”Weight Aids and Seat Bones for Bending and Turning” social_linkedin=”true” social_pinterest=”true” social_email=”true” tweet_text=”Weight Aids and Seat Bones for Bending and Turning Your Horse” hashtag=”Podcast #equestrian #horse” twitter_username=”strides_success” ]

    What we don’t learn is awareness of how the other parts of our body directly or indirectly affect how and where our weight aids are applied with our horse. There is also not a lot of time spent on figuring out how loud or how quiet we can communicate with our horses through our weight aids. In fact, most riders seem to think that a ‘one size fits all’ approach is sufficient regardless of the circumstances, situation or horse involved.

    Learning to correctly feel and then master your weight aids in the saddle is key to developing good feel as a rider. Those subtle shifts and movements, which happen when you direct your muscles to move, rather than your actual weight or bones themselves. This is very much apparent when turning your horse and that is what I want to focus on today.

    So let’s begin with focusing on how your carry yourself in the saddle. Many riders make the mistake of going a little too overboard when told to ‘relax’ through their body.

    Relaxation is key to good riding, however the level of relaxation is also important to consider; particularly when it comes to how it affects your weight aids and seat bones in the saddle when riding

    Ideally you want your muscles to ‘carry’ you in the saddle, enough that your hips and seat are free to move with your horse and follow the motion. Following when riding is a little like following when dancing. The dancer that is following must remain in control of their body, walking that fine line between too relaxed or ‘slack’ and too tense or ‘rigid’. All the while they are looking for cues from their partner and then taking the responsibility on themselves to respond to those cues in the agreed manner.

    Riding is the same. Following does not mean you slouch in the saddle, looking like you have had one too many before you mounted. It rather means you carry your upper body, so your hips and seat are then willing and able to follow the horse’s motion as he crosses the ground.

    Bending and Turning Your Horse Using Your Weight Aids and Seat Bones

    Think about it, your hips and seat bones can not possibly be free to perform a full range of motions if your upper body is heavy and slouching on top of it. Many riders mistake this for ‘shoulders back’, which is unfortunate as this only serves to increase the excess tension and therefore rigidness in the body, rather than simply carrying yourself, through your ribcage and positioning your body in the best possible place from which to begin asking your horse to turn using your weight aids.

    Once you are sure that you are indeed carrying yourself and, as a result, correctly following your horse wiht your seat, you can then begin looking at how subtle changes in different areas of your body will affect your weight aids and therefore what you communicate to your horse through your seat.

    So to begin with, let’s focus on the half halt.  One of the reasons we apply the half halt is to bring your horse’s attention back to you and let him know something is coming up.

    In fact, you can almost think of your half halt as being a big flashing arrow, directing your horse’s focus to your seat so he can begin to get further directions on what to do next

    Not using your half halt will probably result in your horse’s attention being elsewhere and therefore, any subtle movements with your seat to communicate with your horse will have a good chance of being ignored.

    That being said, it is also worth noting that applying the half halt and then following it up with an incorrect, overly exaggerated or heavy use of the seat and weight aids is just as ineffective as not using the half halt at all.  Think of your half halt as the opening part of the sentence which will then, in turn, lead up to the actual question you wish to ask your horse.   Become clear on what you want to ask, before you draw your horse’s attention to your seat to begin with!

    Once you have his attention, think about what you want of your horse as he rounds the bend.  Ideally, your horse’s spine should replicate the arc of the bend or circle.

    Your horse’s spine will stay on the arc all the way through, from his poll or ears to his tail or dock.  Similarly, your spine will too stay centered over your horses, not leaning one way or the other, not twisting and not collapsing to either the inside or outside.

    His hips will travel along parallel either side along this arc, however his inside hip will come slightly forward or ahead of his outside hip.  Your hips or seat bones will be in this same position.  Then look at the shoulders; again, they should remain parallel to the central arc or track as he moves along (like train tracks), however the outside shoulder will have to move a little more forward in order to do so and, therefore, so must your shoulders.

    It seems like an awful lot to remember, and when starting out, it is!  I have found it easier for some riders to rather remember where their legs should be through the turn.  Because your legs are connected to your hips, by moving them into the desired position, your seat bones will generally follow suit and automatically also ‘slot’ into position.  However, as you become used to the inside and outside being dictated by your horse, regardless of where you are in the arena, you can begin rather making the subtle shifts with your seat bones, and then allowing your legs to follow suit.

    So back to how we can use our muscles, either for good or bad, to influence our weight in the saddle.  Find a hard chair or stool and sit down with a hand under each of your seat bones.  Now, begin by moving your shoulders, the right one forwards the left one back and then vice versa.  Notice how a very small movement of only an inch or so, will change how the pressure being exerted on your hands from your seat bones feels.  Similarly, think about ‘weighting’ one of your seat bones.  Many riders will literally ‘bear down’ on that particular seat bone, shifting their upper body to do so.  However, feel that when this happens, your seat bones actually begin ‘sliding’ towards the opposite side.

    Now, rather think of ‘weighting’ that seat body through a combination of elongating the muscles on that side of your torso, and sending a tiny bit more weight or pressure to the heel of that leg.  Notice the subtle change in the pressure being applied on your hand.  It only takes small but precise adjustments with your muscles to ‘weight’ the seat bone.  The more you can learn to control your muscles, the clearer your communication will become with your horse.

    Very often riders use their weight aids in the wrong way; namely leaning with the upper body while will result in their seat shooting to the outside

    The result is that your horse will move completely differently to how you had planned, because he is trying to remain balanced and, literally, stay underneath you.  If you find this happening a lot, go back to making sure you are symmetrical, balanced and straight in the saddle and, once you are sure of that , begin insisting on it from your horse also. Always think about your own body and what you are communicating with your horse while riding  through the corner.

    I really think that being a little ‘picky’ or obsessive about riding in the correct position will help you to make sure that your body is in the best possible place to apply the correct aids for any given movement or direction.  It will take concentration and consistent effort on your part initially, but as your ‘feel’ increases, you will find that merely thinking about it will result in your body shifting slightly in the saddle – and the more consistent you are with always riding in the correct way, the more effective your horse will be at reading the small, subtle changes in your weight and position.

    Happy Riding

    Lorna

    I have written another blog post on applying your weight aids HERE >>

    Get to know your core muscles better which will give you more control over them by joining the FREE 30 Day Rider Fitness Challenge…

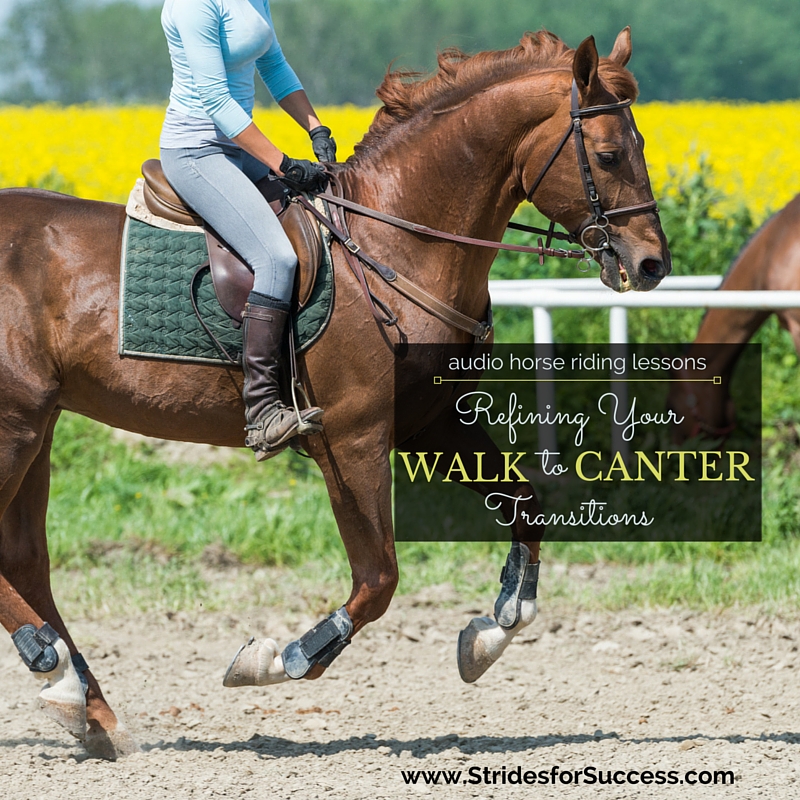
  • Refining Your Walk to Canter Transition

    Refining Your Walk to Canter Transition

    [smart_track_player url=”https://op3.dev/e/traffic.libsyn.com/dailystridespodcast/SFA456-Refining-Your-Walk-to-Canter-Transition.mp3″ title=”A Better Walk to Canter Transition” social_linkedin=”true” social_pinterest=”true” social_email=”true” tweet_text=”Using walk to canter to improve all canter transitions” hashtag=”canter #equestrian” twitter_username=”strides_success” ]

    Do you find that when asking your horse for canter, you tend to ‘over do’ some aspects of your aids?  Perhaps you throw your reins at your horse, or you try to ‘push’ too much with your seat or upper body…  You are shoving and bumping about in the saddle!

    And when your horse eventually ‘strikes’ the canter, you are so far from where you want to be position-wise, that it takes the first 5 to 10 strides just to get your limbs back listening to you. This is before you can even begin to turn your mind to the quality of the canter happening underneath you.

    Why Introduce the Walk to Canter

    Assuming you have a fairly independent seat. And that your horse is schooled and developed enough to understand the aids to canter and then carry himself in the canter… I suggest beginning to improve your canter by introducing walk to canter into your schooling routine.

    Refining your walk to canter is a fantastic exercise for both horse and rider.  It will help you improve the actual canter itself. This is due to the fact that you arrive at the transition more prepared, more organized, and less hurried.

    It helps your horse by strengthening him and helping him to understand more subtle aids, due to you being more organized with giving them!

    Your Horse’s Canter

    Before you begin it is important you understand the canter itself and the aids to ask your horse to canter…  You probably know that your horse ‘leads’ with one of his front legs when he canters.

    Depending on which front leg you want him to lead with, you will ask him to strike off with the opposite back leg.  

    Canter has a three-time beat, so using the left back leg as his ‘striking leg’ he will then move his inside back leg (right back leg) together with his outside front leg (left front leg), meaning the diagonal pair move together.  The third beat comes from the leading front leg (in this case the right front leg). Then there is a short moment of suspension before the outside hind leg touches down again and the sequence begins over.

    Collection in the Walk

    Preparation is everything, so establishing a good quality walk is essential.  Ideally, you want to have a little collection in your walk, which you can achieve by applying lots of half halts throughout the ride.   Think of creating energy with your legs and then containing it or storing it, until needed, with your hands.

    The walk must not lose its forward momentum and your horse must not become ‘sticky’ in the walk, which often happens when riders are trying to collect things up.  Keep in mind that the half halt is only held for a split second; then released.  Rather up the quantity of the half halts, than increasing the length you hold them for.

    Timing Your Aids

    Regarding your aids and applying them… I recommend you begin by becoming aware of what leg is stepping down, onto the ground, at any given time underneath you.

    The reason this is important is that you need to apply your aids to ask for the canter either just before or when the outside hind leg is busy moving forward, coming under the horse, and before he ‘steps down’ onto it.

    When I am teaching in the arena, I ask my riders from very early in their riding journeys to begin identifying the different legs underneath. We do this them by saying ‘Now…’ ‘Now…’ ‘Now…’ ‘Now…’  when a particular leg is ‘touching down’.

    It allows them to become familiar with the rhythm and sequence of the footfalls, so that they can then, while they are still repeating’ Now’, begin noticing how it ‘feels’ when that hind leg is beginning to lift up to moving forward and underneath.

    Next time you are in the saddle, do this exercise.  Feel how, when his inside back leg is moving forward, and this is nice and easy to feel in walk, your corresponding seatbone is ‘down’.  This is due to your horse having to swing his barrel slightly to the other side in order to make room for that leg to come underneath him.

    Your Seat Bones

    So, when the left back leg is coming forwards, your left seatbone will be slightly lower and also moving forwards.  While this is happening your right seat bone will be slightly raised and will feel as though it is ‘sliding’ back.  

    Once your horse puts his right back hoof on the ground, you will feel your right seat bone raise up. It will begin to feel like it is sliding backward, as your horse moves over the right back hoof.  While this is happening, your left seatbone will be lowered slightly. And sliding forwards, as your horse’s left back leg moves underneath him, preparing to bear the weight again.

    You will feel that as your inside seatbone is at its most forward point, your outside seatbone will be ‘back’ slightly and higher that the inside. Then, as the inside hind leg touches the ground, and your horse begins to lift his outside hind leg forward to put down underneath him, your outside seat bone will ‘drop’ and begin to move forward. This is, again, due to the shift in your horse’s barrel to make way for the leg coming underneath him.

    Asking for the Canter

    Now, I personally think the exact time to ask for the transition depends a lot on your horse and how responsive he is to your aids

    If he is a little ‘laid back’, you may have to ask just before your inside seatbone is at its most forward position. So before it begins to move back ‘up’ and back. However, if your horse is a little sensitive, or quite responsive, it may work better for you to ask just as your outside seatbone begins to ‘dip’ and move forward again.

    Knowing exactly when to ask comes down to ‘feel’. And, luckily, this can be learned through time and consistent practice in the saddle. There is a blog post and audio lesson on ‘Improving Your Feel in the Saddle’ HERE >>

    Often, we ask too late. Or at the incorrect time! And the result is either our horse trots, because he cannot get his legs into the sequence for canter. Or he begins to canter with his front legs first, not striking off with the outside hind.  This is not correct, and you will almost feel that your horse skips.  If this happens, bring him back to walk and try again.

    Be Clear About What You Want

    When setting up your first walk to canter transition, have a clear idea in your mind on how you are going to ask for canter.  Focus your attention on establishing a good, active walk with lots of energy.  Become clear on how you are going to apply your aids, and when.

    Your seat is vitally important in asking for the canter.  Often you hear of using your seat to ‘scoop’ your horse up into the canter.  This cannot happen unless you are truly carrying your upper body. And you ask for the transition at the correct time.

    Your inside leg will remain on the girth, your outside leg will ‘swing’ back. This is to indicate to your horse to strike with the outside hind leg and your hands will follow the movement when it happens.

    Using a Circle to Help

    Start riding a 20 meter circle, which will help you initially as your horse will already be positioned with a bend to the inside. This will increase your chance of a clean strike on the correct lead.  You will be working with your horse rather than against it.

    Resist the temptation to lean or push.  The canter is asked for with your seat first and foremost. Your legs and hands must also do their job in both indicating and allowing your  horse to canter

    The transition should be clean.  If your horse begins to rush in the walk, trots or jogs a little when asked, immediately bring him back to walk. From there, work on preparing a good transition all over again. Begin with the walk and half halts.

    Quality of Walk to Canter

    Keep in mind that the quality of the transition can only be as good as the gait leading up to it. So set your intention on an achieving an active, forward walk

    Once you have performed the walk to canter transition, remember to reward your horse with a kind word and a softening of the inside rein.  Let him know that he has indeed carried out what you asked.  If you are late to reward, he may not know for future reference what you are looking for.

    Continue with the canter for 15 to 20 strides. Pay attention to how quickly it takes you to establish a rhythm this time.  Have you managed to keep your upper body light in the saddle?  Is your lower leg where it should be?  Are you following your horse with your pelvis and hands?

    Continue to practice this on both reins and notice if one lead is easier to achieve than the other.  Also, keep your attention on how long it takes you to feel ‘in control’ of the canter.  And, if it happens somewhat sooner than if you canter through trot.

    Happy Riding
    Lorna

    And, finally, if you would like to go further with your riding I highly suggest you give my free training series a go…Find the Gaps in Your Horses Training using this free audio series available for you to listen to in a private podcast feed – so just as easy as listening to the Daily STrides Podcast :) You can sign up for free HERE or visit https://stridesforsuccess.com/free

    Additional Posts on this Topic

        • Setting Up Better Canter Transitions HERE >>
        • Keeping Canter Work Interesting HERE >>
        • 4 Steps to a More Comfortable Canter HERE >>

    Get Support & Guidance in Your Riding

    Riding a Smooth & Timely Walk to Canter Transition

    Some exercises can have a ripple effect all through our riding when we dedicate some time and energy to making them better.  I believe that the walk to canter is one of those exercises and I am excited to help you master the transition this month with your horse.

    This group of episodes is available for you to begin working with today, inside of Connection. They are suitable for all horses and riders who are able to canter. They will help you both become clearer on the aids, and more focused on timing and its importance.  And more balanced and responsive as well.

    Refining Your Walk to Canter Transitions

  • Maintaining Control After Jumping

    Maintaining Control After Jumping

    You’ve just popped the fence and, in your mind, it was a success. Mostly because you managed to stay on board for it!  However, as soon as your horse lands, you are beginning to think that your ‘upright seat’ is becoming more and more of a fantasy…

    In fact, every stride your horse takes is literally bumping you further and further onto his withers… Your lower leg is coming up and back. And you’re pretty sure that you’re on the verge of losing your stirrups.

    Who knew that jumping meant such an up-close and personal view of your horse’s neck?!  You glance up, and low and behold, you are approaching the corner; fast!!

    Let’s Remove ‘Forward’ From Your Position!

    This is a really common problem. And one that often begins when we first begin jumping and the word ‘forward’ is used to encourage the position.  Couple this with a really strong desire not to ‘catch your horse in the mouth’…

    The result is you diving forward, leaning on your horse’s neck with your hands (which are filled with as much mane as they can physically hold), and just being a heavy passenger both over and after the jump.

    Maintaining Your Position After the Jump

    Jumping…  It is really one of the most fun things to do on a horse, but if you are not in control on the ground, between the fences, things have a terrible habit of going from bad to worse very quickly!

    Things Get Worse As Fences Get Higher!

    What compounds the problem more is that, generally speaking, when we are jumping over smaller fences, this ‘technique’ works quite well.  You manage to get from A to B. And your horse is in possession of all his back teeth at the end of the lesson.

    However, the problems begin to show up when the jumps become a little higher. Or there are a few of them added together to form a track or course of fences.

    Having an independent, balanced seat both over and after the fence is essential for you to efficiently pilot your horse over all the obstacles. And achieve that all important clear round.

    What Your Horse Does When Jumping

    I think the first part of either preventing this from becoming your jumping technique, or correcting an already formed habit, is to fully understand what happens to your horse when he jumps.

    As he approaches the jump, your horse should begin to transfer his weight a little more back onto his hocks and hindquarters, rather than his shoulders.  This is in preparation for lifting his shoulders and front end off the ground when beginning his jumping effort.

    He will then, when at the fence, with his hind legs moving under him, lift his shoulders, head, and neck to begin his jumping effort.  His hind legs will then come under him, push-off the ground, and ‘propel’ him on, up, and over the fence.

    His head and neck will stretch out and down a little, his shoulders will pull his front legs up and his knees should ideally ‘snap’ up to clear the fence.

    His hindquarters will fold up underneath him. There will be a point where he will be suspended in mid-air over the jump.  Once he is ‘over’ the fence, he will get the landing gear out, so to speak.  He will stretch out his front legs. And, to balance himself, raise his head and neck in anticipation for the first getaway stride after the fence.

    With his head and neck raised, his front legs can touch down and then move forward again into the first stride leaving space for his hind legs to land.  And then he will push-off again with the hind legs to continue cantering after the fence.

    How We Can Interfere With Jumping

    There are a number of different times when we riders have a great potential to get in the way. This can cause problems with our horse’s technique.  Here are some of the more common mistakes we can be guilty of:-

        • Getting ahead of the movement, to begin with on the approach
        • Diving too early when we reach the jump, resulting in us ‘jumping before the horse’
        • Using our horses head and neck over the fence for support and balance – leaning on our horse
        • Collapsing on our horse’s neck on landing
        • Tipping forward on the landing stride and continue to tip more forward with every stride thereafter

    So in order to control our position after the fence, we need to first control our position in front the fence. I suggest that wherever you previously used the word ‘Forward’; substitute it with ‘Back and Down’.

    Adjusting Your Jumping Position

    Next time you approach a pole or a fence, imagine trying to create an open space in front of you. Think of from your chin to your horse’s withers. Focus on making this space as big and empty as possible.

    Open your chest wide from the shoulder point to shoulder point. Sit up through your waist (no creases in your tummy). And, finally, open the angle between your thigh and your tummy as much as you can.

    Then begin creating energy with your legs. Keep asking. However, instead of letting the ‘energy’ run out the front end, imagine that energy coming from your horse’s back hoof in a line towards his ears. It is ‘filling’ that space you created earlier in front of you. And as it does, you use your hands, and in particular, your outside rein, to contain it and direct it where you want it to go.

    You will have to continuously check that you are carrying yourself and your hands in order for there to be enough ‘space’ for this energy to come up.

    Keep this ‘space’ in mind as you approach your jump or pole or even better; Your marker…

    Choose ‘Markers’ in Your Arena

    The first thing I would suggest you do when working on improving your jumping technique does not involve jumping at all. Simply pick different places around the arena and pretend there is a jump there.

    I and my sister done this for years when hacking out (on the trail). We used the posts from fences as ‘markers’. Alternatively, we used telephone poles, or trees, shadows, signposts, other jumps that we rode past. The list was and is endless.

    As you ride past your marker each time, try to imagine where your horse would take off if that was an actual real jump.

    Keep in mind that you will only then follow your horse after he has actually begun to lift off… Not throw yourself at the fence. It is often helpful to say, either in your head or out loud “Wait, Wait, Wait – Lift”. (I know you may feel a little silly, but it really does help!)

    Practice Your ‘New’ Jumping Position

    Then shift into your jumping position over the ‘fence’ (your marker).  Work on coming back into your normal, upright seat afterward, just as quickly as you would if you were indeed jumping a fence.

    Begin in walk… And really pay attention that when you are moving into your jumping position, it is a correct position.

        1. Weight into the heels
        2. Lift your bum a little out of the saddle
        3. Make sure your bum ‘reverses‘ – REALLY IMPORTANT!
        4. As your bum goes back, fold your hips bringing your upper body closer to the pommel of the saddle or withers
        5. Make sure your back is straight
        6. Keep your chest open – the point of each shoulder stretched away from each other across your chest
        7. Give with your arms and hand, through your shoulders
        8. Look up!

    Carry Your Upper Body

    What I often see happen is that although people get out of the saddle, heels down, etc, etc… Because they don’t support and carry their upper body (open the chest), they are leaning on the horse’s neck for support. This is REALLY difficult to get up out of after the jump when the horse is moving.

    It also causes the rider to squeeze with their knees. From here, the lower leg pivots, the upper body comes more down, They usually lose the stirrups… And on, and on, and on :(

    Put A Basic Position on Autopilot

    Once you are getting in and out of your jumping position easily in walk and it should become something that you don’t have to think about.  However, at the beginning of each session do a mental checklist that you are doing each of the above parts. Practice the exercise with no poles.  Only your imaginary ‘markers’.

    Work in walk, in trot and, when that is good, move to canter.

    Then begin working over a pole on the ground… Use the same principle… And lastly, you will be well able to hold your own over a fence and support and balance yourself all the way.

    The super thing about being able to do that is that your horse will also be able to jump better because you’re not shifting all your weight onto his shoulders :)

    Happy Riding
    Lorna

    Additional Resources for Equestrians

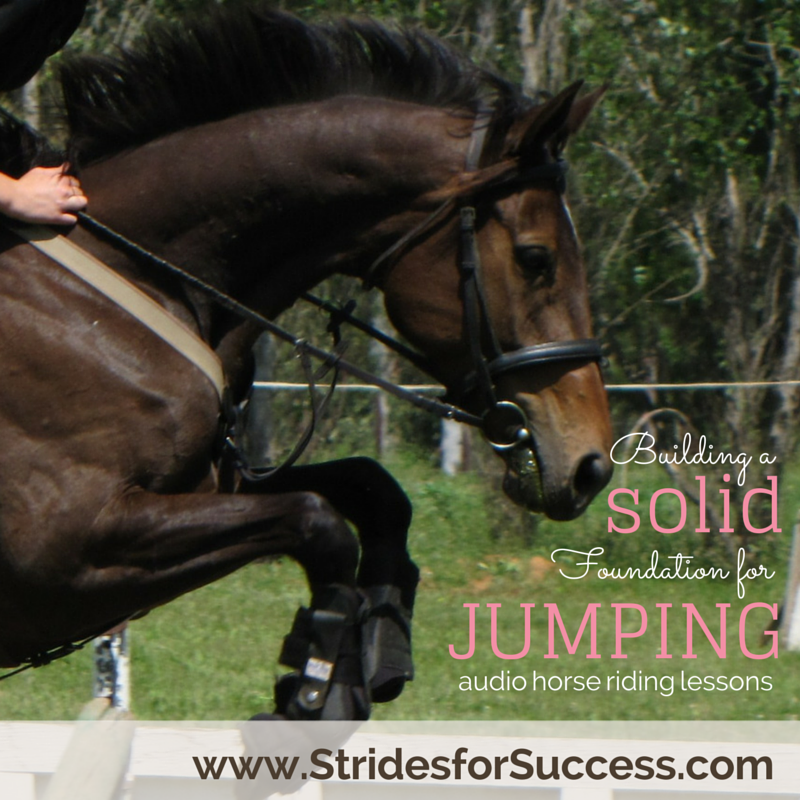
  • Solid Foundations for Jumping

    Solid Foundations for Jumping

    Jumping, it has the ability to thrill and to strike fear into riders, sometimes all at once!   However, if approached in a systematic and patient manner, most of the fear will dissipate allowing both you and your horse to enjoy jumping; whether it be a pop every now and then, or a trip round a course of fences weekly at a local show.

    [smart_track_player url=”https://op3.dev/e/traffic.libsyn.com/dailystridespodcast/SFA356-Building-Solid-Foundations-For-Correct-Jumping.mp3″ title=”Building Solid Foundations for Correct Jumping” social_linkedin=”true” social_pinterest=”true” social_email=”true” tweet_text=”Jumping with your horse? Here is how to get it right from the start…” hashtag=”equestrian #horseriding #jumping” twitter_username=”strides_success” ]

    Generally speaking, all horses can jump, however some horses have more jumping ability than others and it is important to work with your horses natural ability and focus on improving it using a specifically tailored program.

    We should also remember that some horses no matter how much time and effort is invested in their training, just don’t enjoy jumping and that must be respected as well.  Be sure that your horse enjoys the task as much as you do!
    Building a Solid Foundation for Jumping
    In order to produce a horse that is both safe and competent over fences his jumping schooling must be combined with basic flat work or dressage schooling to develop suppleness, balance, strength and agility.

    The stronger the horse, the better he can use himself and his natural ability.  Strength takes time to develop and pushing your horse before he is physically or mentally ready will potentially cause him to become tense or anxious about jumping which can show itself in a whole host of problems, from rushing to running out.

    The key to building a solid foundation is to develop confidence; both your horse’s and your own.   This confidence will ensure relaxation through your horse, which will soften the neck, back and body in general so it can be used correctly and fully both between and over fences. 

    Also in jumping, timing is everything however in order to time correctly, there needs to be a few key pieces in place first, namely; Rhythm, straightness, balance and impulsion.  If anyone of these parts are missing, the likelihood of a smooth, successful jump diminishes greatly.

    Firstly, lets begin by looking at you, the rider.  

    Before you begin jumping I strongly recommend that you have an independent seat.  A quick ‘challenge’ you can do to test this is having the ability to hold the 2 point seat for at least a couple of laps of your arena without falling over, your legs swinging or collapsing on your horses back.  This sounds easy enough, however 30 seconds in your body will know all about it…!

    I also suggest using this quick and simple exercise while out on hacks or trails; pick different markers such as trees, shadows of telephone poles, fence posts and pretend they are a jump.  Begin trying to judge where your horse would take off and being able to ‘slip’ into your jumping position when necessary.  You can initially do this in walk, then in trot and, if you have a grassy bridle path or somewhere else suitable, in canter also.

    You can then take it one step further by beginning to see if you can adjust the ‘take off point’ for your horse and use that accordingly.  I find doing this exercise really helps you ‘feel’ what a balanced jumping position is like, helps you quickly adjust your body in and out of the jumping position and also helps to begin training you to ‘see a stride’.

    Back in the arena a really useful and extremely versatile exercise can be ridden by placing a single pole on the center line at X and working over it in a similar fashion.  Test yourself initially in walk to see how straight you can make your approach and then, once successful, move onto trot and, later, canter.  See if you can judge the take off point and adjust your position to suit this accordingly.

    This exercise is always a good exercise to come back to when ‘tuning up’ both you and your horse.  You can also begin improving your ability to ‘see a stride’ by counting backwards the last three strides to your take off point, “3,2,1 Jump”, and when more experienced, “5,4,3,2,1 Jump”.


    Once mastered, the pole can be ‘popped’ from different angles, all the while making sure you remain riding on a straight line of your choice.  Imagine two long narrow triangles, their points touching at the pole to create a long angular figure of 8.  Ride each line, popping the pole each time at an angle and then balancing your horse around the ‘turn’ at the top of each triangle to come back on the opposite line.

    Again, begin at walk, choose your line or path and once mastered take up trot and then on to canter.

    Secondly, it is important as a rider to allow your horse to ‘figure things out’ for himself.

    I know myself how tempting it is to interfere and ‘help’ but this will only lead to problems further down the line when your horse cannot get himself out of trouble.  At some point in your riding, you will inevitably get it ‘wrong’ and you need your horse to firstly realize this has happened and secondly to make a plan of his own to get you both out of trouble.

    This comes more naturally to some horses than others, however you can also begin to teach your horse this invaluable skill by not interfering.

    I personally think one of the most difficult things to do on a horse is nothing!  However, as riders we sometimes must do just this!

    In the arena, use simple grids to work on both you and your horse, separately and together, to grow your skills over bigger more demanding fences.  Make sure that you are guiding your horse all the way through the grid, however that you are also allowing him to see that adjustments must be made and to actually make the adjustments himself.  Often horses pull through fences only because the rider is pulling through the fences.  You need to disengage and allow your horse to jump the jump.

    Building a solid foundation for jumping

    This also means being balanced over the fence, not throwing your weight about and not depending on your horses neck, body, mane, reins etc for your balance and support, which we spoke about earlier.

    The hours spent practicing over the smaller fences will ensure you can both successfully negotiate a course of larger fences when the time is right.

    Lastly, you can begin to improve both you and your horses effectiveness and technique

    Once both of you are confident, you can then begin looking at improving your style and effectiveness and your horses technique and skills.  However, again, this can only really begin when the foundation has been properly cultivated and developed.

    You can do this using grids that ask more questions of your horse, such as bounces, shorter distances, longer distances, angles, bends, types of fences.  The list is endless and different elements will be more beneficial to improve specific parts of your horses technique.

    At the end of the day, you are looking for the best way to allow your horse to really reach his full potential in a happy safe manner.

    Horses should not be jumped every day.  Remember most of the time spent jumping a round of fences is actually spent on the flat, between fences.  Use this ratio when creating your training program for your horse.

    Also remember that if you can negotiate the smaller fences easily, the larger ones won’t prove a problem… However anyone can get from A to B over a small fence… Getting there correctly and with style is what counts.

    Invest your time training over the smaller fences and less complicated grids and return there regularly as often bad habits slip in when least expected and only every now and then, test your knowledge and skill over larger fences.

    Happy Jumping!
    Lorna

    [wp-tiles post_type=”post” orderby=”date” order=”DESC” grids=”News”]