Tag: rhythm

  • Feeling and Finding The Correct Diagonal in the Trot

    Feeling and Finding The Correct Diagonal in the Trot

    [fusebox_track_player url=”https://op3.dev/e/traffic.libsyn.com/secure/dailystridespodcast/1183_Feeling_and_Finding_The_Correct_Diagonal_in_the_Trot.mp3″ title=”Feeling and Finding the Correct Diagonal in the Trot” social_linkedin=”true” social_pinterest=”true” social_email=”true” ]

    Landing on the correct diagonal can be hit and miss for many riders. Let’s face it, there’s a chance you’ll get it right 50% of the time! And while most riders are pretty well versed on their diagonals in the trot… It’s ‘feeling’ the diagonal that causes confusion.

    Trotting has a two-time beat. The 1,2,1,2,1,2,1,2,1,2 that you experience and feel when you’re in the saddle. If you do sitting trot, it will result in a sit,sit,sit,sit,sit,sit,sit,sit rhythm. However, most riders can ‘tire’ a little when it comes to riding a constant sitting trot! And so, we learn to post or rise in the trot.

    The 1,2,1,2,1,2 is matched with an up,down,up,down,up,down of the riders backside. The rhythm of up-downs and the rhythm of the trot are a perfect match.

    The Correct Diagonal

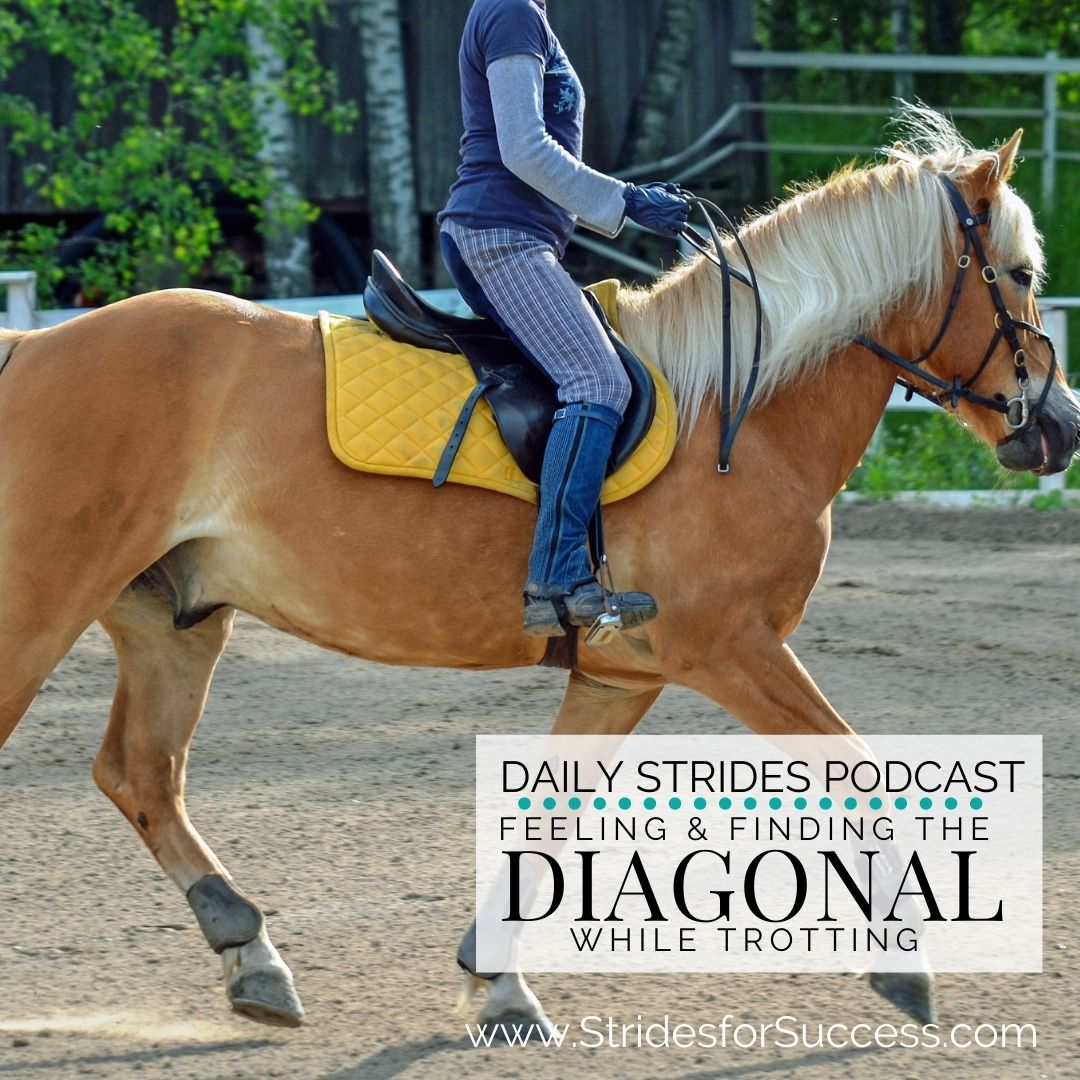
    The reason your horse creates the 1,2, rhythm in the trot is because of how he moves his legs while he is trotting. The right-back foot moves with the front left foot. This is the ‘1’ part of the rhythm. Then the left-back foot moves with the right front foot. This is the ‘2’ part of the rhythm.

    The trot is very ‘even’ with regards to what is moving where… This is also the reason it can be hard to ‘feel’ what diagonal you are on at any given point!

    The correct diagonal is when you are moving with the inside hind leg – and, by association, outside front leg – of your horse. There is a little rhyme, ‘rise and fall with the shoulder by the wall’. That about sums it up. As your horse’s outside shoulder is forward, you want to be ‘up’. As this shoulder moves back, you want to be down.

    I have a post and an episode HERE about how to identify the correct diagonal through sight and voice…

    Up/Down versus Forward/Back

    So, part of the confusion is the ‘up – downs’ we all learn when we start rising or posting to the trot. Because we learn up and down, we tend to think of the trot as being ‘up and down’. It’s not. It’s actually ‘forward and back, with a little up and down thrown in for good measure!

    Your horse’s legs move forward when he trots. They appear to move ‘back again’ in the second part of the stride, but this is actually just his body moving over the previously just moved forward limbs. This is important to learn how to feel your diagonal.

    As you ride sitting trot, notice how the movement is less ‘up and down’ and more ‘forward and back’. From here, notice how your seat bones are actually moving independently of each other.

    Your left seat bone will move forward and dip slightly down as your horse’s left back leg moves forward. This will coincide with your horse’s right shoulder moving forward. As this happens, your right seat bone will move ‘back’ while also coming up a little. This is as you and your horse’s body moves over his right hind foot on the ground.

    It’s a little like imagining the pedals of a bicycle peddling backward. As one goes down and forward, the other comes up and back.

    It is a quick movement and one that is easily missed – especially if we are only allowing ourselves to think in terms of ‘up and down’ when we think of trotting.

    Click here to subscribe

    Start in Sitting Trot

    I am going to suggest starting in sitting trot and using what you can see to guide you initially. You can glance at your horse’s shoulder. Pay attention to the outside one. Let’s for the sake of this example, say that you are riding anticlockwise around the arena. On the ‘left rein’. Your horse’s outside shoulder is his right shoulder in this example.

    Practice glancing down and being able to identify when the shoulder is moving and where it is moving to.

    From here, begin to build a relationship in your head between what that shoulder is doing, and what it means the diagonal back leg is doing in the trot. In this case, it is the left back leg. When your horse’s outside (right) shoulder is forward, it means that his inside (left) hind leg is also moving forward. The same for when it is back.

    From here, begin noticing how this feels in your body. Can you feel the slight ‘dip’ of your inside (left) seat bone? How about the slight forward swing of your inside (left) seat bone?  And what about your upper body? Can you feel any difference there as your horse moves this diagonal pair you are focusing on in the trot? Play with this for a while. Change diagonal often and look for the differences.

    Learning how to feel what is happening underneath you in the trot takes time. It won’t happen if you won’t commit the time to learn!

    Test Yourself Often

    Once you feel that you can, indeed, tell what is moving where test this theory. Feel into it. Identify the correct diagonal pair that you want to move with. Once you think you have identified the pair, begin ‘moving with’ it.

    Moving with the correct diagonal pair simply means rising and falling in time to the movement of those legs.

    As the two legs on your chosen diagonal pair move forward, you move forward. You rise or post. And, as they begin moving back, you do too in that you ’sit’ or ride the ‘down’ part of your rising trot. Remember, your horse’s legs don’t actually move backward, it is simply you and your horse moving over the legs as you travel forward.

    The final part is glancing down to the outside shoulder and seeing if you chose correctly.

    Mastering Your Diagonal

    Choosing the correct diagonal every single time can seem daunting at first. However, the good news is that it’s one of those things in horse riding that is hard until it’s not!

    Meaning, once this ‘clicks’ for you, you will wonder how you could not feel this before.

    If you want step-by-step audio training to listen to as you learn to master this skill, join Connection; the online membership for equestrians. In there you can get the Diagonal audio horse riding lessons. And a whole lot more training, coaching, and riding plans to use with your horse.

    Happy Riding
    Lorna

    Additional Resources:-

  • Rhythm; Learning to Identify and Develop it in Canter

    Rhythm; Learning to Identify and Develop it in Canter

    [fusebox_track_player url=”https://op3.dev/e/traffic.libsyn.com/secure/dailystridespodcast/1182.Developing_Rhythm_in_the_Canter.mp3″ title=”Rhythm; Establishing and Developing it in the Canter” social_linkedin=”true” social_pinterest=”true” social_email=”true” ]

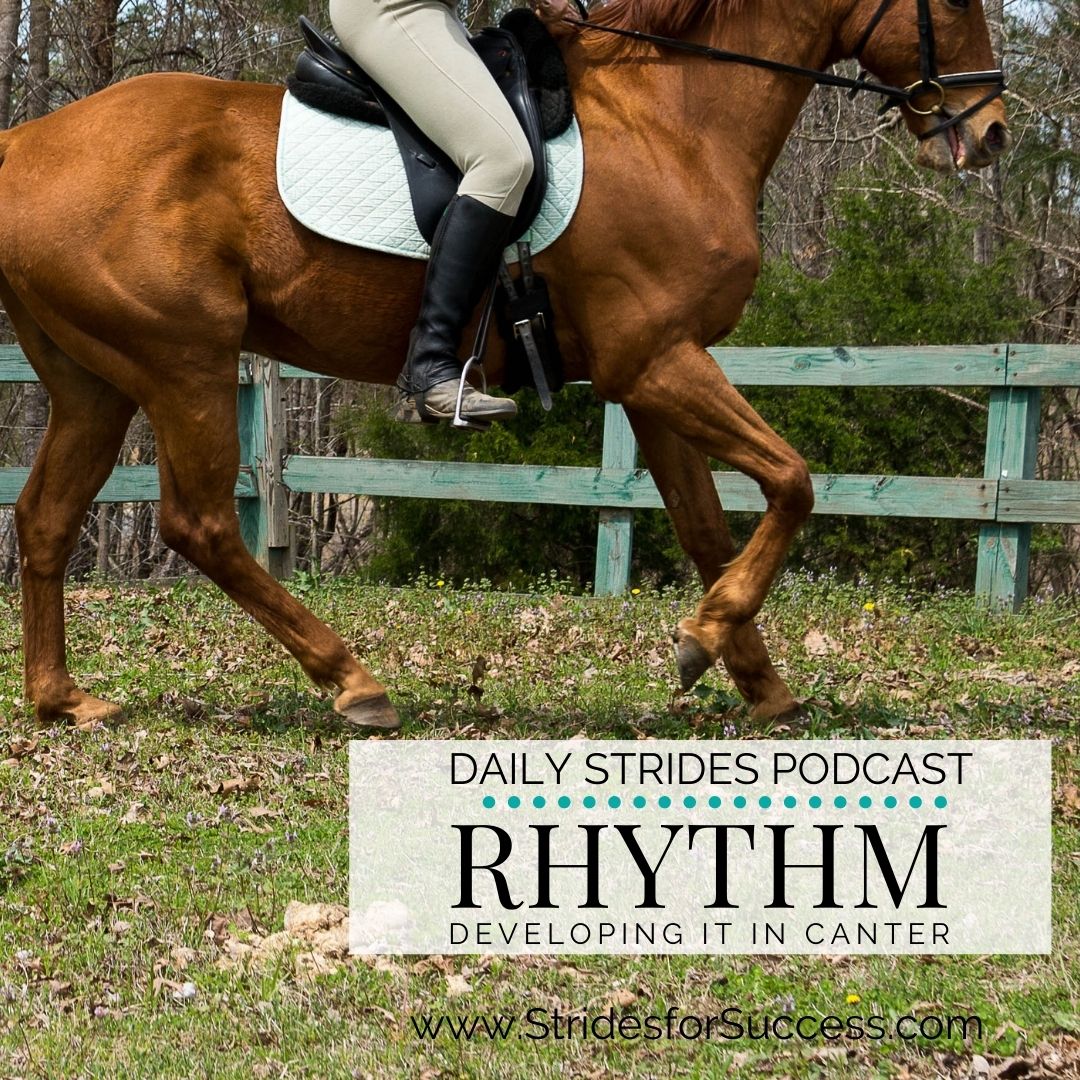
    It can often sound like a jackhammer… Rrrrrrrrrrrrrr.  Instead of the 1,2,3…1,2,3…1,2,3… that the canter should produce when you listen for the rhythm.  And once either a horse or a rider has become ‘used’ to a different way, it can be a real challenge to get things back on track.  Or on beat, as the case is when the rhythm is lost in the canter.

    Some things are taken for granted when we ride horses.  Rhythm is very often one of those things.  And many riders think that, if there is a regular enough repeating sound, rhythm is good.  But sometimes, the rhythm itself is not right.  And when this happens, no further development can happen within the gait until this is corrected.

    The Rhythm in Canter

    I am sure that you are well aware of the fact that your canter should have a 3 beat rhythm.  I am going to also assume here that you understand what causes this gait to have 3 beats (as opposed to 4 or 2 like walk or trot).

    However, what many riders fail to realize is that rhythm in the canter can be lost without your horse becoming disunited behind!  I mention the disunited behind because this is one of the most talked-about and common ways for the canter to develop a 4-time beat.  However, let’s assume here that your horse is indeed united in the canter.

    All feet are moving where they should be.  And yet, you’re just not hearing that distinctive 3-time beat…  Now what? 

    Click here to subscribe

    Canter Lacking Forwardness

    One of the most common challenges when it comes to maintaining a rhythm in the canter is to do it while keeping things, well, slow, and steady!  Horse riding and equestrian sport, like all things, have trends and fashions.  The popular or ‘cool’ thing to be able to do with your horse at that point in the game.

    A slow canter is one of these… Whether it is because of a nervous rider, or just to get that s l o w canter, I don’t know.  However, the challenge comes when riders slow things to the point where each foot is moving individually and separately from the others.

    The diagonal pair of hooves that the inside hind foot and outside front foot make up, are no longer in sync with each other.  One, usually the inside hind, is touching down before the other.  

    This creates a 4 time beat in the canter.  Many riders won’t want to hear this. However, I believe that this is caused by a rider not asking for enough energy.  And then, at the same time,  ‘holding on’ too much to the energy that is being created.

    Recreating the 3 Time Beat

    The remedy for this type of loss of rhythm is often to simply put ‘more’ into the container.  Asking for and allowing more forwardness in the canter itself.  Many riders feel that if they do this, they will lose everything they have worked for.  Maybe this is the horse traveling in a certain ‘frame’.  Or it could be losing ‘on the bit’.

    It’s good to realise and remember that if your horse is creating 4 beats in the canter due to a lack of forwardness, he won’t progress from there!  

    The reason collection is at the top of the training scale is that it requires everything else to be balanced and developed in order for it to happen.  Rhythm is at the bottom of the training scale.  By removing the rhythm, there cannot be collection.  It is a false outcome and one that will cap both horse and rider going forward.

    The Jackhammer Canter

    On the other side of the coin, is the canter where all legs appear to be moving at the same time!  It is quite the sight to behold and, often, it is also a little more difficult to work on.

    The ‘jackhammer’ canter usually happens when the horse learns to move his legs REALLY quickly.  And yet, is not actually covering a whole lot of ground!

    Rrrr…Rrrr…Rrrr…Rrrr…Rrrr.  On and on it goes.  No real indication of what hoof is ‘starting’ to each stride.  And, no real ‘ending’ hoof falls to each stride. In this canter the horse often becomes disunited.  However, this can be just as hard to identify when riding.  None of it feels particularly balanced. Rrrr…Rrrr…Rrrr…Rrrr…Rrrr!

    Begin By Identifying Hoof Sequence

    The important thing to remember is the connection between your seat and your horse’s hind feet.  By directly using your seat to ask your horse to ‘wait’, you can influence the canter itself. 

    This can be a tricky one to correct.  The natural tendency for riders is to pull the reins and resist more with their seat to ‘slow’ the horse down.  However, it is not so much that the horse is traveling fast, as it ‘sounds’ like the horse is traveling fast!

    Start by identifying when the outside hind leg is on the ground.  The ‘1’ of the canter stride.  When it is there, use your outside seat bone to ask your horse to keep it there a fraction longer.  ‘WAIT’ by weighting. More on that HERE

    As this happens (and this is where rider suppleness becomes essential), continue to allow your inside seat bone to move with the canter. This allows the diagonal pair of legs to move for the 2 beats of the canter.  Finally, make sure you create space for your horse’s inside shoulder to move and create the 3 beats. You can do this by softening or opening your inside hand and rein a fraction.

    Developing the Rhythm in Canter

    Once you can begin to hear a more distinctive 1,2,3..1,2,3..1.2.3.. you can begin to play with making each beat more singular.  Like you want to identify each individual beat within the canter rhythm itself.  This is where the real work begins.

    When a horse has become a master of the 4 time canter or the ‘jackhammer’ canter, he will find it quite tiring to stay in a more ‘true’ canter for any length of time.

    He must develop more in order to hold this.  Start with asking for 3 to 5 strides. Pay attention to the quality of the strides.  Also, pay attention that you are not ‘holding’ him there.  You will know when you are if there’s a lot of shoulder movement happening in your body!  Or if you are twisting yourself in order to ‘hold’.

    Your job is to set everything up for him to the canter.  When (not if) he begins to revert to his ‘old’ ways, correct and then set things up again.

    Holding him or doing it for him will not help him in the long run…

    Happy Riding
    Lorna

    Additional Resources:-

  • Developing a Rhythm for Your Progress in the Saddle

    Developing a Rhythm for Your Progress in the Saddle

    Developing a Rhythm for Progress in Your Riding

    Success has a rhythm. And, as an equestrian, I know that you know a fair bit about rhythm already. As riders, we spend a lot of our time, whether mindful or not, focusing on rhythm. It is one of the most basic principles when it comes to riding.

    The ‘up downs’ in trot. Or the ‘1.2.3. Roll’ in canter. Rhythm while on the ground. And the rhythm when working through different movements. Yes, rhythm is something we literally ride by every time we are in the saddle.

    [smart_track_player url=”http://traffic.libsyn.com/dailystridespodcast/1138-Developing-a-Rhythm-for-Your-Progress.mp3″ title=”Developing a Rhythm for Progress in the Saddle” social_linkedin=”true” social_pinterest=”true” social_email=”true” tweet_text=”Struggling to do the things you ‘need’ to do in your riding? Here is how to make things easier for you and your horse…” hashtag=”equestrian” twitter_username=”strides_success” ]

    So it makes good sense to begin tapping into this same principle in order to develop your skills as a rider. To make progress in your training development when it comes to your horse.

    Doing ‘Hard’ Things

    Now that we have established that you have a good relationship with rhythm, even if you never actually thought about it before now. I want to call out another truth when it comes to being an equestrian.

    In order to improve as a rider, we have to be willing to do some ‘hard things’.

    Hard, in this case, is another word for ‘uncomfortable’. The things I am talking about are ones that you have to practice in order to build your skills as a rider. Things that make you feel a little uncertain. That causes emotional discomfort. These are usually things that, if truth be told, you would rather not do because of how they make you feel.

    But these things must be worked on in order to reach the next level in riding. You have to do them enough times that your mind stops seeing them as being ‘hard’. They become part of the ease and flow you experience as a rider because you have worked on them.

    This is when those things actually are absorbed into your comfort zone.

    Identify Your ‘Hard Things’

    Having read the above, there are probably a few things that jumped into your mind already. Things that you don’t feel particularly comfortable doing, however you know that doing these things will really help you in the long run as a rider.

    Your ‘hard things’ can be doing something new for you. Or they can be going backward and revisiting basics. It does not always mean ‘pushing forward’.

    Your ego or mind will feel uncomfortable if you are told that the way forward is to go back. That perhaps you missed a couple of key bits and bobs on your initial few trips through the basics. Going ‘back’ can be just as ‘hard’ as going forward. Please keep that in mind when choosing your ‘hard things’.

    That being said, ‘hard’ can also mean doing things you have never done before. Riding new horses. Trying new exercises. Getting out of the arena and into the field or open space to ride. Hard can be a new trainer who is going to push you further. It can be a new horse who is going to ask different questions.

    Every rider will have their own version of ‘hard’. You need to take the time and use your feelings of ‘comfort versus discomfort’ to figure out your ‘hard things’.

    Sandwich Your Hard Things with ‘Easy’

    As I work with horses, I see over and over that there is a benefit to sprinkling the new and still uncomfortable things between what is already inside of the comfort zone for that horse. I don’t think hammering on and on with the difficult thing is the best way to achieve progress. It may result in a quick win.

    However, if you are looking for long term progress, slow and steady will almost always yield better results.

    Take what you have already achieved a certain level of success with and use those things to ‘bookend’ the more difficult thing you have identified as being your next step to progress. Easy, hard, easy, hard… That is the rhythm you can use in order to help you to succeed in making the presently ‘uncomfortable’ turn into the ‘comfortable.

    What Makes You Feel Uncomfortable?

    Recently I was speaking to a rider who we identified her ‘hard’ as being feeling uncomfortable about working with a horse who did not ‘tow the line’ when it came to her current way of riding. She had ridden this way for a long time and had success with another horse. However, this new horse was proving a real challenge. ‘Simple’ things were all of a sudden difficult. Relaxation is one of those things.

    I suggested that, in order to begin making progress, she needed to ride more horses that required her to change her approach. The ‘uncomfortable’ was riding horses who were not as ‘easy’ for her.

    But rather than just riding those horses; I felt that the way forward was to ‘sandwich’ those horses in between the ‘easy’ ones for her. Comfortable, uncomfortable, comfortable, uncomfortable… There is a rhythm that would help her reach the next level in her riding.

    Another example is another rider I worked with recently who was literally a handbrake to her horse! She would ask for forward, but when her horse obliged, she immediately shut him down and held him back. Again, I suggested allowing for 7 or 8 strides. Then asking for steady. Allowing. Steady. Allowing. Steady.

    Slowly but surely her comfort levels expanded so that ‘forward’ didn’t feel so hard for her anymore.

    Accountability in Your Riding

    So now that you have potentially identified those ‘hard’ things for you in your riding, it all becomes about actually taking action. Doing what you said you were going to do. This can be the sticking point for so many riders.

    However, in order to create the rhythm, you must be moving forwards. Taking action.

    When you are building in accountability to your riding, the first thing to consider is how accountable you are to yourself. Can you hold yourself accountable? Or do you need some outside accountability? Being honest about this will allow you to begin finding solutions that suit you. I, personally, for the most part, work better with outside accountability. If there is a specific person following up with me, asking if I did the ‘thing’, that pushes me to get it done.

    Then you need to plan how you would like the rhythm to be or to look like. Maybe it is working on the transition into canter 5 times every ride. These 5 times will be sprinkled throughout your ride, rather than all being lumped together.

    What is important is at the end of each ride, you know that you practiced that movement 5 times. Couple this with four rides a week and now you will have worked on the thing that you find ‘hard’ 20 times over the course of that week, without it ever becoming overwhelming.

    Apply this technique to whatever it is you have identified as being the ‘hard things’ you need to work on in your riding.

    Rhythm Helps Reestablish Rhythm

    Imagine you are on your horse, trotting. It is a good trot, you’re moving forward. There is a definite rhythm present. Now, imagine that you suddenly lose your balance and ‘fall back’ into the saddle. You get that unpleasant ‘double bounce’. What happens next?

    Well, if you had already established a good rhythm before the misstep, you will simply allow that rhythm to be the catalyst to getting you back on track.

    Rhythm has momentum. And momentum will help when the ‘whoops’ happens. And those things will happen. That is how we learn. However, if you have already created the rhythm, it will in and of itself, help you to not only get back on track but also stay going.

    This is why I believe that success has a rhythm. And this is how I feel you can begin tapping into this for you in your riding.

    Happy Riding
    Lorna

    Related Resources:-

  • A Map for Progress in Your Riding

    A Map for Progress in Your Riding

    Having a map often simplifies the journey.  It helps plan a clear route from A to B.  Riding is a journey.  And so many riders want a map or a plan to follow for progress in their riding.
    [smart_track_player url=”http://traffic.libsyn.com/dailystridespodcast/1121-A-Map-For-Progress-In-Your-Riding.mp3″ title=”A Map for Progress in Your Riding” social_linkedin=”true” social_pinterest=”true” social_email=”true” tweet_text=”Hit a plateau in your riding? You need a map…” hashtag=”equestrian #horseriding” twitter_username=”strides_success” ]
    Well, hold your horses!  What if I was to tell you that there is a map available for equestrians.  Oh yes, and it is loosely called the training scale or the traditional training scale.  So many riders discount this because they think that they have to be riding at a certain level in order to use it.  Or that the training scale is only for riders of a certain discipline, usually dressage.
    Many riders also believe that the training scale is only for the horse.  And a certain ‘type’ of a horse at that. This couldn’t be further from the truth.
    Horse riding is a team sport.  Your horse’s long term success depends on your abilities in the saddle.  Improve your riding skills and you will have improved conversations with your horse.  It is as simple as that.

    What is the training scale and how can you use it as a map in your riding?

    The training scale is a basic system many trainers use when working with horses.  There are certain principles or ‘steps’ which, when followed, ensure that the horse and rider have the mental, emotional and physical ability to progress in their training and riding.
    What often happens is that, without even being aware of the training scale, you are working on some of the principles.  However, when one piece is ‘missing’ or weak, you’ll find that progress stalls.  This is where so many horses and riders then become stuck. 
    Understanding what the training scale is and how you can begin using it today will help you with this.  It means you will clearly see what’s missing or needs work.  Which will inevitably lead to fewer gaps in your training.  Fewer gaps mean that momentum can really begin working for you where your training and progress are concerned.
    By following the principles, step by step, you can really make sure you have a full education in riding.  You can also ensure that your horse is being correctly developed, so he will have the physical and mental abilities necessary to progress in his training.

    Training Scale Foundation:- Relaxation

    Relaxation.  It is a big concept for so many riders.  And the fact that is has nothing to do with ‘doing nothing’ is what confuses so many!  Relaxation should rather be called ‘tension management’.  This is what you must do in order to fully understand and implement relaxation.  Manage your tension in the saddle.
    When you try something new in your riding, often relaxation is the foundational piece that needs attention again.  All new principles must be worked through from the perspective of relaxation.  Can you manage your tension levels as you move up and down through the gears or gaits?  How about if you switch from moving straight to moving laterally?  Or if you decide to pop a fence or jump?
    Different tension is needed for different tasks or work when riding.  Relaxation is your ability to manage your tension, so that it appears smooth throughout the ride. 

    Training Scale Step 1:- Rhythm

    Relaxation is the foundation.  This means that rhythm is the first actual ‘step’ on the ladder or scale.  Rhythm with horses, in my opinion, is that your horse is as close as possible when being ridden to how he naturally moves, in the field alone.
    I believe that your natural rhythm is how you feel when you are ‘doing you’.  When you are doing something you love to do that you find easy to do.  The thing that makes 3 hours feel like 3 minutes.  
    The trick is to work on bringing that same feeling across to the saddle with you. That same openness, flow, and energy.  Your natural rhythm.  This will take time to develop, however it is essential to make progress in your riding.

    Training Scale Step 2:- Suppleness

    The loosey gooseyness that is essential for both horse and rider.  I believe that in most cases where riders are ‘stuck’ are due to a lack of suppleness.  This is often seen when the contact is an issue.  It is a lack of suppleness from the rider that is causing the block through the horse’s energy.

    Suppleness is a mental, emotional and physical development.  It is the ability to move and flow, while still remain strong and true. 

    I am going to ask you to really consider this if you are having issues with, for example, contact with your horse.  If it is ‘fleeting’, you have it for a stride or 4 only to lose it again, take a look at your suppleness. Working on this has the potential to really and truly get you unstuck – without having to actually do anything ‘different’ in the saddle.

    Training Scale Step 3:- Contact & Connection

    Ah, the part everyone wants.  The holy grail; ‘on the bit’.  However, this cannot be correctly or consistency achieved if the other parts we have mentioned are not strong and active in both horse and rider.   I often think of contact as being the step of the training scale where both horse and rider ‘graduate’.
    It is where the horse begins to take responsibility for their own actions and way of going.  it is also where the rider must be confident enough to allow the horse to do this. 
    Contact is a little like a contract that both horse and rider are entering into.  I am agreeing to trust you if you meet me halfway.  This is why sawing, pulling, pushing and shoving will not produce correct contact.  The steps we spoke about before are the only way to actually achieving true, lasting contact in the ride.

    The Traditional Training Scale – Steps 4 to 6

    I have created a free mini-course for you where I go into detail far more detail about the training scale.  I really feel that if you can understand these basic principles, it will move your riding forward.  Even the most basic of conversations with your horse has these things woven through it.
    You can find the 5 Days to Clarity HERE.  I hope that you take the 5 to 10 minutes each day to give it a look or listen and really and truly move things forward in your riding.
    Happy Riding
    Lorna
    Other Resources to Help You in Your Riding:-
  • The Basics when Working a Young or Green Horse

    The Basics when Working a Young or Green Horse

    The Basics when Working a Young or Green Horse

    The opportunity to work with a young or green horse comes with great responsibility. You have the potential to place a lasting imprint on this horses riding career; and his opinion of being ridden in general.

    [smart_track_player url=”https://op3.dev/e/traffic.libsyn.com/dailystridespodcast/1109-The-Basics-When-Working-a-Green-or-Young-Horse.mp3″ title=”The Basics when Working a Young or Green Horse” social_linkedin=”true” social_pinterest=”true” social_email=”true” tweet_text=”Are you starting on your journey with a young or green horse? Here are a few helpful ideas…” hashtag=”equestrian #horseriding” twitter_username=”strides_success” ]

    In order to produce a well rounded riding horse, there are a few basic principles that you should pay attention to. Things that, when your horse understands and develops in each element, will lay a solid foundation for him going forwards.

    1. Forwardness

    It seems so basic that it is not even worth mentioning, however you would be surprised how many riders fail to develop this simple yet absolutely vital principle in their young horse from the beginning.

    So often I see riders on young horses and they are just not going anywhere. They may be physically moving forward, but really, there is no energy there. No ‘sense of purpose’.

    Forwardness is not just physical; as in moving. It is also mental. The ability to think forward is vital to your horses successful development.

    Riding a horse who has to be reminded to move forward every . single . stride . is exhausting. Having to continuously encourage your horse to show up is not ideal. However, when your horse learns how to ‘think forward’, the whole feeling of the ride changes.

    2. Relaxation

    When working with a young or green horse, relaxation is so important to begin establishing early in their training. I feel that there are two different types of relaxation when it comes to working with a young or green horse.

    The first is how we think about relaxation ourselves. We are ‘chilled’. There is no anxiety present. He is ‘carefree’ regarding what he is doing. This can often seem to cause issues when we work on being relaxed while moving forwards.

    With horses, there is always a balance that needs to be found. In this case it is the balance between moving forwards and also remaining relaxed.

    The second is relaxation that forms part of the actual training scale. A better name for this type of relaxation is ‘tension management. Excess tension does not have to show up as anxiety. It often shows up in the horses back. Almost like a stiffness.

    Your job is to make sure that as the horse is moving forwards, the tension is being managed. Especially through the horses back, in order to connect the energy from back to front.

    3. Rhythm

    All horses have a natural rhythm. The true aim of the game when it comes to riding is for your horse to display his ‘natural rhythm’ with us on his back, while remaining in perfect balance. No easy feat!

    Becoming aware of the rhythm is the key to helping your young horse develop his natural rhythm while you are in the saddle.

    A great way to do this is by correctly lunging your horse. It allows him to begin really ‘working’, but also learning how to balance himself; without a rider to worry about as well.

    Your horse has to develop. This will take time, as all development does. It is important to allow your horse the time he needs to develop correctly. In doing so, he will become more confident in his abilities.

    I believe that rhythm and confidence are related. As confidence grows, the rhythm becomes stronger, or less fragile.

    4. Suppleness

    Many riders think that suppleness is all about doing carrot stretches with horses. I don’t. Yes, stretching helps, that is without a doubt. However, suppleness is more about your horses ability to use his body while his body is moving. It is an active ability. As opposed to a stationary one.

    Obviously, suppleness is a physical aspect of your horses development. However, suppleness is also a mental element.

    It is the ability to shift and change mentally to the challenges as they present themselves. To remain confident when working through a challenge. Being able to course correct in order to move forwards again.

    5. Contact

    Contact is where things really begin to get serious when training a green horse. This is the first part of the journey where you ask the horse to take some responsibility.

    Contact is almost like an unwritten agreement between horse & rider that you are both willing to show up. You are ready and committed to participating and contributing to the conversation.

    In order for true contact to be present, all of the other elements must be developed to varying degrees first. It is the culmination of the other training elements. Unfortunately many riders try to establishing a contact too soon with their young or green horse.

    Allowing Your Green Horse Time

    Time is the final element that must be considered when training or working with a young horse. The horse needs time to develop, both physically, mentally and emotionally.

    Following a loose training program consistently over time will produce a solid young horse who someone will enjoy for years to come.

    Happy Riding

    Lorna

  • Serpentines; Making Them Work for You in Your Schooling

    Serpentines; Making Them Work for You in Your Schooling

    Serpentines, Making them work for you in your schooling

    What this episode is all about & how it can help you:-

    • Understand the difference between controlling versus influencing
    • How markers can help you become more mindful throughout the movement
    • Why I suggest slowing things down initially
    • How to begin working on improving your serpentines today

    [smart_track_player url=”https://op3.dev/e/traffic.libsyn.com/dailystridespodcast/1057-Serpentines-Making-them-Work-for-You-in-Your-Schooling.mp3″ title=”Serpentines; Making them Work for You In Your Schooling” social_linkedin=”true” social_pinterest=”true” social_email=”true” tweet_text=”Are you ‘flying’ through your serpentines – or are they a well thought out school movement for you and your horse?” hashtag=”Podcast #Equestrian” twitter_username=”strides_success” ]

    Serpentines really are the exercise or movement that ‘have it all’ when it comes to working or schooling your horse in the arena.  Suppleness, straightness, rhythm, relaxation and a whole host of other principles in between.

    Yet, so many riders fail to make the most out of their serpentines and never really get further than ‘flying’ around the loops full speed ahead!  In this episode of the Daily Strides Podcast I am going to give you a few ideas on how you can get the most out of this basic schooling movement in your riding.

    Deciding on Which Serpentine Suits You

    First of all, let’s quickly chat about what a serpentine is and deciding how many loops is right for you and your horse.  The serpentine is, simply put, like riding the letter s in the arena, but with extra loops added in where necessary.

    The amount of loops in your serpentine will be determined by the size of your arena and how developed both you and your horse are in your training.

    The more loops in your serpentines, the more suppleness will be required to maintain the forwardness and the ‘shape’ of the movement over all.

    Most riders start out with a traditional 3 looped serpentine.  Any odd number of loops will see you finish the movement on the same rein you begun.  An even number or loops will have you change rein when you complete the movement.

    Controlling Versus Influencing in the Saddle

    Many riders have the mindset that they must ‘control’ their horse.  Control every movement, every step.  The rhythm, the forwardness… Even down to how their horse moves and uses his body.  If you are one of these ‘controlling’ riders, I’m afraid I’m going to have to burst your bubble…

    The only thing you can control while riding is yourself.  You cannot control your horse.  However, by controlling yourself, you can learn to have more influence over your horse…  

    One of the aims of correct training with your horse should be getting to the point where your horse takes responsibility for his own movements and actions.  You will ‘control’ yourself and he will control his self.

    Controlling everything is exhausting and results in your focus being place on the wrong things when riding.  Holding your horse up with your inside leg.  Or creating a fixed or rigid ‘frame’ for your horse to work in and therefore removing all suppleness.

    Correct Rather than Control

    As you ride your serpentines over the coming weeks, think of asking your horse to do something and then allowing him to do it.  Don’t be the rider who is always looking over your horses shoulder waiting for him to make a mistake!

    If he goes off track, or makes a ‘mistake’, yes, correct him – but then try to get out-of-the-way again and allow him to continue on.

    This way, you are allowing your horse to begin thinking for himself and taking responsibility for his own actions.  Shifting your mindset around this topic is the is the beginning of working towards self carriage with your horse.

    Using Markers to Help Your Accuracy

    Very often when riders set out to ride a serpentine, they get a little off track with the true shape of the movement they want to ride.  It can end up looking more like a zig-zag rather than a series of equal bends connected by straight lines.

    Before you ride your next serpentine, rather go out and mark the exact track that you want to ride.  The loops, the track as you cross the arena.  The shape, the sizes, the centre line. 

    You can use anything at all, once it is safe, to mark out the path you want to ride on.  Tyres, cones, stones, poles, uprights.  My only concern with using poles or uprights is that sometimes the horse can ‘cling’ to them a little.

    Slowing Down and Starting from Walk

    Once you have your path marked out, I then suggest getting into the arena on your horse and begin working on riding the movement.  Start in walk.  Ride the movement a few times in the walk and begin being mindful to what is going on underneath you.

    Serpentines have a lot of different moving parts as you ride through them and taking the time to notice each stride in walk will help you begin getting the most out of the exercise.

    Notice where you begin, the middle of the short side of your arena.  Pay attention to how you transition between straight and flexed.  How well is your horse ‘staying on track’ through the exercise itself.

    If there was a drone above you, taking a video, would your horses back, from tail to poll, be on the same track all the way through as the one you laid out?

    Most riders think about transitions as going up and down between gaits or gears.  However, a transition is simply a change.  I am going to recommend that, as you ride through the serpentine, becoming really mindful on how you are transitioning between the loops.

    Incorporating Serpentines into Your Schooling

    From here, begin thinking about the best way you can ask  your horse to actually ride the serpentines and then getting out of his way and allowing him to do just that.  No leaning or shoving or holding things up.

    It is common for riders to become a little too enthusiastic with your inside rein as you ride the basic serpentine…

    Notice the suppleness and the bend.  Notice how your horse is coping with the transitions between loops and if you are truly helping him or hindering the process.

    Once you have mastered the exercise in walk, I would then suggest taking things a step further by riding the exercise in trot.  Keep your focus on the ‘eye in the sky’ and how it would look if viewed from above.

    Also make sure you are not ‘controlling’ everything, but rather setting things up and then allowing them to happen. 

    There are so many other ways to add variations to your serpentines.  We have a whole collection of trainings inside of Daily Strides Premium themed around doing just this, which you can begin working on today when you join.

    Happy Riding

    Lorna

    Links mentioned in the episode:-