Tag: riding aids

  • Developing Independent Aids in Your Riding

    Developing Independent Aids in Your Riding

    [fusebox_track_player url=”https://op3.dev/e/traffic.libsyn.com/dailystridespodcast/1321_Developing_Independent_Aids_in_Your_Riding.mp3″ title=”Developing Your Independent Aids in Your Riding” social_linkedin=”true” social_pinterest=”true” social_email=”true” ]
    Ask any rider what they want to make happen when it comes to their riding aids and, hopefully, creating truly independent aids will be high up there on that list.  Because, let’s face it, your aids can only be as clear and useful in direct relation to how independent they are. But saying you want independent aids and working towards developing independent aids are two very different things.
    Especially when, as a whole, your aids are almost always used in conjunction with each other – not independently on their own…
    And yet, for each aid to become a useful member of your team of aids, I believe that you should first isolate each one and develop it intentionally and individually. Having one ‘strong’ independent aid when the rest are flapping about won’t be enough to create clear conversations with your horse.
    Each aid must be strengthened in its own right and then be allowed to contribute to the overall team effort.

    Intentionally Isolating Your Aids

    How well can you use your left leg without moving your right leg at the same time? Or for you, perhaps it’s your inside hand that, when actively engaged in communicating with your horse, causes an involuntary movement from your inside leg?
    When we can’t easily move one body part without unconsciously moving another, there is no way that our aids can be truly classed as independent.
    And yet, this can be quite a challenge for most riders initially – until they begin developing each aid in its own right and then putting them together. I prefer starting riders off with their more obvious aids first.  Their hands and legs. I bring their attention to previously unconscious and unintentional linked movements between these aids.  And whether you are just getting started on your riding journey, or you’ve been at this for a while, it can be eyeopening once these related movements – and their overall influence on the horse – are pointed out.

    Obvious Versus Subtle Aids

    As a rider, your aids can be loosely grouped into two different categories.  Subtle and Obvious.  As mentioned, your obvious aids are the ones that anyone can see and pick up on if they were watching you ride.  Bigger movements happening in your limbs are the obvious ones.  But so could your voice and position if not carefully applied.
    Your ‘obvious aids’ are usually the ones you rely on most when starting your riding journey.  So it makes sense that you work on creating independence in them first as a rider.
    Your subtle aids will then, over time, begin to take on a bigger role in your and your horse’s communication and conversation. These have more to do with your weight, your seat, and your thoughts. The things that are not as easily picked up on by an observer or cannot be seen at all.
    Your subtle aids will create the secret conversation between you and your horse and require true, independent aids to make a reality.

    Start with Obvious Aids First

    Next time you’re in the saddle, ask your horse to walk a 15m circle in the walk.  Spend a few strides making sure that you are in the correct position up there in the saddle.  Check your lines (‘head shoulder hip heel’ line and also the ‘elbow, wrist, thumb, rein, bit’ line).
    Then check that you have your obvious aids in the right place to create a channel or flow for your horse’s body and energy. 
    When on that circle, use your aids to ask for appropriate bend and flexion through your horse’s body while asking your horse to continue to move forward.  So, for example, your outside leg will be slightly behind or further back than your inside leg.
    Once you are correctly positioned, begin experimenting with using a single aid without it having an effect on your other aids. 
    Can you slide (or swing) your outside leg back without moving your hands or tilting/twisting your upper body?  What about gently squeezing the outside rein without lifting or gripping with your inside leg?  Or are you able to ask for ‘over’ using your inside leg without shoving with your seat?  How about asking for a canter using your legs and seat without tipping forward through your upper body?

    Then Work on Subtle Aids

    Why? This question runs through most riders’ heads when they are told to wait before developing their more subtle aids.  And I get it… The subtle ones are the ‘fancy’ ones. They are the aids that everyone speaks about. So why the wait?  Diving into developing independent ‘subtle aids is a complete waste of your time until those more obvious ones are under your control!
    The rest of your body must first learn to be ‘quiet’ in the saddle, so that your horse can really ‘hear’ your more subtle aids, such as your seat, weight aids, breath, etc. 
    You can of course begin training yourself to be in the best position to use these aids from Day 1 in your riding. So ensure that your seat, position, and posture are good. But to truly be fair to your horse, it’s best to have everything else under control and like I said, quiet.

    Your Independent Aids

    My final piece of advice for you developing your independent aids is to develop your physical fitness… And not just in the saddle.  When you are fitter and have more stamina, you will naturally have more control over your body.  And I find that when riders take the time and work on this OUT OF THE SADDLE, it really benefits them in the saddle.
    When you gain more control over your own body, and then understand your aids, you will naturally increase your ability to communicate effectively with your horse…
    And this is why I am rebooting the Equestrian Fitness Challenge for 2024.  Make sure you are on the list to get this year’s brand new challenge sent straight to your inbox by signing up HERE. This year we are focusing on walking… Yep, walking and expanding our knowledge, enthusiasm, and confidence in our abilities as a rider.
    Visit https://equestrianfitnesschallenge.com/24 to get the brand-new challenge!
    Happy Riding
    Lorna

    Equestrian Fitness Challenge ’24

    Let’s walk together for 21 days and have a chat about how you can do much more than you think you can as a rider and an equestrian… I am so excited to bring you along on this journey for the 100% FREE 2024 Equestrian Fitness Challenge
    There will be a daily walk, a 10 minute daily yoga practice, and lots of tips, ideas, exercises, and ways to improve so that you can show up as the best version of you – for you and your horse.
    Sign up today and let’s transform your riding – one stride at a time! 100% FREE 2024 Equestrian Fitness Challenge
    Have a super day
    Happy Riding
    Lorna

    Resources for Riders:-

    Connect with Lorna online:-

    Get Going in Your Riding:-

    Daily Strides Premium is back! You can use the first and original audio horse riding lessons to improve your riding, train your horse, keep things interesting, and have fun… Even if you don’t have a trainer or coach

  • Using Artificial Aids when Training Your Horse

    Using Artificial Aids when Training Your Horse

    [fusebox_track_player url=”https://op3.dev/e/traffic.libsyn.com/dailystridespodcast/1299_Using_Artificial_Aids_For_Good_in_Your_Riding.mp3″ title=”Using Artificial Aids when Training Your Horse” social_linkedin=”true” social_pinterest=”true” social_email=”true” ]
    I think it’s safe to say that all equestrians use artificial aids when working with and communicating with their horses at some point.  And yet, for some reason, many riders see many of these things as being ‘bad’.  However, for the most part, this is simply not true; especially if they are used correctly.
    If you use a saddle, a bridle, a head collar, a leadrope, a stable, an arena, a round pen, etc. etc. etc. when working with or training your horse, you are using artificial aids.
    And when they are used correctly, they can really be a help when explaining things to your horse and also helping your horse to develop strength through his body.  However, the keyword in that sentence is ‘correctly’…

    What is an Artificial

    The easiest way to think about artificial aids is anything that is not attached to you.  It’s not part of your body or who you are! If it’s part of you, it’s a natural aid. So artificial aids are equipment, fences, etc.
    And artificial aids, when used correctly, clarify, strengthen, or ‘back up’ your natural aids.
    They help your horse to understand what you’re saying and what you expect from him when you say it.  And this is a key part of the conversation… In order for your aids to be effective, your horse must understand your aids.
    It is when we are being a little ‘lazy’ without natural aids and depend too much on our artificial aids that we run into trouble.  This is where your artificial aids can start to become too ‘strong’ or downright incorrect when it comes to training your horse.

    Lead with Your Natural Aids

    One of the key factors when using artificial aids is to ensure that you are always leading or offering your natural aids first.  It is only when they are ignored, responded to incorrectly, too weak, or misunderstood, that you can then, maybe, introduce the artificial aid.
    In fact, the goal as a rider should be to develop your natural aids, and your horse’s understanding so that you no longer need the artificial aids to assist. 
    And yes, while many riders will never reach this point in their conversation with their horses, it does help to keep the ‘why’ you are using artificial aids in perspective when you are training and riding.
    Artificial aids are simply a tool to help you become more effective when using your natural aids.

    Using Artificial Aids

    There are many aids that are not natural and all can be used in different ways in order to clarify, back up, or strengthen your natural aids.  A few of the most common and basic examples are:-
    • Whip (crop, pointer!)
    • Spurs
    • Bit
    • Groundpoles
    • Lunge Line
    • Lunge Whip
    • Boundary of Arena
    There are so many more, but these are the ones that the riders I work with most commonly use. And, again, when used correctly, there is nothing wrong with these aids.
    When the rider is thoughtful, responsible, and compassionate each one of these aids can make a huge difference in how well the horse understands what is being asked.
    Make sure you listen to this episode of the Daily Strides Podcast where I go further into how you can begin using these sorts of aids in your riding that will help develop your natural aids.
    Happy Riding
    Lorna

    List of Resources on This Topic:-

    Join Our Online Community of Equestrians

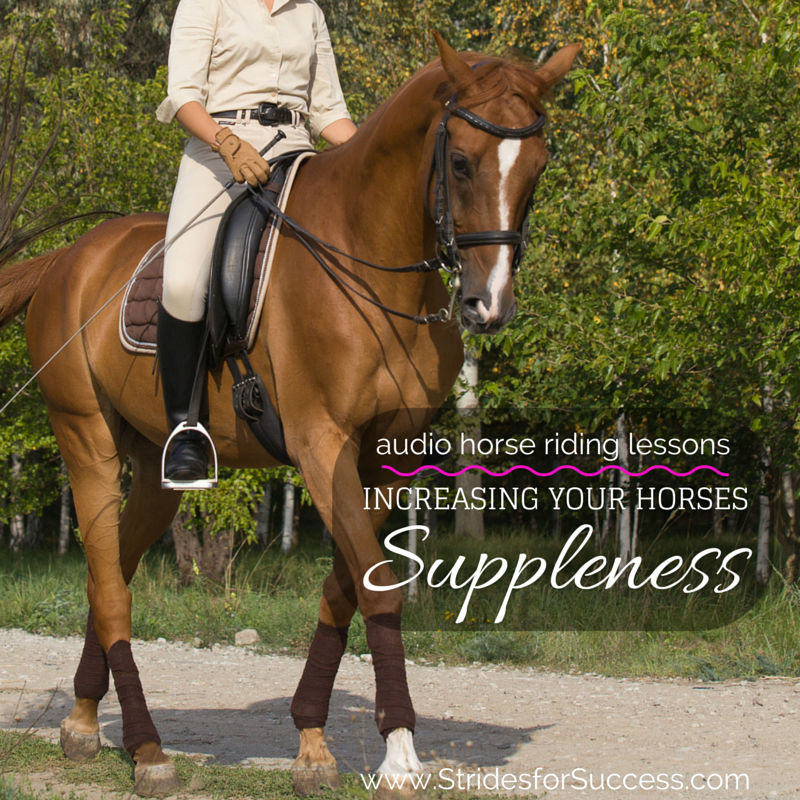
  • Increasing Your Horses Suppleness

    Increasing Your Horses Suppleness

    Have you ever ridden a horse and they feel so wonderfully loose and pliable underneath you?  Perhaps you can remember how your horse was able to really and truly use his body and how the suppleness made it feel like he was performing movements in the best possible way that his body, fitness and confirmation allowed?

    [smart_track_player url=”https://op3.dev/e/traffic.libsyn.com/dailystridespodcast/SFA431-Increasing-Your-Horses-Suppleness.mp3″ title=”Increasing Your Horses Suppleness” social_linkedin=”true” social_pinterest=”true” social_email=”true” tweet_text=”Loosey Goosey… That feeling you get when your horse is warmed up, ‘bendy’ and ready to go… ” hashtag=”Supple #TrainingScale #Equestrian” twitter_username=”strides_success” ]

    True suppleness allows your horse to bend without stiffness and work freely without excess tension or stiffness throughout his back and muscles.   This enables him to perform smoother movements and transitions with greater balance which leads to building strength, development of muscles and growing confidence in both horse and rider.

    Increasing Your Horses Suppleness

    As riders, we are seeking true flexibility or suppleness in our horses, and should always work towards trying to establish, and then allow, elasticity throughout the horse, particularly the jaw, poll, back shoulders, knees, hips and hocks.

    However this is often difficult to understand due to the simple fact that we will not achieve suppleness by ‘fixing’, ‘forcing’ or ‘restricting’ our horses in any way.  Rather than forcing your horse into unnatural frames or positions trying to promote this relaxation and flexibility, think of asking your horse to stretch himself in a natural way, little by little in slight increments, to grow the natural pliability of his muscles and joints.

    Also, when he is flexing or bending, if you are ‘fixing’ him or holding him there, he is not truly supple himself.  When riding , ask your horse for a small about of flexion or bend and then allow him to carry on with the movement himself for a period of strides or seconds.

    As his strength grows, he will become more flexible and his ability to carry himself for longer periods will also increase.

    Suppleness can be thought of in both a forward movement capacity and a sideways or lateral capacity. It is important to ride exercises that boost the development of both. Your horse will not achieve true suppleness if only using his body a certain way. In fact over-development of one will  often result in stiffness in the other.

    Another advantage of working to increase relaxation and suppleness is that it can have a positive effect on your horse mentally and emotionally as well. Often we try to ‘relax’ our horses by speaking to them in a soothing manner, however, if we think about life, feelings follow actions (it is rarely the other way around), so by relaxing the body, we can often dissipate anxiety and stress in the mind and put that energy to better use elsewhere.

    In riding, we are thought to think from the back of the horse to the front of the horse.  Energy created in the hind quarters and then sending it to the front of the horse.  However, we should think of loosening or relaxing our horses the other way around, from front to back.

    There are many horses that are flexible, pliable and supple through their backs and limbs, however they are ‘stuck’ at the poll or jaw which causes that flow of energy to also become stuck or blocked and makes true connection  impossible.

    When working on increasing your horses suppleness, I suggest starting with the poll and jaw.  Place two poles parallel to each other across the center line about 1 meter apart.  In walk, bring your horse between the poles and ask for halt. Try to keep him straight, using the poles for guidance and reference. Then, remembering to keep his neck straight, as him to flex his poll, first one way and then the other.  Use your inside hand and turn your wrist slightly so as the underside is more on top and your thumb is about 45 past the vertical to the outside. Gently squeeze with your ring finger.

    When asking for the movement, keep in mind it is very slight flexion in the poll, not bending though the neck. Ask to the right and then back to center, and then back to the left. You can repeat this quite a few times, all the while noticing any resistance or stiffness. If this shows up, rather invest more time over the coming weeks and months, slowly asking for the flexion and then working it out.

    Don’t force it! Suppleness does not happen overnight, it takes time for your horse to soften, relax and become flexible

    Once you have mastered this in halt and your horse understands, you can begin to incorporate it into walk, trot and eventually, canter.  Use the center line, and if necessary, place some parallel ground poles to work between school to help keep you ‘straight’ and on target for where you want to go.  Remember, you are only flexing your horses poll, not bending the neck.  In walk, ride up the center line and begin asking you horse to flex left then back to straight and then left.

    Pay attention that his shoulders are not ‘swinging’ where you are flexing to which will give your horse the appearance of being slightly inebriated!  Also, focus on keeping him straight through his back, not allowing the hind quarters to fall in or out

    As mentioned, it is important to work all parts of your horses body, so I recommend beginning to incorporating some large circles into your work.  how well your horse can maintain the bend in their body on the circle, will depend on how supple your horse is.  the smaller the circle, the more difficult it will be for your horse, so stick to large circles initially in walk or trot.

    Increasing Your Horses Suppleness

    When riding the circle, Establish and maintain a consistent bend to the inside, all the way from neck to tail. The degree of the bend will depend on the size of the circle as you will follow the arc of the circle.

    Notice if your horse is falling in or out through this shoulders.  Often, when we ask for the horse to bend to the inside, he will begin to literally fall in towards the center of your circle, rather than maintaining the ‘line’ of the circle and his back replicating the arc of the circle.  If this is the case, use your inside leg to encourage him to stay ‘out’ on the circle, however once he is there, he must learn to balance himself so you are not all the time supporting him on the circle or bend.

    There is nothing more exhausting that riding a horse which you have to hold up with your legs

    Again, start your circles in walk and once he understands and has a nice equal bend through his body, go forward to trot and later canter.  Work on both directions and pay attention to any stiffness, tension or lack of balance on one side more than the other.

    If you do notice any problems, see working in it as a long-term project that will be successful if you consistently work little by little at stretching and loosening up your horse

    You can also begin to incorporate some serpentines into your schooling.  Obviously work on your bend while riding the loops, but also focus on your straightness as you cross the center line.  Transition in and out of the two by beginning to ask for some flexion through the poll for 2 to 3 strides before and after the center line.  As you round your ‘loop’ again, straighten the body with just the poll flexed and as you cross the center line, straighten your horse, so you can then change the flexion in order to ride the next loop.  Work the serpentines from both sides, again walk, trot and then canter if necessary.

    You can also incorporate some halts into the serpentine, as you cross the center line, and spend the time in halt flexing the poll again in order to flex the poll and reinforce the principle, in both your head and your horses!

    Finally, you can begin to add some counter bend to your circles.  Ride a large 20 meter circle in walk and once you have established bend to the inside, see if you can ‘change’ the flexion to the outside, paying close attention that the shoulders do not come off the track of the circle.

    The flexion to the outside will be very slight at first, and not held for long periods.   Work on a quarter circle to the outside, then change to a half circle to the inside and then returning to a quarter circle to the outside.  Slowly, your horse will begin to increase his suppleness and flexibility throughout his body and from there, you can begin to make the circle smaller or begin working in trot and, again, later canter

    Suppleness is something that must be continuously and consistently worked on in order to maintain and improve with your horse

    Just like us, if our horses become restricted and only use their body in a certain fixed movement, over time they will lose their ability to bend and be pliable..

    It will take time to build true suppleness, and it will have to become an integral part of your training program to maintain it

    Happy Riding
    Lorna

    [wp-tiles post_type=”post” orderby=”date” order=”DESC” grids=”Simple”]