Tag: strength

  • Using Half Halts on the Lunge to Build Balance

    [fusebox_track_player url=”https://dts.podtrac.com/redirect.mp3/pdcn.co/e/traffic.libsyn.com/dailystridespodcast/1380_Using_Half_Halts_on_the_Lunge_to_Build_Balance.mp3″ title=”Using Half Halts on the Lunge to Build Balance” social_linkedin=”true” social_pinterest=”true” social_email=”true” ]

    Have you ever been lunging your horse and find yourself saying “Whoa there Tonto” a little too often?!
    That moment when your horse seems to go from cool and calm to tripping over themselves as the speed quickens! I can 100% hand over heart say that, from experience, this has the potential to make even the calmest of riders stress a little!

    Most riders see rushing on the lunge as a disobedience problem; their horse is being naughty, ignoring them, or just full of vuma! But what if that’s not what is always going on?

    What if your horse’s rushing while on the lunge is really a balance problem, not a speed problem?

    Rushing v’s Speed

    When a horse loses balance, the natural instinct is to speed up to try to catch themselves. You’ve probably experienced this yourself, either while walking, running, or cycling. Just like when you run on a few steps, or pedal faster to stop yourself from falling over, your horse often does the same.

    If they feel unbalanced, they often run on a little – in an attempt to remain upright!

    Now, I get that some horses will 100% rush and race ‘just because’.  However, that is not what I’m chatting about today. Today, I want to talk about how, for many horses, suddenly speeding up can indicate a lack of balance. And how lunging gives you the perfect opportunity to see this clearly.

    So, if your horse is usually pretty relaxed and ‘rhythmic’ – until he’s not. This might indeed be what’s going on. And I think that lunging can help your horse to develop so that this happens less and less often. You see,

    Because without your weight or mixed signals from the saddle, your horse can figure out how to carry themselves and begin to develop self-balance while developing strength

    Of course, that won’t happen overnight. Building balance takes strength, coordination, and consistency. But lunging — when done correctly — gives your horse space to experiment, to learn, and to begin developing rhythm. And rhythm is where it all starts.

    Rhythm & Relaxation: The Foundations

    No matter what discipline you ride, or what age or stage your horse is at, the first two building blocks of training are relaxation and rhythm.  When they feel that both of these pieces are in place, the energy can flow, and this increases confidence for everyone, horse and rider.

    So, it makes sense to begin at the start with relaxation & rhythm, and one of the best tools for introducing and establishing both of these is to use the half halt while on the lunge.

    Half Halts on the Lunge

    When most riders hear the words ‘half halt’, they immediately think about their hands. Specifically about using the reins. But the half halt is not just a rein aid. It’s a conversation. A pause. A moment of rebalancing that comes from your whole body and your intention, not just your hands.

    When you’re lunging, just like when you’re riding, your lunge line can be ‘part’ of the question or aid… Not the whole aid! You have to learn to communicate using it AND everything else. Your voice, your energy, your body position, your weight, your body language, and even the timing of your breathing.

    When you ask for a half halt on the lunge, you’re really saying,“Hey, come back to me for a moment. Find your balance again.” It can be an invitation, a request, or a correction. 

    And what’s really special about lunging is that, because of your position to your horse, you can see it happen. You can actually watch your horse process the request. And you can see the results. Maybe it’s the moment they soften through the contact, or when they slightly shift the weight off the forehand. It could just be the reestablishing of the rhythm that was in danger of being lost!

    That visual feedback you get from lunging is gold. It helps you begin to understand what a good half halt looks like before you try to feel it in the saddle.

    Reward the Intention

    When you begin introducing half halts on the lunge, I’m going to bet that your horse might not know what you’re asking for yet! Especially if this is not something you’ve been working on regularly before.  So it’s really important to reward every ‘try’. Every subtle thought in the right direction.

    Meaning that even if your horse just thinks about slowing down or steadying, that’s your chance to acknowledge it. If you miss that window, your horse gets confused. The message becomes muddy.

    So, ask for the half halt, then wait. If you see even a hint of balance returning, mark that moment. Praise. Use your voice to tell them, “Yes! That’s what I wanted.”  Clarity and timing are everything.  Every aid you use to ask should also be echoed when you reward. That’s how you build trust and confidence, and understanding. It’s also how your horse will begin to develop strength.

    Transitions, Rhythm & Flow

    Now, if you’ve been guilty of using the lunge line like a steering wheel or a brake (so pulling to keep your horse on the circle or yanking to slow them down), that HAS to stop!  The lunge line isn’t there to control the horse. It’s simply the connection between you.

    Just like how your reins work in riding to ‘gather’ and channel energy, your lunge line will do the same when lunging. 

    I really do think that the only way to begin to truly replace this habit is to create boundaries in the area you are lunging. Let them ‘keep the horse on the circle’ so that you can begin cultivating the contact through the lunge line. I’ve a whole post on this HERE.

    Refining Half Halts on the Lunge

    And once you are using your line correctly, then you can look to improving everything by getting started with basic transitions. Walk to trot. Trot to walk. Halt on the track. Back to walk, etc. etc., etc. Think smooth, not sharp.
    If your horse takes three full circles to make the change or the transition, no worries! That’s your starting point. You’re working on understanding, not obedience.

    Your half halts will be the preparation for every single one of the transitions your horse performs while on the lunge. They set things up so that the transition can be as good as it can be. 

    After a few days or weeks of practicing this, you’ll notice that your horse will become more ‘tuned in’ with regard to your aids and overall communication. That’s when you can begin playing with transitions within the gait. Covering more ground and then covering less ground within the same gait.  The goal is to keep the rhythm steady, no matter the speed.

    Lunging as a Mirror

    Lunging, done well, trains you almost as much as it teaches your horse. It becomes a mirror for your communication. You see, in real time, how every little change you make, your tone, your energy, your posture, affects your horse’s response.

    And the better you get at reading and influencing your horse from the ground, the easier everything feels once you’re in the saddle.

    And remember, lunging isn’t just for young or green horses. It’s for every partnership that wants to improve communication, rhythm, and balance.  It’s also not just for ‘hot horses’ or for when time is short. I am REALLY encouraging you to begin crafting time for lunging starting today.

    Bringing It All Together

    So next time you clip on that lunge line, shift your focus. Instead of thinking, “I need to slow you down,” think, “How can I help you find your rhythm and then maintain it for longer. How can we work together to achieve more balance and lightness?”

    Notice where any of the ‘whoopsies’ appear in your horse’s way of going, when it feels like he’s starting to rush. Pay attention to what led up to that point that may be causing the loss of balance. Then, use your body, voice, and energy to help your horse rebalance, to come back to you. That’s your half halt.

    You’ll be amazed at how your horse starts listening, not just to the sound of your voice, but to the feel of your intention.

    Happy Riding
    Lorna

     Half Halting on the Lunge

    I’ve got 3 resources to help you improve and refine your half halts.

          1. Inside Connection we are working on how to use half halts on the lunge to develop rhythm, relaxation, and self-carriage. Step-by-step audio lessons, a live group lesson, and so much more to really help you understand and put this principle into practice.
          2. Join me for the Half Halts Made Simple Webinar on October 28th. We’ll take everything you’ve learned from the ground and bring it into your riding work.
          3. Sign up for the FREE Your Signature Ride Challenge. It’s a fun, on-horse experience that ties beautifully into everything we’re doing this month.

    Online Training & Coaching

    Connect with Lorna online:-

  • How Flexion can Transform Your Riding

    How Flexion can Transform Your Riding

    [fusebox_track_player url=”https://op3.dev/e/traffic.libsyn.com/dailystridespodcast/1248_How_Flexion_Can_Transform_Your_Riding.mp3″ title=”How Flexion Can Transform Training for You and Your Horse” social_linkedin=”true” social_pinterest=”true” social_email=”true” tweet_text=”Check out this episode on Flexion while riding your horse… ” hashtag=”equestrianpodcast” twitter_username=”strides_success” ]

    I find it a little mind-boggling how, the longer we spend developing ourselves as riders, the more we need to unlearn. Especially when it comes to those first one or two initial horse riding lessons!

    Using your hands and arms to ‘steer’ the horse is one of those things. And, flexion is often one of the best concepts to help riders become clearer on this. And more open to other possibilities when it comes to their aids, their riding, and steering their horse.

    Flexion versus Bending

    Flexion is bending. In the truest definition of the word, it is often attributed to the bending of a limb; an arm or leg. And when we are talking horses, this can also be true. Many vets will do a flexion test to assess soundness.

    However, flexion when riding is a little more subtle. instead of it being a bend, it is more like a suggestion towards a bend…

    I often describe it to my younger riders as being like the indicator lights on a car (also called blinkers, or turn signals). The point is that the indicator merely suggests to other drivers that you’re about to go a certain way, but they don’t actually steer the car.

    I feel that ‘bending’ while riding is more about the channel of the energy. Where the energy flows as the horse and rider move together.

    When Do We Use Flexion

    As I said, flexion can often suggest or indicate to your horse other things. So, for example, if you were preparing to track to the left, you could ask for a slight flexion to the left first. Or if you were preparing to ask for canter on the right lead, you could ask for flexion to the right first.

    When I’m in the saddle, I like to think of flexion as being a very subtle ‘nod’ in the right direction. Like a little prompt or cue for your horse to follow.

    Flexion is also how we determine ‘outside and inside’ when it comes to our aids. Flexion to the right will result in your right side becoming your inside. And therefore your left side becomes your outside.

    So rather than using your position in the arena to determine inside and outside aids, the flexion of the horse will dictate what’s what 🙂

    [convertkit form=3477209]

    Flexion for Suppleness

    Finally, flexion can be introduced to your daily riding work in order to increase suppleness throughout your horse’s body. And I think this is the key defining element when it comes to really understanding flexion and its true meaning when we are working, training, and developing horses.

    As riders, we can use slight but very intentional flexion as a tool to help develop suppleness and increase elasticity throughout our horse’s bodies

    This brings me to go a little deeper into the word ‘slight’. I’ve already mentioned that bending is more of a way to channel the energy through a turn, on a circle, or around a corner.

    Flexion, when riding, is often far more subtle than bending, and can be achieved anywhere in the ride; riding on the straight or through a bend

    True Suppleness = Flow & Ease

    And what makes flexion so important is that, for many horses, this slight shift in how they carry themselves can allow new pathways to open. Both in how they ‘think’ they can work. And in how their body actually can work.

    Flexion is often the key to softening something that has become hard or rigid – and this is because true flexion allows the energy to continue to flow

    So in instances where a true bend is difficult for the horse and rhythm or relaxation is lost, flexion can be a great introduction to the whole ‘idea’.  This is while still moving forward in relaxation and rhythm. A good example of this is introducing shoulder-fore before riding true shoulder-in.

    Also, because flexion is ‘slight’ and merely an indicator, the horse learns to continue to move forward until another aid or another question is asked

    By working on developing true flexion, even the slightest incline towards it, the horse will begin to create new ways of using his body.  And continuing to implement previous training principles.

    Start on the Ground

    So, like so many things to do with horses, the best place to begin your work with flexion is on the ground. Beside, not on, your horse. I will do a follow-up training on this which you can get delivered to your phone by ENTERING YOUR DETAILS HERE.

    Begin Implementing Flexion into Your Riding

    From here, you can begin to work on this principle with your horse using a simple technique that I will talk about in a step-by-step audio training. This training will be delivered a day after the first one for groundwork. Make sure you DOWNLOAD THE FREE TRAINING HERE

    This is a key concept that can literally transform both you and your horse.  From being hollow and wooden to becoming more ‘loosey goosey’, supple, and ‘able’ in your work together.

    Happy Riding
    Lorna

    Get Support & Guidance in Your Riding

    More on this Topic

  • [Training Scale Series] Part 5 – Developing True Straightness

    [Training Scale Series] Part 5 – Developing True Straightness

    [fusebox_track_player url=”https://op3.dev/e/traffic.libsyn.com/secure/dailystridespodcast/1209.Straightness_in_Your_Horse_and_Your_Riding.mp3″ title=”Straightness in Horse And Rider” social_linkedin=”true” social_pinterest=”true” social_email=”true” tweet_text=”Straightness is more than just riding in a straight line with your horse…” hashtag=”equestrianpodcast” twitter_username=”stridesforsuccess” ]

    When I was first starting out as a rider, I thought that straightness was a simple and easy concept. I remember the first time someone told me that one of the hardest things to do on a horse was to ride a straight line.  I didn’t believe them!  However, turns out they might just have been right…

    This is part 5 in a series I have created about the Training Scale.  We have previously covered rhythm, suppleness, contact, and impulsion. Straightness is the fifth ‘step’ on the ladder or scale.

    Keep in mind that whenever you are working on the lower steps of the scale,  you are doing so with an eye on the top steps. And when working on the top steps, you are doing so through the filters of the lower steps of the scale.

    What is Straightness?

    It’s a bit of a trick question; the simple answer is ‘when I ride a straight line’, right?  Well, yes… And part of straightness is definitely being able to ride and work on a straight line.  But what about riding a straight line through a bend?

    Straightness is less about actually being ‘straight’ and more about the developed strength to be very specific about where you are travelling at any given point.  And the tracks you’re travelling on… 

    Imagine riding in a freshly harrowed sand arena with your horse.  As you ride, you will be able to clearly see your horse’s hoofprints in the sand. Once you have walked, trotted, and cantered a few lines and circles, you halt and have a look over the arena.  If you have been truly ‘straight’ through each movement, there will be parallel train tracks created by your horse’s feet, wherever you rode in the arena.

    Your horse’s back left foot will have followed in the same track as his front left foot.  And, similarly, his back right foot will do the same with the front right foot. 

    This is regardless of if you are traveling on a straight line, let’s say A to C. Or if you are riding a circle, loop, serpentine, or simply through the corner.  The only place this won’t apply is if you asked for some lateral work with your horse.  And yet, lateral work also requires a level of straightness, in the flow of the energy.

    Straightness is Like a Train

    Another way to think of straightness is to imagine a train.  When it goes around a corner or a bend, the tracks remain parallel to each other all the way through that turn.

    Regardless of how many carriages the train has, wherever the front carriage of the train travels, the back carriage will follow in the exact same place. If the back carriage swings out, or if the front carriage turns short the train will lack straightness and derail.  Your horse is the same.

    If you take the picture of yourself and your horse’s tracks in the freshly harrowed sand arena and superimpose the train tracks, you will have a good idea of what straightness is.

    What Causes Crookedness?

    What makes straightness confusing is figuring out if any crookedness is begin caused by the rider or the horse.  It’s a little like the chicken and the egg. Which came first and is influencing the other!  In order to achieve true straightness, it must be developed and strengthened in both horse and rider.

    If you are noticing that there is any crookedness present through your horse, I am going to strongly suggest assessing yourself first. 

    Keep in mind that crookedness can come from both lopsidedness and a lack of strength.  This is true for horses and riders.  I personally find that yoga is a great way to identify any lack of symmetry and strength in my body.  It also shines a light on areas of tightness, stiffness, or tension.  A lack of suppleness.

    If there is any lack of movement or flow through your own body, suppleness, it will show up in your horse, particularly when bigger questions are asked. 

    Strengthening Your Horse

    Developing symmetry and strength is key to correctly train your horse. Horses are very similar to us in that they usually have a dominant side.  This is just like how you may favour your right side if you are right handed. You may notice when you do a certain set of exercises with your horse, it is going to be a lot easier for him on one side, or the other.

    Easier being that he can continue to maintain relaxation, rhythm, suppleness, and contact throughout the movement.

    When we notice a weakness, there is a tendency to ‘double down’ on the ‘bad’ side. Unfortunately, this rarely works or helps in the long term.  Imagine if someone kept making you do something you find difficult, you definitely wouldn’t enjoy doing it! You might even become a little ‘sour’😉

    It is far better to ‘sprinkle’ the difficult things through the ride.  Mix the ‘bigger questions’ up with things your horse enjoys and finds easy.  This way your horse will continue to enjoy his work as well.

    Knowing your horse’s dominant side is important when you begin to work towards true straightness.  It allows you to become clear on any potential pitfalls that might show up, and how you can create a program to suit your horse’s individual needs.

    Spotting Weaknesses in Your Horse

    Sometimes, weaknesses are very obvious and easy to spot. It could be that your horse falls in on a circle.  Or he might swing his hindquarters out. You might also feel or see a ‘bulge’.  This can feel like he is pushing against or bracing against you or your aids.  There may also be resistance to questions.   All of this works against true straightness.

    If we go back a few steps and look at how, by working on suppleness, we begin letting energy flow, we can often see how this leads to straightness.  If your horse is not truly straight, you will feel an unequal thrust, which will result in crookedness or ‘buckling’.  This affects the overall balance and performance of the horse.

    Once the energy is flowing, we then begin to funnel it into a channel.  When we are intentional about where we want it to go, noticing any that is going elsewhere becomes easier!

    Start the next time you ride your horse by becoming more mindful about the simple basics. Perhaps go from a walk to a halt, and notice whether he is truly straight? Or if there is perhaps a ‘bulge’, a shift of energy, or even an actual shift of the horse’s body.

    Notice all of the seemingly little things. And then use what you find out to create a plan to begin developing true, equal, strength in your horse. This will lead to straightness.

    Happy Riding
    Lorna

    More, More, More… To Help You :)

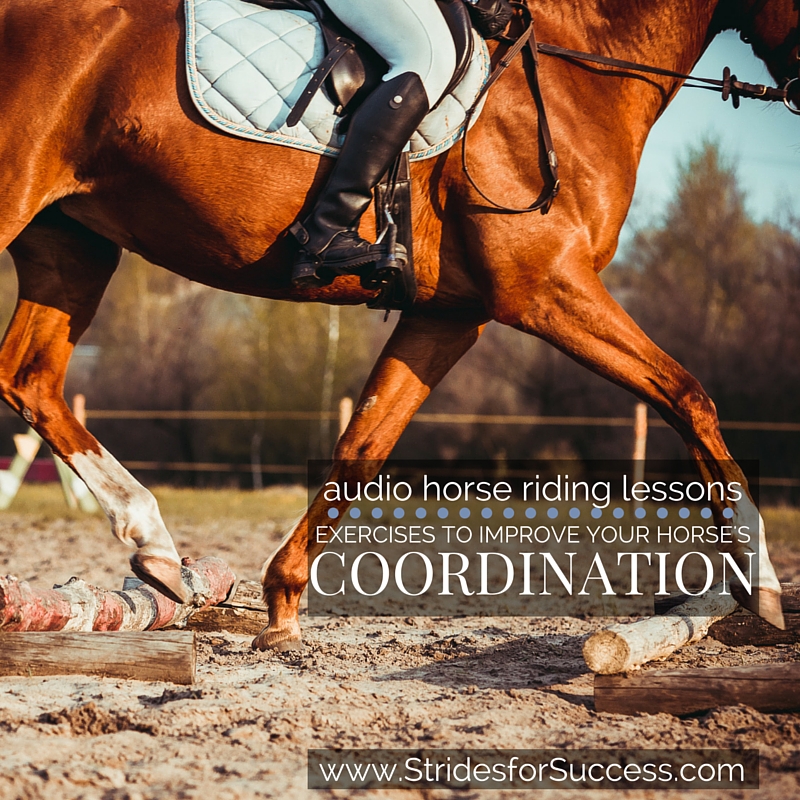
  • Exercises to Improve Your Horses Coordination

    Exercises to Improve Your Horses Coordination

    Have you ever experienced moments when ‘lack of coordination’ seems to be the best description for you while in riding  your horse?  It often leads to feelings of clumsiness and a general lack of confidence in your abilities, right?  Well, imagine how it feels when your horse suffers a similar lack of coordination; lack of balance leading to an uncomfortable ride for both of you.

    This lack of coordination in horses is often associated with fitness and general conditioning, and this is partly true.  Your horse’s general fitness levels, or lack thereof, can play a large part in his overall ability to remain in a balanced way of going.  However, there are other factors that also play a large part in how well your horse can use his body, particularly when in a different or unfamiliar situation.

    [fusebox_track_player url=”https://op3.dev/e/traffic.libsyn.com/dailystridespodcast/646-Exercises-to-Improve-Your-Horses-Coordination.mp3″ title=”Exercises to Improve Your Horses Coordination” social_linkedin=”true” social_pinterest=”true” social_email=”true” ]

    Take your own coordination as an example; if you were to do a task that you do regularly, such as making a cup of tea or coffee in your own kitchen, you would find that your actions happen as though your body is on autopilot.  However, if I asked you over to my house to make some tea; you would find it much more difficult to do pretty simple tasks.

    The same principles apply to your horse, if it is something he does a day in and day out, his body has already figured out the best and most effective way for it to do that particular movement or task.  It is smooth and probably looks graceful and simple because it is done in balance in a way he feels comfortable.   However, just like your own tea making capabilities, when you begin to add different factors to your horse’s schooling, or change scenarios, things can become rather wobbly quite quickly!

    You have to agree that most young horses look wonderfully coordinated while in the field however, as soon as a rider is placed on their back it suddenly seems becomes a rather large effort to continue with one foot in front of the other without falling over!  This is the horse having to learn or adapt to a different situation – this particular one being having a rider on board

    We also see older horses struggling with coordination.  Particularly when they are ridden all the time in a beautifully manicured and maintained arena.  They are used to having perfect footing underneath.  But if you take them out of the arena, maybe on the trail or into an appropriate paddock or field; well things are very different.  The rhythm and balance are suddenly lost and it almost feels like the horse has forgotten all his past training.  Sure, you will have moments where it feels good, but for the most part, it is a disjointed effort that pales in comparison to when he is working in his comfort zone.

    When we are in the saddle, it is always a great advantage when your horse can adapt immediately to different situations you may find yourself in, quickly and without a break in balance or rhythm

    So the first step in improving your horse’s coordination is highlighting the quality of your transitions. This is something you can begin working on immediately when riding your horse the next time.  Focus on the balance and consistent rhythm of each individual transition.  Pay attention that your horse is not speeding up the tempo of the gait he is in before the transition.  Also, work on establishing the new gait as quickly as possible after the transition.   By becoming more concise and specific about how you prepare, and then ride each individual transition, you can begin conditioning your horse to balance himself better and adapt to different situations with greater ease.

    Don’t make the mistake of only working in the more exciting transitions, such as trot to canter and canter to trot.  Transitions that include halt, walk, and trot are equally as beneficial and often easier for the rider to be more consistent through.  Again, focus on the quality of the gait leading up to the transition, maintain that gait right the way until the transition occurs.  The transition itself should be coordinated, straight and smooth, and then followed by a good quality gait afterward as well.

    Imrpoving Your Horses Coordination

    The second thing you can do is working some lateral movement into his schooling routines.  Think of the transitions as really working him while moving in a straight line, tail to head.  The lateral movement then works him sideways, so working his body differently and forcing him to balance differently.  Very often horses that can adapt and who have good coordination are able to remain in balance while moving sideways.  Practicing this in the arena will begin to develop your horse’s ability to do this as well, with you on his back.

    One of the other ways to improve your horse’s coordination is to work him over ground poles.  He must become very aware of how he is moving his body and where he is placing his hooves.  Groundpoles also helps coordination by improving the physical strength of your horse’s back.  They ask more of his joints, his back, and his whole topline in general.  All this while remaining balanced and moving forward in a rhythmic manner is excellent for him.

    You can use single groundpoles placed randomly around the arena, with your horse having to ride different shapes to reach.  You can also use basic trotting poles, either flat on the ground or raised, and later you can build simple grids.

    Regardless of how you use the poles, they will definitely help your horse to become more aware of his feet and legs while being worked in the arena and build muscle and strength while doing so

    The final suggestion I have for you to begin improving your horse’s coordination is hill work.  I am not talking about steep, grueling inclines that exhaust your horse; rather mild inclines that ask him to use himself slightly differently, but in doing so, strengthen and condition his body.   You can work up and down the hills, and later once you are both happily walking and trotting up and down, you can begin asking different questions by introducing transitions into his hill work.

    Maintaining the rhythm of the gait while working and down hills is difficult for many horses.  It is also different because most hills will be either on the trail or in a paddock or field, making the footing or terrain a little less accommodating as well

    So improving your horse’s coordination won’t happen overnight, it will take time.  By working some of these exercises into your daily schooling, or warming up and cooling down, you will help your horse reach a greater level of coordination throughout his body, which will make riding more enjoyable for both of you in the long run.

    Happy Riding
    Lorna

    This blog post and podcast episode is an introduction to 5 audio programs on this specific topic, taking you step by step through exercises you can ride that will improve your horse’s coordination. The other programs are created with riding in mind and listening to them is literally like having a riding instructor with you while you school your horse. The lessons are easy to download onto your phone and then use when in the arena.

    To find out more about how you can get this week’s lessons, as well as over 600 others, you can visit www.stridesforsuccess.com/join/.


    [wp-tiles post_type=”post” orderby=”date” order=”DESC” grids=”News”]

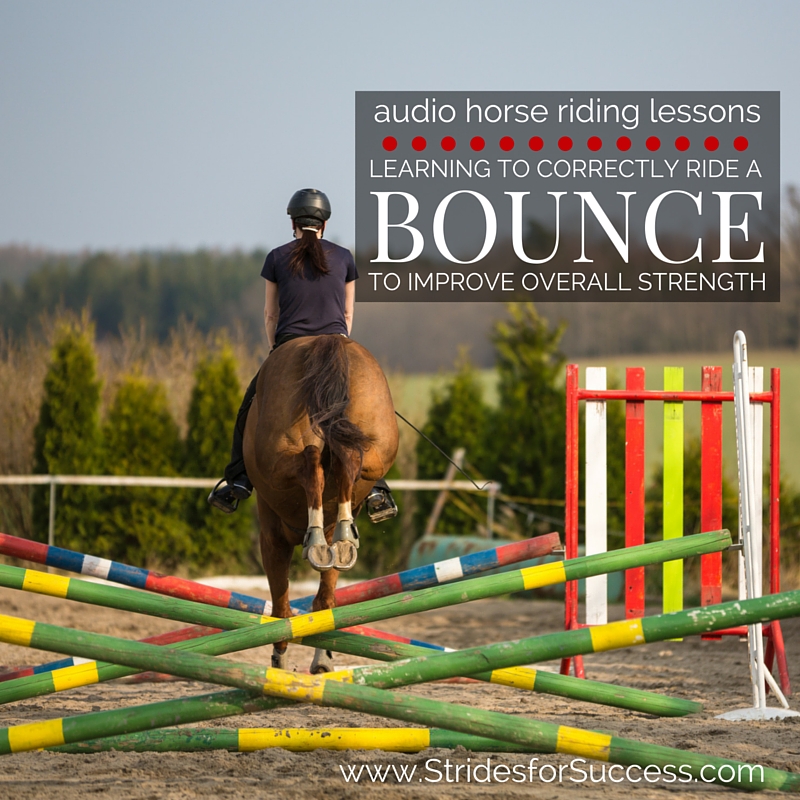
  • Riding a Bounce to Improve Overall Strength

    Riding a Bounce to Improve Overall Strength

    Have you ever experienced popping over a jump with your horse, when he suddenly realises he needs a little ‘more’ if he is going to clear the jump?  He stretches, or pushes, a little farther than you expected and suddenly you find yourself very much behind the movement and bracing for the inevitable ‘thud’ that your backside connecting with the saddle will create on landing!

    Or perhaps your horse has a frustrating habit of hanging a hoof here and there over fences, which leads to poles on the floor and a less ribbons than you would like hanging on your wall!

    [smart_track_player url=”https://op3.dev/e/traffic.libsyn.com/dailystridespodcast/601-Correctly-Riding-a-Bounce-to-Improve-Overall-Strength.mp3″ title=”Riding a Bounce to Improve Overall Strenght” social_linkedin=”true” social_pinterest=”true” social_email=”true” tweet_text=”Do you include bounces in your pole work with your horse? Here’s how to get started…” hashtag=”equestrian #jumping” twitter_username=”Strides_success” ]

    Developing both you and your horse’s physical strength is essential for successful, safe and injury free jumping.  But doing so without ‘jumping the legs off’ your horse is often a challenge for many riders.  This is where incorporating a simple bounce or two into your schooling, initially as ground poles and later as actual jumping obstacles, can help you both become stronger and more in control of your body over jumps and fences.

    For many riders, the thoughts of riding a horse into a bounce is a daunting one.  However, it need not be and in fact, will help you not only become stronger, but also give you a greater understanding of how your horse uses his body both before, during and after a fence, and how you must move to stay in sync with him throughout the effort

    A bounce, simply put, is when a horse lands from one jump (or canter stride) and as he touches down, immediately takes off again over a second jump or ground pole.  There are no ‘non jumping strides’ between the two obstacles; the front feet will touch down and then as the back feet near landing, the front feet will pick up again to jump the second jump.

    Successfully navigating a bounce requires quite a bit of athleticism from your horse, as well as quick thinking.  They are a super way of teaching horses to ‘snap up’ their front legs and also, to use their hind quarters over a fence and on landing to propel them forward again.

    Learning to Correctly Ride a Bounce to Improve Overall Strength

    For the rider, the bounce requires balance and micro adjustments throughout the body in order to stay with the horse, poised over the saddle, rather than getting too far ahead of the movement, or being left behind.

    It also helps riders to react quicker to what is happening underneath them as the horse is continually having to shift the weight between back and front throughout the sequence

    Riding through a grid containing more than one bounce also requires the rider to understand impulsion and how the horse’s energy must be controlled.  If the horse is ‘chased’ through the fences, he will not have time to make the necessary adjustments to successfully clear the obstacles.  Similarly, if the riders fails to create enough impulsion or energy, the horse will be unable to make it through the line without having poles down along the way.

    Before you begin introducing your horse to a bounce, it is important that he is confident jumping both individual fences and also related fences, such as doubles with one or two non jumping strides in between.  The rider must also be able to stay with the horse over fences and have a secure and balanced jumping position when jumping related distances.

    Start by placing a single pole on the ground and cantering over it.  Feel how your horse moves over the pole, and also, how you remain balanced, while getting off his back, as he canters over the pole.  Once you are both comfortable with this, you can then add a second pole between 3m and 3.7m or 10′ and 12′ away from the first.  Canter your horse over the poles and make adjustments to the distance as necessary.

    Work over the poles on both reins, approaching from different directions.  Working over the bounce when still only ground poles is a great way to test your horse’s rhythm and balance.

    See if you can maintain a consistent rhythm before, during and after the poles

    This is also a great opportunity to see how well you can follow your horse before increasing the difficulty.  I suggest keeping the weight dropped into your heels, your back straight, your shoulders open across your chest and your seat moving with your horse and ‘hovering’ when actually moving over the poles, in a light seat.  You can also use this exercise to assess your hands and shoulders.  Are they ‘following’ your horse’s mouth, continuing to maintain a consistent contact with your horse at all times?

    It is tempting to try avoid landing heavily on your horse’s back, or catching him in the mouth by ‘over preparing’ yourself for the jump.   Over preparing will result in you getting into your jumping position too early, and will see you leaning on your horse’s neck and shoulders for support.  Use your practice over the ground poles in order work on this, rather than when there are actual jumps involved, as it will make it much more difficult for your horse to lift his shoulders and perform a clean jumping effort.

    Remember to wait for your horse to begin over the pole, and then follow his lead

    Also notice how centered your horse is over the poles.  Later, when you are both comfortable popping through the bounce, you can begin to build cross poles, which will help keep your horse centered through the line.   But for now, notice if there is a tendency to drift one way or the other.

    Keep in mind that your horse is always influenced by your position in the saddle, so make sure you are riding in a balanced way through the line yourself

    It is common for riders to ‘duck’ one side or the other of the horse’s neck over fences…  Not a good habit to cultivate, so if it is there, nip it in the bud now!  Think about keeping your chin centered over your horse’s neck or mane as you move with your horse through the bounce.

    Once you are both comfortable riding through a single bounce of ground poles, you can begin to add more poles to the line.   Continue to assess the distance and adjust it to suit your horse’s comfort levels.  Later, as you both become stronger, you can then begin asking more difficult questions of your horse by asking him to adjust to set distances, but to begin with, build his confidence levels by building the lines for him and his preferred lengths.

    You then begin to build actual jumps where the poles are.  Depending on the height of the jumps, you may have to adjust the distances again for your horse, and always move through the line from both directions to help keep your horse fresh.

    Keep in mind that riding a bounce takes concentration and strength from your horse; therefore riding a line of bounces is quite taxing.  Don’t over do it, rather work through it and then leave it for a while, to return later when your horse is fresher.  Working your horse through this when he is tired, either physically or mentally, will only lead to mistakes and injuries.

    Happy Riding
    Lorna

    If you are interested in finding out more about bounces and how they can help you and your horse, perhaps the four other audio horse riding programs about this topic can help you. You can get theses, and hundreds more lessons, in Daily Strides Premium.  You can find out more by visiting https://stridesforsuccess.com/join/.

  • Developing Your Horses Self Carriage

    Developing Your Horses Self Carriage

    When you are riding, is your horse carrying himself, or are you in-fact carrying him? 

    Self carriage in horses can be explained as your horse carrying himself, without needing support from or relying on you, the rider, in order to continue and maintain the movement he is performing.

    [smart_track_player url=”https://op3.dev/e/traffic.libsyn.com/dailystridespodcast/SFA391-Developing-Self-Carriage-in-Your-Horse.mp3″ title=”Developing Your Horses Self Carriage” social_linkedin=”true” social_pinterest=”true” social_email=”true” tweet_text=”Does your horse carry himself? Does he know how?! ” hashtag=”Equestrian #SelfCarriage” twitter_username=”strides_success” ]

    Your horses ability to carry himself comes from him being responsible for his own body, balanced physically and also mentally because he understands what is expected of him and is confident that he can do it.

    Developing Self Carriage in your horse

    As you ride, stop directing for a few strides; will your horse be confident, competent, balanced and able to maintain the correct amounts of impulsion and tension to ‘hold’ what he is doing, until you come back with further instructions?

    Unfortunately, for most riders the answer is no! In fact, most horses are ridden in such a way that they may never be truly able to achieve and maintain a degree of self carriage in higher levels of performance and work.

    Self carriage comes from your horse being encouraged to work by himself, confident in his own abilities and your consistent correction only when he gets things wrong.  Self carriage is really self motivation on your horses part and his knowing that when you ask for something it is his job to respond and then continue until asked to do differently.

    However this simply cannot happen if you, as the rider, are micro-managing every movement.

    The riders job is not to support the horse through every stride, but rather to influence the horses movements and balance, which will then, over time, allow the horse to develop the necessary strength to support himself, and achieve true self carriage.

    Another important aspect is the level of trust which must develop between both horse and rider and also, the horses confidence in himself and the same of the rider in herself.

    This is where developing ‘feel’ as a rider is important.  You must be able to feel that he is about to go wrong, or about to lose his balance, or about to stop what is being asked and then act on this before it happens.  Once you have given the aids to get your horse back on track, again, stop giving them and allow him to perform the movement.

    There is a blog post and audio lesson on Improving Your Feel in the Saddle HERE.

    Self carriage requires the horse to be balanced, supple, have the required level of physical strength and his being capable of using this in a controlled and consistent way every time.

    Self Carriage

    Often we see horses in the paddock or field with wonderful self carriage, prancing around, 100% control of their body. They display athletic abilities and prowess that often, as the rider, we can only dream of emulating while in the saddle.

    The disconnect comes because under the saddle, the riders influence pays a huge part.  Rider are often asking their horse for completely different movements, unbeknownst to them, by moving around in the saddle. Unfortunately, if there is not a high level of understanding and awareness on the riders part as to how to control their body while riding, these questions may conflict each other, ruining any hope of obtaining true self carriage.

    It takes calmness of mind from both horse and rider to achieve true self carriage and also the knowledge that self carriage in a young, green or preliminary level horse looks and feels different to self carriage in a well schooled, experienced grand prix level horse.

    When schooling our horses, it is important to introduce new movements slowly and gradually. Remember that the level of balance, for new exercises, will be in direct proportion to the muscles strength and ability while being used that way.  When balance is lost, apply the correct aids quickly to correct your horse, and over time allow him to hold this balance longer and longer in the movement.

    Also remember that self carriage will require different use of the muscles depending on what movement is being performed. Extended trot will both look and feel very different to collected trot and so on.

    Developing self carriage, I feel, begins by the rider working on gaining full control of their aids and developing the ability follow when their horse responds correctly.

    If he responds immediately and correctly to what you are asking… stop asking!  Bring your aids back to neutral and allow him to do what you have asked of him.  If he begins to lose what you have asked or if he wanders (both mentally or physically) off track from what you are asking, then use your aids to correct him.  As soon as he responds and is back where you want, shift back to neutral again.

    Riders, whether consciously or not, often nag their horses continuously while riding.  This will work against your horse developing himself enough to achieve self carriage.  It is important to develop the skills to ask and then allow your horse to perform his movements.  A horse that can only work when his rider is controlling every little micro movement is, in all disciplines, not going to be a successful one and, in some cases may even become downright dangerous to ride.

    The first thing you can do to help your horse to achieve self carriage is carry yourself and make sure your position is correctly applied in order to support your horse and cause as little distraction and hindrance as possible.

    Ask your horse to halt.   Rather than worrying about the quality of the halt for now,  rather notice if is happy to stop where you ask and then wait for further instruction.  If he is jig jogging, side stepping, pulling, leaning, walking on, reversing, do a quick check of your position and what aids you are applying.

    Do the same when you ask him to walk on.  Notice how quickly he responds and if you have to ask more than once, back this up with your whip or spur.  Once he is indeed walking, just allow him to walk.

    One of the most difficult things to do as a rider is nothing!  Nothing is just being neutral and rather only applying aids when necessary.

    • Pay attention to what you are asking, are you nagging?
    • Are you being heavy?
    • Are you fidgeting or nudging, patting, tapping, and just micro managing your horses every move?

    If so, you need to control yourself and only ‘talk’ when you are required to do so!  Again, bring your horse back to halt and notice if he does as you ask and then awaits further instruction or if he is continuously moving and fighting.  If so, correct quickly and then return to neutral.  Repeat the exercise again until you are confident that your horse is responding in a timely and proportionate manner to each question you ask.

    We said at the beginning that self carriage becomes possible as your horse develops his balance and suppleness.  A way to do this is by working and developing his top-line.

    You can do this by working on a 20m circle in a long and low frame.  He must work from behind, pushing with his back end. Make sure you are not continuously correcting and ‘holding’ him in position, but rather guiding and correcting before it becomes necessary.

    Notice how balanced he feels and once he is reaching down for the contact, stretch your hands to him for 1 or 2 strides.  Notice if he can hold himself, in this self carriage, even if just for a second or two to begin with and then work on lengthening the time he can support himself.

    Happy Riding!

    FREE 30 Day Rider Fitness Challenge