Tag: Bending

  • Why Basics Aren’t Just for Beginners

    [fusebox_track_player url=”https://dts.podtrac.com/redirect.mp3/pdcn.co/e/traffic.libsyn.com/dailystridespodcast/1363-Why-the-Basics-Arent-Just-for-Beginners.mp3″ title=”Why Basics Aren’t Just for Beginners” social_linkedin=”true” social_pinterest=”true” social_email=”true” ]

    Ever catch yourself thinking, “Seriously, we’re working on this again? I should be past this by now!” You’re definitely not alone. So many experienced and returning riders feel frustrated when asked to revisit the basics.

    But here’s the thing: The basics aren’t something you master once and leave behind. They’re the building blocks of truly great riding. And the more you understand and refine them, the more they open up your riding potential.

    Basics Aren’t Just for Beginners

    I recently had a chat with a rider who was feeling frustrated about focusing on what she called “beginner stuff.” She felt like she should be further along in her riding journey. Maybe you’ve felt that way too?

    Here’s what I told her—and what I want to share with you today: the basics are not a sign of regression. In fact, the most skilled riders—those who ride professionally or compete at the top levels revisit the basics all the time. The difference is that each time they do, they do so with fresh perspective. They know that their new awareness is the key to refining their riding and ‘feel’ in the saddle.

    Mastering the basics doesn’t mean checking them off and moving on. It means using them as a foundation for better communication with your horse, better results in the saddle, and a more confident, connected ride.

    Understanding the True Basics

    When I say “basics,” I’m talking about things like your position, your posture, how you’re using your seat and legs. It’s how your hands communicate with your horse. It’s transitions, turns, bending, and balance.  These aren’t ‘small’ or ‘beginner’ things. They’re everything.

    And yet, somewhere along the line, many of us start believing that once we know the basics, we should only be focusing on “more advanced” things. The ‘fancy things that impress us when we see other riders flawlessly or effortlessly make them happen. We forget (or ignore) that the only way they can do those ‘fancy’ things, is by refining the basics. Over and over again…

    Your basics will evolve as you evolve. What felt simple when you first started riding may take on an entirely new meaning and depth once you revisit it with greater awareness and skill.

    Why Basics Are the Key to Getting Unstuck

    Feeling stuck in your riding is frustrating—and common. But often, what looks like a plateau is really an invitation to go deeper into the fundamentals. If things aren’t working the way they used to, or you’re not seeing progress, it’s not because you need to try something radically different. It’s often because the foundation needs to be tweaked, strengthened, or adjusted.

    And your basics are your foundation. How high you go or how much you achieve will depend on how strong your foundation is. 

    This is exactly why I created the Returning to Riding Program. It’s a step-by-step system designed to help experienced and returning riders get back in the saddle with clarity, confidence, and purpose. It’s not about starting over—it’s about creating a strong, unshakeable foundation. You’ll revisit the basics not as a beginner, but as a rider who’s ready to evolve.  Want to be the first to know when doors open again? Join the waitlist here »

    The Myth of Mastery

    A big misconception is that once you’ve been riding for a while, you’ve “ticked off” the basics and can move on. But have you ever considered how elite athletes never stop doing their warm-ups? Their training is ongoing. And usually made up of a lot of the basics. Over and over again. Do Olympic sprinters stop practicing their starts? Nope.

    Most top-level performers across all disciplines spend most of their training time on refining the fundamentals. They only do the ‘fancy’ stuff every now and again. The rest of their time is devoted to refining the basics. 

    Why? Because that’s where the magic happens. That’s where you build consistency, reliability, and the kind of connection with your horse that doesn’t crumble under pressure.

    The Role of Position & Feel

    Your position is one of the most powerful tools in your riding. If your alignment is off, even slightly, it can affect every aid you give and how your horse receives it.  When riders say their horse isn’t listening or that things feel “off,” I often find that going back to something as simple as the rider’s posture, leg position, or balance creates the biggest shift. That’s how powerful basics are.  This is true no matter your discipline.

    Whether you’re schooling dressage, hitting the trails, or jumping a course of fences, your ability to clearly and effectively communicate with your horse comes down to your mastery of the basics.

    Oversimplifying the Basics!

    Another challenge? We’ve oversimplified the basics when we teach them to beginners. And that’s fine at first—but later on, those same riders believe the basics are “easy,” when really, they’re anything but.

    Take turning, for example. Most riders start off thinking they just pull on the rein. But later they realize that turning involves their weight, their seat, their eyes, their core, and only then the rein!  That’s not ‘easy’ at all. That’s complex. And incredibly rewarding to master and refine with your horse over time.

    3 Action Steps for Today

    If you’ve been riding a while, or you’re getting back into the saddle after a break, I want to encourage you to treat the basics as your ally. They’re not a sign of starting over. They’re your launchpad to the next level.  Let’s turn this into momentum with a few simple, focused actions:

        1. Identify and work on one specific basic that needs improvement. This could be your transitions, your seat aids, your turning, or your balance. Pick one. Focus on it deliberately during your next three rides.
        2. Sign up for the Returning to Riding waitlist.  This is your next step if you’re serious about creating real, lasting improvement in your riding. You’ll be the first to know when the program opens. Add your name HERE »

    You’re Not Behind—You’re Right on Time

    So let’s leave behind the idea that going back to basics is a setback. Instead, let’s embrace it for what it really is; an opportunity to grow, refine, and reconnect with your horse in a powerful new way.  The basics are not just where you start. They’re where you grow. Again and again.

    Happy Riding
    Lorna

    Similar Episodes and Articles:-

    Online Training to Help Your Riding

    Connect with Lorna online:-

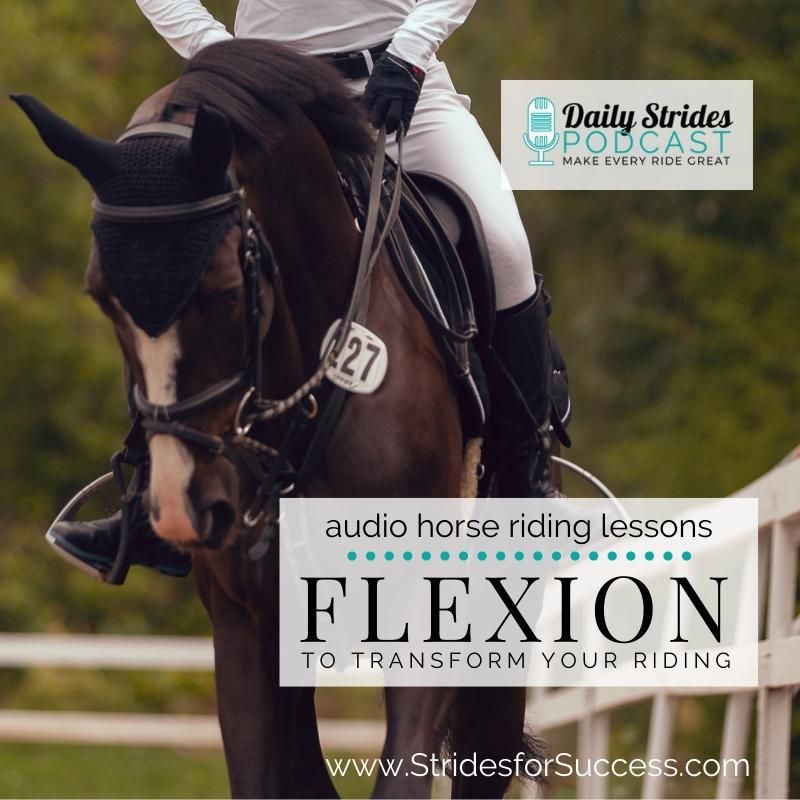
  • How Flexion can Transform Your Riding

    How Flexion can Transform Your Riding

    [fusebox_track_player url=”https://op3.dev/e/traffic.libsyn.com/dailystridespodcast/1248_How_Flexion_Can_Transform_Your_Riding.mp3″ title=”How Flexion Can Transform Training for You and Your Horse” social_linkedin=”true” social_pinterest=”true” social_email=”true” tweet_text=”Check out this episode on Flexion while riding your horse… ” hashtag=”equestrianpodcast” twitter_username=”strides_success” ]

    I find it a little mind-boggling how, the longer we spend developing ourselves as riders, the more we need to unlearn. Especially when it comes to those first one or two initial horse riding lessons!

    Using your hands and arms to ‘steer’ the horse is one of those things. And, flexion is often one of the best concepts to help riders become clearer on this. And more open to other possibilities when it comes to their aids, their riding, and steering their horse.

    Flexion versus Bending

    Flexion is bending. In the truest definition of the word, it is often attributed to the bending of a limb; an arm or leg. And when we are talking horses, this can also be true. Many vets will do a flexion test to assess soundness.

    However, flexion when riding is a little more subtle. instead of it being a bend, it is more like a suggestion towards a bend…

    I often describe it to my younger riders as being like the indicator lights on a car (also called blinkers, or turn signals). The point is that the indicator merely suggests to other drivers that you’re about to go a certain way, but they don’t actually steer the car.

    I feel that ‘bending’ while riding is more about the channel of the energy. Where the energy flows as the horse and rider move together.

    When Do We Use Flexion

    As I said, flexion can often suggest or indicate to your horse other things. So, for example, if you were preparing to track to the left, you could ask for a slight flexion to the left first. Or if you were preparing to ask for canter on the right lead, you could ask for flexion to the right first.

    When I’m in the saddle, I like to think of flexion as being a very subtle ‘nod’ in the right direction. Like a little prompt or cue for your horse to follow.

    Flexion is also how we determine ‘outside and inside’ when it comes to our aids. Flexion to the right will result in your right side becoming your inside. And therefore your left side becomes your outside.

    So rather than using your position in the arena to determine inside and outside aids, the flexion of the horse will dictate what’s what 🙂

    [convertkit form=3477209]

    Flexion for Suppleness

    Finally, flexion can be introduced to your daily riding work in order to increase suppleness throughout your horse’s body. And I think this is the key defining element when it comes to really understanding flexion and its true meaning when we are working, training, and developing horses.

    As riders, we can use slight but very intentional flexion as a tool to help develop suppleness and increase elasticity throughout our horse’s bodies

    This brings me to go a little deeper into the word ‘slight’. I’ve already mentioned that bending is more of a way to channel the energy through a turn, on a circle, or around a corner.

    Flexion, when riding, is often far more subtle than bending, and can be achieved anywhere in the ride; riding on the straight or through a bend

    True Suppleness = Flow & Ease

    And what makes flexion so important is that, for many horses, this slight shift in how they carry themselves can allow new pathways to open. Both in how they ‘think’ they can work. And in how their body actually can work.

    Flexion is often the key to softening something that has become hard or rigid – and this is because true flexion allows the energy to continue to flow

    So in instances where a true bend is difficult for the horse and rhythm or relaxation is lost, flexion can be a great introduction to the whole ‘idea’.  This is while still moving forward in relaxation and rhythm. A good example of this is introducing shoulder-fore before riding true shoulder-in.

    Also, because flexion is ‘slight’ and merely an indicator, the horse learns to continue to move forward until another aid or another question is asked

    By working on developing true flexion, even the slightest incline towards it, the horse will begin to create new ways of using his body.  And continuing to implement previous training principles.

    Start on the Ground

    So, like so many things to do with horses, the best place to begin your work with flexion is on the ground. Beside, not on, your horse. I will do a follow-up training on this which you can get delivered to your phone by ENTERING YOUR DETAILS HERE.

    Begin Implementing Flexion into Your Riding

    From here, you can begin to work on this principle with your horse using a simple technique that I will talk about in a step-by-step audio training. This training will be delivered a day after the first one for groundwork. Make sure you DOWNLOAD THE FREE TRAINING HERE

    This is a key concept that can literally transform both you and your horse.  From being hollow and wooden to becoming more ‘loosey goosey’, supple, and ‘able’ in your work together.

    Happy Riding
    Lorna

    Get Support & Guidance in Your Riding

    More on this Topic

  • Turning Your Horse versus Asking Your Horse to Turn

    Turning Your Horse versus Asking Your Horse to Turn

    [fusebox_track_player url=”https://op3.dev/e/traffic.libsyn.com/secure/dailystridespodcast/1197_Turning_Your_Horse_Versus_Asking_Your_Horse_to_Turn.mp3″ title=”Asking Your Horse to Turn Versus Turning Your Horse…” social_linkedin=”true” social_pinterest=”true” social_email=”true” tweet_text=”Have you been trying to physically turn your horse all this time?” hashtag=”equestrianpodcast” twitter_username=”strides_success” ]

    It seems pretty simple, navigating a corner or bend with your horse.  And yet, for many riders, this becomes a complicated task really quickly.  The issue is not the turn or the bend.  No, the issue is that they are trying to turn their horse, rather than simply setting things up and allowing their horse to turn.

    As the rider, you do not bend or turn your horse.  You simply set things up and ask your horse to bend or turn…

    In this episode, I want to dig a little deeper into how you can begin to make the transition from being the rider who is trying to control everything to the rider who is setting things up and allowing things to unfold naturally.

    What is a Turn?

    A turn or bend is whenever you and your horse deviate from a straight line.  You will meet them while in the arena, each corner for example.  They will also be part of your trail rides, even if it is just when you turn around to come home.

    All activities when we are with our horses will include opportunities to work on improving the basics through the correct riding of a turn or bend. 

    And that is what I want you to begin seeing each one as; an opportunity. So much can be learned from each turn and bend.  They will help you to understand where you are at that moment with your horse with regard to your training and development.  And, they will help you begin to work on going deeper or further in your training.

    Relaxation and Rhythm

    I suggest starting right at the beginning before you ever get to the turn, bend, or corner.  Think about how you can best set both yourself and your horse up.  Pay attention to your current tension (relaxation) levels.  Will they be sufficient to get you through the turn the way you want?

    Work on establishing the correct tension (relaxation) levels in both you and your horse before each turn.  Then, as you ride through it, notice if you both maintain this level.

    The rhythm is the same.  Establish it beforehand and then work on maintaining it through the turn or bend.  However, keep in mind that, very often, the rhythm will have already established itself… Particularly in the trot.  In walk and canter, you may need to work on it.  Once you have a rhythm you are happy with, pay attention to how well you can maintain it throughout the turn or bend.

    Outlining Your Track

    The next piece is often the one that so many riders forget about!  Strange, because it would naturally appear to be one of the most important parts of riding a turn or a bend.  Knowing where you’re going to ride…!  And yet, riders leave this one up to chance.

    Clearly map out your line or track.  If you struggle to visualize this in your mind, use actual physical markers to help you.  

    As you ride through the track you have chosen for you and your horse, you will see how suitable it is for you both at this point in your training.  Sometimes it can be too ‘tight’ and the lack of suppleness in either or both of you will be highlighted as you struggle to maintain rhythm and relaxation.  Or, it might be too shallow a track to ask any real questions.

    Only when you begin to actively ride specific tracks, can you begin using turns, bends, corners and circles in your training to move you both forward. 

    Asking for the Turn

    Now we are into the nitty-gritty.  This is often the first place riders begin when they make the decision to intentionally riding any bends, corners, or turns they meet.  However, hopefully, you can now see that this piece actually comes after a lot of other important things first.

    Often, asking for the turn comes down to how well your position and posture are at that point in the ride.  If either of the above is lacking, your aids will not have the same meaning. 

    You ask with a variety of aids.  Firstly, work on flexion.  This is like a ‘nod and a wink’ in the direction you’re planning on traveling. From here, think about how you can best communicate with your horse that you want an equal bend throughout his body as he rides through the turn.

    Pay attention to your aids, position and posture as your horse begins to bend.  You may need to make adjustments. 

    Allowing the Turn

    As your horse begins to travel through the turn, your job now becomes simply allowing him to do this to the best of his natural abilities.  Yes, you can help and support him if he is very green.  However, it becomes exhausting very quickly if you are trying to control his every footfall.

    Think of your aids as being a channel, funnelling the energy in the direction you want it to travel or move…

    If you feel that the energy is falling out, or leaking somewhere, correct and go back to being the channel.  Correct and allow.  Don’t ‘hold and control’.  If you do this, your horse will never learn to take responsibility for his own actions.

    Also, if you remain in the correct position, with good posture, you will be ready to ask for ‘more’ energy if necessary.  

    This can often happen if the energy that was present before or while setting up the turn has leaked out somewhere, perhaps through an outside shoulder.  Being in the correct place will also help you to reinforce the channel if necessary.  This is often useful to remember when it comes to the hindquarters and your outside leg.

    Straightening Out after the Turn

    Once you and your horse have successfully navigated the turn, you then have to turn your attention to riding the next part of the track.  This is usually back onto a straight line.  The same care and attention should be given to successfully doing this, just like riding through the turn itself.

    Pay attention to the rhythm and relaxation… If you compare them to what you entered the turn with, how do they measure up?

    What was maintained through the turn, and what was lost or is not quite as good as what it was, to begin with?  These are areas you can begin working on in your training with your horse.

    Every time you ride, you will be faced with a turn or bend.  My hope is that you can begin using each one as an opportunity to move the conversation forward for you and your horse.

    Happy Riding
    Lorna

    Additional Links to Help You:-

  • Understanding Inside and Outside in Your Riding

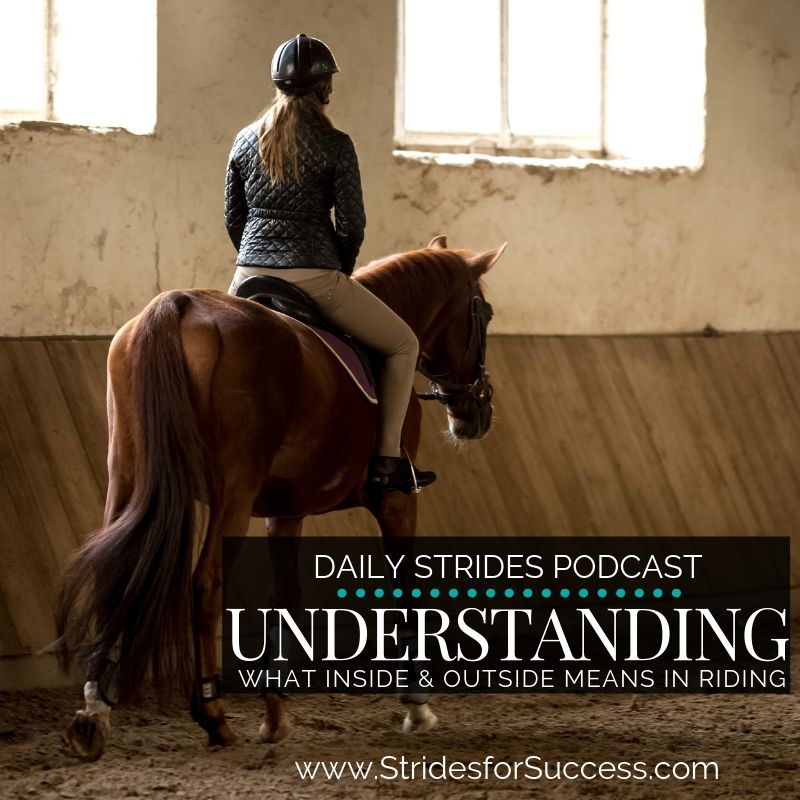
    Understanding Inside and Outside in Your Riding

    Understanding What Inside and outside means in your Riding

    What this episode is all about & how it can help you:-

    • Understand what inside and outside are when it comes to your aids
    • Take the confusion out of applying your aids correctly
    • Get started reframing how you think and apply your aids
    • Think and ride with your horse…

    There is one thing that I notice time and again when working with riders in the arena…  The confusion that shows up regarding left and right.  Now, bear with me here; of course these riders understand and know their left from their right. Most riders over the age of 6 can do that.

    However, the confusion seems to occur when coupling left and right with a specific aid.  Such as left leg, or right hand.  Even ‘track right’ or ‘ask for flexion to the left’ seems to throw many riders off their game.

    [smart_track_player url=”https://op3.dev/e/traffic.libsyn.com/dailystridespodcast/1101-Understanding-Your-Inside-and-Outside-while-in-the-Saddle.mp3″ title=”Understand Inside and Outside in Your Riding” social_linkedin=”true” social_pinterest=”true” social_email=”true” tweet_text=”Are you struggling to coordinate your aids? Here is a simple way to think about them that relates to your horse…” hashtag=”equestrian #horseriding” twitter_username=”strides_success” ]

    I have found that using the terms ‘inside’ and ‘outside’ so much easier for all involved.  But in order to successfully do this, the rider must first understand those terms and how they relate to their horses.

    In this episode of the Daily Strides Podcast I will explain ‘inside’ and ‘outside’ with regards to your horse, rather than where you are in the arena. This concept is not only useful for smoothing out those pesky directional issues in the arena. 

    It is essential for you to really understand and apply your aids when on your horse. 

    Begin By Using Your Location in the Arena

    If you are new to these terms, the easiest way for me to explain outside and inside is to use the arena or space you’re working in.  Your outside is the side of your body closest to the rail or fence of the arena.  Your inside is the side of your body closest to the middle or centre of the arena.

    If using your location in the arena to determine outside and inside, remember to ‘swap’ each time you change rein.  Your inside will become your outside and your outside will become your inside.

    Practice thinking of your aids as being ‘outside’ or ‘inside’, rather than right or left.  Once you have become comfortable using this, you can take the next step in your riding.

    Using Your Position on Movements & School Figures

    The next step to correctly using the concept of outside or inside in your riding is to be aware of where you are at any given point in a movement or figure.  This is regardless of where the shape or movement is being ridden in the arena.

    A circle is simple enough to understand.  The outside is the side closest to the edge of the circle.  The inside is the side closest to the centre of your circle.  This is regardless of where your circle is being ridden in the arena.

    For example, your inside leg is the one closest to the middle of your circle.  Your inside leg is the one your horse is bending around. 

    Sometimes you have to ‘break’ or divide shapes up in order to identify inside and outside.  For example if you are riding a serpentine.  Think of it as being a series of semi-circles connected by short straight lines.

    Your Horses Flexion Determines Inside and Outside

    The aim of starting off using your position in the arena or during an exercise is to become familiar with thinking inside and outside.  However, it is only a stepping stone on the way to the real ‘meaning’ of inside and outside in your riding.

    Inside and outside is truly dictated by our horse and the flexion present through your horse. 

    If your horse is flexed or bending to the left, your left becomes your inside. The same applies to the right.  Flexion to the right means the right side is the inside.

    This is important as there are many exercises that have your horse flexing differently to the ‘shape’ you are riding.  Counter canter is a good example of this.  Leg yielding is another example of where it is important to understand that it is your horses flexion, rather than where you are in the arena that decides inside and outside.

    Start Today – And Say Goodbye to ‘Right’ and ‘Left’

    I really believe that you must begin thinking this way in order to move your riding forward.  It is confusing to continue to think in terms of left and right when in the saddle.

    Thinking inside and outside really connects you to what you are doing and what your horse is doing at any given time.  It helps you to work with your horse. 

    Take time to allow yourself to feel confident thinking about your aids as being inside and outside.  Every time you apply an aid, ask yourself is this inside or outside?  Question what makes it one or the other.

    Soon, inside and outside will become second nature to you in the saddle.  And you can banish any confusion of right and left forever!

    Happy Riding

    Lorna

    Other posts, episodes and resources that relate to this topic:-

    Daily Strides Premium

    If you want to learn more about your aids and the application of your aids, Daily Strides Premium is packed full of trainings you can use.  With specific sections on leg, rein and seat aids and then also schooling, you can begin becoming clearer on your aids immediately.

    Couple this with the live Q&As, the monthly review and planning live calls and the members only private group ~ we are here to help you remain accountable as team leader for you and your horse.

    All of the trainings are easily accessed using your phone, meaning that you can take them with you where ever you are going.  These trainings and so much more are available for you immediately when you join Daily Strides Premium. Find out more HERE

  • A Simple Exercise for Straightness

    A Simple Exercise for Straightness

    A Simple Exercise for Straightness

    What this episode is all about & how it can help you:-

    • Get clear on the importance of straightness
    • Understand your responsibility as the rider
    • Begin using straightness from day 1
    • Use your quarter lines to assess your horse

    [smart_track_player url=”https://op3.dev/e/traffic.libsyn.com/dailystridespodcast/1050-A-Simple-Exercise-for-Straightness.mp3″ title=”A Simple Exercise for Straightness” social_linkedin=”true” social_pinterest=”true” social_email=”true” tweet_text=”Looking for a basic exercise you can ride with your horse to work on suppleness and straightness?” hashtag=”#MakeEveryRideGreat #Equestrian #Podcast” twitter_username=”strides_success” ]

    Straightness.  It is one of the top elements of the traditional Training Scale when working with horses.  Yet, is it also something that we touch on regularly here inside of the Daily Strides Podcast.

    The question for many riders is ‘How can I work on straightness, if it is such a ‘high level’ concept?”  In this episode of the Daily Strides Podcast, I will give you a simple exercise you can begin working on today.  It is an exercise you can use, regardless of where you and your horse are in your training.

    Why Straightness?

    Straightness is simply a way of assessing symmetry in you and your horses way of going.  It is how the energy is brought into the ride and how it is distributed throughout the ride.

    I have explained straightness in more detail on a previous episode of the Daily Strides Podcast.  You can find that episode HERE and I strongly suggest popping on over if you are not fully understanding this exercise or straightness in general. 

    The symmetry comes from equal energy being created in both hind legs and propelling the horse forward.  If one side is stronger, or weaker, than the other the energy input will be different, causing crookedness or excess tension in how the horse goes.

    Straightness is also important when looking at how the energy is used, or the output of the energy.  Again, any weakness or tension on one side over the other will cause the energy to be ‘spent’ differently.  The result, again, will be crookedness or excess tension as the horse tries to constantly compensate or correct.

    Your Responsibility as the Rider

    So, that all being said, how can you begin riding with the intention of developing straightness?  The key word to consider here is ‘developing’.  Your horse will not go straight from day 1.  In fact, if you have ever ridden a young or green horse, it can sometimes feel like riding an eel!

    Their ‘speed-wobbles’ in straightness cause a lack of balance and a loss of rhythm.  It can also cause excess tension as they try to ‘hold’ themselves straight, but lack the physical strength or development to do so. 

    In the previous Daily Strides Podcast episode, we spoke about your responsibility to create a symmetrical ‘mould’ in order to channel your horse’s energy.  It is also important to remember that the sides of your arena, or the rails, are not what should keep you both straight.

    Straightness is a way of travelling.  As your horse develops more correctly, he will be able to travel more straight by just, well, travelling!

    What is important is that you are all the time working toward the ideal.  If you horse is weaker (which most horses are) on one side over the other, rather work on strengthening him in shorter but more correct sessions.

    Straightness From Day 1?

    This can be worked on in simple exercises performed as correctly as possible. Attention to detail is key when schooling horses, regardless of where they are in their journey.

    Riding on the quarter lines, or just 2 meters in off the track will get you started when it comes to noticing straightness.  

    Ensuring that the hind quarters are truly behind the shoulders regardless of if you are on a straight line or a bend.  Over time this will ‘switch’, in that the shoulders will be in front of the hind quarters.  However, this takes more ‘feel’ on your part as the rider.  It also takes more engagement and strength from your horse in order to lighten the front end.

    If you are also just beginning to work on straightness for the first time, becoming mindful about what you can actually see – and what is directly in front of you – is often a little easier. Hence my recommendation of shoulders followed by hind quarters to get you started. 

    The Quarter Line

    Let’s start with this simple movement.  Riding down the quarter line with your horse.  The quarter line is the imaginary line half way between the long side of the arena and the centre line.  There are two of them in any arena!

    Many riders will call the second one the three-quarter line. However regardless of which you ride and what you call it, riding on the quarter line means there is no rails, posts or fences to guide you and your horse.

    What I have noticed is that most riders, as they ride the second half of the line, will begin to ‘fall in’ around the upcoming bend or corner. They ride a large oval or egg shape, rather than a rectangle. 

    Instead of riding to the end of the line and riding the 90 degree bend or corner, the blend everything together.  The corner is no longer defined.  The shoulders, followed by the hind quarters, just veer off track until they get to the short side.

    The straightness on the quarter line was not defined, which resulted in the straightness through the corner not being defined. 

    Rather focus on riding straight, right up to the corner. From there, think about the quality of the bend.  The suppleness through your horses body.  The ‘tracks’ created by your horses inside legs and his outside legs.  The ‘mould’ your body is creating for your horse to travel through the bend.

    This can be started in walk and later worked on in trot and even canter.

    Defining the Line using Poles or Markers

    If you are still struggling to stay on track, I suggest defining things a little more using poles or markers.   I will be running a free ‘mini-course’ in July 2018 where you can get the printable outline for this exercise and what it looks like.  Of course this is just one of the exercises we will be using.  You can sign up to join us HERE


    My one tip for today if you are using poles or markers is to start with ‘wide’ poles.  A less defined track.  Then as your horse develops you can ask for a tighter and more defined track or line. 

    Suppleness

    One of the greatest ways to develop straightness is to focus on increasing true suppleness.  I personally believe that suppleness and straightness are directly related.

    You cannot be truly straight without being supple – ask anyone who practices yoga!

    You want to make sure that rather than your horse falling in or out through the shoulders or hind quarters, derailing, he is truly bending through his body.  Through the 90 degree corner you are riding at the start of and the end of each quarter line.

    Initially he may be ‘tight’.  There may be a lack of bend and this is where you’re focusing on increasing the overall suppleness will have a huge effect.

    Most horses ‘derail’ around corners because it is easier than bending through their body to remain on track. 

    Notice how, when you ask for the bend, is there any loss of rhythm or relaxation.  This is a good indicator that your horse is not as supple as you think he is.  Notice how well he transitions from straight to flexion to bend.  Notice how well he cope if you add circles into the exercises at the corners.

    Noticing the Difference

    By defining what is straight and what is a corner.  What is a rectangle and what is an oval.  By consistently asking for better quality line and then allowing your horse to ride on those lines, you will begin to develop him more evenly through his body.

    The result will be greater strength in propelling you both forward.  Equal thrust from the hind quarters, which will lead to a stronger, more correctly developed horse.

    Helping Your Horse

    Many riders almost look like they are trying to ride the bend.  They twist, contort, shuffle, pull, squeeze… You name it!  They interfere with the horse as he is travelling and moving forward.

    Your job as the rider to set things up and then allow the horse to actually ride through the bend himself.  You simply facilitate him travelling through the bend. 

    Part of straightness is balance.  Part of balance is finding the mid-point.  Becoming stable.  Set things up.  Put your horse in the best possible position to make it correctly through the bend.  And then simply allow him to do just that.

    Will you have to step in and assist from time to time?  Yes!  However assisting is different from doing it for your horse.  Assisting is first allowing him the space to try, and then gently guiding where necessary.

    Have a line in mind and try your best to ride that line.

    Happy Riding

    Lorna

    Links mentioned in the episode:-

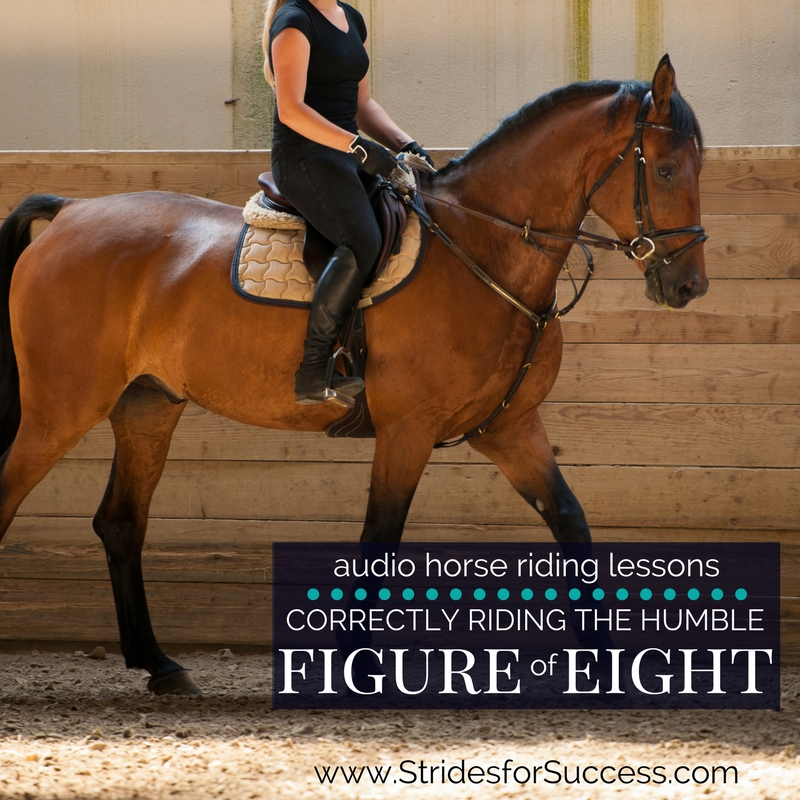
  • Using the Humble Figure of Eight in Your Schooling

    Using the Humble Figure of Eight in Your Schooling

    Correctly Riding the Humble Figure of Eight - Daily Strides Podcast

    [smart_track_player url=”https://op3.dev/e/traffic.libsyn.com/dailystridespodcast/1020-Using-the-Humble-Figure-of-Eight-in-Your-Schooling.mp3″ title=”Using the Humble Figure of Eight in Your Schooling” social_linkedin=”true” social_pinterest=”true” social_email=”true” tweet_text=”Rethinking the Figure of Eight ” hashtag=”Horseriding #Podcast” twitter_username=”strides_success” ]

    What this episode is all about & how it can help you:-

    • How accuracy is key to riding a successful figure of eight
    • The importance of rhythm all the way through
    • The power of ‘straightness’ through the change
    • Identifying where your challenges lie

    The figure of eight can be a fantastic aid in your schooling of both yourself and your horse, if it is ridden correctly and given the focus and effort it deserves.

    The humble figure of eight is one of those things that we learn very early in our introduction to horse riding.  It can sometimes seem that it is too easy to really bother with, but the figure of eight is something you can use regardless of the level you are at in your riding.

    It is an exercise that has lots of different benefits, depending on what level you and your horse are at in your training.  For example, each of the different levels of the traditional training scale can we worked on when riding the figure of eight.

    What is the Figure of Eight?

    Simply put, the figure of eight is two circles, side by side so they look like the number eight.  What trips many riders up is the fact that while it sounds simple, riding a single accurate circle is anything but simple and has a lot of potential for things to go a little off track.

    When we put two circles together, this can lead to further challenges if not approached carefully and with a plan of how you are going to ride the movement. This is one of the reasons why the figure of eight can be so beneficial for your riding, by developing not only physically (you and your horse), but also mentally as well.  You must be able to concentrate for the amount of time it takes to get you through the full figure.

    Why Accuracy is Key to a Good Figure of Eight

    Your circles must be well planned out.  I am going to suggest that if you are not fantastic at riding a line to rather put markers out which will help keep you on track.  Put more markers than what you would think you need out there.  You are going to be thinking about so many other things when you are riding the figure of eight that probably the shape is going to be the part that ‘gives’.  And you don’t want that.

    In order for the figure of eight to be beneficial to your schooling, a correct bend must be maintained throughout the exercise.  Your markers will help you to achieve this.

    The second point to consider when speaking about accuracy with the figure of eight is the middle point where the two circles join.  You must be very specific on where exactly that point is.  I would suggest maybe putting two poles out that you have to go through each time to avoid the centre from moving!

    Knowing its exact location is essential for a good approach and an equally as good departure from it and onto the ‘new’ circle.

    Relaxation and Rhythm while riding a Figure of Eight

    Both relaxation and rhythm are key while riding the movement, whatever gait you are in.  Whether you are in walk, trot or canter you want to make sure that you have those basics in place.

    The basic that is you are relaxed and your horse is relaxed, particularly when it comes to that all important middle point. 

    As well as the relaxation, you also want to notice that you are working to maintaining the rhythm.  A lot of riders will find that when they are on the circle the rhythm is great, but as soon as they begin approaching that middle point.  This is because you are preparing a lot of things to happen in order to successful change rein at this point, and it is easy to lose the rhythm (or / and relaxation) because of this.

    Riding the Figure of Eight

    When you are riding a circle on the left rein (circling to the left), you are riding in a particular way.  Your outside leg is going to be slightly behind or back from where your inside leg is; they are definitely not equal on your horse’s sides.

    The same applies to our seat bones and also our shoulders – our shoulders are going to be mirroring our horse’s shoulders, and they are not going to be ‘equal’.

    However, when you are approaching the middle point of your figure of eight, all this needs to change.  Your inside will become your outside and your outside will become your inside.  A lot has to happen in a small space of time, so I suggest simplifying things by riding a couple of strides of straightness each time at the middle point.

    Giving yourself between three and five strides where you are straightening things out will allow you to be more accurate and also help to maintain the rhythm and relaxation through the change as well. 

    Potential Areas for Things to Go Wrong

    There are two key areas where things have a lot of potential to go off track when it comes to riding a figure of eight.  The first is where the one circle ends, as you are approaching the ‘X’ or middle point (the point where the two circles intersect).  That final quarter of the circle what can sometimes lose its shape due to your horse beginning to fall in.

    To prevent this from happening, you must ride every stride.  Even though you are thinking ahead and you are planning for those couple of strides of straightness, you are not ignoring that final quarter of that circle in order to get there.

    The circle has to continue and you have to maintain the bend and stay on track in order to make that happen.

    The second area where things can potentially go off track is when you have passed the intersection point (the middle ‘X’ point) and have started on your second circle.  It is easy to ride off track by going too far out or a little bit too short.  Basically, our horse either falls out, or falls in.

    There can be a few reasons for this, but it is usually due to the rider not being very clear about where they want to go.  The lack of clarity in the riders plan leads to a lack of clarity in the aids and the communication in general.

    Keeping on Track

    Again, the biggest reason most riders ride mediocre figure of eights is because they underestimate all that is involved in riding a successful one.

    Focus on sitting tall in the saddle, having a good plan about where you are going to ride and how and then making it happen.  Use markers to plan out that track that you want to ride on, and then as you get better at it you can take the markers away and start to use your own eye – your line – to ride it.

    Begin in walk, building up to trot and later canter.  In canter, you can transition through that ‘X’ back down to trot, or you can ride a flying change.

    The beauty of the figure of eight is how versatile it is depending on your level of riding.

    Riding a good quality figure of eight will lead to increased suppleness, which is the next step of that all-important Training Scale for both you and your horse.  But in order to work on suppleness, the foundational pieces of the rhythm and the relaxation must be in place.  Let them be your focus the next time you ride a figure of eight in the arena.

    Happy Riding

    Lorna

    Links mentioned in the episode:-

    Other content that will compliment this episode:-