Tag: contact

  • Maintaining Straightness Throughout the Ride

    Maintaining Straightness Throughout the Ride

    Straightness, Maintaining it Throughout Your Ride

    What this episode is all about & how it can help you:-

    • Be clear on what is straightness
    • Understanding how your aids are a mould
    • Knowing why you have to regulate where the energy is flowing
    • Notice when things are crooked

    If I were to stand in the arena, and you were to ride directly towards me – how straight would you and your horse be?  And how well could you maintain that straightness?  Be honest!

    [smart_track_player url=”https://op3.dev/e/traffic.libsyn.com/dailystridespodcast/1047-Maintaining-Straightness-Throughout-Your-Ride.mp3″ title=”Maintaining Straightness Throughout Your Ride” social_linkedin=”true” social_pinterest=”true” social_email=”true” tweet_text=”Struggling with keeping things on the ‘straight and narrow’ with your horse? ” hashtag=”equestrian #horselovers #makeeveryridegreat” twitter_username=”strides_success” ]

    Before we even get into the straightness it is important to stress the fact that, in order for your horse to be straight, there must be energy happening inside of his body.  Often riders try to work on straightness, but there is just no energy happening!

    If you look at the traditional Training Scale, impulsion comes before straightness.  Phew – that being said, let’s crack on with today’s topic…

    What is Straightness?

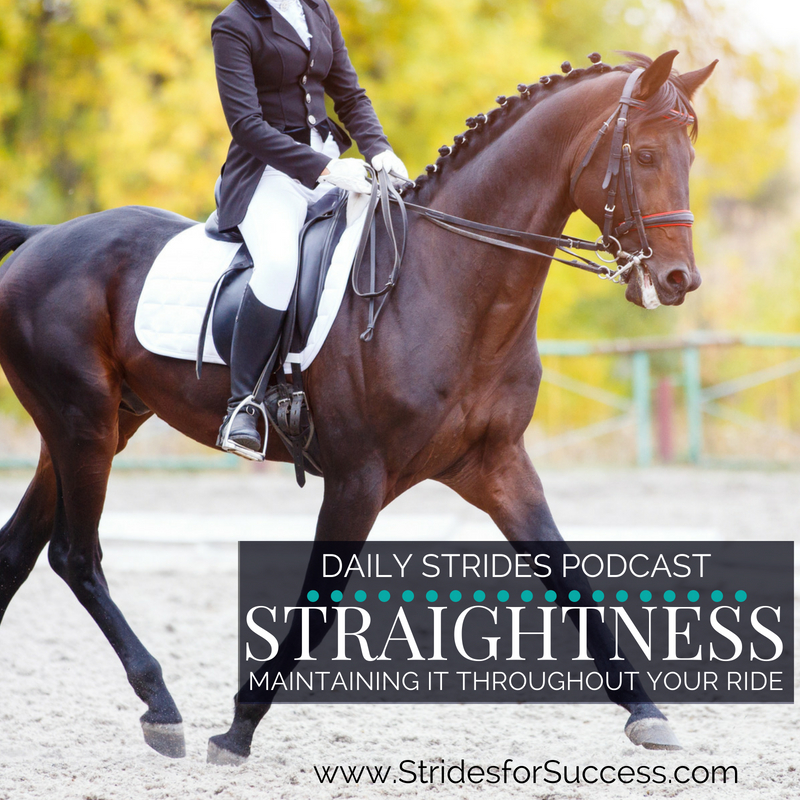
    If we were in an arena together and you were to ride towards me, I would assess straightness just like this.  I would look for your horse’s two legs on the left side of his body and the two legs on the right side of his body to be travelling on two separate tracks, that are running parallel with each other. Train tracks.  It’s that simple.

    Your horse must not deviate from those two parallel tracks.  Simply put; he must not ‘derail’. 

    How could he derail?  He could go crooked by winding and bending.  He could ‘wander’ a little.  However one of the biggest issues riders face is that the shoulders or hind quarters tend to shift off the track.  The horse really and truly derails ‘just a little bit’!

    Bringing it back to us in the arena together, let’s pretend I am standing in front of you (being all brave!).  You are riding towards me.  I should not be able to see your horses hind legs, because technically they should be behind the front legs (this is an example and of course confirmation etc will not make it literal!).

    So, if your horse were to deviate off the tracks, I would then be able to see the hind legs (from the front), or the front legs (from the back).  If I can see this, your horse is no longer working on parallel tracks, but rather three or four different tracks – which dissipates energy.

    Todays episode is all about working on the two parallel train tracks with your horse in basic riding and schooling.

    Your Aids are a Mould

    I said earlier that for straightness to be true, there needs to be energy coming into the channel that you and your horse are creating.

    Rather than ‘channelling’ energy, think about your aids being a mould – and any and all energy that is created in the hind quarters has to fill this mould. 

    When that mould is filled, the physical representation of it is that your horse is riding straight.  If your horse is crooked, it is usually because your mould is, somehow, crooked.

    Sometimes horses can develop where they are a little bit stronger on one side than on the other.  This can be due to a lot of different factors – perhaps an injury.  But it could also be the rider being an influence.

    But usually, if given the opportunity, the correctly schooled horse will go straight – until the rider steps in the way and gets the mould a little wrong. 

    Think about how maybe you are sitting more one side more than the other.  In doing so, your mould is not symmetrical.  Maybe your one hand has dipped down; maybe your one hand has opened more; maybe you have more tension in one seat bone more than the other; maybe your shoulders are tipped slightly; or maybe your one shoulder is travelling ahead of the other.

    By thinking about this mould in the context of any crookedness showing up in your horse, it sometimes becomes easier to identify how you are possibly negatively influencing your horses straightness.

    Sometimes It is Not the Rider

    That all being said, sometimes it can be that the horse has developed physically in a way that he is stronger one side that the other.  This causes him to become uneven as he pushes forward.  He is basically covering more ground one side than the other, which is causing him to be crooked.

    In this case you, the rider, may be straight and your mould is indeed true and perfect.  The the simple fact that there is more energy coming into your mould on one side than the other, is causing the mould to bulge.

    So, there are two ways we must consider this.  First, that we are setting up the mould correctly.   Secondly, that if we are sure that our mould is symmetrical and even, we need to consider that there is more energy coming in one side than on the other, that could be causing the crookedness.

    You Have to Regulate Where the Energy is Flowing

    As a rider, you need to begin thinking about regulating energy, and where this energy flows.  Very often when we talk about regulating the energy and energy flow, we can take it back to contact and connection.  This is how you are communicating with your horse at any given point.

    When you couple your connection or communication with straightness; this is where you get the horse to go where you want him to go

    Let’s assume that you have straightened yourself out.  Sometimes, a horse is perhaps a little bit stronger on one side than the other.  You may see this with a horse that tends to travel one way, the wrong way, over the other, the right way!   For them, it feels uncomfortable to do anything else.

    This is a good indicator of where you need to start regulating things.  Start simple.  Sprinkle little adjustments and exercises in to the regular work.

    Make it easy by doing things that your horse can easily do and perhaps enjoys doing – and then sprinkling the more difficult exercises or movements in between

    One way you could do this is working on a slight incline.  It is very difficult for a horse to have unequal thrust going up a hill.  By your regulating where that energy is flowing, and all the time making sure that your mould is perfect, your horse is going to begin working straight.

    Also, bear in mind that because he has travelled a certain way for a while, it is going to be uncomfortable for him to travel a different way.  Even if this ‘new’ way is the correct way.

    Don’t push it.  Slow and steady is going to win the race when it comes to true straightness

    Noticing When Things are Crooked

    For many riders, issues with straightness will show up in the canter.  If this is the case, I would suggest rather going back to basics; transitions between walk and trot and halt.  You will notice a lot there.

    Notice where there deviations away from the straightness with your horse.  Think about why this could be happening, and then begin to formulate a plan

    But remember, you must be the mould.  The energy must come through to fill your mould, and if your mould is not symmetrical and equal, well your horse is not going to be either.

    Happy Riding

    Lorna

    Links mentioned in the episode:-
  • The Training Scale for You & Your Horse

    The Training Scale for You & Your Horse

    The Training Scale for You and Your Horse

    It is always nice to have a plan or a map to follow when learning something new.  The training scale is that map for many riders when they begin schooling their horse.  However, the training scale can be equally as valuable for you, the rider.  It is a road map to help keep you on track with your riding.

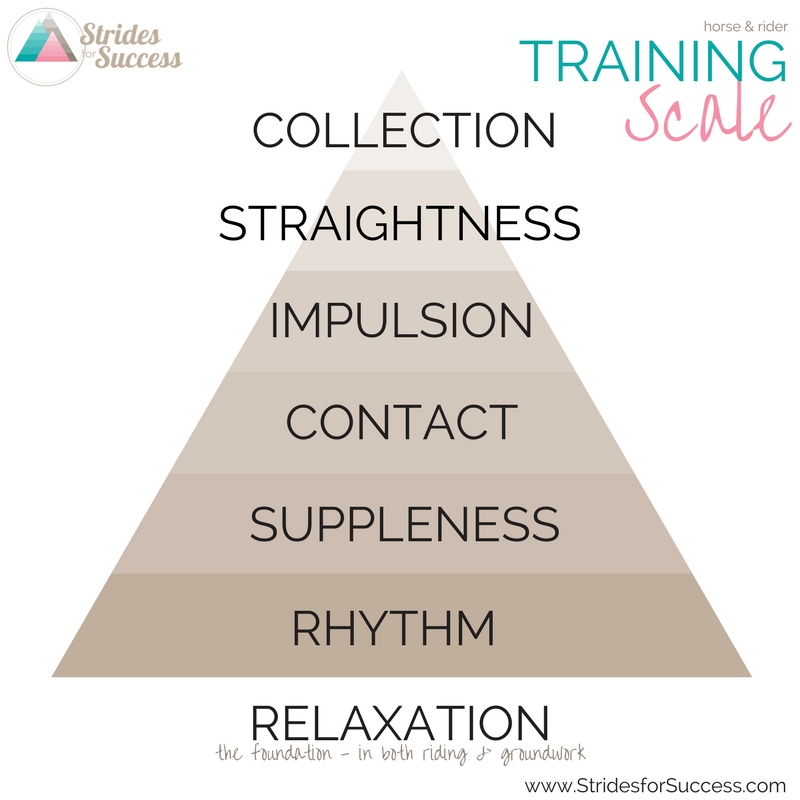
    So before we begin, let’s be clear about what the training scale actually is.  The training scale is sequence of different aspects of training which, when worked through, has been found to develop horses correctly for being ridden.

    While each step is an individual aspect of training, none of them will be worked on individually.  There is a relationship between all of the steps – and that association must be maintained throughout the horses training.

    For the sake this blog post, we are going to call each of these aspects ‘steps’.  Another way to look at them is as blocks.  One must be laid down in order for the next to be placed on top. 

    They take a horse from the very foundational ‘basics’ of rhythm and relaxation and, when used correctly and thoughtfully, build up to the ‘pinnacle’, which is collection.

    The Training Scale - Strides for Success

    Many riders think of the training scale as being a ‘check list’ of sorts.  They feel that once they have reached step 1, they should only focus on mastering step 2 and so on.  When you consider the training scale, it is worth noting that no one step can be correctly achieved when another step has been ignored or cast aside in order to do so.

    The training scale should rather be approached with a more holistic mindset.  Yes, the bottom steps need to be in place in order to successfully build on the next step – but while mastering the bottom steps, a keen eye should be kept on all the steps.  This same principle applies when working on the top steps, the bottom steps need to be the basis of that work.

    No one step of the training scale can be taken and worked on independently and in a vacuum

    So taking this all into account, let’s have a quick overview of those steps and how they look for both horse and rider moving forward.

    The Foundation – Relaxation

    Relaxation is often included with or instead of the first two steps of the training scale.  However, I believe that relaxation starts before a saddle is ever even place on the horse.   The term relaxation is a confusing one for many riders; mostly due to our pre-programmed ideas of relaxation including a swimming pool, a lounger and a beverage!

    True relaxation is when horses and their riders lack excess tension, physically and mentally

    Some tension is needed in order for the horse to carry himself.  This is also true of the rider, a certain amount of tension is necessary.  It is the excess tension, caused by anxiety, stiffness, fear, nervousness, excitement and a whole list of other basic feelings, that causes the lack of true relaxation in the horse.

    The amount of relaxation required will depend on both horse and riders level of training.  Relaxation is relative, however it is also essential to correct riding – in both horse and rider.

    Step 1 – Rhythm

    Rhythm can be defined as a “strong, regular, repeated pattern of movement or sound”.  The key words in that description are regular, repeated pattern.   Each horse has their own natural rhythm.  This is equally true of riders.

    Rhythm, like relaxation, starts on the ground.  The rhythm of the routine you have created for your horse.  What works, what doesn’t.  Learning to know your horses natural rhythm begins here

    In the saddle, the repeated pattern is the footfalls or hoofbeats. The rhythm should not change.  It can be repeated more or less in a given time – and this the tempo that is being changed – but the rhythm itself should remain the same.

    As a rider, you must learn to first follow the rhythm.  Many riders try to force a rhythm on their horse, however forcing the rhythm will actually break your horses natural rhythm.

    Rhythm must initially be worked with, not worked on 

    A loss of rhythm will immediately direct your attention to a loss of balance.  It is learning to pin point that very first beat out of your horses natural rhythm that will determine your success as a rider.  Once the break in rhythm is identified, you can work at re-establishing it again.

    Rhythm & relaxation must be present in all other steps of the trainings scale in order for them to be correct and true

    Step 2 – Suppleness

    Suppleness, rhythm and relaxation are often shuffled around on the first two steps, depending on what training scale you are working from.  However, rather than allowing this to confuse you, think of all three as being equally as essential in order to begin building things further.  Visually, it would look like a triangle, all parts being necessary to maintain each other.

    Suppleness is the elasticity or ‘loosey gooseyness’ that your horse needs in order to use himself to the best of his abilities. It is the ease at which he can perform the work required of him

    Many riders think suppleness is address solely in the warm up phase of riding and schooling, however your horse must have suppleness throughout all his movements when being ridden.

    Stiffness will stop the energy flowing through your horse; and in order to truly connect your horses back-end and front ends together, that energy must be allowed to flow as easily as possible

    From the riders perspective, a lack of suppleness will negatively impact the horses way of going.  Riders often make the mistake of focusing only on their horses suppleness.  They then become frustrated as their progress seems to stall.  The rider must try to consistently improve their own suppleness if they wish to be effective in the saddle.  Remember, the training scale is equally as important for the rider as it is for the horse.

    Due to its direct impact on the flow of the energy through your horse, suppleness, along with relaxation and rhythm, must be present before your horse can begin working on step 3 of the training scale.

    The Training Scale for You and Your Horse

    Step 3 – Contact & Connection

    Once both you and your horse can perform work to a certain level while effectively maintaining relaxation, rhythm and suppleness, you can begin working on improving your contact and connection.

    I like to think of the contact as being a conversation with your horse.  A good conversation has a certain give and take, and ebb and flow, to it – and it is important to consider this when it comes to your contact

    Many riders think of contact as being the thing that creates the ‘head carriage’ in their horses ‘frame’.  Unfortunately if you approach contact or connection in this way, you will actually set your training – and your riding – backwards.

    Contact must first of all be established and then maintained as the horse is being ridden.  It requires soft hands, soft elbows and also good posture and position in the saddle.  A fixed contact will lead to the disappearance of the relaxation and suppleness in both you and your horse.

    Contact and connection are like the ‘banks’ of the river that is your horses flow of energy.  They are how you can begin to direct, influence and channel that energy as your horse is working

    For this reason, it is important to consider your overall position, seat and leg aids as being a part of the contact.  If you seat is heavy or if you are pushing, or shoving with your seat, that energy cannot flow, which will then prevent you from having that elastic contact you need in order to correctly work your horse.

    Steps 4, 5 and 6 – Impulsion, Straightness & Collection

    As your horse works through the first three steps of the training scale, rhythm, suppleness and contact, it is important to keep the next steps in mind.

    For example, there is a certain amount of energy needed to come from behind, impulsion, in order to truly maintain a working contact.  There is also a certain amount of straightness needed when working on truly suppling your horse.

    I will go into more detail on the other three steps of the training scale next week.  However, I strong suggest working on your relaxation and rhythm with the end in mind.

    It is also worth noting that, as I mentioned at the beginning, the training scale is not a checklist.  You cannot forget about rhythm as soon as you begin working on suppleness, or even collection.  Each of the steps need the previous steps to be in place and operating correctly in order for that step to be mastered.  Collection cannot happen without rhythm being present.

    And all of the steps have the potential to test the abilities of both you and your horse, even at the most basic levels of your training.  Investing the time and effort in learning to master the basics will see both you and your horse progress correctly later.

    Click here to subscribe

    If you download the free poster of the training scale, I will send you some information on each of the ‘steps’ in more detail.  It is 100% free and you can sign up HERE to access it.

    Happy riding
    Lorna

    Click here to subscribe

  • Reforming a Horse with a Habit of Running Out

    Reforming a Horse with a Habit of Running Out

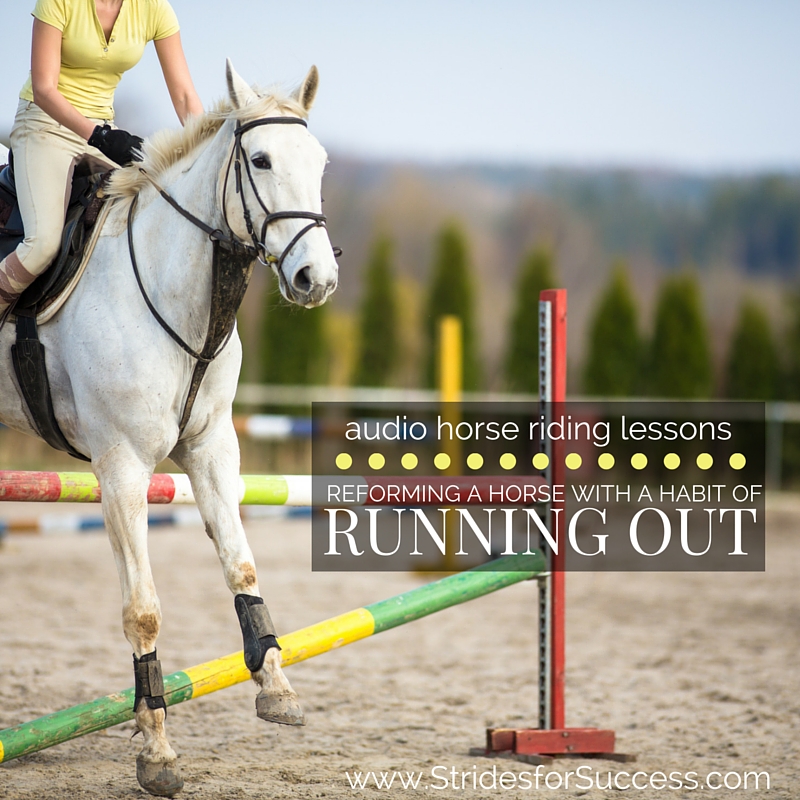
    Reforming a Horse with a Habit of Running Out You’re cantering along, the jump firmly in your sights, getting ready for your horse to take off…  When all of a sudden he begins to ‘veer’ a little off course.  Before you know it, the jump flies past you, to one side…  Your horse has, once again, proven that he is the master of running out at a fence! [smart_track_player url=”https://op3.dev/e/traffic.libsyn.com/dailystridespodcast/656-Reforming-a-Horse-with-a-Habit-of-Running-Out.mp3″ title=”Reforming a Horse with a Habit of Running Out” social_linkedin=”true” social_pinterest=”true” social_email=”true” tweet_text=”Is your horse pretty special at jumping; in that he is special at dropping the shoulder and ducking?! Here’s what to do…” hashtag=”equestrian #horseriding” twitter_username=”strides_success” ] Frustrating, right?  Particularly when it seems to happen regardless of what you do.  Or how you do it.  In fact for many riders, it feels like they spend more time running out at fences than actually jumping any at all!
    The unfortunate side of this is that the more confident your horse becomes with being able to sidestep a jump, the more often he will do it.
    And the more he does it, the better he becomes at dropping that shoulder and ducking to the side.

    Running Out…

    Running out is a common problem many riders face when they begin jumping more demanding fences.  Now, more demanding can mean 50cm to one person and 1m to another.
    Horses who have learned to employ the running out technique rarely discriminate on fence heights and types!  
    However, what is important to note is that it generally happens when there is an actual jumping effort required.
    For the rest of this blog post we are going to assume that you have eliminated all the obvious reasons that your horse might not want to jump; teeth, back, tack, soreness, sickness, being overfaced, tiredness etc.  This blog post is about horses who have learned to use running out as an easier alternative to jumping the actual fence.

    How Running Out is Different to a Refusal

    Many riders confuse running out with refusals.  Perhaps this is because they are penalised similarly.  However it is good to remember that running out and refusing a jump are two very different things.
    When your horse refuses, he generally stops in front of the fence.  Think of a grinding, sliding halt.
    Refusals can have many causes and reasons; many of which are to do with a horse not feeling confident or comfortable jumping the fence.
    Running out, on the other hand, is when your horse maintains his forward momentum, however he changes course in front of the fence and simply canters or trots past the fence to one side.  
    It can sometimes also be caused by overfacing the horse, however I have found that most horses who become skilled at running out, do so because the rider is allowing it to happen…

    Running Out and The Rider…

    “What?!”, you say.  “I do not ‘allow’ him to run out!  He just does it himself and there is nothing I can do to stop him!!”
    And that there is probably the biggest stumbling block most riders meet when trying to reform a horse who has mastered the art of running out. They try to fix it by working over fences or jumps
    Almost all cases of running out can actually find their roots way back in the basic flatwork schooling, or lack of, in the horse.  What generally tends to happen is the horse has been jumping quite happily, popping fences without question.  But one day, for whatever reason, he takes a chance and dives out the side door… The mere fact he was able to change course like that, usually without repercussions, is enough to plant a seed that perhaps – if the right opportunity presents itself – he can do it again!

    The Path of Least Resistance

    Sounds devious, but don’t worry, I am not suggesting your horse has some evil or mischievous tendencies; he has just found the path of least resistance and has decided to take it!
    The downside to having a horse who has a talent for running out is that reforming him is often a long journey.  This is particularly true if the rider he runs out with is the one accompanying him on this journey. Again, this is because very often it is the rider’s lack of ‘riding’ that has given him the opportunity to take the side door to begin with.  But, it can be done.  It will just take a lot of consistency, time, firmness and pure concentration from the rider to get there.

    Correcting the Rider First

    So, as mentioned earlier, the rider makes all the difference when dealing with a horse who has developed a knack for spotting a side door and running out.  It may be due to the rider getting into their jumping position too early.  This is essentially dropping the contact.  When the contact is dropped, your horse is left to his own devices.  Again, if so inclined, he will take the path of least resistance or the easiest route!
    Running out may also be caused by the rider not using their legs, seat and hands to correctly ‘channel’ the horse’s energy and direct it where they want.  
    Just like if the banks of a river are weak and the water runs out, so too will your horse if your legs are not being used to shut down those tendencies and keep him moving forward to where you want him to go

    Riding a Line

    The third most common reason I see horses running out is due to their riders taking a less than straight approach to the fence or jump.
    There is no ‘line’ to the fence.  Nothing connecting the approach to the getaway. 
    This often results in the horse meeting the fence at an odd angle.  Which essentially opens a door and allows him to simply canter on past.

    Approaching with Too Much Speed

    The final reason I want to mention, before we begin talking about solutions is that the horse is allowed to become too fast to the fence.  Due to the speed of the approach, the rider has no control over the horse.
    All the energy is running out the front like a freight train.  And just like that freight train; once it begins to derail, a whole army would find it difficult to get it back on track.

    Working on ‘Over’ Rather Than ‘Around’…

    So, now that we have placed the cause of the running out squarely in the riders court, we can begin working on how to re-school and reform the horse, so he goes over rather than around. When we ride, we often hear the term between leg and hand.  Put simply this means that the energy you are creating with your legs, is being directed to where and how you want it used with your hand.  Now, obviously things are a little more complicated that that, however, the basic principle is true when riding.
    When you’re dealing with a horse who likes to take the side door, the connection between your leg and hand is not a very strong one.  
    Simply put, there are holes there that your horse, if so inclined, can take advantage of.  Begin by practicing how you channel this forwardness and movement in your horse.

    Strengthening Your ‘Channel’

    Focus on straightness throughout his body when being ridden, and on the level of responsiveness to your aids
    Your horse should remain straight and true when being worked on the flat.  If you find him becoming crooked or ‘veering’ when working, quickly and quietly correct him.  He should then be responsive enough to your aids, particularly your leg in this situation.
    I also find that working on the centre or quarter lines is a good test of this straightness. 
    From here, you can also begin working on implementing better half halts.  This will help you to ‘steady’ things a little when you approach the fence.

    Gathering Energy on the Approach

    As I mentioned above, sometimes the approach to the fence is just too long, fast and strung out for you to keep the connection between leg and hand.   The energy is all running out the front.  This allows your horse to take advantage of this lack of direction. Practice applying the half halt, while continuing to move forward where you want to go.  It will help to ensure you gather the energy, rather than allow it to run out.
    You may find that as you begin closing those ‘side exits’ that once existed for your horse and his energy, there is a lot more energy there underneath you which needs to be directed.  
    This is another reason why working on perfecting your half halts is vitally important, otherwise your horse may begin to run…

    Using Ground Poles

    Another thing you can begin practicing, before you attempt jumping again, is working over ground poles.  This is good for both you and your horse.  You get to learn how to ‘wait’ for your horse to go over the pole, before following him over.
    Your horse has the opportunity to become familiar with the concept of working over the centre of the pole.  Ride a perfectly straight line on the approach, over the jump and continuing on with the getaway on landing
    Because you are channelling him between your leg and hand, all side exits have been shut.  The only way forward is the one which you present by riding him straight to where you want him to go. Running out is a frustrating and often costly habit where penalties are concerned.  However, before you lay the blame at your horse’s door, it is one of those challenges that very often has its roots in the rider’s own tendencies. This may be a bitter pill to swallow, however knowing that you may just be the reason also means that you are the key to banishing those pesky side dives and running out into the past; for good! Happy Riding Lorna This podcast episode and blog post is an overview of this weeks topic, running out.   The other four audio programs are step by step exercises and instructions you can listen to while in the saddle.  They help you to begin working through this problem with your horse.
    You can purchase the full 5 audio trainings for this topic HERE
    It is like having a riding instructor with you in the arena.  The lessons are simply downloaded to your phone and are then ready to listen to while you are in the saddle.
    You can listen to the over and over again, until both you and your horse are popping the centre of those jumps; every time!

    Daily Strides Premium

    Daily Strides Premium is packed full of audio trainings you can listen to anywhere you can bring your phone (including on your horse).  They will help you work towards your goal of having better conversations with your horse, both in and out of the saddle. You will also be able to create a plan for your rides and review what has happened when you join in on the monthly ‘Review and Planning’ call.  In there, you will go step by step through the month that was.  You then take that information and begin planning out the coming month.  When you will ride.  What you will work on.  And of course all aligned with your goals for you and your horse.
    Do you need to be competing? No!  Do you need to have competitive goals or ambitions? No again!
    In fact, I love working with riders who just ‘enjoy’ their horse; helping them to build and strengthen their relationship.  No competitions necessary ;) 
    Couple this with the live Q&As and the members only private group ~ we are here to help you remain accountable as team leader for you and your horse.
    All of the trainings are easily accessed using your phone, meaning that you can take them with you where ever you are going.  These trainings and so much more are available for you immediately when you join Daily Strides Premium. Find out more HERE
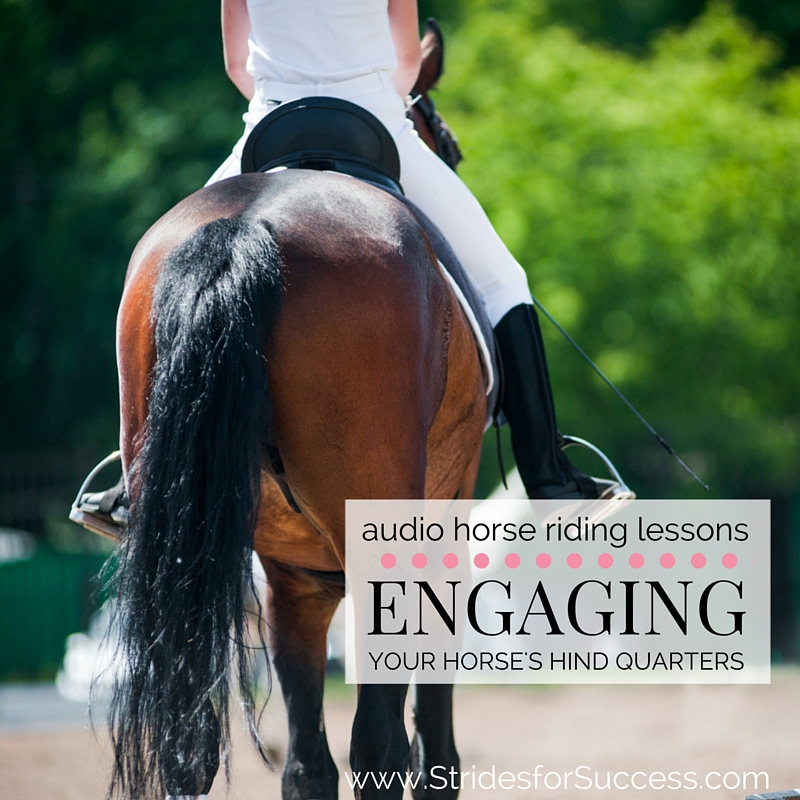
  • Engaging Your Horse’s Hind Quarters

    Engaging Your Horse’s Hind Quarters

    Have you ever looked at photos or videos of your horse and it looks like his hind quarters are, literally, being left behind? They are dragging out behind him, rather than working underneath him. Or perhaps you have gotten the feeling that when you ask for ‘more’ when in the saddle, there is just no way he can provide ‘more’ without speeding up and becoming long…

    Knowing how to activate and then engaging your horse’s hind quarters is vital to his long-term training and development. However for many riders, it can be a little daunting trying to figure out if he is truly in ‘rear wheel drive’ rather than ‘front wheel drive’ while they are working or schooling their horse.

    [smart_track_player url=”https://op3.dev/e/traffic.libsyn.com/dailystridespodcast/631-Engaging-the-Hind-Quarters.mp3″ title=”Engaging Your Horses Hind Quarters” social_linkedin=”true” social_pinterest=”true” social_email=”true” tweet_text=”Struggling to get the back end working? Engaging the hind quarters – step by step..” hashtag=”equestrian #dailystrides #horseriding” twitter_username=”strides_success” ]

    However taking the time to begin asking your horse to work correctly from back to front will be a key factor in his overall development and training and also, the deciding factor between him becoming stronger when being ridden, or just remaining where he is, effectively capping his progress.

    So, first and foremost when we talk about engaging the hind quarters, we are speaking about activating them or getting them to work while we are riding our horse and then connecting the energy produced to the front of his body. Engaged in this sense means to bind or interlock, so engaging the hind quarters is literally interlocking it with the rest of his body. Like I mentioned earlier, your horse being in rear wheel drive, means that his all the time pushing from behind, using his hind quarters. This is far more favourable when being ridden than pulling from the front with his front legs and shoulders.

    Before we go any further it is also worth mentioning that your horse will need time to develop the necessary strength to truly activate and then engage his hindquarters when being ridden. It is up to you, the rider, to make sure you do not push him beyond what he is capable of for his level of training or schooling. Slow and steady wins the race when working with horses…

    Pushing from behind requires your horse to be moving forward in the first place. Many riders seem to think that their horse merely moving is going forward, but in truth, going forward can more be described as your horse moving forward with a sense of purpose. They must have a little ‘pep in their step’ so to speak, rather than ambling along, hooves shuffling and dragging on the ground, each step looking like a momentous task

    Responsiveness is part of the key to having your horse moving forward. A simple ‘You ask; he responds’ system in place which both you and your horse understand that there is a mutual responsibility from all parties if it is to work effectively. You are responsible for making sure that you are clear in what you ask. Your aids and also where you plan on going from that point are well thought out and executed. Your horse must then become responsible for adhering to your aids and directions in a willing and cooperative way.

    If either side of the team, horse and rider, reneges on their individual responsibilities the result is a lack of forward movement, which will result in an inability to engage the hind quarters

    Once your horse is moving forward, it is then up to you to allow that energy being created from behind to connect with the front of the horse, thus actually ‘engaging’ the hind quarters. There are a few different aspects to allowing this to happen, but again, if any are missing it will result in the hind quarters being ‘disengaged’ and left to their own devices, separate to the rest of the horse’s body working with the forward movement.

    Engaging Your Horse's Hind Quarters

    Think of energy as being a little like water or electricity. It will generally always try to find the shortest and easiest route. If you allow your horse to become crooked through his body, the energy will not flow where you want it and rather ‘shoot out the side door’. An example of this is on a circle, the hind quarters being allowed to swing out wide of the tracks the front feet have created. When this happens the energy, rather than pushing forward from behind and connecting to the front of the horse, will be lost out the side door of the horse, resulting in the horse going into ‘front wheel drive’ again.

    When riding you should think of your aids, particularly seat, legs and arms, as being the banks of a river or canal. They will channel the water / energy that is being created in the hind quarters where you want it to go. This will continue to keep the energy moving forward and connecting, from back to front

    This is why straightness is so important when training a horse and rider. Many times we focus on how straight the horse is, but ignore the obvious twisting or tilting of the rider’s body. Any crookedness in either horse or rider will again result in a disengagement of the hind quarters, which will see the energy dissipate and eventually be lost.

    Another important factor to consider when thinking about this engaging of the back to the front of your horse’s body is the idea of ‘allowing’ that energy to flow underneath you through your horse’s back. Some riders really work hard at activating the hind quarters and getting them to work, but then due to a heaviness or tightness in their body, block this energy from connecting through or engaging with the front of the horse

    When we learn to ride initially, we are often told to ‘sit up’, however we are rarely told why; other than the whole falling off aspect of collapsing through your body. But let’s assume you have indeed mastered staying on, however you are still finding it difficult to truly connect the hind quarters to the front end of the horse (through your contact), it may just be because you are blocking this.

    Just as water can be dammed up, blocked or diverted, so too can energy. Sitting heavy in the saddle is the most common culprit here, but so too are shutting things down with your thighs. They can have a vice like effect on your horse if there is excess tension in your body. Also, leaning forward over your horse’s shoulders or withers will be highly effective in shutting down any engagement of the hind quarters.

    Make sure that when you are riding, you are all the time encouraging your horse to use his back by being ‘light’ in the saddle. This is often as simple as sitting up through your rib cage, carrying your upper torso. This simple change is often enough to allow your pelvis to begin moving with the horse, which will in turn allow your horse to use his back.

    Once you have managed to get your horse moving forward from his hind quarters or from behind and then are allowing that energy to flow underneath or through you in the saddle, the final piece of the puzzle is ready to happen…

    To truly engage means to connect, bind or interlock. In the case of the hind quarters, we want to connect them to the rest of the horse like a gear cog. This allows you to truly direct the energy being created there. We do this through our contact with the horse

    The unfortunate part of this is that most people look at the contact part as Step 1, rather than the final piece of the puzzle, or in this case for simplicity sake, Step 3. Contact is just like the responsiveness, there is a responsibility on both horse and rider to fulfil their end of the contract in order for it to work correctly and be effective.

    If either horse or rider try to force it, it will be lost. Similarly, if either side try to evade it, it will be lost. Many times we blame the horse for evading the contact, but I see many riders who also ‘evade’ through reins that are too loose, or fingers that are wide open and look better suited to playing a piano rather than holding their reins.

    Only when all three steps are in place can your horse truly engage his hind quarters and can you then begin to feel the difference between rear wheel drive and front wheel drive. The difference? Night and day! It feels like there is always energy there to perform what is asked. It feels like your horse moving forward with purpose. It looks so much more pleasing to the eye, as both horse and rider are in true agreement with each other, both maintaining responsibility for their individual part in keeping things together.

    There are many exercises you can do to begin asking your horse to use his hind quarters but none will really be successful until you truly understand what it means to engage and connect the back to the front.

    Happy Riding
    Lorna

    This is the first of 5 audio programs on this topic. In the rest of the programs you can listen to while riding for step by step instructions on how to effectively begin engaging your horse’s hind quarters. The exercises are suitable for all levels of riders and can be worked into your usual schooling routine with your horse.

    For more information on how to download the rest of the lessons and gain access to over 600 audio horse riding programs on a whole range of different topics, visit https://stridesforsuccess.com/join/

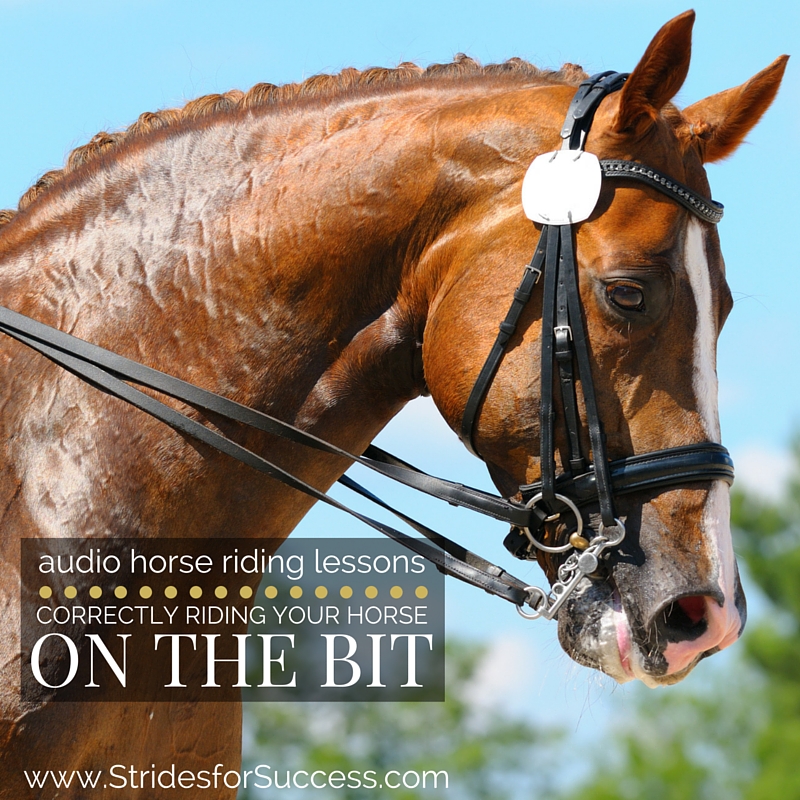
  • Assessing ‘On The Bit’ While Riding

    Assessing ‘On The Bit’ While Riding

    [fusebox_track_player url=”https://op3.dev/e/traffic.libsyn.com/secure/dailystridespodcast/576-Correctly-Riding-Your-Horse-On-The-Bit.mp3″ title=”Correctly Riding Your Horse ‘On the Bit’” social_linkedin=”true” social_pinterest=”true” social_email=”true” ]

    Left – Right – Left – Right – Left – Right…  The horse’s head turning one way and then back the other.  Every single stride.  A misguided attempt by the rider to achieve ‘on the bit’.  Have you ever seen this?   The horse looks like he is auditioning for the role of the bobblehead in the back window of someone’s car.  The rider looks like they are trying to get a ‘swinging’ upper body workout in with their riding… Left – Right – Left – Right – Left – Right…

    On the bit is a little like the holy grail of horse riding.  It is an ideal that most riders aspire to.  However, because it is more a result that is achieved through the culmination of hours of consistent riding; many riders will never truly achieve it because they are not willing to put the work in.

    Unfortunately, just like most highly desired outcomes, the eagerness to obtain it leaves the door wide open for endless counterfeit reproductions being passed off as the real thing.  One of those being that many riders are merrily sawing away at their horse’s mouths thinking they are indeed ‘on the bit’.

    What is ‘On The Bit’?

    It almost becomes easier to define ‘on the bit’ by what it is not, rather than what it is.  However I think we should always try to see the correct picture first and then hold those above-mentioned ‘counterfeits’ against it so we can see the differences.

    ‘On The Bit’ is when your horse is creating energy with his hind quarters, that is being funnelled along, through his back to the front end of his body, where it is ‘channelled’ into the contact with the reins and bit.

    What is vitally important to note is that the reins and bit part can only happen after the energy has been correctly manifested.  After it has been connected through the back.  Reins and bit are the final pieces of the puzzle rather than the starting points. This is what generally trips many riders up.

    No Sawing Required!

    Being ‘On The Bit’ has nothing to do with sawing your horse’s mouth, or pulling his head in (or up, or down, or anywhere for that matter!).

    It has everything to do with your horse using himself to the best of his ability and learning to carry both himself and you.

    The Pre-Requisites for ‘On the Bit’

    So before we even begin discussing how to achieve this contact and connection, let’s first begin by making sure all the prerequisites are in place. This will ensure both you and your horse have the best possible chance of correctly working on the bit.   It goes without saying that your horse must be moving forward.  However, moving forward correctly off your leg, rather than just running aimlessly around the arena is also a vital disparity to make.

    Moving off your leg will ensure that your horse is responsive to your aids and traveling with rhythm and balance.

    You ask, he responds.  If you are having to push for every stride, or if your horse has a little ‘think’ about actually doing what you want each time you ask, I would highly suggest working on his responsiveness first, before you begin anything else in your training.

    Connecting the Energy

    Once you have established forwardness, you can then begin working on allowing that same energy to connect through from the back to the front.  

    Horses should work in rear wheel drive, meaning that they push from behind rather than pull from the front

    However, this energy then needs to connect or move through the horse in order to ‘lift’ and carry the front half of his body along with him.  What a lot of riders don’t realize is that they are the actual cause or reason that connection or transference of energy is not happening.  Simply sitting heavily in the saddle, or slouching through your shoulders or upper body, is enough to shut down that flow of energy.

    Correctly Working Your Horse On the Bit

    Self Carriage for Riders First…

    To prevent this, I want you to think about sitting up through your waist and ribs.  Think of trying to elongate your torso.  Use your muscles to carry your upper body so it does not collapse on your pelvis and hips.

    Once you are carrying yourself, I also suggest paying attention to the distance between the point of your shoulders across your chest.  Notice how when you draw your shoulders together – and shorten this distance – it affects your whole body.  Be aware of keeping your chest open all through your riding.

    Many instructors will teach this as ‘Shoulders Back’, but I find that simply pushing your shoulders back rather makes your body rigid.  Opening your chest is a softer and more flexible movement.

    The Final Piece of ‘On the Bit’

    Once you have your horse moving forward in a responsive fashion, and the energy flowing underneath you connecting the hindquarters to the front end of your horse, you’re ready.

    The final piece of the puzzle is gathering or channelling that energy to where you want it to go. You do this using your contact

    Establishing and maintaining consistent contact with your horse is key to riding on the bit.  The contact should be elasticized and ‘stretchy’; your elbows being pliable and supple enough to literally hold your horse’s mouth in your hands.  Pulling, forcing, sawing or any other use of physical force will not allow the correct use of the contact.

    Developing Over Time

    Through working correctly, your horse will begin to become stronger through his body, and assuming you are carrying yourself while in the saddle, he will begin to lift his back as he works.  This lifting of his back will allow him greater connection from the back-end through to the front end.

    It will also begin to free up his shoulders a little more.  The less the shoulders are ‘pulling’ the more they can begin ‘swinging’ and from here your horse will begin seeking out the connection with your contact.

    It will feel like holding a one end of a skipping rope with another person.  Not gripping or pulling.  There is a mutual understanding. Both are willing to do the necessary to maintain the connection and move the rope where they want it to go

    Don’t make the mistake of becoming obsessed with your horse’s head carriage.  Remember, being on the bit is the result of working correctly over time in order to build and develop the necessary strength and trust with your horse.  Where and how he carries his head will be the result of both of you carrying yourselves correctly.

    Reestablishing On the Bit when Necessary

    Also remember to use your half-halt, both to set up your transitions or different movements.  And also to rebalance and regroup when things fall apart, which they will quite often initially.

    Be consistent with your contact through the outside rein, and soft – almost offering – of your contact through the inside rein.

    As your horse begins to spend more time working on the bit, you can use your inside rein to see his he is truly carrying himself.  Does he continue to move forward when you soften your inside rein?  If so, he is truly moving and working ‘On The Bit’.

    Happy Riding
    Lorna

    Connection for Equestrians

    I have created 5 audio horse riding programs on this subject.  They will take you step by step through working your horse correctly in order to achieve a consistent ‘On the Bit’.

    If you are interested in listening to these programs (and hundreds more) you can visit https://stridesforsuccess.com/join/ to find out more.

    Other Info On this Topic

    Additional Resources To Help Equestrians:-

  • Retraining a Horse that Evades Your Contact

    Retraining a Horse that Evades Your Contact

    [fusebox_track_player url=”https://op3.dev/e/traffic.libsyn.com/dailystridespodcast/526-Retraining-a-Horse-that-Evades-Your-Contact.mp3″ title=”Retraining a Horse that Evades Your Contact” social_linkedin=”true” social_pinterest=”true” social_email=”true” ]

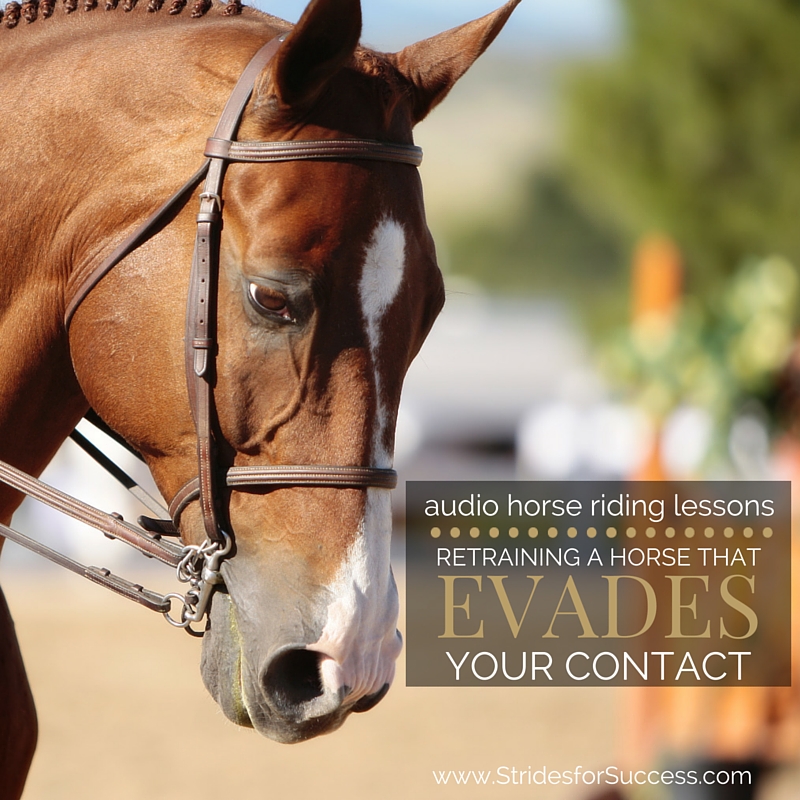
    Are there days where your horse’s camel impression is worryingly accurate?  He lounges along, his back all strung out resembling a cable that’s sole purpose is to work against you.  His neck stretched out in what must be an extremely uncomfortable way, his nose pointing skyward…  And it seems that all your efforts to establish a correct contact are falling on deaf ears?!

    Or perhaps your horse is the other end of the spectrum? As soon as you pick up a contact he curls his head so his lips are close to touching his chest… Leaving you with loopy reins that have no contact at all with said horse’s mouth?!

    The unfortunate fact is that horses evade contact in many different ways and for many different reasons which all have the potential to ruin a good performance or ride.  However before we go any further, let’s get clear on what is correct, ‘true contact when riding a horse…

    What is True Contact?

    Contact is your connection with your horse through your rein aid.  You must offer a stable, consistent contact through your hand and rein, which in turn, your horse will then accept with his mouth.  However, the contact that we can ‘see’ in the above description is merely the end result of a lot of other communications and aids.

    Things that are ongoing and happening between horse and rider. Their culmination is what produces a consistent, soft, and accepting contact.

    In order to create correct contact, the horse must be moving forward from behind.  So the rider must first work on activating the hindquarters, then allowing that energy to connect through to the front, before they can then harness and direct it using their contact.

    Responsibility and Responsiveness

    In order to achieve correct contact you need to be responsible and your horse must be responsive.

    This means that you are conscientious in how you ask for and respond to your horse’s contact that will cause no discomfort or pain to your horse.  He must be perceptive and reactive to your aids when he receives them.

    Very often riders forget or just don’t know about the first, vitally important, responsibility on their part in order to achieve a correct contact. Because of this, they become focused on ‘head carriage’.  Or if their horse is ‘on the bit’.

    Instead, I want you to think of contact as being the result of a carefully set up and orchestrated use of your different aids when in the saddle. And this culminates in your horse accepting your conscientious, soft, and elastic contact.

    How Does a Horse Evade the Contact?

    So, how does a horse evade the bit or contact?  Horses generally do this in a few different ways.  They either become ‘above the bit’. This is where their noses are ‘skyward’ and the whole back, from tail to ears, is hollow.

    Or they can also become ‘behind the bit’. This is when they begin to curl their head and neck back towards their body, nose to chest, which leaves the rider very little options when it comes to contact at all.

    Lastly, there are some horses that when you have ‘closed’ all open doors, will still try to evade by wriggling around, never truly connecting with the rider through the reins at all.  It feels like someone has replaced your horse with an eel!

    Retraining a Horse that Evades Your Contact

    Why Does a Horse Evade the Contact?

    All of the above descriptions lead to a less than pleasant picture to look at. And all also look extremely uncomfortable for the horse!  So what is it exactly that brings them to act like this?

        • The rider is asking incorrectly – This can be due to ignorance or incorrect training on the riders part.  Very often riders will only focus on their horse’s head and where it is, rather than what is happening underneath them that is leading their horse to travel like that.
        • Unsteady contact from the rider – Many riders continue to do this, even though they understand and know about the importance of a steady and ‘safe’ contact for their horse.

    Some riders continue to use the reins as a safety harness rather than work on developing an independent seat.

        • The horse is unbalanced – Young and underdeveloped horses will find it difficult to accept a contact for any great length of time.  This needs to be worked on and developed slowly, over time, using correct aids and techniques, in a way the horse can understand and trust.
        • Over or incorrect use of a gadget or training aid – This is particularly evident with the usage of draw reins, where horses begin to evade the contact by coming behind the vertical or bit.
        • The horse’s conformation makes him more inclined to travel like this initially
        • Physical discomfort – Such as pain in the back due to tack or another disease or injury.  Also problems with teeth and correct fitting of the bit.  All physical discomfort should be ruled out before continuing on with and retraining your horse.

    Contact as a Development Step

    So often we think of contact as being just holding the reins, however the contact that you create is so much more than that.  This is both in terms of communication between horse and rider and also as a vital piece to moving on up the training scale with your horse later.

    It is your job as the rider to create or provide a contact that is consistent, kind, soft, following yet effective.  

    Once you have done this, your horse can then accept this contact and trust you that you won’t catch him in the mouth or drop him by releasing and letting go of the contact.

    Your level of contact will depend on how much energy you are asking your horse to create with his hind quarters.  Contact is merely gathering up and then giving that energy some focused direction of where to go

    Therefore it is impossible to have contact if you horse is not using his hind quarters to push himself forward  and having forward energy.  It is the lack of this forward momentum that causes a horse to begin to lean or become heavy on your hand and essentially evade the bit.

    Reschooling a More Correct Contact

    So assuming that you have an independent seat and your hands are thoughtful and balanced, once a horse has begun to evade how can you then begin to re-school or retrain him to a better way of going? Nne where he is happy to accept your contact?

        • Forwardness & Responsiveness
        • Rhythm
        • Suppleness
        • Straightness

    Begin working on assessing how responsive your horse is to your aids.  If you ask for more, does he respond and begin creating a little more energy into his movement?  Is this response immediate or does he think about it for a few steps?  If his response time is a little ‘wanting’ I suggest carrying a schooling whip and backing up your leg aids with it each time he shows begins to procrastinate or ignore your aids.

    Once he is responsive then make sure he is indeed moving forward, pushing from behind.  It is impossible to direct what is not there, so make sure your horse is using his hindquarters with each stride.

    Then work on creating a rhythm in the gait you have chosen.  I suggest working on a 20m circle, and using half halts and transitions on the circle to further engage the hindquarters as your horse is working.

    Straightness to Enhance Contact

    Straightness is important.  Firstly to correctly channel the energy where you want it to go. But also so you can quickly lock any doors that your horse will try to open once you have blocked his initial ‘evade of choice’!

    Many horses will look for another way of evading when you shut down the initial window of opportunity!

    Finally, don’t be afraid of creating contact with your horse while riding.  Many riders are worried about hurting their horse’s mouth, or pulling on the reins and never truly get to experience and feel how wonderful it is to communicate with their horse in a consistent, safe, following contact.

    Happy Riding

    Lorna

    Additional Resources for Equestrians:-

    Retraining a horse that Evades Your contact