Tag: dressage

  • Analysing Your Dressage Score Sheets to Improve Your Riding

    Analysing Your Dressage Score Sheets to Improve Your Riding

    Dressage is a funny thing when we really think about it.  Riders pay someone for their opinion on how well they are riding for those few minutes. And how well their horse is responding and performing for those few minutes. And yet, often when riders receive their marks, it can feel like harsh criticism!  Remember, dressage is all about the judge’s opinion.  It is subjective.  Unlike, say, jumping for example.  In jumping, the pole is either up or it’s down.  No in-between and definitely not open to interpretation!

    But, the fact that the comments are subjective allows you to begin analyzing your dressage score sheets and use them as a training tool for you and your horse. And this may require a mindset shift first… 

    In this episode of the Daily Strides Podcast, I want to help you begin using your score sheets as a tool to improve your riding. After all, if shift our thoughts about each dressage test to being less about harsh judgment and more of a mini private lesson, well, it helps us to be more open to the feedback we receive.

    Understanding Dressage Score Sheets

    So let’s begin by saying that each movement is scored between 0 and 10.  0 means it never happened, and 10 is perfect! And, it is also worth noting that judges are only required to comment on any movement that was deemed to be a 5 or under.  So, if you see a fairly empty comments section, well that’s a good thing :)

    The dressage score sheets are a tool used by the judges to evaluate your performance during a dressage test. They include comments, scores, and, sometimes, diagrams or notes regarding specific movements and overall performance. The goal is to help you understand how the overall test went, and pointers to work on for the next time.

    Remember, the judge is not there to train or coach you.  They are merely observing what they see.

    And when this is also coupled with the fact that there’s a lot happening quickly, one movement, then the next, and the next, etc. it makes sense that the judge won’t be able to write a composition for you.  They are, again, simply commenting on what they are observing as you ride your test.

     1. Analyze the Comments Thoroughly

    When you receive your dressage comment sheet, the first step is to read through it carefully. Many riders make the big mistake of only wanting the ‘score’ or the ‘mark’. And, yes, in the moment that is usually what’s most important.  However, going forward…

    Pay close attention to the judge’s comments on each movement and the overall impression. Judges often use abbreviations and shorthand, so make sure you understand their terminology. If you have any questions or uncertainties, don’t hesitate to seek clarification from experienced trainers or judges.

     2. Notice Patterns

    Dressage tests consist of a series of movements which are judged separately. One by one as you ride through your test.  By searching for patterns, both in an individual test and by looking over previous tests as well, you can begin to identify things about yourself and your horse.  What movements you are stronger or more able to ride?  And, similarly, the movements that need more attention and development.

    Look for patterns in the feedback; if several movements received similar comments, it’s a clear indication of an area that requires improvement.

    Remember, dressage judges are not just random riders put there to dish out harsh criticism! Becoming a judge is not something a rider can do on a whim.  Different governing bodies have different requirements, but it is safe to say that most judges will have been successful in their own right as dressage riders. And then also have passed some sort of training, exam, or program. This means that while their opinions can be subjective, they are also guided by well-defined principles.

     3. Begin Creating a Training Program

    Once you’ve identified specific areas that need improvement, now the work begins on improving those individual things.  And this is what can trip riders up.  Things such as relaxation or rhythm are absolute basics, and a lot of riders are not keen to go back to the start again! They rather want to work on the ‘fancier’ movements. Unfortunately, this is why they will remain ‘stuck’ at a certain level without ever really progressing.

    Many of the planned riding sessions in your program can be based on the feedback from your dressage score sheets.

    For example, if the judge (or judges!) pointed out issues with your horse’s impulsion, your goal might be to improve impulsion in your next training sessions.  I also think that it’s important not to get too hung up on only improving the weaker parts of your test.  That will usually result in riding becoming a bit of a chore for you and your horse!  Sprinkle the topics that need work throughout your rides.  And remember to keep it fun for both of you.

     4. Record Yourself Riding the Test

    My final tip for you to make the most of your dressage score sheets is to actually record yourself riding the test.  Now, obviously, this can only be done going forward with future tests.  But if you have the recording on the actual test that was judged and then use that to compare, movement for movement, with your dressage score sheet, you can begin to ‘see’ what is more or less desirable in your work.

    This allows you to visually assess your performance and compare it with the judge’s feedback.  A side by side review or comparision. 

    Instead of seeing your marks, scores, and comments as negative, be realistic about what they really are.  Personalized feedback from an expert on the topic tells you where to focus your attention and energy going forward so that you and your horse can improve.

    And that can be an amazing thing!

    Happy Riding
    Lorna

    More on This Topic

    Join Our Online Community of Equestrians

    Dressage Score Sheets to Improve Your Riding - Connection August 2023

  • Improving Your Dressage Scores – Part 2

    Improving Your Dressage Scores – Part 2

    You leave the arena on a long rein at A and to say you feel a little disheartened is putting things mildly… Dressage can be difficult, there’s no doubt about it, however what tends to stack the odds even more so against a good dressage score is the fact that many riders see it as ‘boring’; a means to an end of sorts.

    Are you the sort of rider that thinks the most challenging part of dressage is memorising your test? For many riders, this is the be all and end all of dressage. Is it any wonder that it is often those same riders that feel hard done by and disappointed when they receive their score sheet?

    [fusebox_track_player url=”https://op3.dev/e/traffic.libsyn.com/dailystridespodcast/681-Improving-Your-Dressage-Scores-Part-2.mp3″ title=”Improving Your Dressage Scores Part 2″ social_linkedin=”true” social_pinterest=”true” social_email=”true” ]The dressage test is merely a means to see how the horses, and riders, training is progressing and a way to ‘course correct’ where necessary. If the test is looked at in this way, the boredom vanishes and the scores begin to mean something…

    We already discussed a few points on improving your dressage scores previously here on the blog. You can read Part 1 HERE >>

    In this blog post I want to focus on using the training aspects that the test is trying to encourage, the reason behind the ‘symmetry’ on both reins and the disastrous effect riding the test just to ‘check’ all the movements off can have on your overall score.

    Training Aspects of the Test

    Each level of dressage is looking to progress and build on the level that came before. The ascension through the levels corresponds with the basic training scale, the foundation of which is rhythm, relaxation and, suppleness. Both the movements themselves and the sequence they are asked in that are laid out in the test are there to see just how well you and your horse have grasped the concepts.

    Depending on the level you are riding at, the dressage judge will be looking for slightly different things while you ride your horse. Keep this in mind and work towards what is required for your level. Don’t try to achieve something that is far more advanced than where you are right now. Similarly, if you are riding at a higher level, but have not truly mastered the basics, your scores and comments will reflect this.

    Allow the level you are currently at to set the tone for all your rides. Focus on achieving that particular aspect of riding within both yourself and your horse, regardless of the exercise or work you are busy with. This is how you will then become better; and move up the scale.

    Focusing on Symmetry while Riding

    You have probably noticed that when riding a dressage test, whatever you do on one rein is generally repeated on the opposite rein soon after. This is not due to the creator or designer of the test taking a shortcut when designing the test; rather it has to do with the symmetry that you should be aiming for in your riding.

    Dressage tests are there so the experts, judges, can guide you and give you pointers as to how both you and your horse can improve your overall ride. By seeing how well you both can ride a movement to the right and to the left, any stiffness, crookedness or lopsidedness is more easily identified and noted.

    Going back to that initial thought that the dressage test is to see how well your training is progressing, you have to agree that being loose and supple on ‘both’ sides is vitally important to your horses way of going… And to both of you successfully grasping and then applying the concepts behind each step of the training scale.

    Change Your Perception of the Scores

    A lot of riders seem to think that their dressage judge is just there to nit pick their overall riding performance. Reshaping this single belief can sometimes be the catalyst to becoming a more effective and efficient rider – regardless of where and when.

    I suggest rather thinking of your next dressage judge as being a trainer of sorts. It’s like having a lesson or training session and then being given a hardcopy of your homework afterwards

    Just like when in the arena with a trainer, the judges comments on your dressage score sheet will usually include some positive aspects of your ride. They will also spotlight a few places that can be improved, a couple of ideas on what to focus on improving and, very often, an overall synopsis that you can use as a benchmark for your riding at that particular time in your equestrian journey.

    If knowledge is power, your dressage score is a mighty benchmark of your riding progress indeed. Seeing it as this, rather than something negative can very often encourage you to really begin working on your weaknesses; and take more pride in your strengths

    Improving Your Dressage Scores - Part 2

    Don’t Ride a Checklist!

    Before you begin getting into the more technical aspects of your particular test, you have to first memorise the test. Every dressage test is like a map, you reach a particular place on your way to somewhere else. However just looking at the test as this is the downfall of so many riders.

    Most riders seem to have an attitude of getting in and out of the arena as quickly as possible. Savour your time in the arena – it’s your time, use all of it to the fullest to really show what you and your horse can do.

    When we are initially introduced to dressage, the mere fact that we have to ‘learn’ the test seems to be the overriding factor of the whole process. It is easy to begin believing that taking a wrong turn somewhere, going off course so to speak, is the worse thing that can happen to you. It’s not! If you do find yourself on a slight detour, how you react and deal with it will very often dictate the outcome of the test – not the fact that you took a wrong turn.

    Rather think about each individual movement you ride in the test as setting up the next movement. That way, you can work on riding the current movement to the best of your ability, while still keeping your ‘plan’ or ‘map’ in mind

    If you do find yourself ‘lost’ out on the course, take a moment to gather yourself and your horse, pick up where you went wrong and continue on; it’s done! Worrying and stressing about it won’t undo it. Rather make a conscious decision to ride every movement from that point on to the absolute best of you and your horses ability.

    If you can begin seeing your dressage scores as another tool in your belt that you can use to better your riding, you will soon begin to see a definite improvement in your overall scores. Ride each test to the best of your abilities and value each score sheet as much as you would a lesson with a top trainer; that is essentially what it is after all.

    Happy Riding
    Lorna

    This is part 2 in a series on how you can begin improving your dressage scores. There are 5 audio programs in each part, which along with other ‘schooling’ topics, are available for you to download and listen to inside of Daily Strides Premium. To find out more click HERE >>

    [wp-tiles post_type=”post” orderby=”date” order=”DESC” grids=”Plain”]

  • Teaching Your Horse to Rein Back

    Teaching Your Horse to Rein Back

    . Teaching Your Horse to REin Back Correctly
    Have you ever found yourself out on the trail needing to reverse?  Or even in the arena, knowing that your horse reversing in a calm, quiet fashion would be a really useful achievement in that particular moment?

    You ask him to go back.  However, rather than the smooth, no-fuss reverse you were imagining, it rather feels like you left the handbrake on and he begrudgingly edges ‘back’.  Head raised in protest.  Hooves seemingly glued to the ground beneath them.

    By the end of the exercise, your horse, rather than having gone straight backward as requested, is far closer to a 90° angle from where you began…

    Rein back is a really useful movement for your horse to know.  It’s also one that can really begin at any time in his education. From being first handled in the stable, to later in the dressage arena. It is a nifty little tool to have when there are gates to be opened along the trail.

    However, having that smooth movement, which you can truly direct your horse where you require him to go, like a lot of things, takes practice.

    [smart_track_player url=”https://op3.dev/e/traffic.libsyn.com/dailystridespodcast/626-Teaching-Your-Horse-to-Rein-Back-Correctly.mp3″ title=”Teaching Your Horse to Rein Back Correctly” social_linkedin=”true” social_pinterest=”true” social_email=”true” tweet_text=”Struggling to go backwards with your horse? Here’s how to get started today – the right way…” hashtag=”equestrian #horseriding” twitter_username=”strides_success” ]

    What Is Correct Rein Back?

    This practice begins with becoming really clear on what happens when your horse performs a rein back that is correct and balanced. We know that he must reverse, or go backward, however how he gets there is vitally important to the overall success of the movement.

    When a horse moves in rein back, his legs move in diagonal pairs. His right front leg and his left back leg move backwards together. This is one step. Then his left front leg and right back leg move backwards together, step two. As he moves back, he should remain straight and his hind quarters will begin to move a little more underneath him with each passing step.

    His back should remain relaxed, as will his head and neck. When he has moved back as far as you desire, he should then promptly move forward again when you ask him to.  Without hesitation

    What Should The Rider Do During Rein Back?

    While your horse is moving back you, the rider, should remain upright.  You will use your core to lighten your seat bones a little. Your lower legs will move back slightly.

    Your legs are really important due to how they ask your horse to move.  Timing is everything.  You will use your leg to ask the horse to lift his leg.  They ask the question. The rider can use their legs either together or one by one, depending on the situation. Forward movement is then ‘resisted’ by the riders hands.  then resisting any forward movement with the hands.

    This all sounds easy enough, however, unless the groundwork has been correctly laid, just following the above directions will not achieve a seamless, relaxed rein back.

    In fact, many bad or faulty rein back performed by riders are the direct result of a lack of groundwork and patience when it comes to explaining to the horse what they expect from them.

    Explaining Rein Back to Your Horse

    As I mentioned at the beginning, horses can be introduced to rein back early in their lives. This is generally in the stable or stall when asking them to move backwards is something that will occur often daily. Rather than just pushing or shoving horses around the stables, think about using this basic movement as a start for when they are later under saddle.

    From this, and regardless of your horse’s age, I suggest first taking him out to the arena.  Have him fully tacked up if necessary.  You are going to begin to explain rein back to him with you on the ground.

    Ask him to halt correctly, which is square.  Once he is standing still, not fidgeting, place your hand on his chest (where it joins his neck) and using a little pressure, push him back while asking him verbally to do so as well. Use a single word all the time, I suggest ‘Back’.

    This is so that later, when you are in the saddle, you can use the same word to convey rein back intially to your horse. 

    When you begin, just ask for one or two steps. Don’t worry too much if they are crooked or if they are a little hesitant to begin with. What is important is that you reward any step in the ‘right’ direction and then ask him to move forward immediately after going backwards.

    Thinking Forwards, While Going Backwards…

    The going forwards as soon as the rein back is finished, is vitally important. Allowing him to stop and wait after he has performed a few steps of rein back will begin to set him in a ‘sticky’ mindset. Horses must always think ‘forward’, so make sure you keep instilling this throughout his groundwork exercises and his ridden exercises.

    Try Not to Pull or Haul Your Horse Backwards

    You may notice that I did not mention ‘pulling’ or ‘resisting’ with the reins or the lead rope when I spoke about asking for the rein back. Rather only using your voice aids and the pressure from your hand on his chest.

    This is really important to note; the rein should never be used to ‘pull’ the horse backwards.

    The horse must first understand the concept of moving back and then later, when you are in the saddle, the rein is merely to tell the horse “Okay, not forward here, rather backwards with that leg you have lifted in the air.”

    When a rider uses the rein to actually move the horse backwards, it generally results in the horse lifting his head and neck, which causes the horses back to stiffen and tense up. 

    This, in turn, causes the actual steps of the rein back to become choppy and short and, if persisted with, fall out of sequence. So rather than the legs moving in diagonal pairs, the horse will move each leg individually. When this happens, it is not a true rein back.

    Finding a Helper When You’re in the Saddle

    Take the time to truly make sure your horse understands what is being asked of him on the ground.  This will help when he then has to work things out under the saddle.  Where he has the added distraction of a rider’s weight on board!  Once you are in the saddle, I suggest finding a sympathetic helper on the ground who will take your space in front of the horse to apply those same groundwork pressure at the front of the horse.

    From the saddle, you will set up the square halt, and then, lightening your seat bones a little in the saddle and sliding your lower legs back slightly, ask your horse to lift his leg.

    At this moment, your helper will apply pressure while you say the ‘Back’ and resist any steps forward with the rein. As before, look for one or two steps initially.  Then move your horse forward into immediately when you are finished with the rein back.

    Be sure that you remain upright in the saddle. Many riders will lean forward a little to try lighten their seat bones.  This can be quite off-putting for the horse and unbalance them further. Also, make sure you are not pulling on the reins. They are only there to ‘direct’ your horse as to which way he must move his legs. Think of them as a detour sign, rather than as a gear stick!

    Rein Back in Your Day to Day Schooling

    Finally, once your horse clearly understands what is required of him in the rein back, you can begin working this into your everyday schooling sessions. As he becomes stronger and more balanced, he will be able to perform a straighter and longer rein back.  4 to 6 steps are generally ample.

    Just make sure that you ask him to move forward each time immediately into either walk, trot or canter.  He must continue to think ‘forward’ rather than ‘backwards’.

    Rein back will help to not only supple your horse.  It will also begin strengthening this hind quarters for later work that will require more collection. And, it’s a pretty handy movement to have when out on the trails with your horse!

    Happy Riding
    Lorna

    Other Resources to Help with This Topic

  • Improving Your Dressage Scores

    Improving Your Dressage Scores

    [fusebox_track_player url=”https://op3.dev/e/traffic.libsyn.com/dailystridespodcast/611-Improving-Your-Dressage-Scores-Part-1.mp3″ title=”Improving Your Dressage Scores – Part 1″ social_linkedin=”true” social_pinterest=”true” social_email=”true” ]

    You halt, salute, and exit the arena from your latest dressage test. Your best ‘free walk on a long rein’.  Now, your thoughts turn to your scores; how well your dressage test went…  That one circle may have looked a little more on the triangular side… But, on the plus side, you aced the canter leads each time and you’re almost sure the halt was a square one.

    However, when the actual test scores are handed out, you realize things did not go that well – at all!

    Riding a dressage test can be a nerve-wracking endeavor at the best of times.  Firstly there is learning the test. Then having to ride the actual movement while thinking about preparing the next movement. It is not an overstatement to say that there is a lot going on both physically and mentally.  All this while keeping a grin pinned to your face.

    Am I the only person with vivid memories of that pony club instructor drumming it into you that judges like to see you enjoying yourself?! 

    Add this to the fact that your trust teammate, your horse, might have other ideas about how to impress the judges with his athletic abilities…  Dressage can often seem very clinical.  The comments and accompanying scores from the judges often repeat themselves over and over; regardless of the test or day, it was ridden on.

    However, if the same movements are consistently producing the same comments, perhaps the judges might have a point?  

    So, taking that into account and working on the items that are showing up for you each test, here are some other simple tips you can begin implementing today that will help you to improve your overall scores and feel better after your next test.

    1. Plan your warm up

    Preparation is everything and this is also true for better results with your dressage test.  Even if your next test is months away, begin now on finding the best warming up sequence for you and your horse.  Focus on exercises that encourage relaxation as well as responsiveness.  Also, exercises that help your horse to loosen up and become supple through his body.

    Often the difference between a mediocre and a good test is the amount of time and preparation spent warming up.  A few circles and transitions is not enough to really have you both ready to ride a great test when you enter the arena

    Also, remember to keep in mind that different circumstances that are outside of your control may necessitate you having to have a few different warm up plans ready.  Factors such as wind, the length of time traveling to the competition grounds, the horses you are sharing the practice arena with all can affect both you and your horse.  Take the time to figure out what exercises work best to overcome those different challenges and help you both to relax and concentrate on the task at hand.

    2. Practice the actual entrance

    So like many things in life, first impressions count and with dressage, the first impression is how you enter the ring right up to when you track left or right at the top of the arena.  Very often we practice over and over how straight we are on the centerline and also, how straight and square our halt is.  These things are really important.

    However, if the ‘turn’ itself into the arena is not a great quality bend, it will take the first few strides of your journey up the center line to sort out and fix.  

    This will leave you with less focus and preparation for your halt.  I suggest laying out a mock ‘A’ with mock ends and corners the arena and practice firstly establishing a good, forward going gait before you ‘enter’.  Also, work on the bend as you enter to make sure you are on the centerline from the word go.

    Make sure that the quality of the gait you enter in is one which you intend to continue on with

    Many riders tend to use the time before they hear the bell to show their horse any ‘spooky’ objects around the arena.  I suggest if you can, work on desensitizing your horse at home, so you can use the minute or two before you enter A to really establish focus and forwardness in your horse.  Of course, new situations will always have the potential for your horse to react in a different way.  But working through different scenarios and ‘spooky objects’ at home will not only help desensitize your horse but also help you figure out the best way to regroup and refocus your horse if he should have a ‘moment’ in the arena.

    Improving Your Dressage Scores

    3. Quality of Transitions

    With all the stress and nerves surrounding remembering and riding your dressage test, it is easy to fall into the trap of thinking about your transitions as merely a way to get from A to B (with the A and the B being the important parts of the equation).  However, transitions make up quite a large percentage of the scores in your test.  They are key to riding a good A or B at all!

    The first transition you will meet is usually the one into the halt on the center line.  Take the time to practice this, not just the straightness and squareness of the halt, but also how your horse ‘steps down’ into the halt and then, how he propels or pushes himself out of the halt into whichever gait you choose.

    Work on refining your aids, the more subtle the better.  Also, pay attention to how responsive your horse is both preparing for, during, and riding out of any transition.   This is a part of your test where a point here or there can make a big difference to the overall score at the bottom of the sheet.

    4. Understanding what the judge is looking for

    We all think of accuracy as being ‘hitting the markers’ and this is true, but I find that very often accuracy is also reading the test correctly beforehand so you understand what the judge is looking for with each separate movement.

    Very often riders try to run before they can walk regarding what they expect from their horse in dressage

    The temptation to look at higher level horses and riders and then try to emulate them in lower level tests is always present.  However, it is important to keep in mind that depending on the level of the test, trying to ‘skip ahead’ without getting the basics correct is a recipe for disaster.  A good example of this is lower level riders who are obsessed with their horse’s ‘head carriage’.  Rather than working on encouraging relaxation, rhythm, balance, and a sense of forwardness, they pull their horses ‘on the bit’.   Another hang up of riders is aiming for a lot of self-carriage by fixing their horses into a stiff frame.  Instead, focus on straightness, consistent contact, and impulsion.

    The dressage levels are created for a specific reason; to build strong foundations.  Then, with each progressive level, another layer of sound training from which both horse and rider can grow from

    Take the time when learning and then riding the test to figure out what the judge is looking for with your particular level. Put your focus on working towards delivering exactly that to the best of your abilities both in your warm-ups and when performing the actual dressage test in the arena.

    5. Create mental ‘checkpoints’ to help you refocus

    Imagine if there was a speaker in your ear, that every once in a while reminded you to carry yourself, or half halt, or whatever it is that you forget to do. This can make all the difference for you and your horse if you take the time to do it.   See the ‘speaker’ as being the voice in your own head.  I suggest using the corners as your ‘checkpoints’.  Every time you ride through one, you will mentally remind yourself to check that you are indeed doing (or not doing as the case may be!) that one thing that makes all the difference.  Make this a habit every time you ride.  Begin with consciously saying it out loud as you ride into each corner and later, it will become second nature to you as you ride your schooling routines or a dressage test.

    Using the corners as checkpoints will also ensure that you pay attention to riding every corner, which can be a game changer when riding a whole dressage test

    The corners are the easiest place to rebalance and make any small adjustments necessary to keep your horse working with you for the duration of the test, and because they appear so often, this will ensure that both you and your horse are focused throughout the performance on the job at hand.

    There are many ways to improve your dressage scores.  Keep in mind that a few points here and there are what make all the difference to the overall scores.  Also, try to improve marginally from one test to the next, perhaps 2 or 3 points on each outing.  This way you will make your overall goal of reaching the next level an attainable one, but also a sustainable one.

    Dressage is more like a marathon than a sprint.  Pace both yourself and your horse, master the basics and from there, you will begin to see the results you want at the end of each score sheet.

    Happy Riding
    Lorna

    Connection for Equestrians

    This is the first in a series of 5 audio programs on this topic. The Daily Strides Podcast episode that appears above is a general overview, while the other four programs are step by step instructions you can follow from the saddle to help you improve your dressage scores.

    To find out more about how you can get all this weeks programs inside of Connection, you can visit www.stridesforsuccess.com/join/

  • Assessing ‘On The Bit’ While Riding

    Assessing ‘On The Bit’ While Riding

    [fusebox_track_player url=”https://op3.dev/e/traffic.libsyn.com/secure/dailystridespodcast/576-Correctly-Riding-Your-Horse-On-The-Bit.mp3″ title=”Correctly Riding Your Horse ‘On the Bit’” social_linkedin=”true” social_pinterest=”true” social_email=”true” ]

    Left – Right – Left – Right – Left – Right…  The horse’s head turning one way and then back the other.  Every single stride.  A misguided attempt by the rider to achieve ‘on the bit’.  Have you ever seen this?   The horse looks like he is auditioning for the role of the bobblehead in the back window of someone’s car.  The rider looks like they are trying to get a ‘swinging’ upper body workout in with their riding… Left – Right – Left – Right – Left – Right…

    On the bit is a little like the holy grail of horse riding.  It is an ideal that most riders aspire to.  However, because it is more a result that is achieved through the culmination of hours of consistent riding; many riders will never truly achieve it because they are not willing to put the work in.

    Unfortunately, just like most highly desired outcomes, the eagerness to obtain it leaves the door wide open for endless counterfeit reproductions being passed off as the real thing.  One of those being that many riders are merrily sawing away at their horse’s mouths thinking they are indeed ‘on the bit’.

    What is ‘On The Bit’?

    It almost becomes easier to define ‘on the bit’ by what it is not, rather than what it is.  However I think we should always try to see the correct picture first and then hold those above-mentioned ‘counterfeits’ against it so we can see the differences.

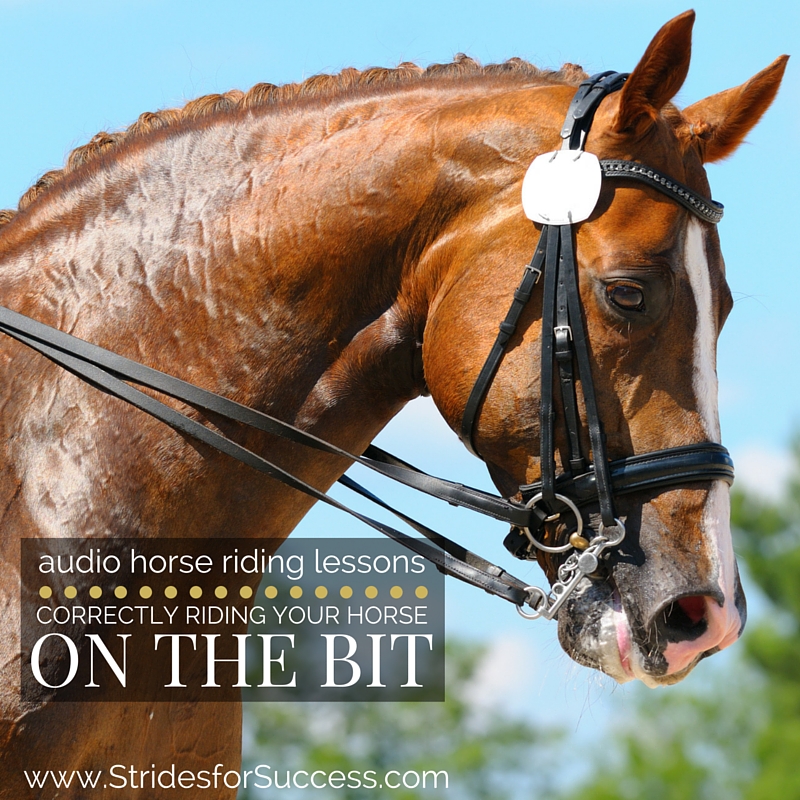
    ‘On The Bit’ is when your horse is creating energy with his hind quarters, that is being funnelled along, through his back to the front end of his body, where it is ‘channelled’ into the contact with the reins and bit.

    What is vitally important to note is that the reins and bit part can only happen after the energy has been correctly manifested.  After it has been connected through the back.  Reins and bit are the final pieces of the puzzle rather than the starting points. This is what generally trips many riders up.

    No Sawing Required!

    Being ‘On The Bit’ has nothing to do with sawing your horse’s mouth, or pulling his head in (or up, or down, or anywhere for that matter!).

    It has everything to do with your horse using himself to the best of his ability and learning to carry both himself and you.

    The Pre-Requisites for ‘On the Bit’

    So before we even begin discussing how to achieve this contact and connection, let’s first begin by making sure all the prerequisites are in place. This will ensure both you and your horse have the best possible chance of correctly working on the bit.   It goes without saying that your horse must be moving forward.  However, moving forward correctly off your leg, rather than just running aimlessly around the arena is also a vital disparity to make.

    Moving off your leg will ensure that your horse is responsive to your aids and traveling with rhythm and balance.

    You ask, he responds.  If you are having to push for every stride, or if your horse has a little ‘think’ about actually doing what you want each time you ask, I would highly suggest working on his responsiveness first, before you begin anything else in your training.

    Connecting the Energy

    Once you have established forwardness, you can then begin working on allowing that same energy to connect through from the back to the front.  

    Horses should work in rear wheel drive, meaning that they push from behind rather than pull from the front

    However, this energy then needs to connect or move through the horse in order to ‘lift’ and carry the front half of his body along with him.  What a lot of riders don’t realize is that they are the actual cause or reason that connection or transference of energy is not happening.  Simply sitting heavily in the saddle, or slouching through your shoulders or upper body, is enough to shut down that flow of energy.

    Correctly Working Your Horse On the Bit

    Self Carriage for Riders First…

    To prevent this, I want you to think about sitting up through your waist and ribs.  Think of trying to elongate your torso.  Use your muscles to carry your upper body so it does not collapse on your pelvis and hips.

    Once you are carrying yourself, I also suggest paying attention to the distance between the point of your shoulders across your chest.  Notice how when you draw your shoulders together – and shorten this distance – it affects your whole body.  Be aware of keeping your chest open all through your riding.

    Many instructors will teach this as ‘Shoulders Back’, but I find that simply pushing your shoulders back rather makes your body rigid.  Opening your chest is a softer and more flexible movement.

    The Final Piece of ‘On the Bit’

    Once you have your horse moving forward in a responsive fashion, and the energy flowing underneath you connecting the hindquarters to the front end of your horse, you’re ready.

    The final piece of the puzzle is gathering or channelling that energy to where you want it to go. You do this using your contact

    Establishing and maintaining consistent contact with your horse is key to riding on the bit.  The contact should be elasticized and ‘stretchy’; your elbows being pliable and supple enough to literally hold your horse’s mouth in your hands.  Pulling, forcing, sawing or any other use of physical force will not allow the correct use of the contact.

    Developing Over Time

    Through working correctly, your horse will begin to become stronger through his body, and assuming you are carrying yourself while in the saddle, he will begin to lift his back as he works.  This lifting of his back will allow him greater connection from the back-end through to the front end.

    It will also begin to free up his shoulders a little more.  The less the shoulders are ‘pulling’ the more they can begin ‘swinging’ and from here your horse will begin seeking out the connection with your contact.

    It will feel like holding a one end of a skipping rope with another person.  Not gripping or pulling.  There is a mutual understanding. Both are willing to do the necessary to maintain the connection and move the rope where they want it to go

    Don’t make the mistake of becoming obsessed with your horse’s head carriage.  Remember, being on the bit is the result of working correctly over time in order to build and develop the necessary strength and trust with your horse.  Where and how he carries his head will be the result of both of you carrying yourselves correctly.

    Reestablishing On the Bit when Necessary

    Also remember to use your half-halt, both to set up your transitions or different movements.  And also to rebalance and regroup when things fall apart, which they will quite often initially.

    Be consistent with your contact through the outside rein, and soft – almost offering – of your contact through the inside rein.

    As your horse begins to spend more time working on the bit, you can use your inside rein to see his he is truly carrying himself.  Does he continue to move forward when you soften your inside rein?  If so, he is truly moving and working ‘On The Bit’.

    Happy Riding
    Lorna

    Connection for Equestrians

    I have created 5 audio horse riding programs on this subject.  They will take you step by step through working your horse correctly in order to achieve a consistent ‘On the Bit’.

    If you are interested in listening to these programs (and hundreds more) you can visit https://stridesforsuccess.com/join/ to find out more.

    Other Info On this Topic

    Additional Resources To Help Equestrians:-

  • Become Crystal Clear on Counter Canter

    Become Crystal Clear on Counter Canter

    [fusebox_track_player url=”https://op3.dev/e/traffic.libsyn.com/dailystridespodcast/561-Becoming-Crystal-Clear-on-Counter-Canter.mp3″ title=”Becoming Crystal Clear on the Counter Canter” social_linkedin=”true” social_pinterest=”true” social_email=”true” ]

    You have finally managed to truly be able to dictate what lead your horse strikes off with, each time, in the canter.  The shouts of ‘Wrong Leg’ following you around the arena are a thing of the past… However, now everything you have learned is being turned a little on its head when you realize that sometimes, you can indeed canter on the ‘wrong leg’!

    Cantering is fantastic.  And when we are learning how to canter we tend to become a little obsessive about being ‘on the correct lead’.  It is often drummed into us as being the ‘inside front leg’.  So, it goes without saying that the potential to get more than a little confused when counter canter is first introduced is quite high for most riders!

    Why Counter Canter?

    So why do we bother with counter canter?  Counter canter is a great way to increase your horse’s balance and suppleness.  It also gives both his brain and his body a great workout.

    The counter canter will help to maintain a level of discipline and responsiveness to your aids. 

    This is because you are asking for your horse to not just assume what must happen (such as a flying change or a change of lead), but, to rather wait for your instructions and then follow them.   It is also a great way to increase collection in the canter through the use of the half-halt.

    Is Your Horse Ready for Counter Canter?

    However, it is really important to first make sure that your horse is indeed ready for the counter canter.  Being ready will entail being able to ride a balanced canter.  Also, to be able to change gears within the canter to some degree.  So, shortening and lengthening the stride in the canter.

    It also involves moving forward off your leg and a certain level of self-carriage in your horse, as you ideally want him to lighten the front end while performing the counter canter.

    Becoming Crystal Clear on the Counter Canter

    Inside Versus Outside

    Another factor that can have a big influence on the success of the movement is how the rider perceives ‘inside’ and ‘outside’ when riding their horse.  We are generally thought at the beginning of our training that the inside is the side closest to the middle of the arena or circle.  This, in turn, makes the outside being the side closest to the rail.

    However, as our knowledge and understanding of riding grows, it’s important to ‘update’ this thinking with the true meaning.

    The inside and outside are dictated by the flexion of your horse.  

    So with the counter canter, the inside is the side that is leading the canter, the leading front leg of the canter.

    Straightness in the Canter

    The other extremely important prerequisite is straightness, both through the canter itself, but also in the transitions both in and out of the canter.  Very often, we riders tend to get a little carried away with the concept of our ‘inside leg’, particularly in the canter.  It can often be to the point where our horses are essential doing travers or haunches in as they canter.  I think this is due to riders hearing all the time that the horse must be ‘bent around’ the inside leg’.

    I find that thinking of your inside leg as being more of a ‘wall’ that keeps your horse going in the direction you want is more helpful.  Then using your outside rein as the second wall, will help you remember to keep your horse straight between the two.  

    Yes, there is a slight flexion to the inside, but your horse’s back-end and front end must continue on the same track.

    Moving Off the Track…

    Therefore your horse’s responsiveness and understanding of your aids and what you are asking are also vitally important.  Particularly the fact that he must not always move away from your outside leg.  In the counter canter, you will ask him to place a little more of his weight on his outside hind leg, and you will use your outside leg to ask for this increased engagement.

    If your horse only knows your outside leg to mean he must move away or over, he will begin curling his hindquarters away from your leg, rather than maintaining the straightness you desire.  This is essential for using his outside hind leg to create the energy required to keep the balance and rhythm in the canter.

    The reason I mention this here is that very often when a rider is riding counter canter, the hindquarters are being forced out rather than maintaining the track the front end has created.

    Let’s say you are tracking right, and riding counter canter (so cantering on the left lead).  Your horse’s hindquarters must not swing out more to the left as your round the bend to the right, they must rather continue to follow the shoulders, which will create a path and an arc on the circle or track you have chosen.

    Walk to Canter

    So assuming your horse is capable of all the above, you can begin thinking about counter canter.  I like to first introduce the concept of using walk to canter on the long side of the arena.  The reason for this is, if you have not asked for a counter canter previously, your horse will be so used to the true canter, that he may quickly become confused and frustrated by the rules suddenly being changed.

    Begin by testing your horse’s responsiveness to your aids.  

    As you are warming up your horse and then beginning to work him, use your half halts to begin engaging him a little more, both his body and his attention.  Ask for circles and turns, on both reins to loosen him up and also, tune in his responsiveness to your inside leg.

    Transitions within the Canter

    From here, in the canter itself, ask for transitions (lengthening and shortening) within the canter.  As you canter, begin to collect things up a little more.

    Remember, when you are collecting your horse must continue to move forward.  Ride the ‘can – ter’  ‘can – ter’  ‘can – ter’.  Test if you can maintain forwardness, rhythm, balance and straightness while doing so.

    When you are sure that your horse is responsive and carrying himself sufficiently, ask for a walk down one of the long sides of the school, however about 2 meters from the outside track.  The reason I say this is because very often our horses associate the outside track with cantering on the correct or true lead.

    Your aim here is to have him listening to you and also in the frame of mind that ‘anything is possible’.  

    Before you reach the middle of the long side (E or B if your arena is marked) ask for the walk to counter canter transition.

    Initial Counter Canter Attempts

    You may find that your horse gets a little confused initially.  He may not be quite sure where to put his legs and may even do a flying change one or two strides into the canter.  If the transition is less than great, bring him back to walk, circle around and repeat the process, but this time adding a few more half halts beforehand, so your horse is really paying attention.

    Once he is in counter canter, allow him to canter on and round the bend in a large arc.  Do not try to ride into the corners or to make a small curve or semicircle.

    Try to maintain the ‘can – ter’  ‘can – ter’  ‘can – ter’  and also, try to keep the hind legs in line with the shoulders as you are riding.  I find that focusing on the ‘channel’ between the inside leg and the outside rein often helps with this.

    Improving Each Attempt

    When you have ridden a semicircle or half circle in the counter canter and are on the other long side of the arena, bring him back to walk.  Use your time in the walk to assess how the counter canter went;

        • Was the rhythm maintained throughout?
        • Did the canter continue to move forward or did it get a little sticky in places?
        • Was your horse straight through the shoulders and hindquarters?
        • Did he respond to your aids and then wait for your further instruction?

    When you and your horse are confident riding the counter canter in larger shapes you can then begin to ask for more difficult turns as well as moving into the counter canter by changing the rein in the canter but not changing the leg.

    Developing the Counter Canter

    Movements such as serpentines, where I would initially suggest a 2 looped serpentine, and shallow loops can be incorporated into your schooling session.  Also, look out for any stiffness on one side or the other and work towards loosening and then developing your horse slowly over time, so he can perform the movement to the same degree on both sides.

    The counter canter can seem confusing to both horse and rider which is why I again stress the importance of making sure your horse is ready for it before you introduce it.

    Happy Riding

    Lorna

    Additional Resources to Help with This Topic