Tag: Trot

  • Lengthening Your Horse’s Stride in Trot

    Lengthening Your Horse’s Stride in Trot

    [fusebox_track_player url=”https://op3.dev/e/traffic.libsyn.com/dailystridespodcast/531-Lengthening-Your-Horses-Stride-in-Trot.mp3″ title=”Lengthening Your Horses Stride in the Trot” social_linkedin=”true” social_pinterest=”true” social_email=”true” ]

    We have all seen the wonderful video clips of horses showing extravagant extensions in the trot and I think most riders dream of being able to perform a similar feat.  However, for most riders, merely asking for a lengthening of the stride in trot results in their horse either breaking into a canter or running on to their forehand, with the hind end being, well, left behind!

    Being able to lengthen and then subsequently shorten your horse’s stride when you want, develops your horse’s responsiveness, suppleness, and balance while being ridden.  

    It also allows you to make adjustments if necessary while in the saddle, without changing from one gait to another.

    However, it takes time for your horse to develop physically and mentally so as to begin holding a lengthened stride for longer periods.  Failure to do so is often a lack of patience from riders, who will try to push and force their horse to lengthen. This results in the horse hollowing his back, shortening the stride, and rushing onto the forehand.

    What is Lengthening the Stride?

    When your horse lengthens, he basically covers more ground in the same amount of strides.  Each stride he takes sees him stretching or reaching more forward.  His hind feet coming more underneath him with every stride and then the front legs stretching out more in front of him with each stride.

    However, when lengthening his stride, he will not change the tempo of the gait.  The 1 – 2 – 1 – 2 – 1 – 2 of the trot will remain the same, regardless of the length of the stride or ground being covered with each passing stride.

    Asking, not pushing is the key to a true lengthening on the stride in trot.  

    In order to lengthen his stride, your horse must lengthen his whole back and topline.  Suppleness is required to do this, and often we only think of suppleness as being lateral, it is also important longitudinal as well.

    Start with Rhythm

    The rhythm and tempo of the trot should remain consistent throughout the gait.  I think that this is often the most simple place and way to begin introducing your horse to this type of work.  Start by becoming familiar with your horses tempo and knowing the length of this strides in working trot.

    Depending on how independent and ‘under control’ your seat is, you can lengthen your horse in trot from either rising trot or sitting trot,

    I strongly suggest working in rising trot initially as it will allow your horses back to lengthen out without you being heavy on it during the longer strides.  

    I also find that using rising trot tends to prevent an overly ambitious ‘seat shoving’ happening from the rider, whether intentional or not!

    So first and foremost, focus on creating and then maintaining or establishing a correct and balanced rhythm and tempo.  

    You can do this through all three gaits, using the transitions to further engage your horse’s hind quarters and also, refine your aids and your horse’s responsiveness to them.

    Pay Attention to Straightness

    It is also important to cultivate straightness in your horse.  Doing this earlier on will make it easier for him later when you begin asking for the lengthened strides.  If you horse is straight, he will push equally from both hind legs, propelling him correctly in the gait.

    If he is crooked or falling out, he will find it hard to maintain a rhythm, as one side will literally be moving more forward than the other.

    Spend quite a bit of time on transitions, using your half halts, and circles, particularly smaller ones, such as 12 or 10 meter circles.  Work between shortening your horse slightly and then returning back to working trot as well.  Don’t attempt to lengthen until you have truly established and can maintain a good balance throughout the above mentioned exercises.

    Begin By Shortening First…

    I find that riders often find lengthening the canter easier than the trot, particularly when there are canter poles involved.  However, you can use a similar principle in the trot when starting out at first.  Pick two fixed points in the arena or on the trail where you are riding.  Ride between these two points quite a few times in working trot, counting each time the amount of strides your horse fits between the two points.

    Use your body passing the first point as the ‘go’ or ‘start’ and then again, your body passing the second point as your ‘stop’ or ‘end’.  Continue to do so until you have a regular amount of strides each time as you ride through this movement.

    Think of it almost as having two ground poles with 5 or 6 canter strides in between, but use the points you have chosen as the poles and trot rather than canter.

    Once you know the amount of strides in a ‘normal’ working trot, then ask for a slight shortening of the stride between the two points.  If you can get an extra stride in there, then your horse has truly shortened. However remember the tempo or recurrence of the 1 – 2 – 1 – 2 – 1 – 2  must remain the same throughout.

    The shortening of the stride can be thought of as your horse lifting his legs more ‘up’ rather than ‘out in front’.

    Lengthening Your Horses Stride in Trot

    Asking for Lengthened Strides

    Once you and your horse have established a balanced transition between the working trot and a slightly shorter more collected trot, you can then begin to think about asking for a few lengthened strides in the trot.  It is really important to maintain the contact between you and your horse throughout the movement.

    Lengthening the stride does not mean throwing the reins at your horse and kicking on.  It simply means that you are allowing your horse more space to move within each stride.

    You may find, particularly if it is your horse’s first time, that initially there will be very little difference.  This is fine, your horse has to first understand what you are asking and then also, begin to understand how he can move his body to achieve this new lengthening of it.

    Remember, when you horse lengthens his stride, he will use his muscles, tendons, ligaments and joints differently. Slow and steady, taking plenty of time to learn this correctly, is key to maintaining a sound horse that enjoys his job.

    Noticing the Increased Lenght

    If he does begin to lengthen the stride, you will count less strides between your ‘start’ and ‘end’ points than what you were counting while in working trot or whatever you are using as your ‘control gait’.   I say ‘control gait, as in order to know if your horse is lengthening rather than running, you need something to measure it against.  Use your working trot as the measure or the control.

    Keep in mind that your horse cannot move or ‘extend’ his shoulders if you are leaning or jiggling around on top of them.  

    Pay attention to your position and posture throughout the exercise, and again, take things slowly.  The better your horse understands and the more confident he feels about his ability to perform the movement, the greater it will eventually be.

    Happy Riding

    Lorna

    Additional Resources for Equestrians:-

    Lengthening Your Horses Stride in Trot

    [wp-tiles post_type=”post” orderby=”date” order=”DESC” grids=”Simple”]

  • The Correct Diagonal In Trot

    The Correct Diagonal In Trot

    Finding the Correct Diagonal in Trot

    There you are, happily trotting around the arena, delighted at the fact that you can ‘post’ correctly; until someone goes and bursts your bubble by pointing out that you are on the wrong diagonal…  “Sit for two” they shout your way…  And you’re thinking ‘Come again?’!

    [smart_track_player url=”https://op3.dev/e/traffic.libsyn.com/dailystridespodcast/SFA486-Finding-the-Correct-Diagonal-in-Trot.mp3″ title=”Finding the Correct Diagonal in Trot” social_linkedin=”true” social_pinterest=”true” social_email=”true” tweet_text=”Struggling with your diagonal in the trot? This will help (no looking required!) ” hashtag=”trotting #horseriding #equestrian” twitter_username=”strides_success” ]

    What is the Diagonal in the Trot?

    Being on the correct diagonal is to do with rising or posting to the trot.  We know that when our horse trots, his legs move in diagonal pairs, the front inside with the back outside and the front outside with the back inside.

    Your horses way of travelling, in diagonal pairs, is what creates the two-time beat that we experience in trot.  The 1,2,1,2,1,2…  or, when we rise or post to the trot, the up, down, up, down, up, down.

    Posting or rising on the correct diagonal in trot is when you are sitting or down when your horse’s outside shoulder (and inside hind leg) are on the ground.  This means that you are rising or posting when the same outside shoulder and inside hind leg and moving forward.

    There is a well-known ‘rhyme’ to help riders remember which diagonal pair is the correct one to post.  It goes ‘Rise and fall to the leg by the wall’.  This pertains to the front leg closest to the wall, or the outside shoulder, which when we are first being introduced to a diagonal, is the easiest way to establish if you are correct or incorrect.

    So, Why Worry About Which Diagonal You’re On?

    Remembering which diagonal is the correct one is important.  However, understanding the reason you ride on one diagonal or the other will help you move forward in your riding training.

    It actually has little to do with the outside front leg, or shoulder.  It has more to do with the inside hind leg, the other half of the diagonal pair to the outside front leg, which is creating the energy and impulsion in the trot.

    As your horses inside hind leg comes onto the ground, this is the point where he is most balanced.  

    Your being ‘down’ at this point will help to maintain this balance, particularly around turns, bends and circles.

    Using Diagonals to Help with Equal Development

    The other consideration or factor with riding the correct diagonal is that you are equally conditioning or working your horse’s back and hind end.

    As your horse trots, his hind legs are constantly pushing him forward.  If you were to always ‘sit’ or be in the ‘down’ part of your rising trot on the same hind leg, that constant one sidedness would begin to show itself over time in a lack of suppleness through your horse’s back.

    Therefore, while you are in an arena or an enclosed space and assuming you are working your horse equally on both sides, you can use the wall or fence as your ‘outside’ reference.  

    However, as soon as you leave the arena and perhaps are on the trail or the road, there is no ‘outside’ or ‘inside’.  When posting to the trot along a long straight road, it can be easy to forget about diagonals.  This can potentially be an issue for your horse.  This is because your outside and inside may not change for long periods, if ever.

    Therefore it is important that you are consistently changing your diagonal periodically throughout the ride.

    Learning to Feel which Diagonal You Are On

    Learning to feel which diagonal you are on at any given time takes consistent effort and focus on your part.  You should aim to eventually be able to literally feel which diagonal you are riding on at any given stride.  I will explain more about that later in this post.

    However, initially I recommend using  your eyes to make sure you are indeed riding on the correct diagonal.  Seeing is much easier than feeling initially. And you can use your sight to ‘train’ your feel over time. 

    I suggest beginning in walk where you can learn to distinguish, using a glance of your eyes, where your horse’s outside shoulder is at any given time.   The term glance is an important one here/  This is because if we begin to lean or even tilt our head down to see what is going on with the shoulder, it changes our weight in the saddle.  This will, in turn, unbalance our horse.

    So, while you are walking, glance down at the outside shoulder and notice it going back and forward.  Many instructors will recommend noticing the forward and coupling this with your ‘rise’ or ‘post’.

    In my experience it is far easier for you as a rider to notice the ‘back’ part of your horse’s stride.  Once you have that pinpointed, you simply couple this with the ‘down’ or ‘sit’ part of your rising trot.

    While in the walk practice your posting or rising to correlate or synchronise with your horse’s outside shoulder position in every stride.  It also helps to say it out loud; “back,    back,    back,     back” and again, match this with your ‘down’ action.

    Putting This into Practice in the Trot Itself

    From here you can begin to pick up working trot.  However, this time, before you give any notice to your horse’s shoulder, I recommend you say “back” each time you are down or sitting as you are going through the motions of your posting or rising to the trot.  Saying it out loud, will help as well.  Once you have been repeating this for a few strides, where it becomes almost like a rhythmical mantra of sorts, you can then begin to glance down and see where your horse’s shoulder is.

    The reason I suggest repeating your new ‘back, back, back” mantra out loud is that you may find it difficult to keep paying attention to what you are doing, while also figuring out where your horse’s shoulder is!  It all happens quite fast when actually working through this.

    So, while you are repeating “Back” each time you sit, you can begin to see if this does indeed align with your horse’s shoulder being back at the same time.   If it does, fantastic, you are on the correct diagonal.

    Changing Your Diagonal

    However, if you see that you are rising on the incorrect diagonal, you can simply sit for two.  This means that as you are going up, down, up, down, up, down with the trot, you will put two downs in there.  Your sequence will be up, down, up, down, down, up down, up, down.  

    By sitting for two beats, or indeed any even number (four, six, eight etc) you will swap your diagonal and when you go ‘up’ again, it will be on the opposite diagonal.

    Developing Your ‘Feel’ For Your Diagonal

    Once you are able to tell which diagonal you are on with just a quick glance, you can begin to develop your ability to feel the correct diagonal.  Again, I am going to suggest beginning in the walk.

    First notice how your seat bones move backwards and forwards.  It can initially feel like they are moving together, but try to isolate this a little more; they are actually moving individually.

    Then begin to take notice of how they move up and down as well.  For example, as your left seat bone moves forward, it will have ‘dipped’ lower than your right seat bone. As this is happening, your right seat bone will also be on the move.  It will be moving backwards, and will be higher than your other seat bone.

    This backwards, forward, up and down feeling you are noticing is happening because your horse is moving.  His hips are moving your hips and seat bones.  What is important is to recognise that his hips are moving, because his hind legs are moving.

    Therefore, if you start to become mindful of how your seat bones are moving and where they are moving to, you will know exactly what is happening with your horses legs.

    Feeling the Movement in the Sitting Trot

    Once you can feel this movement in the walk, you can begin working in sitting trot.  Many riders think of sitting trot as being a purely up and down movement, however, this will change when you begin to focus your attention on your hips and what they are doing as you ride the sitting trot.

    You will feel that at each ‘bounce’ (beat one) of the trot stride, one of your hips will be higher than the other one.  The next bounce (beat two) will produce the same result, but on the opposite side.

    This is caused by the diagonal pairs of your horse’s legs in the trot moving underneath you.  From here, you can begin to isolate what your outside hip is doing.  When it is up, you can begin to rise at that point in the trot.  This will be the posting part of your trot.

    You rise as your horse’s inside hind leg is moving forward underneath you and as his outside shoulder is moving forward.  You will then ‘sit’ as your horse’s inside hind leg and outside shoulder are on the ground and your horse’s body is moving over them.

    The Correct Diagonal Impacts Your Horses Development

    As mentioned, when you are riding on the correct diagonal, your horse more balanced on turns and circles.  However, the correct diagonal will also affect your horses way of ‘going’.

    When on the correct diagonal, as his inside hind leg moves up and forward, you are rising along with it out of the saddle.  This literally frees up more ‘space’ for your horses inside hind leg to move into.  

    The more developed both you and your horse become, the greater the importance of this ‘space’.  As riders, we want to give our horse instructions, aids, when they will be most effective for our horse to take action on.

    How our horse engages or uses his inside hind leg is one of the biggest factors in the quality of the gaits our horse produces.  The balance, rhythm, tempo and just overall performance.  Therefore knowing where your horse’s hind legs are at any given time, regardless of the gait you are in, will help you to begin timing the application of your aids more effectively. 

    Developing Your Ability to Ride the Correct Diagonal in Trot

    Effective application of aids and timing of aids leads to clearer communication between horse and rider.  It has a direct impact on the overall quality of the conversation in the saddle.

    Therefore it makes sense to take the time to begin learning what is moving when underneath you; and then implementing that in your day-to-day riding.

    Happy riding!

    Lorna

    Links to related content & freebies:-

  • A Smooth Sitting Trot

    A Smooth Sitting Trot

    [fusebox_track_player url=”https://op3.dev/e/traffic.libsyn.com/dailystridespodcast/SFA381-Mastering-a-Smooth-Sitting-Trot.mp3″ title=”Riding a Smooth Sitting Trot” social_linkedin=”true” social_pinterest=”true” social_email=”true” ]

    Does the thought of any sort of prolonged periods of sitting trot fill both you, your bum, and your horse’s back with a sense of dread?!  Perhaps the find the more you try not to bounce; the higher you appear to go?!

    Sitting trot is probably one of the most confounding things to master when you first begin riding. And often enough time is not invested at the beginning of your training to understanding the sitting trot. This leaves riders to their own devices, of which there are many, in trying to stay in the saddle and not bounce around like a gummy bear!

    Ideally, the sitting trot should be thought before the rising or posting to the trot, however, because sitting trot has gotten a bad name over the past few years, this is rarely the case.

    This leads most novice riders to think of it as difficult or hard, which does not have to be the case.

    Challenges with the Sitting Trot

    Riding a good sitting trot involves staying in the saddle and moving with your horse.  No bouncing and no daylight between your backside and your horse’s back.  However, this is often easier said than done.  What happens is when your horse’s back moves up on the first stride of the trot, you move up with it.

    However as your horse’s back moves back down, you are not quite quick enough to move with your horse and your ‘coming down’ is now a fraction of a second behind your horse’s movement.  

    This can be due to a number of reasons and the problems begin to present themselves when your horse’s back moves up again, while you are still on your way down.  The saddle or your horse’s back will ‘bump’ you and this causes the bounce, of which two or three in a row is usually enough to put most riders off balance and results in them clinging on by any means possible!

    The Trampoline Effect

    The same effect is experienced when on a trampoline with another person. If they touch down on the trampoline before you do… Their bounce coming back up meets your legs coming down… And results in a huge bounce, knocking you completely off balance and sometimes off the trampoline itself!

    When the bouncing begins, so do all reactive actions that riders take to try make the bouncing stop, all of which only make the bouncing worse and get the rider further and further away from their correct position, which is essential to correctly move with the horse and stop the cycle.

    What Not to Do…

    Common faults include gripping with upper thighs to stay in the saddle or using your reins to balance yourself.  Collapsing your upper body and rolling into an almost fetal position is also popular!

    Gripping with knees and/or holding the arch at the pommel of the saddle is another common occurrence. And, of course, flapping the legs. I have even seen riders hanging on around their horses neck!!  Not good folks, not good!!!

    Sitting Trot; the Right Way…

    A smooth sitting trot begins with being relaxed enough to move with your horse.  

    However many riders confuse a relaxed body with a floppy body.  Relaxed means that while you are still carrying yourself.  You have simply released all the excess tension from your muscles.  There is the right amout of tension there.  This allows you to be pliable and flexible enough to allow that movement.

    Your hips and pelvis will certainly move up and down in the sitting trot.  However, there is also a slight backward and forwards movement happening as well.

    Becoming Like Jelly…

    The strange thing about initially riding a sitting trot is that often the best way to learn how to actually begin moving with your horse is to ride a little incorrectly.  This is just so you can begin to really feel what is happening under you.

    You can then begin ‘polishing’ things up and holding a correct position for longer each time.

    Firstly, make sure your legs are long and not gripping upwards.  Focus on keeping your toes up, which for some reason seems easier to think of than weight into the heel in this particular situation.  Also, keep your knee off the saddle.

    By ‘off’ I mean no gripping or squeezing, just a very relaxed knee laying gently against the saddle.

    Next, look at opening your pelvis.  Do this by allowing your thighs to relax and open up.  Again, no gripping, or pressing…  Just gently draped down over your saddle and relaxed all the time.  As you ‘open your pelvis’, allow your body to sink down, so you are no longer really carrying yourself in the saddle and are actually becoming heavy.

    Again, I have to stress, this is not the correct way to ride, however often when riders are stiff or tense, ‘over relaxing’ is the key to allowing them to feel for the first time, what it is like to move with their horse instead of tensing against each stride.

    Move With Your Horse

    Once you have relaxed everything, you will probably feel almost like you are leaning back a little and are quite low in the saddle.  Don’t hold this position for too long and it is uncomfortable for your horse, not to mention bad for your back. However, while there try to notice how your horse’s back is moving underneath you.  I

    f you feel confident, you can try a few strides of a very slow trot and see how, in this ‘jelly-like’ position, you stay on the saddle, not bouncing off it.

    Self Carriage for the Rider

    Once you can master the sitting trot in a completely relaxed position, you can begin to carry yourself again.  Do this by engaging your core muscles, in particular your abdominal muscles.  Notice how, when you engage the muscles in your tummy, you lift your body up.  You are still relaxed, however now you are beginning to carry yourself.

    Again, ask for slow, short trots, making sure not to spend too long in the gait as, until you can master carrying yourself and allowing your pelvis to follow. Otherwise you will feel very heavy on your horses back and may cause him discomfort.

    As you use your core to carry yourself, pay attention to how you are sitting up through your body. Almost as though you don’t want your rib-cage to squash the organs underneath.  Work on keeping your chest open. The points of your shoulders opened out and no ‘creases’ on the front of your tummy.   Try not to arch your back or pull your shoulders back, as this will only cause you to tense your lower back again. This will lead to straight back to bouncing.  You must carry your upper body so your pelvis, hips, and seat can indeed move with your horse

    Sitting Trot is Like Dancing…

    Sometimes we hear that we must try and absorb the energy. However, this is often difficult to visualize or understand for many riders.  If this is the case for you, rather think of moving with your horse. Like a dancing partner.

    Each of you is responsible for carrying and supporting your own body and all the while, you move together.

    Another exercise you can try is to put both reins into one hand and, bending your elbow, place your other arm behind you with your hand flat on your back.  This works in two ways; you can feel what is happening with your back as you ride, but also, your elbow is now slightly behind your shoulder, which will help keep your upper body and chest area open.

    Lastly, remember to keep on relaxing through your legs so you do not grip up.  A ground pointing toe is often the result of gripping up with the legs, so pay attention that legs are hanging down, with the weight going into your heel.

    Start with a Few Strides of Trot

    Again, begin by trotting 5 to 10 strides and then back to walk.  Repeat until you can really begin to understand what is happening to your body as your horse trots. But, also, that you don’t have to concentrate on not gripping or curling forward.

    If you do run into trouble and feel like you are about to fall off at any time, lean back, push your heels down, and bring your lower leg forward.  Once you have regained your balance, begin working on ‘fixing’ your position again.

    As I mentioned earlier allowing yourself to become heavy and completely relaxed in the saddle is not correct. However sometimes as riders, we make such an issue out of our bouncing in the sitting trot, that we train ourselves to tense up in order to try to prevent it.

    Often the easiest way to untrain this is to feel what the movement is actually like with a totally relaxed body. Then begin to control your core so that it can support you and, most importantly, can move with your horse in the trot.

    Once you have mastered carrying yourself and not bouncing for the shorter, slower periods of trot, you can then begin to ride longer pieces of sitting trot as you are now moving with your horse, not against him.

    And, trust me, when this happens both you and him will be happier for it!

    Happy Riding
    Lorna

    Additional Resources for Equestrians

    Mastering a Smooth Sitting Trot

  • Rising or Posting in Trot

    Rising or Posting in Trot

    [smart_track_player url=”https://op3.dev/e/traffic.libsyn.com/dailystridespodcast/SFA326-Posting-or-Rising-to-the-Trot.mp3″ title=”Rising or Posting in the Trot” social_linkedin=”true” social_pinterest=”true” social_email=”true” tweet_text=”How do you post in the trot? Are you helping or hindering your progress? ” hashtag=”trotting #horsebackriding #equestrian” twitter_username=”strides_success” ]

    Have you ever sat down (no pun intended) and thought about how correct your rising or posting in trot actually is?  Rising or posting in trot is one of the first aspects we learn when starting out riding a horse.  And it is also one of those things that we forgot to come back and upgrade!

    We happily spend hours trotting around the arena or along the trail. Up-down, up-down, up-down.  And all without ever stopping to consider if the movement we are performing is helping or hindering our horse.  Or if it is stalling our own progress as a rider…

    Let’s Chat About Trot

    Trot is a two time beat, 1 2 1 2 1 2 1 2. This 1 2 is caused when the pairs of diagonal legs move together underneath you; off fore with near hind (creating the 1) and then near fore with off hind (creating the 2).

    A rising trot, or posting, is used in many different aspects of riding.  Warming up, trotting long distances for comfort, schooling in the arena, and lower level dressage to name a few.  It is also used, later, to begin influencing your horse’s tempo in the trot. Which can only happen if you have developed your posting or rising sufficiently to do so.

    It really is a versatile and well-used skill when riding.  And, of course, when we are rising or posting in trot we are not sitting in the trot.  For many riders, this can become bouncy and often uncomfortable after a while.
    Rising or Posting in Trot

    Up and Down?

    When posting in trot, we will ‘sit’ for the 1 and ‘rise’ for the 2, or vice versa. However, when we are thought rising trot early in our riding education the words “down” and “up” are often used. These are instead of “rise” or “sit”.

    Because the words ‘Up’ and ‘Down’ are used most people do just that, which is not technically correct…

    Next time you are at the barn, watch a few riders trotting. Notice the different styles of posting in trot and also, the differences between these styles.  Those that look stiff, and unbalanced, and falling back in the saddle are often doing an up and down movement.

    Their legs will straighten.  Often they will thrust their whole body ‘up and forward’. It’s like they’re pulling themselves up from the shoulders, rather that using the horses momentum, their core, their own legs to ‘push’ them up.

    The usual outcome for this type of a ‘rise’ or post is a lack of balance. It also results in an inability to use your body to affect the ‘down’ or return to the saddle. The rider will get slightly left behind and fall back into the saddle.  The problem is worsened due to the fact that because they fell backward, much too close to the cantle or back of the saddle, it becomes uncomfortable for both horse and rider.  It is also not great news for your saddle!

    Lack of Suppleness

    Another downside of actually standing up and down is the fact that your whole body moves with each rise or post. As we all know, trotting requires you to keep your hands and upper body ‘quiet’ while riding…

    Standing straight up makes this pretty much impossible. And using your shoulders and upper body to ‘pull’ yourself up, whether with or without the use of your reins, requires quite a bit of movement!

    The result is ‘bouncy and jerky hands in the trot.  This negatively impacts your horse’s way of going due to the jarring effect on his mouth. It also produces a lack of consistent contact through the reins.

    Rather Think Forward and Back

    Imagine moving your pelvis, and only your pelvis, in a forward and diagonally upward direction. This movement will happen in perfect coordination with your horse.  This is because you will use the energy of your horse to help lift yourself ‘up and down’, rather than having to pull yourself.

    Posting like this allows your lower leg to remain in position.  It is underneath you and supporting you as you ‘rise’ and it also lessens the movement in your upper body. These two factors are huge for not only your ability as a rider to continue providing a consistent ‘conversation’ with your horse.  But also your horse’s comfort levels.

    Being secure in your position is essential to being able to ride with independent aids and queues… This softer rise or post to the trot allows you to use your body in other ways to ask different questions of your horse.

    Influence Your Horse By Posting in Trot

    Once this ‘rocking’ motion is perfected, you can then begin to use your posting or rising to influence your horse’s tempo in the trot.  If he is running on a little, you can re-balance the situation by slowing your rise slightly. The same applies if he is trotting in a less than energetic fashion.

    However, like all things horse riding and aids-related, positively influencing your horse’s trot requires more than just posting in the trot. It requires a host of supporting aids as well.

    There is a full week of audio horse riding lessons on this topic inside of Connection (formerly Daily Strides Premium).  They are focused on improving your technique to rising or posting to the trot. We work on the straight, work on circles and also go through exercises for the transitions into and out of the trot.  You can find out more about Connection (formerly Daily Strides Premium) HERE >>

    Happy Riding
    Lorna

    Get Audio Horse Riding Lessons and Begin Training Your HorseToday!

    Right now, there are so many lessons, on all different topics, available for you on a Private Podcast Feed that delivers them straight to your phone, so you can listen as you ride your horse. Your own time, your own arena, your own horse… More Details HERE

    Connection is an online membership for equestrians working alone to train their horse without a coach or trainer.

    Get Support & Guidance in Your Riding

  • The Trot to Canter Transition

    The Trot to Canter Transition

    [smart_track_player url=”https://op3.dev/e/traffic.libsyn.com/dailystridespodcast/SFA296-The-Trot-To-Canter-Transition.mp3″ title=”The Trot to Canter Transition” social_linkedin=”true” social_pinterest=”true” social_email=”true” tweet_text=”A better trot to canter transition with your horse” hashtag=”horseriding #transitions” twitter_username=”strides_success” ]

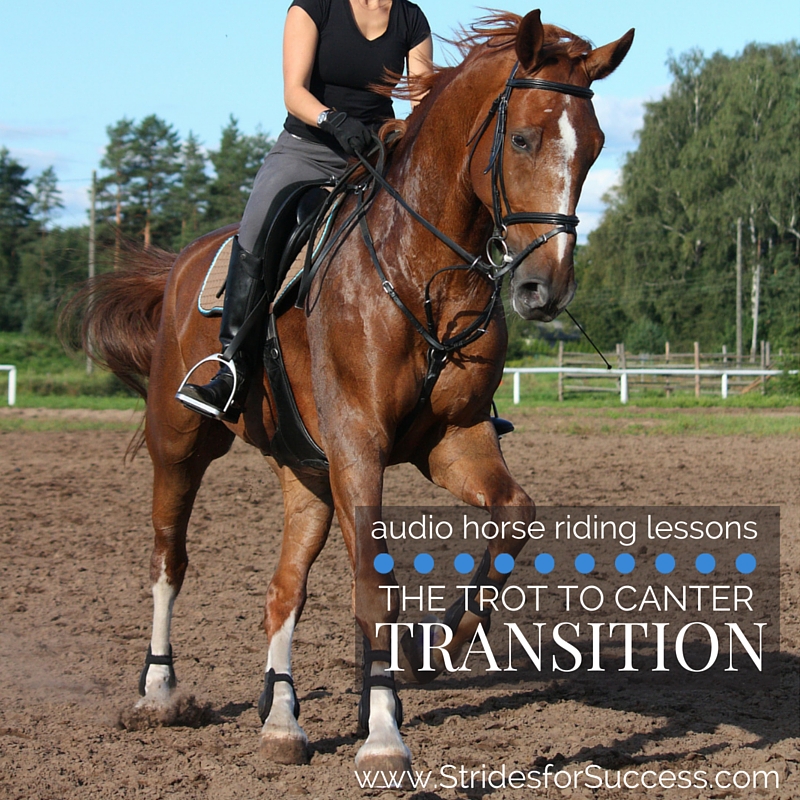
    Do you manage to perform a ‘clean’ trot to canter transition every time?  This transition is often one of the most difficult to maintain balance and rhythm.  And this is true for both horse and rider.

    The potential for your horse to run into the canter, instead of actually ‘striking’ the canter when asked is quite high.

    In this episode of the Daily Strides Podcast, we cover an exercise that will help you become more clear with giving your horse the aids to canter.  It will also help to place your horse into a situation where he can transition from trot to canter more easily.

    Trot to Canter Transition

    Perfect this Transition?

    I want you to begin by riding a 20-meter circle, paying close attention to the quality of your trot.  Make sure you have a nice, active working trot; your horse moving forward from your leg.

    As you are trotting, notice how responsive your horse is to your aids…

    Are you having to ask two or three times for a specific movement or response? Use the initial trot on the circle to secure your horse’s undivided attention.  And to develop his willingness to do as you ask.

    Riding a Smaller Circle

    Once you have the trot moving forward as you want it, begin gradually leg yielding on to a smaller circle.  I say slowly, as I would like you to do this over a few rotations of the circle.  Continue to decrease the size until you are eventually riding an approximately 12m circle.

    Again, spend some time here re-balancing and establishing an active trot.  Pay close attention to your position.  Don’t lean or tip forward onto your horses neck. I also want you to be mindful of your aids.  Are your legs where they should be?  Are you asking the right questions?

    Trot to Canter Transition

    After 3 to 4 circuits of the smaller circle, you can begin leg yielding back out to your original bigger circle.  This is where you will ask for the trot to canter transition.  It is an ideal place to ask as firstly your horse is naturally flexed correctly.  And secondly, you are using a strong inside leg, riding into your outside rein, which you will use to balance the actual transition and the canter itself.

    As you near the ‘outside’ circle again, I want you to have a quick check of your position and after half halting your horse, you can ask for the canter.

    If your horse ‘runs’, bring him back, re-balance the trot, and then try again.  If your horse transitions into the canter, but then breaks back to trot after only two or three strides, you know that your inside leg is not being used effectively.

    You can continue this exercise a few times, paying attention to what you are asking, how you are asking and how your horse responds.  From there, you can try the trot to canter transition on the circle alone and see how you get on.

    Happy Riding
    Lorna

    Additional Resources To Help Equestrians:-