Tag: Leg Aids

  • Relationship between Your Inside Leg and Outside Rein

    Relationship between Your Inside Leg and Outside Rein

    Most riders have heard about how they should ‘ride from the inside leg to the outside rein’; but really – what does that mean?!  How exactly do you ride from what seems like a bit of a diagonal and what about all the other aids?  Should we forget about them?

    [smart_track_player url=”https://op3.dev/e/traffic.libsyn.com/dailystridespodcast/766-The-Relationship-Between-Your-Inside-Leg-and-Your-Outside-Rein.mp3″ title=”The Relationship Between Your Inside Leg and Your Outside Rein” social_linkedin=”true” social_pinterest=”true” social_email=”true” tweet_text=”A simple explanation – to clear up any confusion – of the relationship between the inside leg and outside leg in the saddle ” hashtag=”equestrian #horseriding” twitter_username=”strides_success” ]

    The term ‘riding from the inside leg to the outside rein’ is one that is used a lot when it comes to riding.  The confusing part of it however, is that this concept is so much more than just those two aids.  In fact if it is done correctly, it is a finely balanced combination of all your aids – that is continuously requiring adjustment and ‘recalibration’ with every passing stride.

    A channel for your horses energy

    What is important to remember is that your aids are like a channel for your horses energy.  Think about the banks of a river; they keep the water in, and therefore, flowing where they want it to go.  Your aids work in the same way for the energy your horse creates.

    When you ride, you ask your horse to create energy with his hind quarters.  This energy must then be directed where you want it to go.  If you allow it to just ‘run out the front’, your horse will most probably become quite long and stringy.  He will also become heavy on his forehand.  If you hold too much energy in and don’t allow it to flow, you run the risk of encountering an explosion of sorts!

    Understanding that your job is to ask for the creation of energy and then regulate the flow is, in my opinion, the first step to grasping the concept of the ‘inside leg to outside rein’.

    The Relationship Between Your Inside Leg & Outside Rein

    How responsive is your horse to your aids?

    From here, you need to asses how responsive your horse is to your aids, particularly your inside leg.  Is he quick to respond to questions you ask with it, and does he clearly understand what is expected of him when you ask those questions?

    Your inside leg asks for the energy to be created.  This energy is created in the hind quarters and then flows though the horses back to connect with the front end.  As we have already mentioned your aids then channel the flow of this energy.  However this cannot happen if your horse ignores or is unresponsive to your questions to begin with.

    You cannot channel and regulate what is not there!

    The Role of Your Outside Rein

    So once this energy is flowing, your inside leg is then used to ‘contain’ it and keep it in the imaginary river that we spoke about earlier.  However, all rivers need two banks.  This is where your outside rein comes into play.  it is the opposing channel or bank for the inside leg.

    Now, obviously, this is a very simplified version of what is going on, however in order to fully understand how they work together, I find it is one of the easiest ways to explain the concept.

    What is important to realise is that it is this relationship, between inside leg and outside rein, that then dictates how that energy flows through the horse.  If it is allowed to run freely out the front, or if it will be regulated. 

    If you are regulating that flow of energy, you then need to begin working on how you are balancing that flow.

    Balancing Your Inside Leg to Your Outside Rein

    Again, think of the energy as being water in a river.  If it is allowed to run freely out, it will be fast and lack direction.  If it is dammed up, their is much more potential there to work with.  If it is blocked, well, it may just explode (think bucking and general high jinx)!

    You need to work on balancing the energy being created, keeping the energy flowing in the ‘river’ and deciding how much you are going to allow it to flow out.  Once you understand this, it is now time to incorporate your other aids into your communication.

    Your Other ‘Supporting’ Aids

    In order for the relationship between the inside leg and outside rein to truly work; your outside leg, inside rein and seat must also be involved.  Their role is more of a supporting one – they are not the lead characters in the relationship!

    The additional involvement of your inside rein and outside legs will constantly change, depending on the questions you are asking your horse and his response.  If you fail to incorporate them into your riding, the basic principle of your inside leg to outside rein cannot work effectively.  

    However, if you overuse the supporting aids, well it’s a little like “too many cooks spoiling the broth”.  It becomes overwhelming, each aid fighting for your horses attention and consideration.  This is where you see the horse either shutting down completely and ignoring the rider, or becoming agitated, frustrated and displaying far too much excess tension throughout their body.

    The Relationship Between Your Inside Leg & Your Outside Rein

    Fine Tuning this Relationship

    Initially you may have to use more pressure or apply your aids more frequently until your horse begins to understand what you are asking.  How long it takes until you can begin to become more subtle with your aids will depend on your riding skills – and how quiet you are when riding – and also your horses training.

    Refining the relationship between your inside leg and outside rein means having your seat and body play a larger part in your communication with your horse.   

    Begin by Focusing on the Where & How

    I suggest you begin by focusing on your position in the saddle.  If you are in the correct position, your body is in the best place to apply the aids clearly and correctly. This is true for your leg and your rein.

    Pay attention to your ‘lines’; head, shoulder, hip, heel and then ‘elbow, wrist, thumb, rein, bit’.  When those correct lines are in place will have a dramatic influence on the effectiveness of your aids.

    From here, work on your horses responsiveness to your aids and how much pressure and how often you are applying those aids.  This is always changing, from stride to stride, so it is up to you to begin developing your feel in order to consistently adapt your aids to the situation.

    Happy Riding
    Lorna

    There are four more audio programs on this topic available for you to download and listen to while riding inside of Daily Strides Premium. The additional programs will take you step by step through the process of applying these aids when riding, helping you to better understand and apply this concept in the saddle.

    They are part of the ‘Rider Aids Collection’, a series of audio programs all about the different aids we use when riding and how you can best apply yours. This collection is divided into Seat Aids, Leg Aids and Rein Aids; allowing you to find the group of lessons that best suit your particular needs – regardless of where you are in your riding.

    You can find out more by visiting HERE >>

    [wp-tiles post_type=”post” orderby=”date” order=”DESC” grids=”News”]

  • Reforming a Horse with a Habit of Running Out

    Reforming a Horse with a Habit of Running Out

    Reforming a Horse with a Habit of Running Out You’re cantering along, the jump firmly in your sights, getting ready for your horse to take off…  When all of a sudden he begins to ‘veer’ a little off course.  Before you know it, the jump flies past you, to one side…  Your horse has, once again, proven that he is the master of running out at a fence! [smart_track_player url=”https://op3.dev/e/traffic.libsyn.com/dailystridespodcast/656-Reforming-a-Horse-with-a-Habit-of-Running-Out.mp3″ title=”Reforming a Horse with a Habit of Running Out” social_linkedin=”true” social_pinterest=”true” social_email=”true” tweet_text=”Is your horse pretty special at jumping; in that he is special at dropping the shoulder and ducking?! Here’s what to do…” hashtag=”equestrian #horseriding” twitter_username=”strides_success” ] Frustrating, right?  Particularly when it seems to happen regardless of what you do.  Or how you do it.  In fact for many riders, it feels like they spend more time running out at fences than actually jumping any at all!
    The unfortunate side of this is that the more confident your horse becomes with being able to sidestep a jump, the more often he will do it.
    And the more he does it, the better he becomes at dropping that shoulder and ducking to the side.

    Running Out…

    Running out is a common problem many riders face when they begin jumping more demanding fences.  Now, more demanding can mean 50cm to one person and 1m to another.
    Horses who have learned to employ the running out technique rarely discriminate on fence heights and types!  
    However, what is important to note is that it generally happens when there is an actual jumping effort required.
    For the rest of this blog post we are going to assume that you have eliminated all the obvious reasons that your horse might not want to jump; teeth, back, tack, soreness, sickness, being overfaced, tiredness etc.  This blog post is about horses who have learned to use running out as an easier alternative to jumping the actual fence.

    How Running Out is Different to a Refusal

    Many riders confuse running out with refusals.  Perhaps this is because they are penalised similarly.  However it is good to remember that running out and refusing a jump are two very different things.
    When your horse refuses, he generally stops in front of the fence.  Think of a grinding, sliding halt.
    Refusals can have many causes and reasons; many of which are to do with a horse not feeling confident or comfortable jumping the fence.
    Running out, on the other hand, is when your horse maintains his forward momentum, however he changes course in front of the fence and simply canters or trots past the fence to one side.  
    It can sometimes also be caused by overfacing the horse, however I have found that most horses who become skilled at running out, do so because the rider is allowing it to happen…

    Running Out and The Rider…

    “What?!”, you say.  “I do not ‘allow’ him to run out!  He just does it himself and there is nothing I can do to stop him!!”
    And that there is probably the biggest stumbling block most riders meet when trying to reform a horse who has mastered the art of running out. They try to fix it by working over fences or jumps
    Almost all cases of running out can actually find their roots way back in the basic flatwork schooling, or lack of, in the horse.  What generally tends to happen is the horse has been jumping quite happily, popping fences without question.  But one day, for whatever reason, he takes a chance and dives out the side door… The mere fact he was able to change course like that, usually without repercussions, is enough to plant a seed that perhaps – if the right opportunity presents itself – he can do it again!

    The Path of Least Resistance

    Sounds devious, but don’t worry, I am not suggesting your horse has some evil or mischievous tendencies; he has just found the path of least resistance and has decided to take it!
    The downside to having a horse who has a talent for running out is that reforming him is often a long journey.  This is particularly true if the rider he runs out with is the one accompanying him on this journey. Again, this is because very often it is the rider’s lack of ‘riding’ that has given him the opportunity to take the side door to begin with.  But, it can be done.  It will just take a lot of consistency, time, firmness and pure concentration from the rider to get there.

    Correcting the Rider First

    So, as mentioned earlier, the rider makes all the difference when dealing with a horse who has developed a knack for spotting a side door and running out.  It may be due to the rider getting into their jumping position too early.  This is essentially dropping the contact.  When the contact is dropped, your horse is left to his own devices.  Again, if so inclined, he will take the path of least resistance or the easiest route!
    Running out may also be caused by the rider not using their legs, seat and hands to correctly ‘channel’ the horse’s energy and direct it where they want.  
    Just like if the banks of a river are weak and the water runs out, so too will your horse if your legs are not being used to shut down those tendencies and keep him moving forward to where you want him to go

    Riding a Line

    The third most common reason I see horses running out is due to their riders taking a less than straight approach to the fence or jump.
    There is no ‘line’ to the fence.  Nothing connecting the approach to the getaway. 
    This often results in the horse meeting the fence at an odd angle.  Which essentially opens a door and allows him to simply canter on past.

    Approaching with Too Much Speed

    The final reason I want to mention, before we begin talking about solutions is that the horse is allowed to become too fast to the fence.  Due to the speed of the approach, the rider has no control over the horse.
    All the energy is running out the front like a freight train.  And just like that freight train; once it begins to derail, a whole army would find it difficult to get it back on track.

    Working on ‘Over’ Rather Than ‘Around’…

    So, now that we have placed the cause of the running out squarely in the riders court, we can begin working on how to re-school and reform the horse, so he goes over rather than around. When we ride, we often hear the term between leg and hand.  Put simply this means that the energy you are creating with your legs, is being directed to where and how you want it used with your hand.  Now, obviously things are a little more complicated that that, however, the basic principle is true when riding.
    When you’re dealing with a horse who likes to take the side door, the connection between your leg and hand is not a very strong one.  
    Simply put, there are holes there that your horse, if so inclined, can take advantage of.  Begin by practicing how you channel this forwardness and movement in your horse.

    Strengthening Your ‘Channel’

    Focus on straightness throughout his body when being ridden, and on the level of responsiveness to your aids
    Your horse should remain straight and true when being worked on the flat.  If you find him becoming crooked or ‘veering’ when working, quickly and quietly correct him.  He should then be responsive enough to your aids, particularly your leg in this situation.
    I also find that working on the centre or quarter lines is a good test of this straightness. 
    From here, you can also begin working on implementing better half halts.  This will help you to ‘steady’ things a little when you approach the fence.

    Gathering Energy on the Approach

    As I mentioned above, sometimes the approach to the fence is just too long, fast and strung out for you to keep the connection between leg and hand.   The energy is all running out the front.  This allows your horse to take advantage of this lack of direction. Practice applying the half halt, while continuing to move forward where you want to go.  It will help to ensure you gather the energy, rather than allow it to run out.
    You may find that as you begin closing those ‘side exits’ that once existed for your horse and his energy, there is a lot more energy there underneath you which needs to be directed.  
    This is another reason why working on perfecting your half halts is vitally important, otherwise your horse may begin to run…

    Using Ground Poles

    Another thing you can begin practicing, before you attempt jumping again, is working over ground poles.  This is good for both you and your horse.  You get to learn how to ‘wait’ for your horse to go over the pole, before following him over.
    Your horse has the opportunity to become familiar with the concept of working over the centre of the pole.  Ride a perfectly straight line on the approach, over the jump and continuing on with the getaway on landing
    Because you are channelling him between your leg and hand, all side exits have been shut.  The only way forward is the one which you present by riding him straight to where you want him to go. Running out is a frustrating and often costly habit where penalties are concerned.  However, before you lay the blame at your horse’s door, it is one of those challenges that very often has its roots in the rider’s own tendencies. This may be a bitter pill to swallow, however knowing that you may just be the reason also means that you are the key to banishing those pesky side dives and running out into the past; for good! Happy Riding Lorna This podcast episode and blog post is an overview of this weeks topic, running out.   The other four audio programs are step by step exercises and instructions you can listen to while in the saddle.  They help you to begin working through this problem with your horse.
    You can purchase the full 5 audio trainings for this topic HERE
    It is like having a riding instructor with you in the arena.  The lessons are simply downloaded to your phone and are then ready to listen to while you are in the saddle.
    You can listen to the over and over again, until both you and your horse are popping the centre of those jumps; every time!

    Daily Strides Premium

    Daily Strides Premium is packed full of audio trainings you can listen to anywhere you can bring your phone (including on your horse).  They will help you work towards your goal of having better conversations with your horse, both in and out of the saddle. You will also be able to create a plan for your rides and review what has happened when you join in on the monthly ‘Review and Planning’ call.  In there, you will go step by step through the month that was.  You then take that information and begin planning out the coming month.  When you will ride.  What you will work on.  And of course all aligned with your goals for you and your horse.
    Do you need to be competing? No!  Do you need to have competitive goals or ambitions? No again!
    In fact, I love working with riders who just ‘enjoy’ their horse; helping them to build and strengthen their relationship.  No competitions necessary ;) 
    Couple this with the live Q&As and the members only private group ~ we are here to help you remain accountable as team leader for you and your horse.
    All of the trainings are easily accessed using your phone, meaning that you can take them with you where ever you are going.  These trainings and so much more are available for you immediately when you join Daily Strides Premium. Find out more HERE
  • Building Your Riding Fitness

    Building Your Riding Fitness

    [fusebox_track_player url=”https://op3.dev/e/traffic.libsyn.com/dailystridespodcast/SFA421-Building-Your-Riding-Fitness-While-in-the-Saddle.mp3″ title=”Building Rider Fitness in the Saddle” social_linkedin=”true” social_pinterest=”true” social_email=”true” ]

    Do you find yourself huffing and puffing after a few strides of canter?  Have you been riding less recently and find that now your back in the saddle, you’re less effective than before?  Are you spending hours schooling your horse but seeing little to no difference in his way of going…

    It often amazes me how much time, effort, planning, and work riders put into conditioning and increasing the fitness levels of their horses. And yet completely fail to invest even a little of that towards their own fitness levels!

    Contrary to popular belief, riding is a team sport… You and your horse!  So it leads us to the fact that, as with any team sports, it is essential that all members of the team are doing their best to contribute to the team’s success.

    How Will Increasing Your Riding Fitness Help?

    Increasing your level of fitness with regard to horse riding has numerous positive consequences on your overall performance in the saddle.

    You will find that you become increasingly better able to communicate with your horse. And your aids will become easier to apply and clearer for your horse to understand

    You will also develop a more independent seat as your core strength grows. This, again, will increase your effectiveness in the saddle. Another huge positive result is that any stiffness and rigidness that you are holding within your body will begin to dissipate as you both physically and mentally begin to have more faith in your abilities. And, of course, your stamina levels will increase too…

    Meaning you can enjoy your more canters and for longer periods!

    Building Your Riding Fitness while in the Saddle

    Setting Yourself Up for Success

    Before we go any further, it is important that in order to ride these exercises, you are on a trustworthy horse. I also strongly suggest riding in a safe or enclosed area.  A young horse or a strange place is not the best time to try out new exercises. Especially ones that will test your balance and strength!

    If your horse tends to ‘wander’ when you are not directing him, perhaps creating a small chute in the arena using jumping uprights and poles will help. This will allow you to focus on what you are doing. And ensure that you get the most out of the exercises.

    These exercises are also excellent to do while warming up or cooling your horse down.  It is you that must do the work, not your horse!  

    Getting Started; Your Position

    I suggest beginning with giving your position a quick once over, and check that you are in a correct alignment.  Simply put, you’re sitting correctly in the saddle.

    Take your feet out of the stirrups, and start with some light stretches.

    After this, you can begin the first exercise. This involves drawing up your knees, one at a time, to your horse’s withers.  While you are doing this, pay close attention that your upper body remains straight and upright.  It is tempting to ‘curl’ your lower back and shoulders when performing this exercise but don’t.

    Focus on identifying your legs individually and then lifting them using only your leg to do so.  

    Use your core muscles to help you keep your balance while your knee is raised.  Hold it for a few seconds and then gently replace your leg and repeat on the other leg.  If you are feeling brave, you can raise both knees at the same time (jockey style), however again, make sure you are not crouching with your back and shoulders.

    Legs & Core Strength & Fitness

    This is a super exercise not only for your legs and core muscles, but also to help you make sure you are indeed sitting on your seat bones.  It also helps to relax the pelvis which will help with the other exercises and your riding in general.

    If you find that you are feeling unbalanced or concerned about ‘tipping over’ out of the saddle, rather ask your horse to halt and, having someone hold him still if necessary, complete the exercises while your horse is standing still.  

    With your feet still out of your stirrups, begin stretching your legs down nice and long.  Then one at a time lift your leg away from your horse’s side. There should be daylight between your leg and the saddle.

    Try to lift your lower and upper leg. But, make sure that while you lift, you are not leaning your body weight to the opposite side to lift your leg for you!

    The lift must come from the muscles on the outside of your hips and the sides of your torso.  Pay attention that your body remains upright and not collapsing down.  

    After you have managed to lift each leg individually, you can then try lifting both legs together.  Again, it is tempting to lean forward and curl your upper body. But try to continue carrying yourself as you perform the exercise.

    Introducing Sitting Trot

    You can also incorporate some sitting trot work into this initial warm-up.  Pay attention that you are keeping your pelvis and thighs open. Not gripping up, but rather stretching your leg down around your horse.

    Focus on allowing your lower body to move with your horse in almost a back and forward motion rather than an up and down motion.  You can also work some circles into your school movements, all the while maintaining a good basic position.

    Posting in the Walk

    Another great exercise you can work on to increase your fitness levels is posting in the walk.  Obviously you will need to take your stirrups back for this exercise, and once your feet are in…  Yes, you guessed it; Check your position!

    Posting or performing the up-down movement from the rising trot while walking can be quite a challenge. This is due to the fact that your horse’s natural momentum in the trot is not there to help you.

    Keep in mind that when you post or stand, you are doing so on your heel, not your toes.  

    Also, that your lower leg remains underneath you.  Many riders will try to use their upper bodies to ‘pull’ themselves up and whether or not they use the reins, this is incorrect.  Rather think of pushing yourself up using your legs.

    Once up, it will require your core muscles to help you maintain your balance and lower yourself back into the saddle with the sufficient ‘grace’ that is required!!  Do not allow your body to fall back into the saddle as you come down as it will be uncomfortable, and may even hurt, your horse’s back.

    FREE 30 Day Rider Fitness Challenge

    Standing in the Stirrups

    Developing on from the highest point of this exercise, you can begin to ‘stand’ in your stirrups as you walk around the arena.  When standing, keep in mind that your knees will have to keep a slight bend in them in order to help you absorb the movement of your horse underneath you.

    It is, again, worth mentioning that you should not use your reins for support and balance while performing this exercise…  

    Rather hold a martingale strap or even a stirrup leather that is secured around your horse’s neck for support if necessary.  Also, make sure you do not collapse down into the saddle when you have finished.  Gently lower yourself into the saddle…

    Or remain ‘standing’ in to the trot and even the canter.  This will use your legs and also your core muscles to achieve it correctly.  Start off slow and for short bursts, working over time to longer periods at faster paces.  

    Additional Exercises to Increase Fitness

    Other exercises you can use, which we cover step by step in this week’s Daily Strides Premium are changing the variation of your posting while trotting.  Rather than the usual up, down, up, down, up, down; rather begin sitting or posting/rising for an extra beat.

    This would look like up, up, down, up, up, down, up, up, down, or the other way around; down, down up, down, down, up.

    All variations of this will firstly create mindfulness around what you are doing while you post or rise. And, secondly, require your core muscles to shift from sitting to the rising trot more frequently than your normal up, down, up, down does.

    You can also work in the two-point seat…

    In fact, this is a great way to initially test your riding fitness levels by seeing how long you can hold the position, independently, before sitting down.  Work at increasing this time period on a weekly basis.  Make sure, again, that the weight is down in your heel and that your back is straight, not rounded or arched.

    Your Riding Fitness Is Your Responsibility

    As you can see there are numerous ways to incorporate a mini-workout into your everyday riding and schooling.

    Very often with adult riders, time is the greatest challenge when it comes to fitness, however as before, all these exercises can be performed while you are warming up and cooling down.

    Happy Riding
    Lorna

    Additional Resources for Equestrians

  • How to Use Your Leg While Riding

    How to Use Your Leg While Riding

    .How to use your legs while riding

    Do you find yourself a tad confused as to what exactly to do with your legs while you ride?  Do you find that even if you know what to do, degree of pressure to use or how often to apply the aid is confusing you?

    You are hearing terms such as ‘Keep your leg on’, ‘use your leg’, ‘more leg’, ‘leg’, ‘soften your leg’, ‘support with your leg’, ‘back up your leg’… leg, leg, leg!!!  You find yourself thinking back to the days when you were just happy keeping one either side of your horse!

    [smart_track_player url=”https://op3.dev/e/traffic.libsyn.com/dailystridespodcast/SFA416-What-to-do-with-Your-Legs-While-Riding.mp3″ title=”What to Do With Your Legs While Riding” social_linkedin=”true” social_pinterest=”true” social_email=”true” tweet_text=”Confused about leg aids in the saddle? This will clear things up…” hashtag=”equestrian #deadtotheleg #horseriding” twitter_username=”strides_success” ]

    Knowing how to apply your leg, when to apply your leg and with what pressure and regularity is something that takes lots of practice.  It falls under the ‘feel’ category of horsemanship and riding skills.  However, you can begin to improve your use of your leg right now with a few simple steps.

    Why Your Leg Aids are So Important in Riding

    You leg is one of the riding aids you use to communicate with your horse.  It is used to influence your horses forward and sideways movement.  It also has a regulating influence when necessary. Couple this with being essential for bending your horse, as well as helping to contain your horse.

    Your leg will always be present on your horses sides while you ride.  It should never be absent or, for whatever reason, taken away.  This is often the aspect of the leg aid that confuses many riders; they initially only see the leg as a driving aid.

    Before we begin, it is necessary to understand that in order to use your leg correctly, you need to have developed an independent seat while you are riding.  Using your legs to balance or grip will make it impossible for you to use them to direct and ask questions of your horse.

    It is also important to realize that consistency is key to mastering the leg aids, for both you and your horse.

    If you wish to better your skills in the saddle, committing to being mindful and present as much as possible while you ride. This is particularly true when it comes to how, when and why you are using your legs.

    How Your Overall Position will Affect Your Leg Effectiveness

    The first aspect of beginning to use your legs as effectively as possible begins with ensuring you have a correct position in the saddle.  Many times an ineffective or ‘hokey pokey’ leg is caused by a faulty seat.  Make sure you are sitting on your seat-bones.  This will allow your legs to ‘fall’ down your horses sides.

    You ideally want to establish the first of the two all important ‘lines’ of riding; the head, shoulder, hip to heel.  What is important to point out here is that your hip is not your backside!!

    Another way to think of this line and really know if it is true and correct is to imagine that if we could click our fingers and ‘abbrakedabra’ our horse away, you should technically land on your feet; not your backside and not on your face… Your feet should be underneath you at all times in the saddle!

    Learning to ‘Drape’ Your Legs Around Your Horse

    Once you have established what is right for you, don’t squeeze or tense your legs to keep them in position, this will happen naturally if your seat is correct and your hips and pelvis is open and relaxed.

    Keep in mind that how your legs ‘fall’ depends a great deal on how you are actually put together!

    In fact, the fall of your leg will depend on many different factors, the most obvious being both you and your horses conformation as well as the saddle etc.  Sometimes taking a few photos of yourself in the saddle from the side and behind can help you establish if your position is indeed correct to the best of the situation.

    Different Situations results in Different Applications

    Next thing to begin thinking about is the type of leg aid necessary for a given situation, and the degree to which it should be used.  This depends a lot on the horse himself and the type of questions you are intending to ask with your legs.

    Generally speaking, hotter horses respond better to a consistent pressure.  Laid back, docile horses prefer to be asked and then the aid taken away.  This action can then be repeated as much as necessary to achieve the desired result.  

    One of the biggest problems faced by many riders is that both these applications of the aids almost seems to appear counter-intuitive when they initially begin working with a horse that may be similar to either of the two I just mentioned.

    A ‘Hot’ Horse Versus a ‘Laid Back’ Horse

    A hot or sensitive horse almost invites us to keep our leg off, training the rider to just apply a mere hint of an aid when they feel it is absolutely necessary…  Frustratingly, this will just compound the problem and condition the horse even more that the leg is something which they must run away from.

    Strangely these same sensitive horses actually respond much better to a steady consistent pressure or contact from the leg, rather than short bursts of an aid here and there…

    Similarly, the same is true for the more laid back horses of the world.  The rider feels like they must give continuous, strong leg aids, usually to the tune of squeezing or ‘pumping’.  Unfortunately, this often increases their frustration as their horse ignores them more and more… These types of horses respond better to short, concise directions that are given when needed…

    Like all things worth doing, learning which aid to apply to a particular horse for the best result takes time.  However it is well worth the investment in the long run.

    The Varying Degrees of Pressure

    The third factor to consider when applying your leg aids is the degree of pressure that you use when applying the aid.  Again, this depends on many factors.  These include those we have already spoken about and others.  The feed your horse is receiving, if he is stabled or turned out.  Look at the work he is doing, his fitness levels.

    Even outside factors such as the weather conditions at that time, the riding conditions…  The list is endless and as I mentioned at the beginning, this again falls under the category of developing your feel as a rider.  Luckily, all of these things, you can work on daily and become aware of every time you get into the saddle.

    In fact, only through increasing your mindfulness will you have any lasting success in increasing the effectiveness of your leg aids.

    When it comes to actually applying your leg aids,  we can broadly break the term leg aids down into three different and distinct categories.  It is important to keep in mind that within these three categories, the aids can be further divided up based on degrees of pressure and regularity of occurrence.

    Your Driving Leg Aid

    The first is the driving aid.  Terms to describe this particular aid can often be heard resounding around arenas, ringing in the ears of exhausted riders.  Exasperated instructors and trainers can be seen, turning red in the face and heard roaring “Put Your Leg On!!” or “Give Him Some Leg!!”.  Sometimes, a short, repetitive and quite often effective ‘LEG!!” will do the trick.

    What the instructor or trainer is trying to say is ‘Use your leg to create initial energy in your horse’… Hmmm, come again?!

    I suggest thinking of your driving leg as turning the ignition or key in your car, or just switching on the vacuum cleaner. You ask and it responds without having to be continuously pushed in or turned.  When your horse is truly listening to your aids, this will also happen when you apply this aid.

    I recommend  that you imagine your legs are going to wrap underneath your horses tummy and pick him up.  Try lengthening your leg and then imagine that using your calves, you are going to lift his barrel up underneath you.  Of course, if you do really imagine doing this, your seat and core will also begin to respond in the correct way to ask for the forward movement.

    Your Maintenance Leg Aid

    The second use of the leg aid is a more maintenance aid.  Once your horse is going forward, this will be used to keep him doing so in the way you desire.  This is often expressed as ‘Keep Your Leg On’ or ‘Hold Him with Your Leg’.

    There is confusion surrounding this application of the leg aid.  Many riders turn purple in the face from the physical exertion of squeezing continuously while riding… Which of course is not what this means at all!

    If you can think of your legs as being the barriers on the side of the road.  Except instead of keeping your horses direction on the straight and narrow (which of course your legs help to do) rather, for this aid, think of keeping the energy being created focused where you want it go.

    Its like when you use the accelerator pedal in your car to go faster (your driving aid).  Once you have reached your desired speed you lighten the pressure.  This is while still keeping your foot on the pedal.  You are now maintaining that speed (keeping your leg on).

    Your Relaxed ‘Leg Off’ Leg Aid

    The final term and leg aid that often confuses riders is the ‘Relax Your Leg’ or ‘Take Your Leg Off’.  Again, this does not literally mean what it says.  In fact, trying to lift your legs off your horses sides for any length of time will quickly tire you out! This often results in twisting your upper body to compensate.

    Rather this means that, given the situation, think of softening your leg in order to achieve a particular outcome  

    For example, often relaxing your outside leg while leg yielding will allow your horse to actually move to the outside.  It creates a ‘door’ of sorts for him to move through.  Again, the use of this aid depends a lot on the situation and circumstances of it being applied.

    Becoming more mindful as to how you use your legs involves paying attention to the reaction you receive from your horse.  Keep in mind that only through consistent correct practice will you eventually achieve a ‘better’ leg.  This will lead to having almost invisible conversations with your horse.  Quiet and soft, with the result you desire.

    Happy Riding
    Lorna

    You can purchase the audio trainings on this topic HERE

    Links to related content & freebies:-

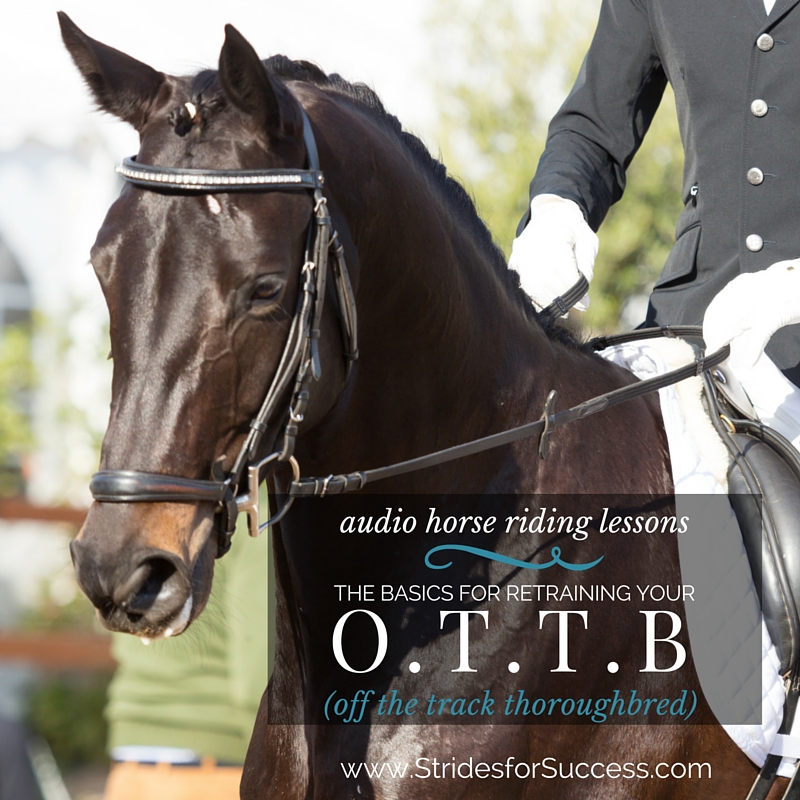
  • Basic Exercises for your OTTB (Off the Track Thoroughbred)

    Basic Exercises for your OTTB (Off the Track Thoroughbred)

    There seems to be two types of riders in the world, those that love an OTTB and those that don’t!  I am squarely in the former category and if you are also there, well make yourself comfortable because this week on Daily Strides we are focusing on basic exercises you can begin implementing with your OTTB today that will help lay a solid foundation for future schooling, regardless of the discipline.

    [smart_track_player url=”https://op3.dev/e/traffic.libsyn.com/dailystridespodcast/SFA366-The-Basics-for-Reschooling-Your-OTTB.mp3″ title=”Basic Exercises for Reschooling Your OTTB” social_linkedin=”true” social_pinterest=”true” social_email=”true” tweet_text=”Lucky enough to have an OTTB in your life? Here’s a few exercises to help smooth the transition..” hashtag=”OTTB #RetiredRacehorse” twitter_username=”strides_success” ]

    An OTTB, or off the track thoroughbred or retired racehorse, are athletes whom are bred with a specific purpose in mind; to get from A to B as fast as possible while remaining sound.  They also, through years of selective breeding, mature earlier, have quicker reaction times and have a winning attitude which can sometimes be difficult to work with if you do not understand how to use this to further the horses training.

    However, for all their wonderful attributes,  OTTBs are often looked down on by many pleasure riders and competitive riders in specific disciplines alike, which is a shame because a quick flick through the history books will soon highlight numerous thoroughbreds who, once finished their careers on the racetrack, achieved glory in both dressage, jumping and eventing.

    Reschooling Your OTTB

    The OTTB has a sensitive and quick mind and because of this, they do will under the guidance of riders who are careful and mindful of what they ask and how they ask for it.    The thoroughbred also has fantastic athletic ability and are wonderful animals to train because of how well they can use their body and brain.

    Of course, it goes without saying that initially choosing the correct horse is vital, with emphasis on the horses age, confirmation, temperament, racing history, soundness, to a lesser extent breeding and the all important condition and shape of the hooves.

    Being such a highly prized and bred animal, the OTTB may need extra care which might just equate to extra financial implications and while purchasing an OTTB may be cheaper initially, he may just cost you in other areas in the long run.

    When your horse first retires from the track, you can either ‘allow him to be a horse for a while’ and after roughing him off correctly, turn him out for a few months into some nice pasture, or you can start him in work straight away.  It seems to depend on the horse and if he is not happy and needs more time ‘away’ he will let you know!  Of course before starting any training program, ensure all the necessary health checks are performed; teeth, back, dewormer, inoculations etc.

     Begin With Training Your OTTB to Lunge Correctly

    Your initial goal in your training program should be to achieve a level of relaxation from your horse.  Keep in mind that his life up to now was very ‘busy’ and he will need a transition period where he can start enjoying his new career.  Lunging is a super aid to begin both building a bond with your horse and achieve that goal of relaxation.

    Use the time on the lunge to train your horse to your voice.  Simple commands such as Walk, Trot, Canter, Steady and Whoa, will go a long way to helping him understand your new seat and leg aids when you do mount up on him.

    Lunging also helps divide his past life and his new life.  It works as a transitioning tool from one to the other and allows your horse to  ‘let down’ and realize that life is now very different, as is the work expected of him.

    Once your horse has a good grasp of the voice commands, you can begin to incorporate some loose schooling into his training program as well, particularly if he will be going forward to a jumping career (whether pleasure or competitive).  Beginning over poles on the ground and building up smaller fences as his confidence grows will allow him to perform the all important task of figuring things out for himself.

    Transitioning to a New Career Can be Difficult!

    When you do begin to work your OTTB under the saddle, use a general purpose or jumping saddle initially, not a dressage saddle.  Your horse is used to having his rider do most work in a 2 point seat, not the deep seat that a dressage saddle encourages.

    Begin with being very mindful about what you are asking and how you are going about asking for it.  Remember your horse was asked to ‘go’ and ‘stop’ very differently in his past career and it will take time and consistent aids applied with patience and kindness to show him what you want when you apply your aids.

    Consistency is the key to retraining your OTTB and building a strong bond  forged in trust will ensure you have a willing partner with whom to have wonderful adventures for many years to come.  

    Another piece of information to bear in mind is that while your retired racehorse may rush and want to run on initially, this may not so much be caused by him being unbalanced, more that he just doesn’t understand what is being asked of him and old habits, as we can all attest to when put in stressful situations, die-hard!  This is a horse who has possibly years of training in him and who knows how to do a job…  Just not the job you want!
    Reschooling Your OTTB

    Establishing Halt

    Focus on asking for halt first, using all the correct aids and not worrying about anything else, just the fact that the horse ceased moving, if only for a second or two initially.  Your horse may not initially understand what you are asking, as using the seat and legs is probably a whole new experience for him, but with patient repetition and having your voice aids back up your seat, leg and rein aids, you will slowly begin to convey what the aids to Halt are.

    Make sure you reward every small step forward.  Thoroughbreds are often sensitive by nature and telling him that he is doing well, no matter how small the progress is, will go a long way to keeping him relaxed and happy in his job, rather than anxious and nervous.  As with all horses, as soon as he stops or yields to your aids, release the pressure and reward with your voice as well, so he begins to understand the reward system.

    You may find that initially he might jog and crab sideways, step backwards, shake his head, paw the ground and just behave like an impatient, overly wound up ball of tension; Ignore these behaviors and continue to ask for him to stop and when he does, no matter how far from where you initially asked, reward him.

    Once you have established the ‘rules’ for asking him to stop, you can then begin polishing and disciplining the stop a little more so it begins to resemble a halt in the true sense of the word.

    Moving Forward From Your Leg

    Same principles applies when training your horse to move forward from your leg.  Ask with your voice and leg initially (this is where the work on the lunge is a huge aid) and keep in mind that he does not know what your legs are, or what they are for; let alone that he must move forward from them.

    Be gentle with your legs and offer no resistance with your hand.  Don’t worry about how straight he walks, or even if he trots, just reward the fact that he moved forward and slowly begin to place more emphasis on the leg and less on your voice.  It will take time to establish this and, again, patience and consistency coupled with compassion and lots of rewarding will get you both there eventually.

    What is also important to note here is that once he moves forward from your leg, he must also accept your leg being there as he is going forward.  Don’t take your leg off if he ‘shoots’ forward, rather let him learn that your leg is something that will be a constant part of his new career, so best he gets used to it from the beginning.

    Thoroughbreds like a contact and I have found it can often settle them, so don’t have your reins loose, maintain a contact, but make sure you are soft enough through your hands and arms to allow his forward movement.

    Continue to work through the halt and forward aids until they become fluid and the desired response is achieved all the time and make sure you implement them both outside the arena as well as inside.

    Teaching Your OTTB to Straightness

    Once your horse as a pretty good understanding of what is expected when you apply the aids to halt and then again, to move forward, you can begin tidying things up by asking more questions and expecting better results with regards to where he is putting his legs.

    Place two poles paralleled on the ground about  3 meters apart, I suggest on the quarter line, and begin asking for the halt between the poles.  As he becomes more responsive to standing ‘straight’ and responding to your leg to maintain straightness in the halt, you can begin moving the poles closer together.

    It is important to remember that while he may be getting used to your legs when asked to go forward, he initially most probably won’t understand your legs in moving laterally or sideways.  However he may understand rein aids, including neck reining, to move over and so you can use this to your advantage when introducing him to moving over.

    To introduce him to your legs in relation to being straight, begin in the stable with ground work done while grooming or cleaning.  Place your hand where your leg will be and asking for a very clearly spoken ‘OVER’ while applying pressure with your hand.  When he moves away, again release the pressure and reward using  your voice and softening of the ‘rein’ or whatever you are using to control him in the stable.  Over time, he will begin to understand that pressure in that area, coupled with the ‘OVER’ means just that and you can begin using your leg from the saddle, instead of your hand from the ground, to achieve similar results while riding.

    You can also place a second pair of parallel poles further up the quarter line and as you move forward from the halt, begin encouraging him to stay ‘straight’ between the poles.  You can alternate between halting between the poles and just continuing straight between the pole.  AS he becomes more accurate with where he places his feet, you can roll the poles closer together, leaving him less space to play with in terms of stepping and jiggling.


    As always, do all exercises first from walk and then from trot.  You may find in trot that he drifts over, particularly to the outside and again, you can use your ‘neck reining’ aid to back up your outside leg in communicating with him where you would prefer him to go

    Rome wasn’t built in a day and often when he may begin to get frustrated, old habits may revert.  By changing what is being asked and not allowing his schooling sessions to become boring for his sharp mind, you will probably find it is enough to nip any bad habits in the bud, and when you return to the ‘problem area’ again, either another day or later in the schooling session, he will willingly oblige you.

    In finishing, I just want to stress that patience is essential when working with this quick and finely tuned animal, however it is well worth the time invested and you will soon have a wonderful horse who really wants to please you and is ready to turn his hoof to almost anything as well!

    Happy Riding
    Lorna

    Have you joined in the FREE 30 Day Rider Fitness Challenge yet? Condition yourself better, so you can be the best for your horse that you can be. Click below to join us today…

    This topic makes up one of over 100 full weeks of audio horse riding lessons inside of Daily Strides Premium.  In this specific group of lessons we are focusing on working with your OTTB to retrain and re-school him for his new career as you’re riding horse.  There is also a lessons on halting & moving forward from your leg and another on exercises you can do to start polishing his movements and begin asking for more accurate responses.  The final lesson of the group is focused on bending correctly, with the foundation being straight through the bend.  You can find out more about Daily Strides Premium HERE >>
    DAily STrides